33 Easy Thanksgiving Crafts to Make for Kids and Family
The turkey is ordered. The pie is planned. But the table still looks bare, and the kids are already asking what to do.
You do not need to be crafty to pull off something special. You also do not need to run to a craft store or spend an hour of prep time. These easy Thanksgiving crafts run on what is already in the house.
Paper, scissors, pinecones, mason jars, and a little glue. Some projects take 10 minutes. Others take 30. All of them look finished when they are done.
This list has quick projects for toddlers, older kids, adults, and families crafting together. Pick one, pick five, and get started before the first guest knocks.
What Do You Need to Make Easy Thanksgiving Crafts?
You do not need to stock up before you start. The best Thanksgiving crafts for kids and adults run on what is already in the house. Pull out a bin, lay down some newspaper, and sort what you have before the crafting begins. A labeled tray for each supply type saves time and keeps little hands from grabbing the wrong thing.
Common supplies to gather:
- Paper, cardstock, glue sticks, scissors, and markers
- Natural items: pinecones, acorns, dried leaves, and small twigs
- Household recyclables: toilet rolls, popsicle sticks, egg cartons, paper bags
- Optional tools for adults: hot glue gun, acrylic paints, foam stencils, twine
Safety tips for kids:
- Use child-safe scissors for kids under 8
- Keep hot glue guns away from young children. Only Adults should handle these.
- Use washable paint so cleanup is fast and stress-free
- Lay down a newspaper or a plastic mat before painting sessions
Pro Tip: Sort supplies into labeled bins or trays before you start. It saves time and keeps little hands from grabbing the hot glue.
33 Easy Thanksgiving Crafts to Make for Every Age
You don’t need craft experience to make something great. These easy Thanksgiving crafts use everyday supplies and deliver results, which the whole family will actually be proud of.
Pick your favorites and get started!
1. Handprint Turkey
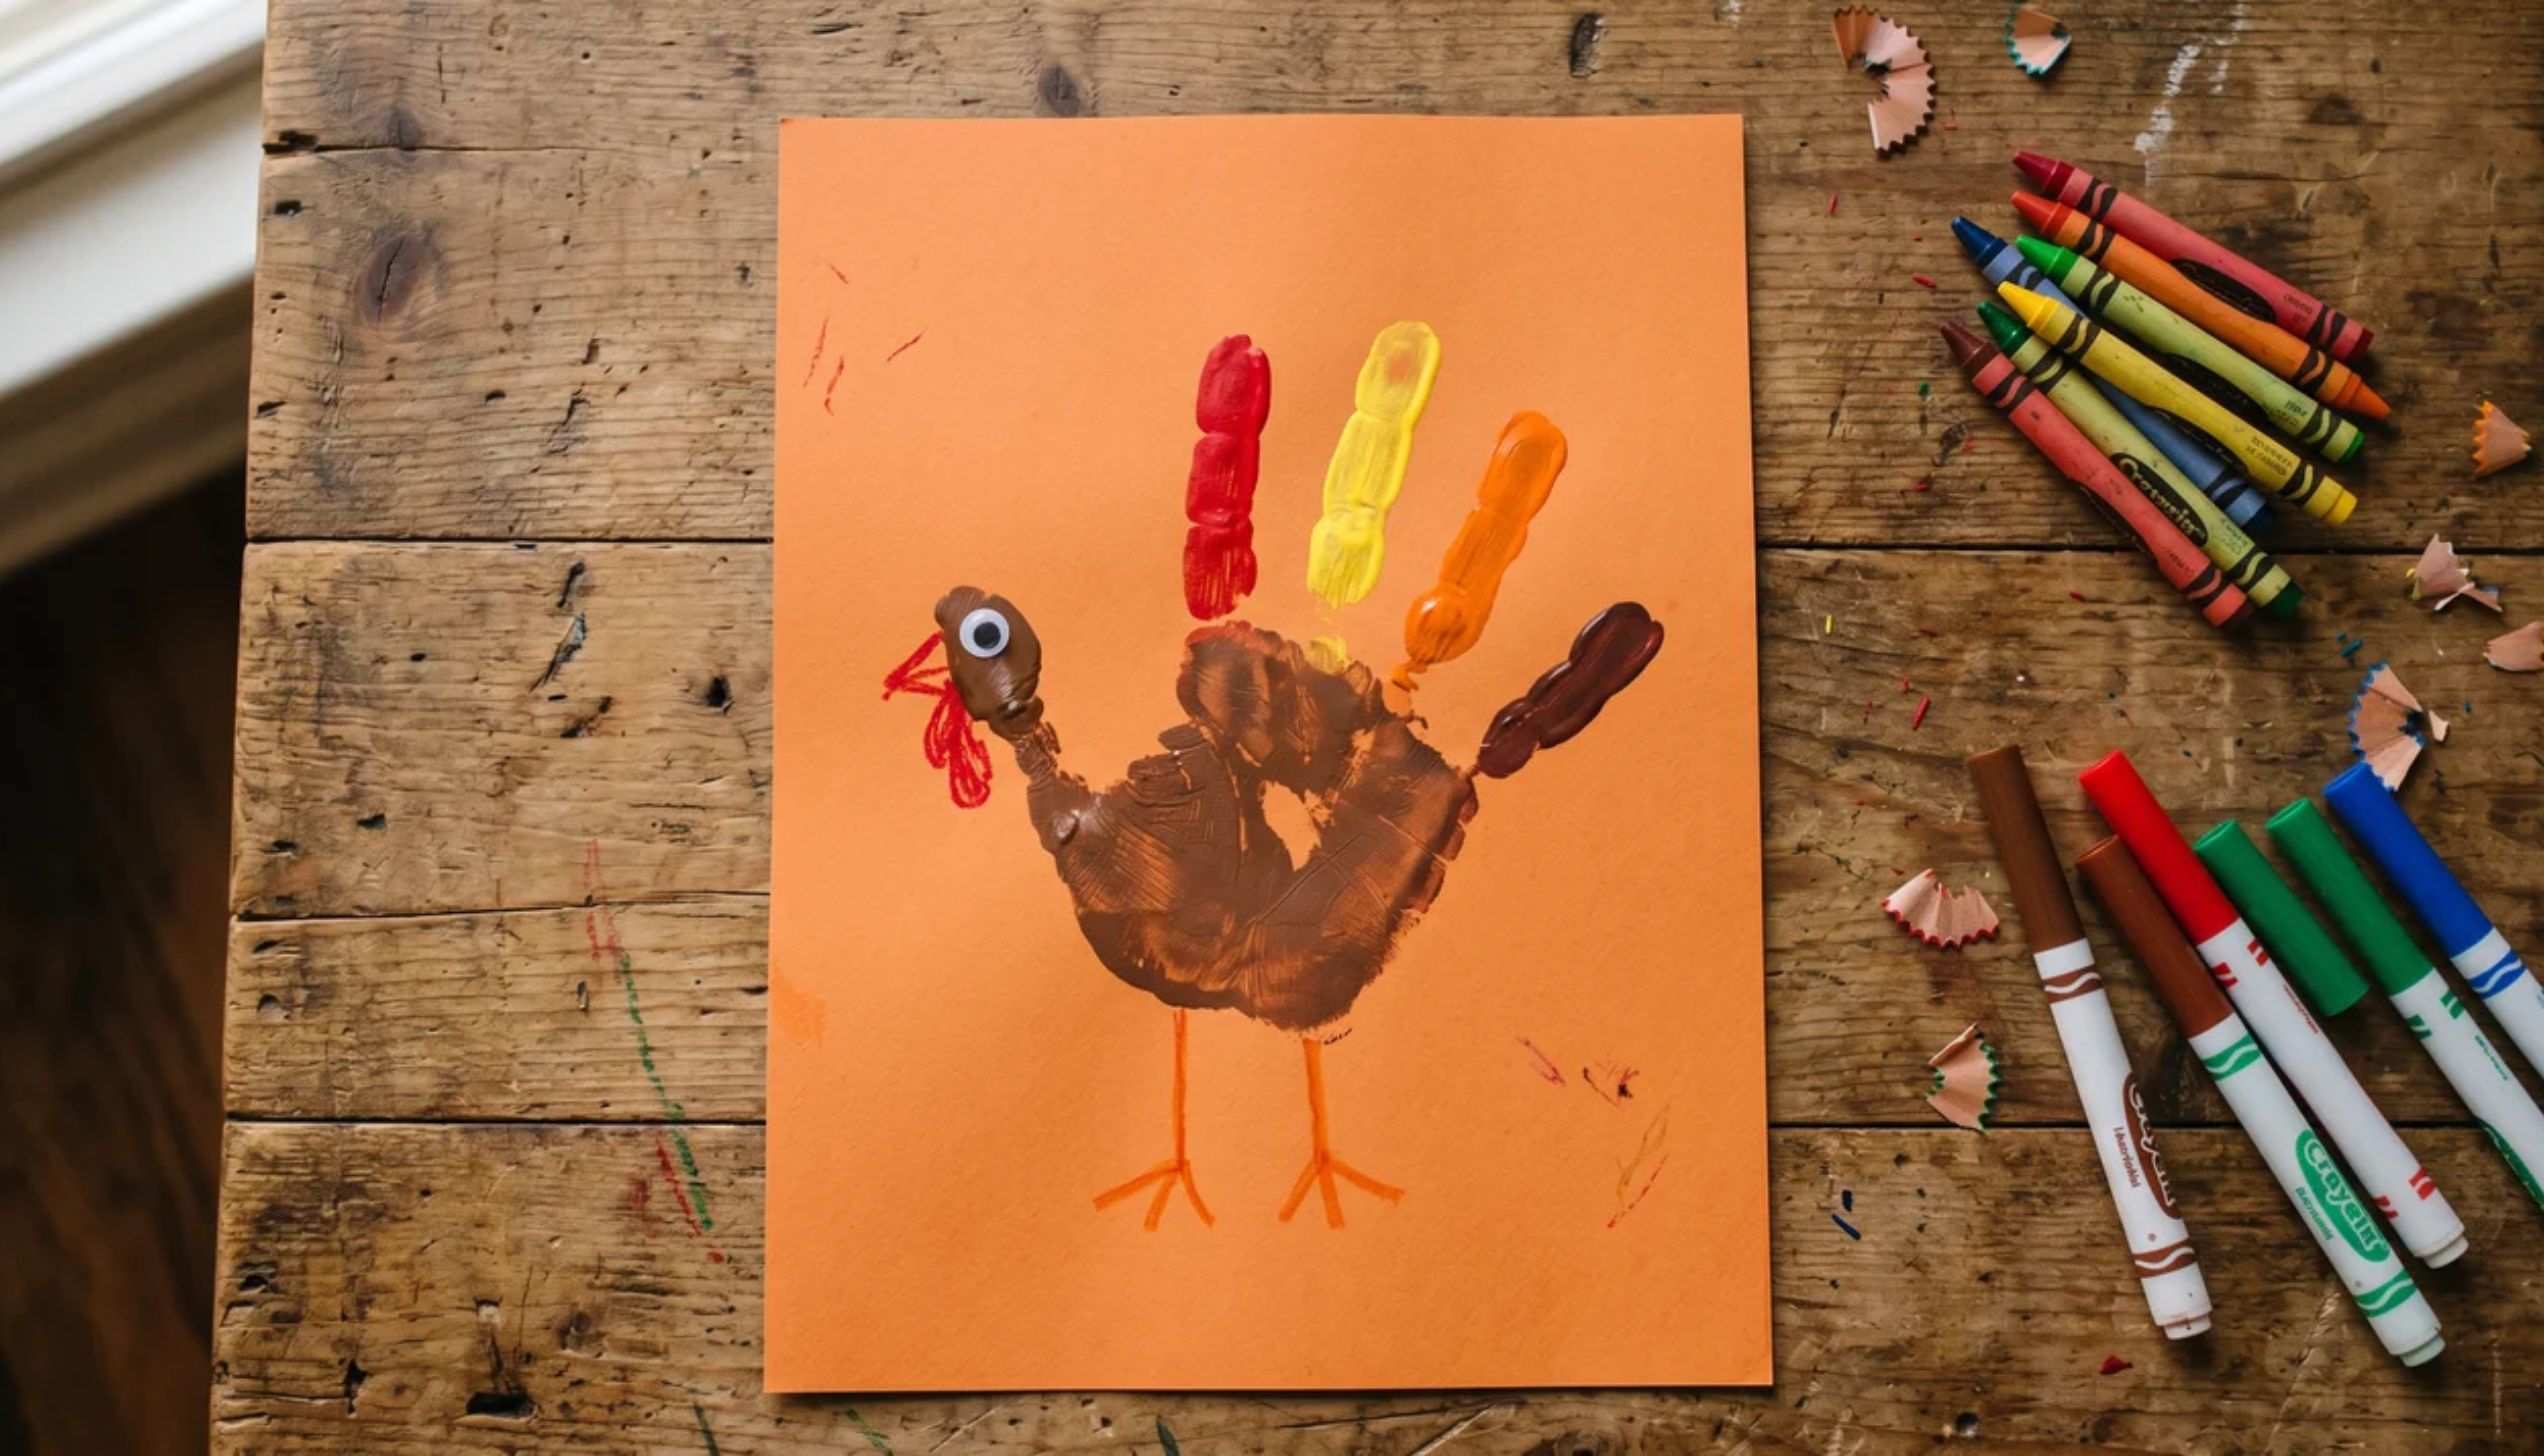
A handprint turkey is one of the most loved easy Thanksgiving crafts for kids. Parents save these for years.
Step 1: Press your child’s hand flat onto brown or orange cardstock. Trace around it with a pencil.
Step 2: Carefully cut out the handprint shape.
Step 3: Color each finger a different bright color. These are the turkey’s feathers.
Step 4: Draw a small oval at the base of the thumb. This is the turkey’s body.
Step 5: Add a red wattle, orange beak, and two small eyes with markers.
Step 6: Write the child’s name and year on the back.
Pro Tip: Make one every year. Watching the handprints grow is a tradition families love.
2. Footprint Turkey
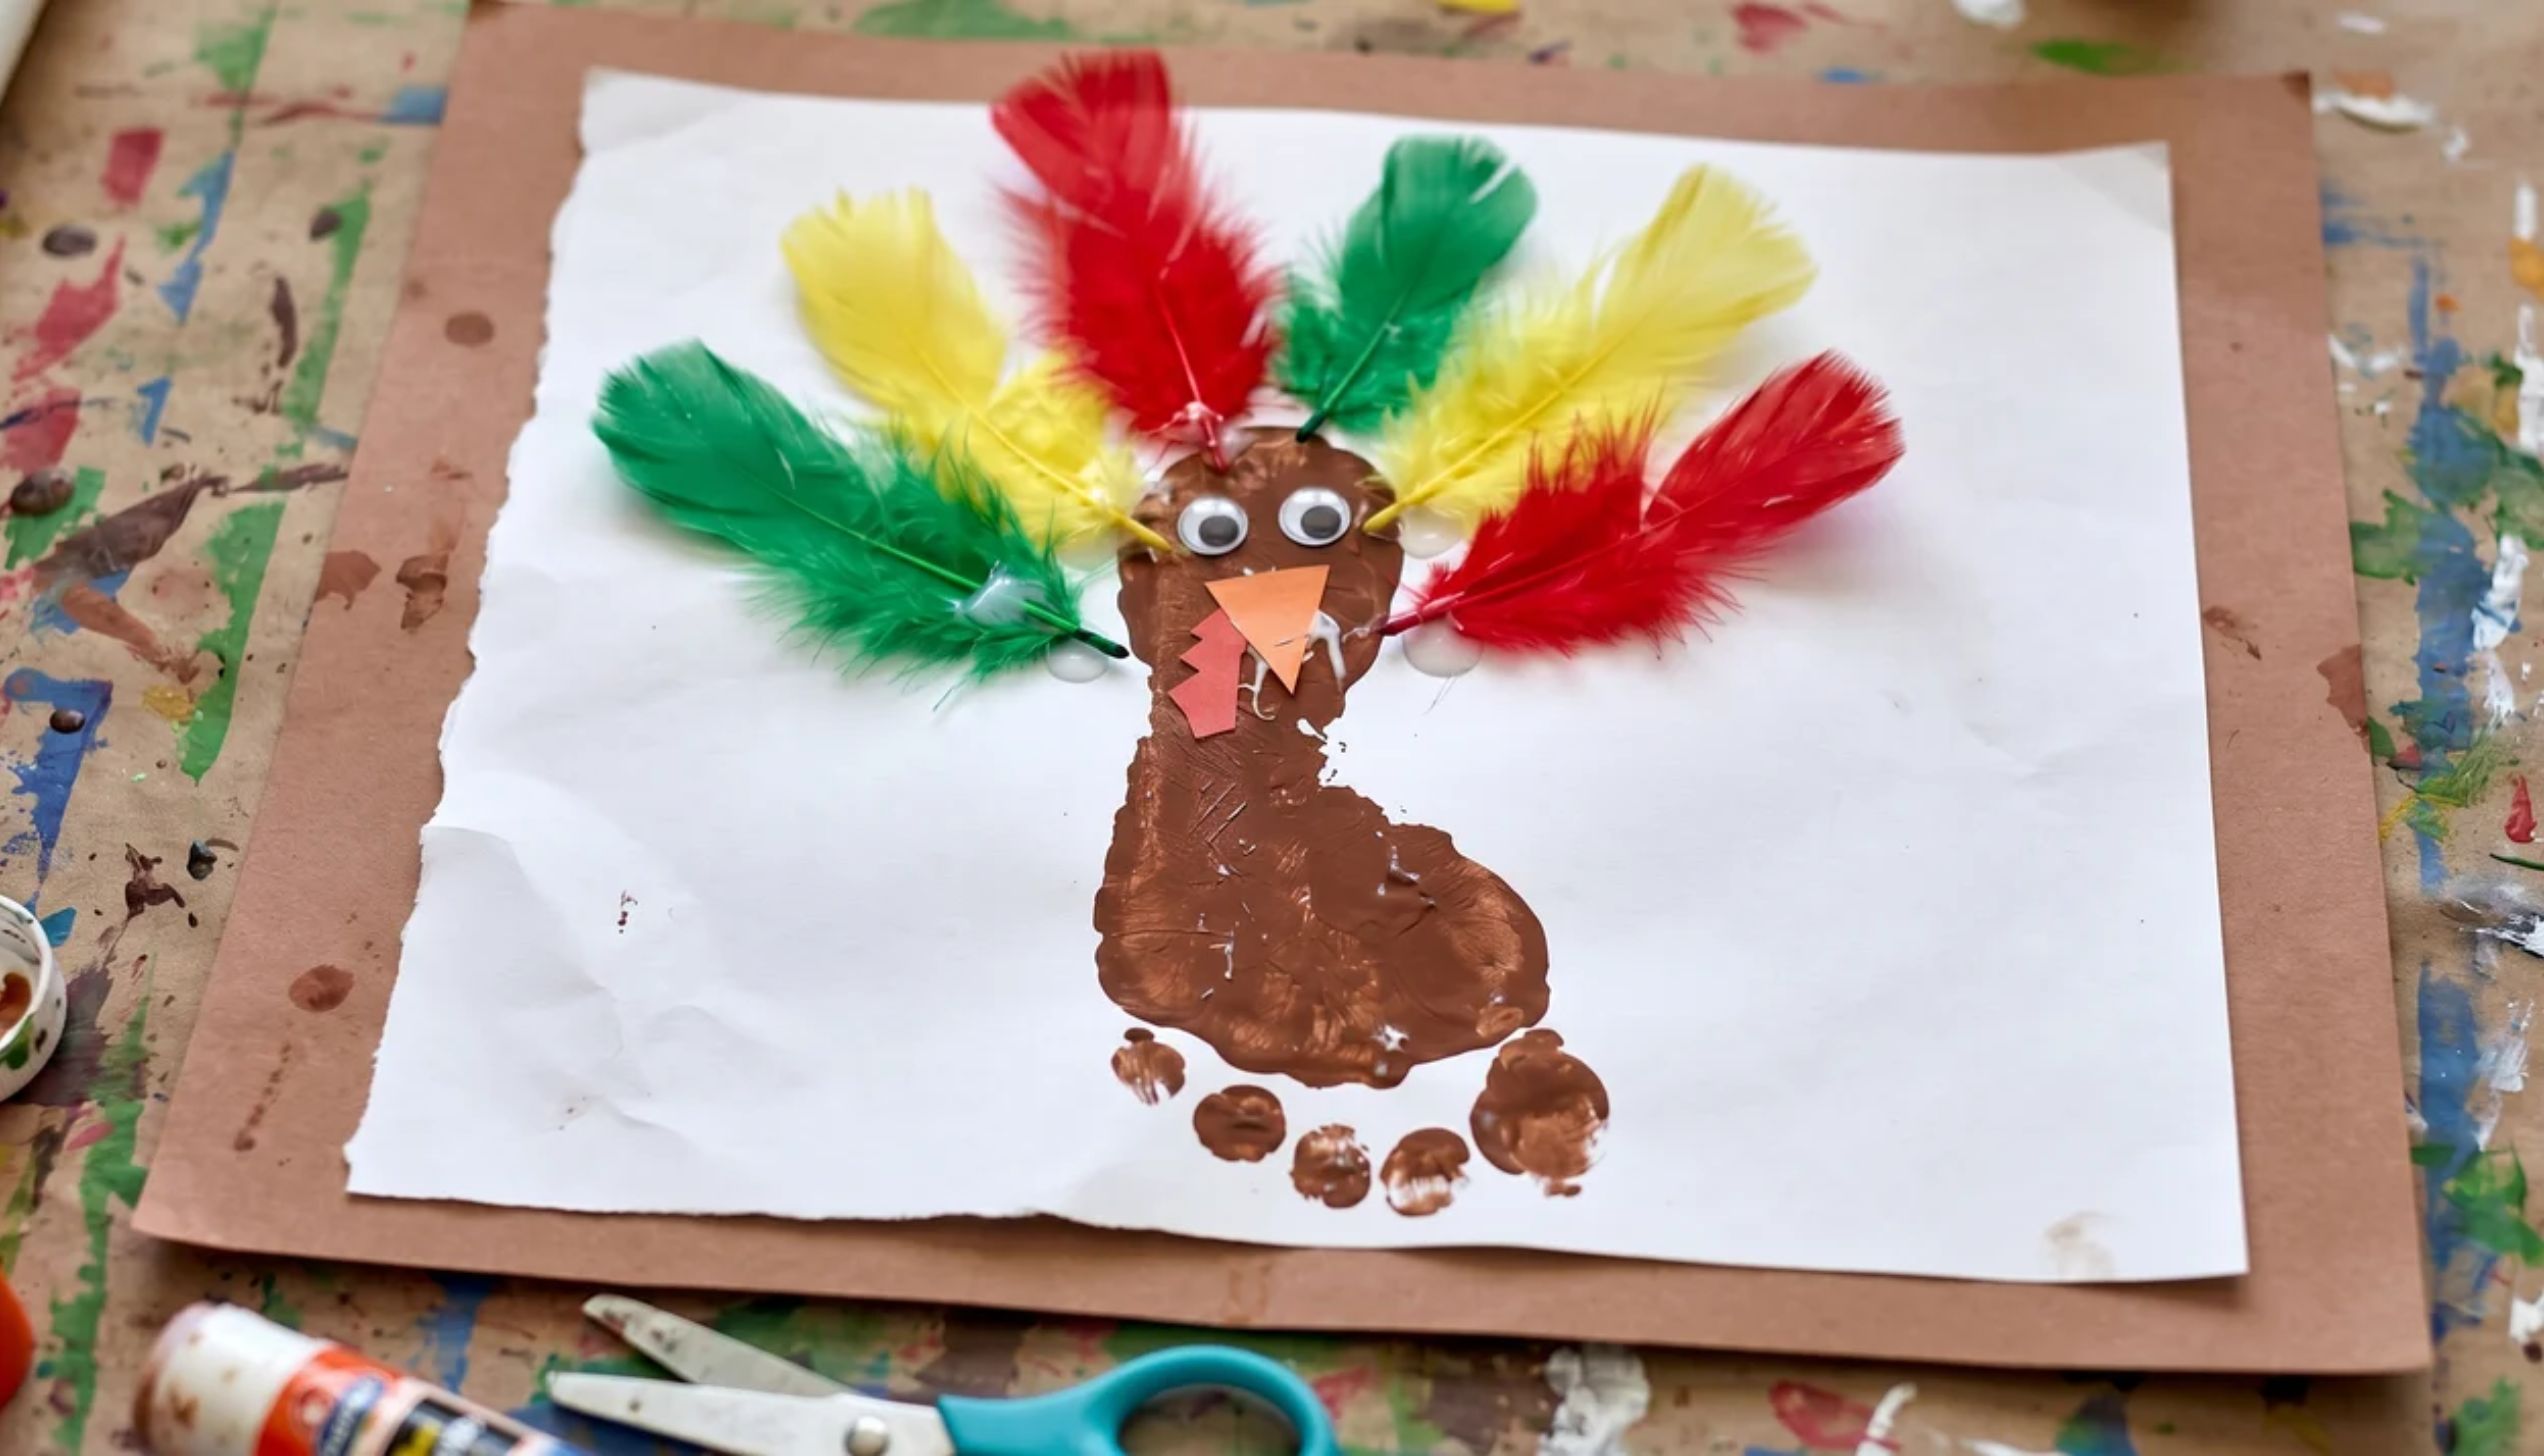
Tiny footprints make the cutest turkey bodies. This craft works best for toddlers and young children.
Step 1: Pour a small amount of brown washable paint into a tray.
Step 2: Press your child’s foot into the paint, then stamp it firmly onto white paper.
Step 3: Let it dry completely for about 10 minutes.
Step 4: Use orange and red markers to add feathers fanning out from the toes.
Step 5: Add eyes, a beak, and a wattle to the heel area.
Step 6: Write the date and your child’s name below the print.
3. Paper Plate Turkey
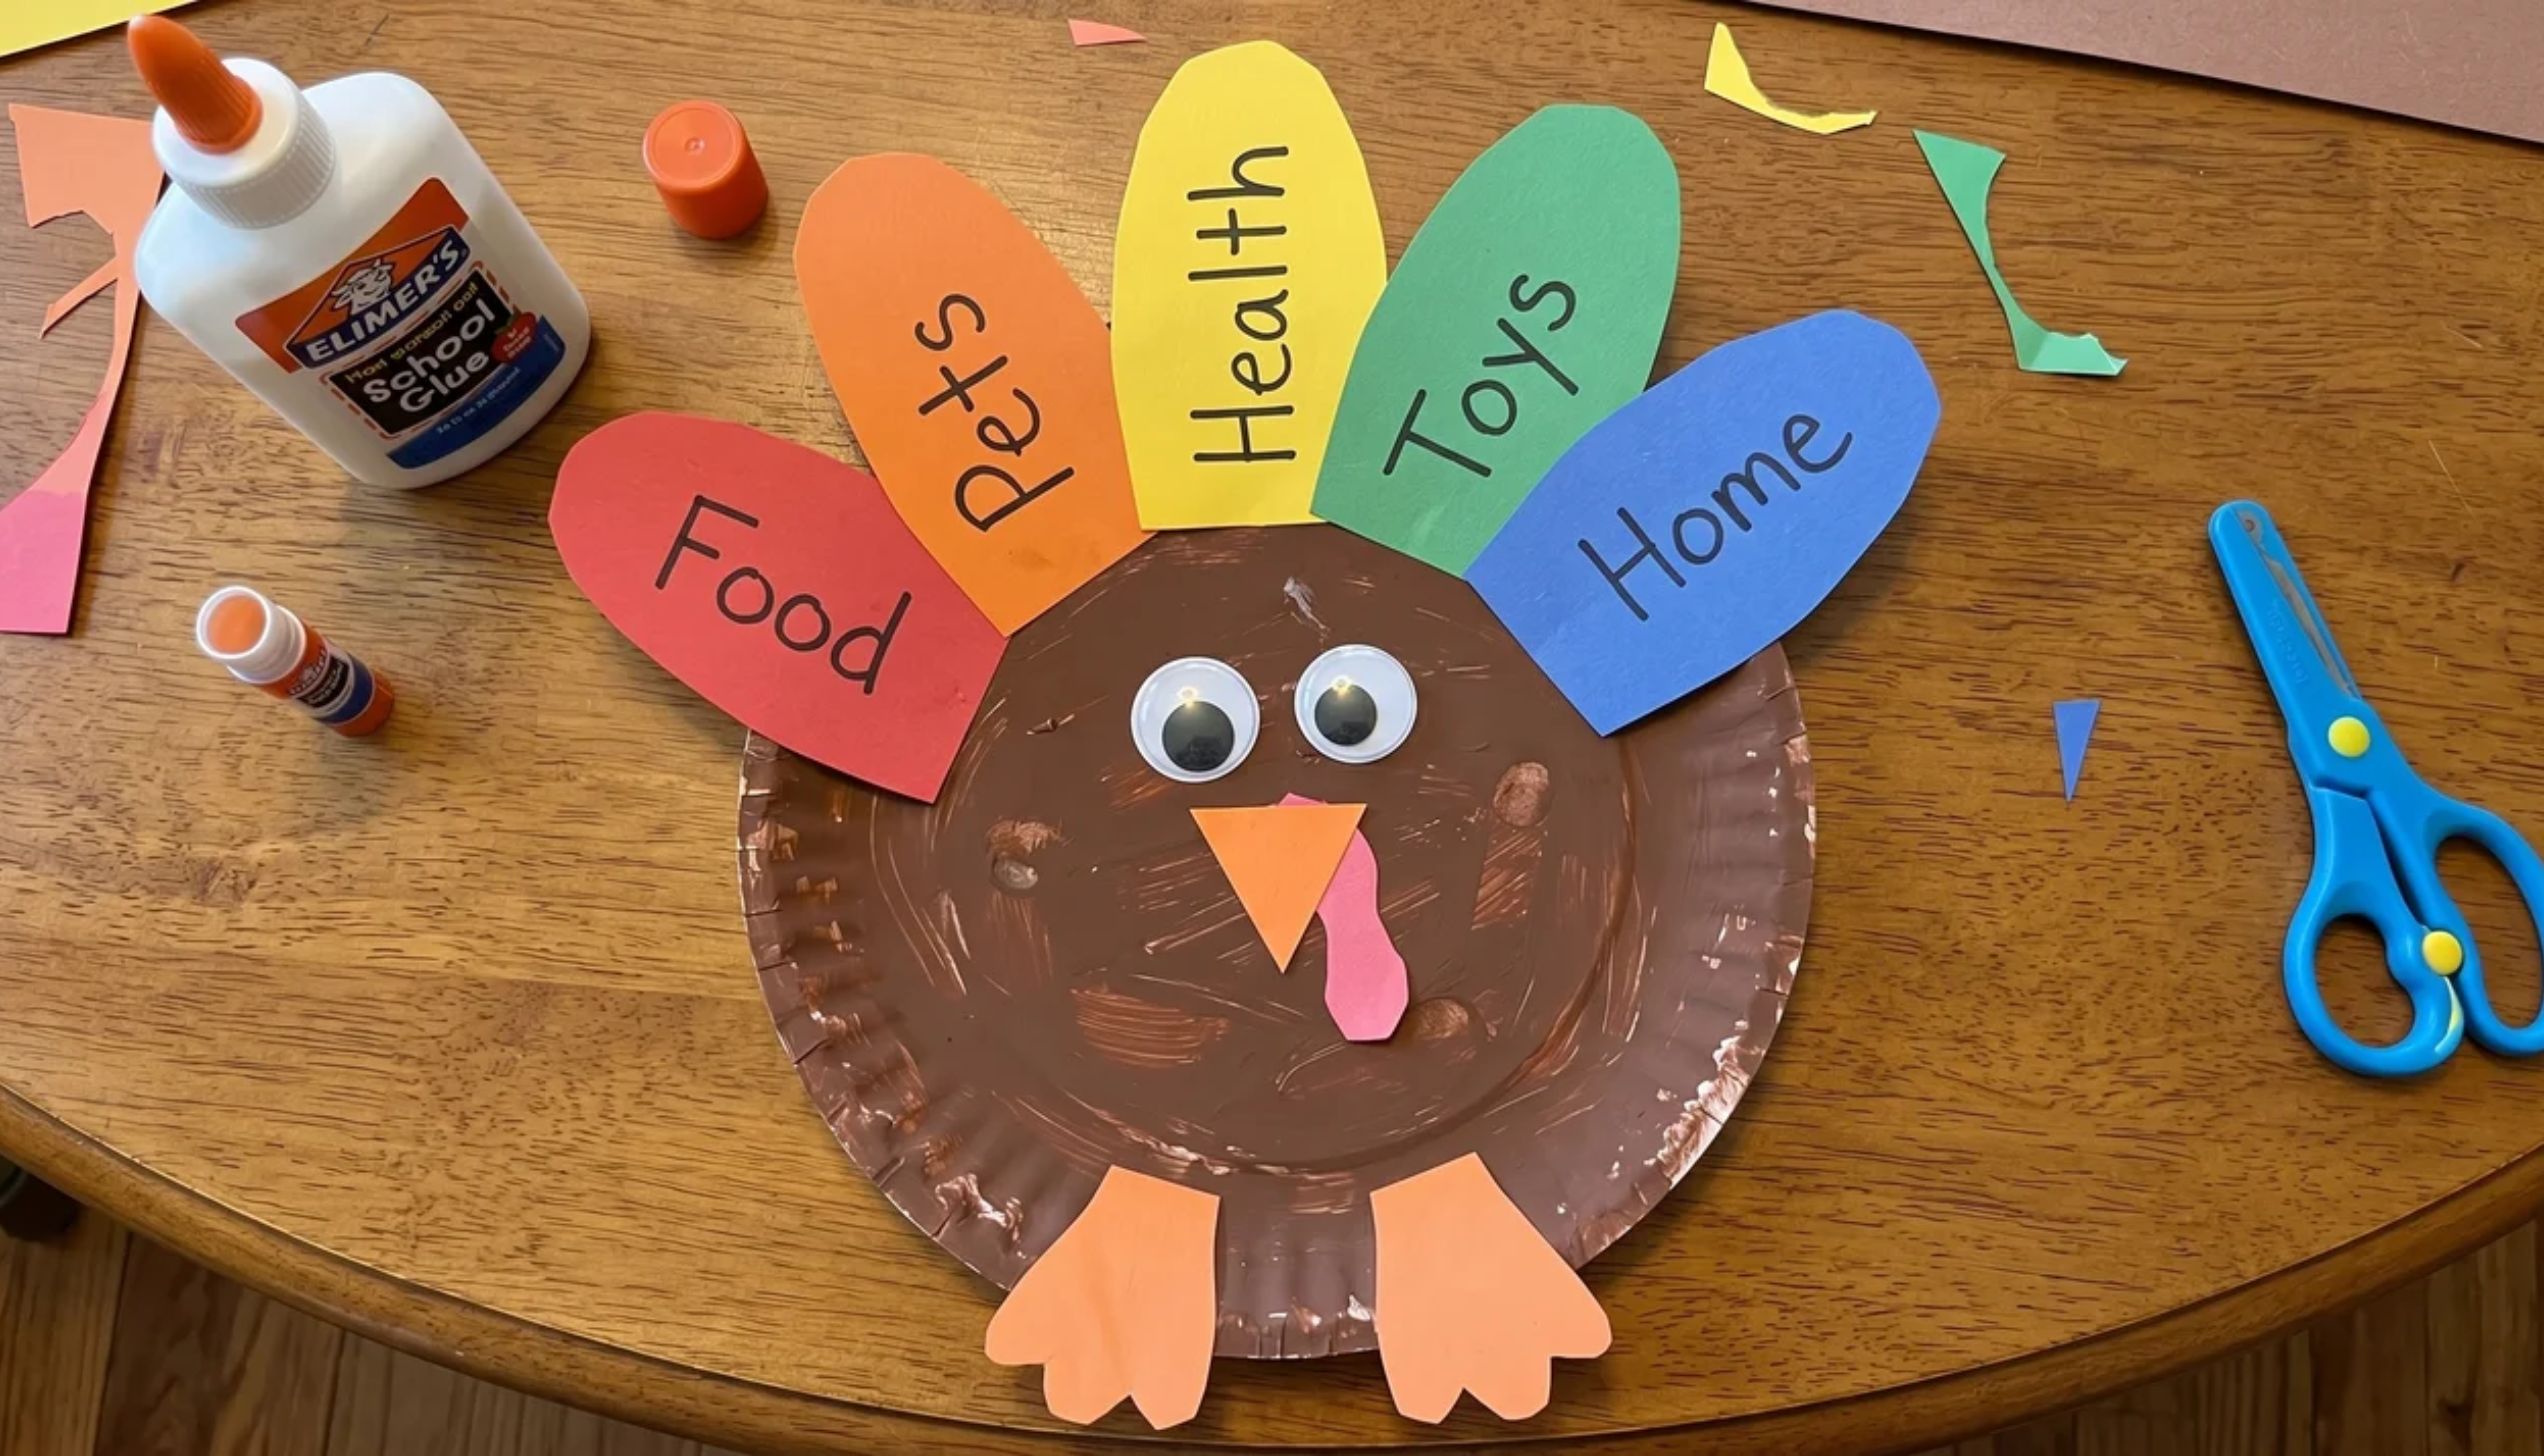
Paper plates are cheap, easy to find, and make great turkey bases. This is a crowd-pleasing craft for classrooms and the home.
Step 1: Paint a paper plate brown. Let it dry fully.
Step 2: Cut feather shapes from orange, yellow, and red construction paper.
Step 3: Glue the feathers around the top half of the plate.
Step 4: Cut a small brown circle for the turkey’s head. Glue it to the center top.
Step 5: Add a construction paper beak, red wattle, and googly eyes.
Step 6: Hang the finished turkey on a door or window.
4. Pinecone Turkeys
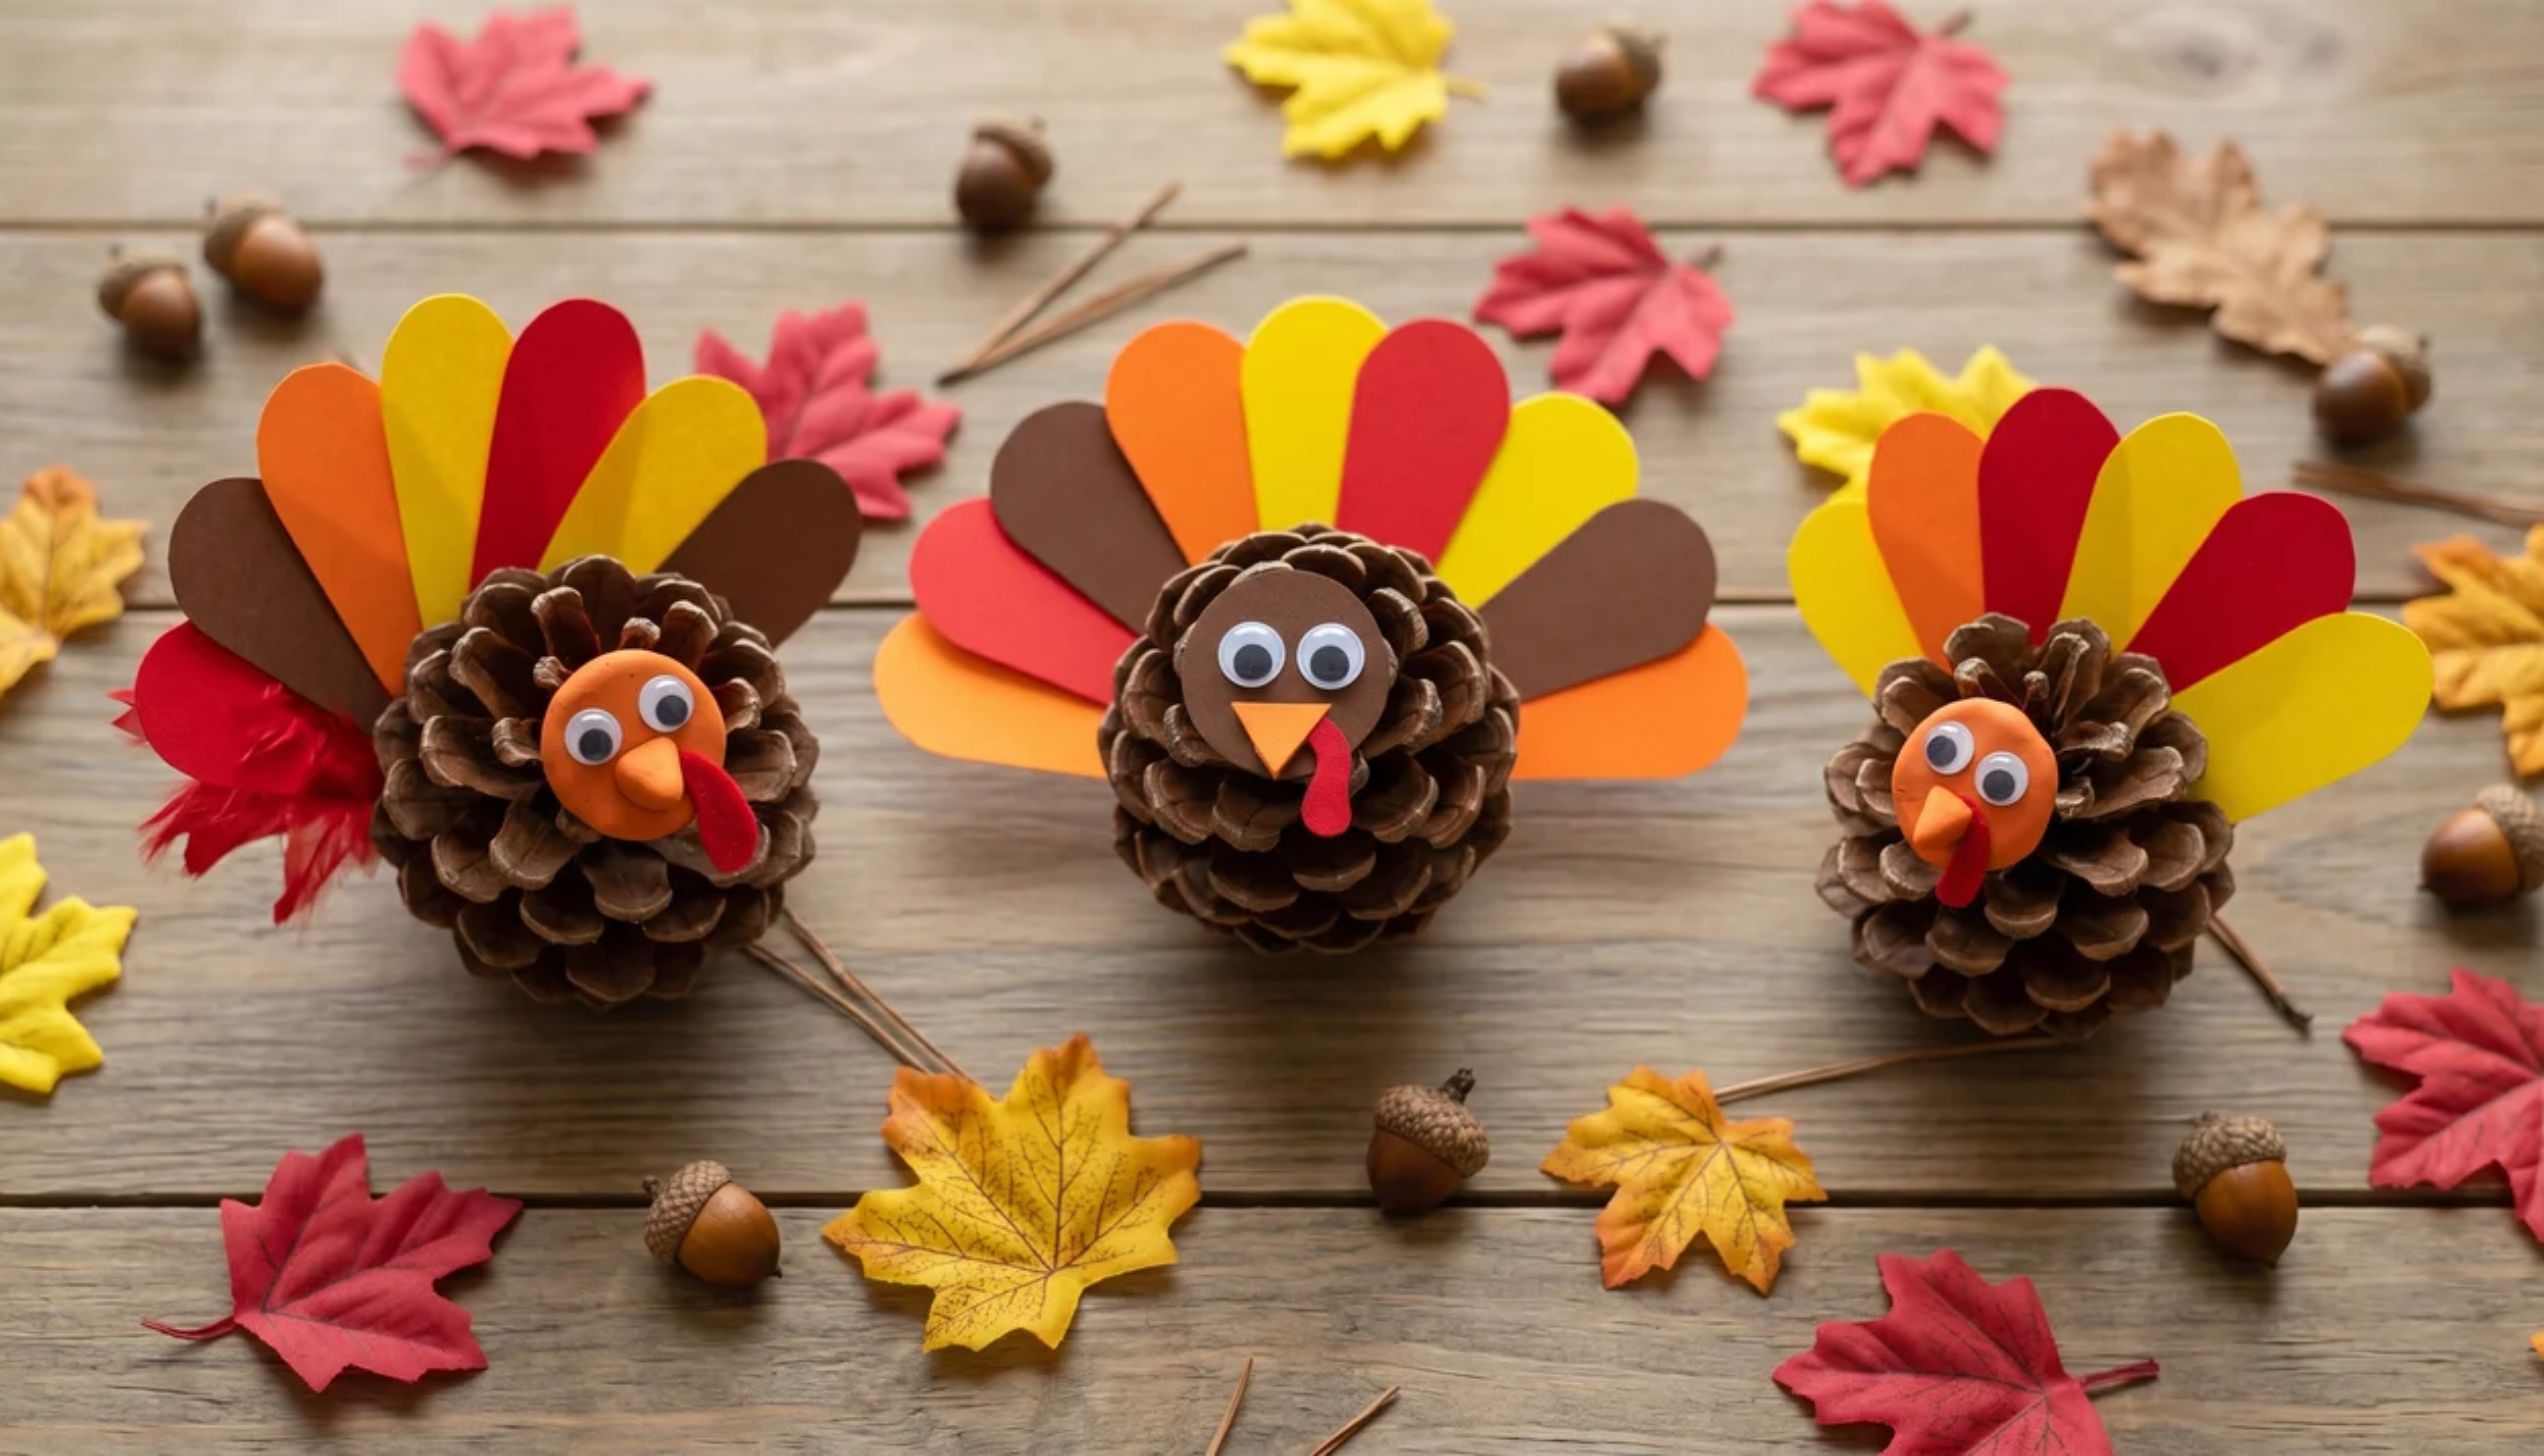
Pinecone turkeys are textured, fun, and use materials straight from the backyard.
Step 1: Collect medium-sized pinecones from outside. Let them dry if damp.
Step 2: Cut small feather shapes from colored paper using orange, red, yellow, and brown.
Step 3: Tuck the paper feathers between the scales at the wide end of the pinecone.
Step 4: Roll a small ball of orange clay or cut a small orange foam circle for the head.
Step 5: Press the head onto the narrow tip of the pinecone.
Step 6: Add two tiny googly eyes and a small red wattle with a marker or felt.
5. Leafy Thankful Tree
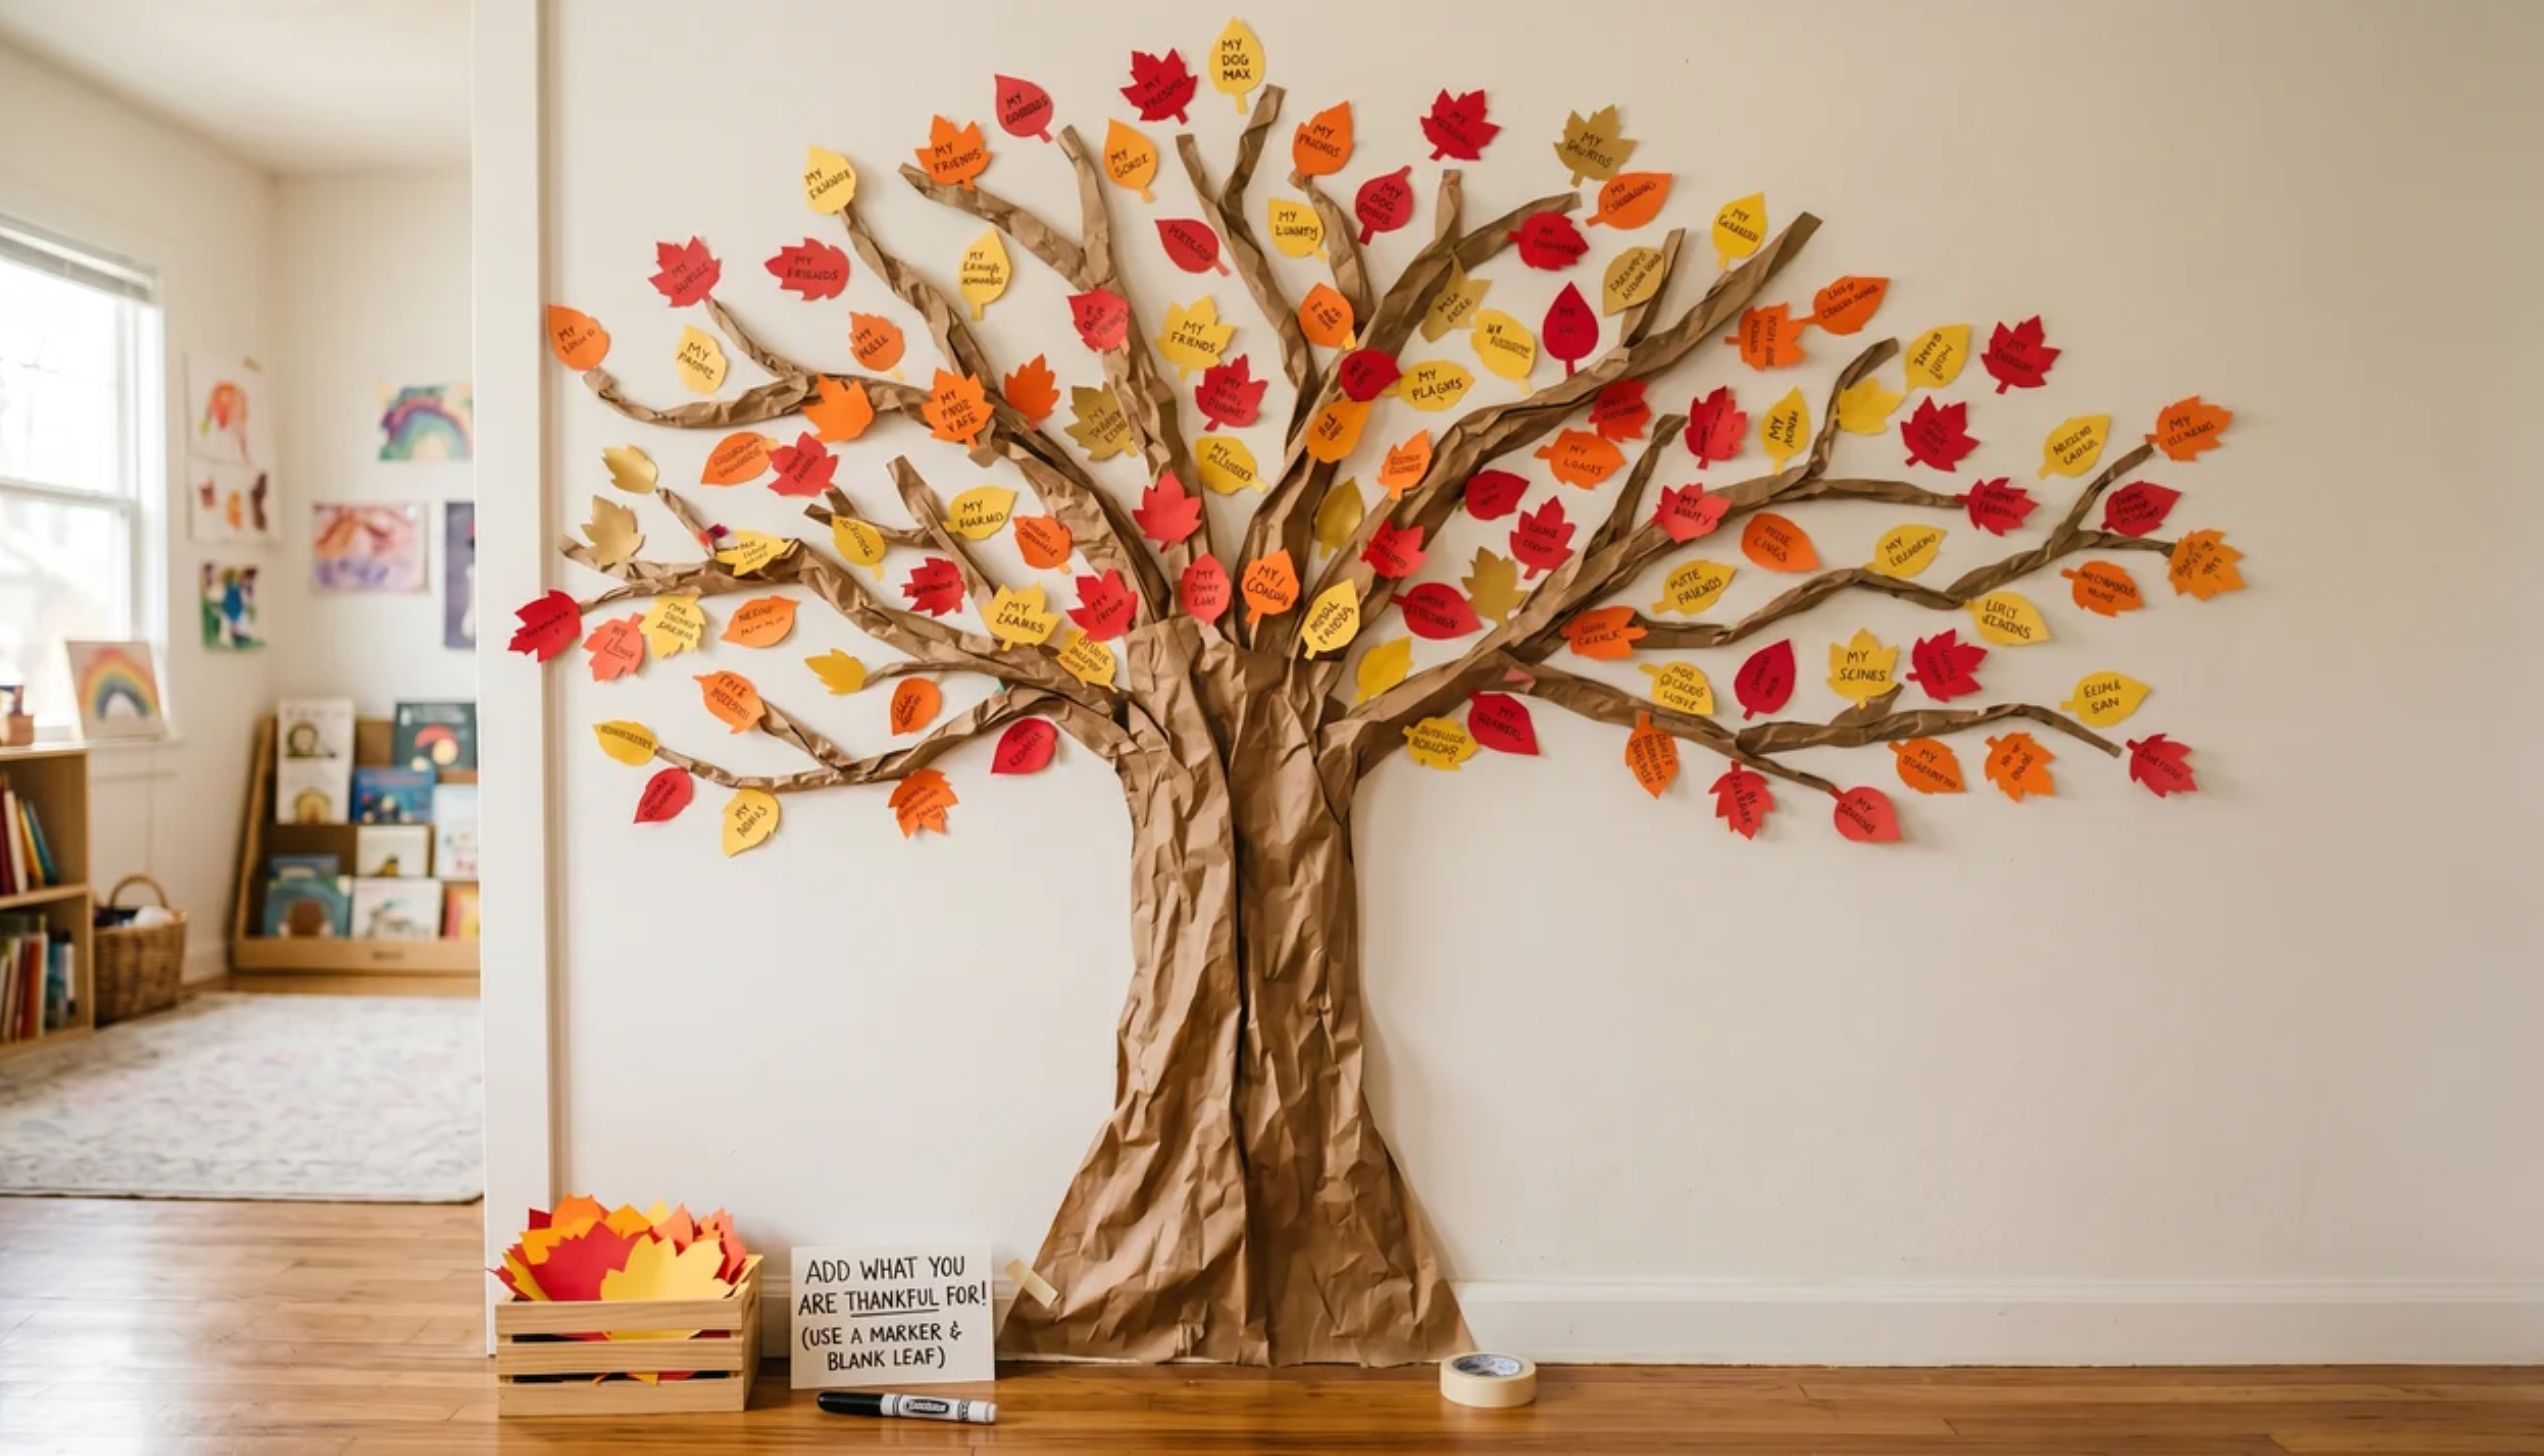
This craft doubles as a beautiful decoration and a meaningful family activity.
Step 1: Draw or trace a bare tree trunk and branches on a large piece of brown craft paper.
Step 2: Cut out leaf shapes from red, orange, and yellow paper; make plenty.
Step 3: Ask each child to write one thing they are grateful for on a leaf.
Step 4: Glue or tape the leaves onto the branches.
Step 5: Hang the tree on a wall or door throughout November.
Step 6: Keep adding leaves as the month goes on.
6. Turkey Popcorn Treat Bags
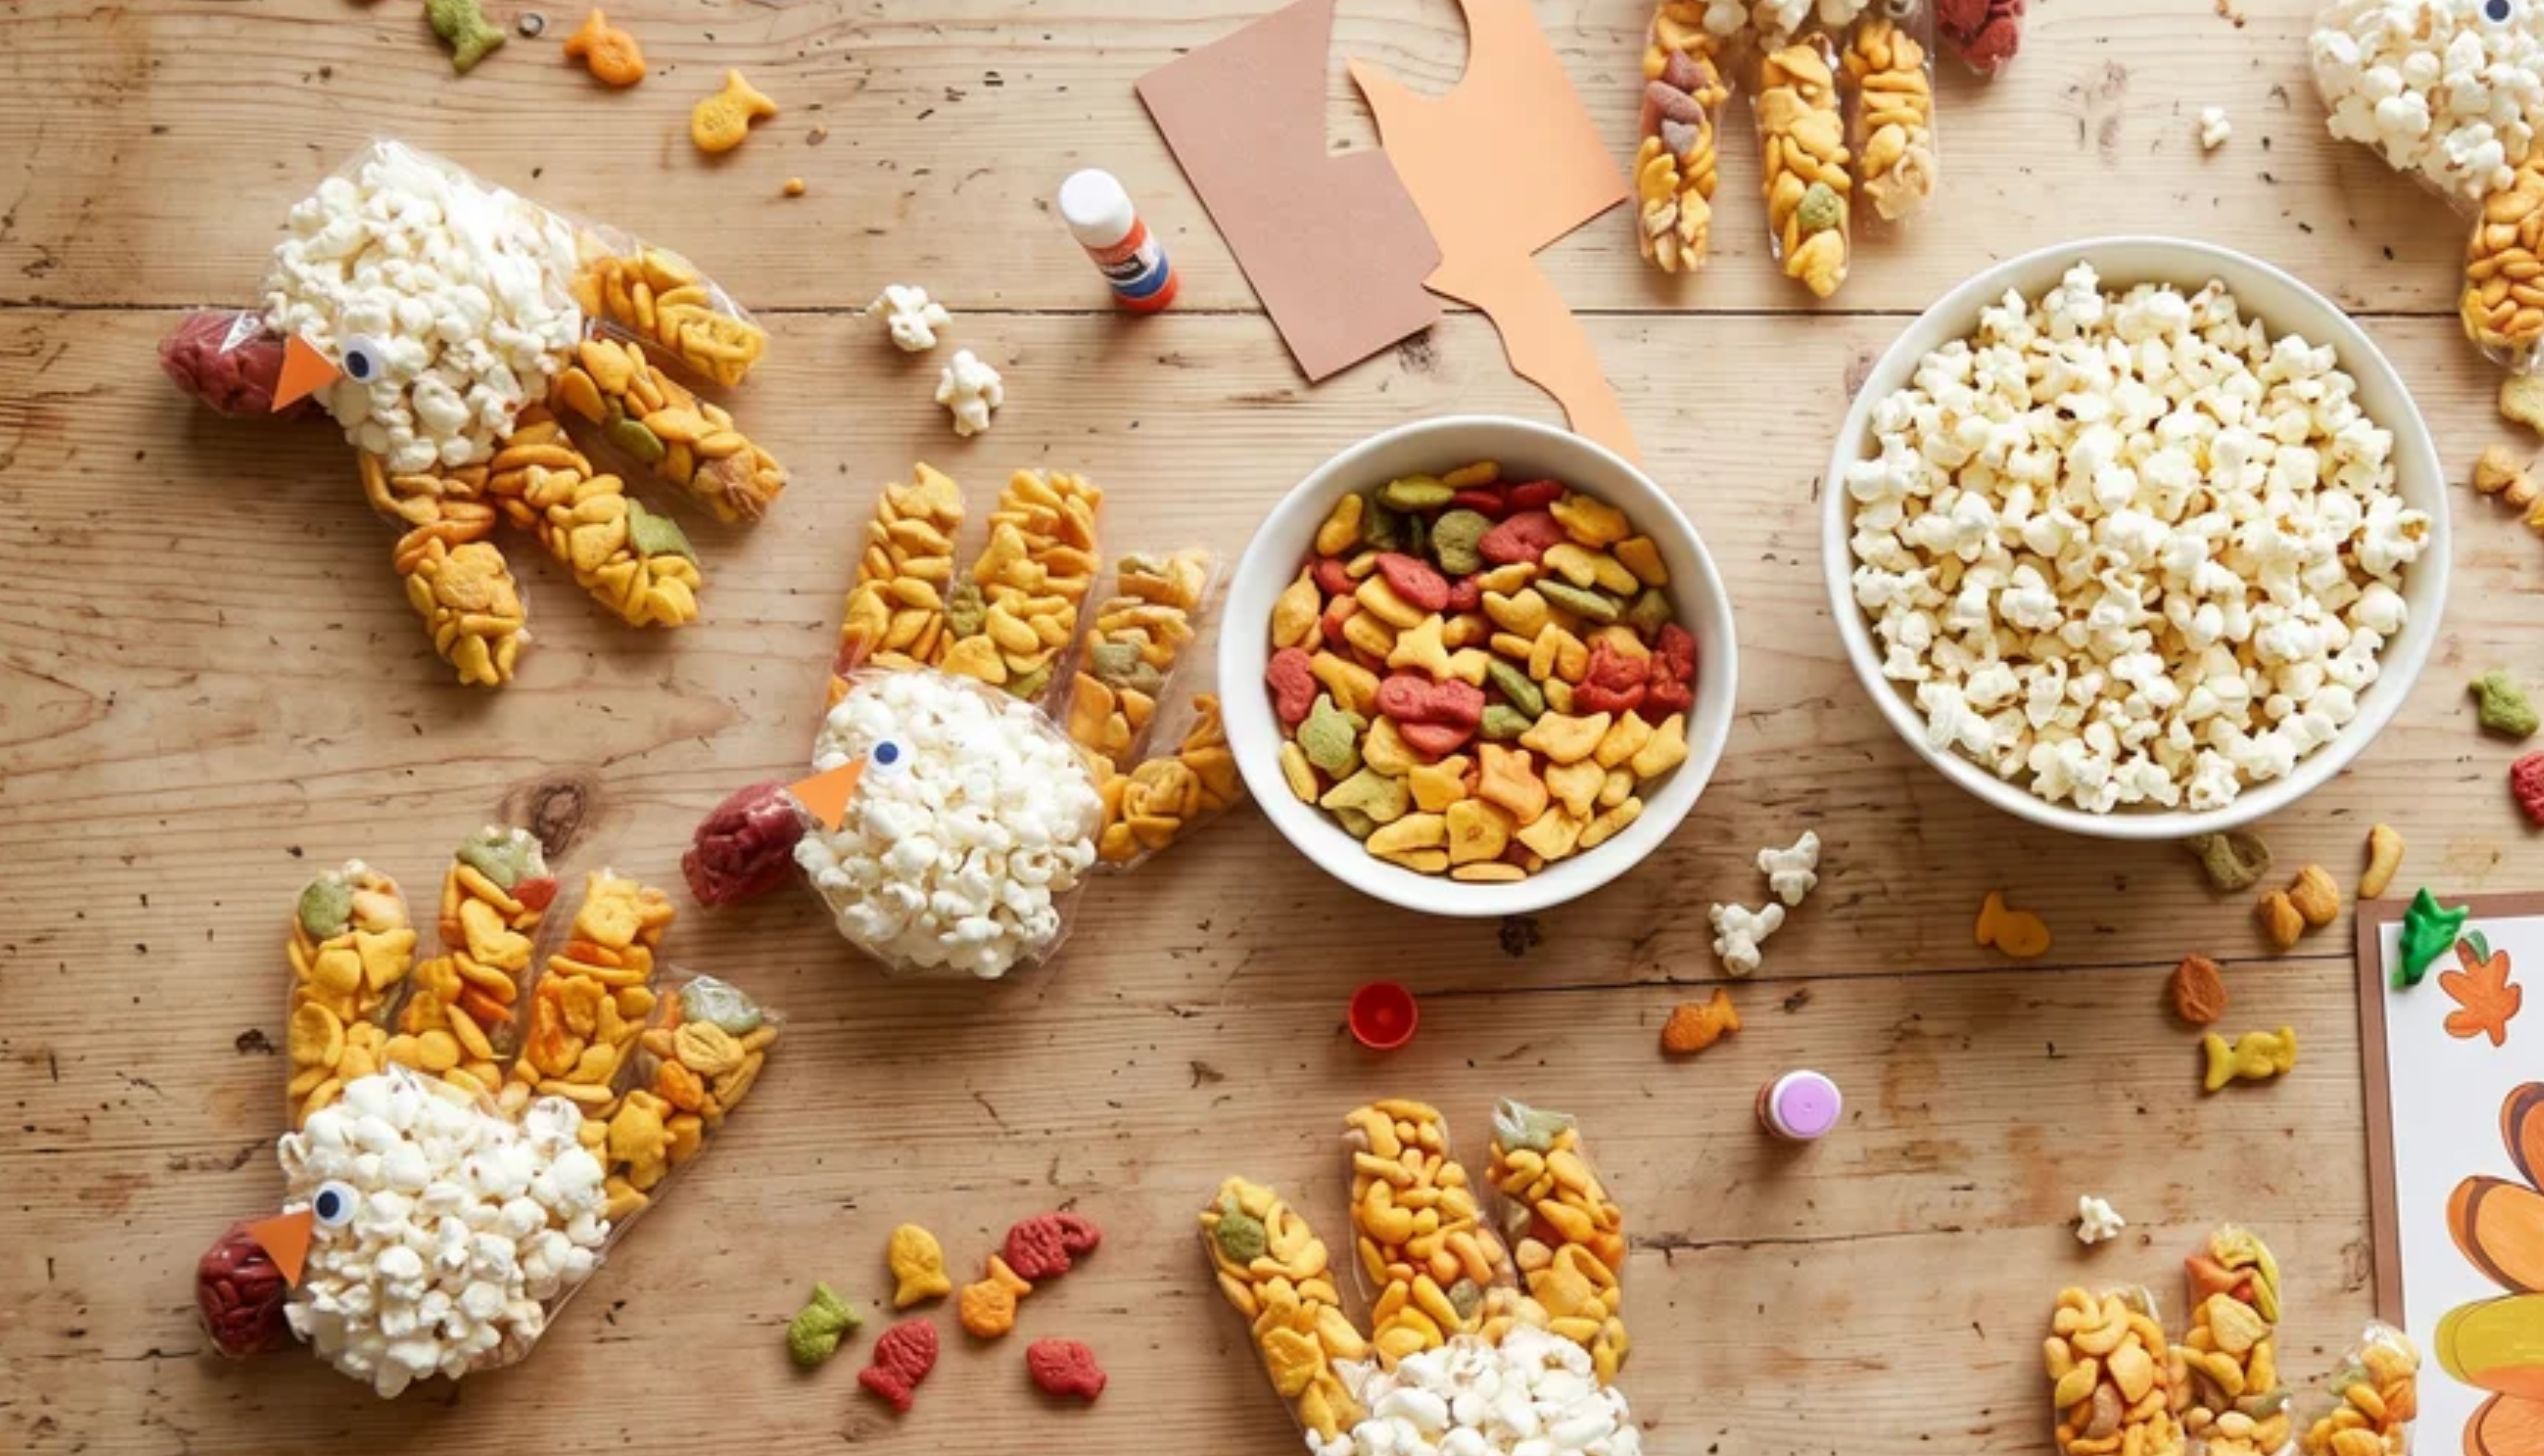
Kids can assemble these fun bags for the Thanksgiving table or party favors.
Step 1: Fill small, clear treat bags with popped popcorn.
Step 2: Tie the top of the bag with orange or yellow ribbon.
Step 3: Cut a small turkey head from brown and orange cardstock.
Step 4: Draw a face, eyes, beak, and red wattle.
Step 5: Attach the turkey head to the tied ribbon with tape or a staple.
Step 6: Fan out strips of red, orange, and yellow paper behind the head for feathers.
7. Paper Bag Turkey Puppets
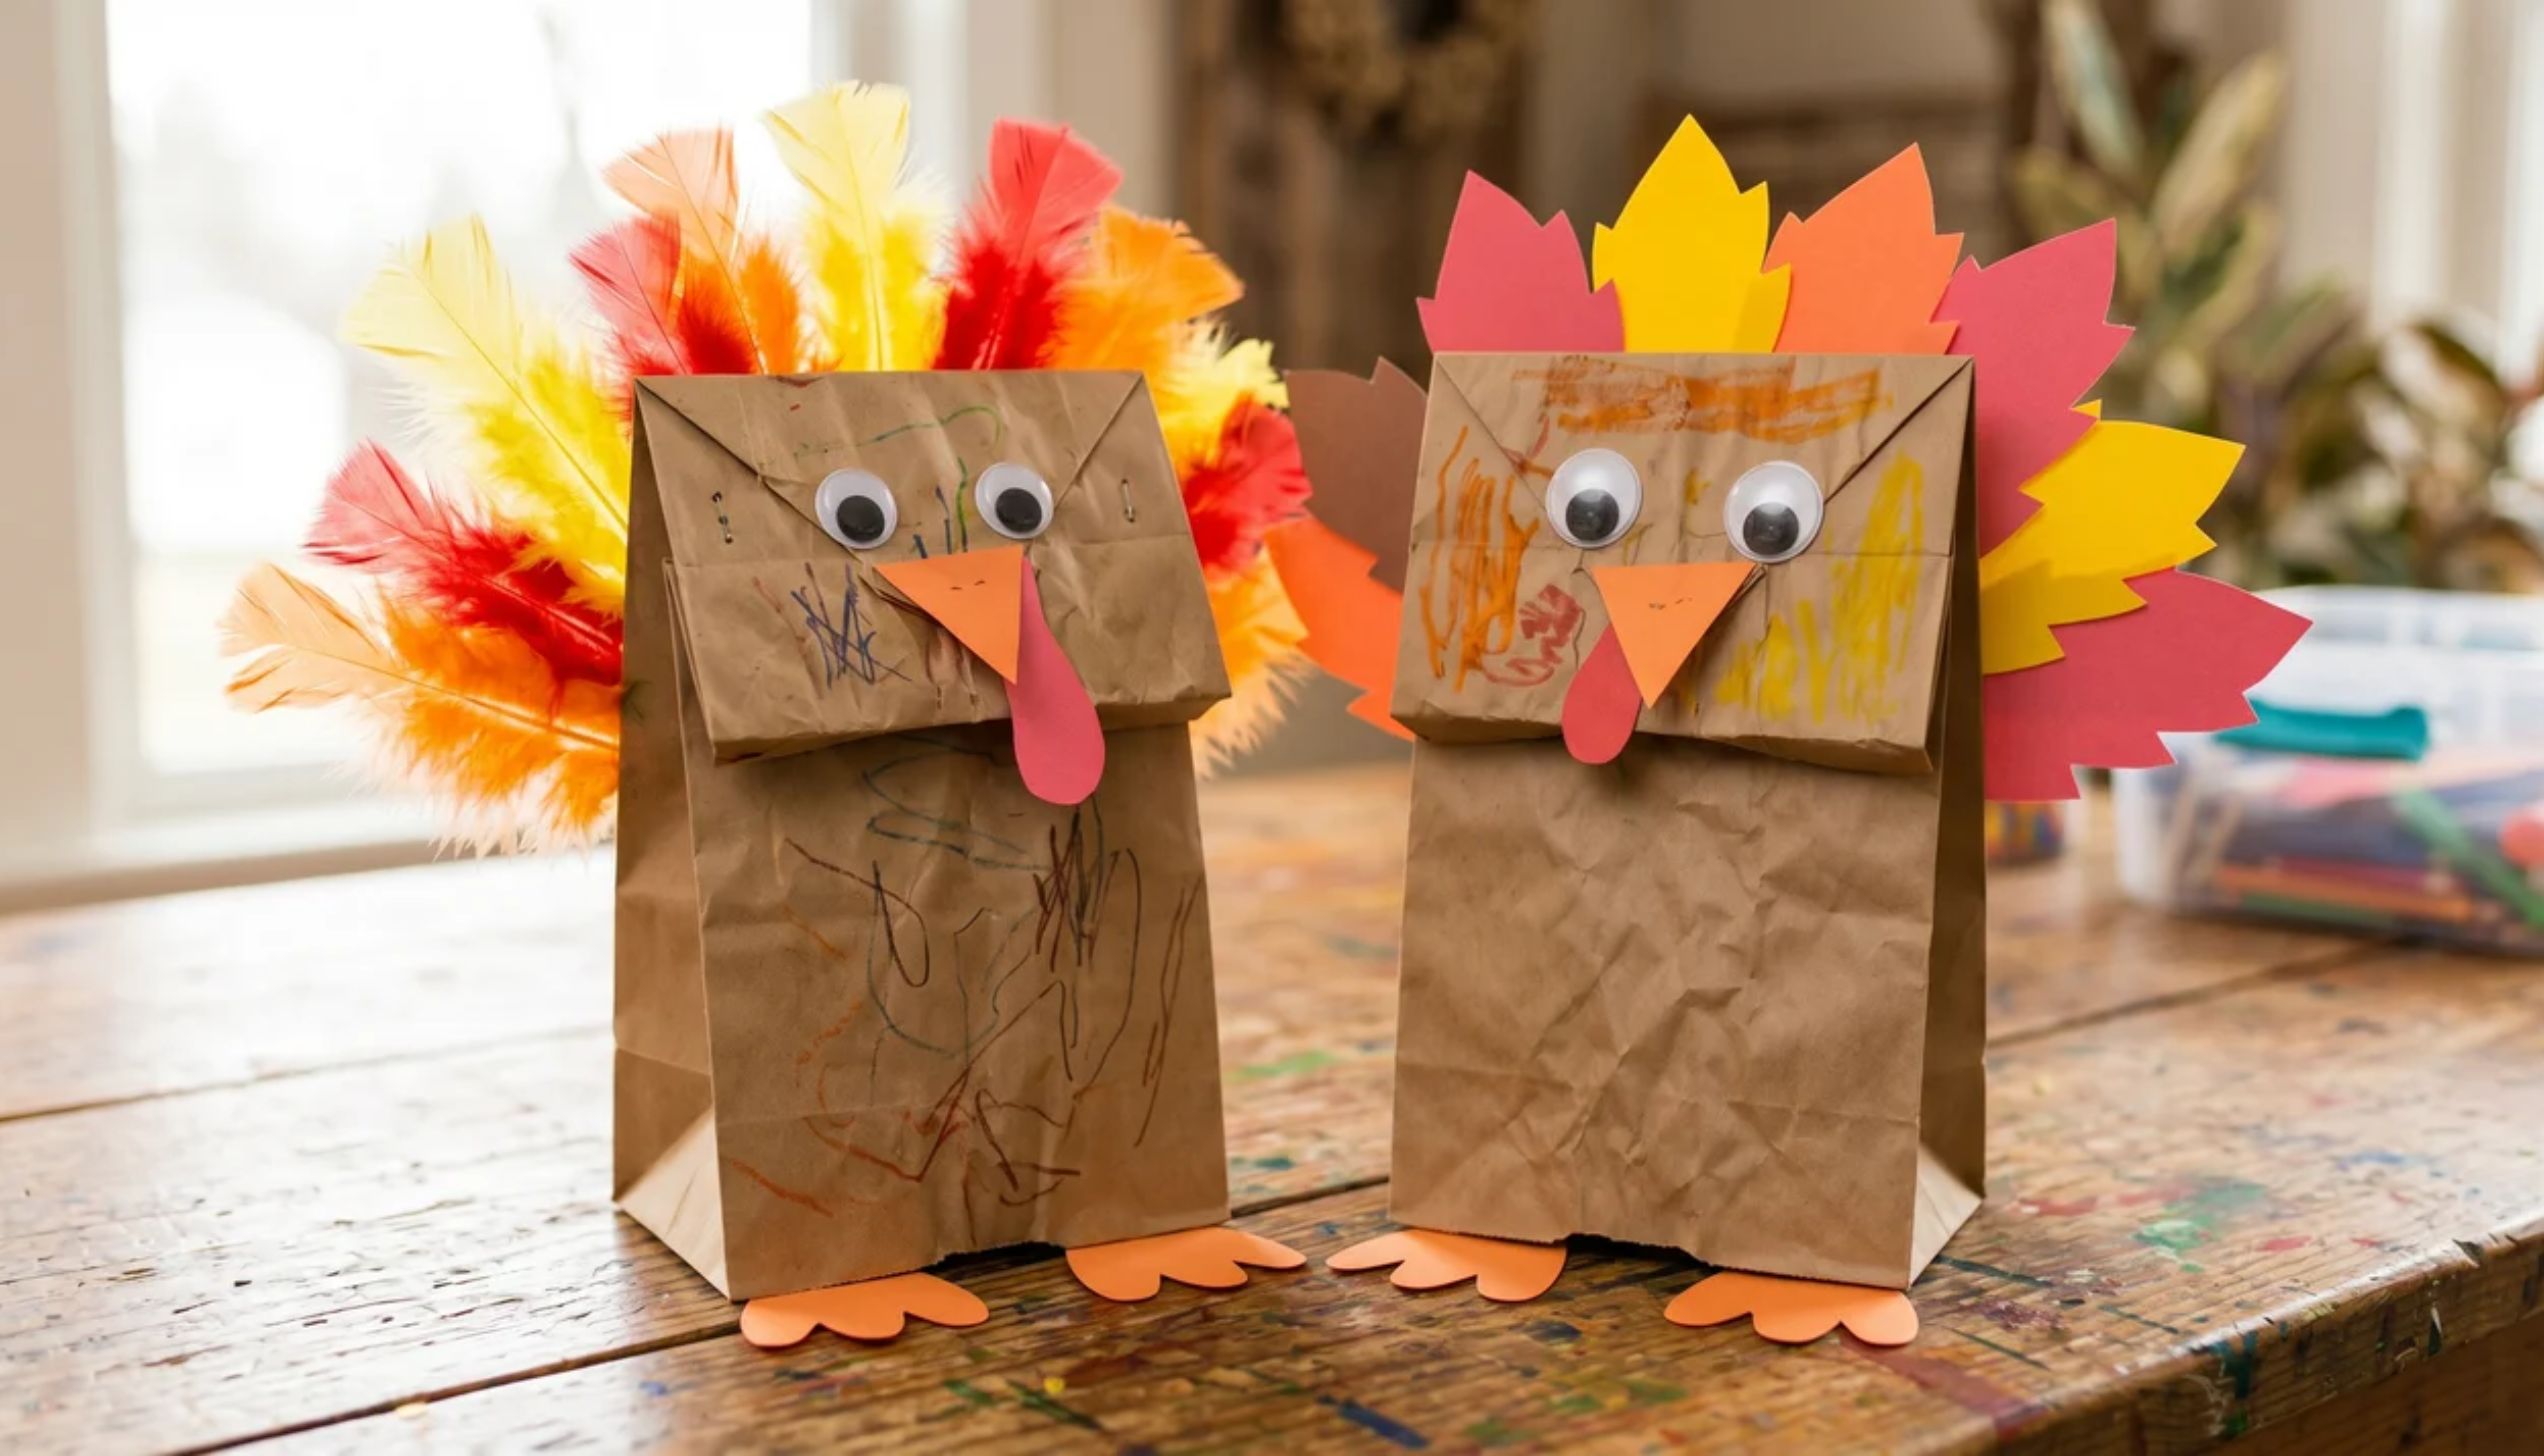
Simple and playful, paper bag puppets keep kids busy before and after dinner.
Step 1: Use a small brown paper lunch bag. Keep the bag folded flat.
Step 2: The folded flap becomes the turkey’s head. Draw eyes and a beak on it.
Step 3: Cut a red wattle from construction paper and glue it below the beak.
Step 4: Cut feather shapes from orange, yellow, and red paper.
Step 5: Glue the feathers to the back of the bag body.
Step 6: Slide your hand into the bag and move the flap to make the turkey talk.
8. Pumpkin Seed Art Collage
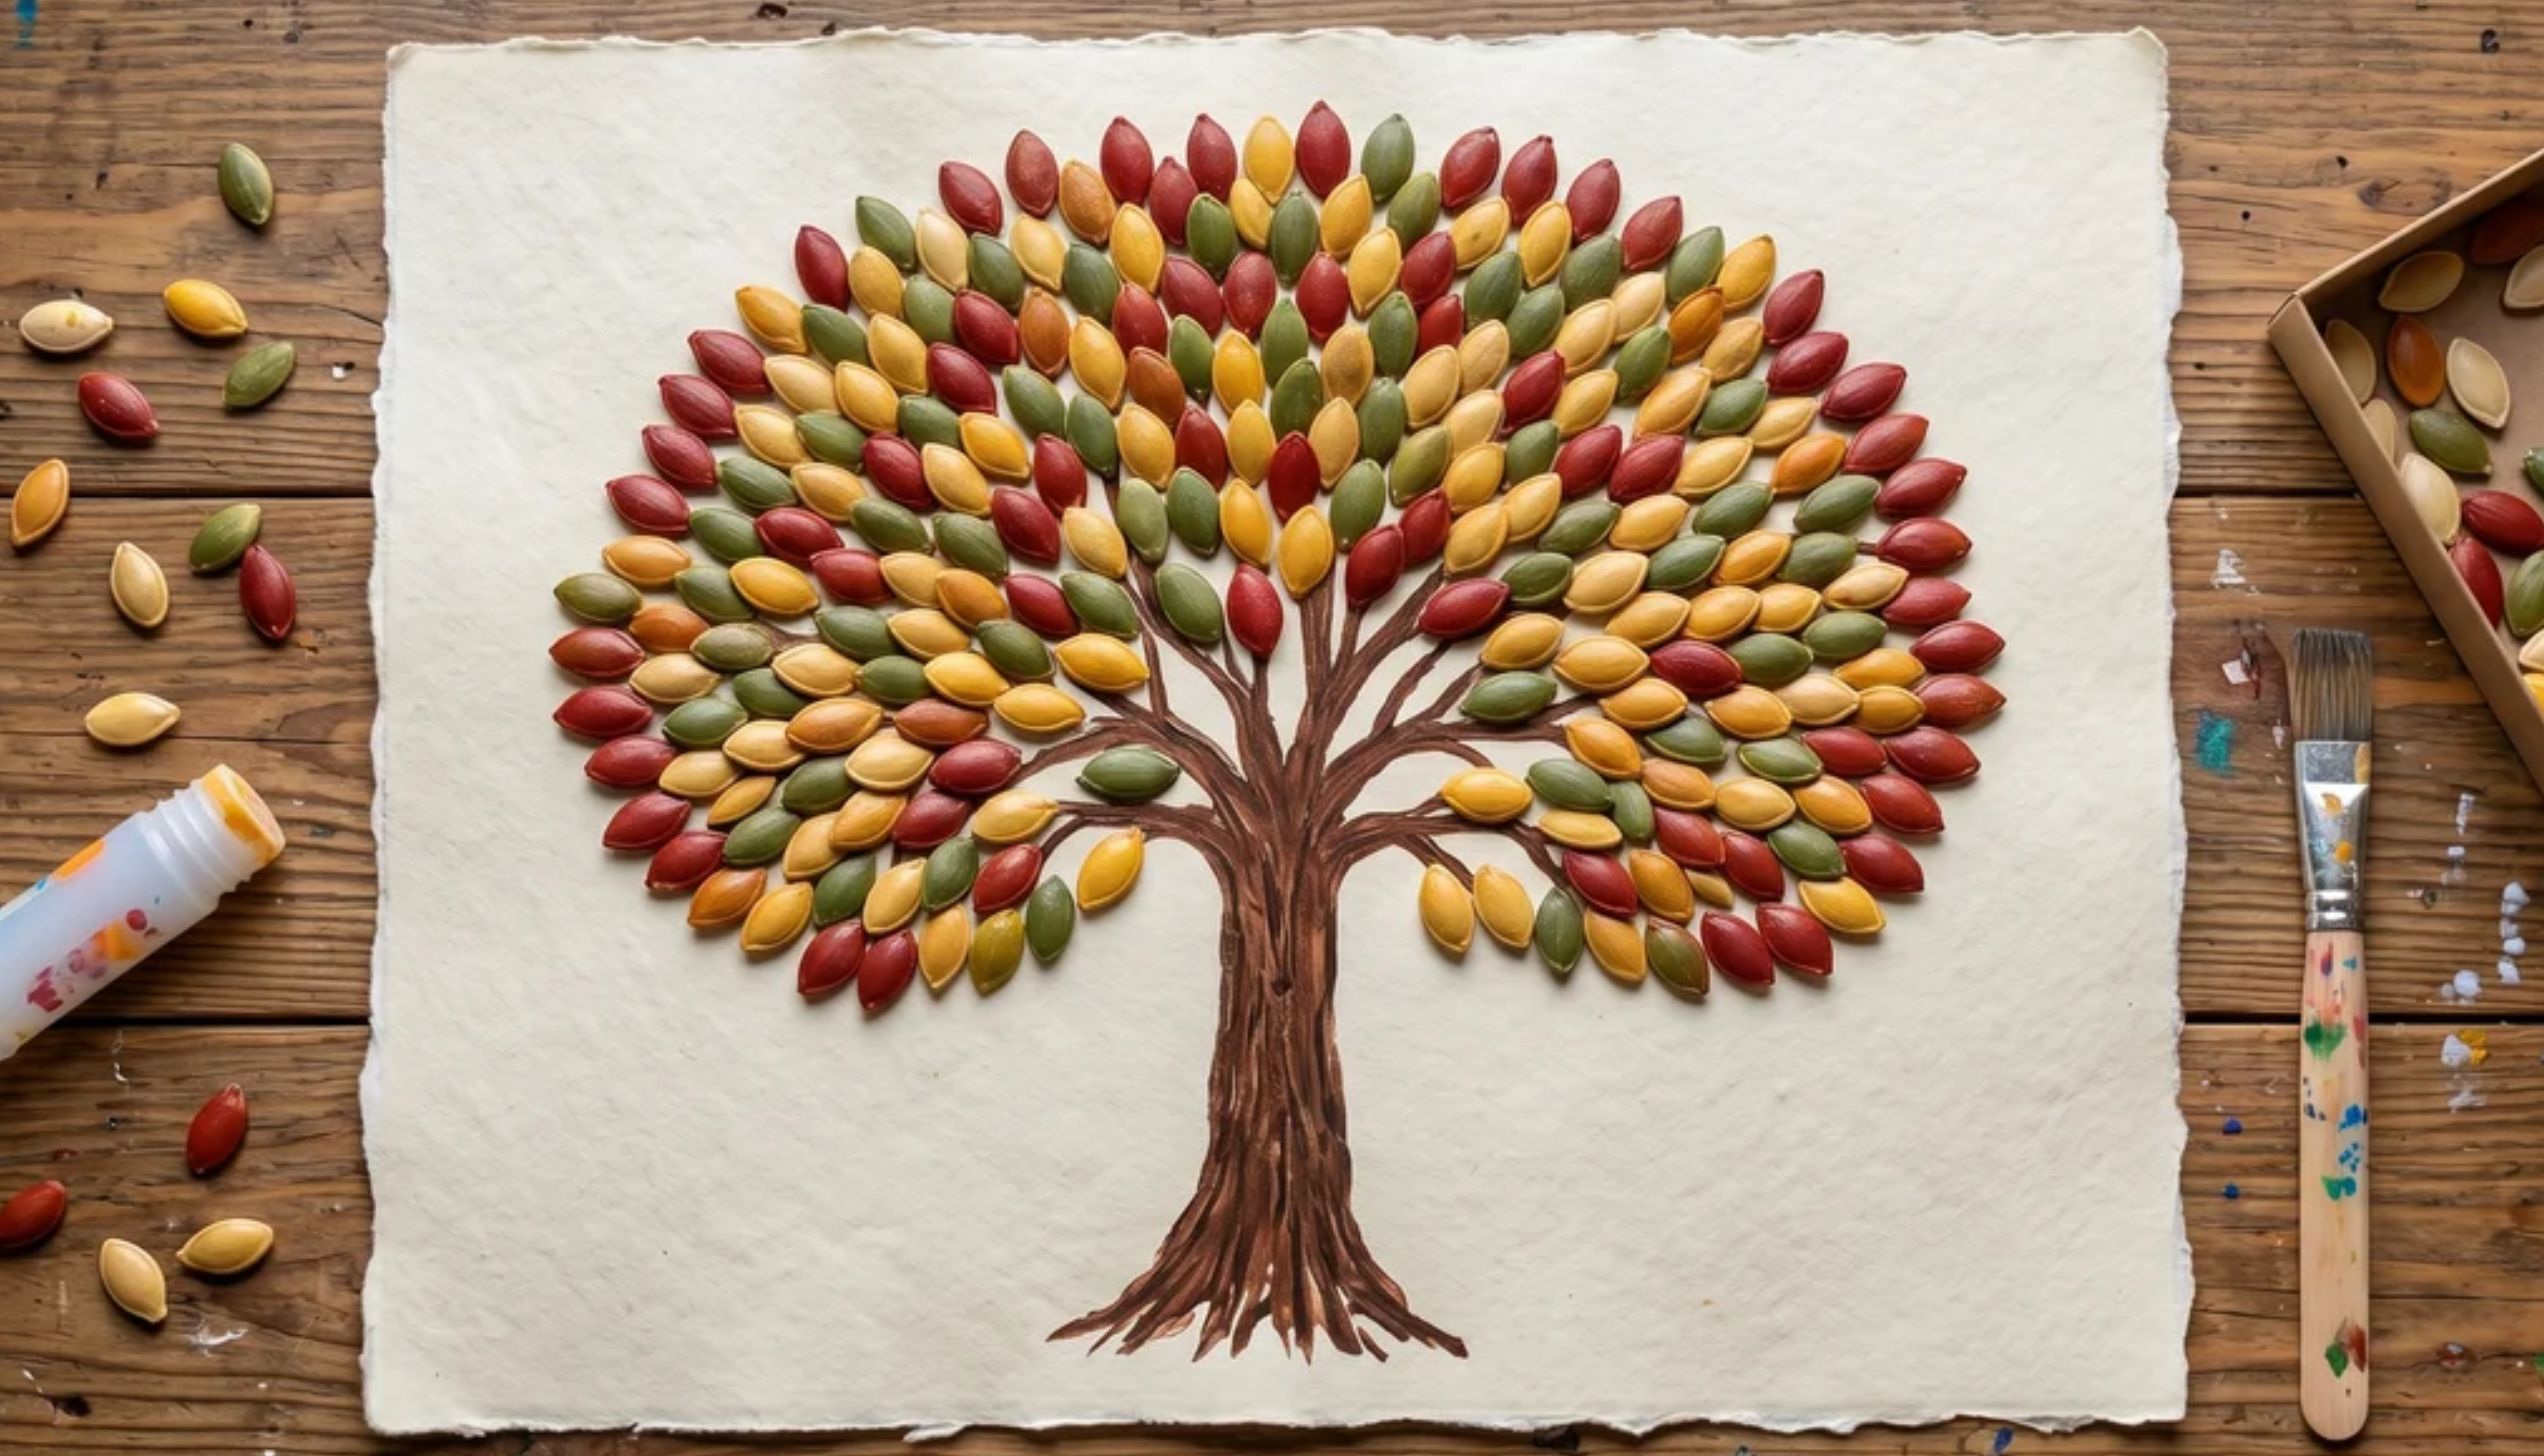
Save those pumpkin seeds from carving and turn them into fall art.
Step 1: Rinse and dry pumpkin seeds completely after carving.
Step 2: Draw a simple tree-shaped outline on paper.
Step 3: Apply white craft glue inside the outline.
Step 4: Press pumpkin seeds onto the glue to fill the shape.
Step 5: Let it dry flat for at least one hour.
Step 6: Optionally, paint the seeds red, yellow, or green after they have dried.
9. Turkey Spoon Puppets
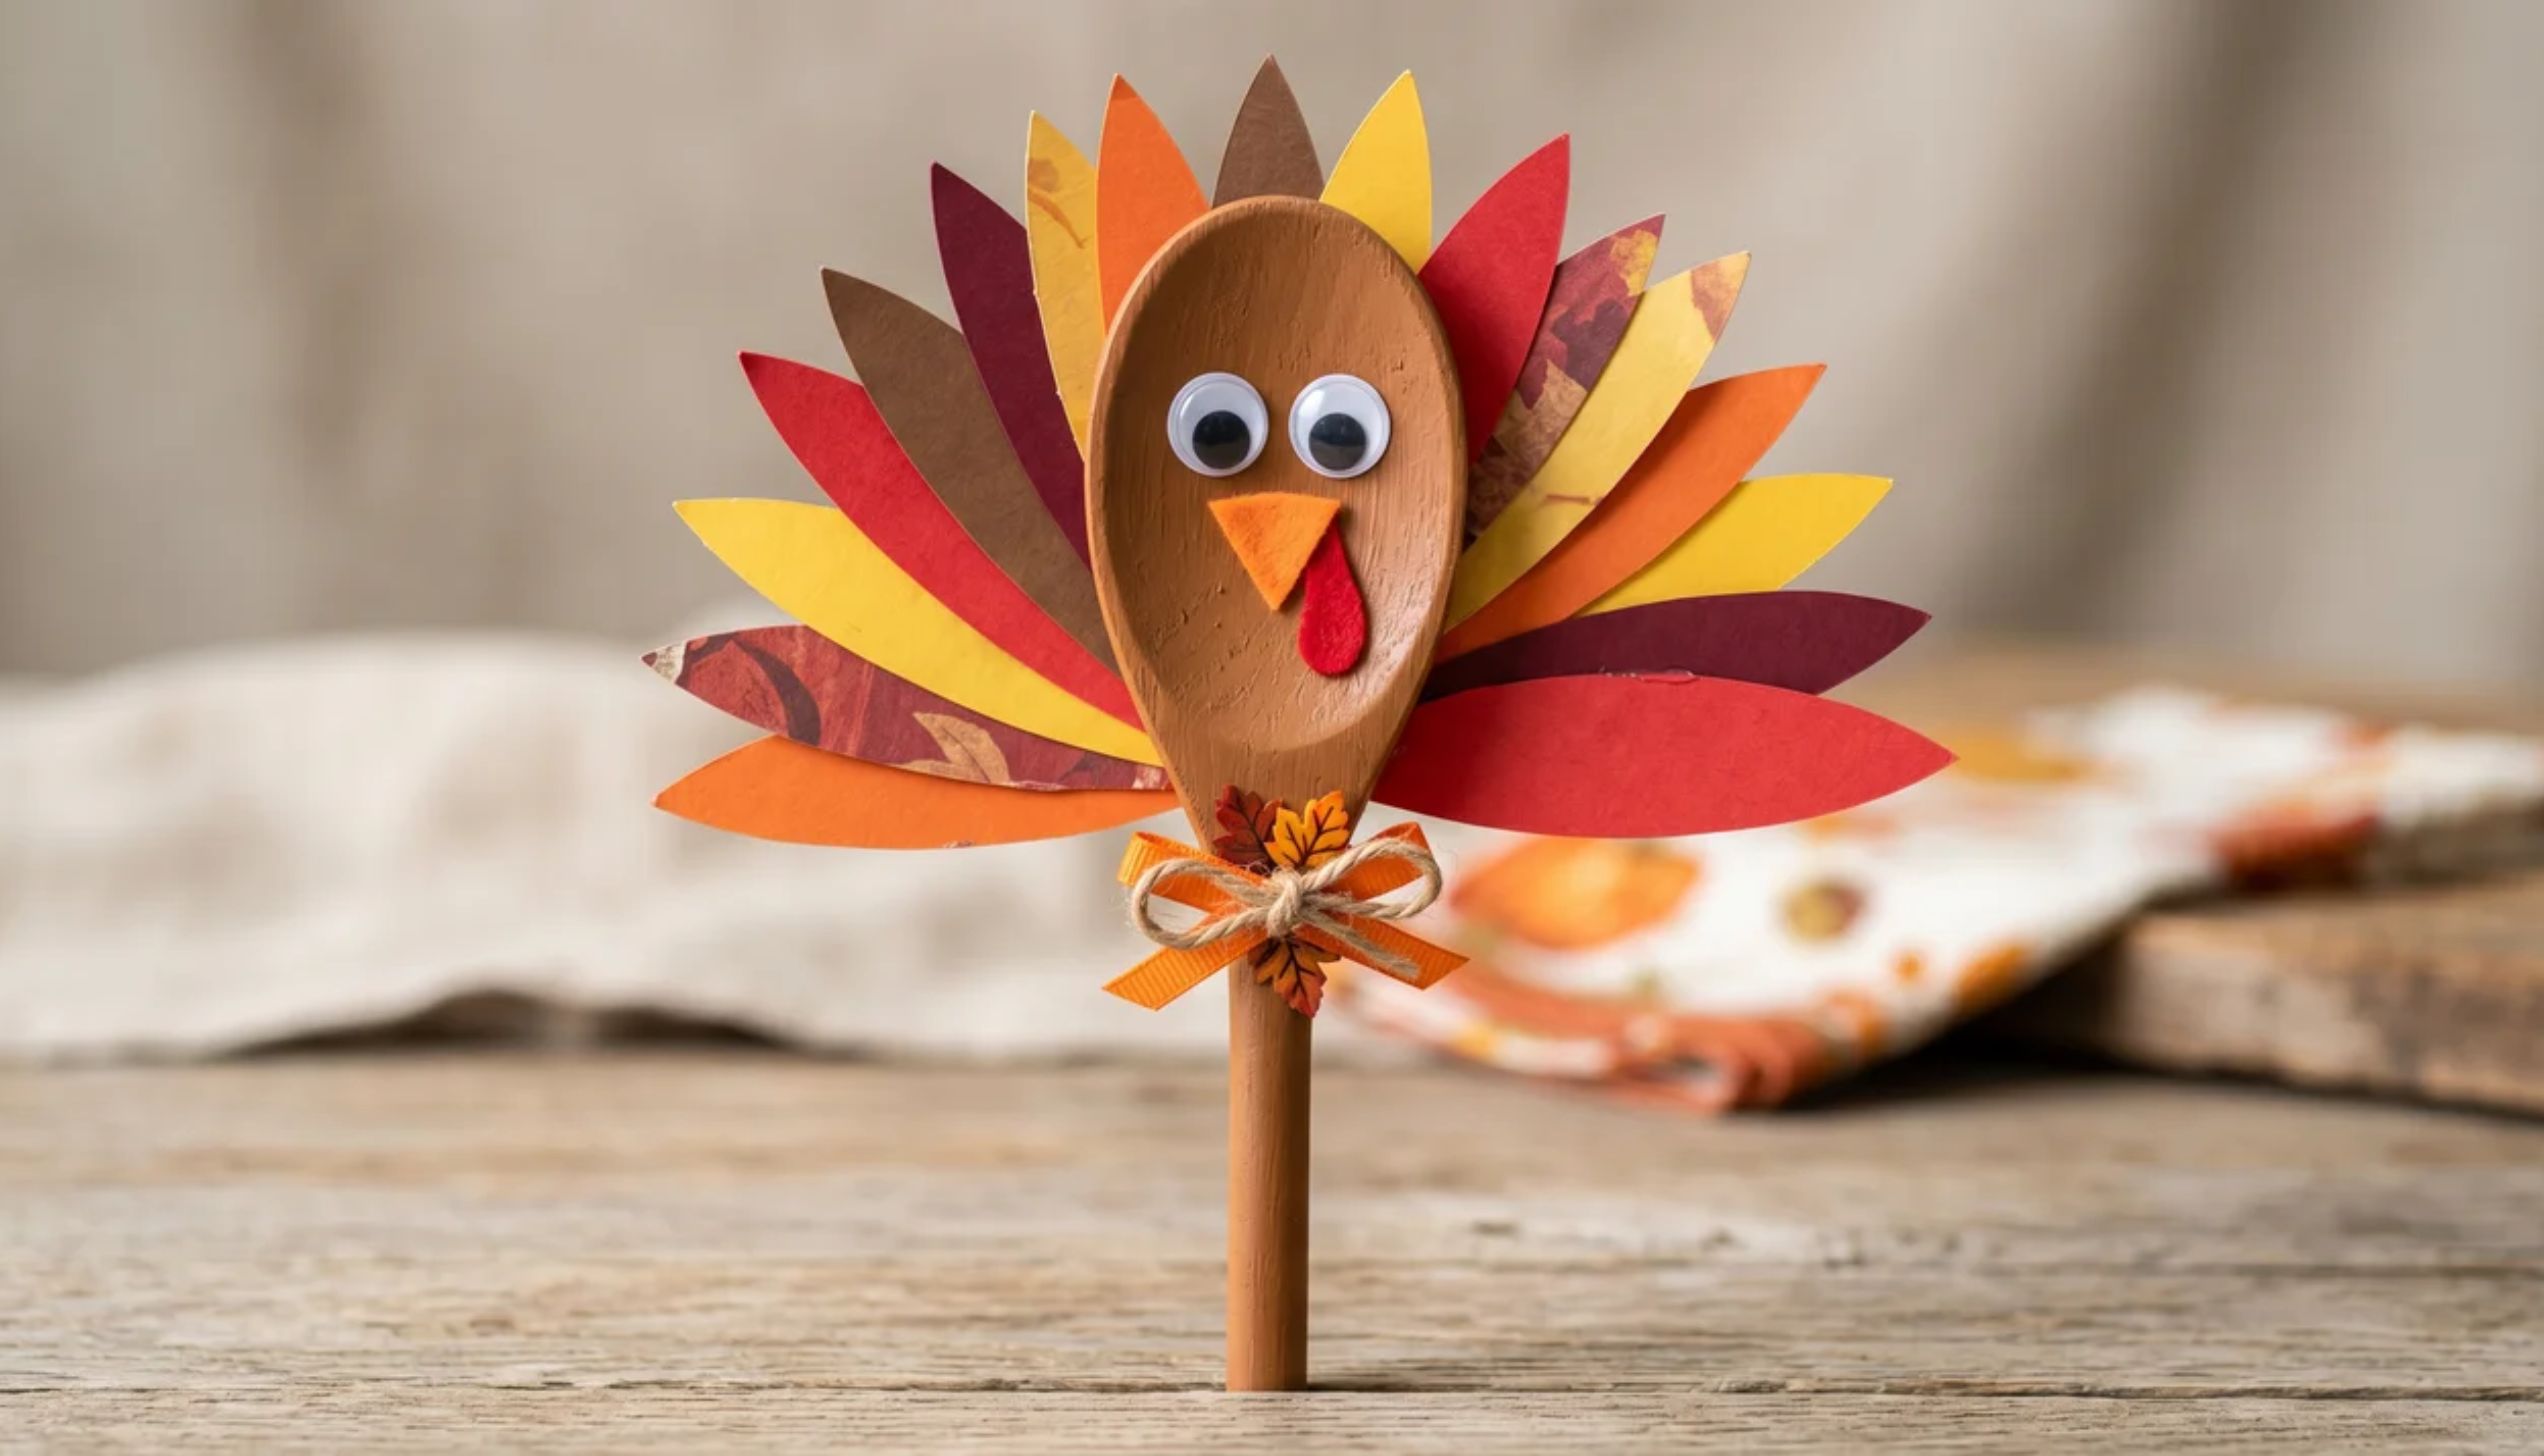
Wooden spoons make surprisingly good turkey puppets, quick to make, fun to hold, and easy enough for kids of all ages to finish in one sitting.
Step 1: Hold a plain wooden spoon with the handle facing you. This is the turkey’s head.
Step 2: Draw two small eyes and an orange beak in the center of the spoon bowl.
Step 3: Cut a small red wattle from felt or construction paper. Glue it just below the beak.
Step 4: Cut feather shapes from orange, red, and yellow paper or felt.
Step 5: Fan the feathers out and glue them to the back of the spoon handle.
Step 6: Let everything dry flat. Hold the handle to use it as a puppet.
10. Toilet Roll Turkey
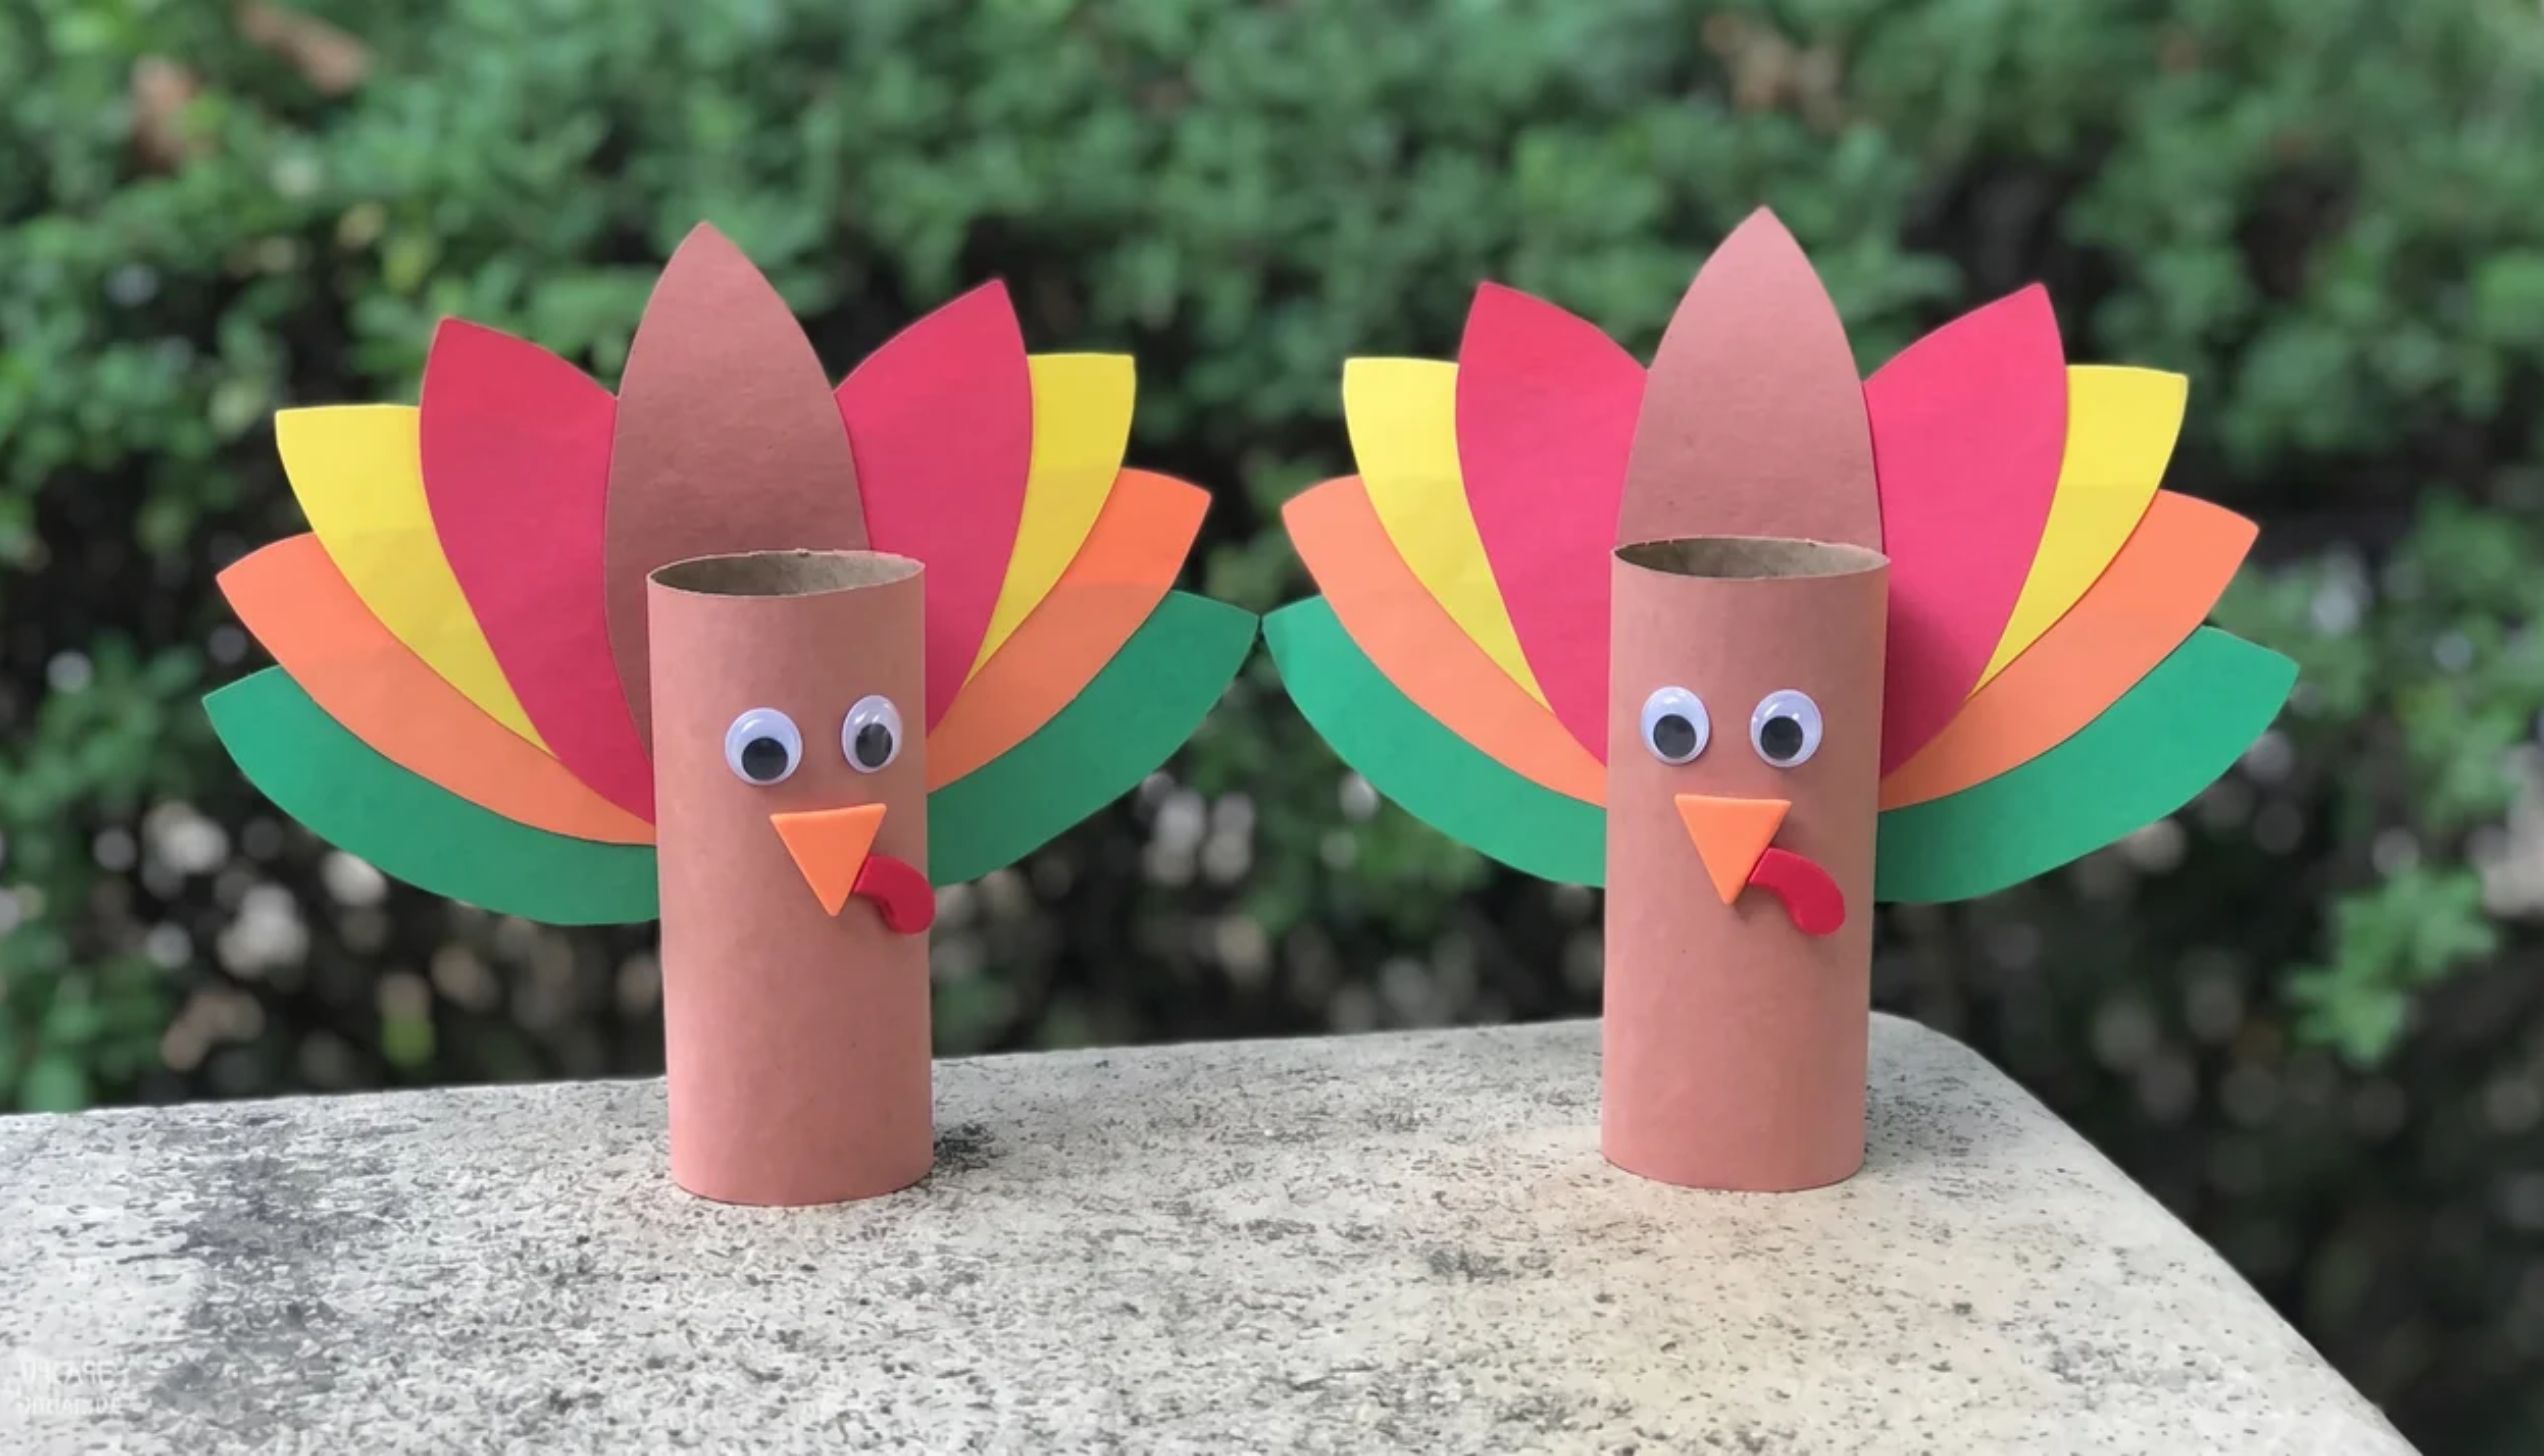
Toilet rolls are free, recyclable, and surprisingly fun to make into Thanksgiving turkeys.
Step 1: Paint a cardboard toilet roll brown. Let it dry fully.
Step 2: Cut a small circle from brown cardstock for the turkey’s head.
Step 3: Draw eyes, a beak, and a red wattle on the circle.
Step 4: Glue the head to the top of the roll.
Step 5: Cut feather shapes from bright paper and fan them out behind the roll.
Step 6: Glue the feathers in place. Stand the turkey upright on a table.
11. Fall Suncatchers
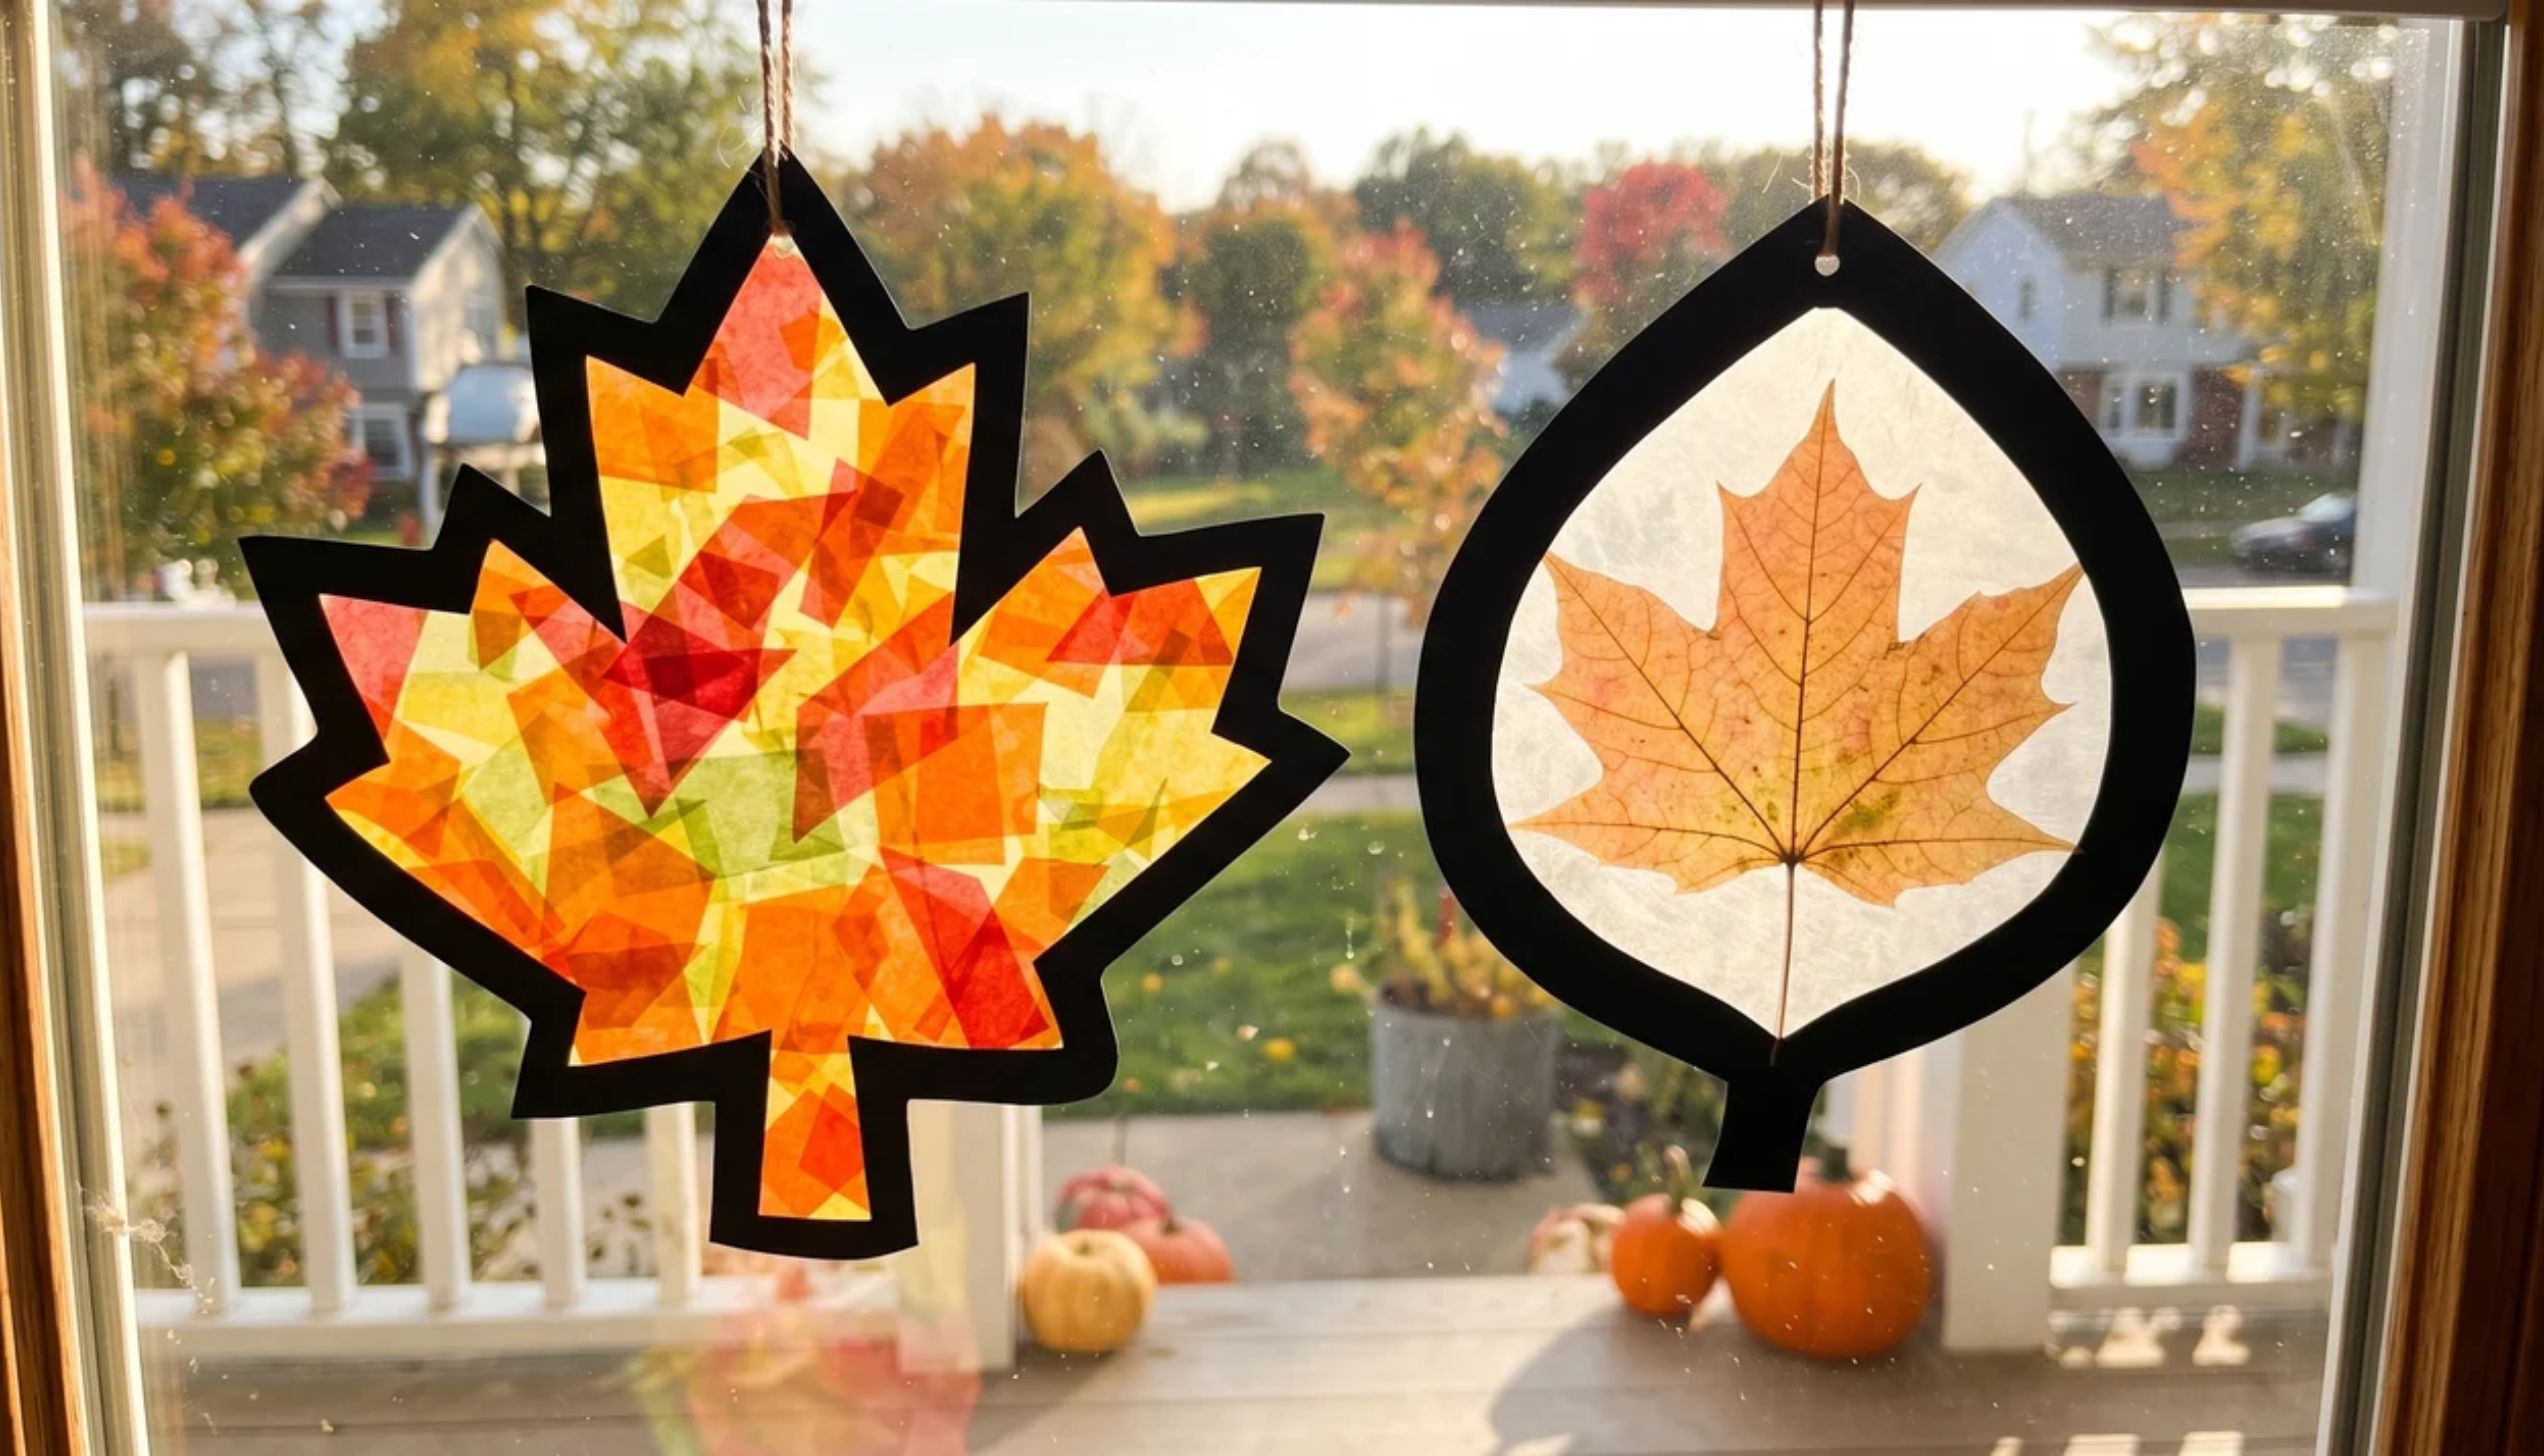
Hold one of these up to a sunny window, and the room fills with warm fall color. They take very little time but look like something you’d find in a craft shop.
Step 1: Cut a large circle or leaf shape from black cardstock. Cut smaller shapes inside to create a frame.
Step 2: Tape small pieces of colored tissue paper or cellophane over the cut-out holes.
Step 3: Alternatively, press real dried leaves flat inside a sheet of wax paper.
Step 4: Seal with a second sheet of wax paper using a warm iron on low heat (adult step only).
Step 5: Trim the edges into a leaf or pumpkin shape.
Step 6: Hang in a sunny window with a piece of string or tape.
12. Turkey Headbands
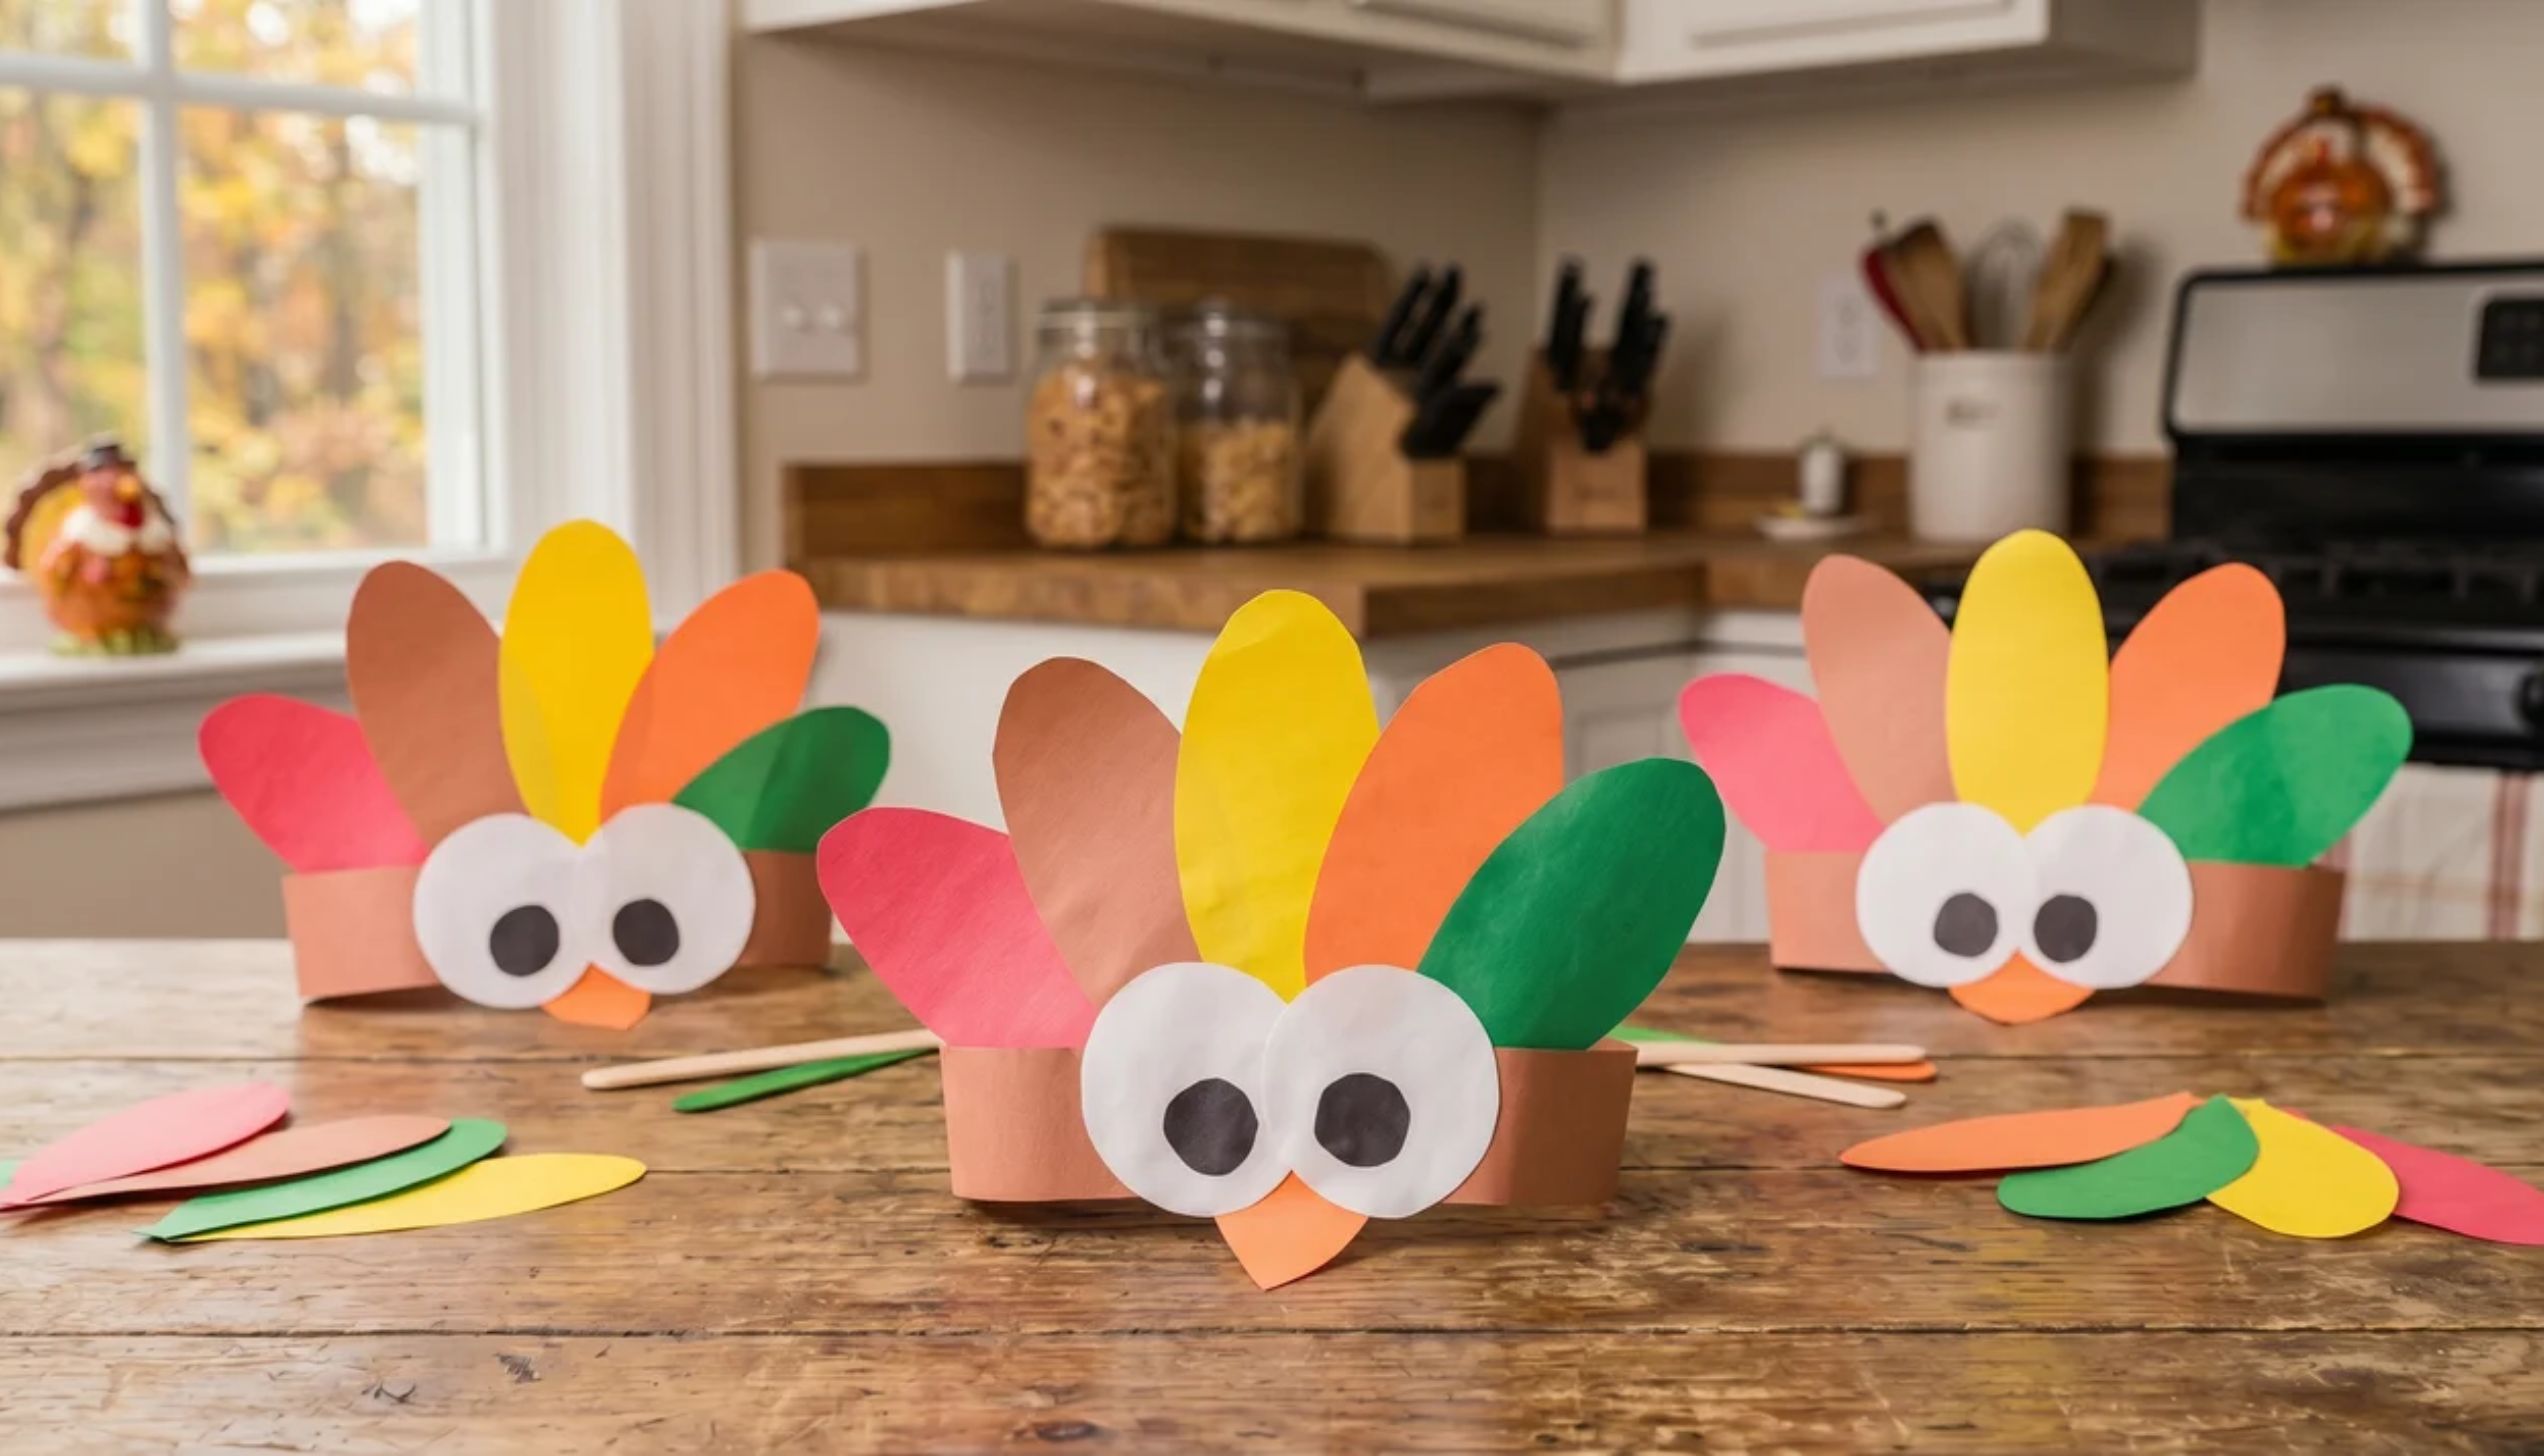
These headbands are the kind of craft kids refuse to take off. Once they’re wearing them, the Thanksgiving parade usually starts on its own.
Step 1: Measure a strip of brown cardstock around the child’s head. Staple or tape the ends together to form a band.
Step 2: Cut feather shapes from red, orange, yellow, and brown paper.
Step 3: Decorate the feathers with markers, stripes, dots, or zigzag patterns.
Step 4: Glue or staple the feathers to the front of the headband, fanning upward.
Step 5: Cut a small turkey face from brown paper, add eyes, beak, and wattle.
Step 6: Glue the face to the center front of the headband.
13. Hand-Painted Pumpkins
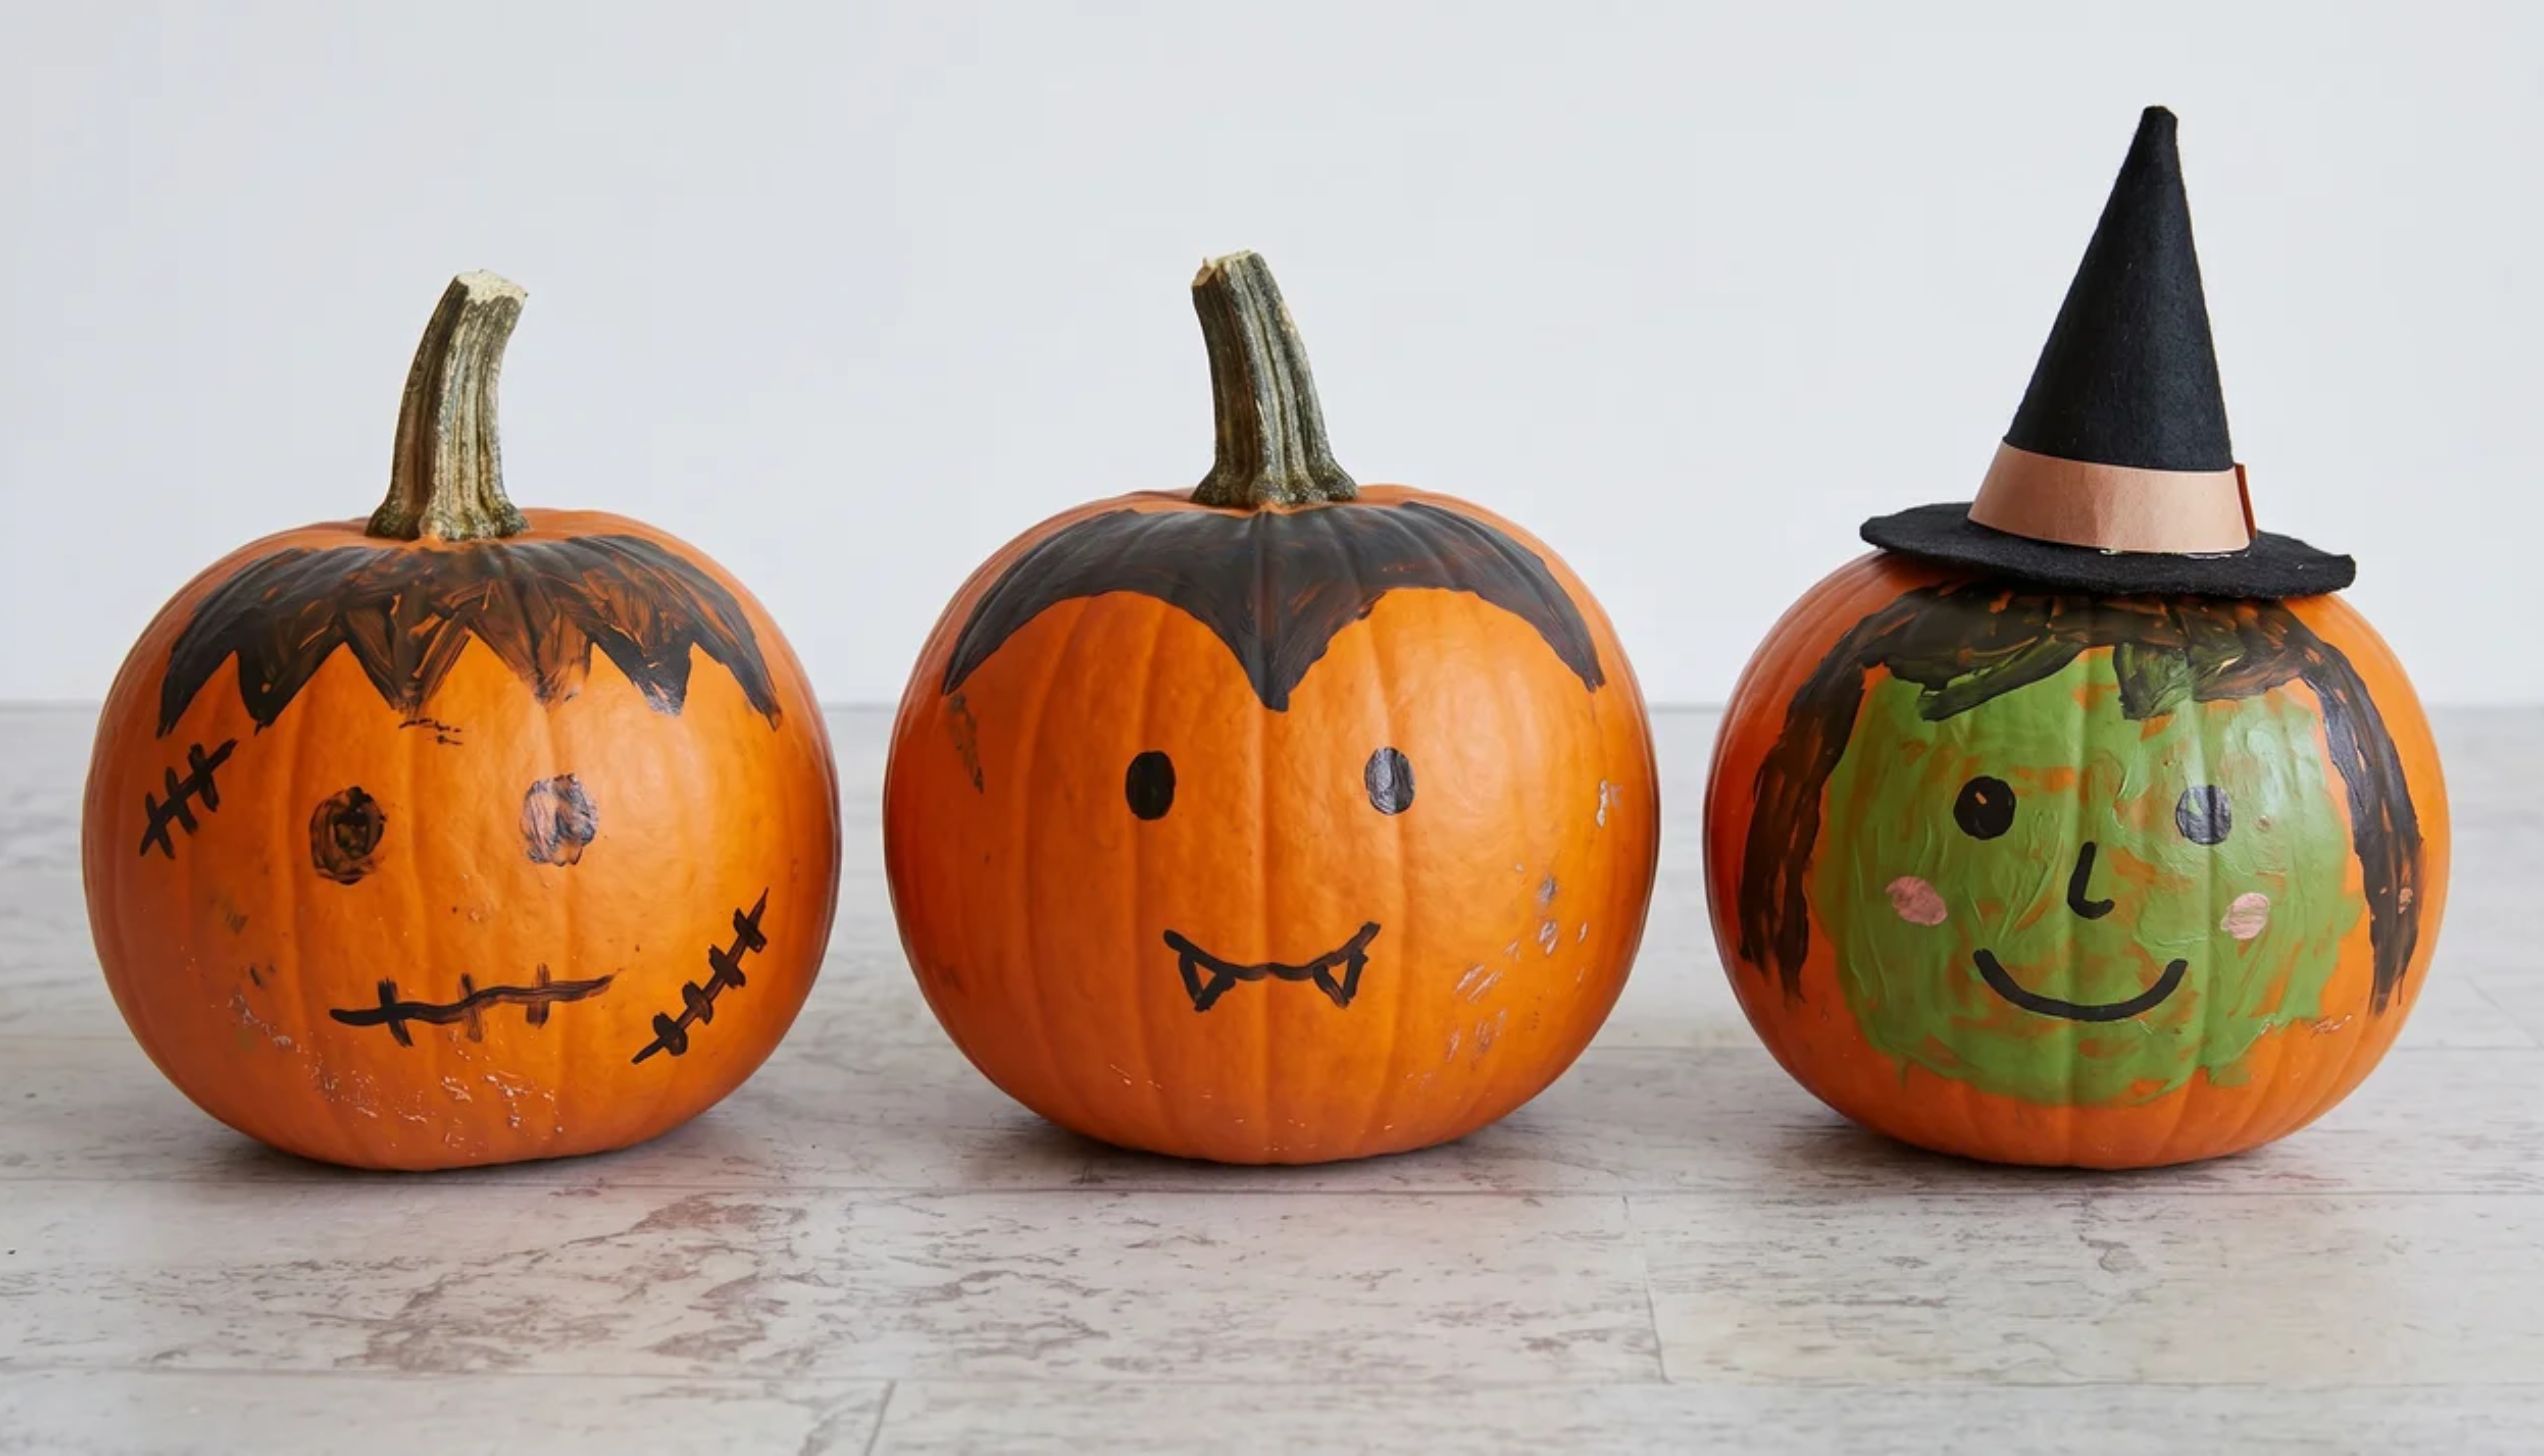
Painted pumpkins skip the mess of carving but still give you a beautiful result. They also last much longer on the table, sometimes weeks.
Step 1: Wipe your pumpkin clean and let it dry.
Step 2: Apply a base coat of white acrylic paint. Let it dry for 30 minutes.
Step 3: Choose a design like stripes, polka dots, leaves, or a simple “Give Thanks” message.
Step 4: Paint your design using small brushes or paint markers.
Step 5: Let the paint dry completely, usually 1 to 2 hours.
Step 6: Apply a clear sealant spray to protect the finish.
14. Thanksgiving Paper Lanterns
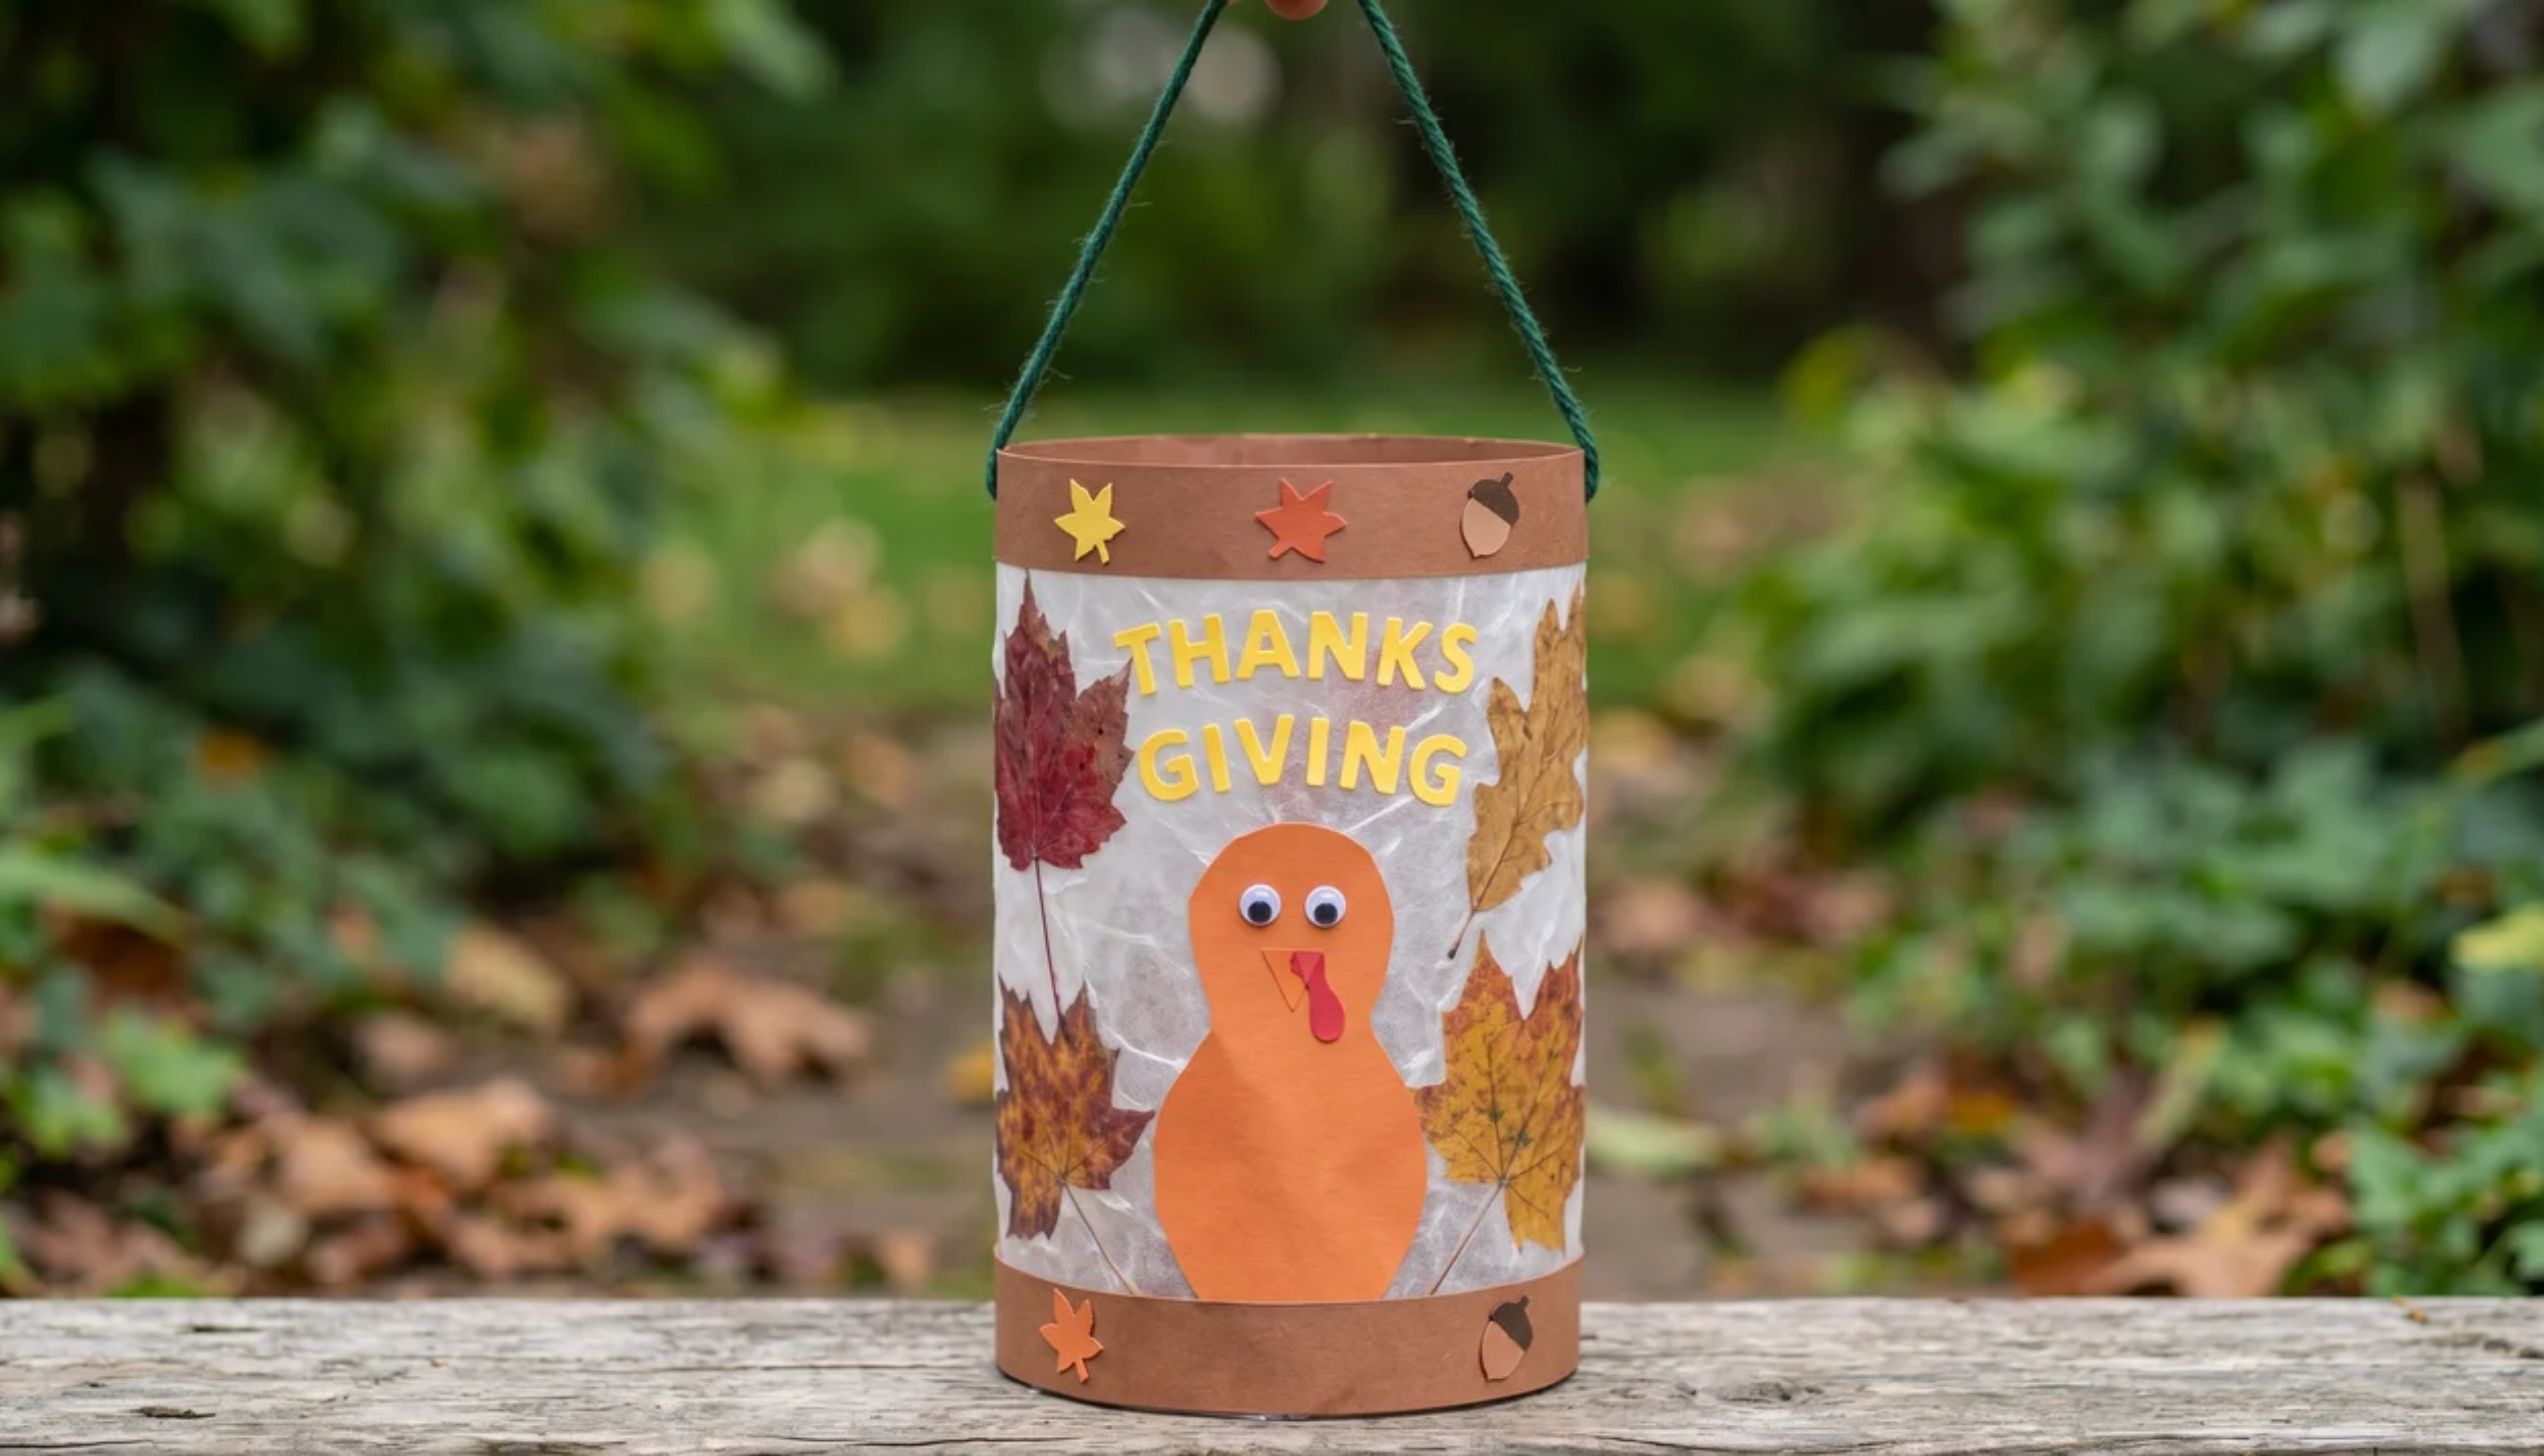
Paper lanterns add a soft warm glow to the Thanksgiving table and take only minutes to fold and assemble. They look great as a centerpiece or lined along a windowsill.
Step 1: Fold a sheet of cardstock in any color in half lengthwise.
Step 2: Cut slits along the folded edge, stopping about one inch from the open edge. Space the cuts evenly.
Step 3: Open the sheet flat. Draw or stamp fall designs between the slits: leaves, pumpkins, or small turkeys.
Step 4: Roll the sheet into a cylinder shape with the slits running vertically.
Step 5: Overlap the short edges and tape or staple them together to hold the cylinder shape.
Step 6: Cut a thin strip of cardstock for the handle. Staple both ends to the top of the lantern.
15. DIY Gratitude Jar

This is one of those crafts that gets better the longer you leave it out. By Thanksgiving Day, the jar is full, and reading the notes aloud at the table becomes the best part of the meal.
Step 1: Clean and dry a large mason jar or any clear glass jar.
Step 2: Decorate the outside with twine, fall ribbon, or a simple “We Are Thankful” label.
Step 3: Cut small strips of paper in fall colors, orange, yellow, and red.
Step 4: Place the strips, a pen, and the jar together in a visible spot in your home.
Step 5: Ask everyone to write something they are grateful for and drop it in the jar each day.
Step 6: Read the notes aloud at the Thanksgiving table.
16. Harvest Basket Craft
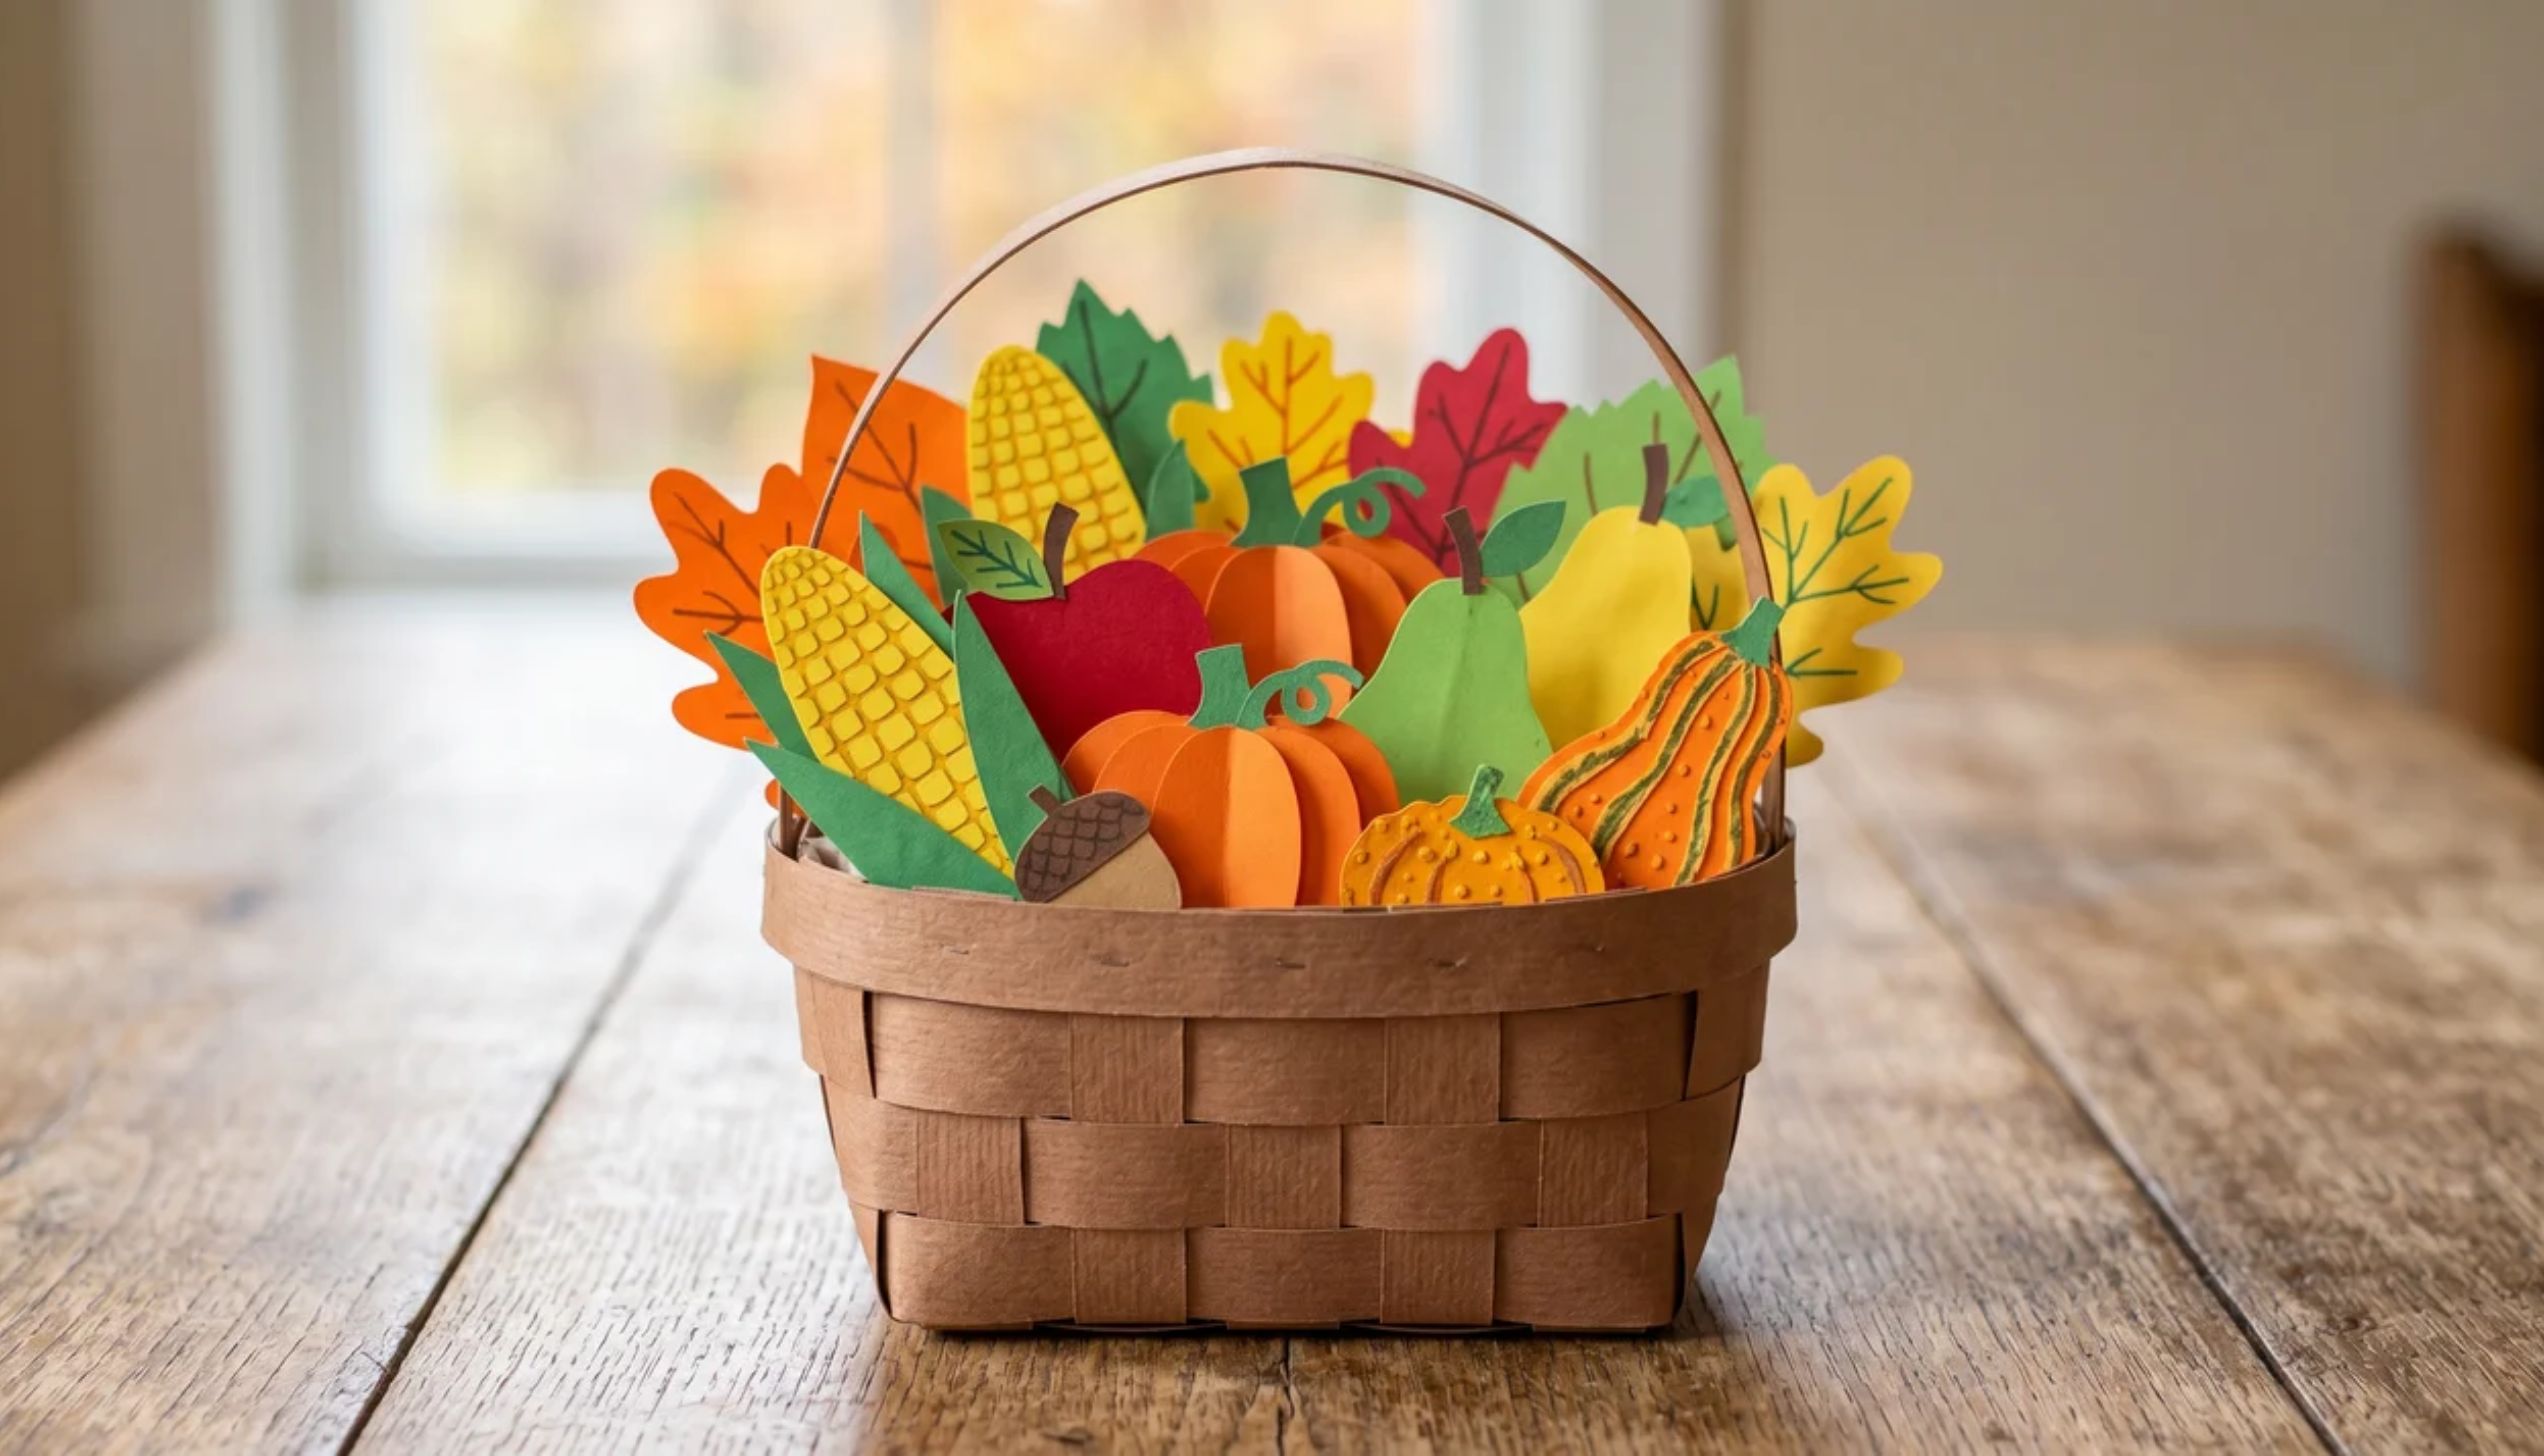
A harvest basket is a simple, no-fuss decoration that uses what is already in season. Fill it with other crafts like paper gourds, dried corn, and fall leaves, and it looks like you spent hours on it.
Step 1: Find a medium-sized wicker or wire basket. Clean it out and dry it if needed.
Step 2: Line the inside of the basket with a piece of burlap or a fall-colored cloth napkin.
Step 3: Place two or three small pumpkins or gourds of different sizes into the basket as the base layer.
Step 4: Fill in the gaps with dried corn cobs, small apples, or acorns.
Step 5: Tuck in a few sprigs of dried wheat, eucalyptus, or rosemary around the sides for height and texture.
Step 6: Add colorful fall leaves, real or faux, layered over and around the items.
Step 7: Place cinnamon sticks between items for a warm, spiced scent.
Step 8: Set the finished basket on a porch, entryway table, or as a dining table centerpiece
17. Turkey Place Cards
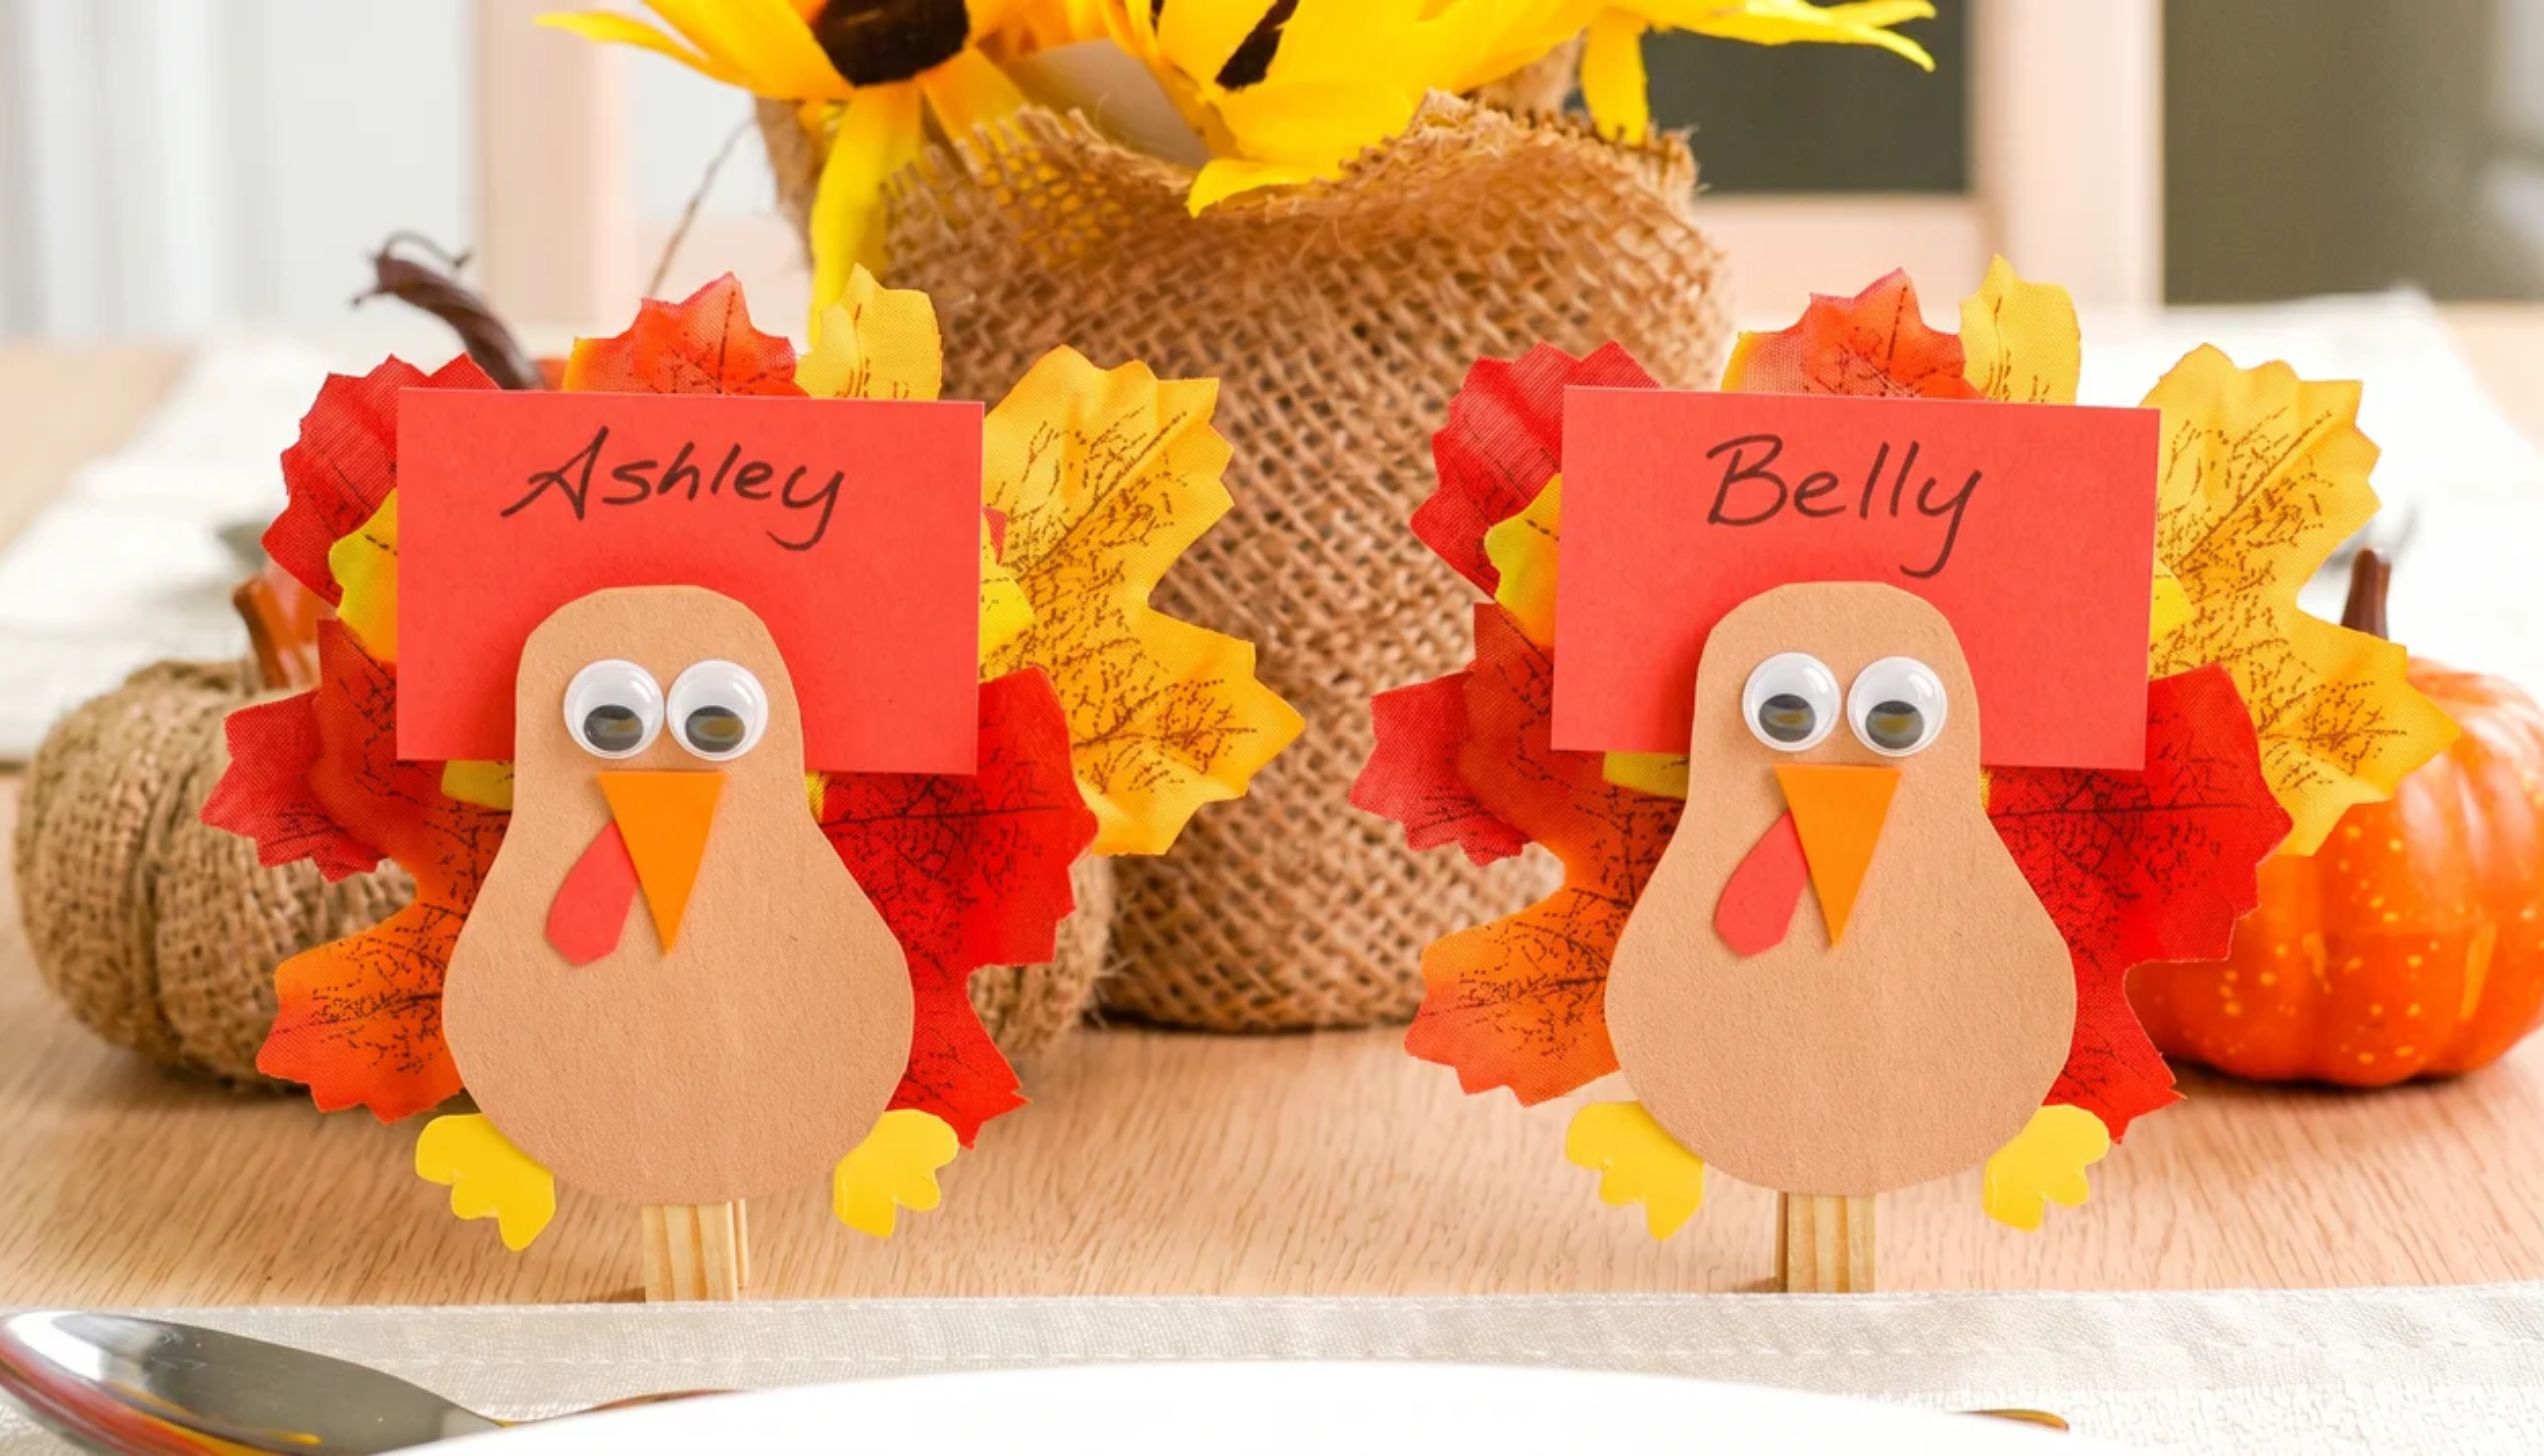
A place card does a small job but a handmade turkey place card does it with personality. Guests love finding one at their seat.
Step 1: Fold small pieces of cardstock in half to create card tents.
Step 2: Write each guest’s name on the front of a card.
Step 3: Draw or glue a small turkey shape to one side of each card.
Step 4: Cut mini feathers from paper and glue them behind the turkey.
Step 5: Add color with markers or colored pencils.
Step 6: Stand the cards at each place setting.
18. Burlap Garland
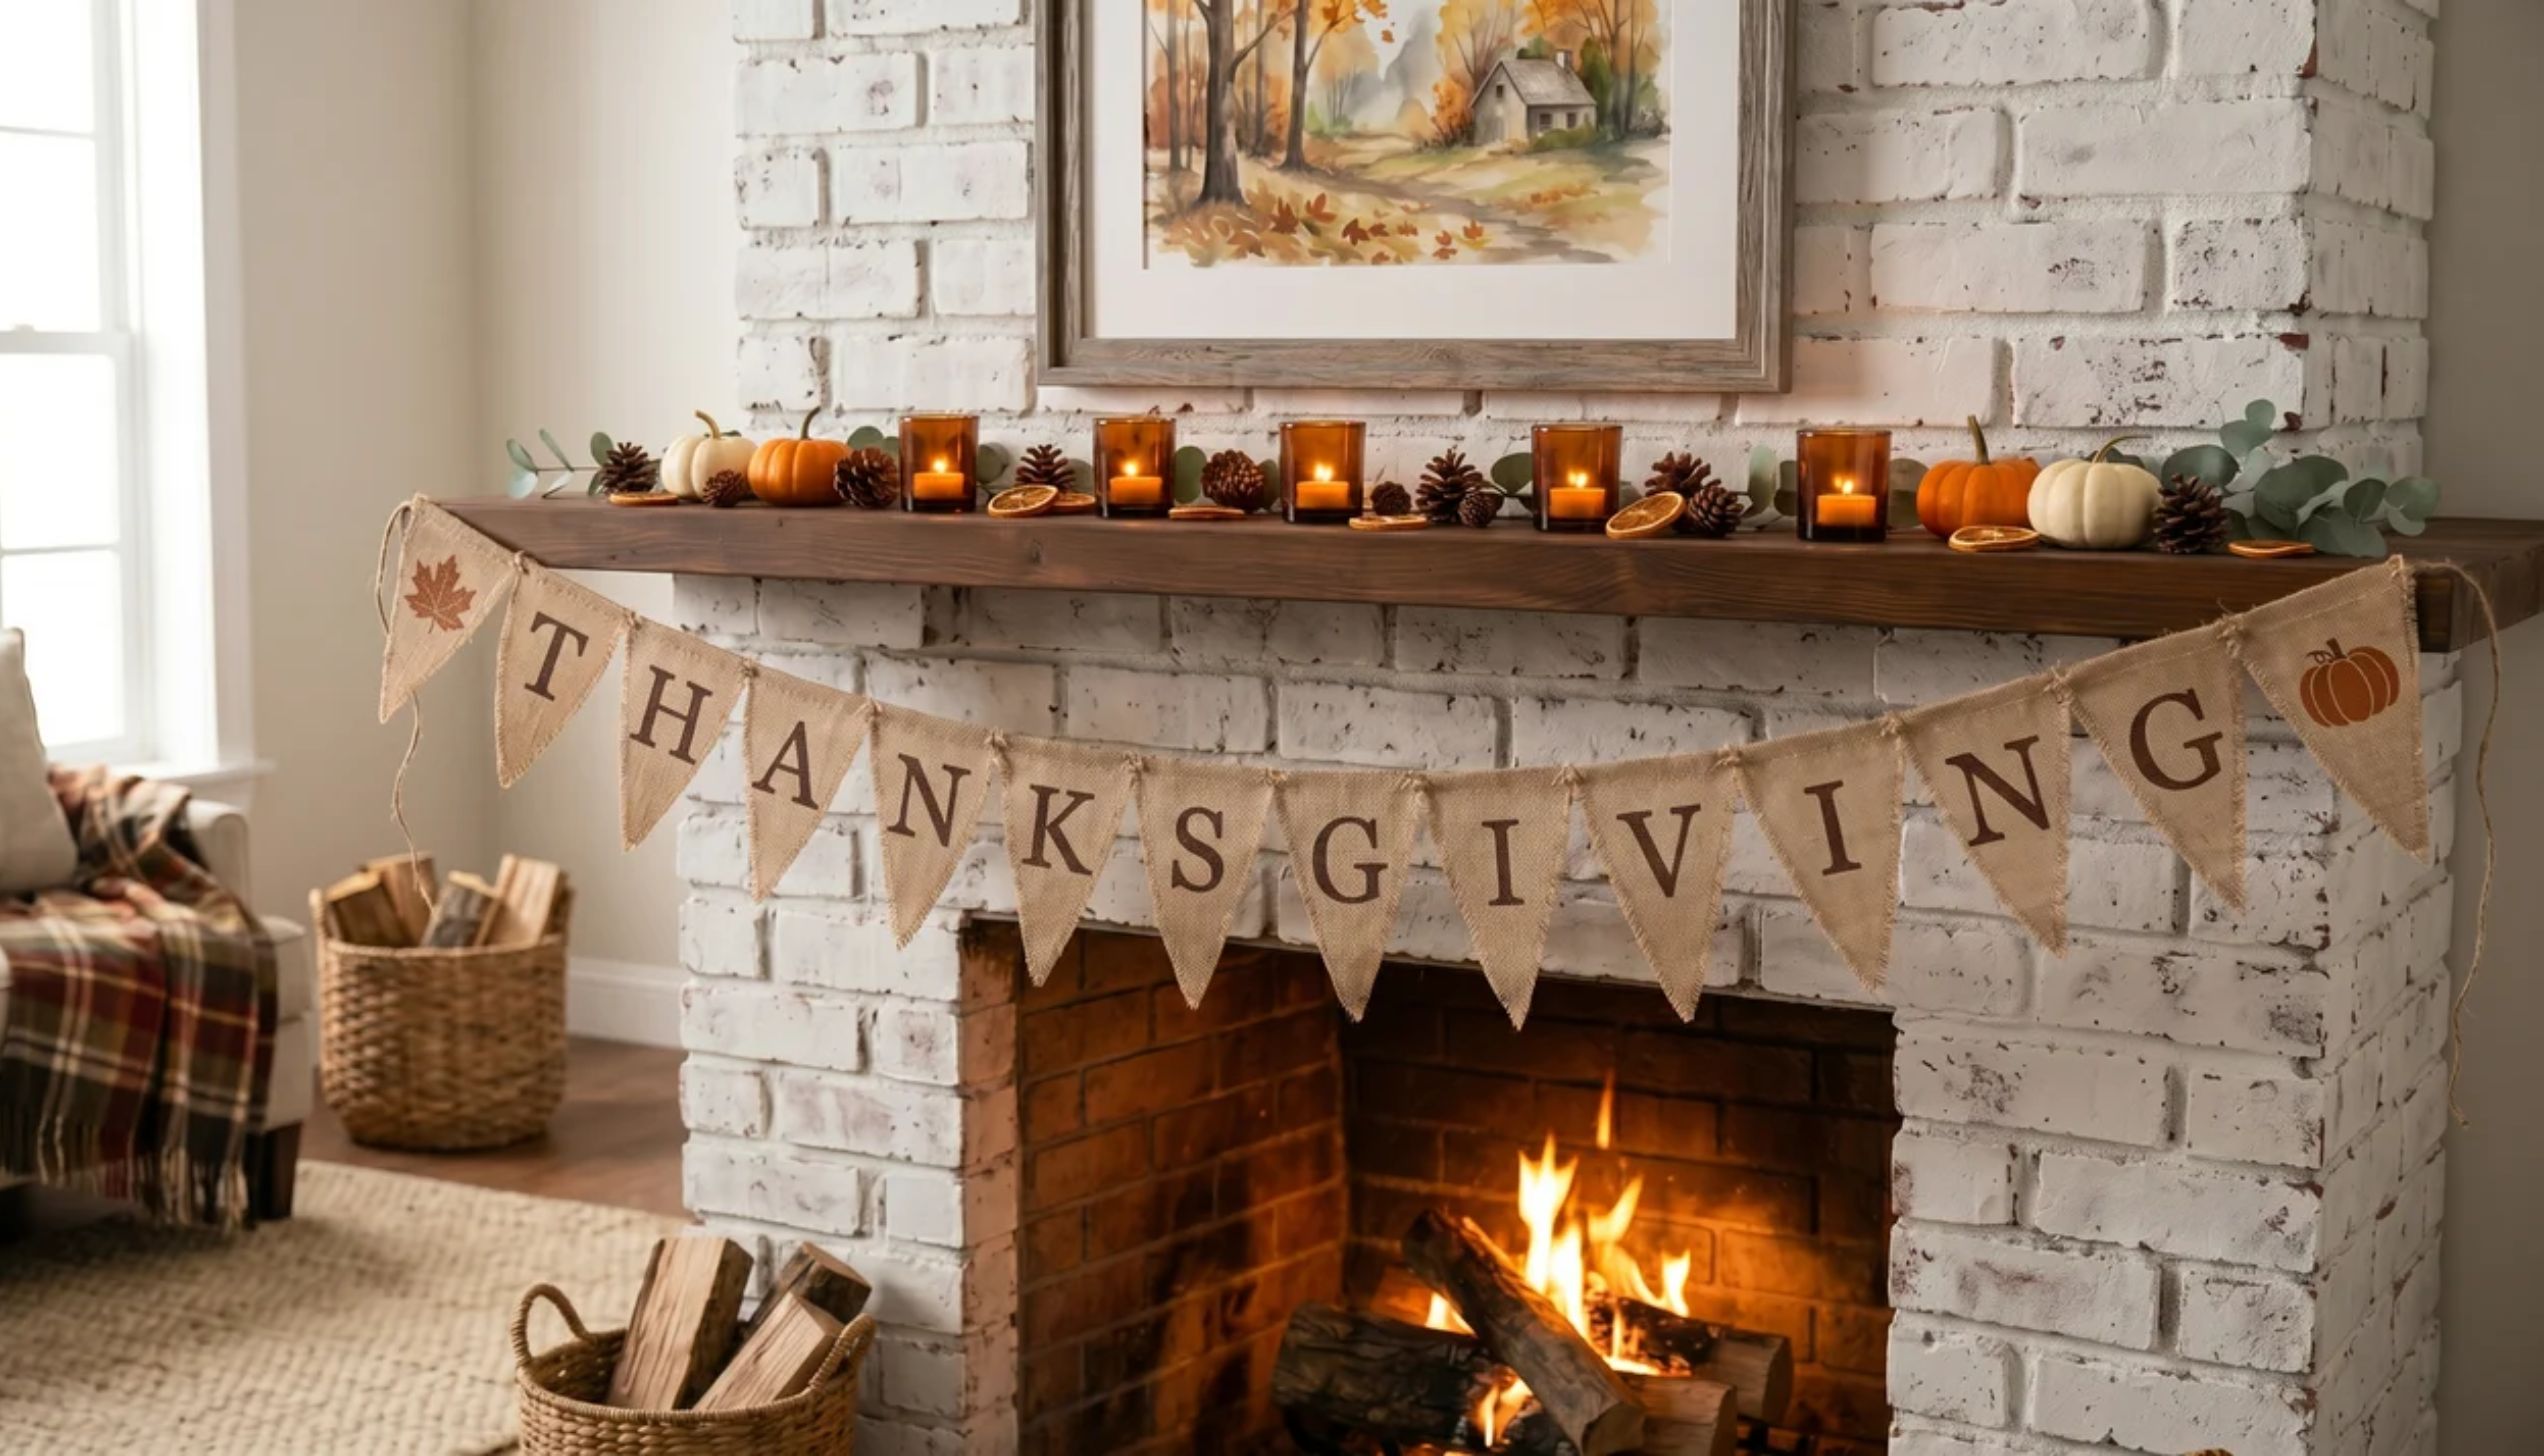
Burlap garland has that warm, homemade look that works in almost any space. Hang it on a mantel, doorway, or dining wall, and it instantly feels like Thanksgiving.
Step 1: Cut the burlap into triangular pennant shapes, all the same size.
Step 2: Fold the top edge of each triangle over a long piece of twine and glue it down.
Step 3: Stamp or stencil fall motifs onto each pennant leaf, pumpkin, or letter.
Step 4: Spell out “GIVE THANKS” or “THANKSGIVCING” across the pennants.
Step 5: Let everything dry completely before hanging.
Step 6: String the garland across a mantel, window, or doorway.
19. Fabric Pumpkins
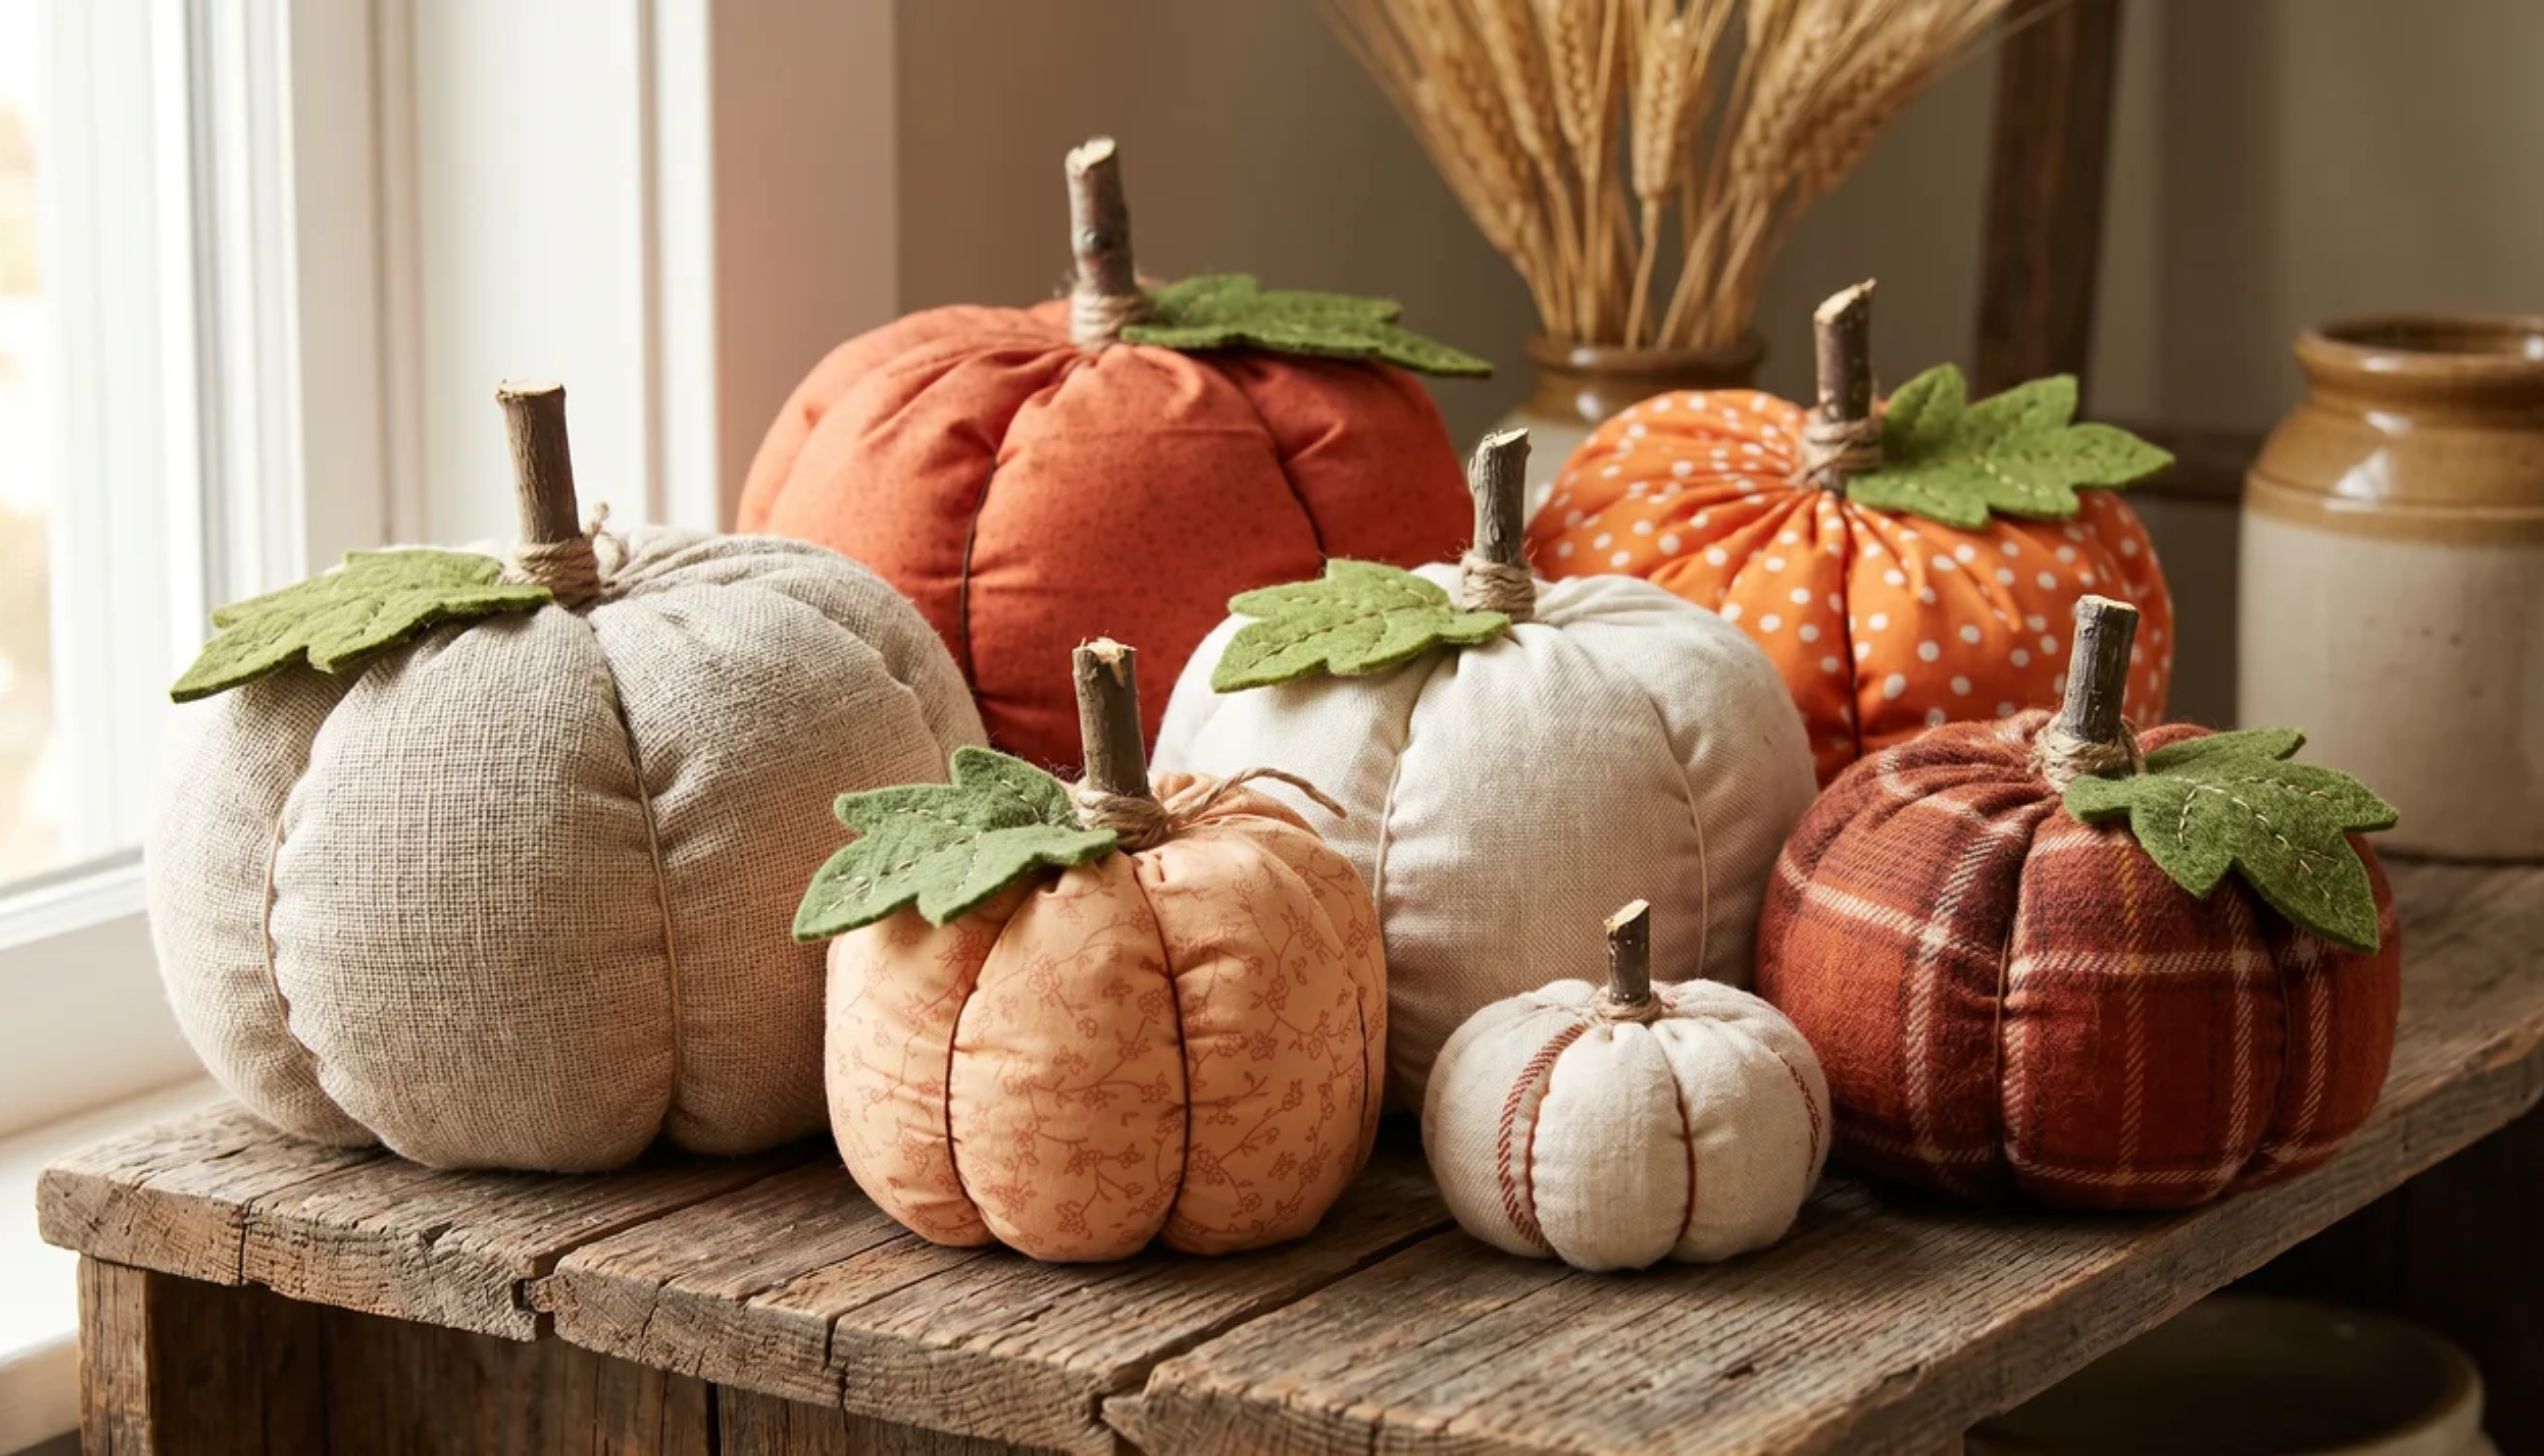
Scrap fabric and a handful of stuffing are all you need. These soft pumpkins are reusable every year just pack them away with the rest of your fall décor.
Step 1: Cut a rectangle from orange scrap fabric about 12 x 8 inches for a medium pumpkin.
Step 2: Fold it in half lengthwise, right sides together, and sew or glue the long edge closed.
Step 3: Turn it right side out so the seam is inside.
Step 4: Stuff the tube firmly with polyfill stuffing.
Step 5: Gather both ends tightly with a string and tie off. Pull a second string through the center, from top to bottom, to create the pumpkin ridges.
Step 6: Push a small twig into the top as a stem. Add a small piece of green felt as a leaf.
20. Mason Jar Candle Holders

Mason jars are already beautiful; add a few pressed leaves, some twine, and a tea light, and they become a real table moment. These also make thoughtful handmade gifts.
Step 1: Clean and dry a mason jar.
Step 2: Apply a thin layer of craft glue to the outside of the jar.
Step 3: Press dried leaves, pressed flowers, or torn tissue paper pieces onto the glue.
Step 4: Let it dry. Apply a second thin coat of glue over the top to seal everything.
Step 5: Tie a piece of twine or fall ribbon around the neck of the jar.
Step 6: Place a tea light or battery-operated candle inside.
21. Leaf Wreath
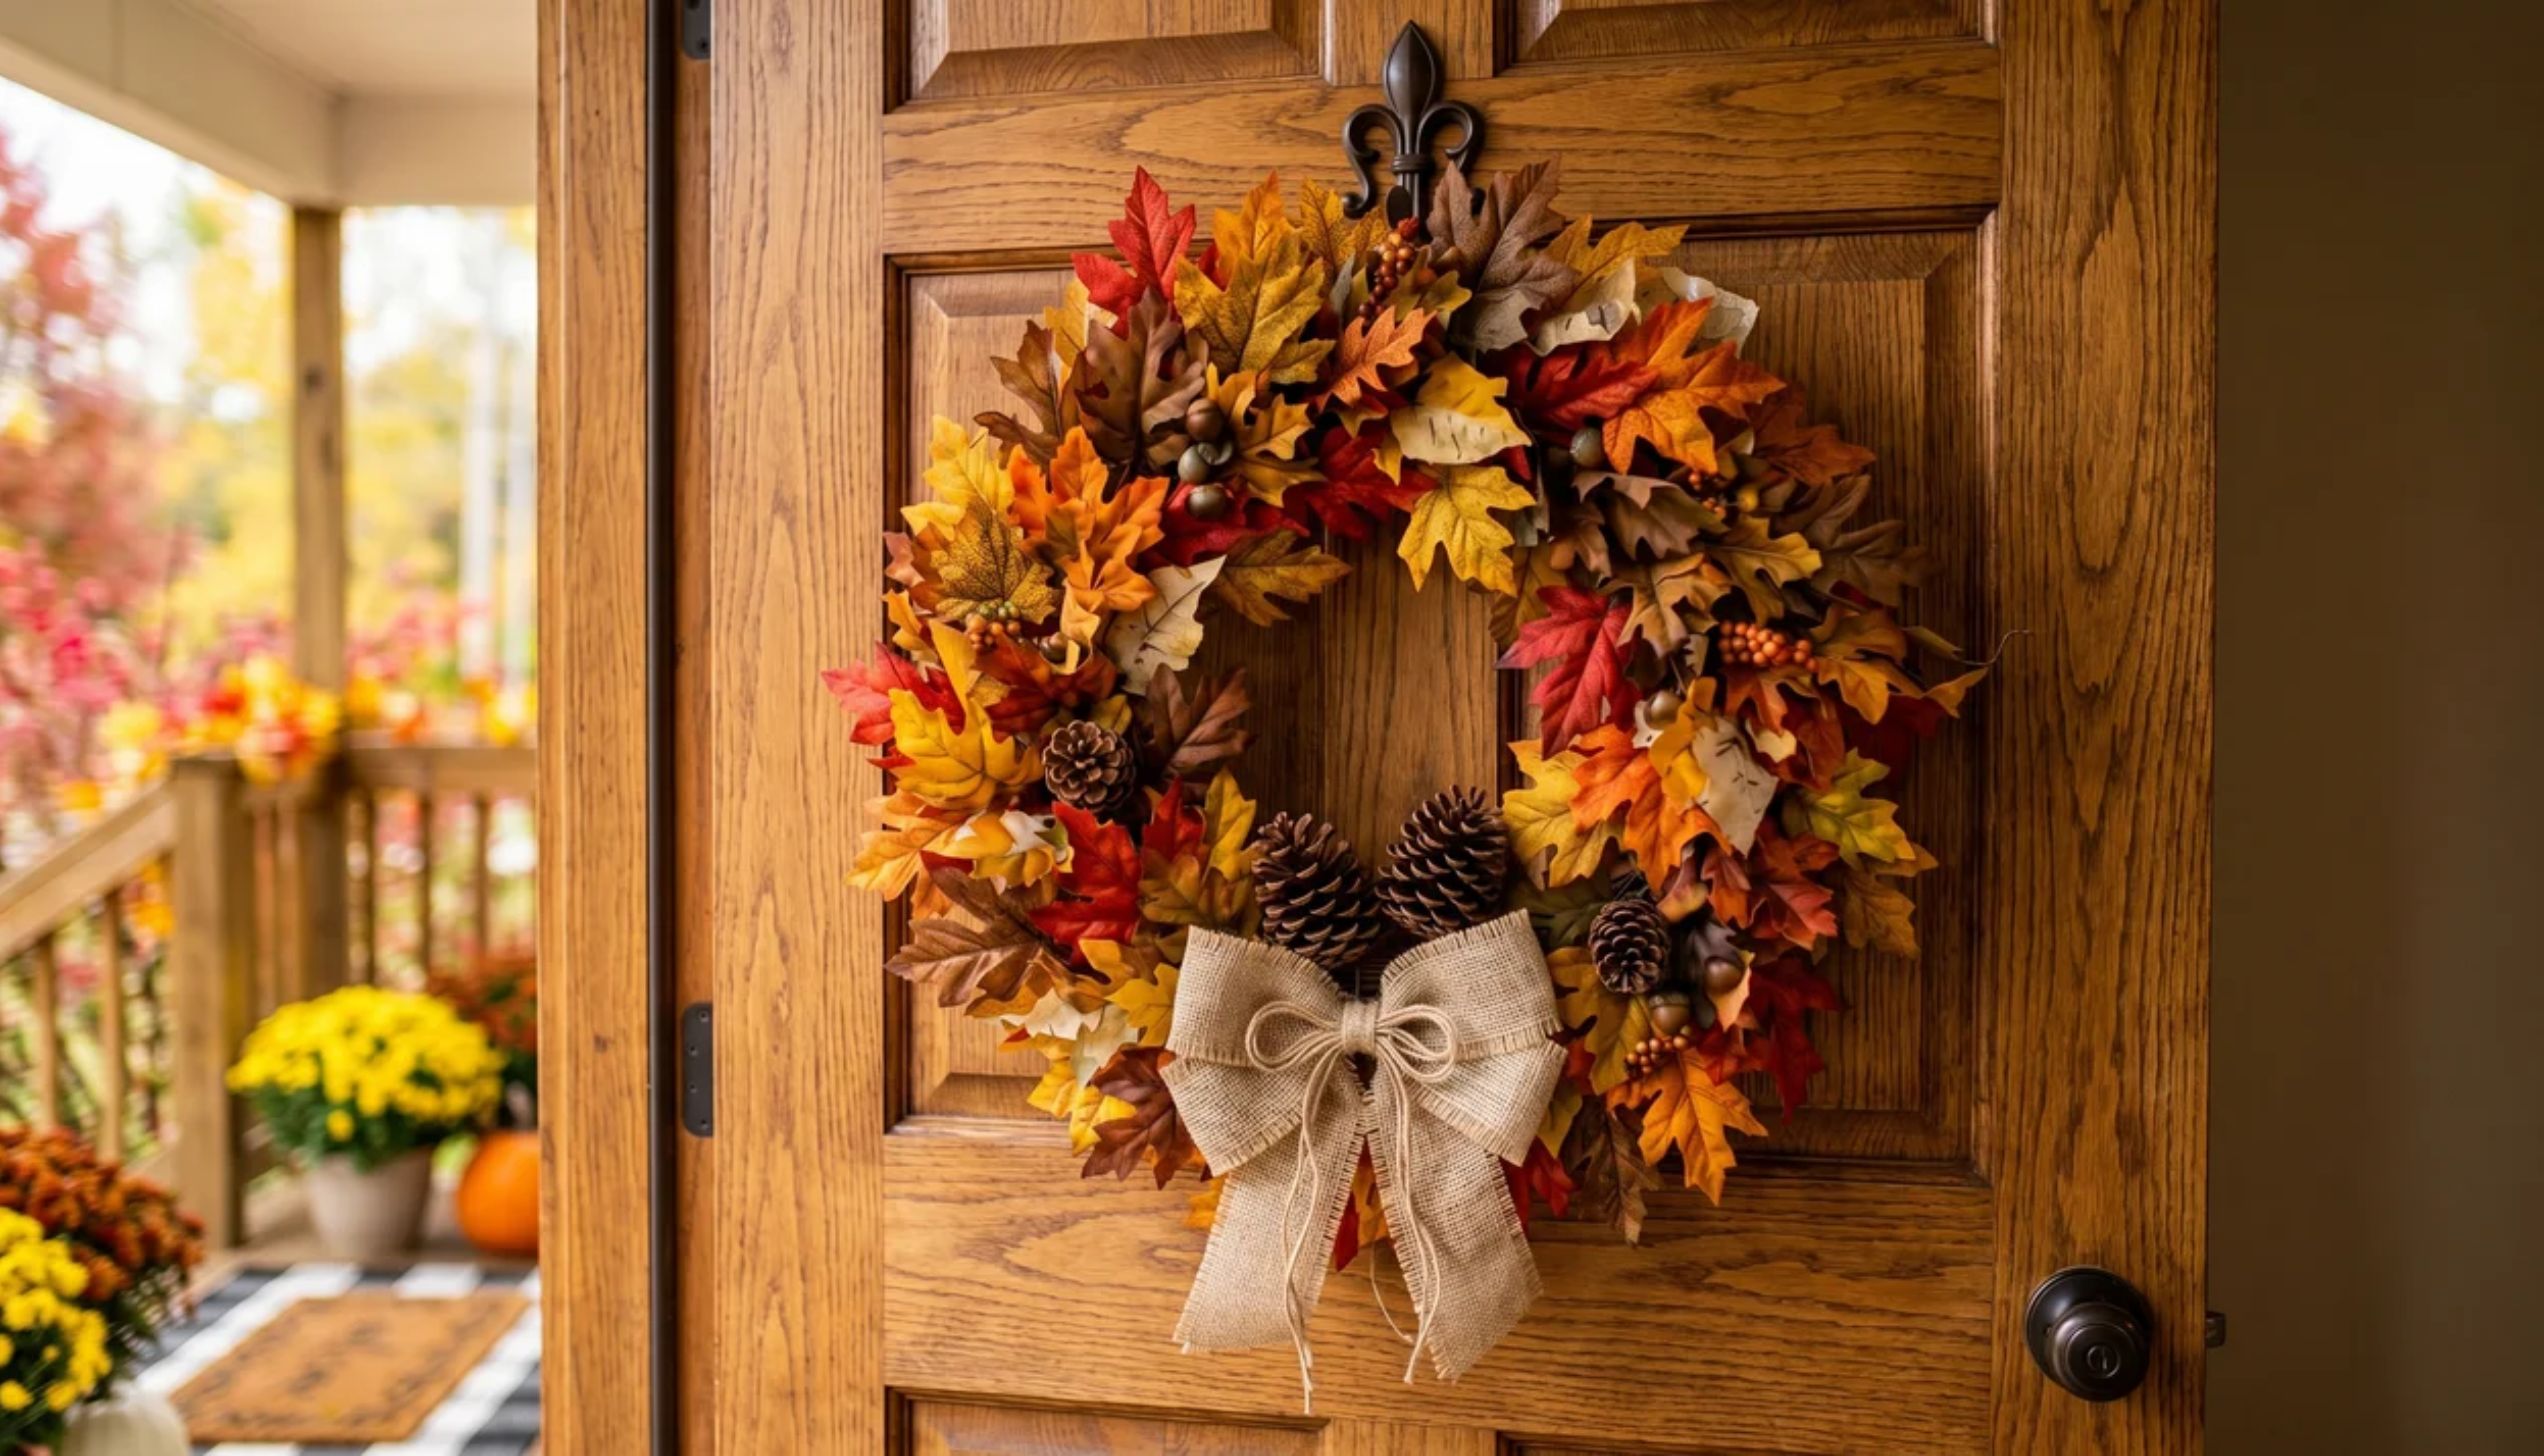
A leaf wreath at the front door sets the tone for your Thanksgiving celebration.
Step 1: Gather a wire wreath frame from a craft store or bend a wire coat hanger into a circle.
Step 2: Collect real or faux fall leaves in red, orange, yellow, and brown.
Step 3: Hot-glue the leaves onto the frame, overlapping them as you go.
Step 4: Layer different leaf sizes and colors for a full, natural look.
Step 5: Add pinecones, acorns, or a small burlap bow as a finishing touch.
Step 6: Hang with a wreath hook or ribbon on your front door.
22. Acorn and Leaf Centerpiece
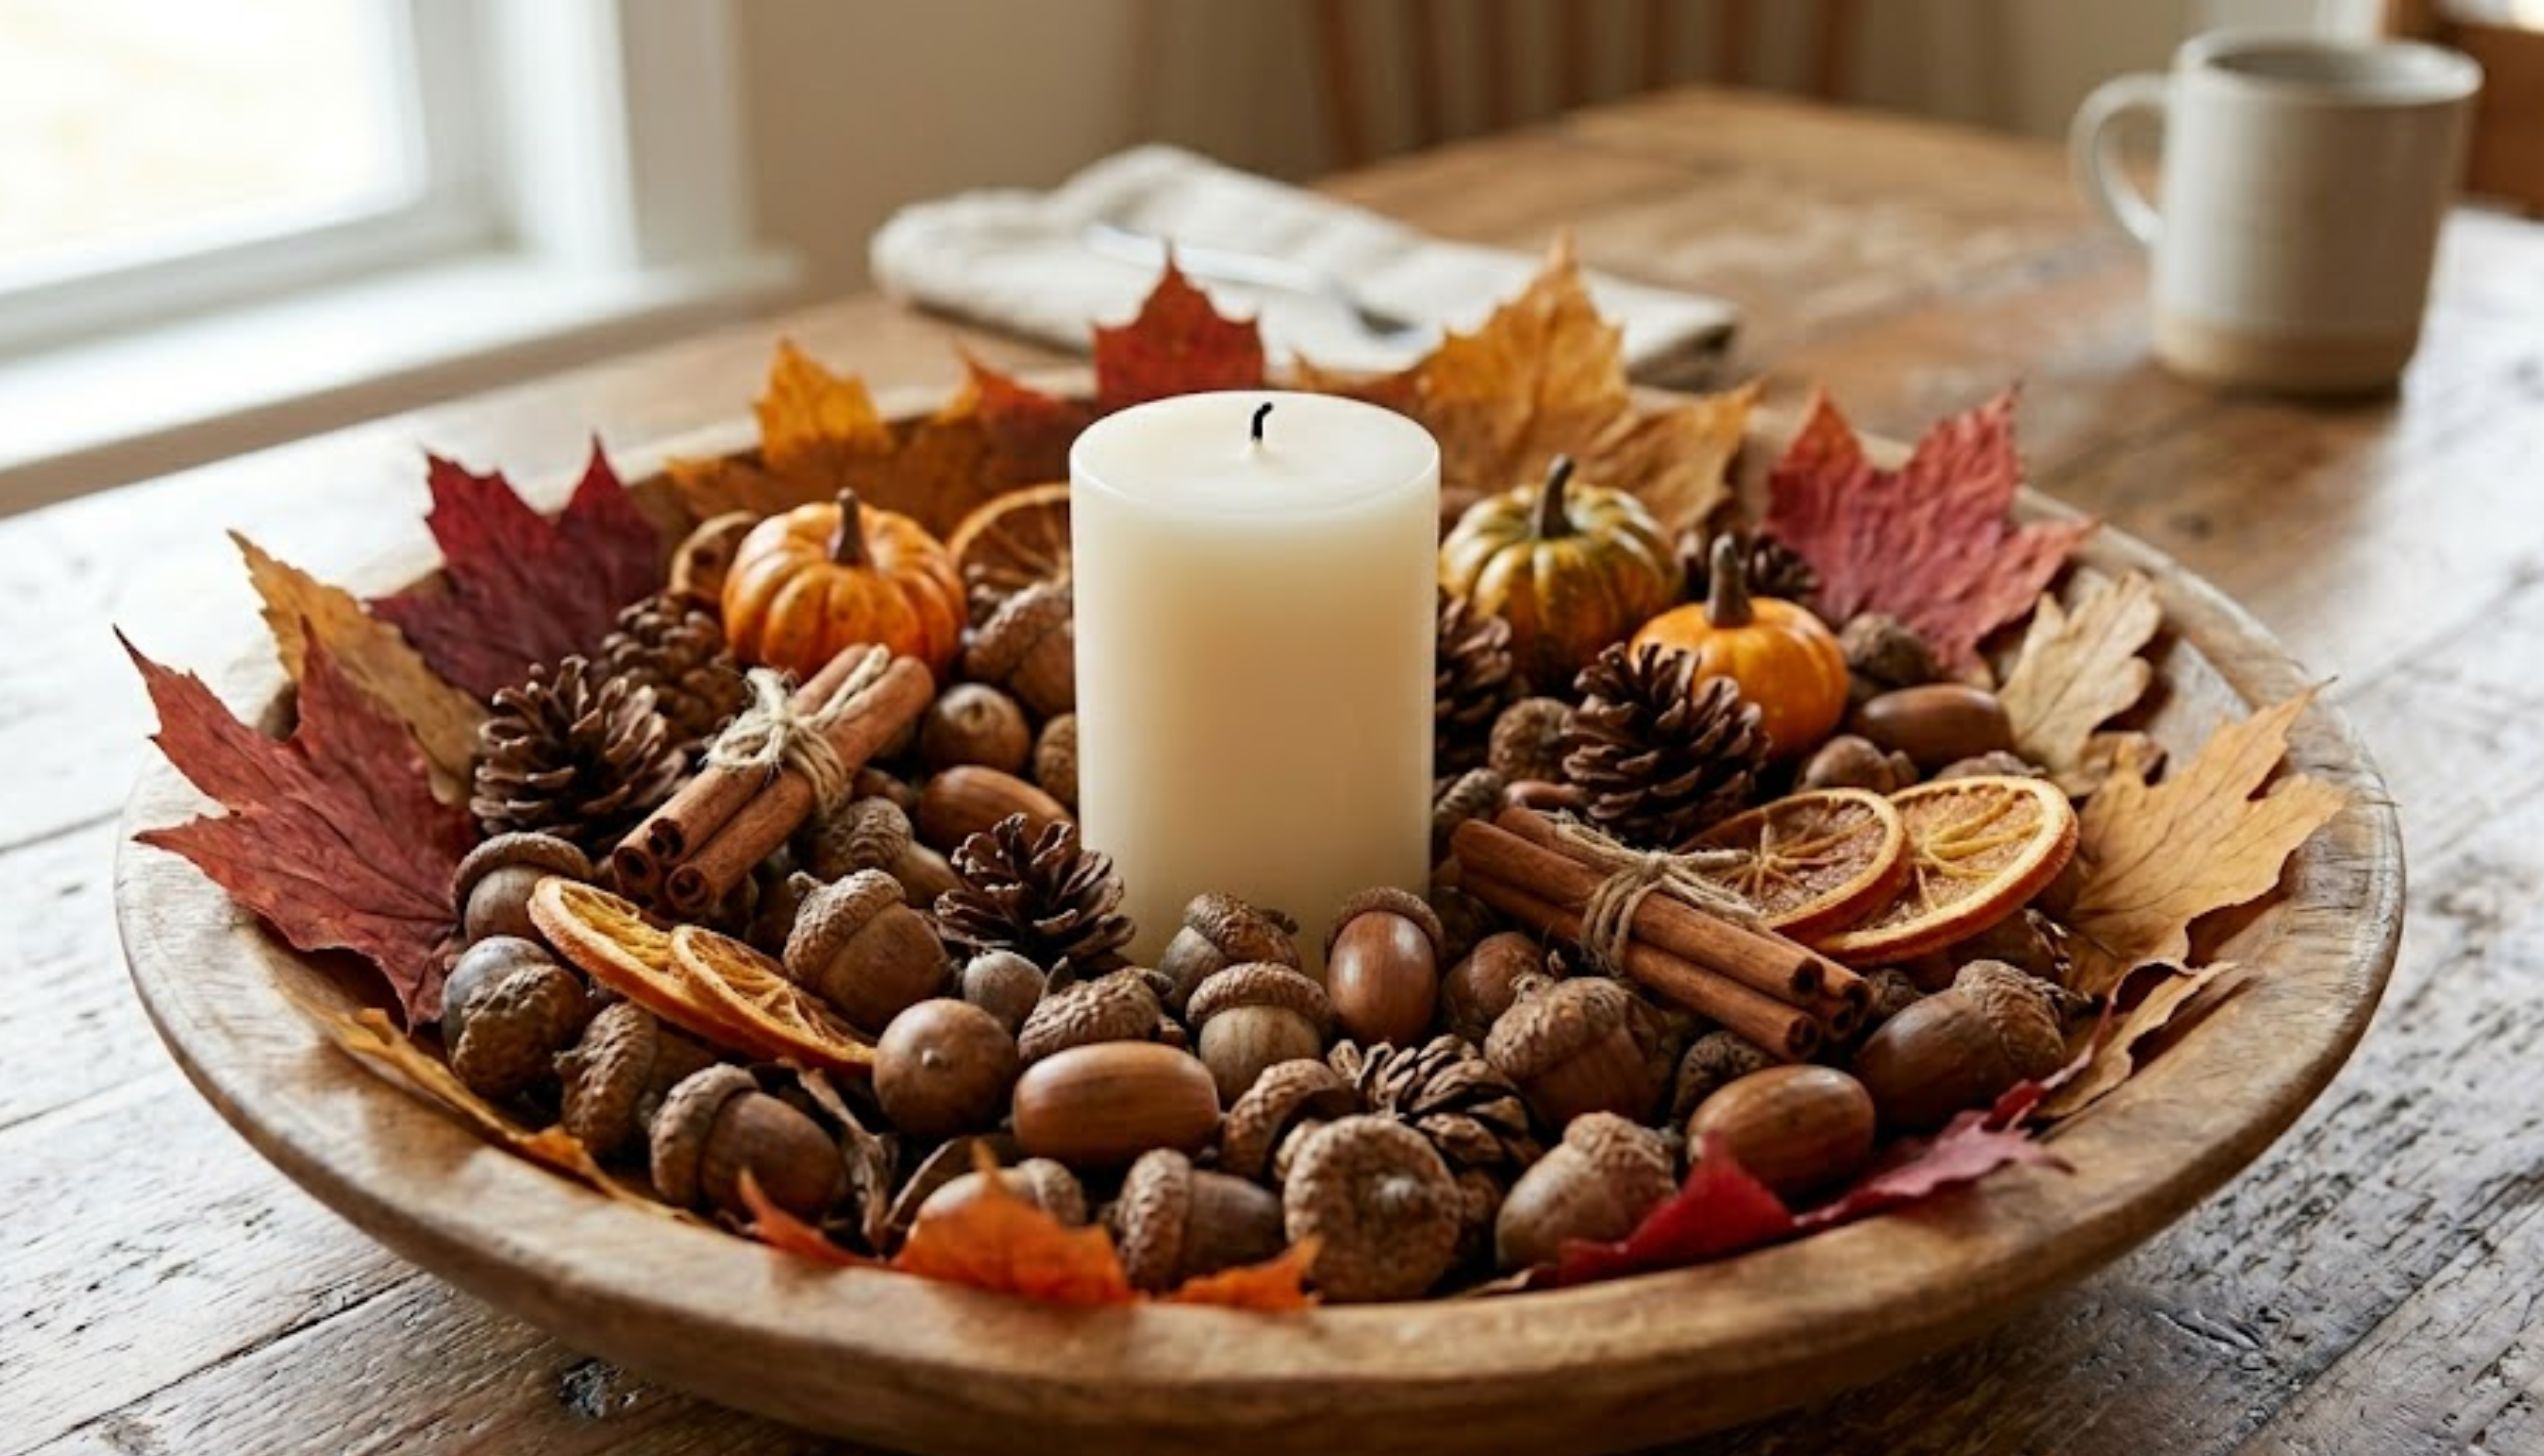
This no-glue centerpiece comes together in minutes and looks like something from a home décor shop.
Step 1: Choose a shallow wooden bowl, tray, or large plate as your base.
Step 2: Collect acorns, small pinecones, and fall leaves from outside.
Step 3: Arrange the acorns and pinecones to fill the base of the container.
Step 4: Lay several colorful fall leaves on top and around the edges.
Step 5: Add a few small gourds, cinnamon sticks, or dried orange slices for variety.
Step 6: Place a pillar candle in the center for a warm, finished look.
23. Mini Chalkboard Sign Decorations
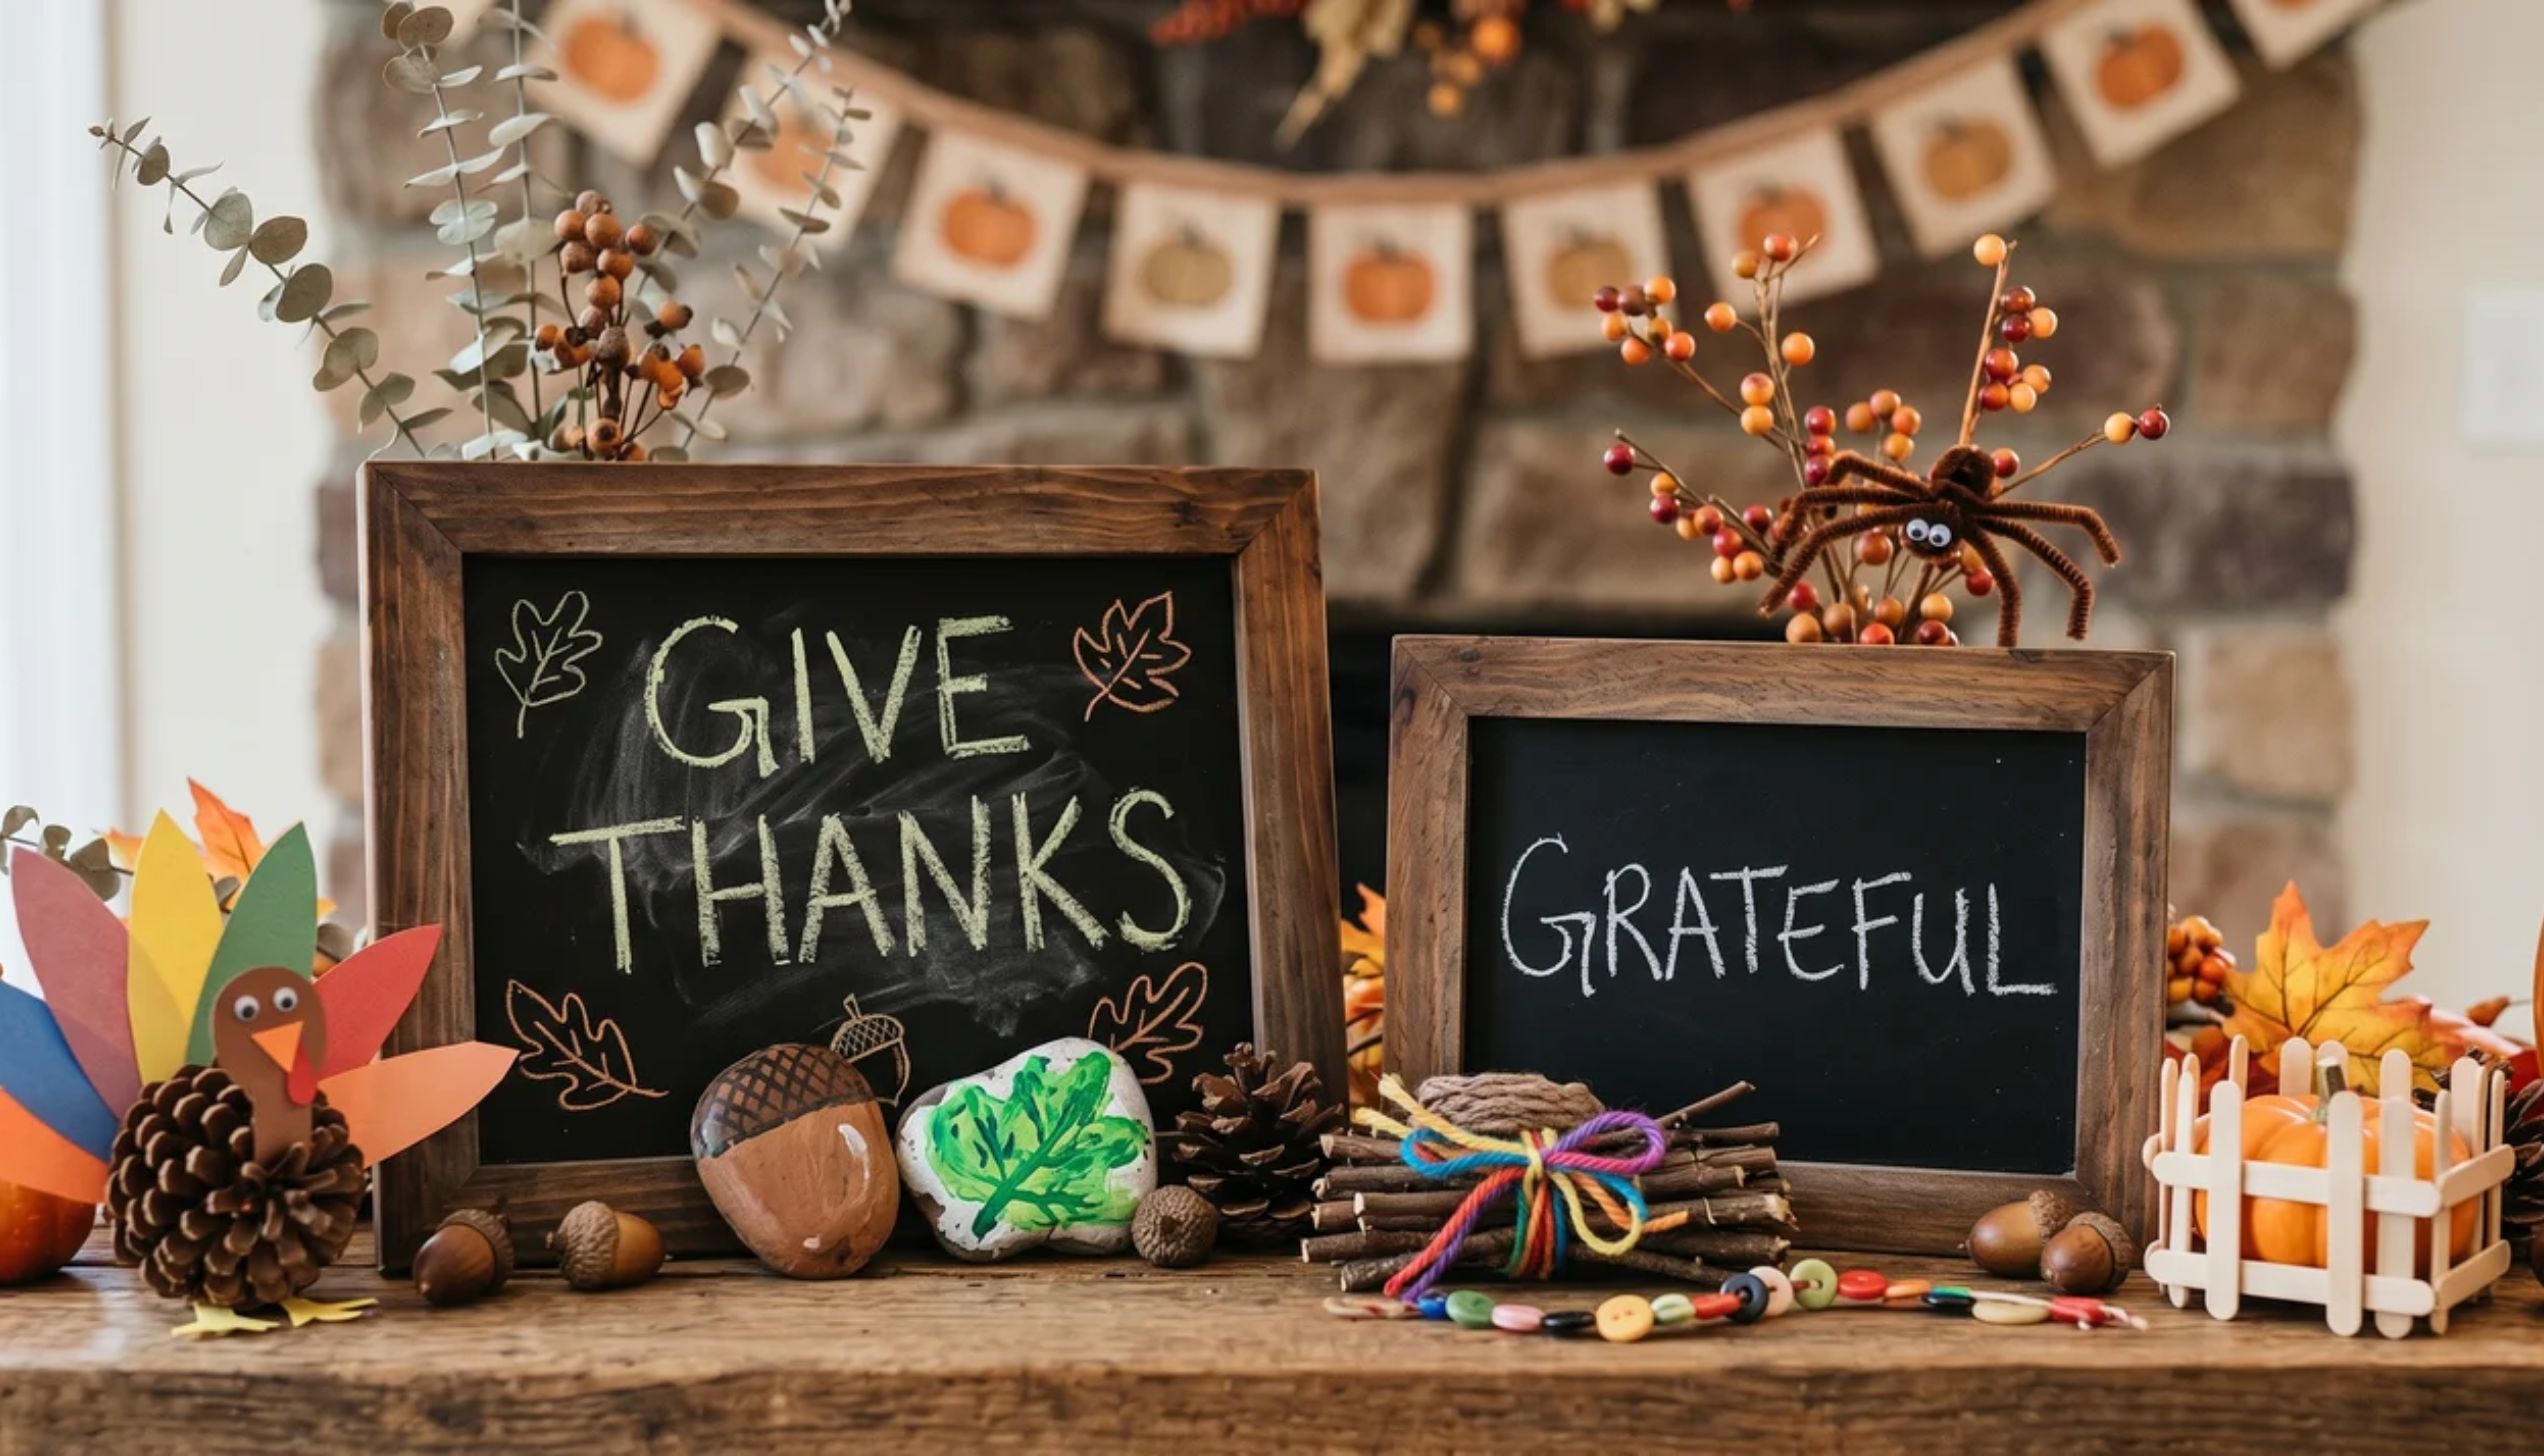
Chalkboard signs add a personal, charming touch to your Thanksgiving table or mantel.
Step 1: Buy small chalkboard signs from a dollar store or craft shop, or make your own by painting small wooden plaques with chalkboard paint.
Step 2: Let any chalkboard paint dry for 24 hours before writing.
Step 3: Use chalk or chalk markers to write messages like “Give Thanks,” the Thanksgiving menu, or family names.
Step 4: Decorate the borders with simple leaf or pumpkin drawings.
Step 5: Prop signs against a wall, on the mantel, or at each table setting.
Step 6: Wipe clean and reuse every year.
24. Thanksgiving Wall Art
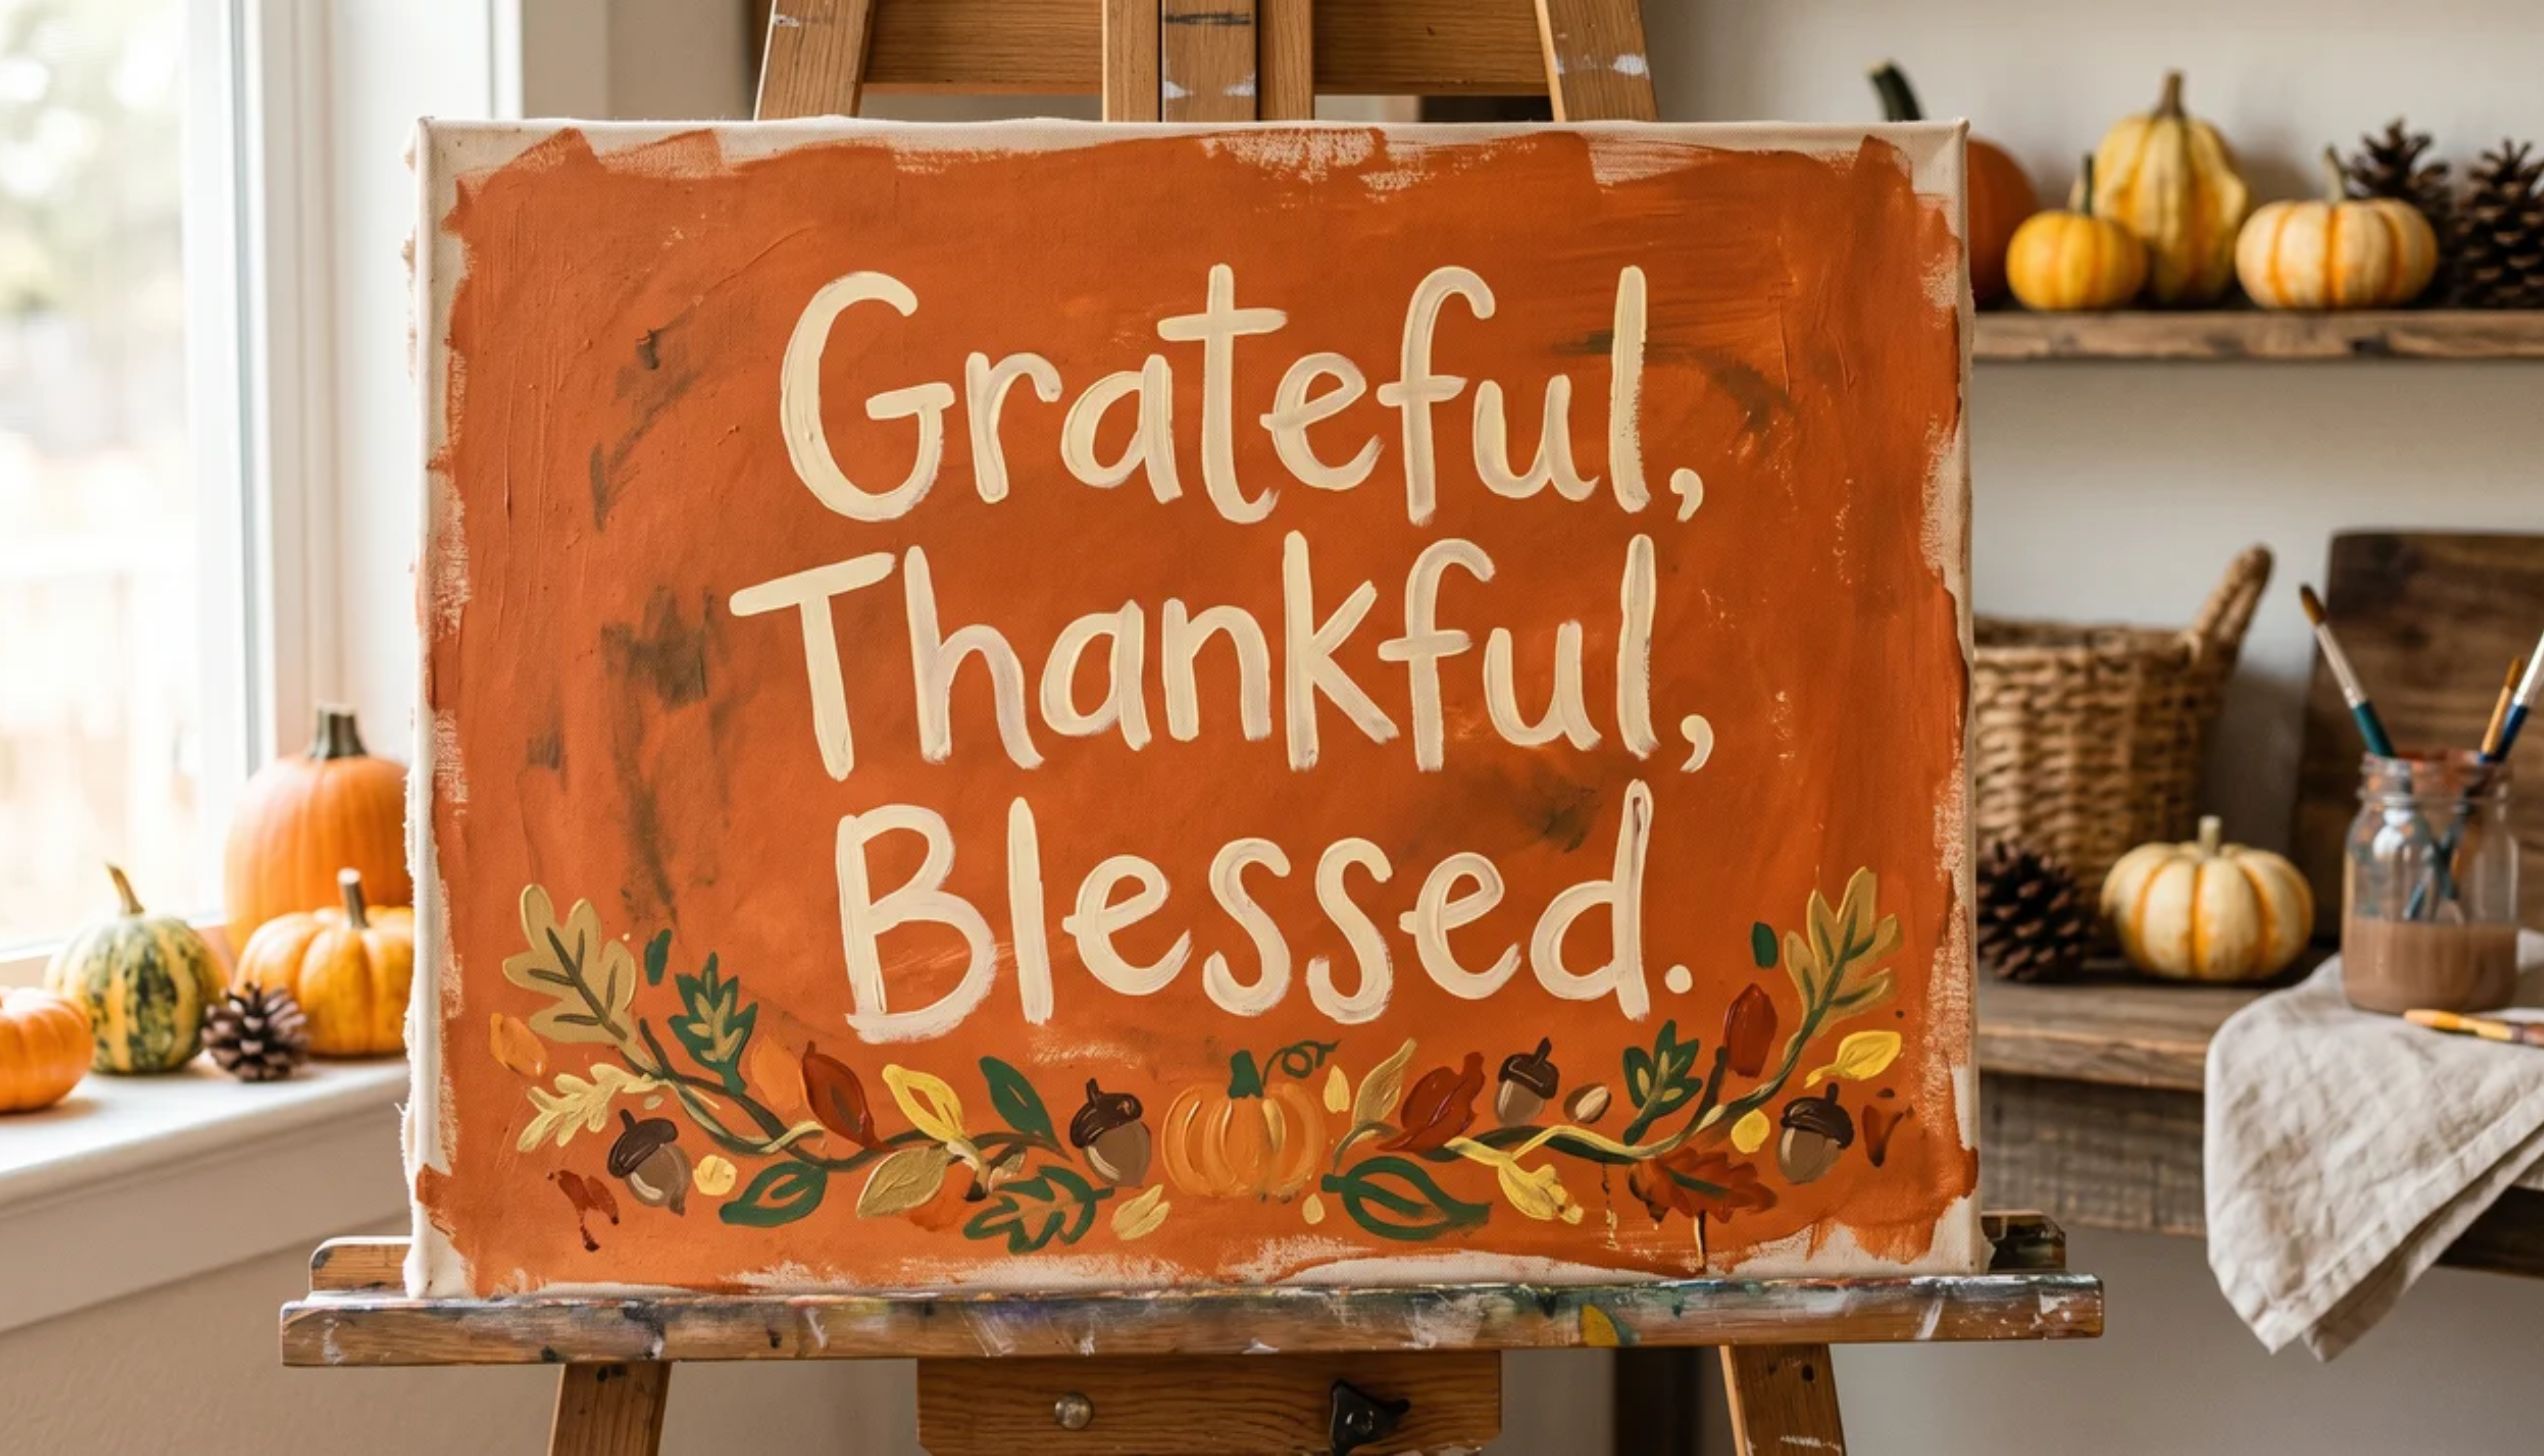
A hand-painted canvas adds a personal, seasonal touch to any wall in your home.
Step 1: Buy a blank canvas from a craft store; any size works.
Step 2: Apply a base coat in a neutral color like cream, tan, or burnt orange. Let it dry.
Step 3: Sketch your design lightly in pencil: a turkey, pumpkin, leaves, or a quote like “Grateful, Thankful, Blessed.”
Step 4: Paint over your pencil lines with acrylic paint.
Step 5: Add details with a fine brush, outlines, shadows, and textures.
Step 6: Let it dry fully before hanging.
25. Thankful Paper Chain
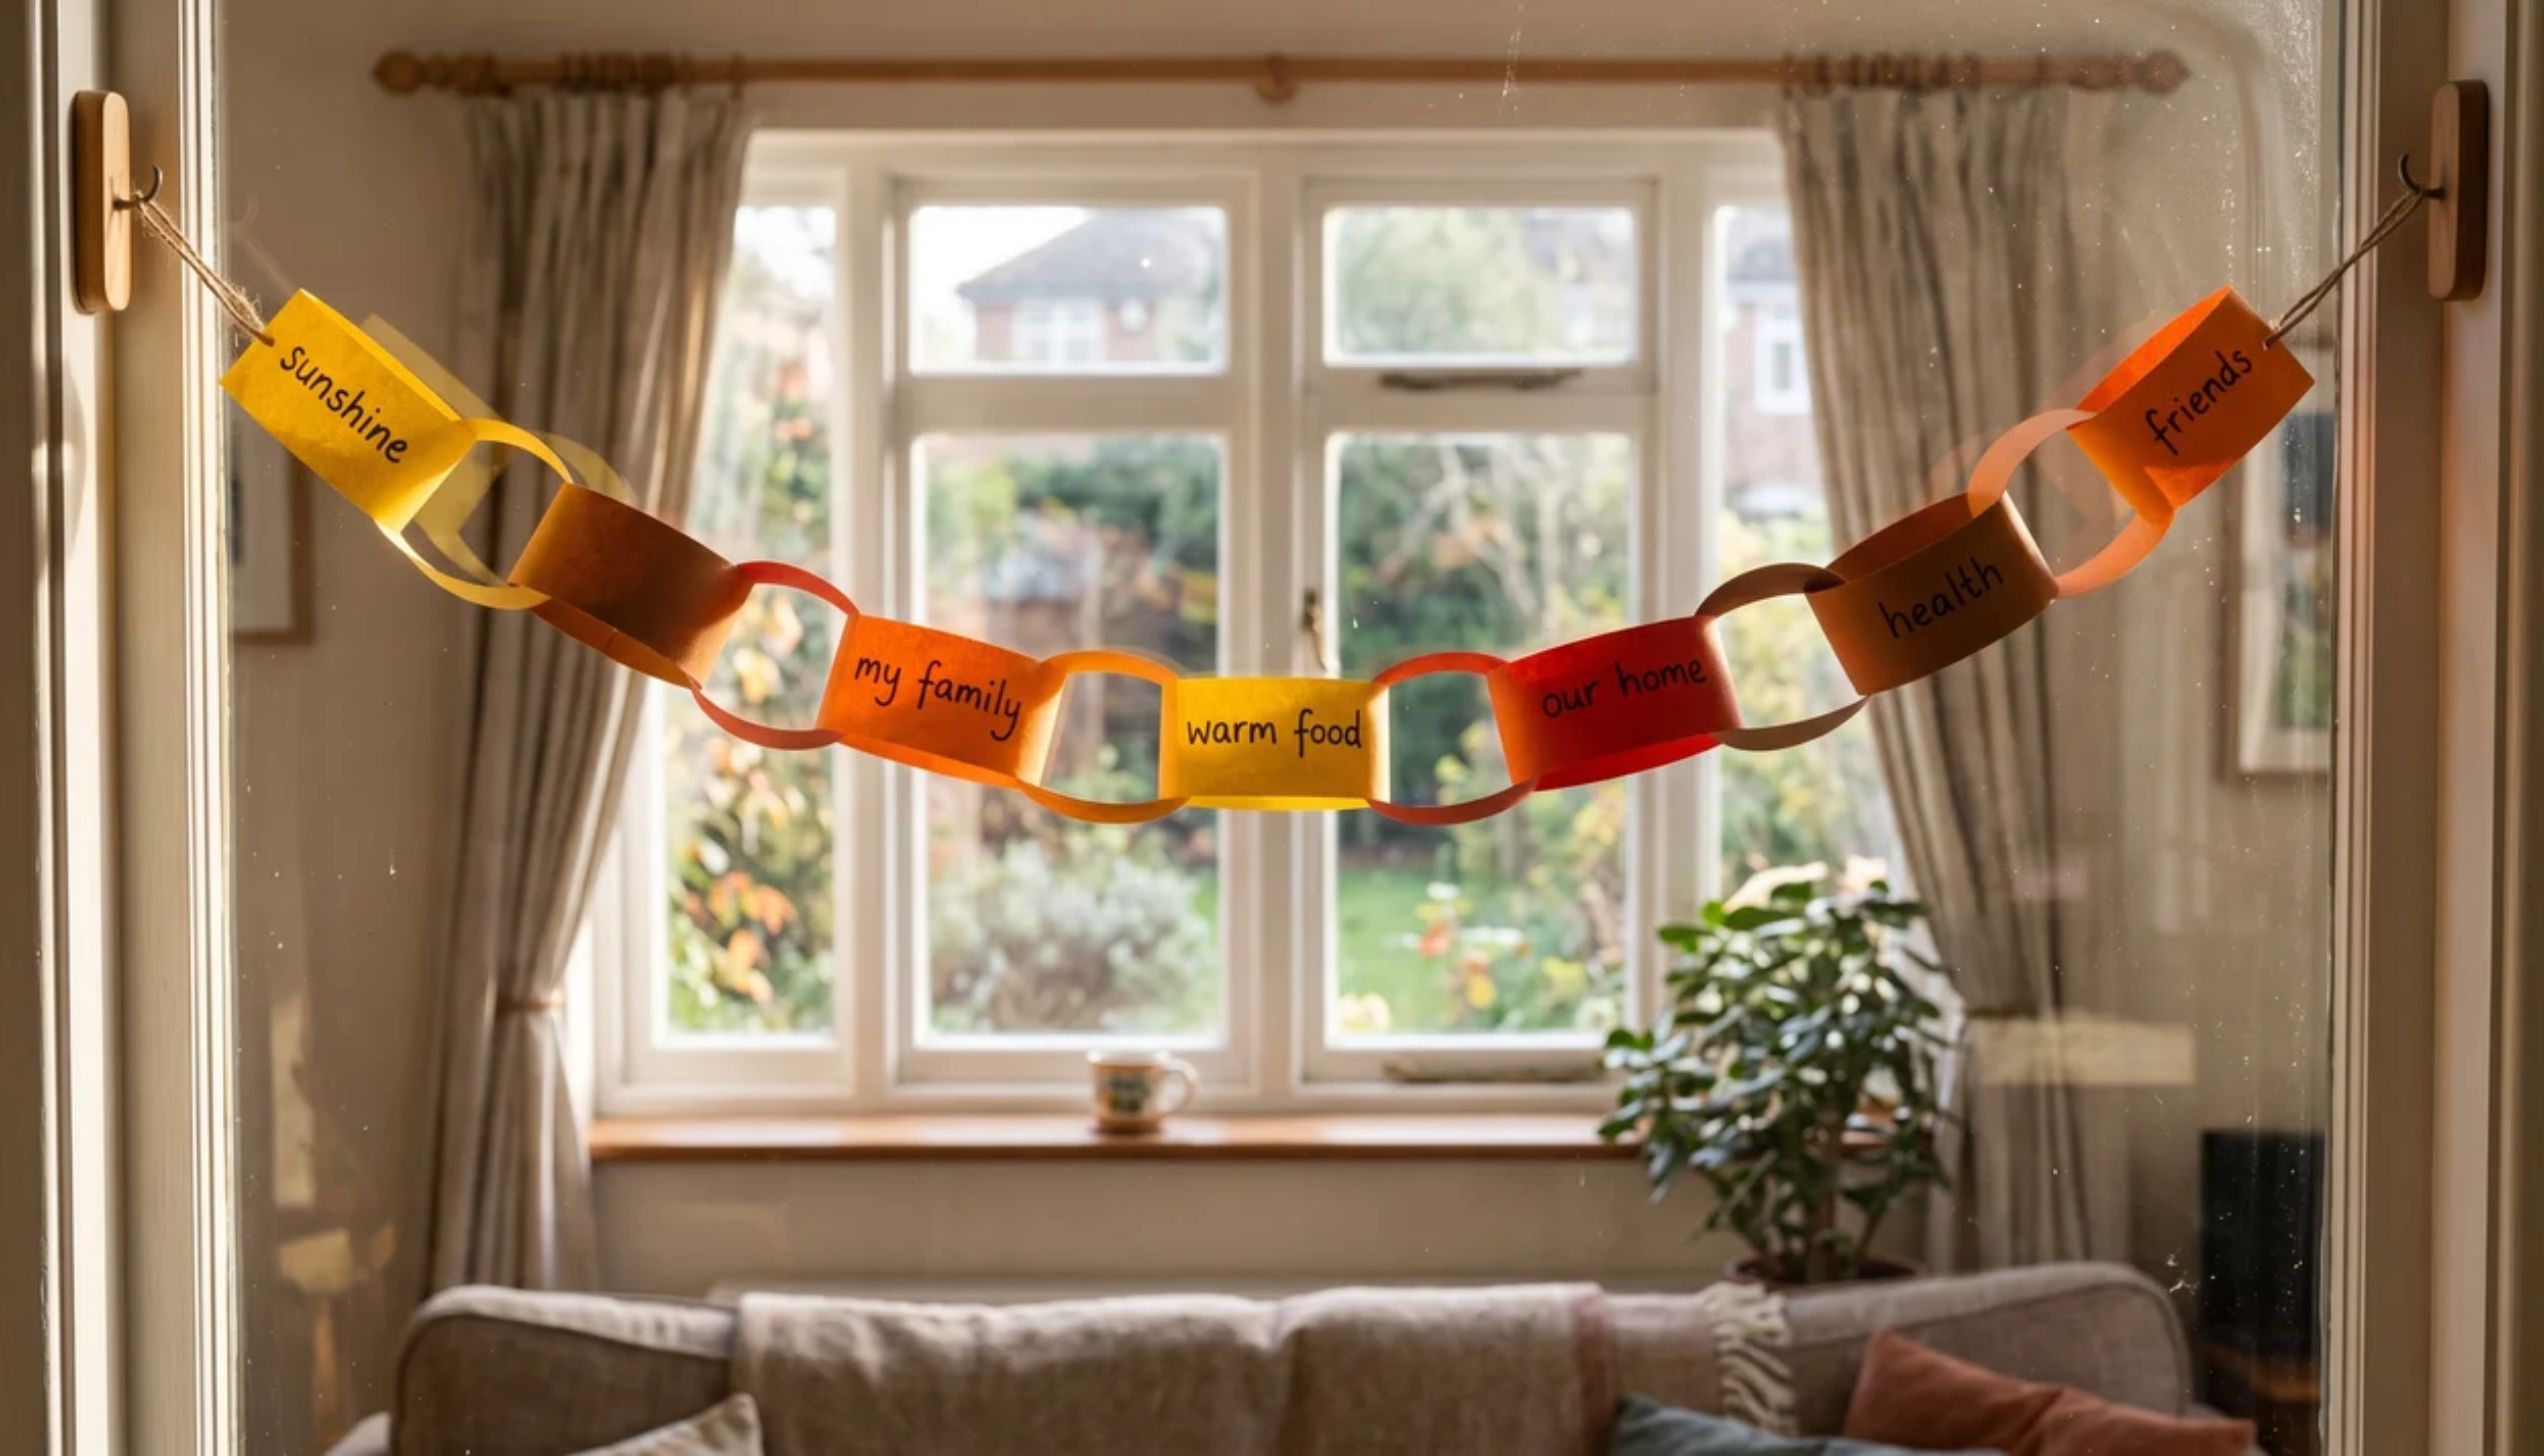
This craft grows longer as Thanksgiving approaches, and it is one of the most touching and easy Thanksgiving crafts to display.
Step 1: Cut strips of paper in fall colors, orange, red, yellow, and brown.
Step 2: Ask each family member to write one thing they are thankful for on a strip.
Step 3: Curl the first strip into a loop and staple or tape the ends together.
Step 4: Thread the next strip through the first loop before closing it.
Step 5: Keep adding links every day throughout November.
Step 6: Hang the chain across a window, mantel, or doorway on Thanksgiving Day.
26. Thanksgiving Memory Wheel
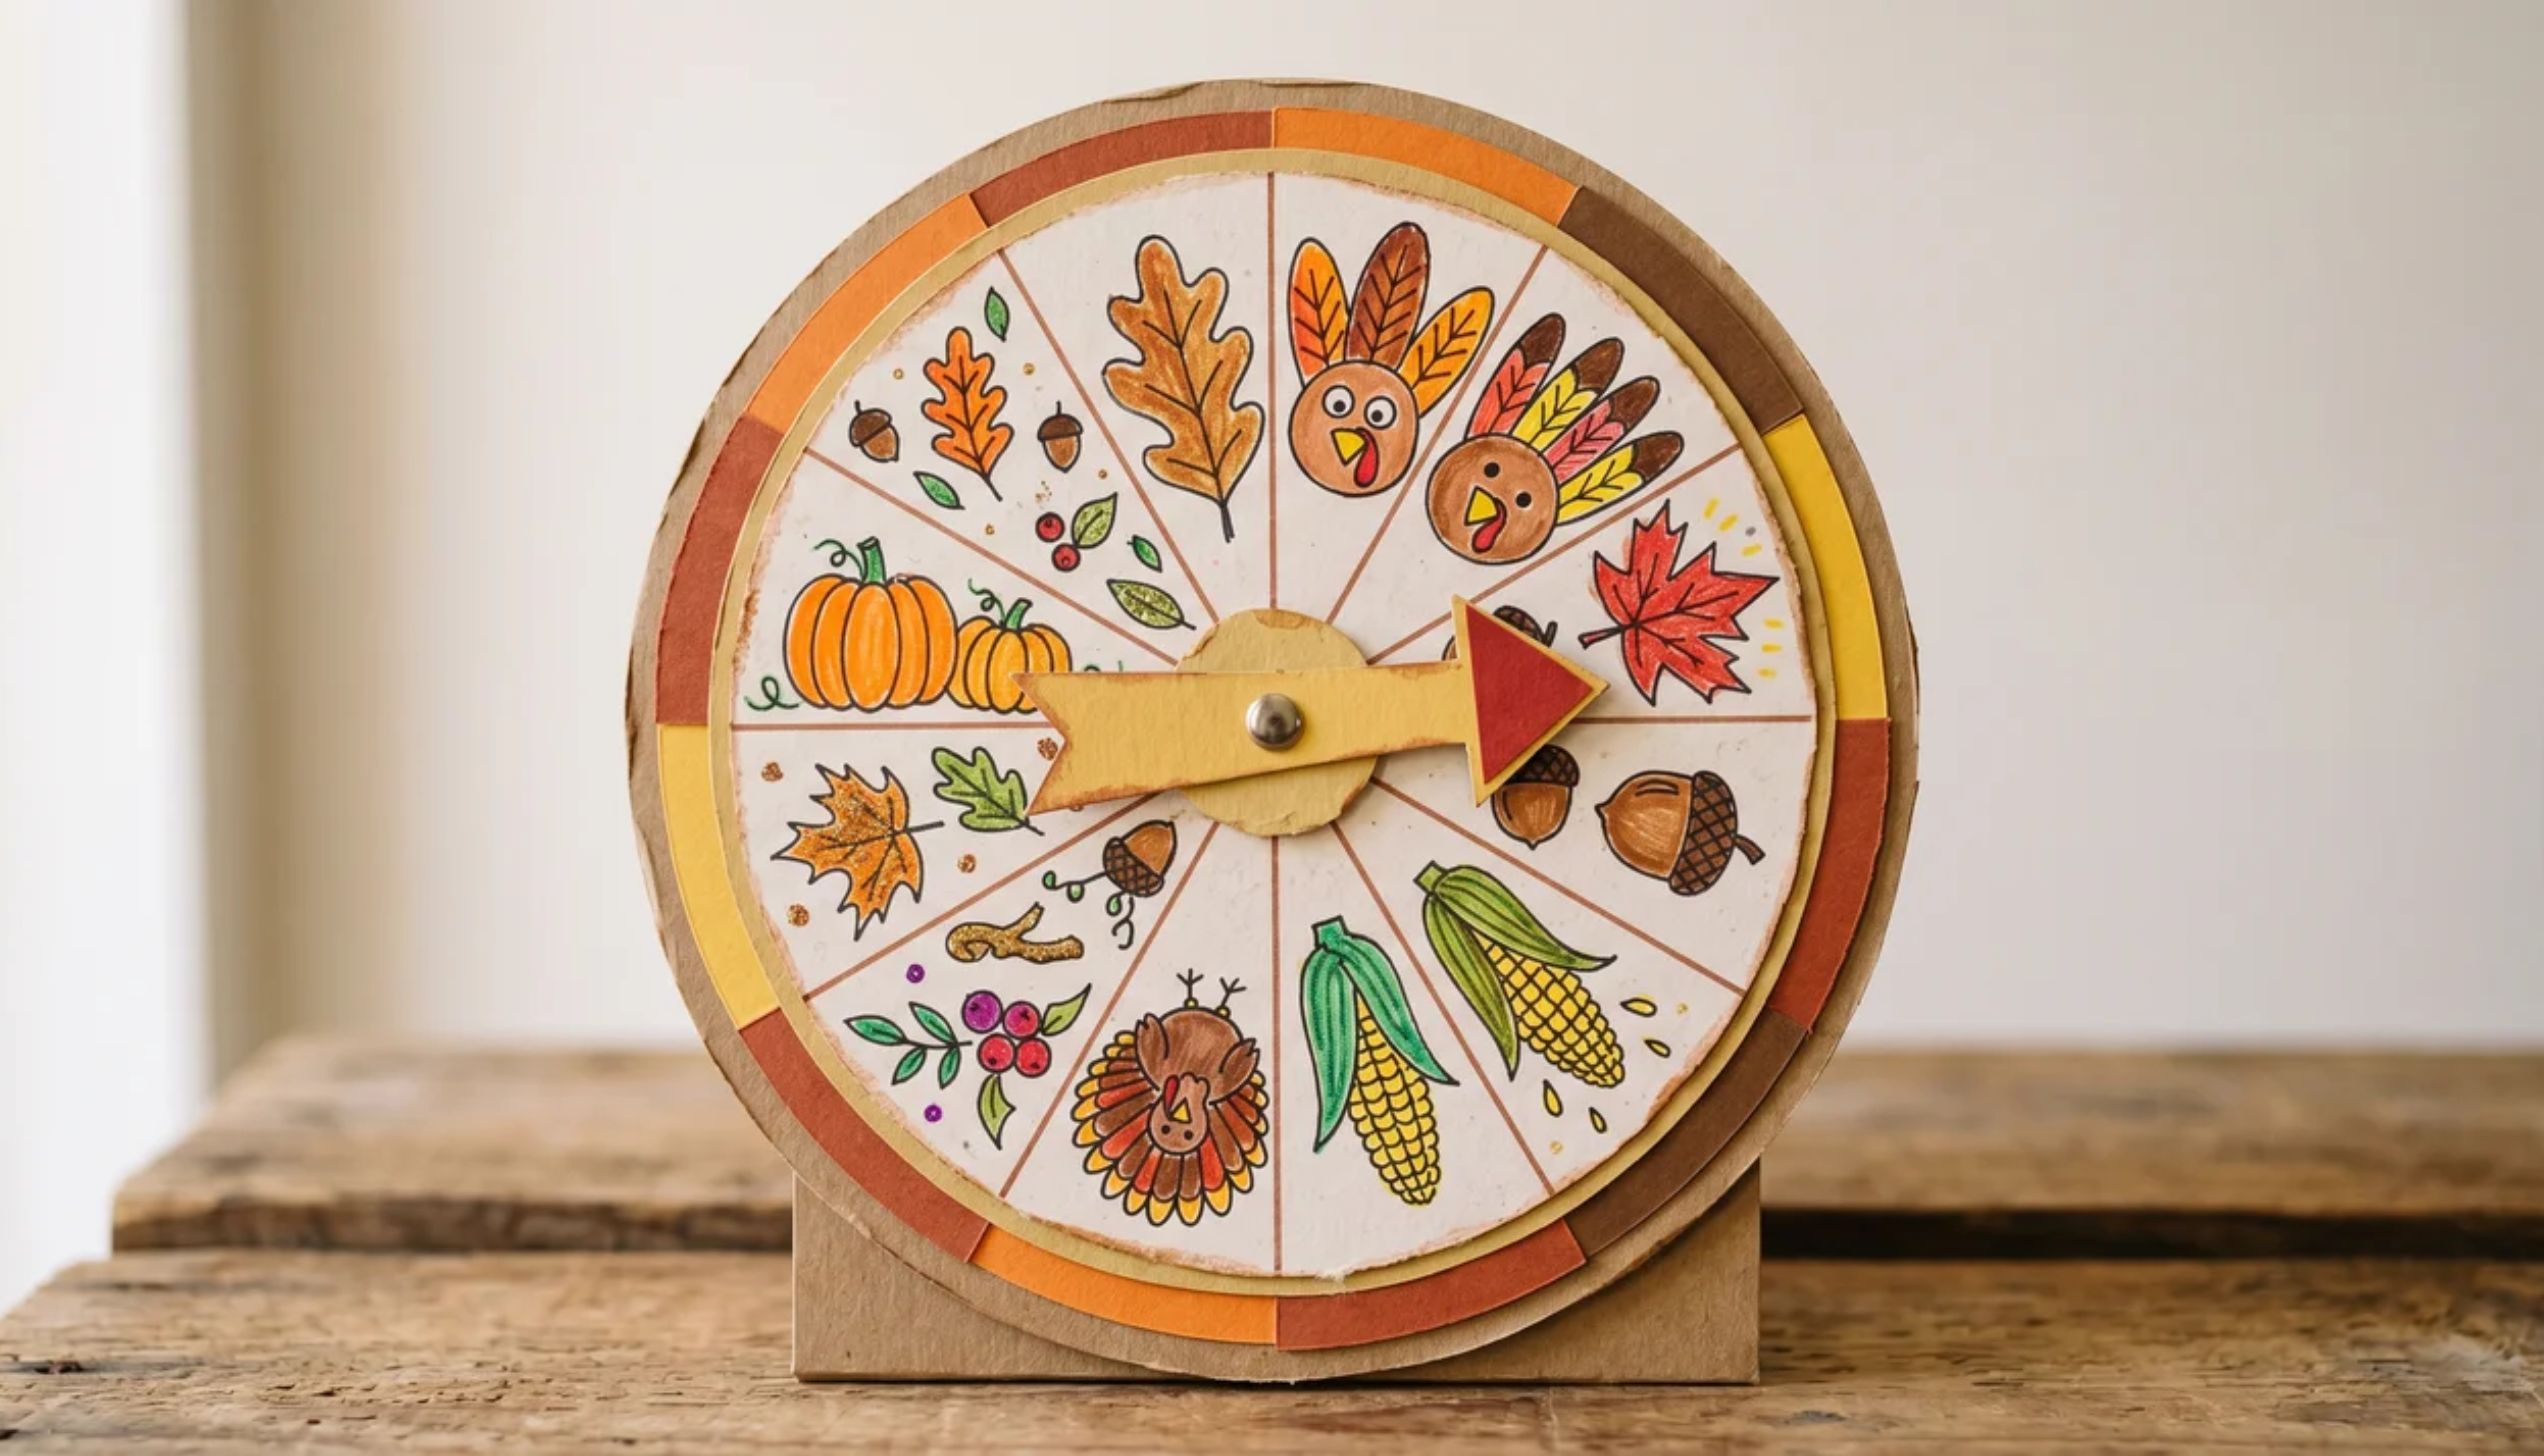
A memory wheel gives every family member a chance to capture what they loved most about this Thanksgiving. Spin it, read it aloud, and save it for next year.
Step 1: Cut two equal-sized circles from cardstock, one in a fall color like orange or brown, one in cream or white.
Step 2: Divide the cream circle into equal sections by drawing light pencil lines from the center outward like slices of a pie.
Step 4: Ask each person to write or draw their favorite Thanksgiving memory, food, or moment in their section.
Step 5: Cut a small triangular window into the orange circle large enough to show one section at a time.
Step 7: Spin the top circle to reveal each person’s section one at a time.
Step 8: Write the year on the back and store it with your Thanksgiving keepsakes.
27. DIY Turkey Vase
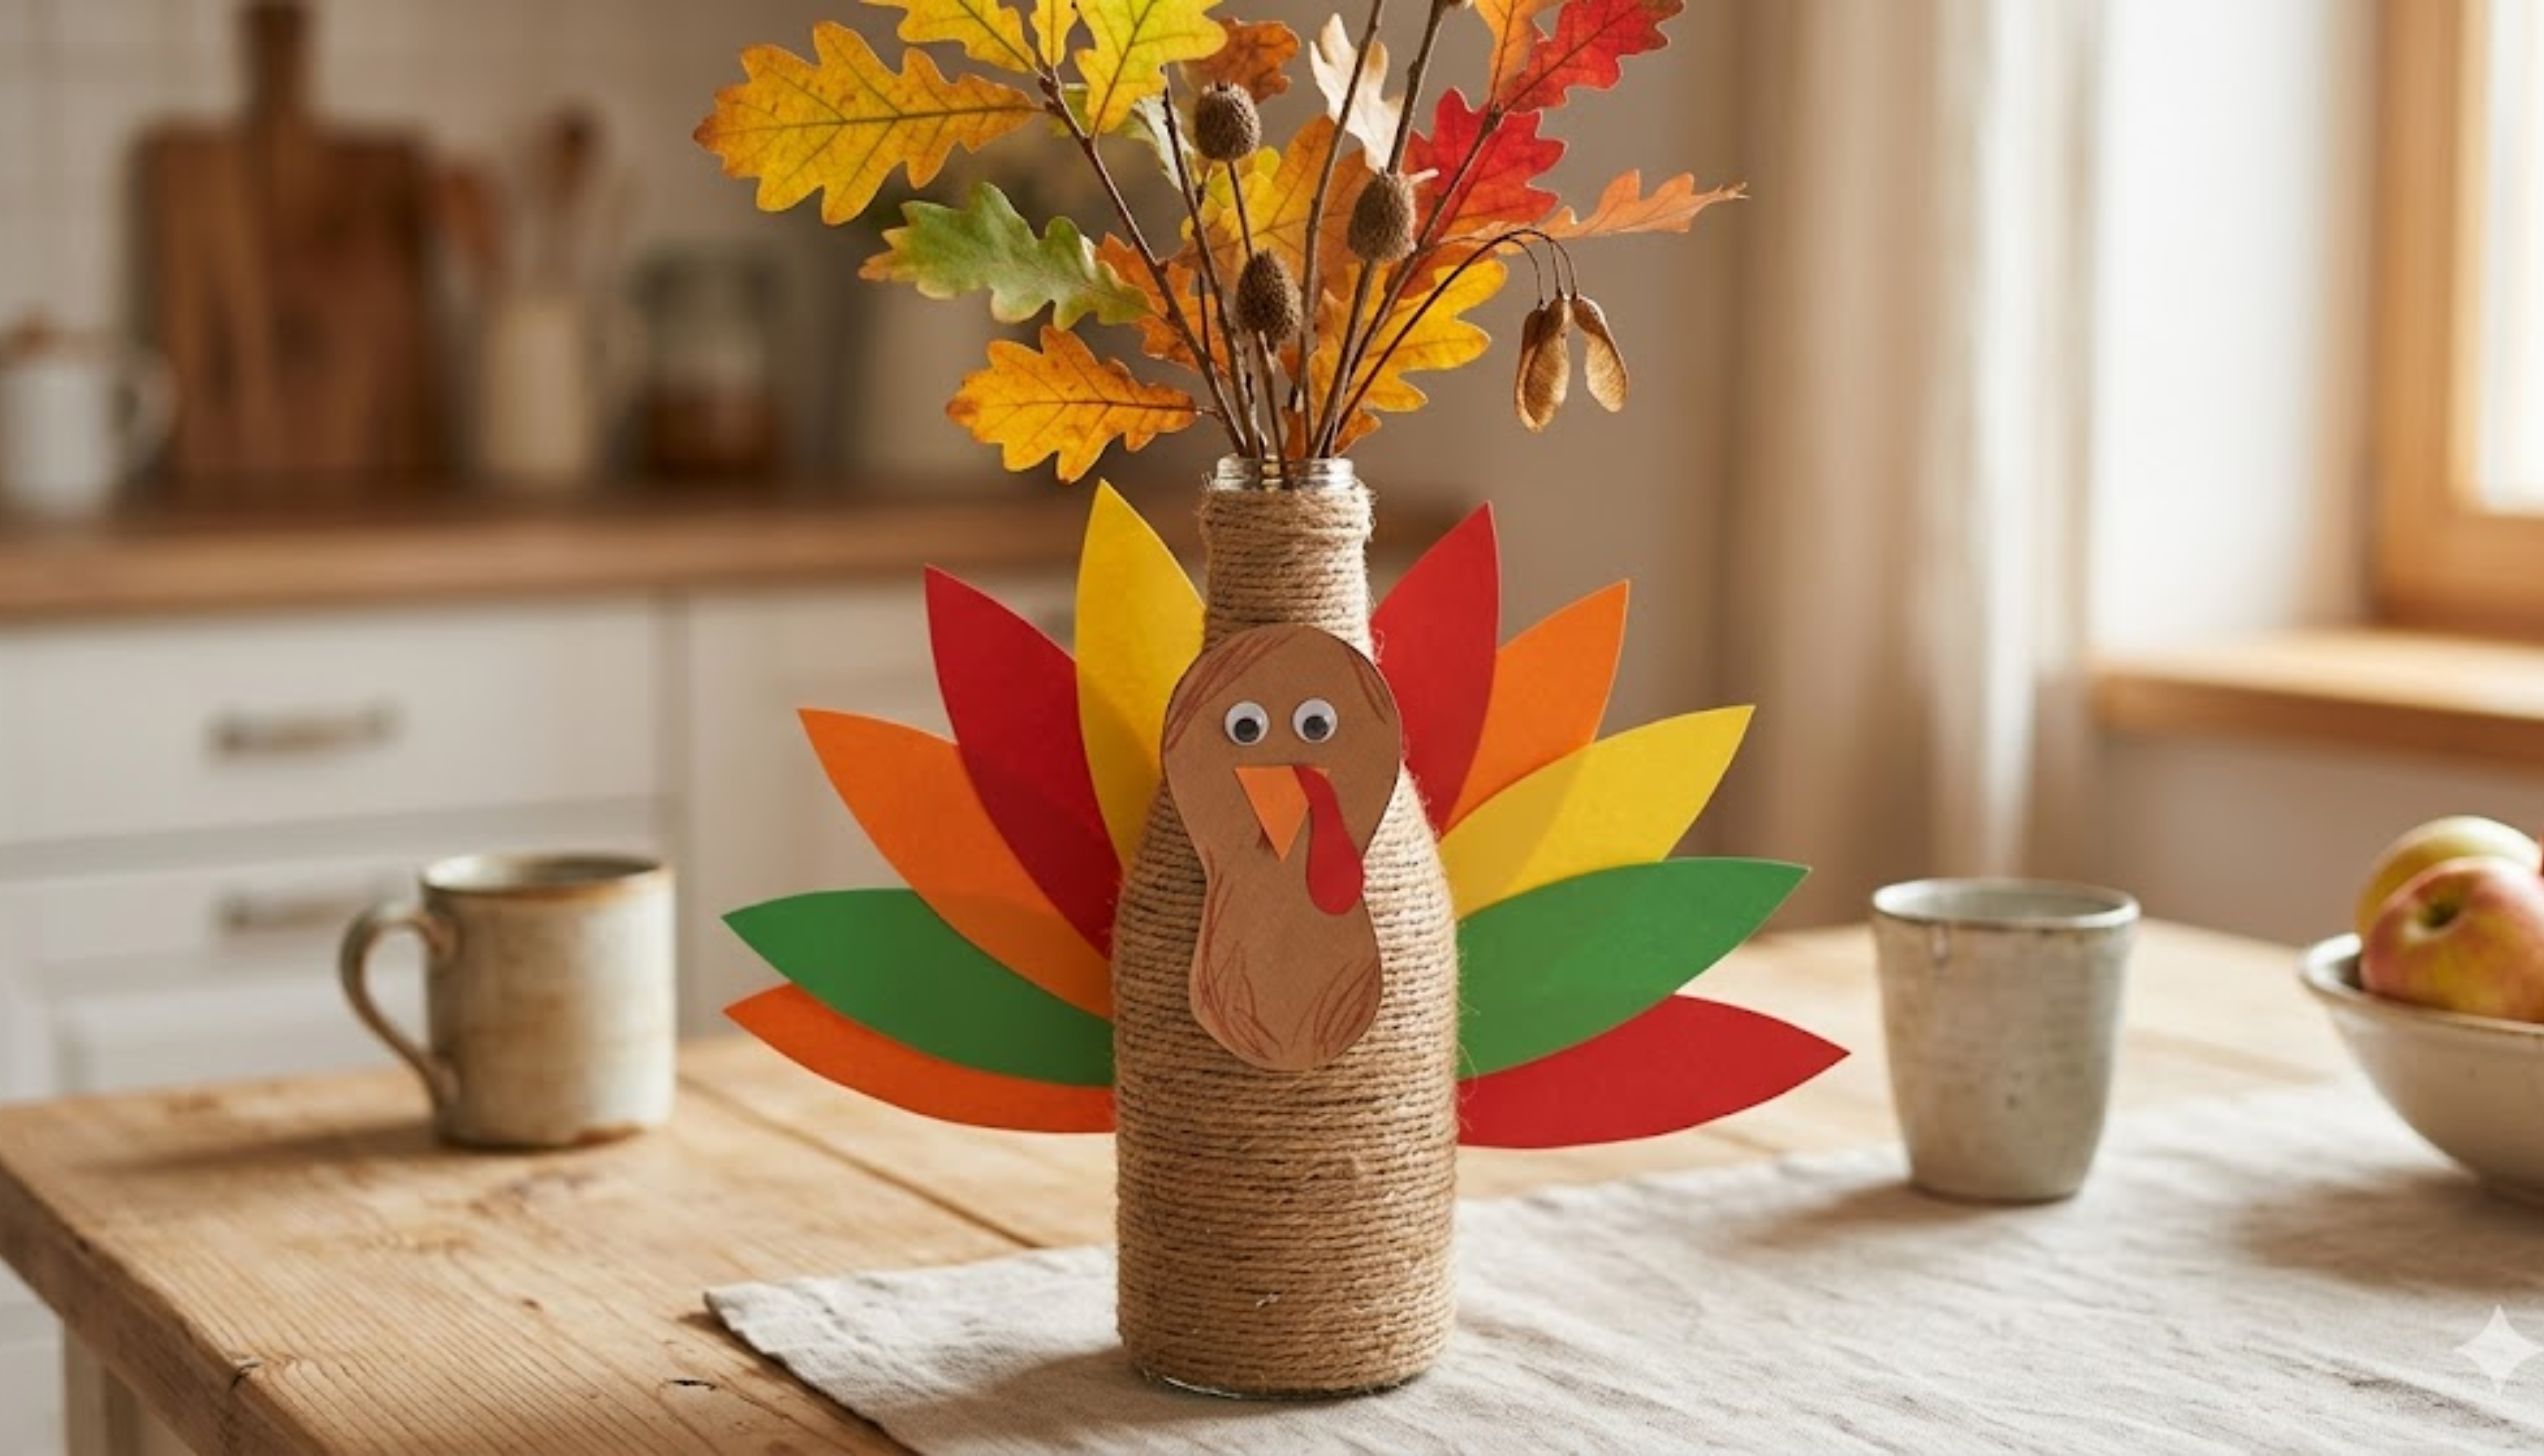
This group craft uses recycled bottles and simple materials to create a fun table decoration.
Step 1: Clean and dry a glass bottle or jar; any size works.
Step 2: Wrap the outside with brown twine or raffia, securing with hot glue as you go.
Step 3: Cut tail feathers from bright cardstock and fan them out behind the bottle.
Step 4: Tape or glue the paper feather to the back of the bottle.
Step 5: Cut a small turkey head from brown paper and glue it to the front of the bottle neck.
Step 6: Add eyes, a beak, and a wattle. Place fresh or faux autumn branches inside.
28. Collaborative Leaf Collage
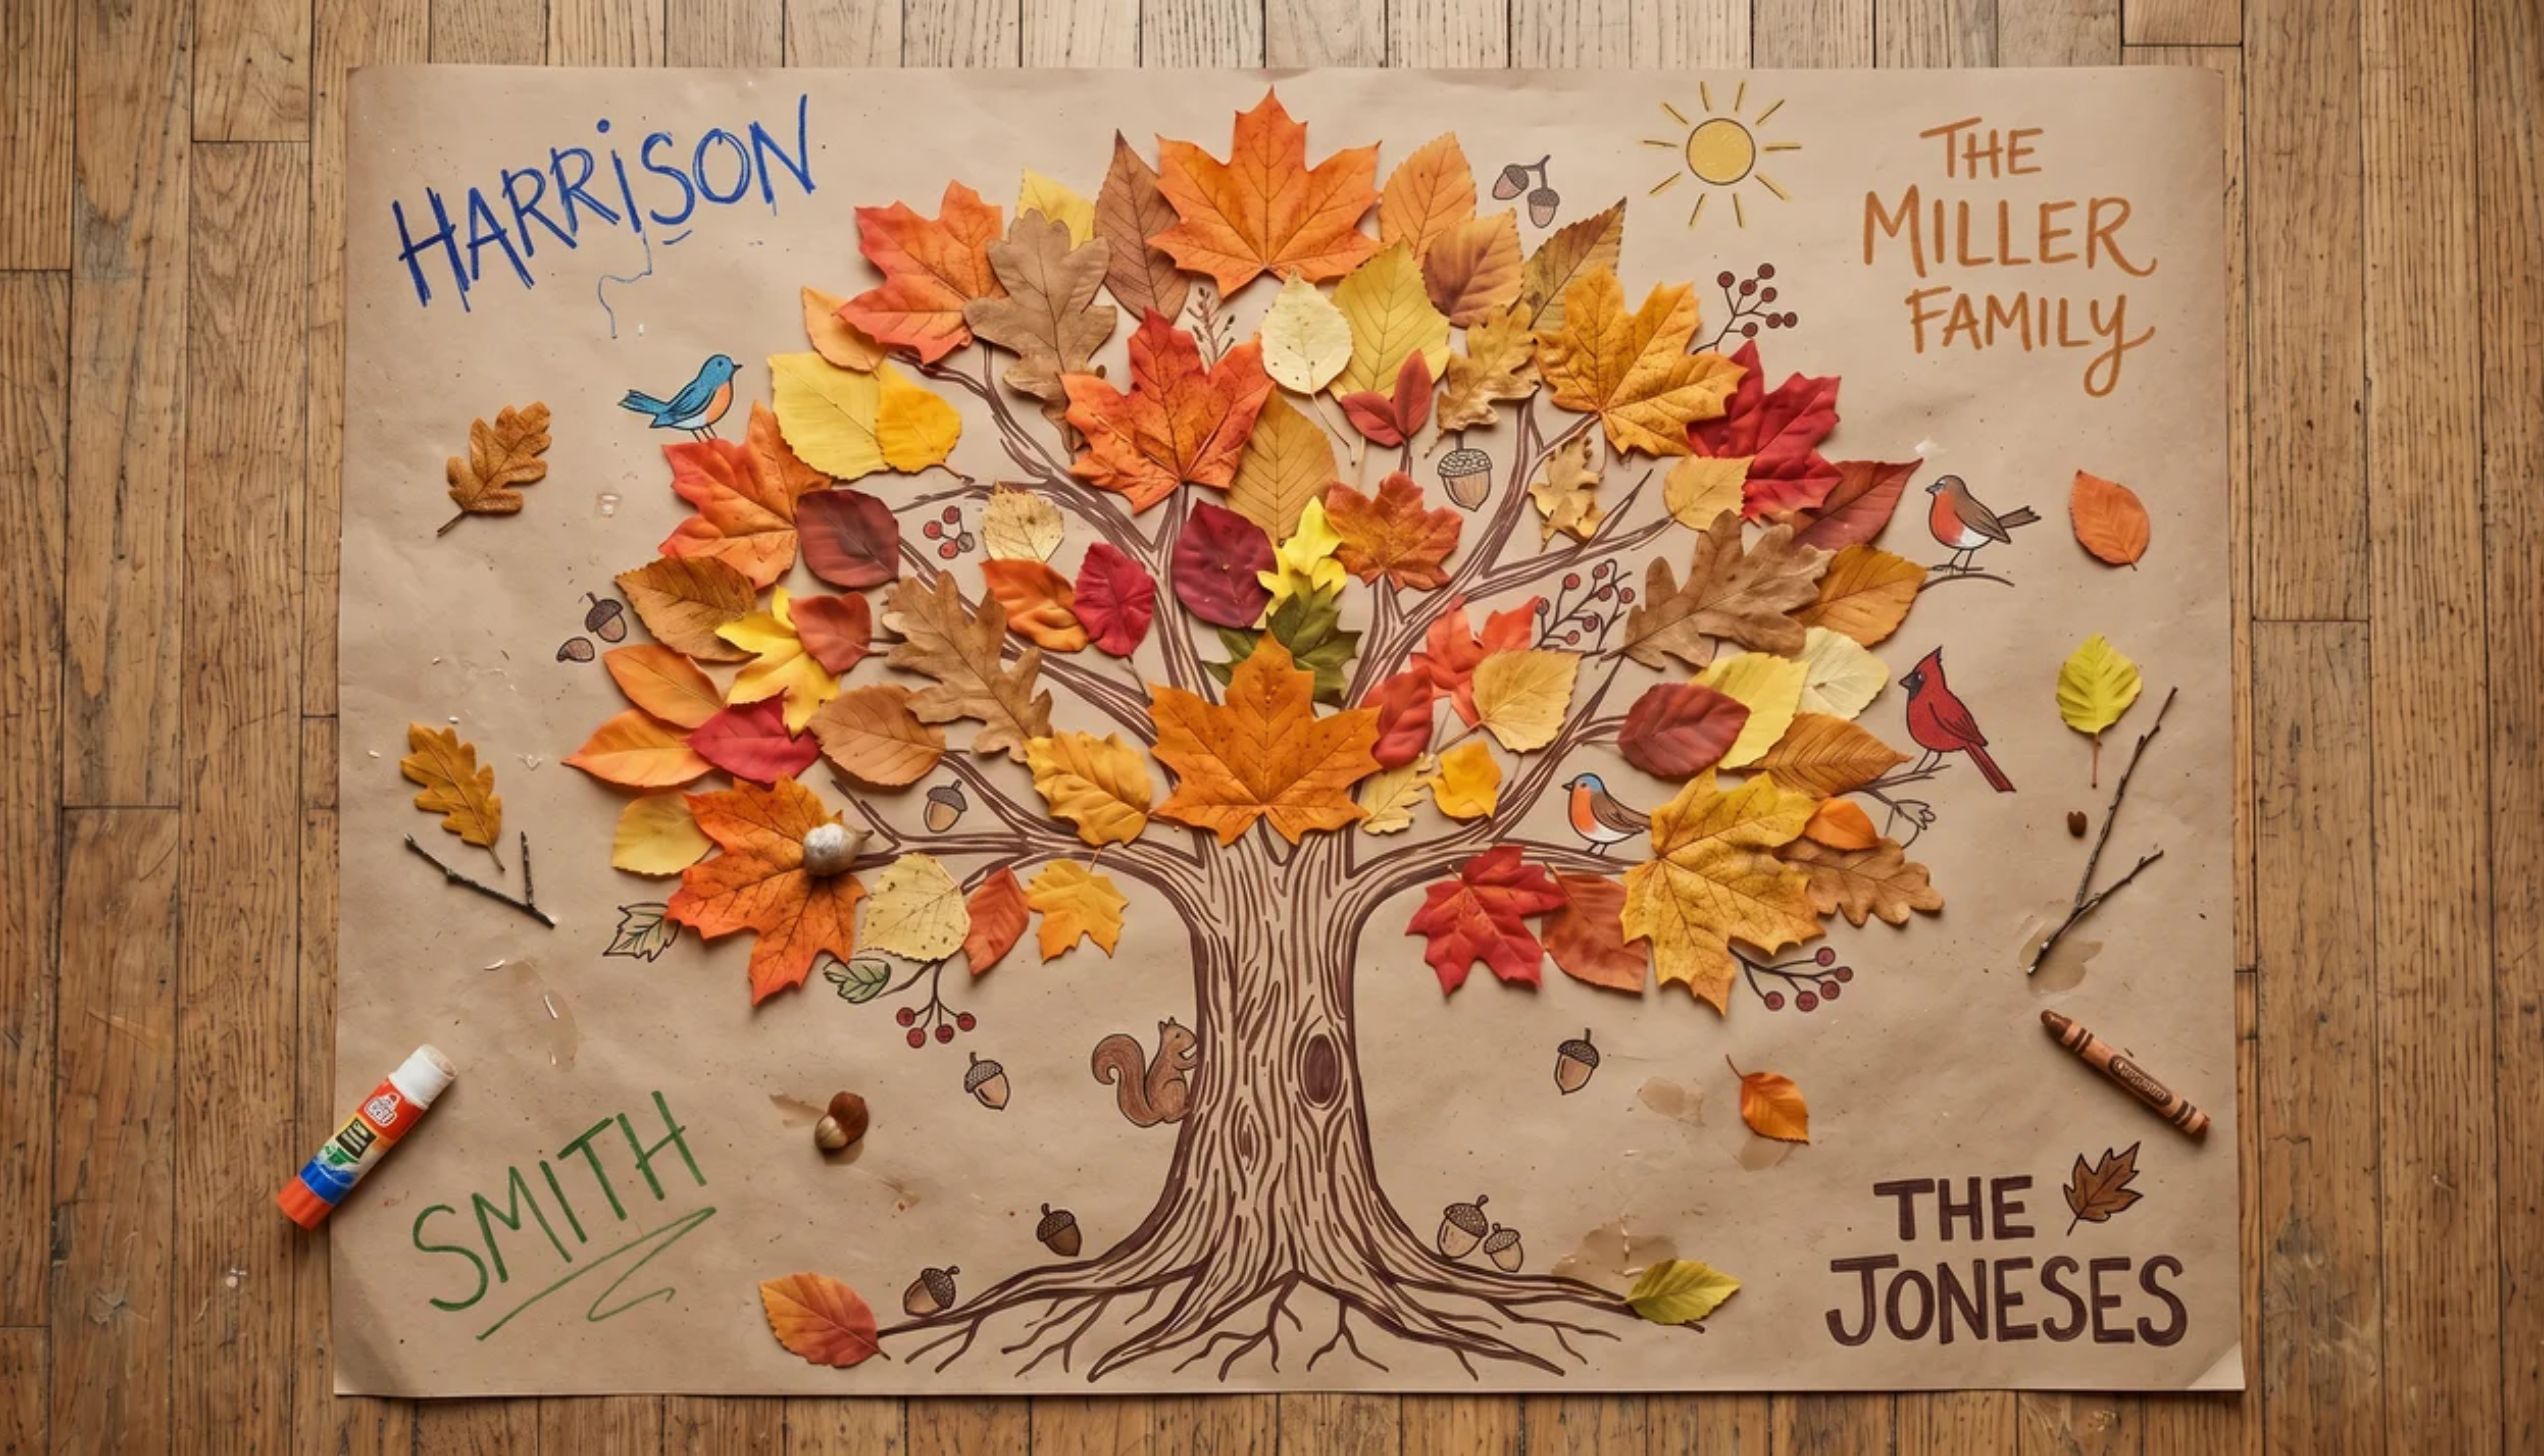
Every family member adds to this large autumn scene it ends up as one-of-a-kind wall art.
Step 1: Tape a large sheet of craft paper or cardboard to a table.
Step 2: Collect real or faux autumn leaves in various sizes and colors.
Step 3: Each person arranges and glues their leaves onto the paper to create a fall scene, a tree, a forest floor, or a simple pile.
Step 4: Add details with markers, acorns, branches, birds, or squirrels.
Step 5: Write each family member’s name in the corner of the collage.
Step 6: Frame or hang the finished piece as a Thanksgiving keepsake.
29. Fall-Themed Banner
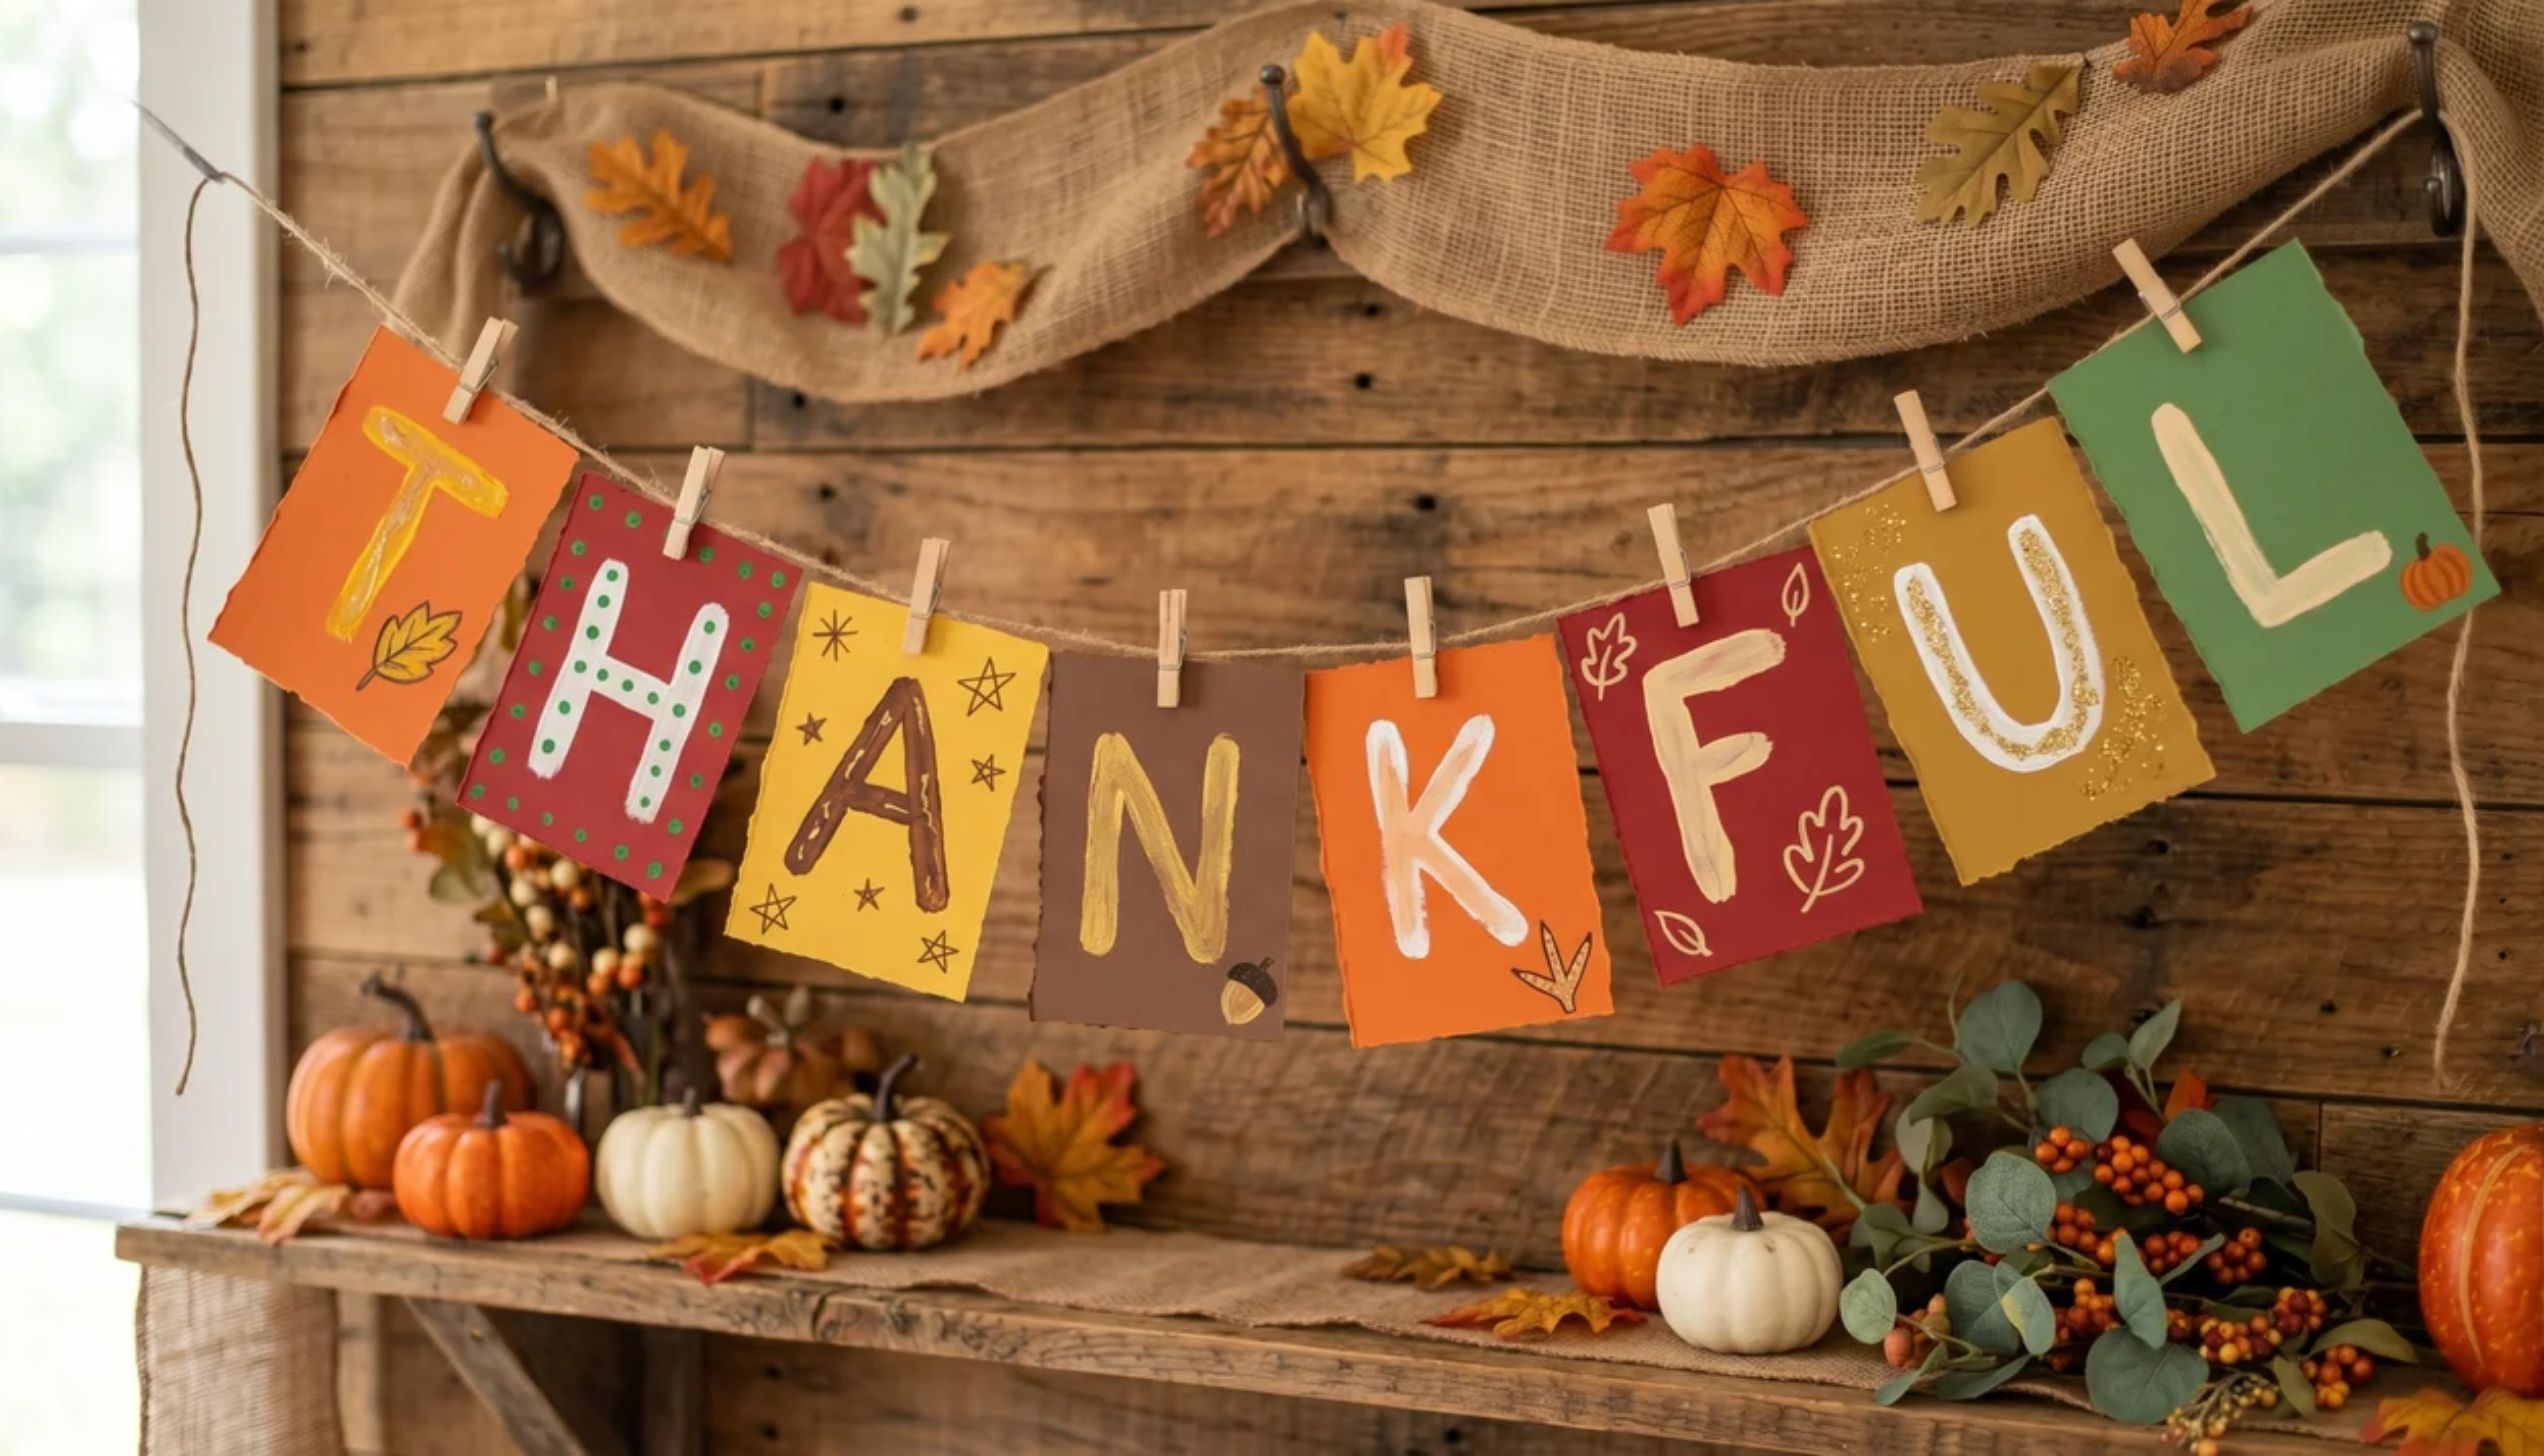
A handmade banner over the Thanksgiving table makes the space feel festive and personal.
Step 1: Cut equal-sized rectangles or triangles from cardstock or felt in fall colors.
Step 2: Assign one letter per banner piece to spell out “THANKFUL” or “GIVE THANKS.”
Step 3: Each family member decorates their own letter panel with markers, stamps, or stickers.
Step 4: Punch a hole in the top-left and top-right corners of each panel.
Step 5: Thread twine through the holes to connect all the panels in order.
Step 6: Hang the banner above the dining table or across a wall.
30. Leaf-Stamped Napkins
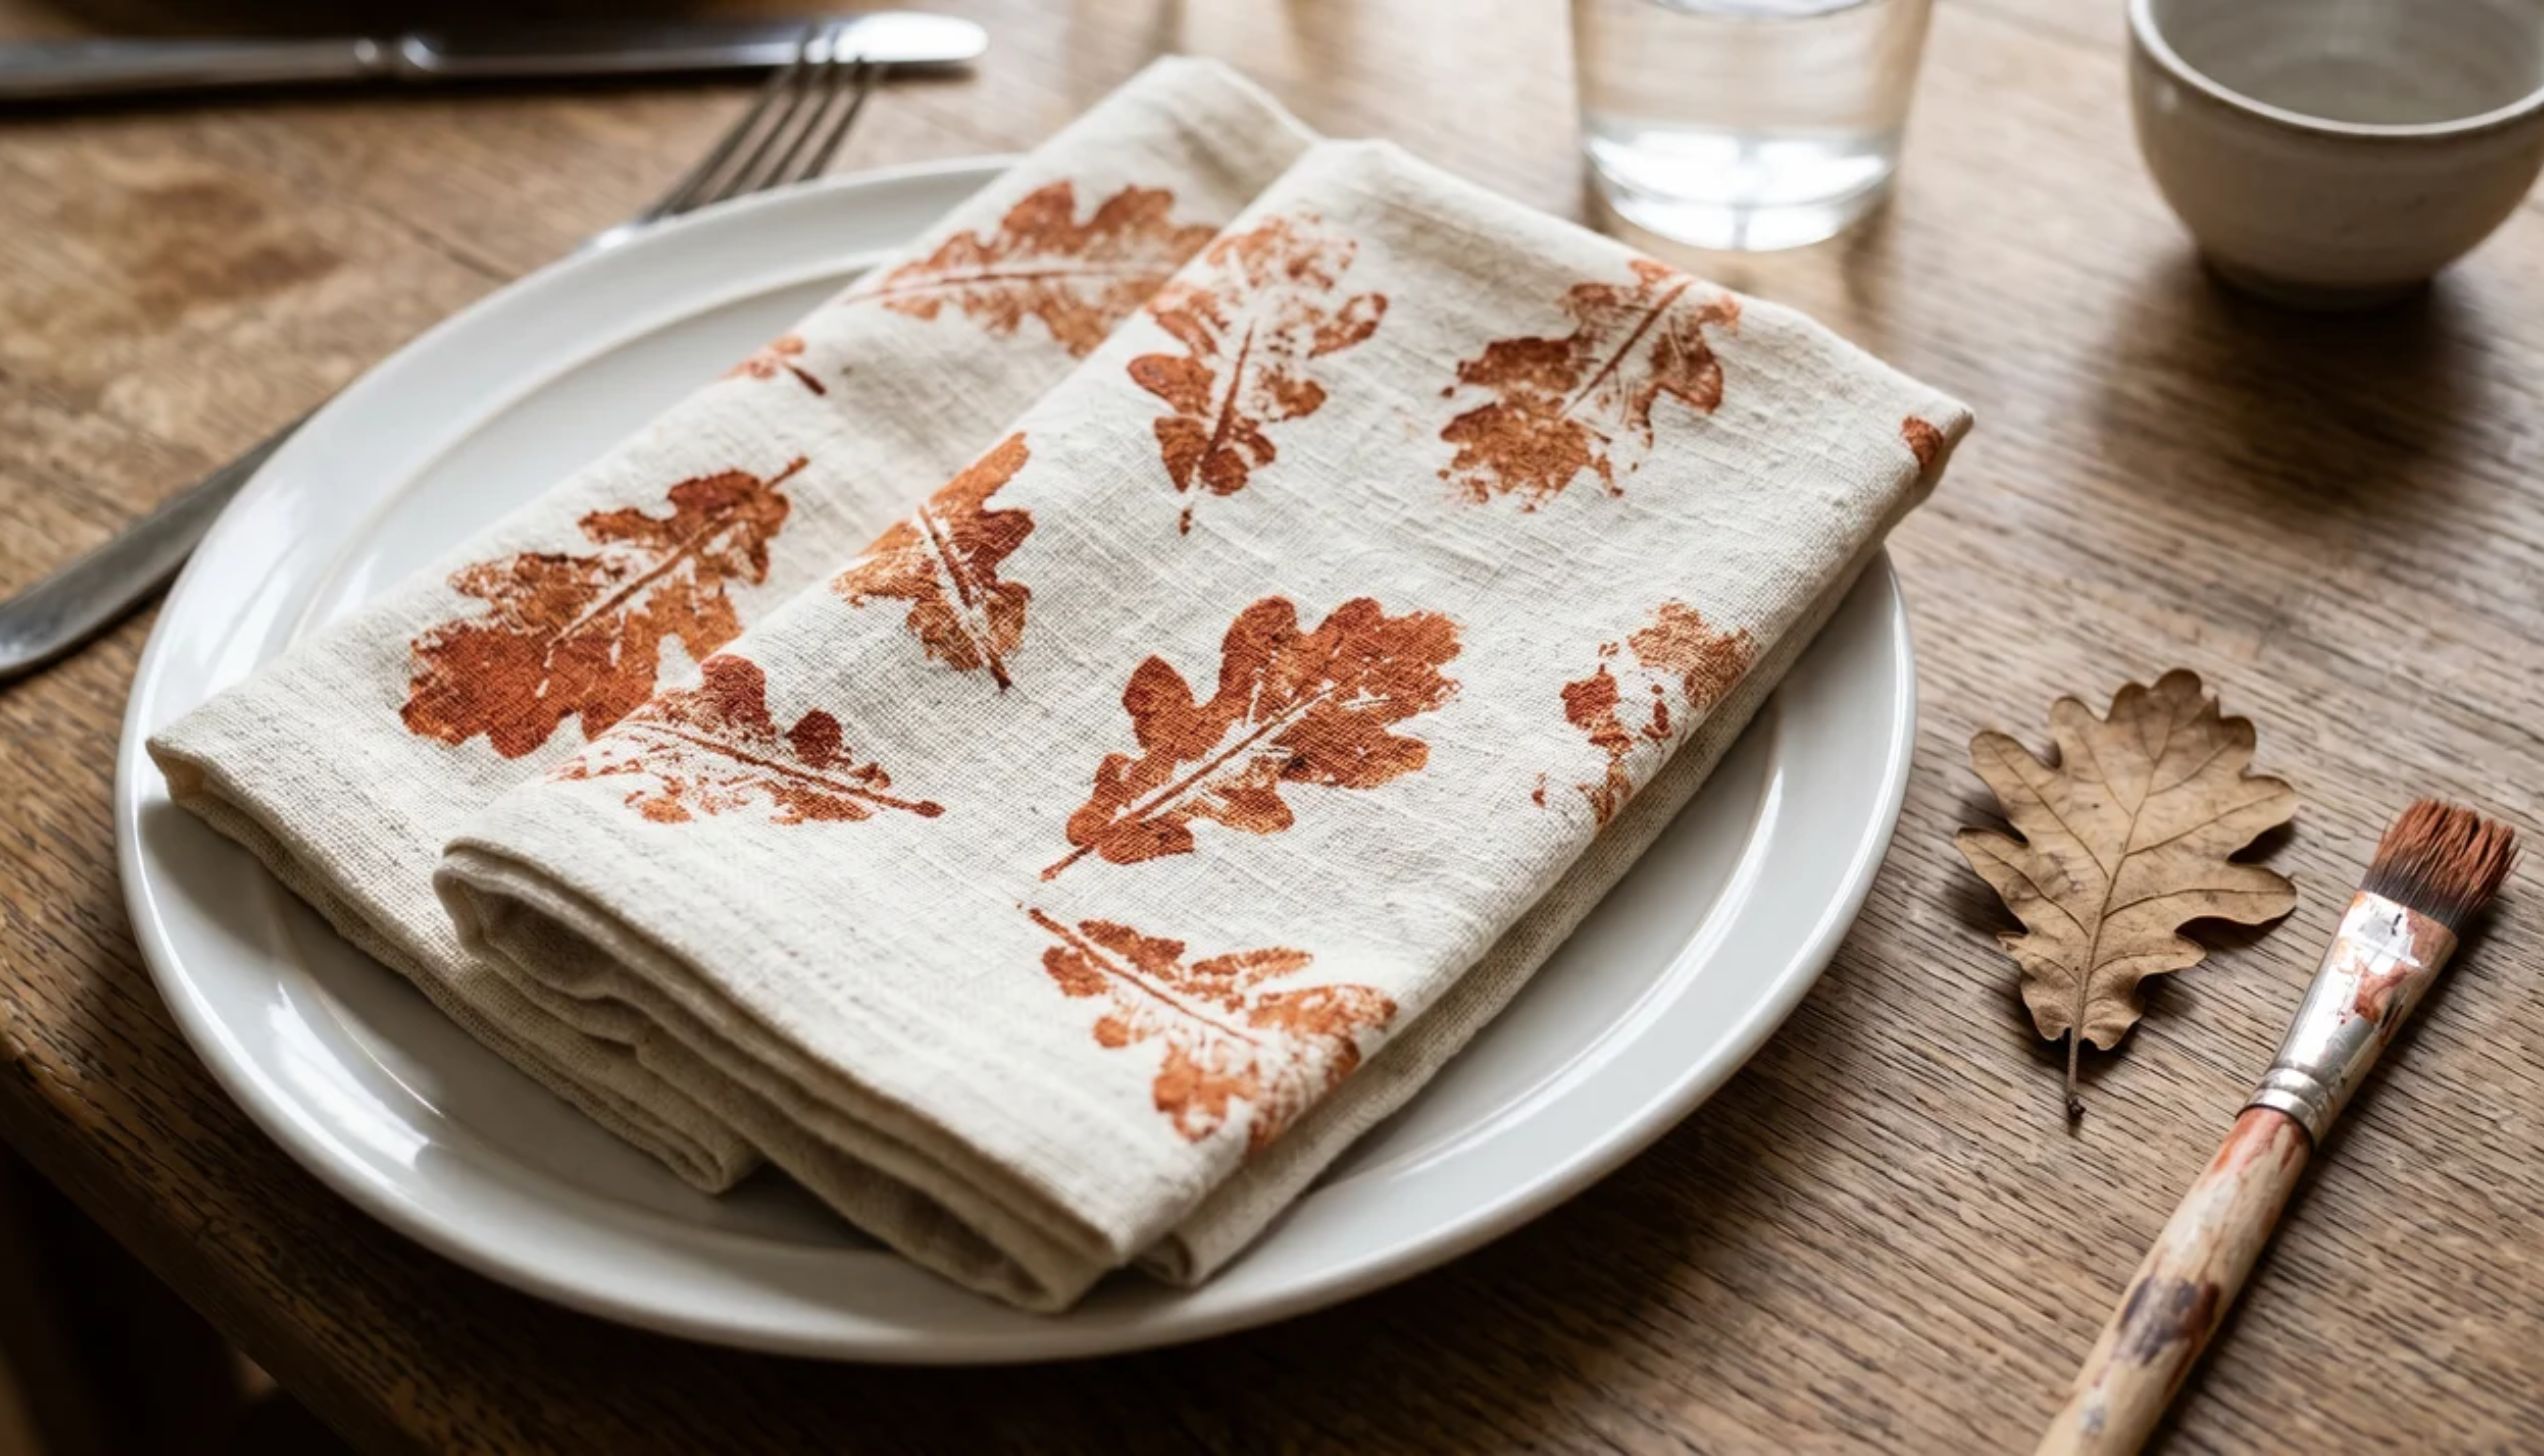
These make plain napkins look like something from a boutique table setting.
Step 1: Lay a plain fabric napkin flat on a protected surface.
Step 2: Brush a thin coat of fabric paint onto the back of a real leaf.
Step 3: Press the leaf firmly onto the napkin, then peel it off carefully.
Step 4: Repeat the pattern across the napkin, or scatter the prints randomly.
Step 5: Let the paint dry fully for at least 2 hours.
Step 6: Heat-set the paint with a warm iron to make it permanent.
31. Thanksgiving Gift Tags

These little tags add a personal touch to Thanksgiving favors, pies sent home with guests, or early holiday gifts.
Step 1: Cut small tag shapes from cardstock in fall colors.
Step 2: Punch a hole at the top of each tag.
Step 3: Decorate with small leaf or pumpkin stamps, drawn designs, or washi tape borders.
Step 4: Write a short message, “With Gratitude,” a name, or “Happy Thanksgiving.”
Step 5: Thread a short piece of twine through the hole.
Step 6: Tie to your gift, pie box, or favor bag.
32. Fall Animal Masks
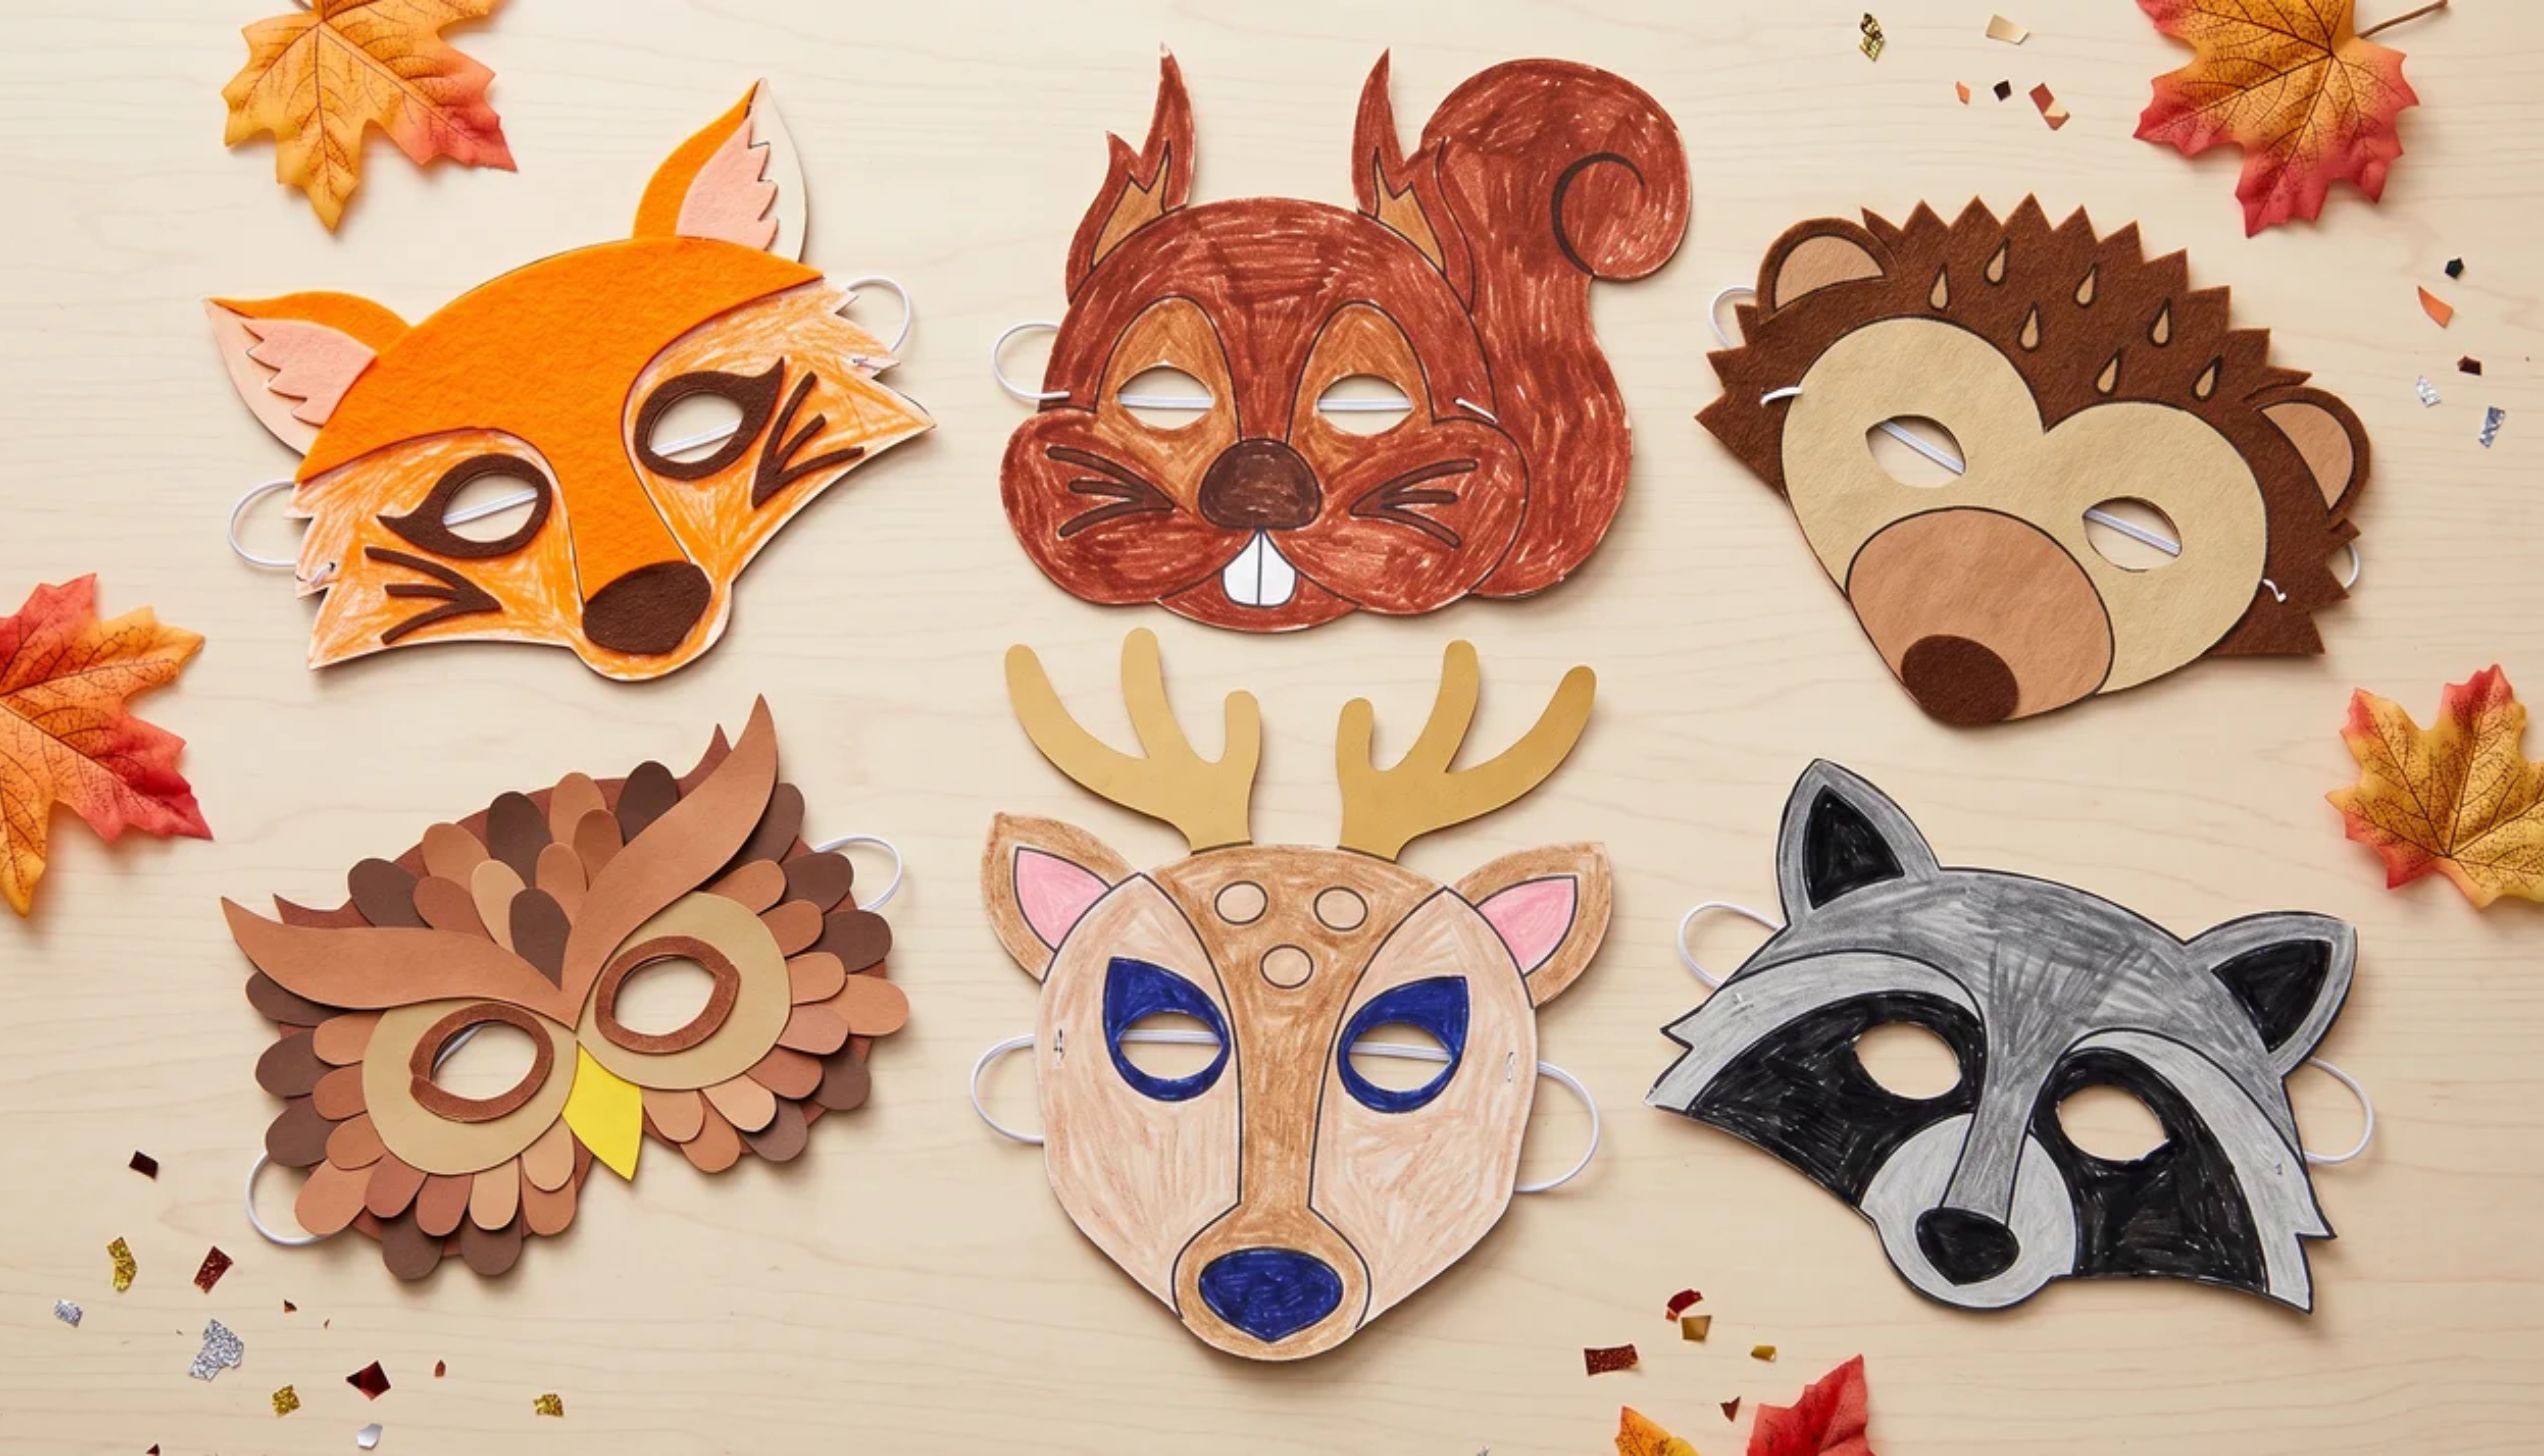
Fall animal masks are a hit with kids who need something to do before dinner. Make a fox, an owl, or a squirrel, and suddenly the living room has a full forest cast.
Step 1: Print or freehand draw an animal face outline onto cardstock. Fox, owl, raccoon, or squirrel all work well.
Step 2: Cut out the mask shape, including two eyeholes large enough for the child to see through clearly.
Step 3: Paint the mask in fall colors: rust orange for a fox, brown and cream for an owl, and grey for a squirrel.
Step 4: Let the color dry completely for about 20 to 30 minutes.
Step 5: Add details with markers: whiskers on a fox, feather markings on an owl, stripes on a raccoon.
Step 6: Glue on small felt shapes for ears, nose details, or fur texture.
Step 7: Punch a small hole on each side of the mask, near the eyes.
Step 8: Thread a piece of elastic or a ribbon through each hole, then tie it securely at the back to hold the mask in place.
33. Turkey Feather Fans
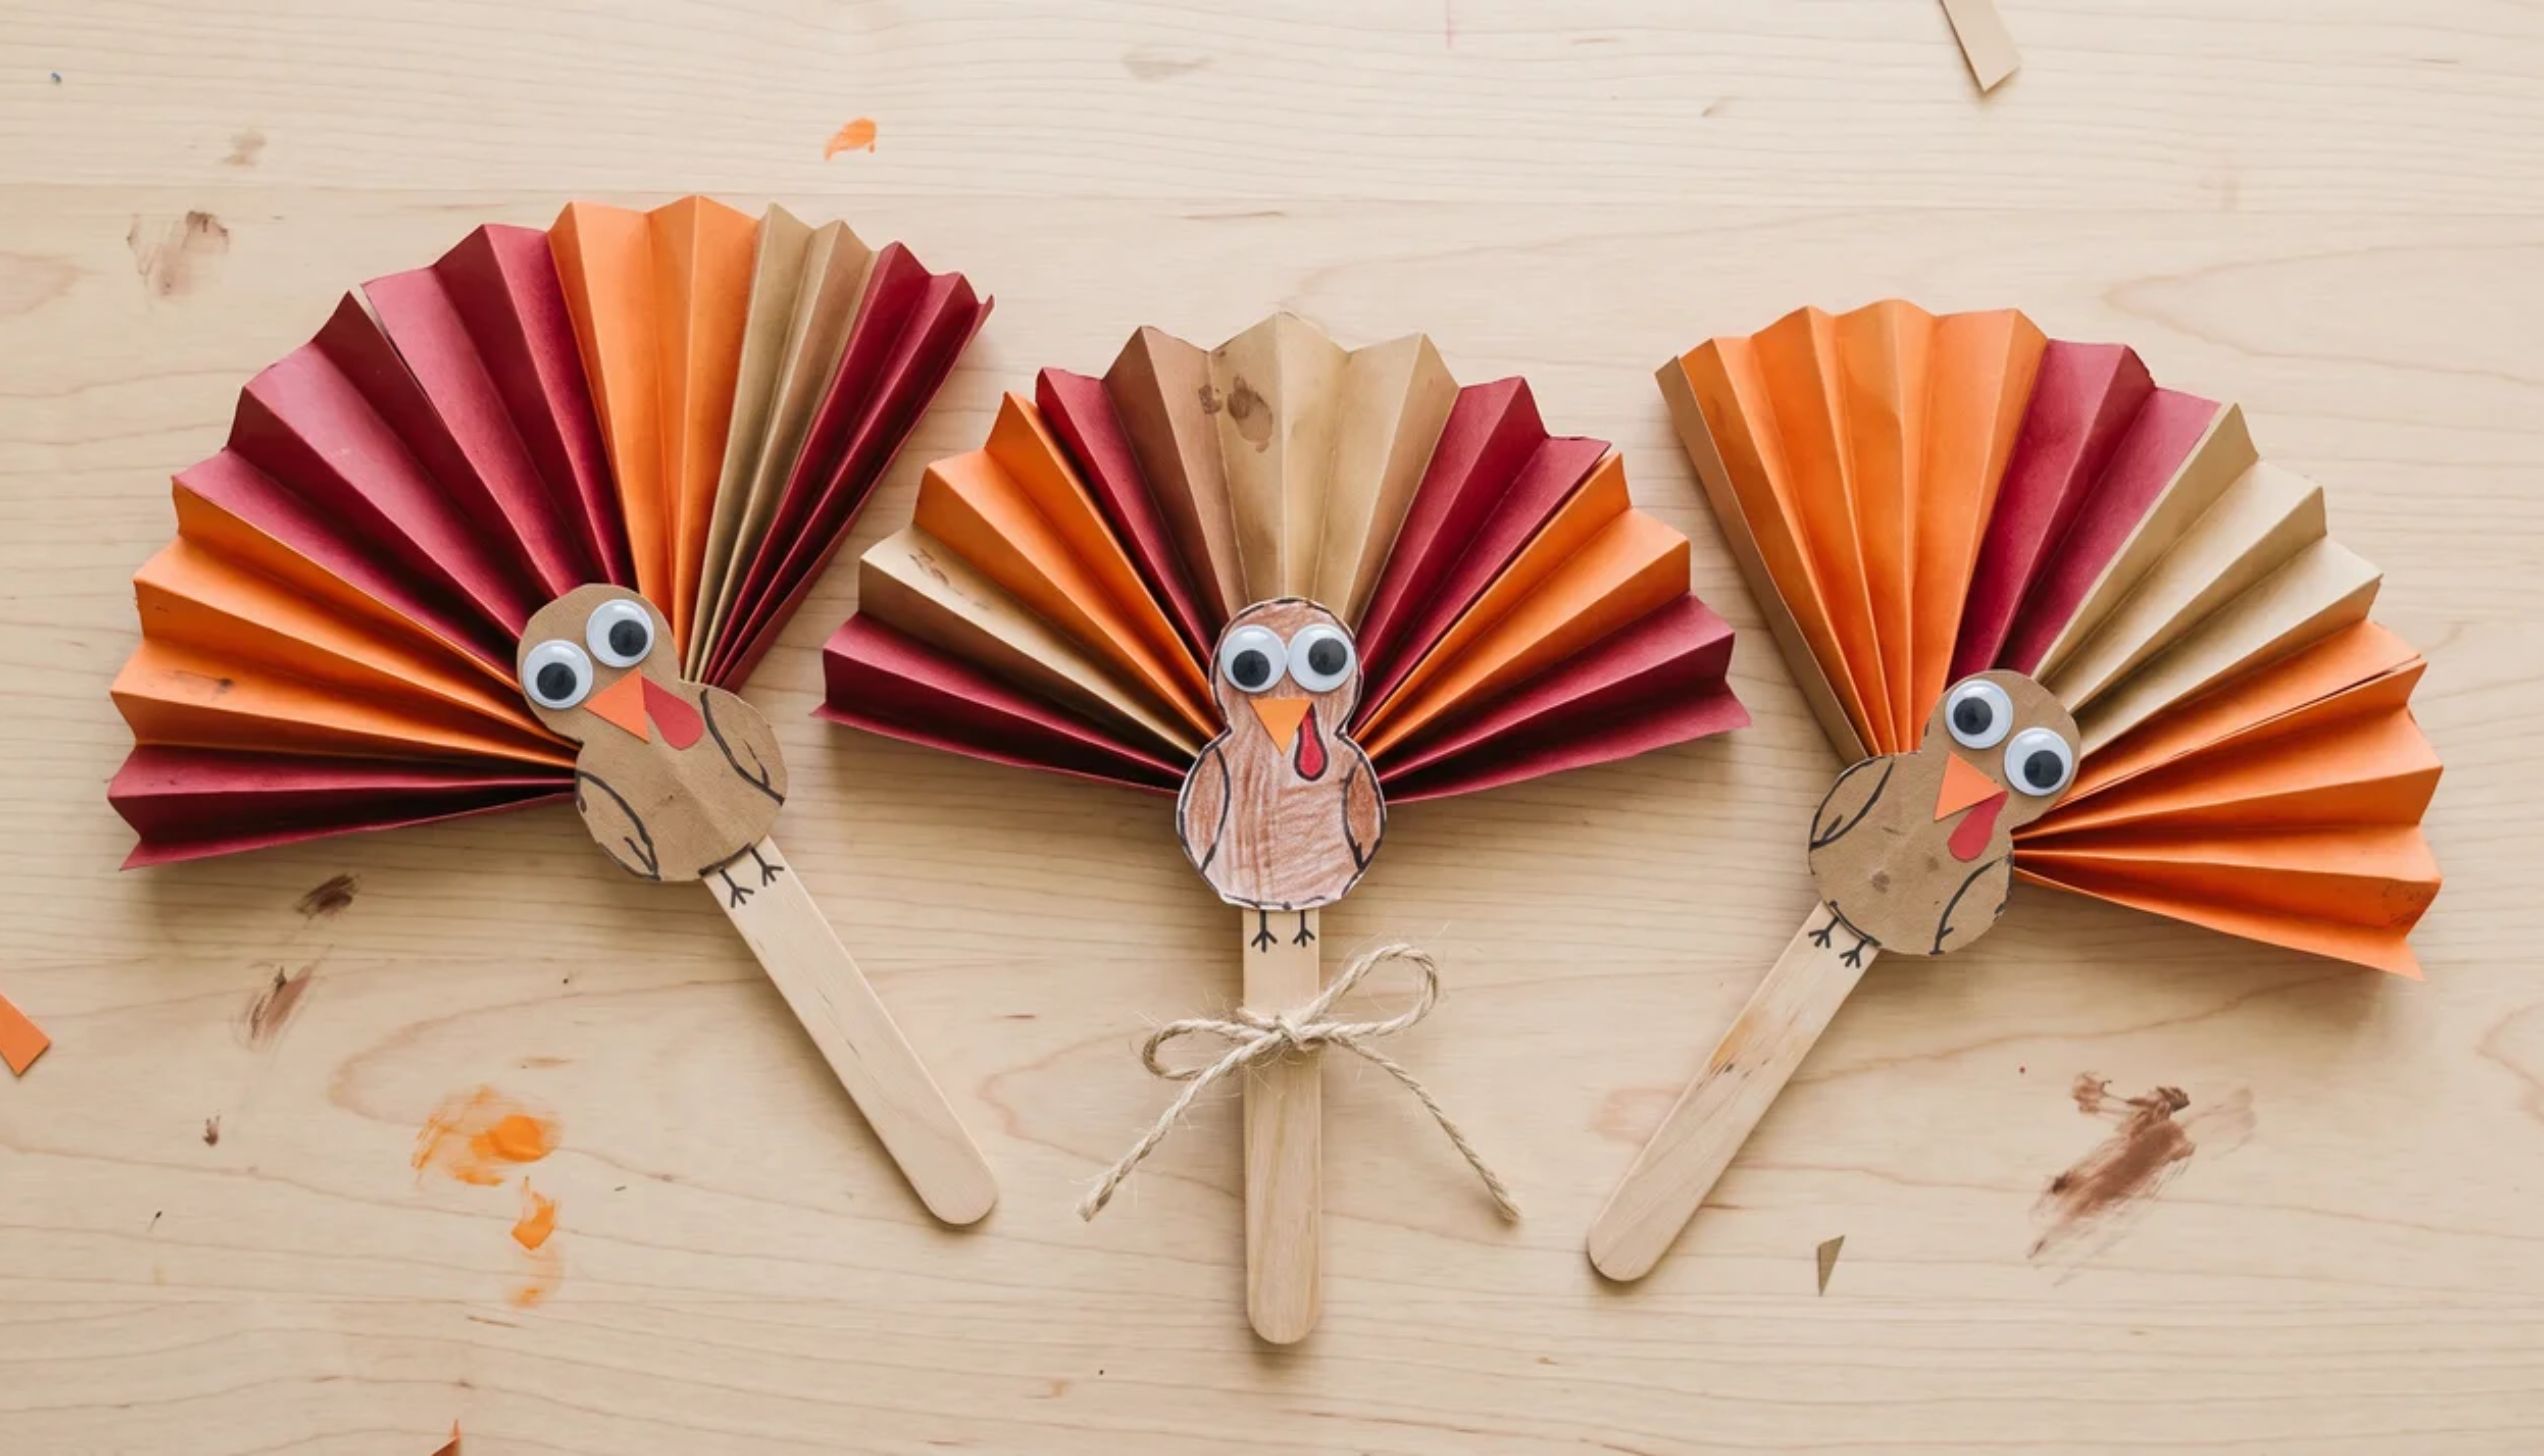
Turkey feather fans are quick, colorful, and double as both a craft and a prop for Thanksgiving photos. Kids love waving them around before dinner.
Step 1: Fold colorful paper from cardstock in fall colors orange, red, yellow, brown, and rust.
Step 2: Decorate each feather with markers, adding stripes, dots, or zigzag lines down the center.
Step 3: Stack all the feathers together, lining up the narrow ends at the bottom.
Step 4: Punch a hole through the narrow ends of the stack.
Step 5: Push a brass fastener through the hole to hold all the feathers together at the base.
Step 6: Fan the feathers out in a semicircle and adjust the spread to your liking.
Step 7: Hold the stick as the handle, or glue a wide popsicle stick to the back for a sturdier grip.
Tips for Stress-Free Crafting on Thanksgiving
A little preparation goes a long way. These tips keep easy Thanksgiving crafts fun, not frustrating.
- Prep the night before. Cut shapes, pre-measure supplies, and set up workstations in advance.
- Use washable supplies with kids. Washable paint and glue sticks mean less worry about messes on clothes or furniture.
- Keep workstations organized. Use muffin tins, egg cartons, or small cups to sort materials by color or type.
- Set realistic expectations. Kid crafts don’t need to look perfect. The process matters more than the product.
- Do the messy crafts first. Get painting and gluing done early so everything has time to dry before dinner.
- Have a drying station ready. Clear a counter or spread newspaper on the floor so wet projects can lie flat without getting bumped.
Conclusion
These easy Thanksgiving crafts do not need a perfect setup or a big budget. They need a table, some basic supplies, and the people you love.
Start with one idea. Let the kids pick their own. Try something different yourself. Some of what you make goes straight on the wall. Some end up at a place setting or inside a gratitude jar. A few crafts become traditions you repeat every November.
The handprints from this year look different from the ones made next year. The gratitude jar fills up differently each time. The paper chain grows a little longer every November, when someone adds a link. That is the whole point.
Pull out the supplies, lay down some newspaper, and start. Your home will feel warmer for it.