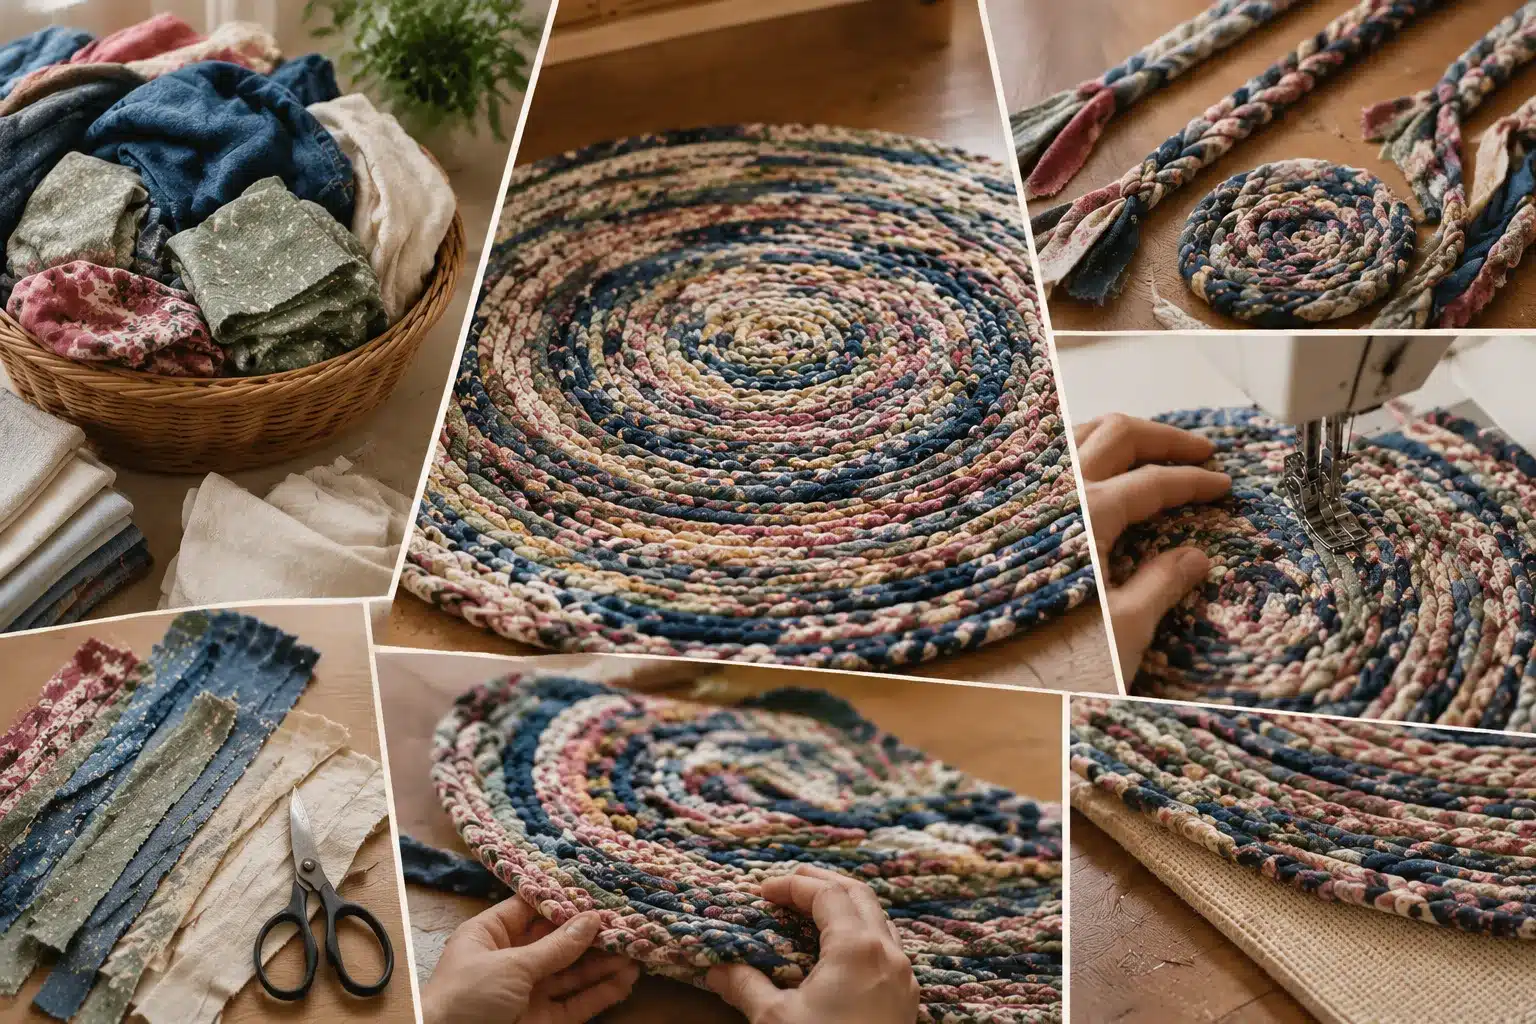
How to Make a Rag Rug From Old Clothes and Fabric Scraps

Old t-shirts, worn-out sheets, and leftover fabric scraps do not have to end up in the trash. With a little time and patience, you can turn them into a rag rug that adds warmth and personality to any room.
Rag rugs have been made by hand for generations. They are affordable, easy to customize, and a smart way to reuse textiles instead of throwing them away.
Braiding, weaving, crocheting, and no-sew tying each give a different look and texture so there is a method that works for your skill level and the tools you have.
This post covers the best fabrics to use, tools required, step-by-step instructions for making a braided rag rug, common mistakes to avoid, and tips for keeping your rug in good shape for years.
What Is a Rag Rug?
A rag rug is a rug made from strips of fabric instead of traditional rug fibers like wool or cotton yarn. The fabric strips are braided, woven through a frame, crocheted, or tied together to form a flat, durable surface.
This craft dates back centuries.
Families once made rag rugs out of necessity, using worn clothing, old bedding, and fabric scraps that could not be used for anything else. Nothing went to waste.
Common materials for a rag rug include:
- Old t-shirts
- Cotton sheets
- Denim
- Towels
- Fabric scraps from sewing projects
Rag rugs have made a comeback in recent years. The handmade look, the low cost, and keeping usable fabric out of landfills all make these rugs worth the effort.
Why Make a Rag Rug at Home?
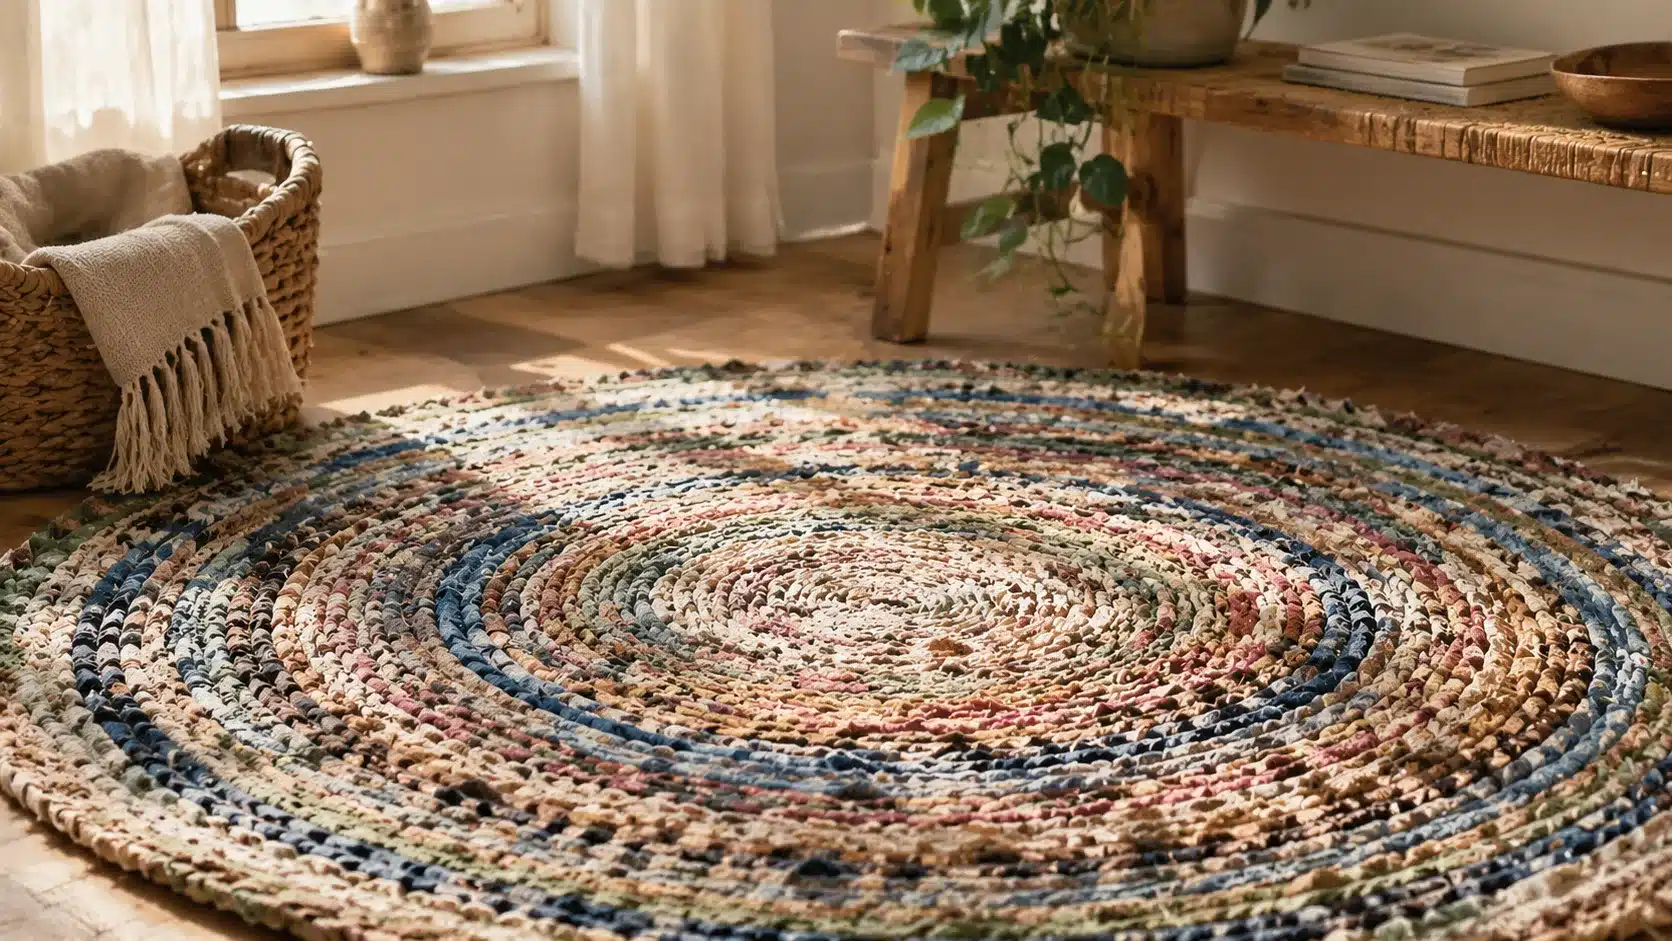
Making your own rag rug comes with real advantages over buying one from a store.
You get to use fabric you already own. There is no need to buy new materials when old clothing and linens work just as well.
This makes rag rugs one of the most budget-friendly rug projects you can take on.
You also have full control over the final look. You choose the colors, size, shape, and pattern, so the rug fits your space exactly the way you want it to.
| Handmade Rag Rug | Store-Bought Rug |
|---|---|
| Uses recycled materials | Usually made from new materials |
| Custom size and design | Limited options |
| Low-cost DIY project | Higher upfront cost |
| Takes time and effort | Ready to use right away |
The tradeoff is time. A handmade rag rug takes longer to finish than picking one off a shelf, but many crafters find the process relaxing and rewarding.
Different Ways to Make a Rag Rug

There is more than one way to build a rag rug, and each method gives a different texture and finished look.
1. Braided Rag Rug
This is the most common starting point for beginners. Long fabric strips are braided together, then coiled and stitched into an oval, round, or rectangular shape.
Braided rugs tend to be thick and sturdy. They work well in entryways and other high-traffic spots.
2. Woven Rag Rug
A woven rag rug is made on a simple loom or frame. Fabric strips are woven over and under a set of base threads, similar to traditional weaving.
This method creates a flatter rug with a more structured, traditional appearance. It suits larger rugs and more defined patterns.
3. Crocheted Rag Rug
For this method, fabric is cut and joined into a continuous strip that acts like yarn, then crocheted with a large hook.
The result is a thick, soft rug that feels comfortable underfoot. T-shirt fabric works especially well for crocheted rugs because of its stretch and softness.
4. No-Sew Rag Rug
If you would rather skip sewing altogether, a no-sew rug uses a rug mat, mesh canvas, or non-slip backing as a base.
Fabric strips are tied directly through the holes. This is the fastest method and a good choice for a weekend project or a first attempt at rag rug making.
Materials and Tools Needed to Make a Rag Rug
Before starting, gather the following:
| Material or Tool | Purpose |
|---|---|
| Old fabric or clothes | Main rug material |
| Fabric scissors | Cutting strips |
| Measuring tape | Planning size |
| Sewing needle and thread | Joining pieces |
| Crochet hook (optional) | Crochet method |
| Rug backing (optional) | Prevent slipping |
| Non-slip pad | Safety on smooth floors |
Most of these items are things you likely already have at home, which keeps the overall project cost low.
How to Prepare Fabric for a Rag Rug

Properly preparing fabric is an important first step before making a rag rug. Clean, cut, and organize your fabric pieces to create a smoother weaving or braiding process and a more even finished rug.
1. Choose the Right Fabric
Not all fabric works equally well for a rag rug. Cotton sheets, t-shirts, denim, and flannel hold up best over time because they are sturdy and do not stretch out of shape easily.
Avoid stretchy synthetic fabrics, very thin materials, and anything that frays excessively. These fabrics tend to break down faster, making the braiding or weaving process more difficult.
2. Plan Your Colors Before Cutting
Sorting colors before you cut strips saves time and keeps the finished rug from looking random. Group your fabrics into two or three color piles, for example, one dark, one light, and one neutral.
This makes it easy to pull a consistent pattern as you braid or crochet. Mixing too many colors at once without a plan tends to produce a muddy look.
3. Wash and Prepare Old Fabric
Always wash and dry fabric before cutting it into strips. This step matters more than it might seem.
- Wash used clothing and linens first
- Treat and remove any visible stains
- Dry the fabric completely
- Iron if the fabric is heavily wrinkled
Washing beforehand prevents the finished rug from shrinking later and keeps it cleaner from the start, since old fabric can carry dust or odors.
4. Cut Fabric Into Strips
Cut your fabric into strips of consistent width. Most rag rugs use strips between 1 and 2 inches wide, though this can vary based on the technique and desired thickness.
Keep the width consistent throughout the project.
If a strip runs short, join it to the next strip rather than starting over. The quickest no-lump join: cut a small slit near the end of both strips, thread one through the other, then pull the tail back through its own slit and pull tight. This creates a flat, secure connection.
Wider strips create a thicker, chunkier rug. Narrower strips give a tighter, more refined pattern but take longer to complete.
How to Make a Braided Rag Rug Step by Step

Start with the basic braiding technique and work through each step carefully to create a sturdy, evenly shaped rag rug. This process turns simple fabric strips into a durable handmade piece for any room.
Step 1: Cut and Join Fabric Strips
Start with three long strips of fabric. Tie or sew the ends together at one end so you have a single starting point for the braid.
Sort your colors ahead of time so you know the pattern you are working toward before you begin.
Step 2: Start Braiding the Fabric
Braid the three strips together using a standard braiding technique. Keep the tension even throughout so the braid does not become loose or uneven in places.
Avoid pulling too tightly, as this can cause the braid to curl or twist instead of lying flat.
Step 3: Shape the Rug
Once you have a length of braid, begin coiling it into your desired shape.
- For an oval rug, curve the braid gradually along the long sides
- For a round rug, coil the braid in a tight spiral
- For a rectangular rug, shape the braid with sharper turns at the corners
Secure each section as you go so the shape holds while you continue adding more braid.
Step 4: Sew or Attach Braided Sections
Stitch the coiled sections together as you build outward.
You can hand-stitch this with a heavy needle and thread, or use a sewing machine set to a wide, sturdy stitch.
Keep the rows flat against each other as you sew to avoid bumps or gaps in the finished rug.
Step 5: Finish the Edges
Tuck in and secure any loose fabric ends. Trim away uneven pieces for a cleaner look. If you want extra durability or grip, add a rug backing to the underside before your final stitches.
How Much Fabric Do You Need to Make a Rag Rug?
Fabric requirements vary depending on the size of the rug and the technique used.
| Rug Size | Fabric Needed |
|---|---|
| Small mat | 5 to 10 old shirts or equivalent fabric |
| Medium rug | 10 to 20 yards of fabric |
| Large area rug | 20 or more yards |
Several factors affect how much fabric you will actually need, including strip width, how thick you want the rug to be, how tightly you weave or braid, and the type of fabric you choose. Thicker strips and looser weaves generally use more fabric per square foot.
How to Make a Rag Rug Last Longer
A little regular care goes a long way toward keeping your rag rug in good shape.
- Vacuum the rug regularly on a low setting
- Shake out dust and debris outdoors
- Spot clean stains as soon as they happen
- Wash according to the fabric type used
- Avoid soaking the rug in excess moisture
- Use a rug pad underneath to reduce wear
Following these habits helps preserve both the shape and color of your handmade rug.
How to Wash and Clean a Rag Rug

Machine Washing: Check the fabric type before tossing your rug in the washer.
Cotton and denim rugs generally hold up fine on a gentle cycle with mild detergent. Avoid harsh chemicals that can weaken the fibers over time.
Hand Washing: For rugs that should not go in a machine, hand washing is a safer option.
- Soak the rug in water with mild detergent
- Gently scrub any dirty areas
- Rinse thoroughly to remove all soap
- Lay flat to air dry completely
Always let the rug dry fully before placing it back on the floor to prevent mildew. For rugs made from mixed fabrics, use cold water and a short, gentle cycle to protect the more fragile pieces.
Frequent Errors When Making a Rag Rug
- Using Different Fabric Thicknesses: Mixing thick and thin fabrics in the same rug creates an uneven texture and an inconsistent look. Group similar fabric weights together before you start cutting strips.
- Cutting Strips Too Narrow: Strips that are too thin produce a weak, flimsy rug that wears out quickly. Stick to wider strips, especially for high-traffic areas.
- Making the Braid Too Loose: A loose braid loses its shape over time and can unravel. Keep even tension throughout the entire braiding process.
- Skipping Fabric Preparation: Skipping the wash step can cause shrinkage or color bleeding after the rug is finished. Always wash and dry fabric before you begin cutting.
- Forgetting Slip Protection: Without a non-slip backing, a rag rug can shift or slide on smooth flooring. Add a rug pad or non-slip material underneath for safety.
Final Thoughts
A rag rug is proof that old fabric still has plenty of life left in it.
With basic tools and a bit of patience, you can transform worn clothing and leftover scraps into something you will actually use every day. It is a project that rewards a little effort with a rug that has real character, something you will not find on a store shelf.
Beginners can start simple with a braided or no-sew method and build confidence from there. Once you get comfortable with the basics, trying a woven or crocheted rug is a natural next step.
The real key to a rug that lasts is proper fabric preparation, consistent strip cutting, and secure finishing at every step. Get those fundamentals right, and the rest of the process falls into place.
Frequently Asked Questions
Is Making A Rag Rug Difficult For Beginners?
No, braided and no-sew methods are simple enough for first-time crafters with no prior experience.
What Is The Best Fabric For A Rag Rug?
Cotton, denim, and flannel work best because they are sturdy, absorbent, and hold their shape well.
Can I Make A Rag Rug Without Sewing?
Yes, a no-sew rug uses a mesh canvas or rug mat, with fabric strips tied directly through the holes.
How Long Does It Take To Make A Rag Rug?
Small rugs can take a few hours, while larger rugs may take several days, depending on the method used.
Can You Mix Fabric Types in the Same Rag Rug?
Yes, but group similar weights together. Mixing very thick and very thin fabrics in the same rug creates an uneven surface that wears inconsistently.