How to Make Slime at Home (7 Types That Actually Work)
Making slime sounds easy. Pour some glue, add a few things, stir, and you are done.
But then it sticks to everything. Or it tears the second you stretch it. Or it never forms at all. That is a measuring problem, not a skill problem.
Slime follows a simple science. Once you understand what each ingredient does, every batch comes out right. It becomes one of the most satisfying craft projects for kids at home to return to.
This post shows you how to make slime using a basic glue base and a borax method. You will also find fun types, a troubleshooting table, and storage tips to keep it fresh for weeks.
What Is Slime?
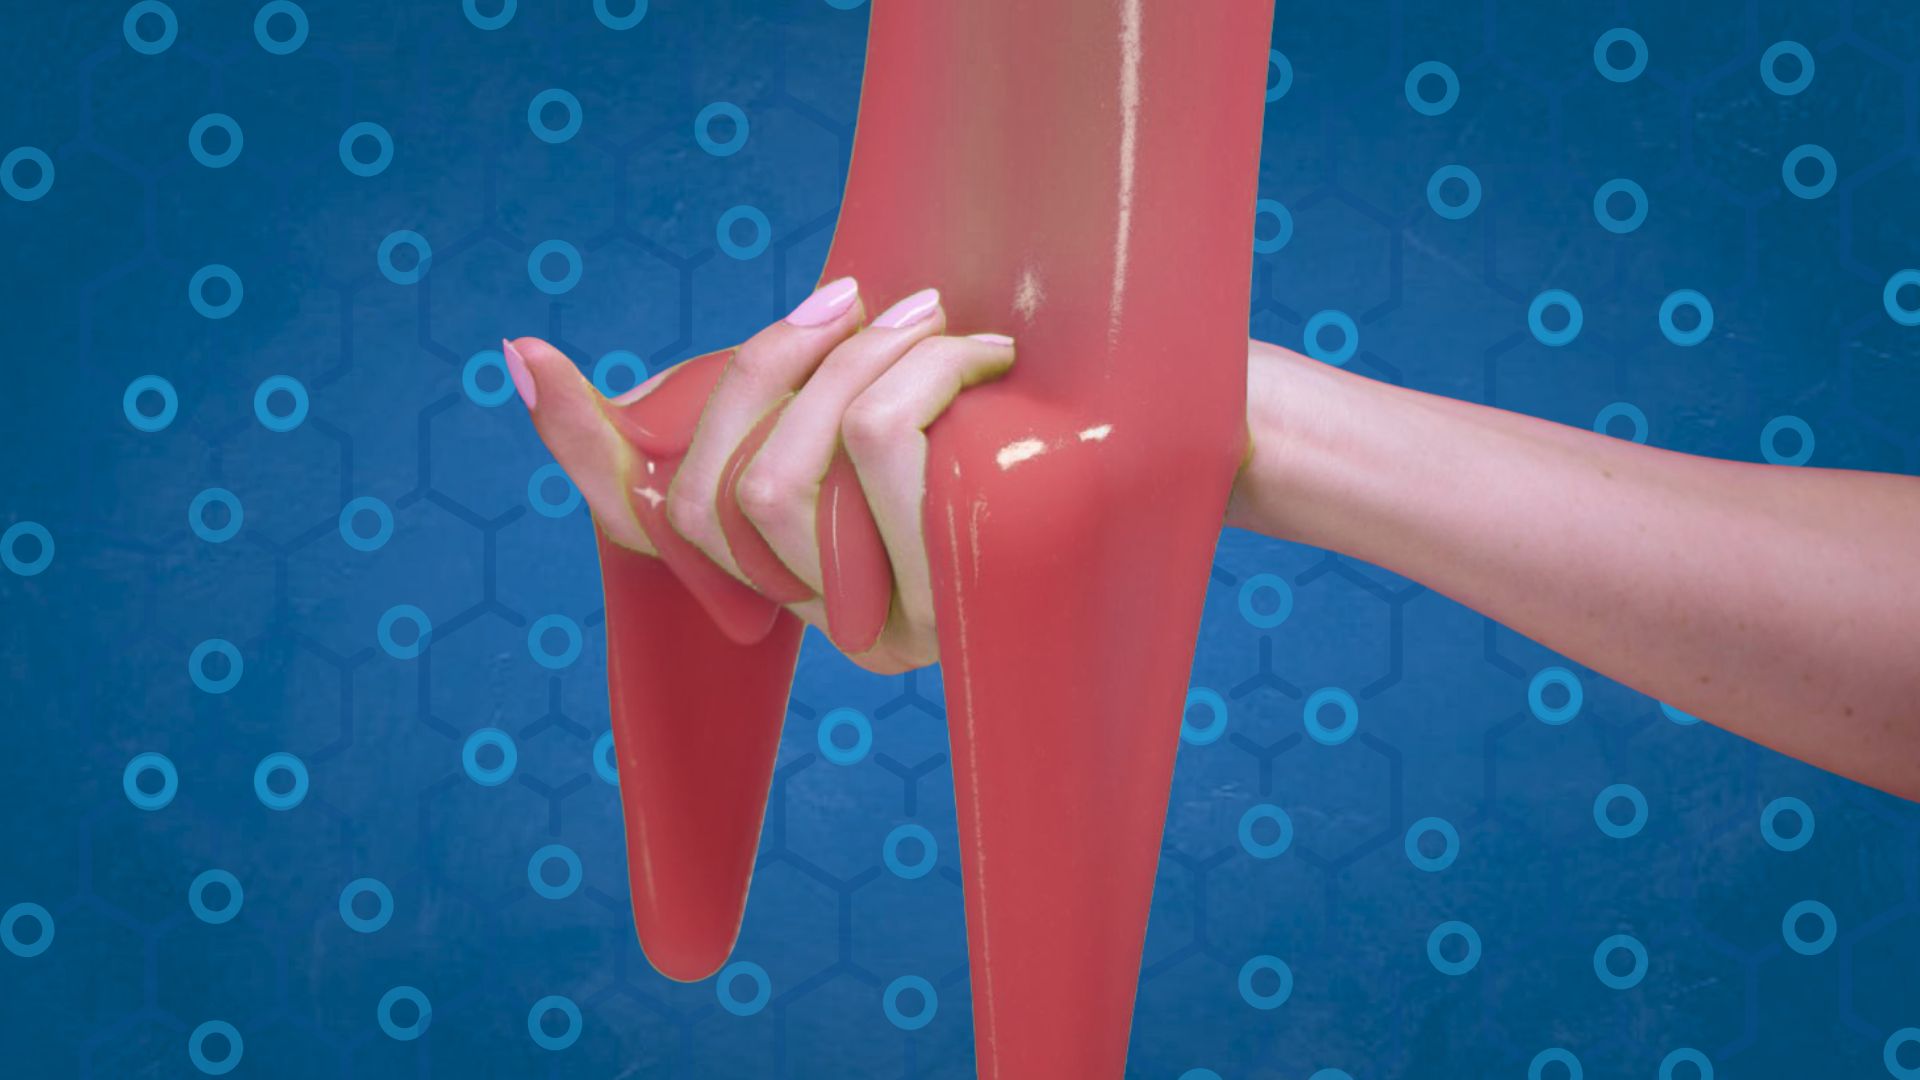
Slime is a stretchy, squishy material you can make at home with just a few ingredients. It starts as a liquid but acts like a soft solid when you pull it. Scientists call this type of material a non-Newtonian fluid, which means it does not flow the way normal liquids do.
It does not pour like water. It does not stay rigid like a solid. It sits somewhere in between. You can squeeze it into a ball, stretch it into a long ribbon, or press it flat. It holds the shape you give it, then slowly spreads back out again.
That combination of stretch and resistance is what makes it so satisfying to play with. It also makes it a fun way to see basic chemistry in action without a lab or special equipment. Projects like making slime or crafting with clay are both great ways to build fine motor skills through hands-on play.
How Does Slime Work?
Slime starts with glue. Inside the glue, there are long chains of molecules called polymers. In liquid form, these chains slide past each other freely. That is why glue pours and spreads.
When you add an activator, such as contact lens solution or a borax mixture, a process called cross-linking takes place. The activator creates bonds between the polymer chains. Those bonds lock the chains together into a flexible web instead of letting them slide.
That web is your slime.
Too little activator leaves the chains too loose. The slime stays sticky. Too much activator pulls the chains too tight. The slime turns stiff and snaps. The right amount gives you a smooth, stretchy result that holds together without breaking.
What You Need Before You Start
Most of these supplies are easy to find at a grocery store or craft store. You do not need specialty tools. A large bowl, a spoon, and the right glue are enough to get started.
Your Tools
- Large mixing bowl
- Spoon or spatula
- Measuring spoons
Main Ingredients
- 1 bottle of white school glue, Elmer’s works well
- 1 bottle of clear glue, for glow-in-the-dark slime only
- ½ tsp baking soda
- Contact lens solution that contains boric acid, check the label before buying
- Food coloring in your chosen colors
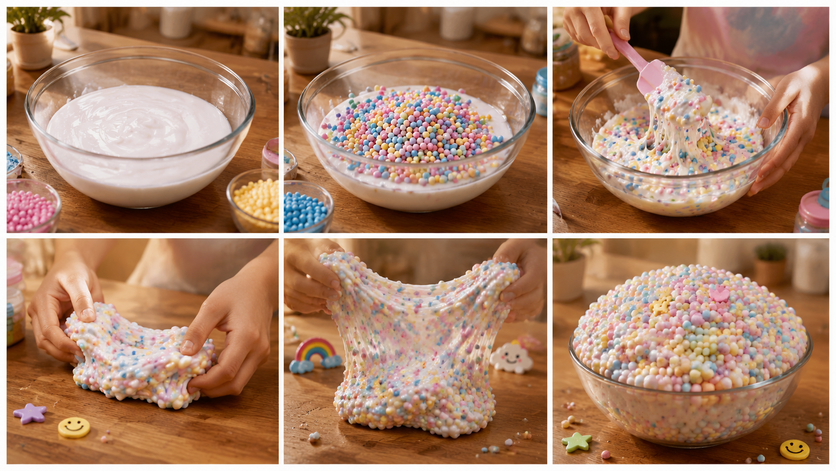
Add-Ins for Different Types
- 2–3 tbsp shaving cream, for fluffy slime
- 1–2 tbsp glitter
- 1–2 tsp glow-in-the-dark powder or paint
- ½ cup Orbeez water beads
- Googly eyes, small plastic worms, or toy teeth
- 1 cup foam beads, for crunchy slime
- 2 tbsp iron oxide powder, for magnetic slime
- 1 strong neodymium magnet, for playing with magnetic slime, not mixing in
For Storage
- One airtight container or zip-lock bag per batch
Classic Slime Recipe With Glue
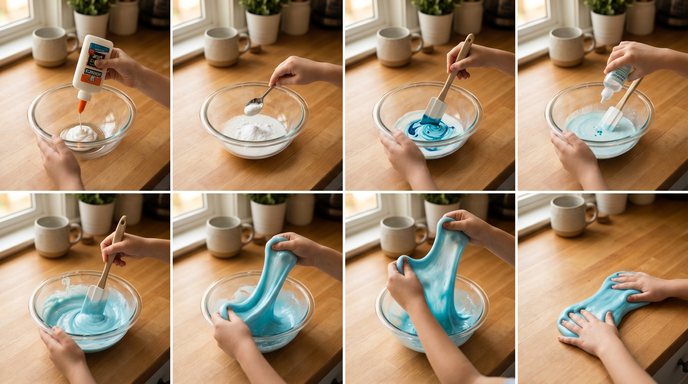
This is your base. Every type in this post builds on these eight steps. Get this one right first, and every variation becomes easy to follow.
Ingredients:
- 1 bottle white school glue
- ½ tsp baking soda
- Food coloring
- Contact lens solution with boric acid
Steps:
- Pour the full bottle of glue into your bowl.
- Add the baking soda. Stir until it fully blends in.
- Add a few drops of food coloring.
- Mix until the color is even throughout the bowl.
- Add contact lens solution, just a few drops at a time.
- Keep stirring. The slime will begin to pull away from the sides of the bowl.
- If it still sticks to your hands, add a few more drops. Keep mixing.
- Pull the slime out. Knead it with your hands for 1–2 minutes until smooth.
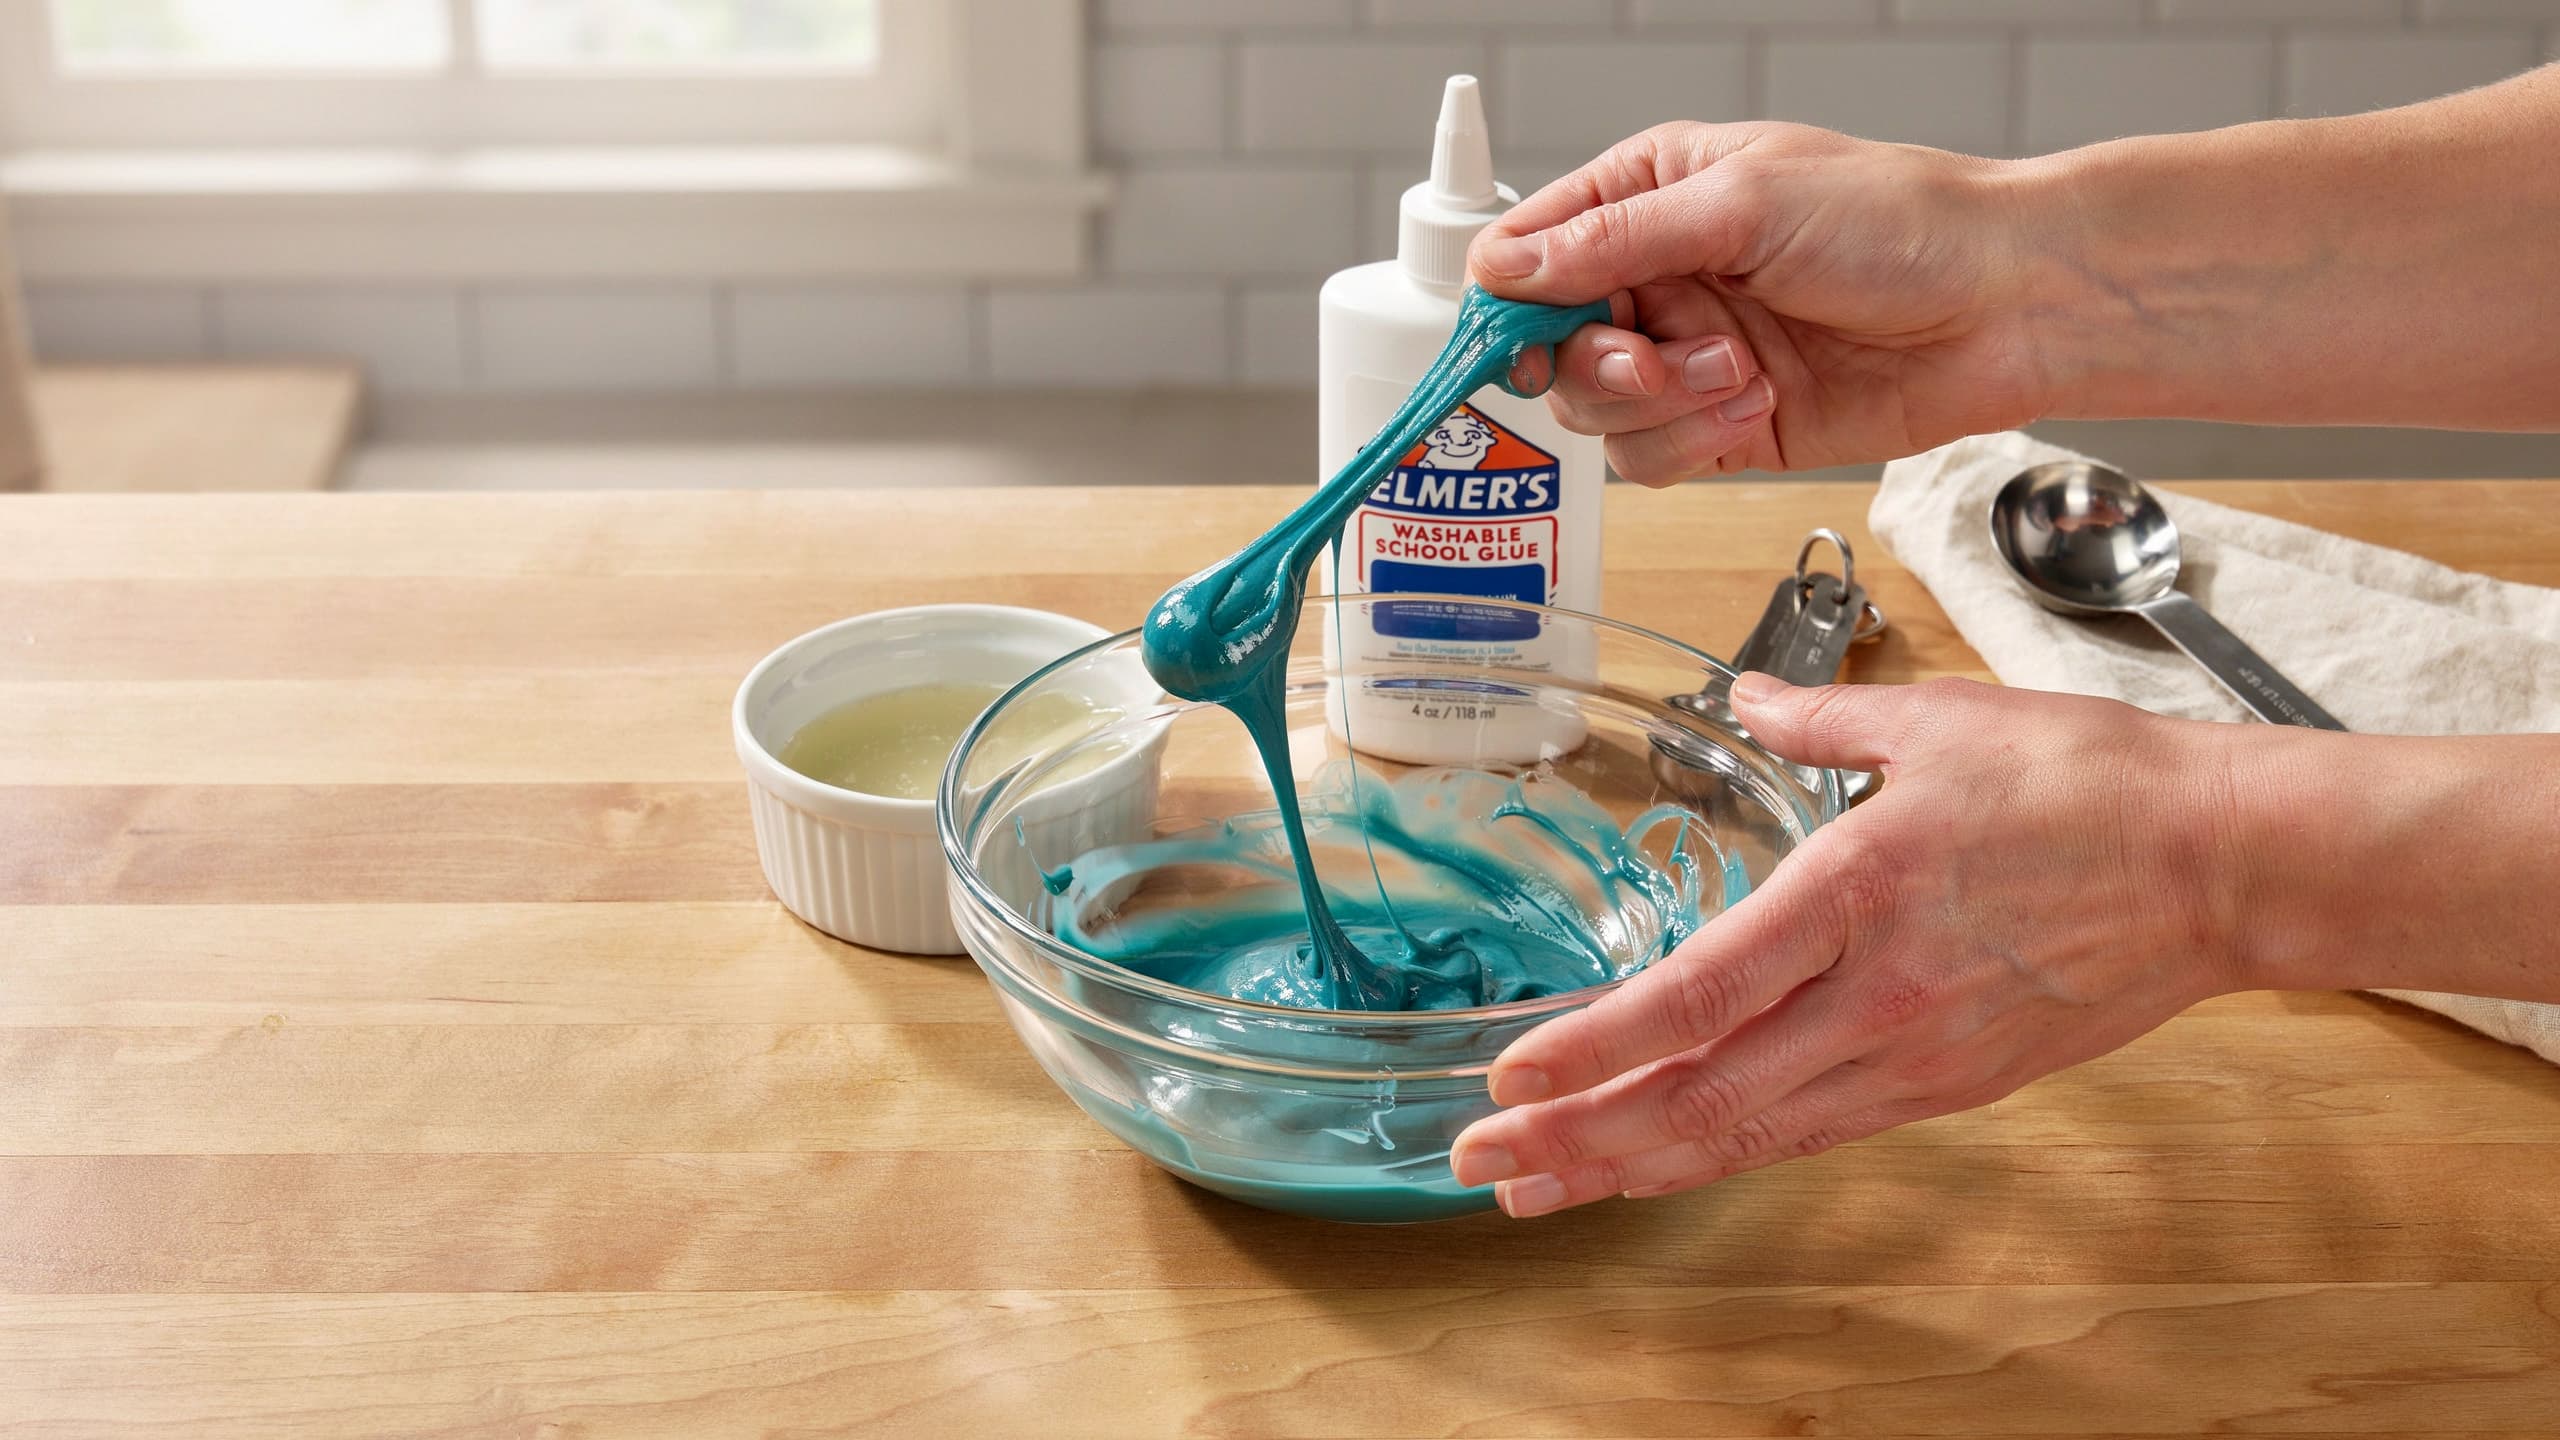
The finished slime should feel stretchy and smooth. It should not stick to your fingers when you pull it slowly. If it does, knead in a tiny drop more of contact solution. This slime recipe with glue is the starting point for all seven types below
How to Make Slime With Borax
Borax is the original slime activator. Many people prefer it because the slime forms fast and holds together well over time. The texture is slightly firmer than the contact solution version, but just as stretchy when the ratio is right.
Make your borax solution first:
- 1 tsp borax powder
- 1 cup warm water
Mix until the borax fully dissolves. Let the solution cool before using it.
Steps:
- Pour one bottle of white school glue into your bowl.
- Add food coloring and stir until even.
- Add the borax solution slowly, a few drops at a time.
- Stir after each addition. The slime will start to pull together and thicken.
- Once it stops sticking to the bowl, pull it out.
- Knead with your hands for 1–2 minutes until smooth.
7 Slime Types to Make at Home
The base is done. Now pick a type and take it further. Each one below builds on the classic recipe above, adding something new. Together with the base, these six types give you 7 slime recipes to try at home.
1. Fluffy Cloud Slime
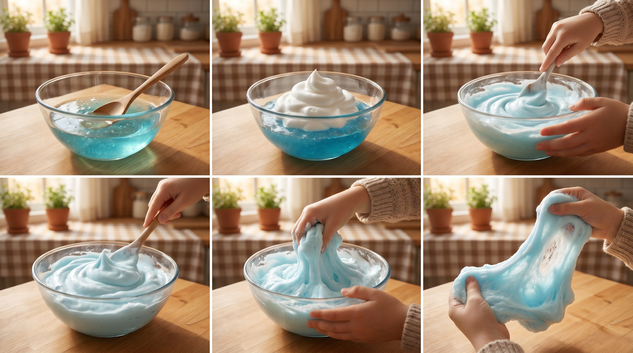
Shaving cream turns regular slime into something soft and cloud-like. It feels lighter than the base and springs back slowly when you press it.
Extra Ingredient: 2–3 tbsp shaving cream
Steps:
- Make the classic base slime (all 8 steps above).
- Scoop shaving cream on top of the finished slime.
- Fold it in slowly, one spoonful at a time.
- Keep folding until the texture feels light and airy.
Add shaving cream gradually. Too much too fast makes the slime too soft to hold its shape.
2. Glitter Sparkle Slime
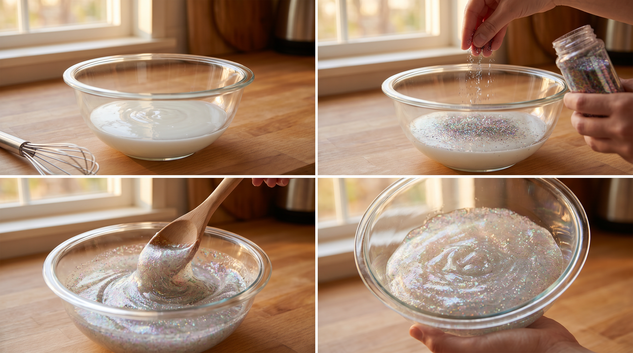
Glitter gives slime a bright, playful shine that catches light when you stretch or twist it. This is one of the simplest variations to make.
Extra Ingredient: 1–2 tbsp glitter (any color or mix)
Steps:
- Make the classic base slime.
- Sprinkle glitter in while the slime is still in the bowl.
- Fold and knead until glitter is spread throughout.
Lay newspaper or paper towels under your workspace first. Glitter spreads fast and sticks to surfaces.
3. Glow-in-the-Dark Slime
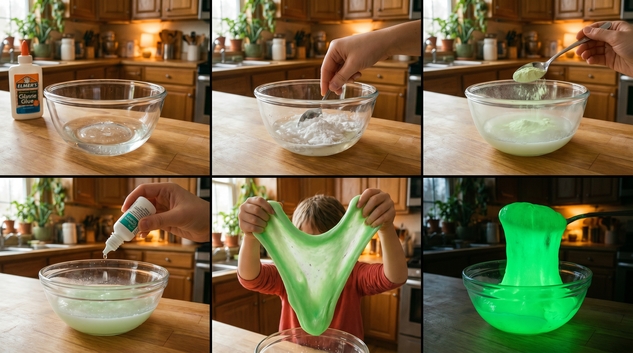
This slime looks plain in daylight but glows brightly after a few seconds under a lamp. Use clear glue, not white, so the glow shows clearly.
Ingredients, different from the classic base:
- 1 bottle of clear glue
- ½ tsp baking soda
- 1–2 tsp glow-in-the-dark powder or glow paint
- Contact lens solution with boric acid
Steps:
- Pour clear glue into your bowl.
- Add baking soda. Stir well.
- Add glow powder or paint. Mix until fully combined.
- Add contact solution, a few drops at a time.
- Mix until slime pulls away from the bowl.
- Knead with your hands until smooth.
Hold the slime under a bright light for 30 seconds, then turn off the lights. The glow lasts several minutes before it needs recharging.
4. Galaxy Slime
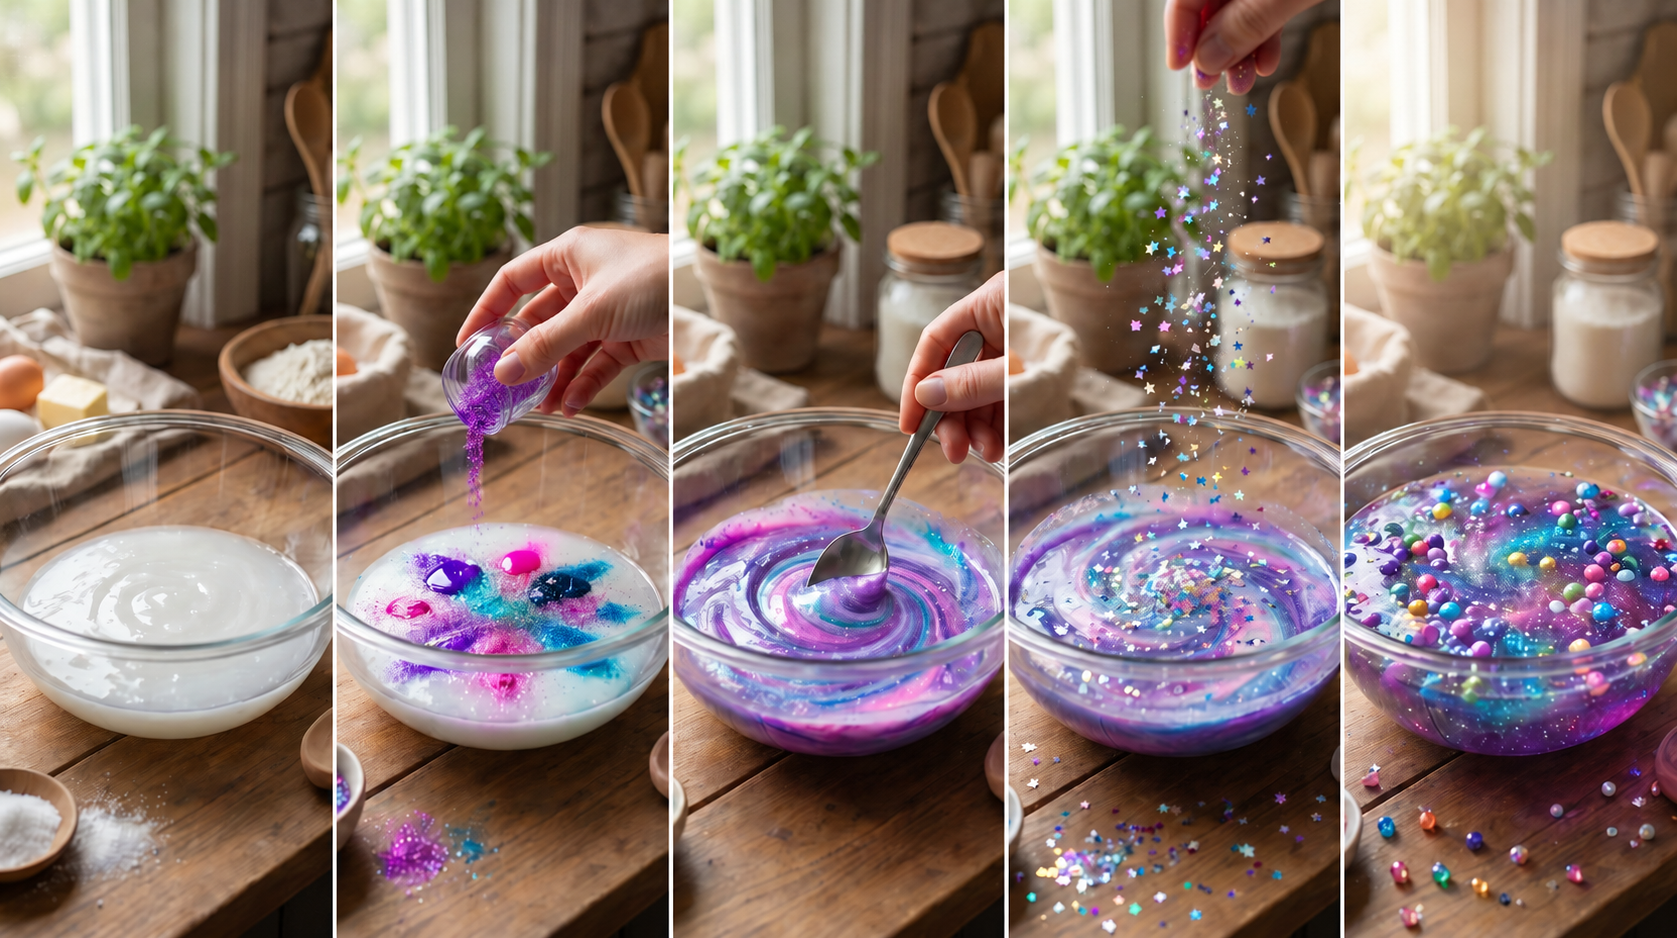
Galaxy slime uses multiple neon colors, glitter, and water beads to create a layered, space-inspired look. The key is to swirl, not fully mix, the colors.
Extra Ingredients:
- Neon food coloring (purple, pink, blue, or green)
- 1 tbsp glitter
- ½ cup Orbeez water beads
Steps:
- Make the classic base using neon food coloring.
- Split the slime and color each piece differently.
- Swirl two colors together loosely. Do not fully blend them.
- Add glitter and fold in gently.
- Press the Orbeez beads into the slime by hand.
Add star-shaped confetti or small metallic beads for a deeper space look.
5. Monster Slime
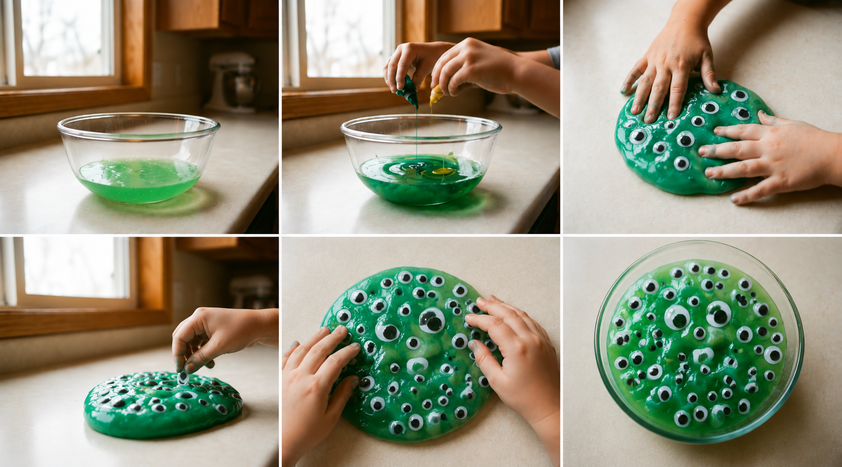
Monster slime is the most creative type in this list. It is made to look and feel like a creature, and kids can build their own version.
Extra Ingredients:
- Green or purple food coloring
- 5–10 googly eyes
- Optional: small plastic worms or toy teeth
Steps:
- Make classic base slime with green or purple coloring.
- Press googly eyes into the slime while it is still fresh and pliable.
- Add plastic worms or toy teeth if using.
- Give your monster a name and shape it however you want.
6. Magnetic Slime
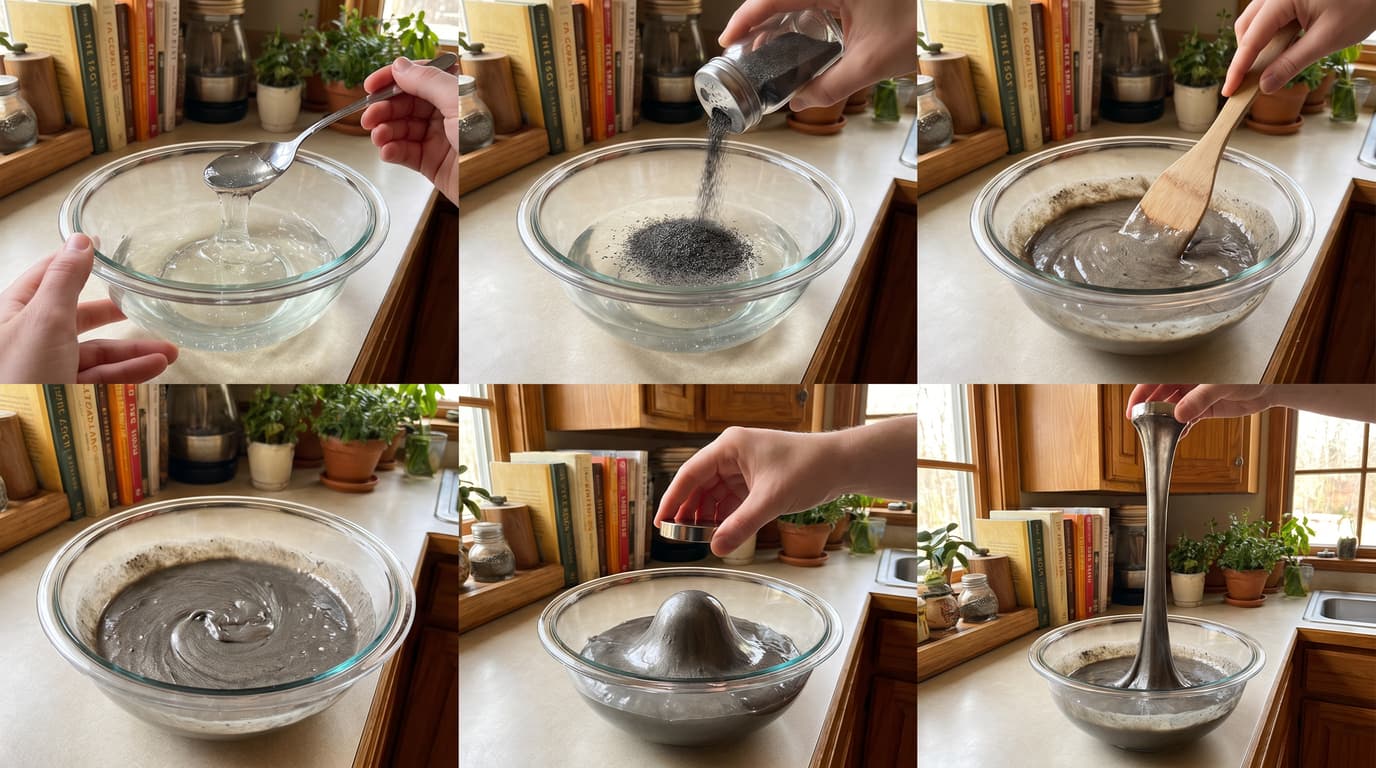
Magnetic slime reacts to a strong magnet. It creeps and pulls toward it without being touched. It works as a science experiment and a toy at the same time.
Extra Ingredients:
- 2 tbsp iron oxide powder
- 1 strong neodymium magnet, for playing with the slime, not mixing in
Steps:
- Make the classic base slime first.
- Lay an old newspaper across your workspace.
- Add iron oxide powder slowly, a small amount at a time.
- Mix well between each addition until the particles spread evenly.
- Hold the neodymium magnet close to the slime, but do not let it touch.
- Watch the slime creep and pull toward the magnet.
Safety Note: Iron oxide powder stains clothes and surfaces. Wear old clothes and cover your workspace with paper. Wash hands thoroughly after use. Keep neodymium magnets away from phones, laptops, and credit cards. Children under 12 should only use neodymium magnets with an adult present. Never let children swallow iron powder, magnets, or any type of slime.
7. Crunchy Slime
Foam beads give this type a bumpy, textured feel and a satisfying sound every time you press or squeeze it.
Extra Ingredient: 1 cup foam beads
Steps:
- Make the classic base slime.
- Add foam beads a little at a time.
- Stir gently between additions so they stay in the bowl.
- Knead until the beads are evenly mixed through.
Add more beads in small batches if you want a heavier crunch. Too many at once can make the slime hard to hold together.
What to Do When Slime Goes Wrong
Most slime problems trace back to too much or too little activator. The fix is almost always simple. Match what your slime is doing to the table below and apply the correction before starting a new batch.
| Problem | Likely Cause | Quick Fix |
|---|---|---|
| Slime is too sticky | Not enough activator | Add contact solution 1–2 drops at a time. Knead after each drop. |
| Slime is stiff or snaps | Too much activator | Knead in a small drop of hand lotion or a tiny amount of plain glue. |
| Slime will not form | Wrong glue type or missing boric acid | Use white school glue. Check the contact solution label for boric acid. |
| Slime feels rubbery | Over-activated | Warm it in your hands. Knead in a few drops of plain white glue. |
| Slime dried out after storage | Exposed to air | Knead slowly for 2–3 minutes. Add one drop of water if needed. |
Tips for Better Slime Every Time
These five habits apply to every recipe in this post. They will reduce failed batches and save time and ingredients.
- Add activator slowly. A few drops at a time are always better than a large pour. You can always add more. You cannot take it back once the slime stiffens.
- Knead for the full time. One to two minutes of hand kneading changes the texture from rough and patchy to smooth and even. Do not skip this step.
- Use room-temperature ingredients. Cold glue or cold contact solution slows the forming process. Let everything sit out for 10 minutes before you start.
- Seal the slime as soon as you stop playing. Even short exposure to air dries out the surface and changes the texture.
- Clean up while everything is still fresh. Slime wipes off bowls and surfaces with a damp paper towel when wet. Dried slime takes much longer to remove.
Conclusion
The first few batches of slime rarely come out perfect. That is normal. Once you see how the texture changes with each drop of activator, you start to get a feel for it. The science is simple. The results just take a few tries to read correctly.
You now know how to make slime using a glue base, how to make slime with borax, and how to take either starting point in seven different directions. Start with the classic base, get comfortable with the feel, then pick one variation that sounds interesting.
Keep your supplies in one box so you can mix a fresh batch quickly whenever the mood strikes. Slime keeps well for weeks when stored right, and making a new type costs almost nothing.
Frequently Asked Questions
How do you make slime without borax?
Use a contact lens solution that lists boric acid as an ingredient. It acts as an activator and completely replaces borax.
How long does homemade slime last?
Stored in a sealed container at room temperature, slime stays good for 2–3 weeks.
Can young kids make slime on their own?
Kids aged 8 and up can handle most steps. Younger children should have an adult nearby to help with measuring and mixing.