How to Make a DIY Compost Bin for Sustainable Gardening
Store-bought compost bins cost $50 to $150. That is a lot for a container meant to hold yard scraps.
You can build a diy compost bin for under $25 using materials you may already have. In many cases, it costs nothing at all.
The problem is not cost. The problem is set up. Bins with no airflow stall. Bins in full sun dry out. Bins loaded with the wrong scraps smell bad fast.
This post walks you through four build options, what to add and what to leave out, how to layer your pile correctly, how long composting takes, and the exact signs that tell you your first batch is ready to use.
What Is a DIY Compost Bin and How Does It Work?
A diy compost bin is a container that turns organic waste into nutrient-rich soil through natural decomposition. Inside, bacteria and other microorganisms break down food scraps and yard waste when they have the right conditions: oxygen, moisture, and a balanced mix of carbon and nitrogen.
When those three elements are in place, the pile heats up, material breaks down, and volume shrinks by 30 to 60 percent. A well-maintained hot compost pile can reach 130 to 160°F internally, which is enough to kill weed seeds and pathogens, according to the U.S. Environmental Protection Agency.
Every compost bin, regardless of design, depends on these two types of input:
- Browns (carbon): Dry leaves, cardboard, newspaper, straw, wood chips
- Greens (nitrogen): Vegetable scraps, fruit peels, coffee grounds, fresh grass clippings
The ratio that keeps the system working: 2 parts browns to 3 parts greens by volume.
What You Need Before Building a DIY Compost Bin
The setup basics matter more than the compost bin design you choose. A poorly placed bin or one without drainage will fail no matter how well it is built.
Before you start, confirm all of these are in place:
- A container with at least 10 to 30 gallons of volume for a useful batch
- Airflow holes on all sides and the bottom for consistent oxygen circulation
- Direct soil contact below the bin (not on concrete or wood decking)
- Easy front or top access for turning and harvesting finished compost
- A spot in partial shade within reach of a garden hose
Full sun dries the pile quickly. Full shade slows decomposition. Partial shade with some morning sun is the right balance.
The Easiest DIY Compost Bin to Build
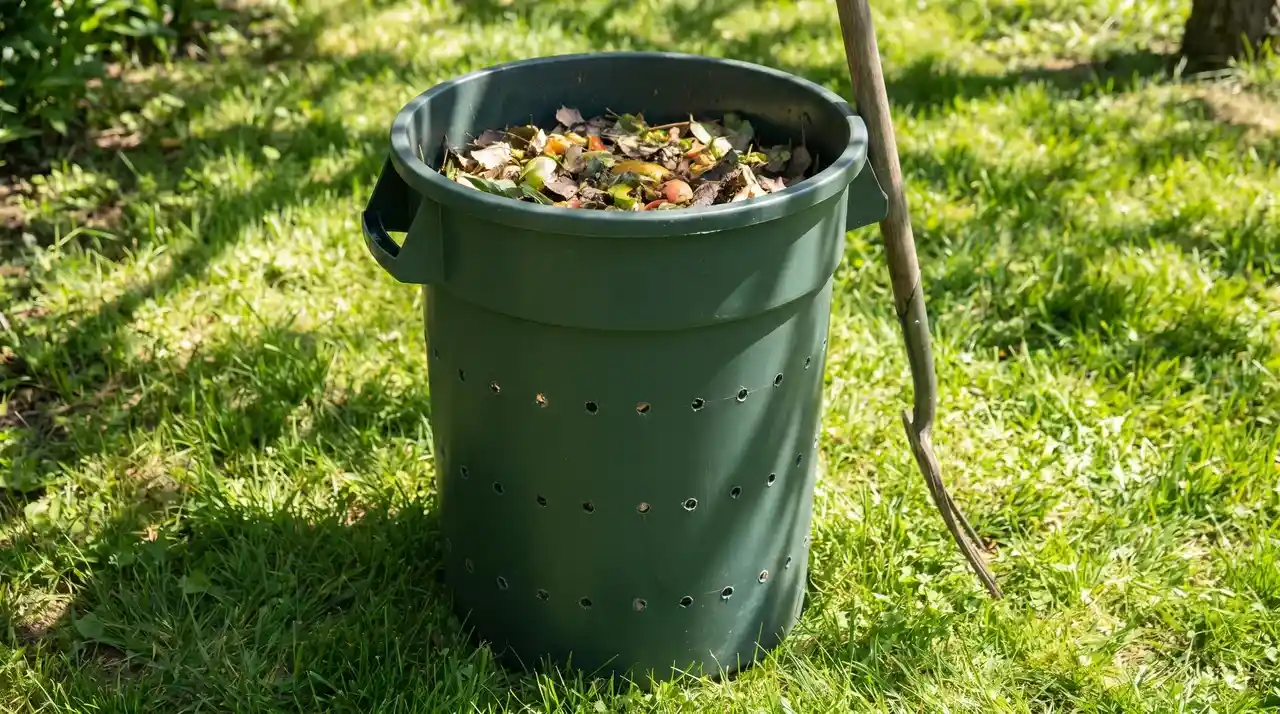
For a first build, a plastic trash can is the most practical starting point. A plastic trash can bin takes under 30 minutes to build, costs $10 to $25, and works for both hot and cold composting.
What you need:
Gather a 32-gallon plastic trash can with a lid, a drill with a half-inch bit, and small mesh squares if you want rodent protection over the holes.
- 32-gallon plastic trash can with a lid
- Drill with a ½-inch drill bit
- Optional: small mesh screen pieces to cover holes
Estimated cost: $10–$25 (free if you have an old can). Time to build: 20–30 minutes
How to Build It, Step by Step
Start with the bottom holes first. Spacing them evenly gives consistent drainage before moving on to the sides.
- Drill 10 to 12 holes in the bottom, spaced evenly, for drainage and airflow
- Drill 8 to 10 holes on each side, about 4 to 5 inches apart, going down
- Cut small mesh squares and glue them inside over each hole to block rodents (optional)
- Set the can directly on grass or soil, not on concrete
- Add a 2-inch base layer of dry leaves or torn cardboard before adding any food scraps
Darker bins hold heat better than light-colored ones. If you have a choice between two old cans, go with the darker one.
Three More Compost Bin Designs That Work
A trash can suits most beginners, but yard size, budget, and composting goals vary. These three compost bin design options use different materials and solve different problems.
Wire Mesh Bin
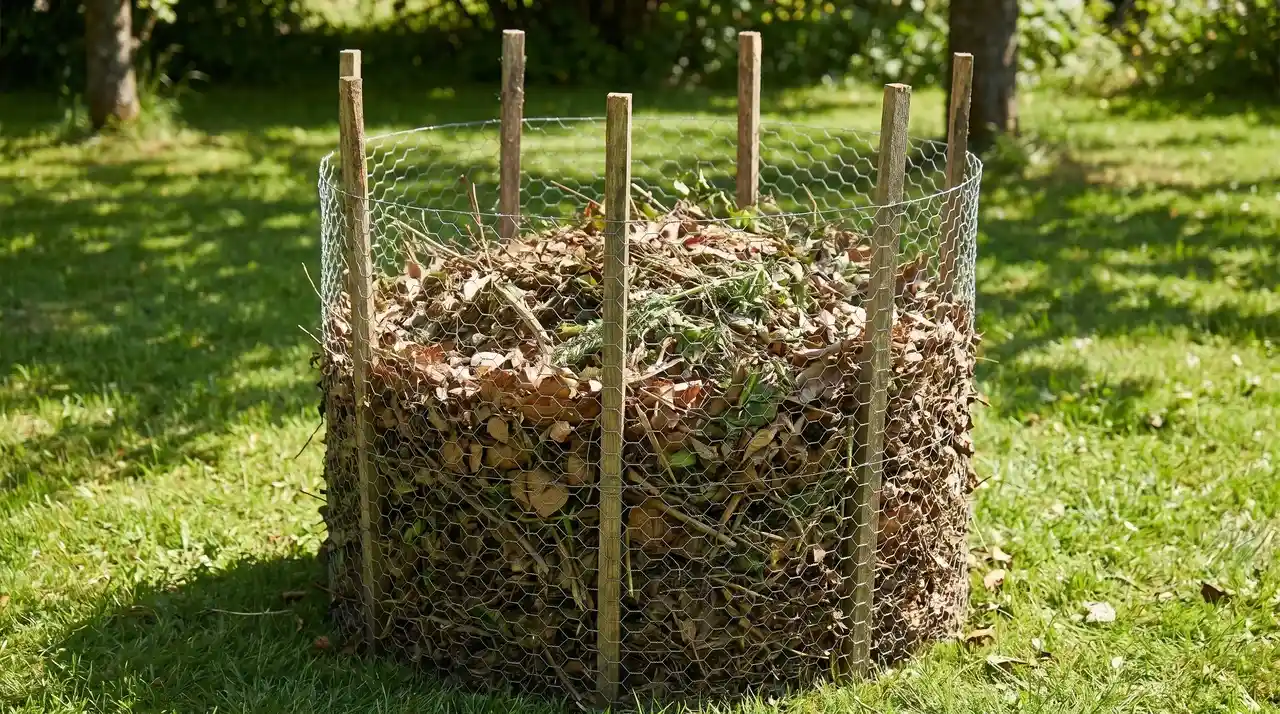
This is the cheapest and fastest build on the list. It costs as little as $5, takes about 15 minutes, and handles large volumes of leaves and yard waste without any issues.
- Best for: Large yards, leaf-heavy composting, tight budgets.
- Materials: 10 feet of chicken wire or hardware cloth, 3–4 wooden stakes, wire ties
- Cost: $5–$15
- Build time: 15–20 minutes
- How: Shape the wire into a cylinder about 3 feet wide. Secure the ends with wire ties. Drive stakes into the ground around the outside for support.
- Note: Easy to open up and turn the pile. Not the best for food scraps alone: works great for leaves and yard waste.
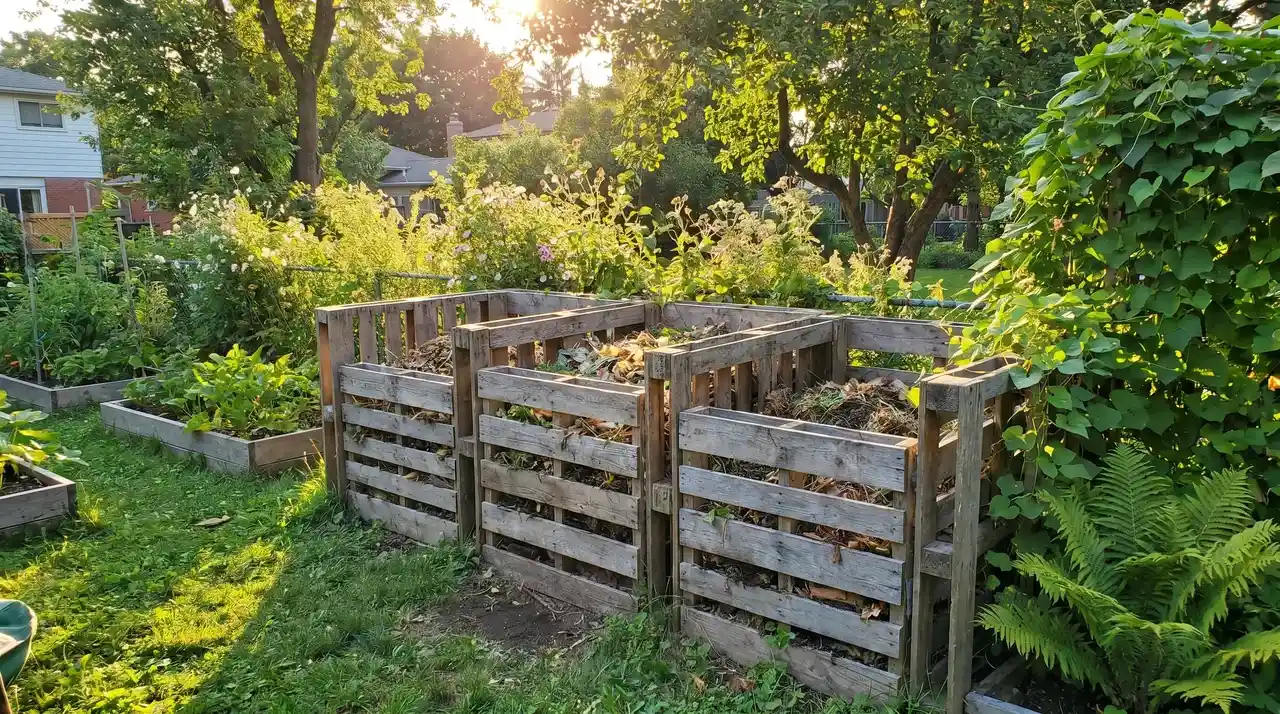
Pallet Bin
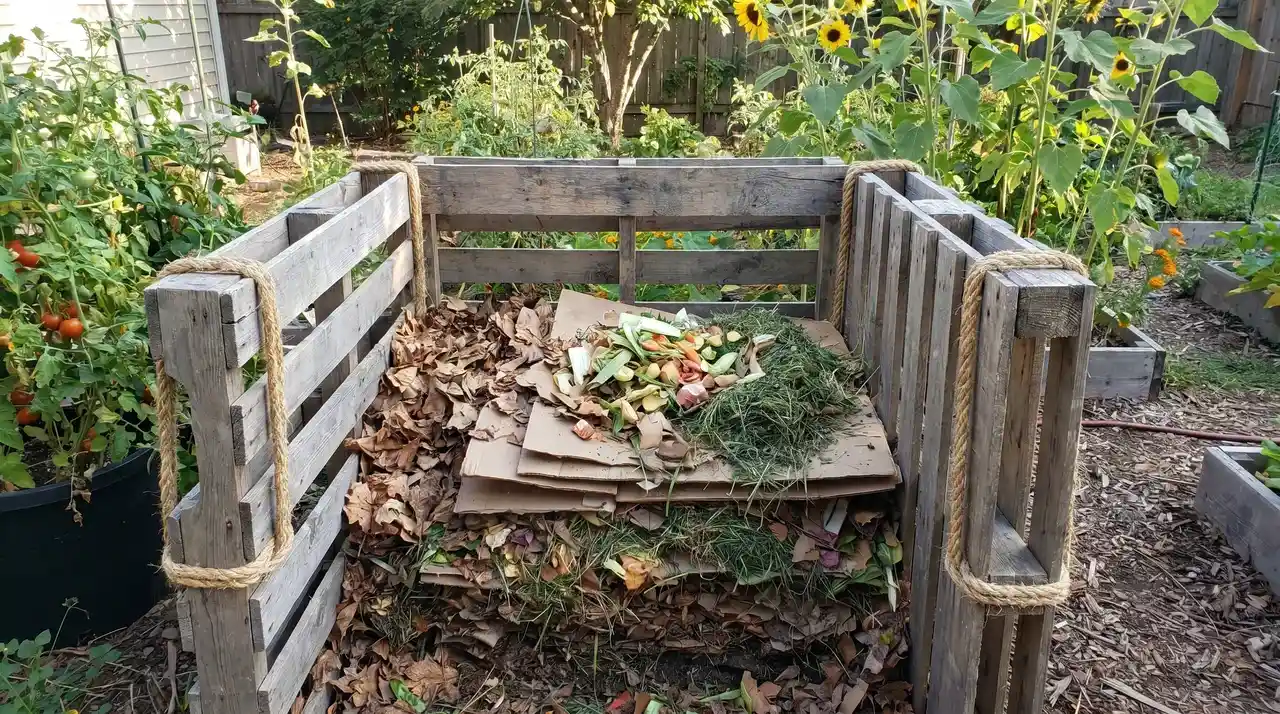
Got access to free pallets? This build costs almost nothing and handles high-volume composting well. It’s one of the most popular DIY setups for good reason.
- Best for: High-volume composting, free materials, rural or large-lot settings.
- Materials: 3–4 wooden pallets, zip ties or rope, optional hardware cloth for lining
- Cost: Free to $10
- Build time: 30–45 minutes
- How: Stand three pallets in a U-shape. Secure the corners with zip ties or rope. Leave the front open for access.
- Note: The gaps in pallets provide natural airflow. Line the inside with ½-inch hardware cloth if rodents are a concern in your area.
Wood Frame 3-Sided Bin
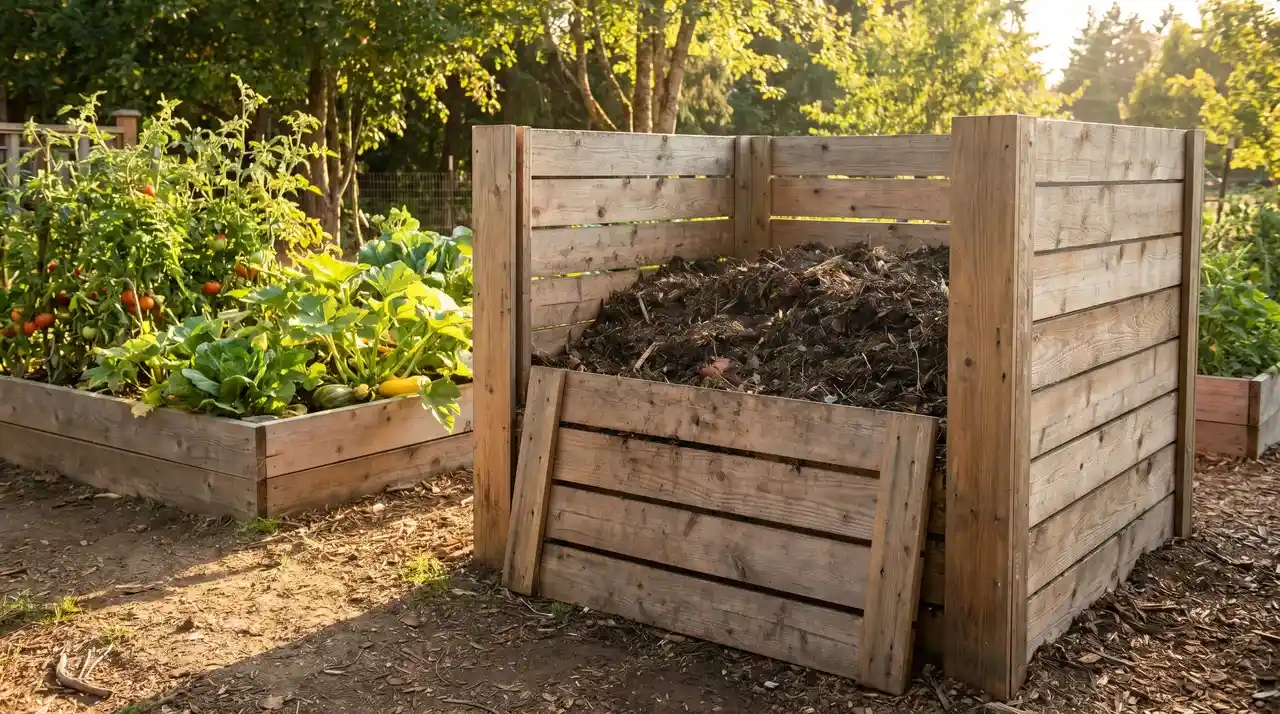
This is the most permanent option on the list. It looks clean, lasts for years, and gives you easy front access when it’s time to turn or harvest.
- Best for: Serious gardeners who want a permanent, good-looking setup.
- Materials: Untreated cedar or pine boards (2×6), 4×4 corner posts, exterior screws, post-hole digger
- Cost: $40–$80
- Build time: 2–4 hours
- How: Build four walls using horizontal boards between corner posts. Leave the front boards as removable slats so you can slide them out for easy scooping.
Important: Use only untreated lumber. Pressure-treated wood contains chemicals that can leach into your compost and eventually into your soil.
What to Put In Your DIY Compost Bin (and What to Skip)
Every batch depends on the right balance between browns and greens. Getting this ratio right is the single most important factor in a working diy compost bin.
Correct ratio: 2 parts browns to 3 parts greens by volume. Too many greens and the pile turns wet and smells fast. Too many browns, and it dries out and stalls
| Browns (Carbon) | Greens (Nitrogen) |
|---|---|
| Dry leaves | Vegetable scraps |
| Cardboard (torn small) | Coffee grounds + filters |
| Newspaper | Grass clippings |
| Paper bags | Fresh plant trimmings |
| Straw | Fruit peels |
| Wood chips | Eggshells |
Always leave these out:
- Meat, fish, and dairy attract rodents and create strong odors
- Cooked food with oil or sauce breaks down poorly and draws pests
- Diseased or pest-ridden plants can spread problems back to your garden
- Pet waste contains harmful bacteria that can survive composting
- Glossy or coated paper: does not break down properly
Quick rule: If it came from a plant and isn’t diseased or coated, it probably belongs in the bin.
How to Layer Your Compost for Best Results
Layering is where many first-time composters go wrong. Dumping greens in without covering them causes odors within a day or two and draws insects fast.
Follow this order every time you add new material:
- Browns (base layer, 2 to 3 inches deep)
- Greens (thin middle layer)
- Browns (top cover, 1 to 2 inches deep)
The top brown layer is the most important step. It locks in moisture, blocks odors, and keeps pests out. The pile should feel like a wrung-out sponge: damp but not dripping. If it drips when squeezed, add dry leaves. If it crumbles dry, add a slow pour of water.
How Long Does Composting Take?
Composting time depends on which method you use, how small the materials are, and how often you turn the pile. Knowing which type you are running sets realistic expectations from the start.
| Method | Time to Finish |
|---|---|
| Hot composting (turning every 2 weeks) | 2 to 6 weeks |
| Cold composting (minimal turning) | 2 to 6 months |
| Leaf-heavy piles (mostly browns) | 6 to 12 months |
You can shorten composting time by:
- Chopping or tearing scraps into smaller pieces before adding them
- Turning the pile every 2 to 3 weeks with a garden fork
- Adjusting moisture after heavy rain or dry spells
- Keeping the brown-to-green ratio in balance throughout
How to Keep Pests Out of a DIY Compost Bin?
Pests show up when fresh food scraps sit uncovered at the top of the pile. A few simple habits stop the problem before it starts.
By bin type:
- Trash can bin: the lid keeps rodents out. Always bury fresh food scraps under a layer of browns before closing the lid.
- Wood frame bin: attach ½-inch hardware cloth to the inside walls and staple a mesh floor to the base.
- Pallet bin: line the inside walls with hardware cloth. Bury the base 4–6 inches into the ground or add a mesh floor.
- Wire mesh bin: best for yard waste only. If you add food scraps, bury them deep in the center and cover well.
Extra habits that help:
- Always cover new food scraps with a 2-inch layer of dry leaves or cardboard before closing the bin
- Sprinkle used coffee grounds on top of each layer as a mild natural deterrent
- Add food scraps in small amounts each time rather than one large weekly dump
- Check the bin after heavy rain, as wet piles are more attractive to insects
Common DIY Compost Bin Mistakes to Avoid
These are the same errors beginners make over and over. Knowing them upfront saves months of frustration.
| Mistake | What Happens | Fix |
|---|---|---|
| Wrong location (full sun or deep shade) | The pile dries out or breaks down too slowly | Move to partial shade near a water source |
| Too many greens, not enough browns | The pile turns wet and smelly | Add 2 to 3 parts of browns for every part of greens |
| Dumping food in one large batch | Attracts rodents and insects | Add small amounts and cover each time |
| Never turning the pile | Decomposition slows significantly | Turn every 2 to 3 weeks with a garden fork |
| Stopping before the batch is done | Unfinished compost is misread as failure | If it smells earthy and is shrinking, it is working |
How to Know When Your Compost Is Ready to Use
Finished compost looks and smells nothing like the scraps that went in. These signs tell you when a batch is ready for the garden. If one or two signs are missing, let the pile rest another 2 to 4 weeks.
Signs your compost is ready:
- Dark brown, crumbly texture that looks and feels like rich garden soil
- No original materials visible, no recognizable eggshells, leaves, or plant stems
- Earthy smell, not sour, rotten, or sharp like ammonia
- Cool temperature, the pile has stopped generating internal heat
Once finished, compost works well as a soil amendment in garden beds, containers, and as a top dressing around outdoor plants. Caring for outdoor plants like mums and other perennials improves noticeably when finished compost is worked into the bed each spring.
Connclusion
Building a diy compost bin is one of the most practical weekend projects for any home with outdoor space. A 32-gallon trash can, a drill, and 30 minutes give you a working system that turns kitchen scraps and yard waste into free, usable soil.
Keep the ratio in check: 2 to 3 parts browns for every part of greens. Cover food scraps each time you add them. Turn the pile every couple of weeks for faster results.
Cold composting takes time, but the payoff is real. Once your first batch turns dark, crumbly, and earthy-smelling, the whole process clicks into place.
Start small with one bin. One batch. Your garden beds will show the difference within a single growing season.
Frequently Asked Questions
Can I Use a Regular Plastic Storage Bin as a Compost Bin?
Yes. Drill holes in the bottom and all four sides for airflow, and place it on soil or grass rather than concrete. Darker bins hold heat better.
How Often Should I Turn My Compost?
Every 2–3 weeks is enough. More frequent turning speeds up the process, but it’s not required. A pile that’s never turned will still compost: just more slowly.
Do Diy Compost Bins Smell Bad?
A well-managed bin should smell like soil, not garbage. Bad odors usually mean too many greens, not enough airflow, or excess moisture. Add dry leaves and drill more holes to fix it.