How to Make a Paper Boat for Kids and Beginners

You need one sheet of paper and five minutes. That is all.
Learning how to make a paper boat is one of those skills that stays with you. It combines simple folding with basic science, and the result actually floats on water.
Most folding guides rush through the steps or skip the parts that matter. This one does not.
Here, you will learn every fold in order and why each one works. You will also find tips on choosing the right paper, avoiding common mistakes, and making your boat float longer.
What Is a Paper Boat?
A paper boat is a simple origami model made from one rectangular sheet. No scissors. No glue. Just clean, repeated folds that create a small floating structure.
Each fold builds on the last. The result is a hollow, balanced base that can sit on water without sinking right away.
Why Do Paper Boats Stay Popular? Paper boats have remained popular because anyone can make one with no supplies or experience.
Teachers use them in early STEM lessons to show how shape affects function. Folding a boat and testing whether it floats connects geometry to real-world results kids can see and test themselves.
Materials Needed for Making a Paper Boat
You only need one sheet of standard A4 or US Letter printer paper to get started. Thicker paper makes clean creases harder to press. Thinner paper collapses before it holds its shape. Standard 80 gsm printer paper sits in the middle and works best.
Optional items that help:
- A ruler (to press creases flat on the first few folds)
- Crayons or wax (to coat the paper before folding for longer float time)
- Colored paper (for decoration before you start folding)
- Clear tape (to seal the bottom seam of the finished boat)
Best Paper for a Paper Boat
The paper type changes how long your boat floats. Here is a quick comparison:
| Paper Type | Float Time | Notes |
|---|---|---|
| Wax paper | 10 to 20+ minutes | Water-resistant coating slows absorption |
| Watercolor paper (90 gsm+) | 5 to 15 minutes | Dense and slow to absorb water |
| Magazine paper | 3 to 8 minutes | Coated surface slows water entry |
| Standard printer paper (80 gsm) | 1 to 4 minutes | Best starting point for beginners |
| Newspaper | Under 1 minute | Too thin; soaks through very fast |
Paper weight tip: Too thin (tissue paper) and the folds collapse. Too thick (cardstock), and the creases will not stay sharp. 80 to 90 gsm printer paper folds flat, holds creases well, and opens into a clean boat shape.
How to Make a Paper Boat Step by Step
These are the full folding instructions for the classic paper boat. Follow each step in order. Take your time on the first two folds since they set up everything that comes after.
Step 1: Fold the Paper in Half
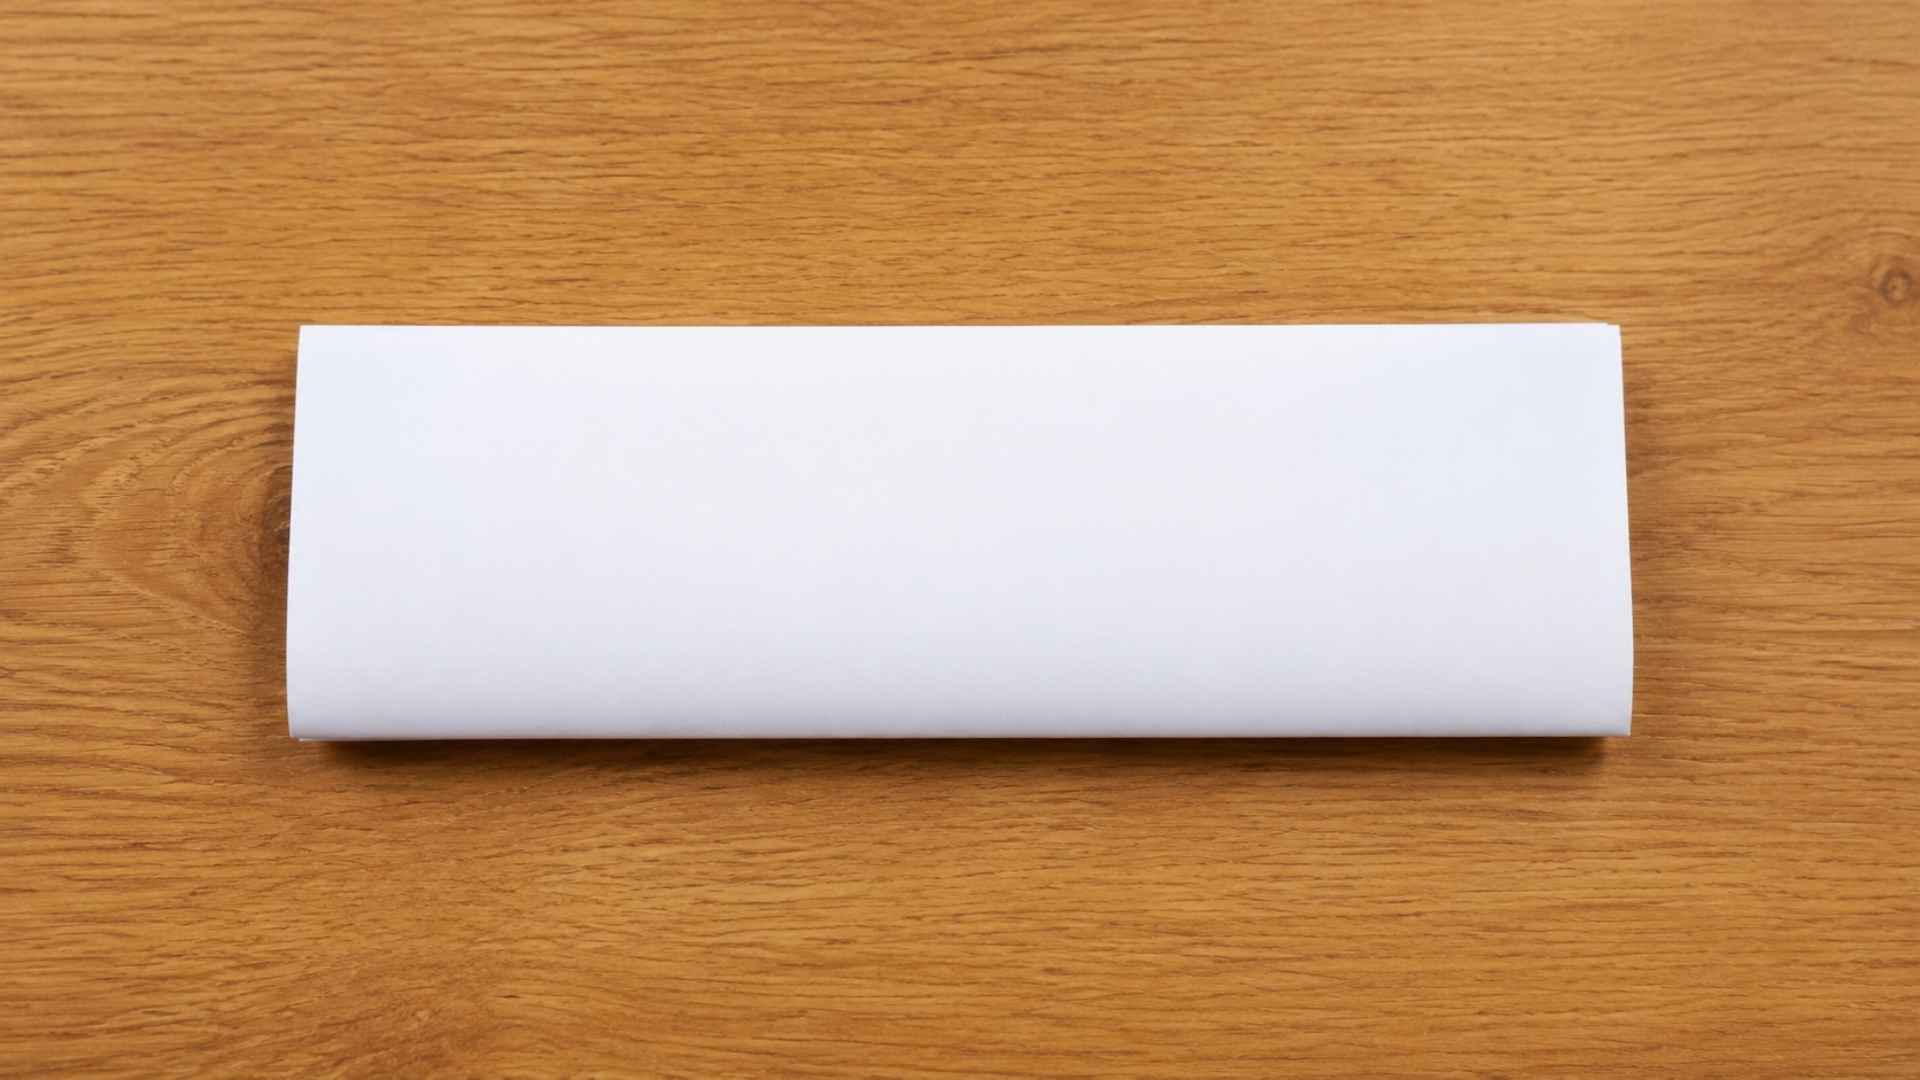
Place your sheet flat with the long side running left to right. Fold the top half down to meet the bottom edge. Line up the corners as closely as you can. Press along the fold with your fingernail to make a sharp crease.
You now have a long, narrow rectangle. The folded edge faces you at the bottom.
Step 2: Create the Triangle Fold
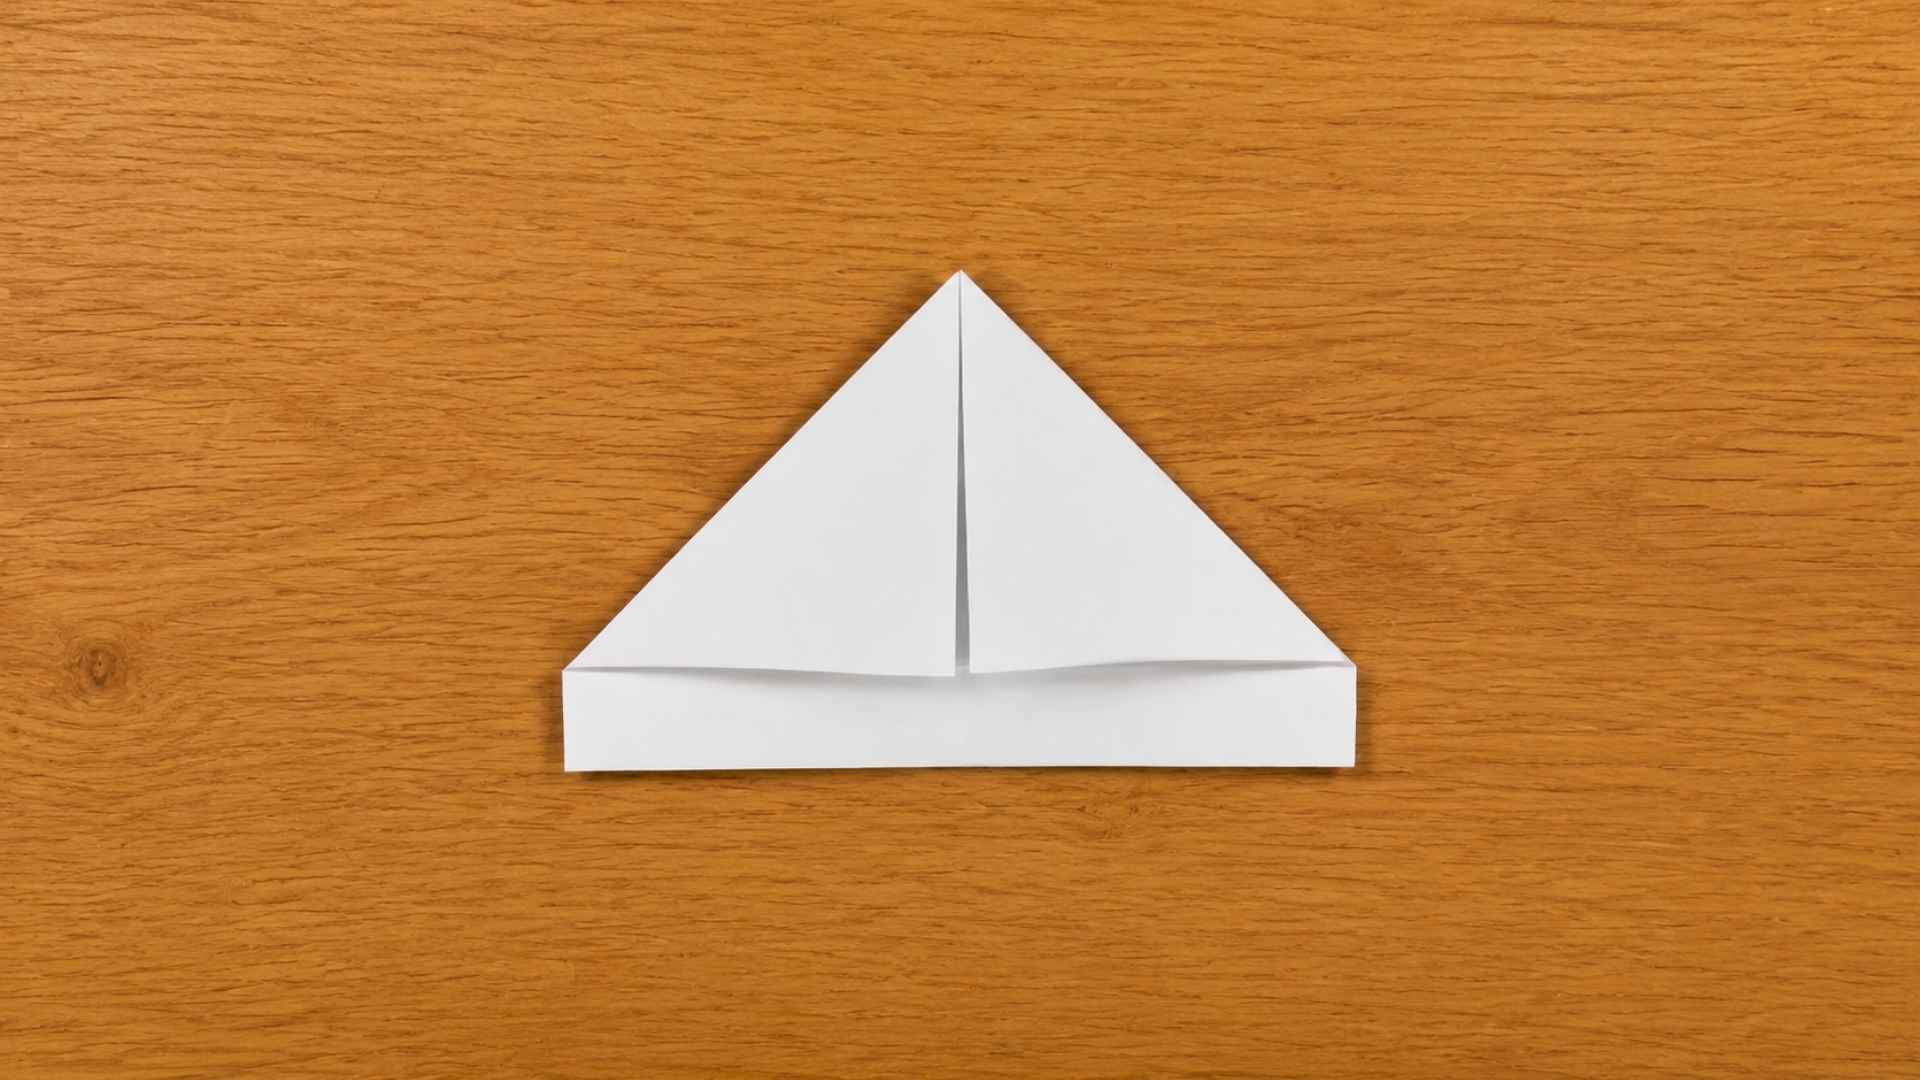
Keep the folded rectangle in front of you with the open edges at the top. Fold the top-left corner down to the center of the paper. The corner should point to the middle of the bottom edge. Press it flat. Now fold the top-right corner down the same way.
You will see a triangle shape at the top. A small strip of paper still shows at the bottom. Do not fold that strip yet.
Step 3: Fold Up the Bottom Strip
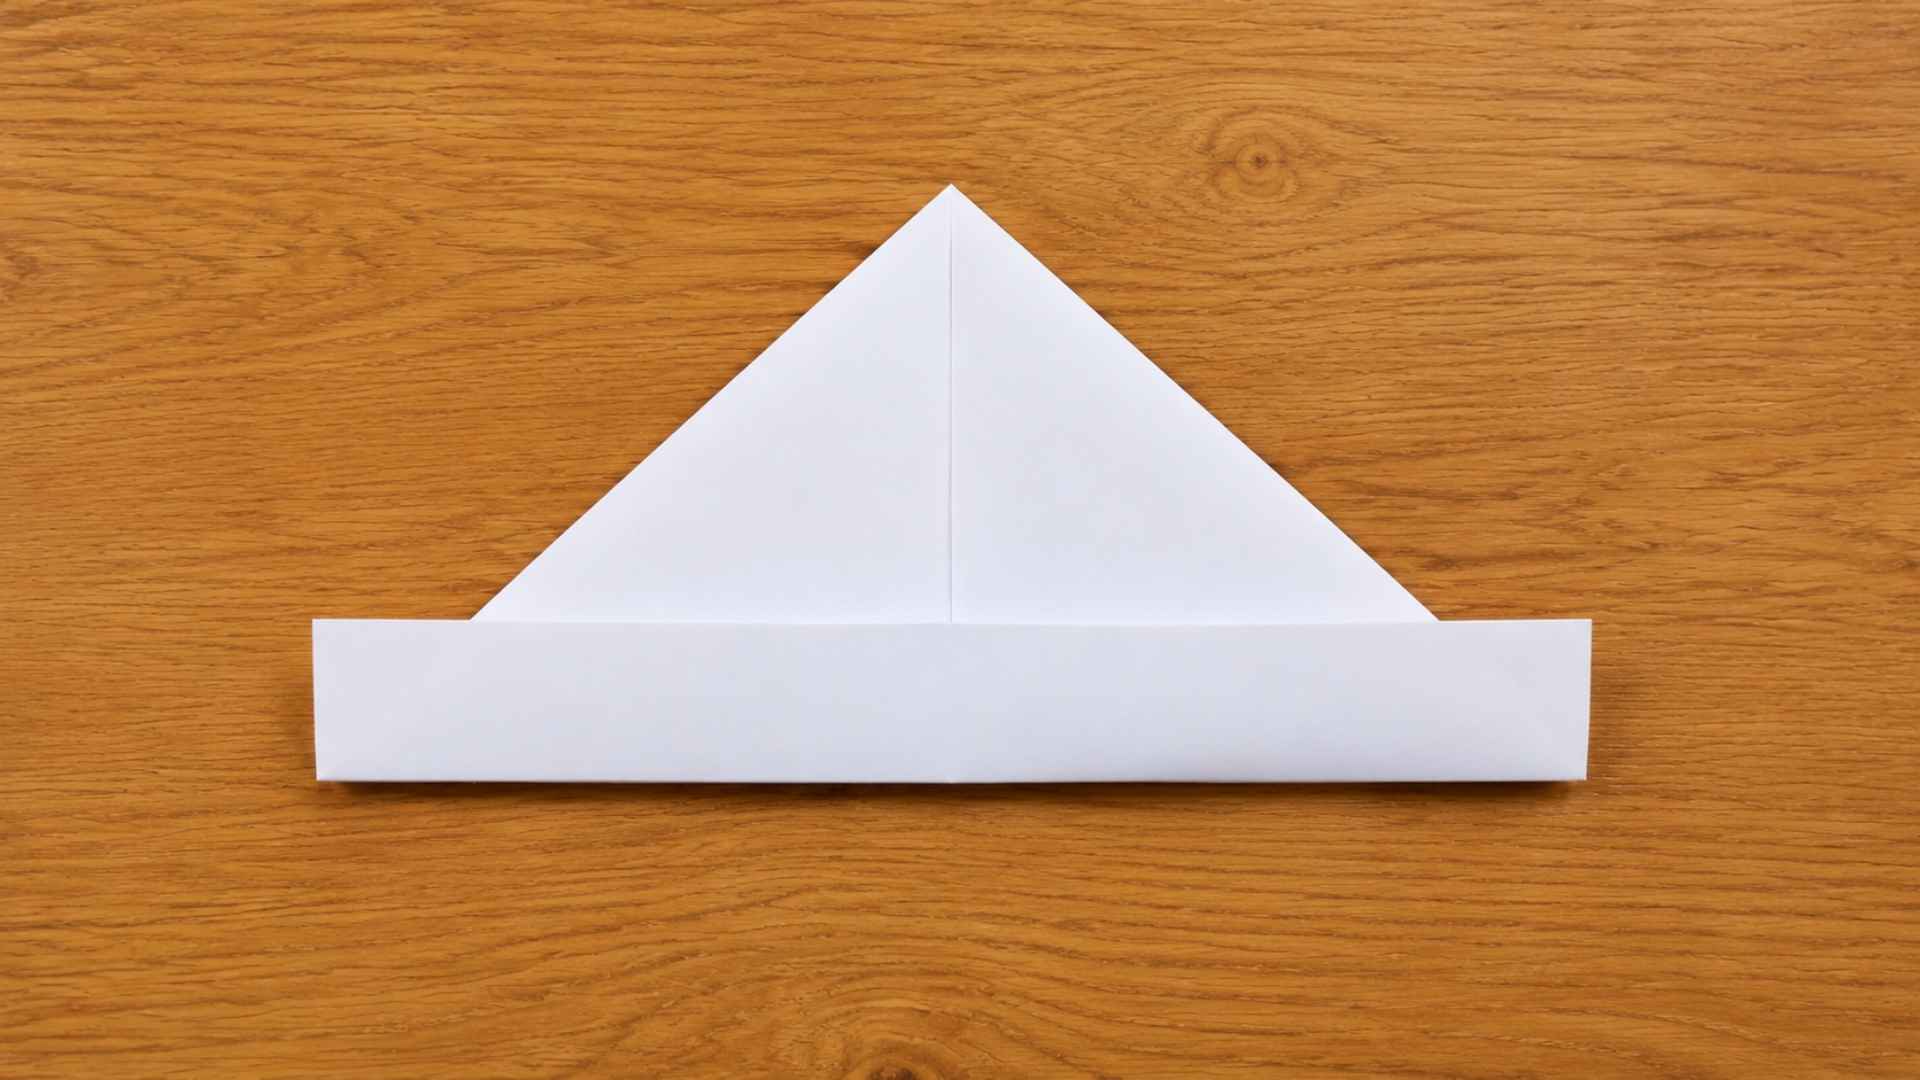
Fold the bottom strip on the front side up over the base of the triangle. Press it flat. Flip the shape over. Fold the bottom strip on the back side up the same way.
You now have a paper hat shape. It looks like a triangle sitting on a folded base.
Step 4: Open and Flatten into a Diamond
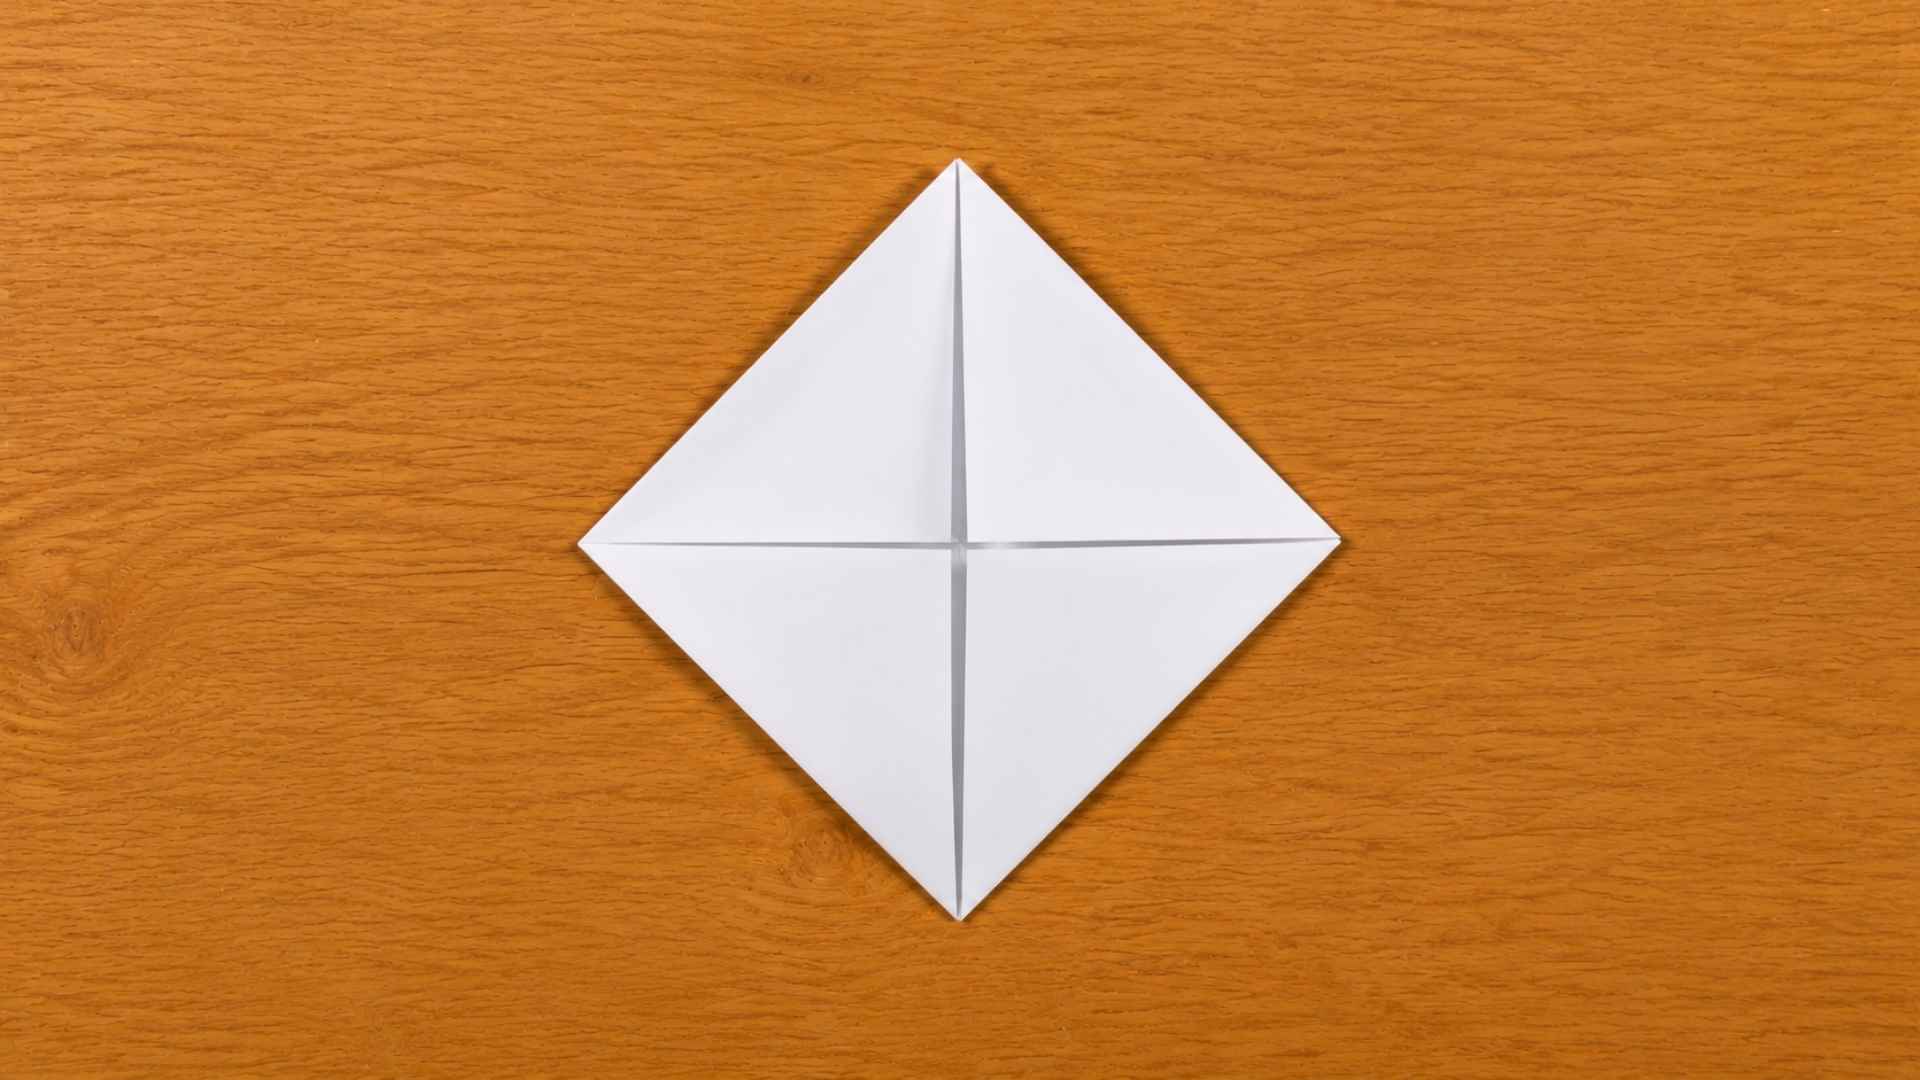
Hold the hat with both hands. Place your fingers inside the open bottom. Gently push the two side points toward each other. The hat will open from the inside. Keep pressing until the shape flattens into a square or diamond.
Flatten it completely so all four layers sit together. Do not rush this step. Forcing it will loosen the folds from Step 2.
Step 5: Fold the Bottom Corners Up
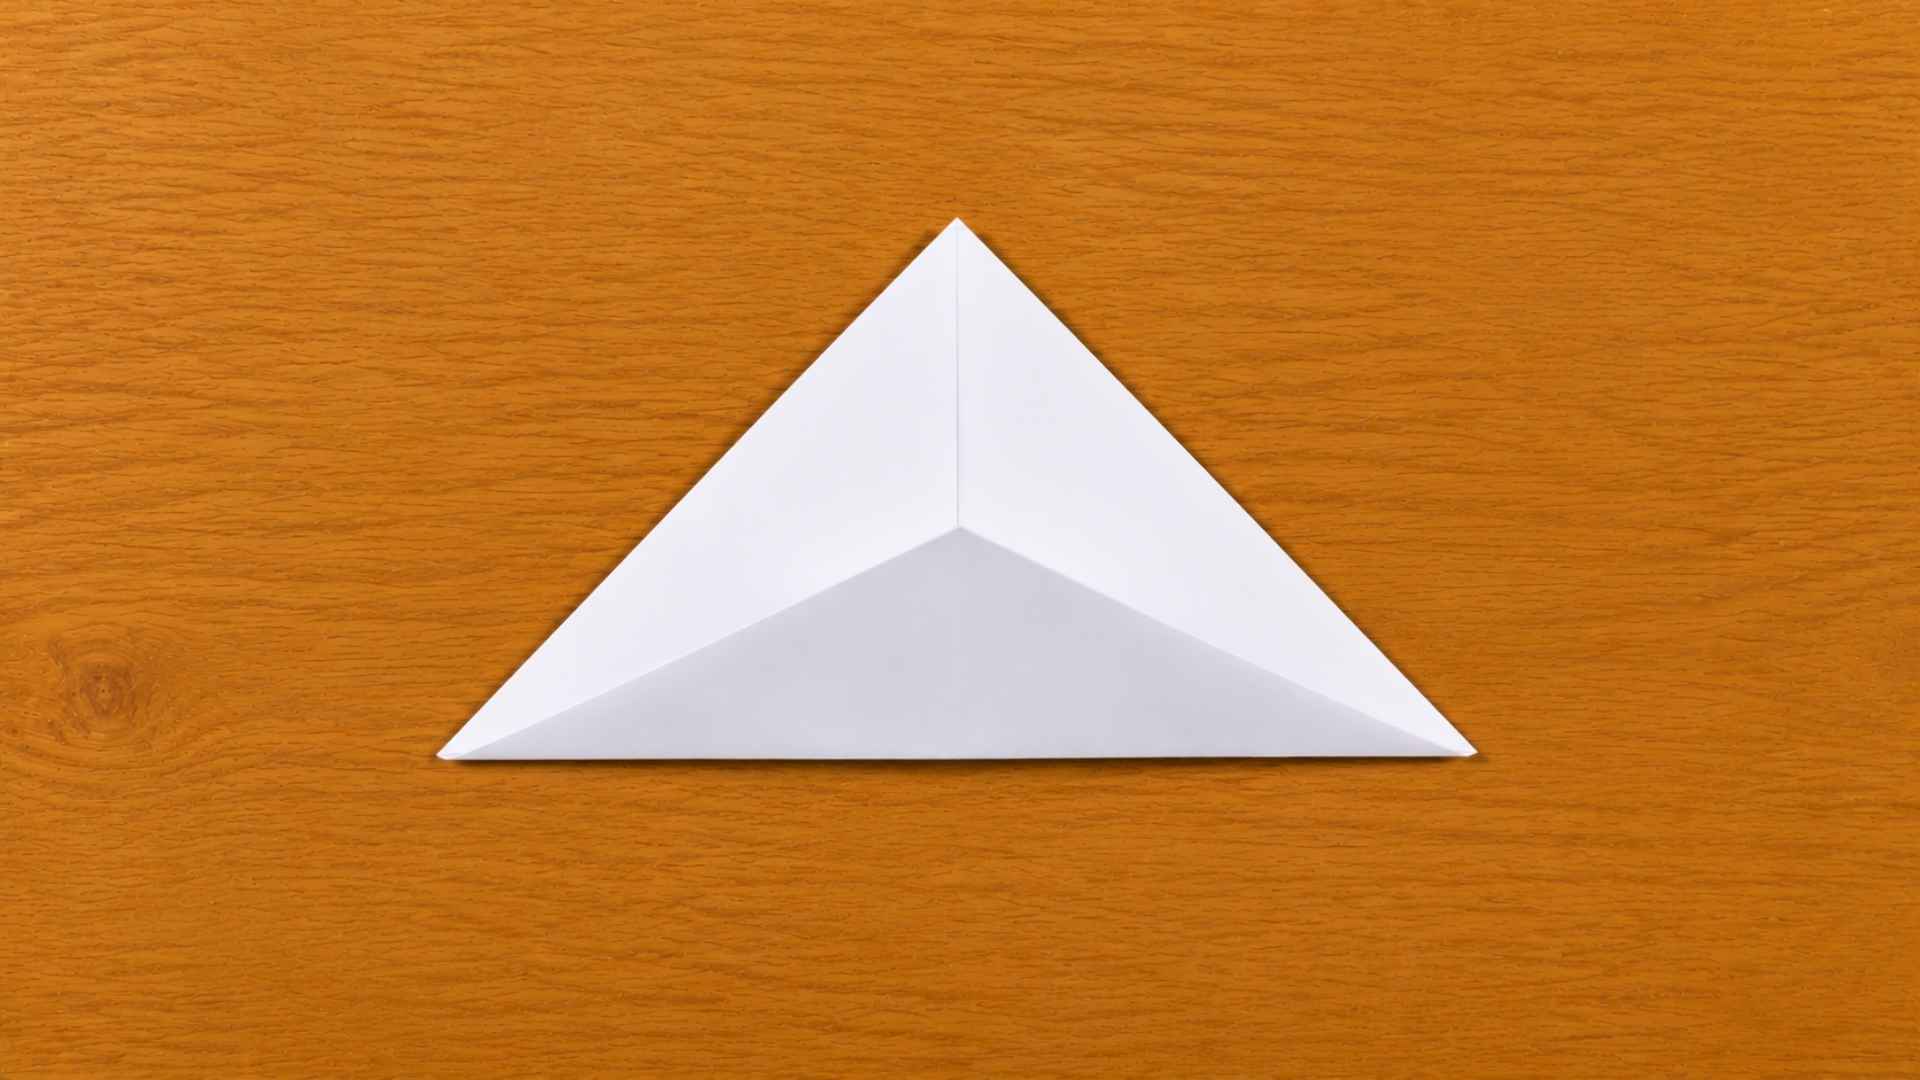
Take the bottom point of the diamond and fold it straight up toward the top point on the front side. Press the crease firmly. Flip the paper over. Fold the bottom point on the back side upward in the same way.
Both sides should now look the same. This keeps the shape balanced for the next step.
Step 6: Open into a Square Pocket
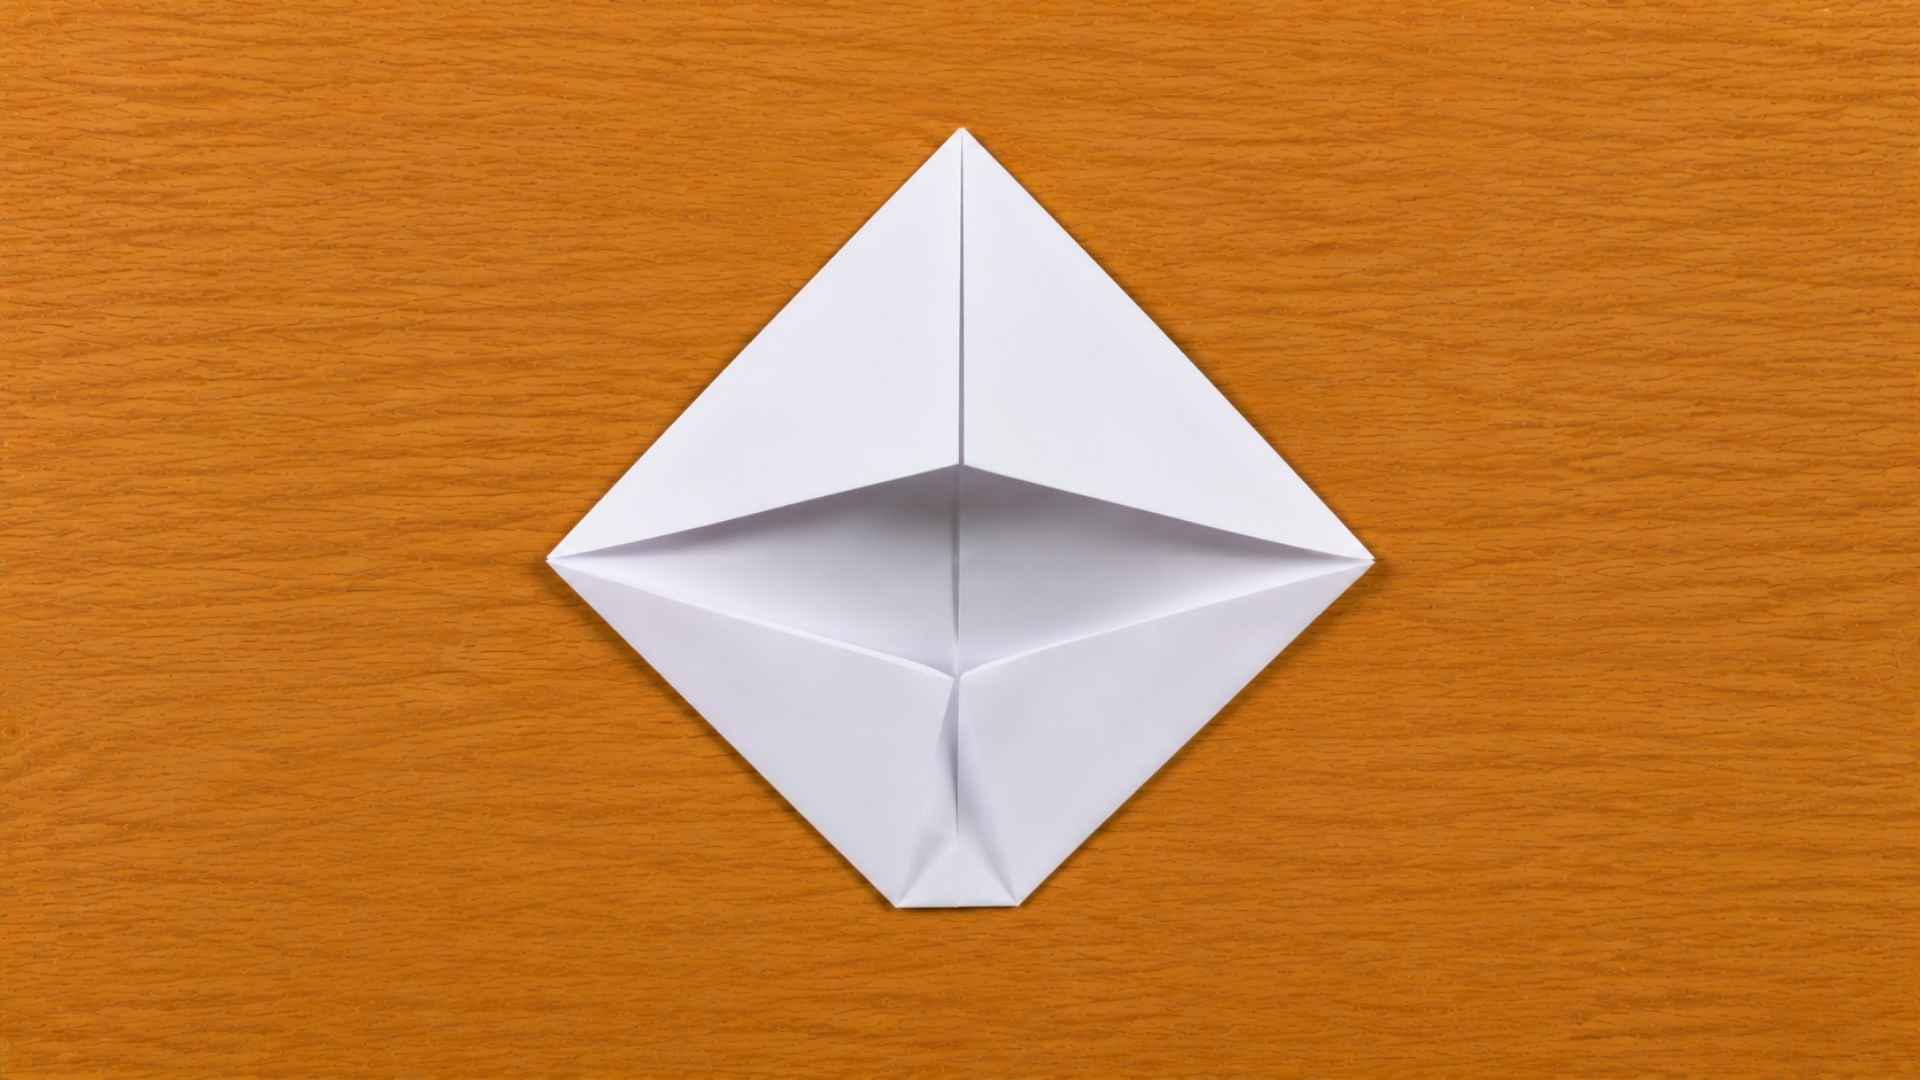
Hold the folded triangle with both hands. Place your thumbs inside the open bottom edge. Gently push the two side corners toward each other. The shape will open from the inside. Press it completely flat into a small square pocket before moving on.
Step 7: Pull Open the Boat Shape
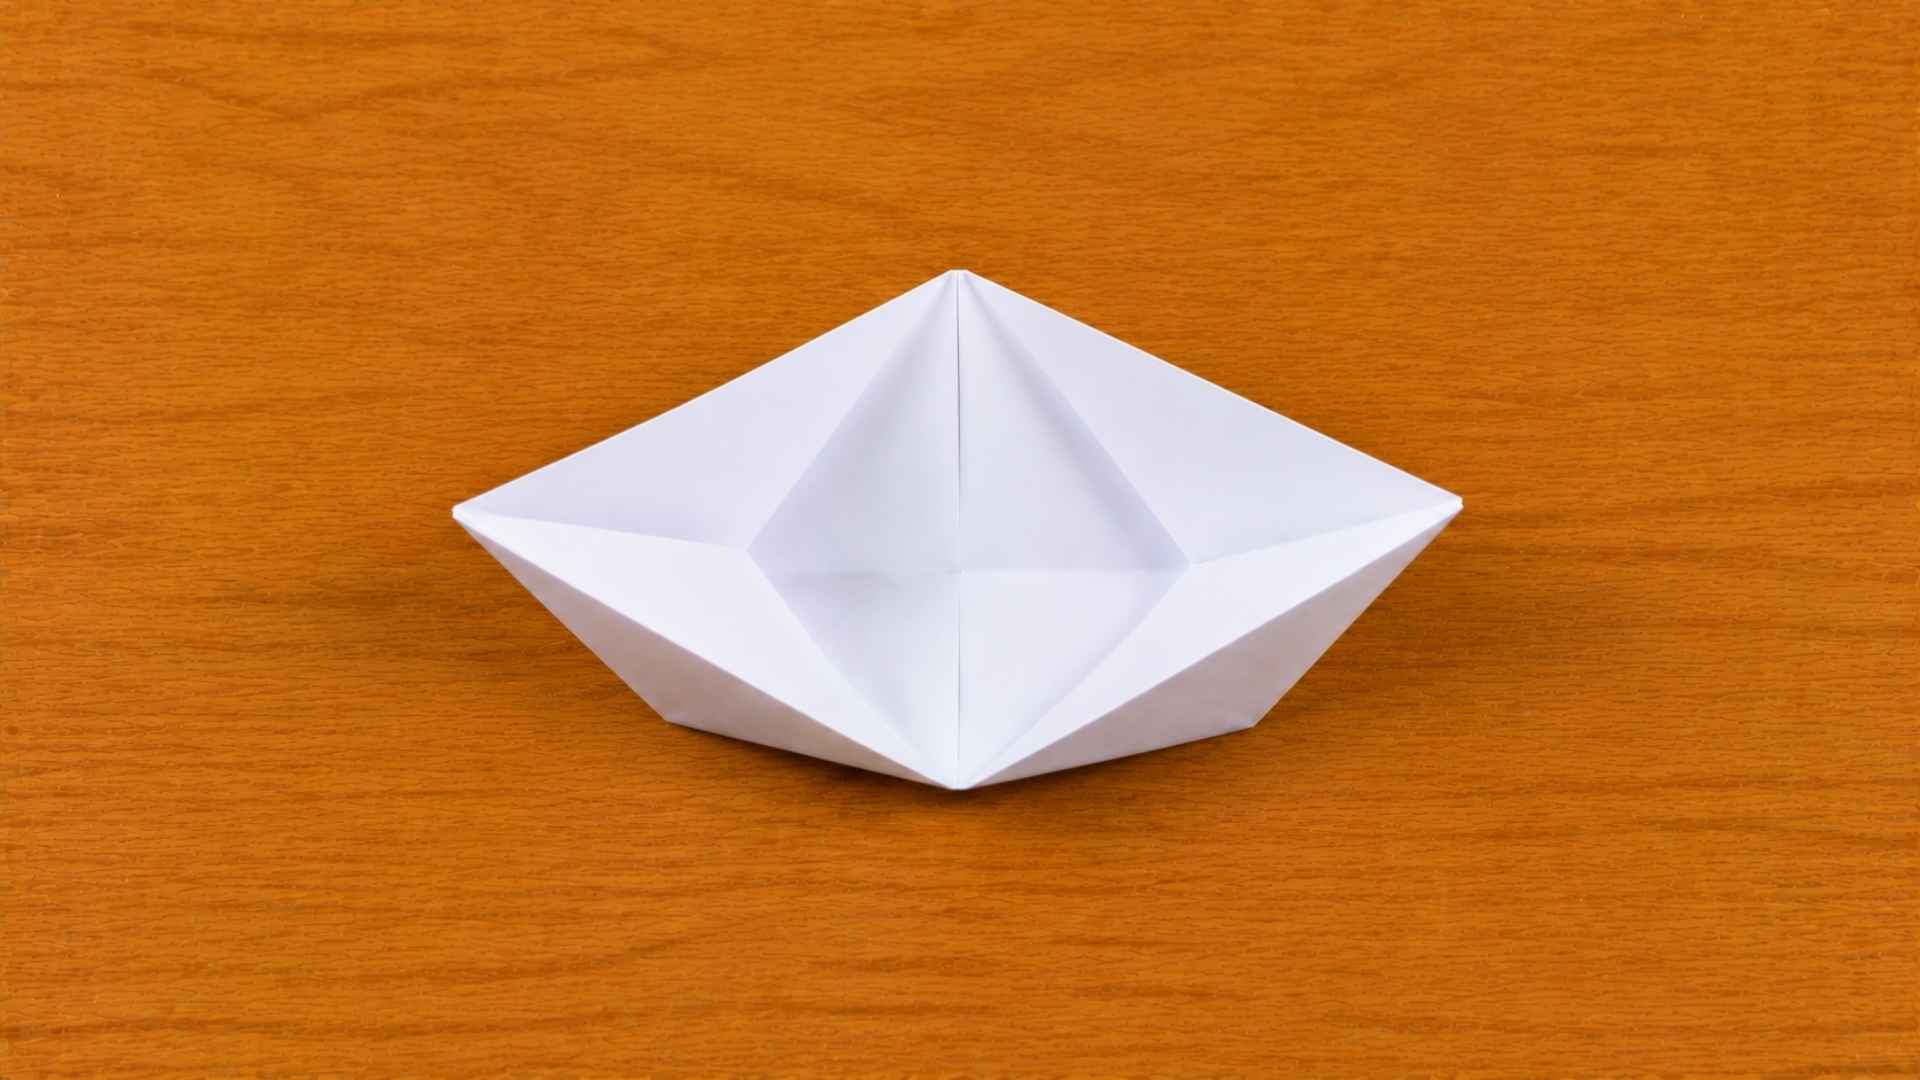
Hold the small square with one hand on each top corner. Slowly pull the two top corners apart. The paper will pop open into a boat shape from the inside. Pull evenly on both sides. Pulling too hard on one side will tear the fold or make the boat sit crooked.
Once the boat opens fully, press the base down gently with two fingers so it sits flat.
Step 8: Final Adjustments for Stability
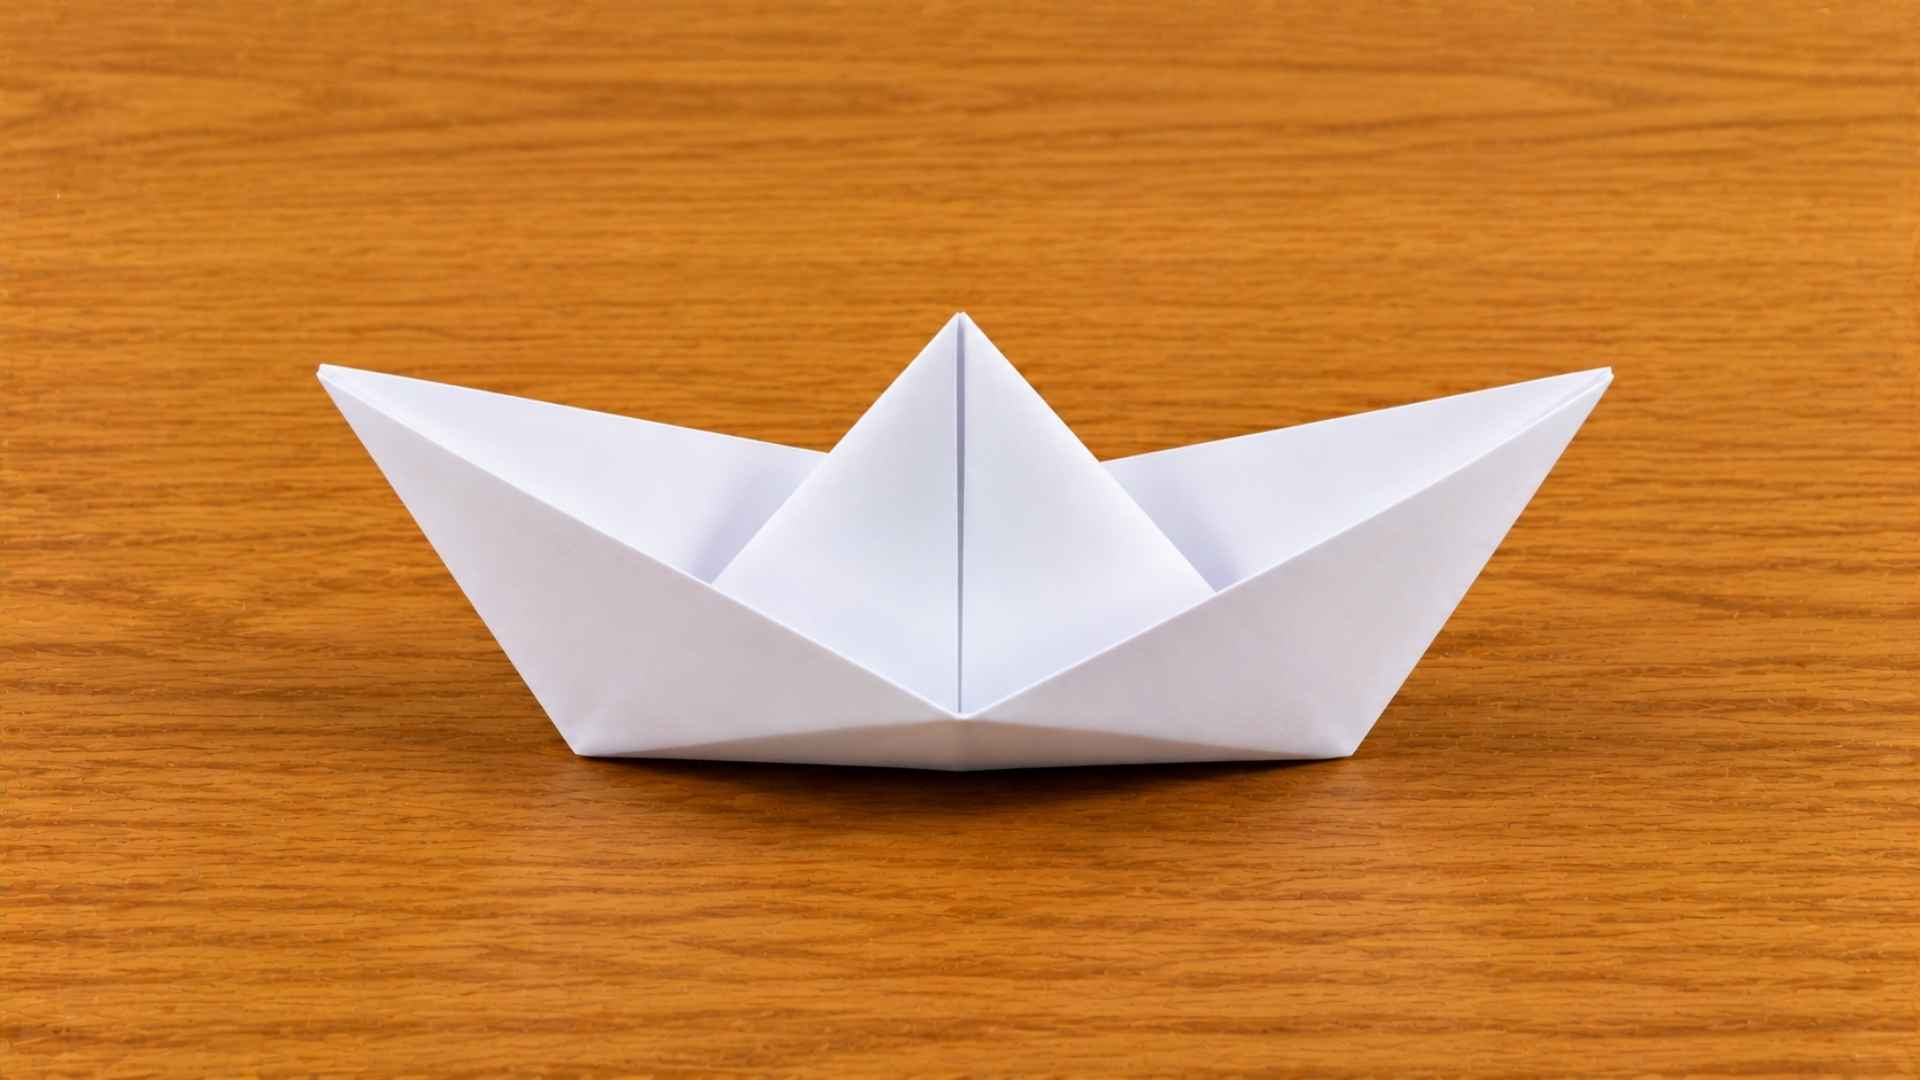
Check that the boat sits level. If one side dips lower, the folds are uneven. Gently press the higher side down to balance it. Run your fingernail along every visible crease one more time. Sharp creases keep the walls upright in water.
Your paper boat is ready.
Why Does a Paper Boat Float?
Your paper boat floats because of buoyancy. Water pushes upward against any object placed in it. When your boat sits on the surface, the water pushes up against the flat base. If that upward push is stronger than the weight of the boat, the boat floats.
A flat sheet of paper sinks because all its weight lands on a tiny surface area. When you fold it into a boat shape, the weight spreads across a wide, hollow base.
That hollow base pushes more water aside, and the water pushes back harder. More water displaced means more upward push, which keeps the boat afloat.
Why the Folds Work
- Symmetry keeps the boat balanced. When both sides mirror each other, the weight is evenly distributed. An uneven fold tips the boat and lets water spill over the edge.
- Layered folds add strength. Each time you fold paper over itself, you create multiple stiff layers. That stiffness is why the boat holds its shape instead of going flat.
- Trapped air supports the float. The hollow inside holds a pocket of air. Air is much lighter than water. That air pocket lowers the overall weight of the boat, giving the water enough upward push to keep it up.
How Long Does a Paper Boat Float?
Float time depends on three things: paper type, fold tightness, and how still the water is.
- Still water in a tray: 2 to 5 minutes
- Gentle movement or current: 1 to 3 minutes
- Rough water or waves: under 1 minute
- Wax paper with firm folds in still water: 15 to 20 minutes or more
Paper is not waterproof. The goal is a good float and an enjoyable activity, not a permanent vessel. For longer float times, the tips below make a real difference.
How to Make a Paper Boat Float Longer
Even small changes can make a big difference in how long your paper boat stays afloat. These simple tips help reduce water absorption, strengthen the folds, and keep your boat floating for longer.
1. Press Every Crease Tightly
Loose seams let water in fast. Water finds every gap between layers. Pressing each fold firmly with your fingernail closes those gaps and adds real float time.
Focus on the bottom seam of the finished boat. This is where water enters first. Run your fingernail along it twice. Flatten the hull firmly before placing the boat on the water.
2. Use the Right Paper
If you only have regular printer paper, lightly color the entire surface on both sides with a wax crayon before folding. This adds a thin wax layer that slows water from soaking in.
For the longest float time, wax paper is the most practical option. It folds almost as well as regular paper and holds up well in a shallow tray of water.
3. Tape the Bottom After Folding
Apply a strip of clear tape along the bottom seam of the finished boat. This seals the outer seam where water enters first. It adds roughly 3 to 5 minutes of extra float time and does not change how the boat looks or folds.
4. Fold on a Hard Surface
Fold on a hard surface, not a carpet or soft mat. Soft surfaces let the paper shift slightly with each fold. Small misalignments add up quickly. A table or a hardcover book underneath makes every crease more precise.
Test the finished boat in a shallow tray, not a deep bowl or sink. In a deep container, even a small tilt sends water over the side. A shallow tray keeps the water calm and gives the boat a fair float test.
Different Types of Paper Boats
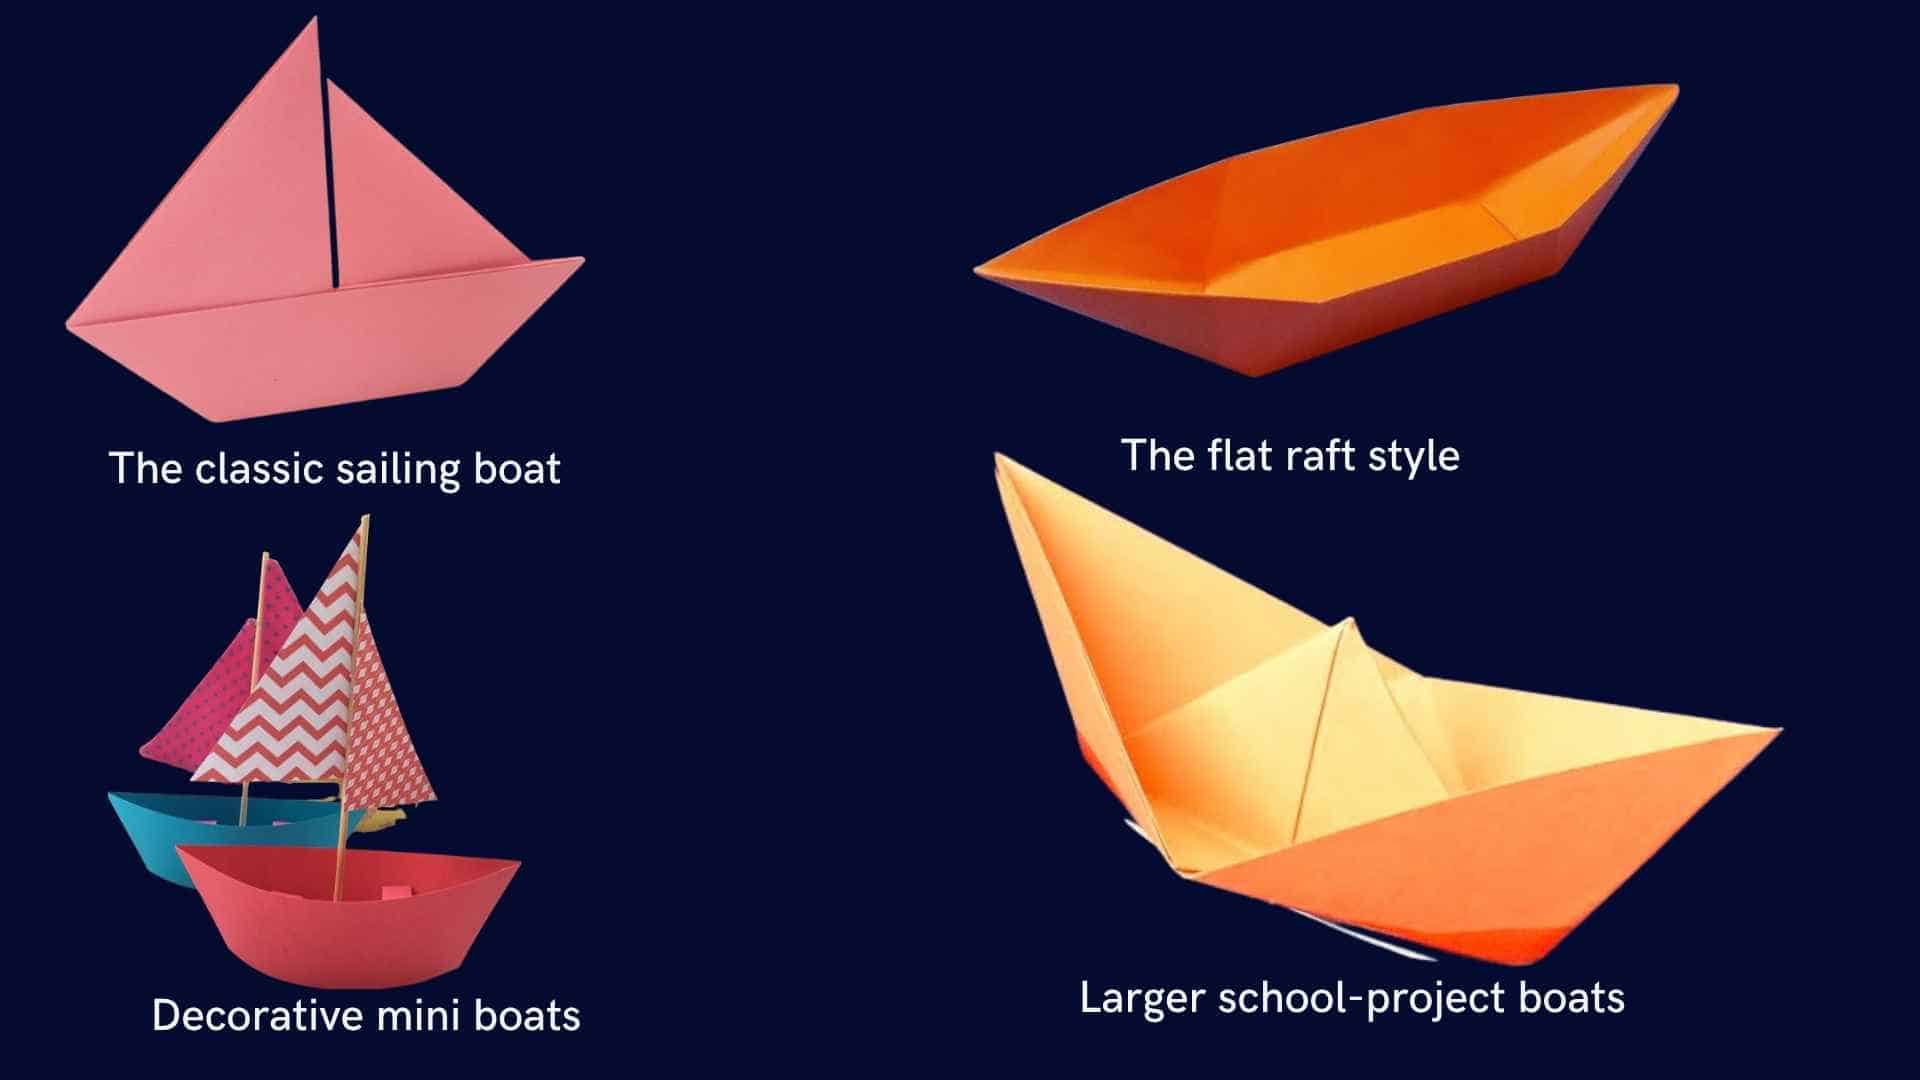
Paper boats are not all the same. Once you know the basic fold, there are several designs worth trying.
- Classic paper boat: The standard beginner model covered in this guide. One rectangular sheet. Under five minutes.
- Flat raft style: Uses a wider, shallower fold. Sits lower in the water. More stable and harder to tip. Works well for racing.
- Decorative mini boats: Folded from quarter sheets or sticky notes. Do not float well but work as table displays or party decorations.
- Aluminum foil boat: Follow the same folding steps using aluminum foil. Foil does not absorb water. It floats for much longer than any paper version.
- School project boats: Built from poster paper or chart paper. The bigger hull displaces more water before the paper soaks through.
Common Mistakes and How to Fix Them
This is the most common problem beginners run into. Here is what causes it and how to correct it.
Mistake 1: Corners do not meet in Step 2. This happens when the paper shifts during the first fold. Fix it by going back to Step 1 and refolding the rectangle, ensuring the edges are perfectly aligned before creasing.
Mistake 2: The diamond in Step 4 looks lopsided. This means the two triangle folds from Step 2 were not even. Unfold back to the hat shape. Adjust both triangles so they match, then try opening it again.
Mistake 3: The boat collapses when you open it in Step 7. The brim folds in Step 3 were not pressed firmly enough. Go back to Step 3 and press each crease with your thumbnail before moving forward.
Quick rule: If something looks off, go back one step. Do not try to force a correction mid-fold.
Age and Skill Level: Kids aged 7 and up can usually follow these steps without help. Younger children may need an adult to guide the first two folds. The hat shape in Step 3 is a good stopping point for very young kids. They can wear it as a hat before opening it into a boat.
Fun Things to Do With Your Paper Boat
Once you know the basic fold, there is a lot more you can do with it. Here are three simple ways to make it more fun.
1. Decorate Before You Fold
Decorate your paper before you start folding. This is much easier than trying to color a finished boat. Use markers, crayons, or watercolor paints. Draw stripes, waves, a flag, or a name on the sail area. Let any paint dry fully before folding so the paper does not tear along the creases.
2. Name Your Boat
Write the name on the side after folding. Names like “Blue Arrow” or “Storm Runner” give kids a reason to care about the outcome of the float test.
3. Race Boats in a Tub
Fill a plastic tub, bathtub, or small pool with a few inches of water. Make two or more boats. Race them by blowing gently from one end. Set a finish line with a piece of tape on the side of the tub. The first boat to cross wins.
Conclusion
Making a paper boat takes one sheet of paper and five minutes.
Start with an A4 sheet, keep your creases tight, and the shape comes together fast. For a longer float, use wax paper or run a crayon over regular printer paper before you start folding.
The science is simple. A hollow base displaces water and stays afloat until the paper absorbs too much moisture. Tighter folds, wax coating, and a strip of tape on the bottom seam all slow that process down.
Once you have the basic paper boat instructions down, decorate it, name it, and race it in a shallow tub. This activity works for any age, takes no prep, and costs nothing beyond one sheet of paper.
Try making a few boats with different paper types and see which one floats the longest. The results might surprise you.
Frequently Asked Questions
Can kids easily make a paper boat?
Yes. Paper boats are simple to make and are a great craft for kids. Younger children may need a little help with folding.
How do you waterproof a paper boat?
Brush the finished boat with melted beeswax or soy wax, or use a clear waterproof craft spray for better water resistance.
What crafts can a 12-year-old do?
Popular crafts include diamond painting, clay bead bracelets, acrylic painting, origami, and simple DIY projects.
What is 3D paper craft?
3D paper craft is the process of turning flat paper into three-dimensional objects using folding, cutting, and gluing techniques.