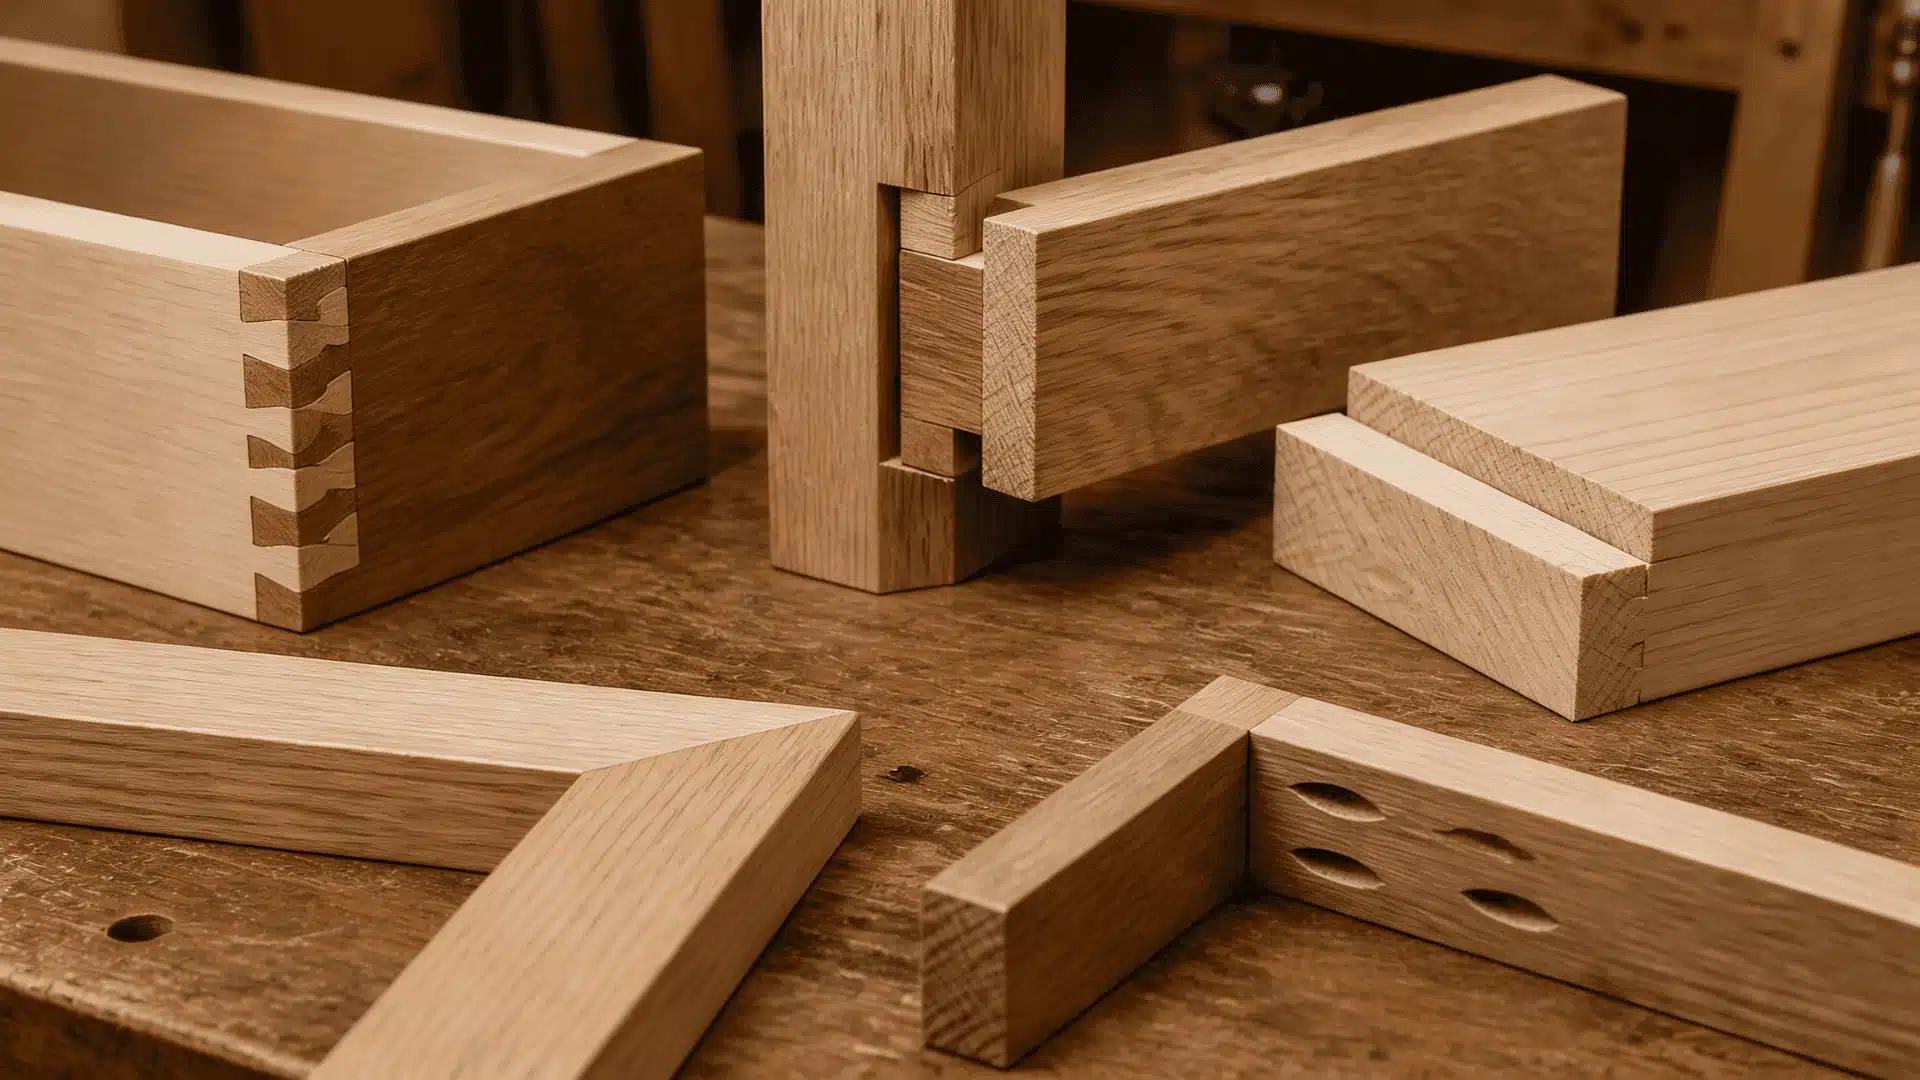
19 Types of Wood Joints Every Woodworker Should Know
Most woodworking projects that fall apart do so at the joint, not because of the wood itself. The connection point is where everything either holds or fails.
Understanding the different types of wood joints is the foundation of every build, from a basic shelf to a fine furniture piece, yet most beginners overlook them entirely when starting out.
Here you will find a complete breakdown of wood joints, what each one does, when to use it, and how strong it really is.
Start from the basics and work up to the advanced options. Each joint covered here will help match the right connection to any project.
What Are Wood Joints?
A wood joint is where two or more pieces of wood connect. They form the foundation of every woodworking project, with different joints built for strength, appearance, or simplicity.
Wood joints are held together using three basic methods:
- Glue: Bonds surfaces directly. Works best when both pieces share enough contact area.
- Mechanical Fasteners: Screws, nails, or bolts that physically lock pieces in place, often used alongside glue.
- Interlocking Cuts: Shaped cuts on both pieces that fit together without relying fully on glue or fasteners.
The more surface area two pieces share at a joint, the stronger the bond. Wood also naturally expands and contracts with changes in humidity, so joints that do not allow for movement can crack or loosen over time.
Quick Tip: Always consider your local climate when choosing a joint. In areas with high humidity or big temperature swings, joints that allow slight wood movement will last much longer.
Basic and Beginner-Friendly Wood Joints
If you are just starting out in woodworking, these joints are the best place to begin. They are simple to make and require very few tools.
1. Butt Joint
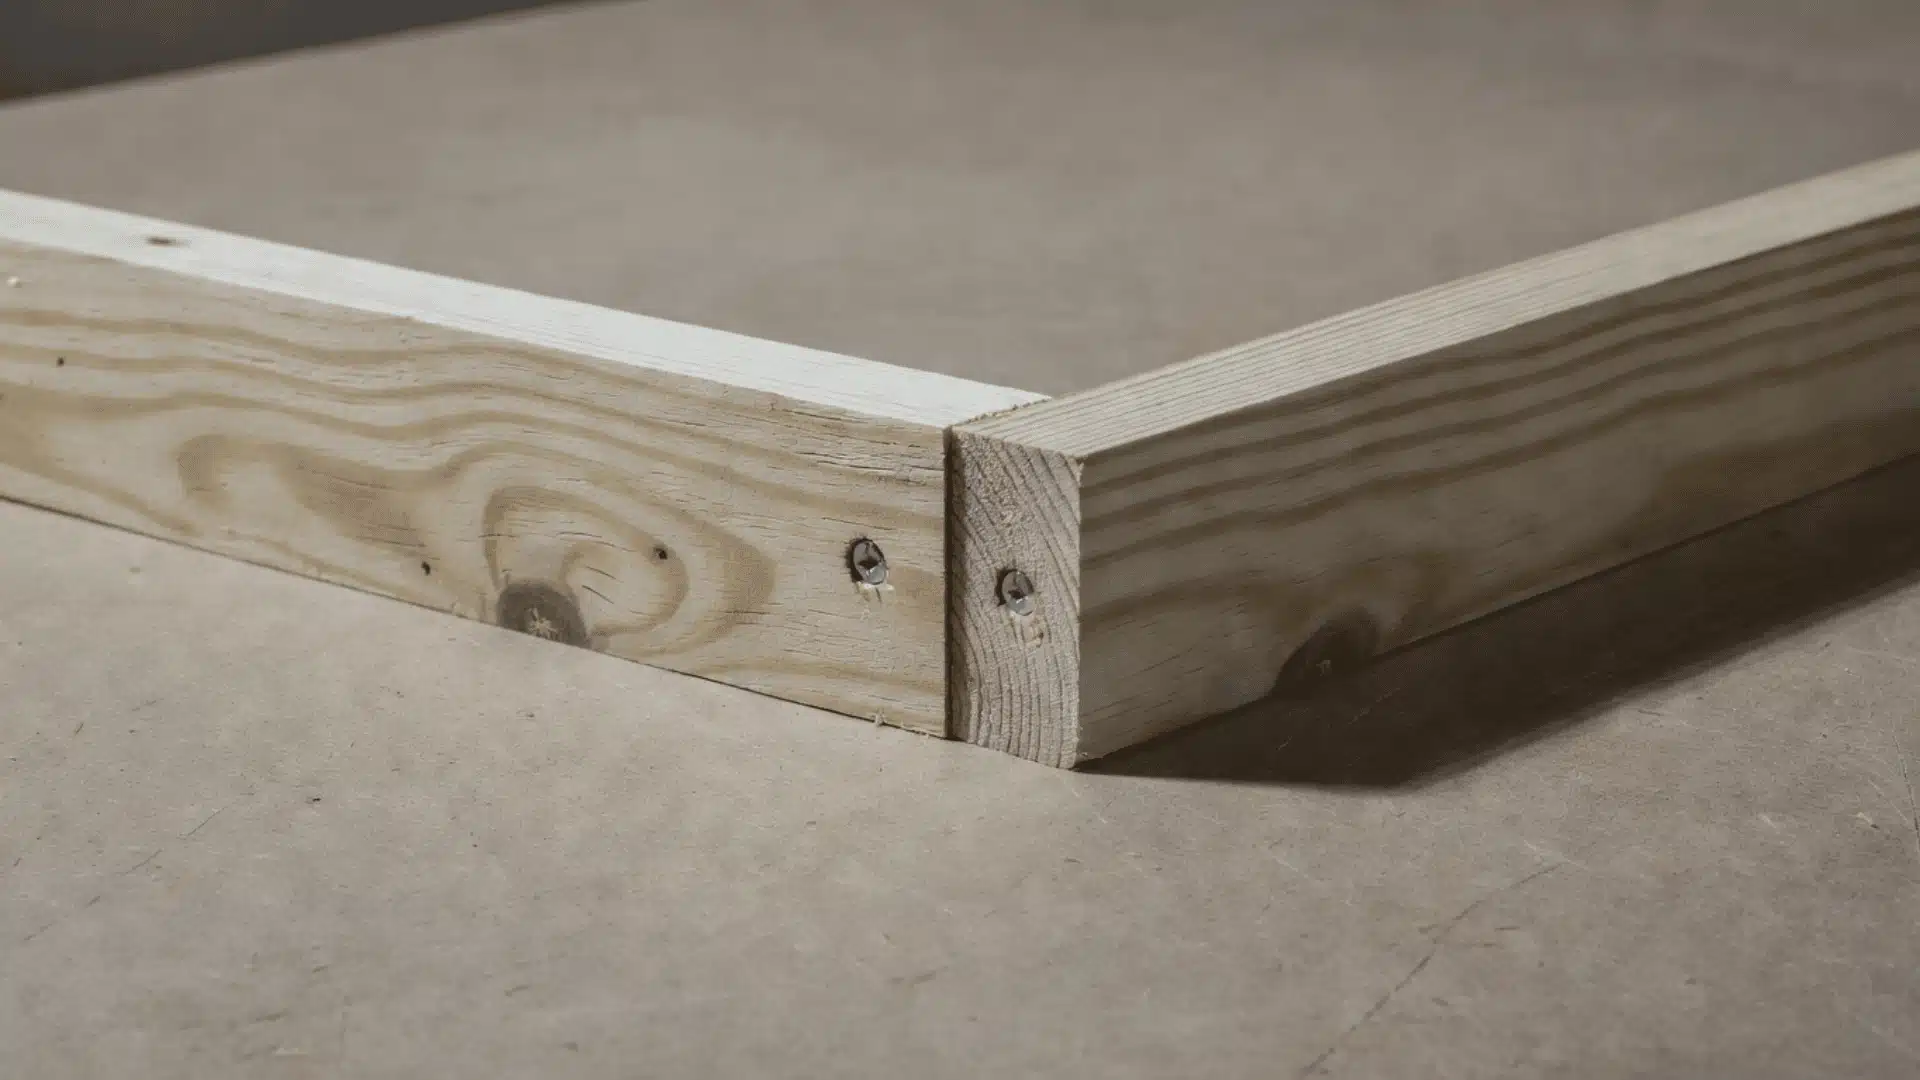
The butt joint connects the end or edge of one board against another using screws, nails, or glue. It is fast, easy to make, and common in basic framing projects.
| Advantages | Limitations |
|---|---|
| Fast with no complex cuts | Small glue surface, weak bond on its own |
| Perfect for beginners | Pulls apart easily under tension |
| Requires only basic tools | Needs strong fasteners to hold |
Quick Tip: If you are using a butt joint for anything that needs to bear weight, always reinforce it with screws rather than relying on glue alone. It will hold much longer.
2. Miter Joint
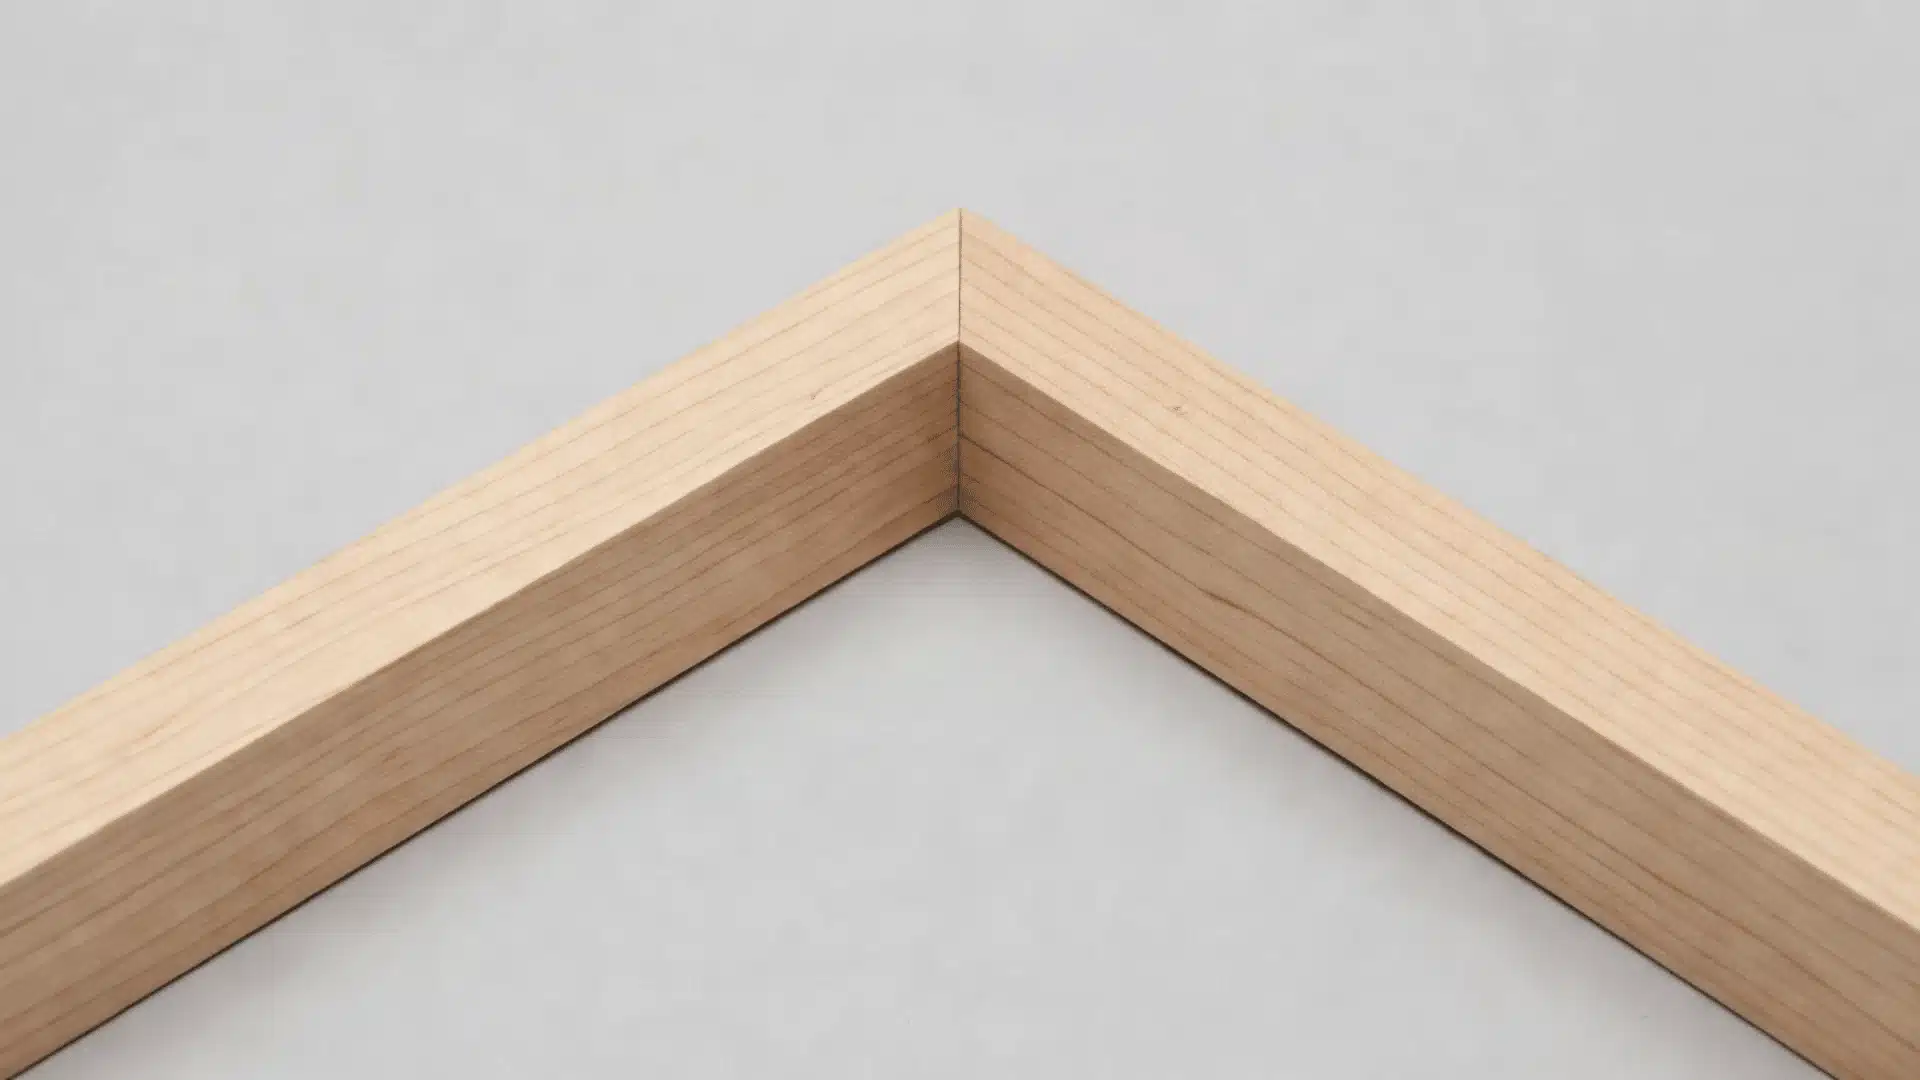
A miter joint is made by cutting two boards at an angle, usually 45 degrees, so they meet at a clean corner without any exposed end grain showing on the outside.
| Advantages | Limitations |
|---|---|
| Cleaner and more finished than a butt joint | Weak on its own, needs reinforcement |
| Hides end grain for a polished corner | Even a slight angle error leaves a visible gap |
3. Coped Joint

A coped joint is made by cutting one molding piece to match the exact profile of another. It is widely used in baseboards and crown molding to get a tight fit at wall corners.
| Advantages | Limitations |
|---|---|
| Fits more precisely than a miter joint | Requires careful shaping to match the profile |
| Works well on imperfect wall corners | More time-consuming than a basic miter cut |
4. Pocket-Hole Joint
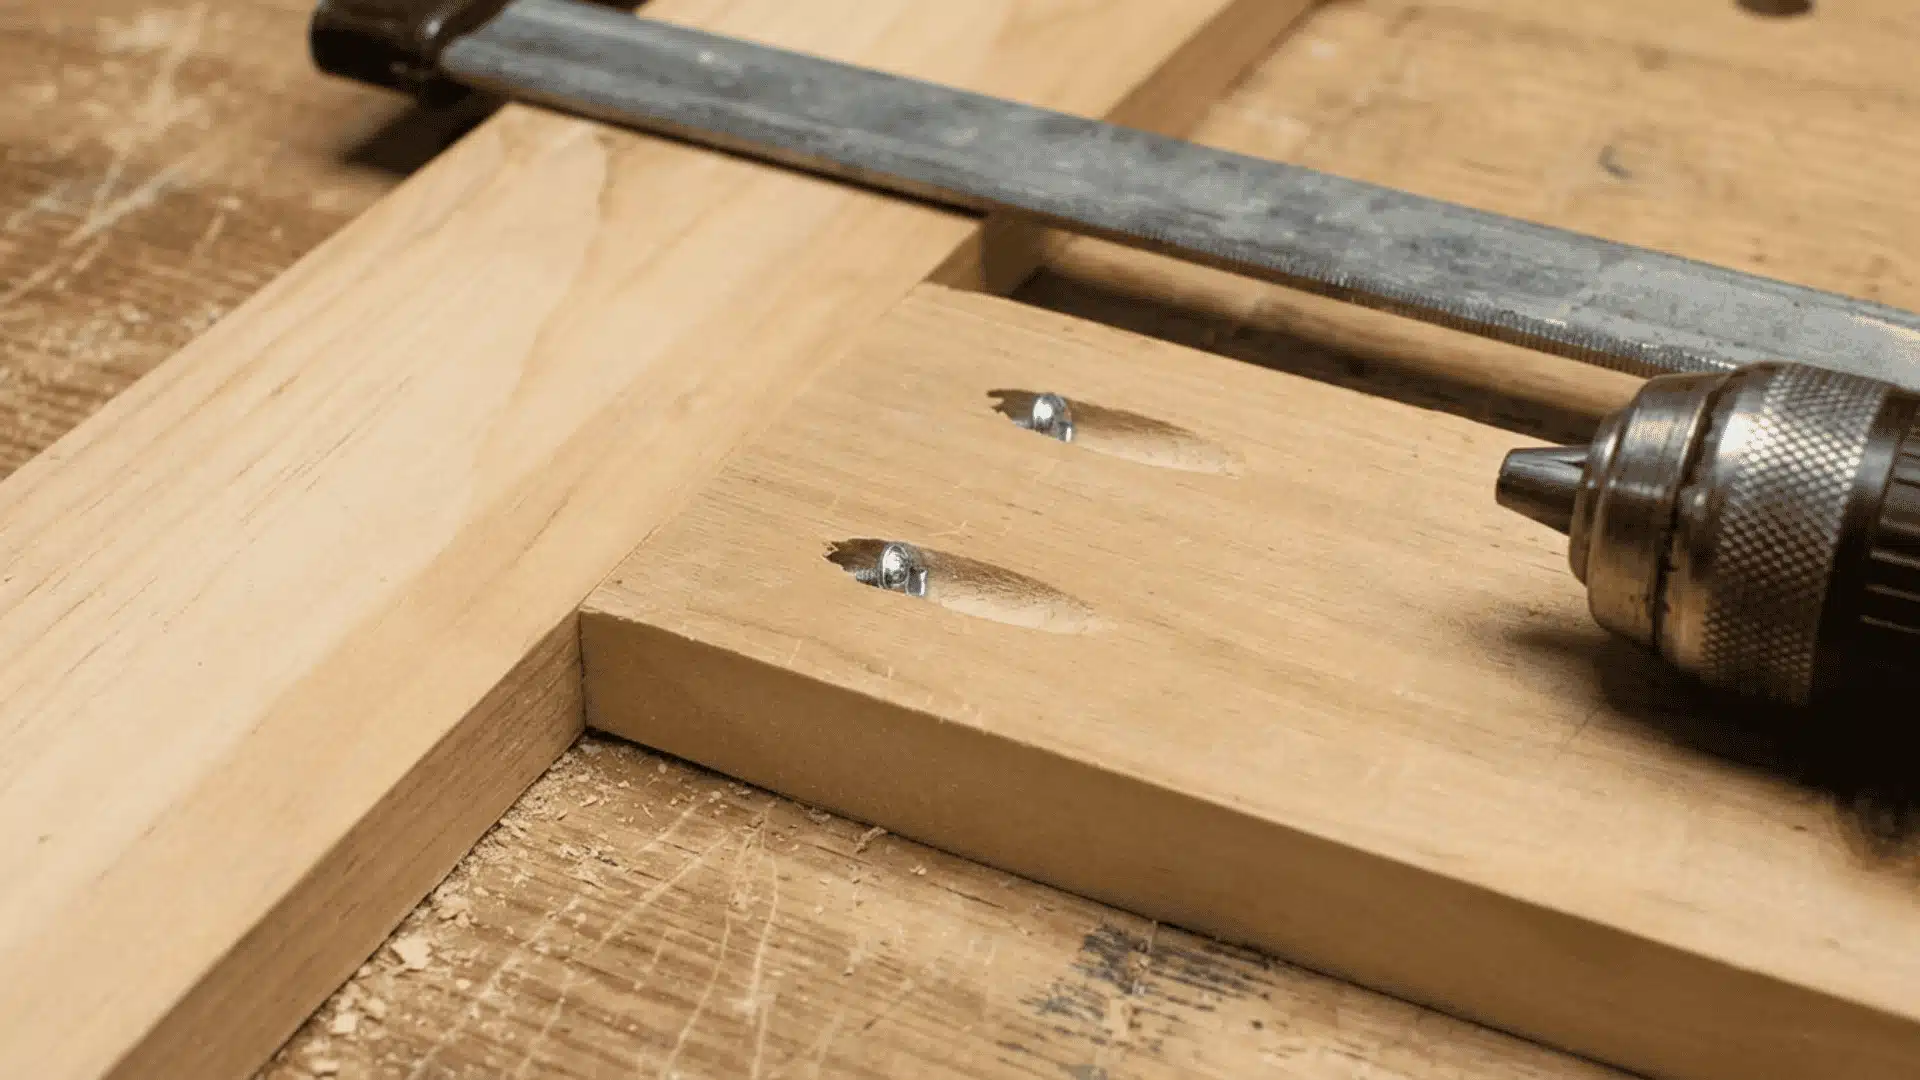
A pocket-hole joint uses angled holes drilled into one board and special screws to pull two pieces tightly together. It is one of the fastest joinery methods used in cabinets and furniture builds.
| Advantages | Limitations |
|---|---|
| Quick to assemble with very little clamping | Pocket holes are visible unless covered |
| Strong enough for everyday furniture and cabinets | Less refined than traditional woodworking joints |
Quick Tip: Pocket-hole plugs are available in many wood species and can hide the holes cleanly if the joint will be visible in the finished piece.
5. Dowel Joint
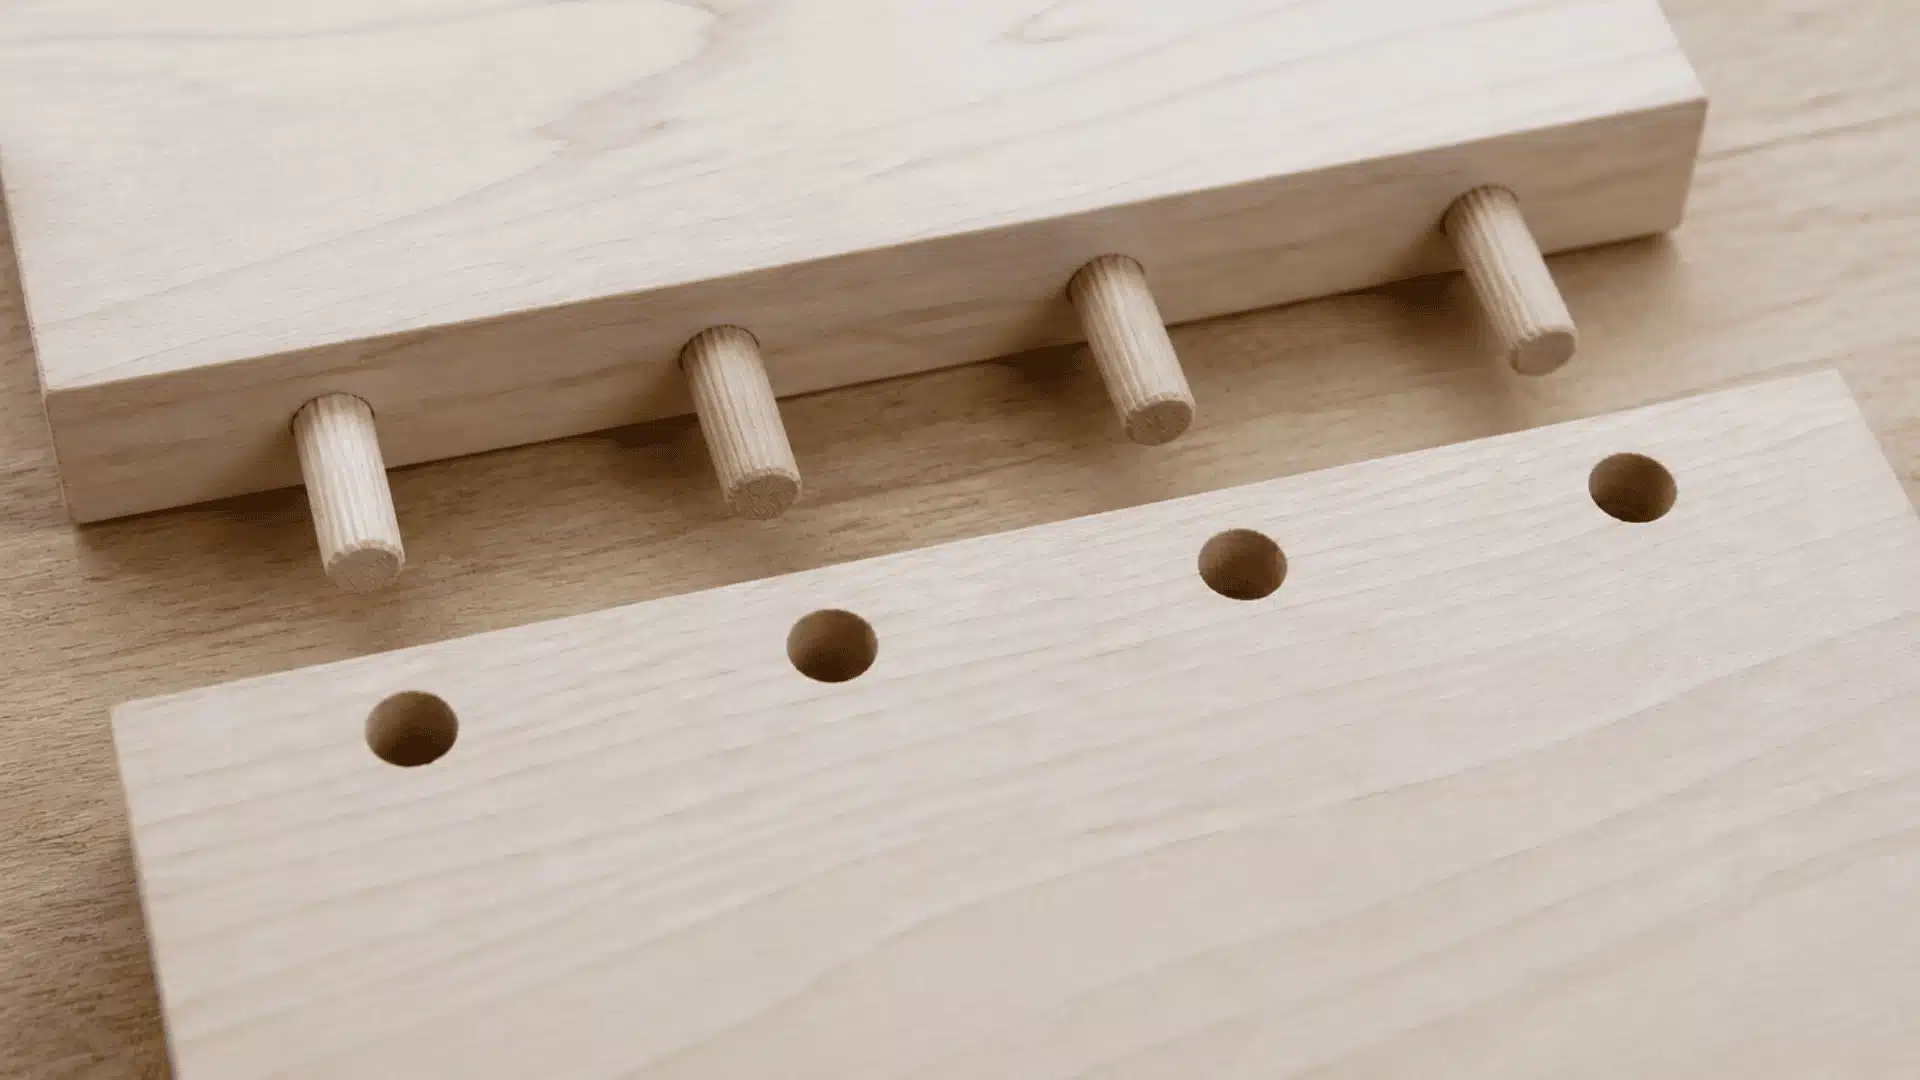
A dowel joint uses small round wooden pins that fit into matching drilled holes on both pieces of wood. It is commonly used in furniture making for a clean, hidden connection.
| Advantages | Limitations |
|---|---|
| Connection is completely hidden once assembled | Requires precise drilling for holes to line up |
| Keeps boards properly aligned during glue-up | Takes more time to set up than simpler joints |
6. Biscuit Joint
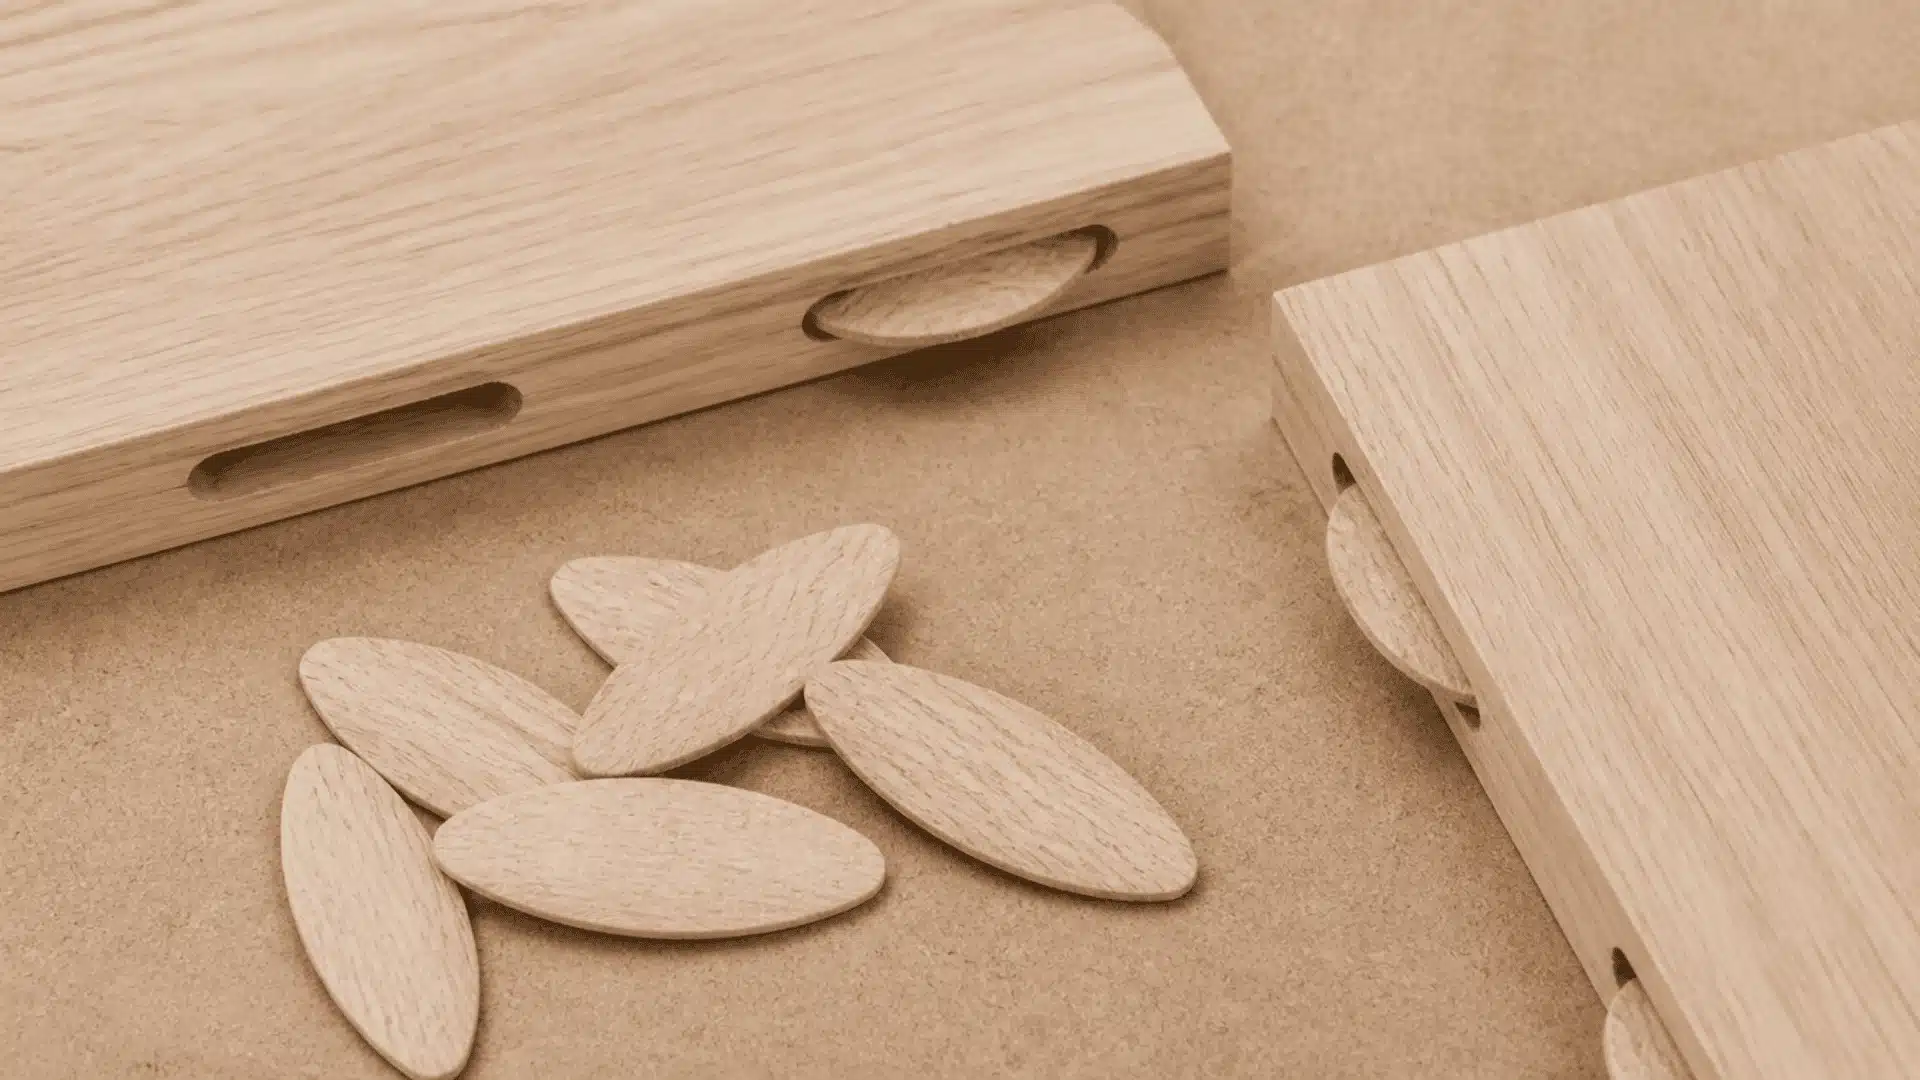
A biscuit joint uses small oval-shaped wooden pieces that slide into matching slots cut into both boards. When glue is applied, the biscuits expand slightly and lock the boards in place.
| Advantages | Limitations |
|---|---|
| Keeps boards aligned perfectly during glue-up | Moderate strength, not ideal for heavy loads |
| Completely hidden once assembled | Requires a biscuit joiner tool, an added cost |
Groove and Edge-Based Wood Joints
These joints work by cutting grooves or channels into the wood so pieces can slot together. They are widely used in shelves, cabinets, and panel builds.
7. Dado Joint
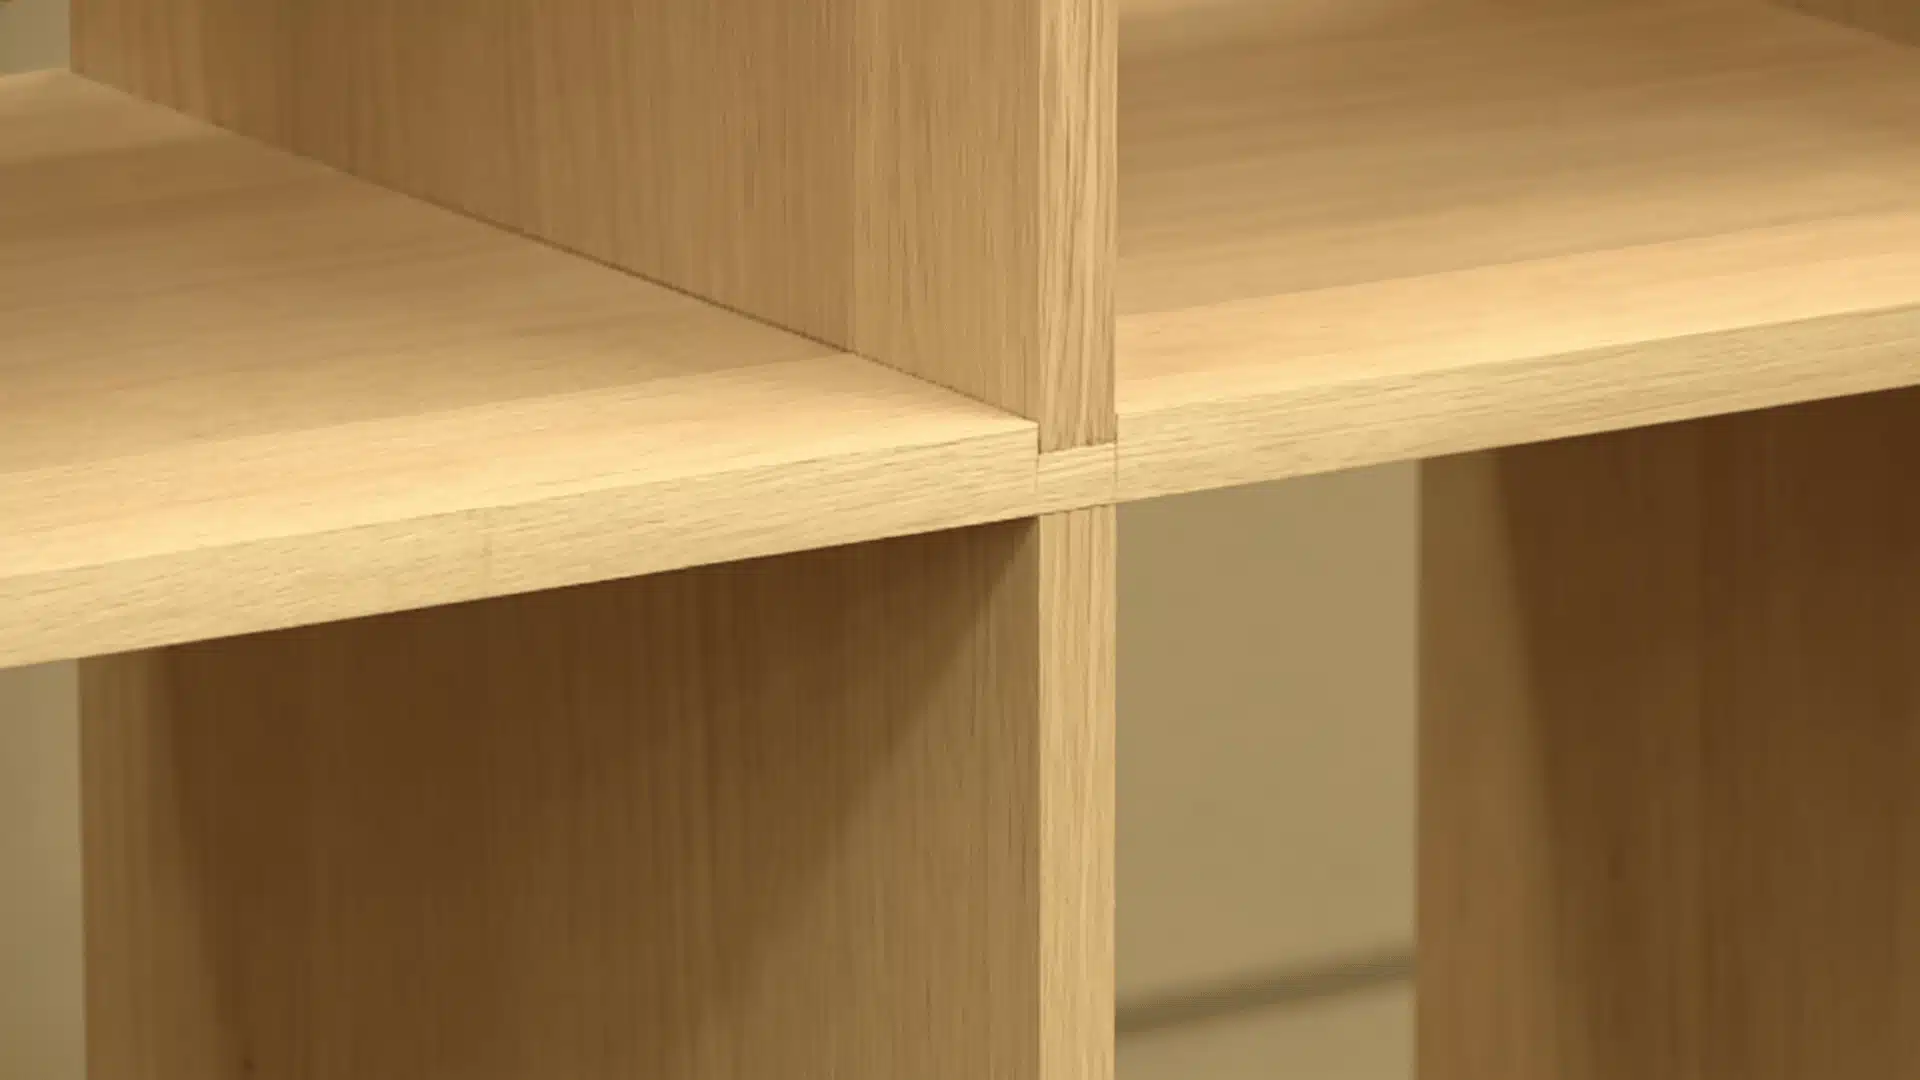
A dado joint is made by cutting a slot across the wood grain so another board can sit inside it. It is a go-to joint for building bookcases and cabinet shelving.
| Advantages | Limitations |
|---|---|
| Gives shelves solid support inside the groove | Requires accurate cutting for a proper fit |
| Much more stable than a basic butt joint | Cutting too deep weakens the board overall |
Quick Tip: Always aim to cut the dado slot to exactly half the thickness of the board. Going deeper than that weakens the wood and affects the overall strength of the shelf.
8. Rabbet Joint
A rabbet joint is made by cutting an L-shaped groove along the edge of a board so another piece can sit inside it. It is commonly used on cabinet backs and drawers.
| Advantages | Limitations |
|---|---|
| More glue area than a basic butt joint | Moderate strength only |
| Creates a cleaner edge connection | Often needs glue or fasteners to hold firmly |
9. Tongue-and-Groove Joint
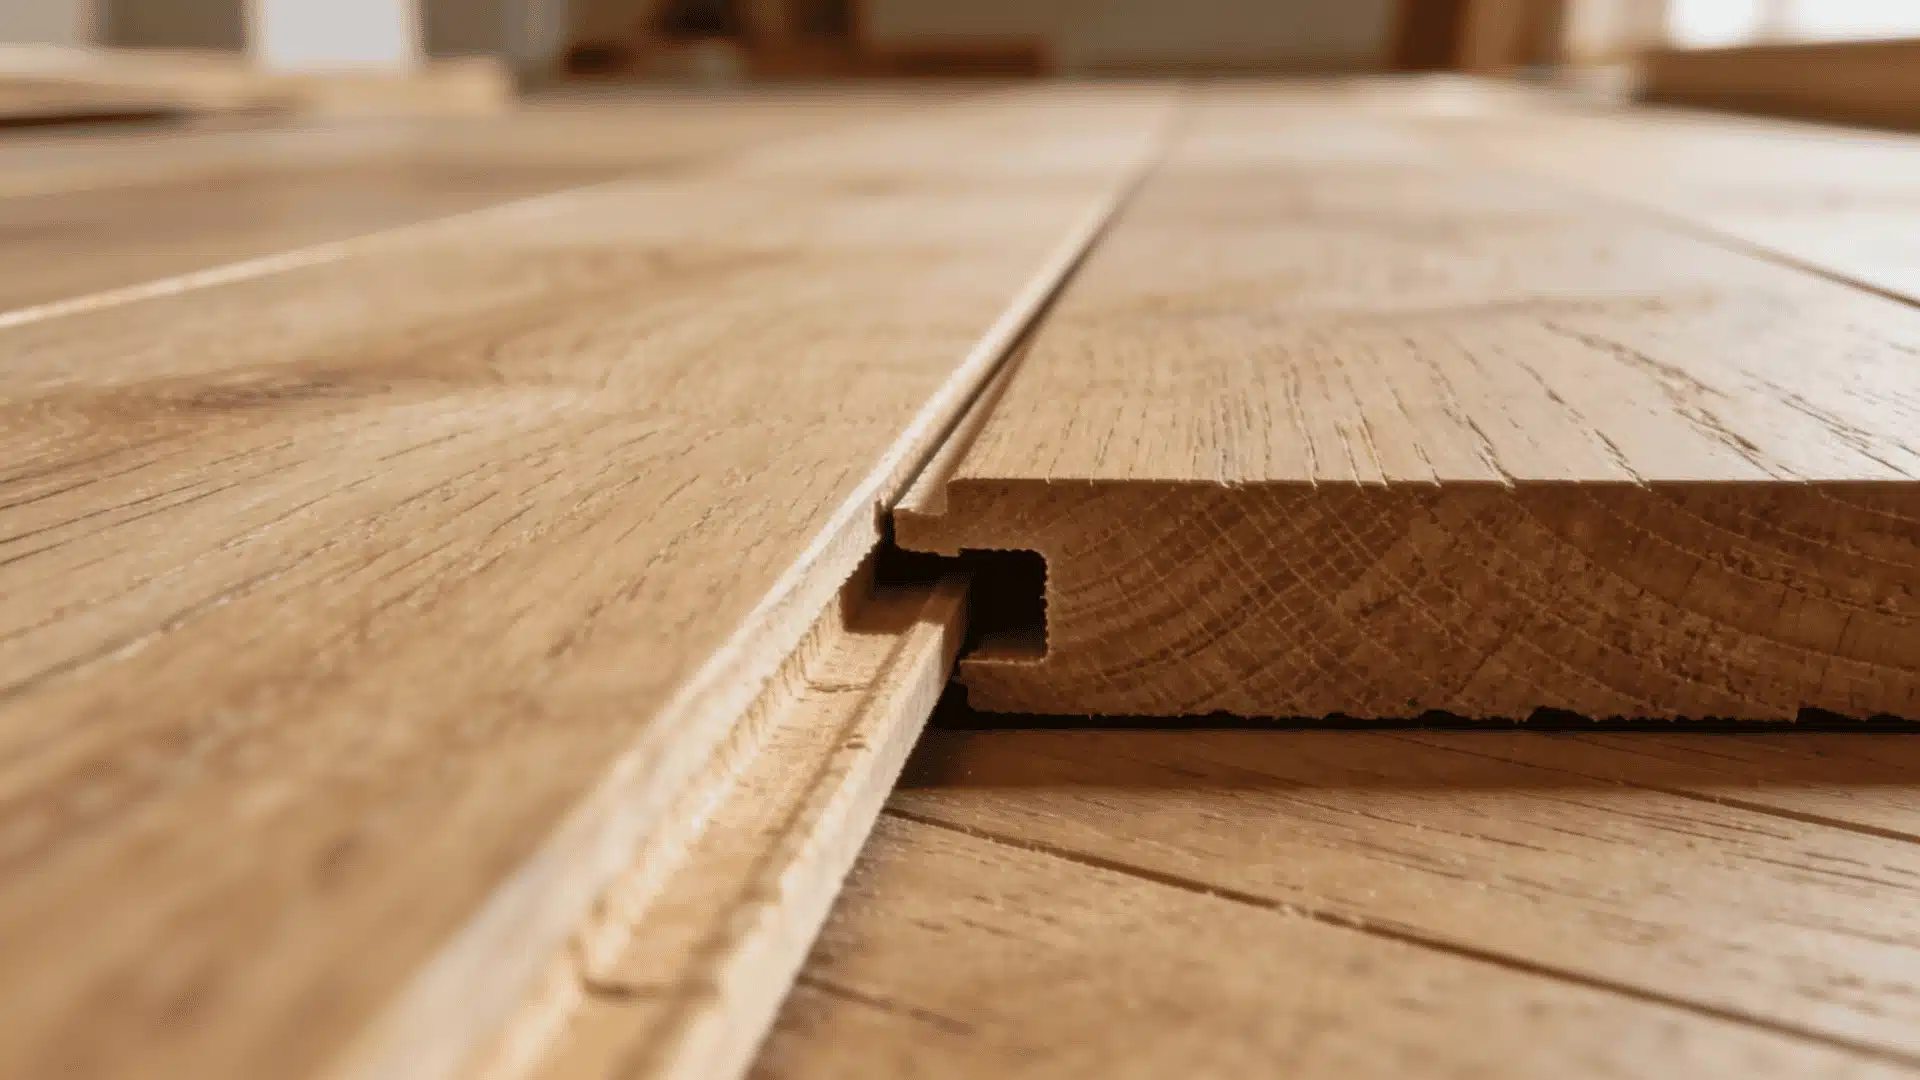
A tongue-and-groove joint works by fitting a ridge on one board into a matching slot on another. The boards lock together side by side and are commonly used in flooring, paneling, and tabletops.
| Advantages | Limitations |
|---|---|
| Keeps boards aligned without extra fasteners | Requires accurate milling for a proper fit |
| Reduces visible gaps between boards | Wood expansion can affect how tightly the joint fits |
10. Edge Joint
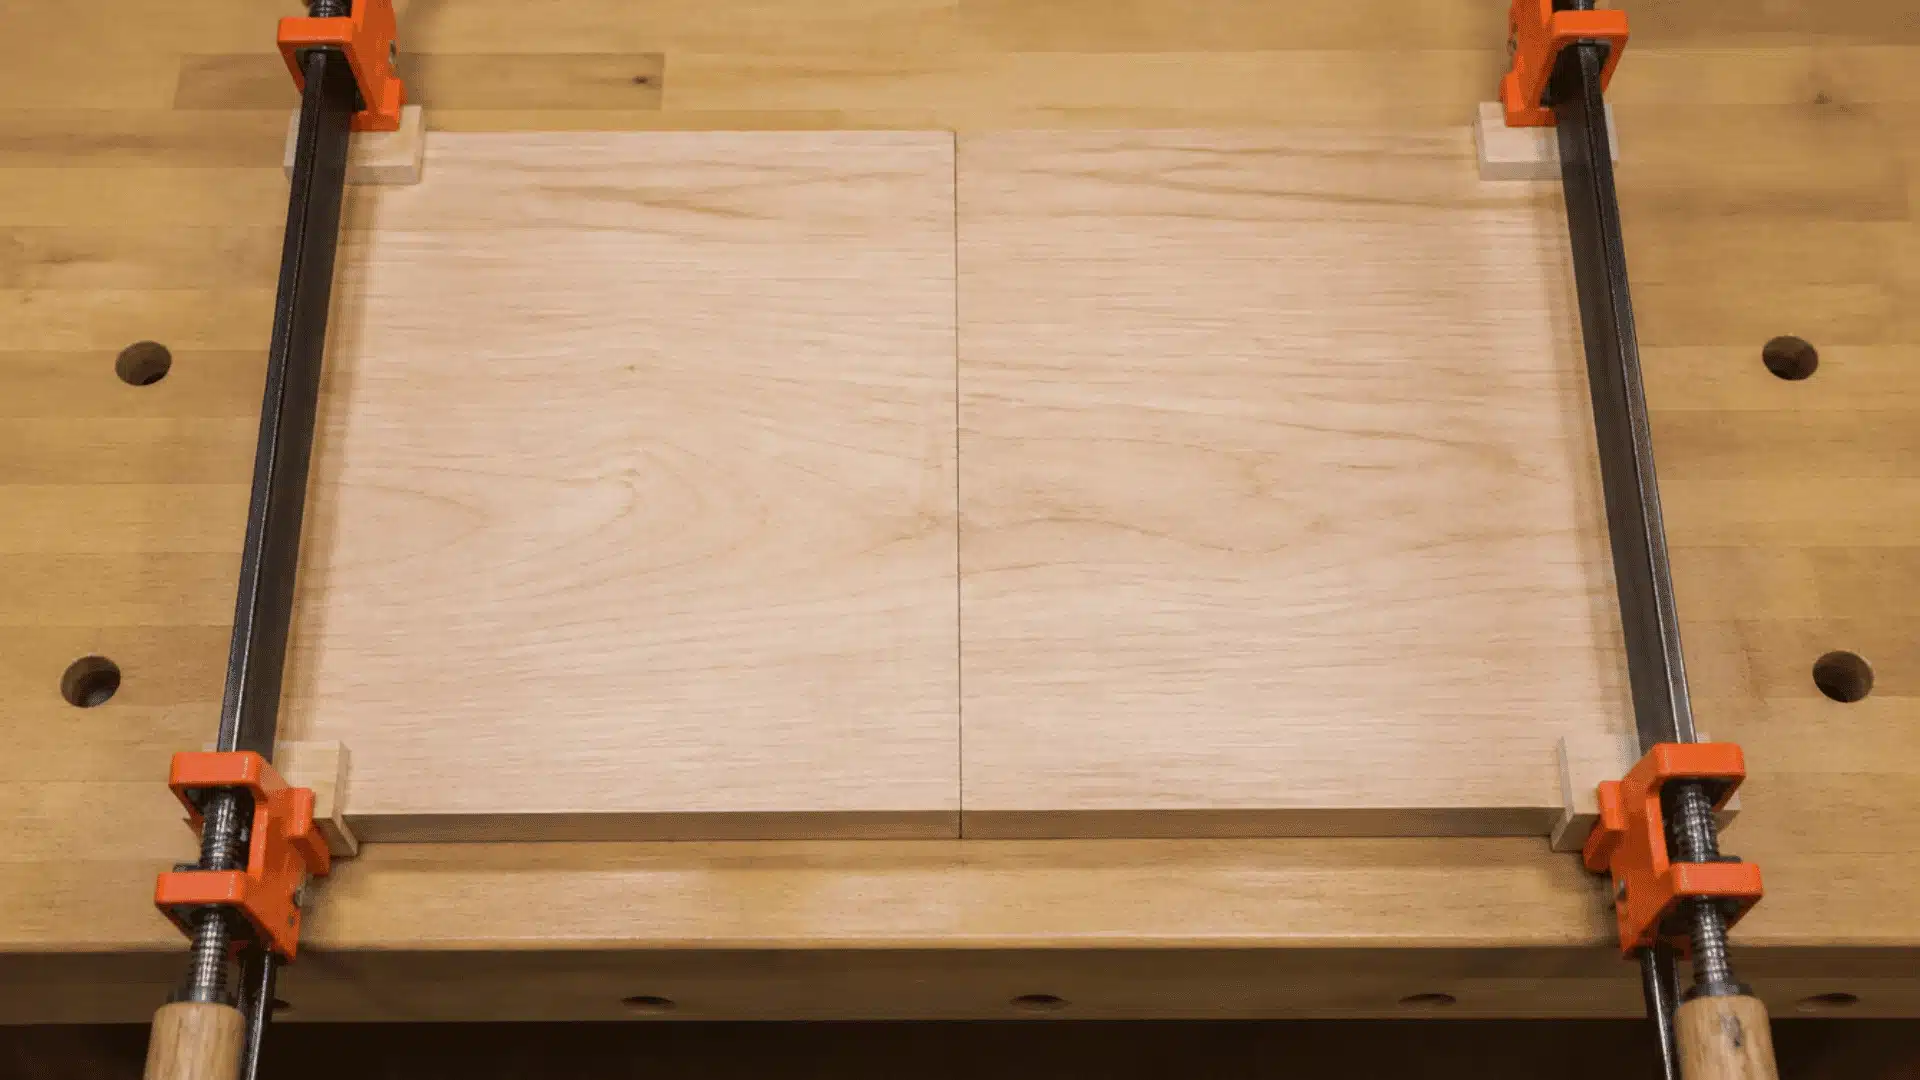
An edge joint connects two boards along their edges to create a wider surface. It is a straightforward method commonly used for building tabletops and large wood panels.
| Advantages | Limitations |
|---|---|
| Creates large, wide wood surfaces easily | Both edges must be perfectly straight |
| Simple to assemble with proper clamping | Poor alignment leads to uneven surfaces |
Quick Tip: Run both board edges through a jointer or sand them flat before gluing. Even a small gap between edges will show up clearly once the panel is finished.
Structural and Framing Wood Joints
These joints are built for strength and stability. They are commonly used in frames, tables, and other projects where the joint needs to handle regular stress and load.
11. Lap Joint
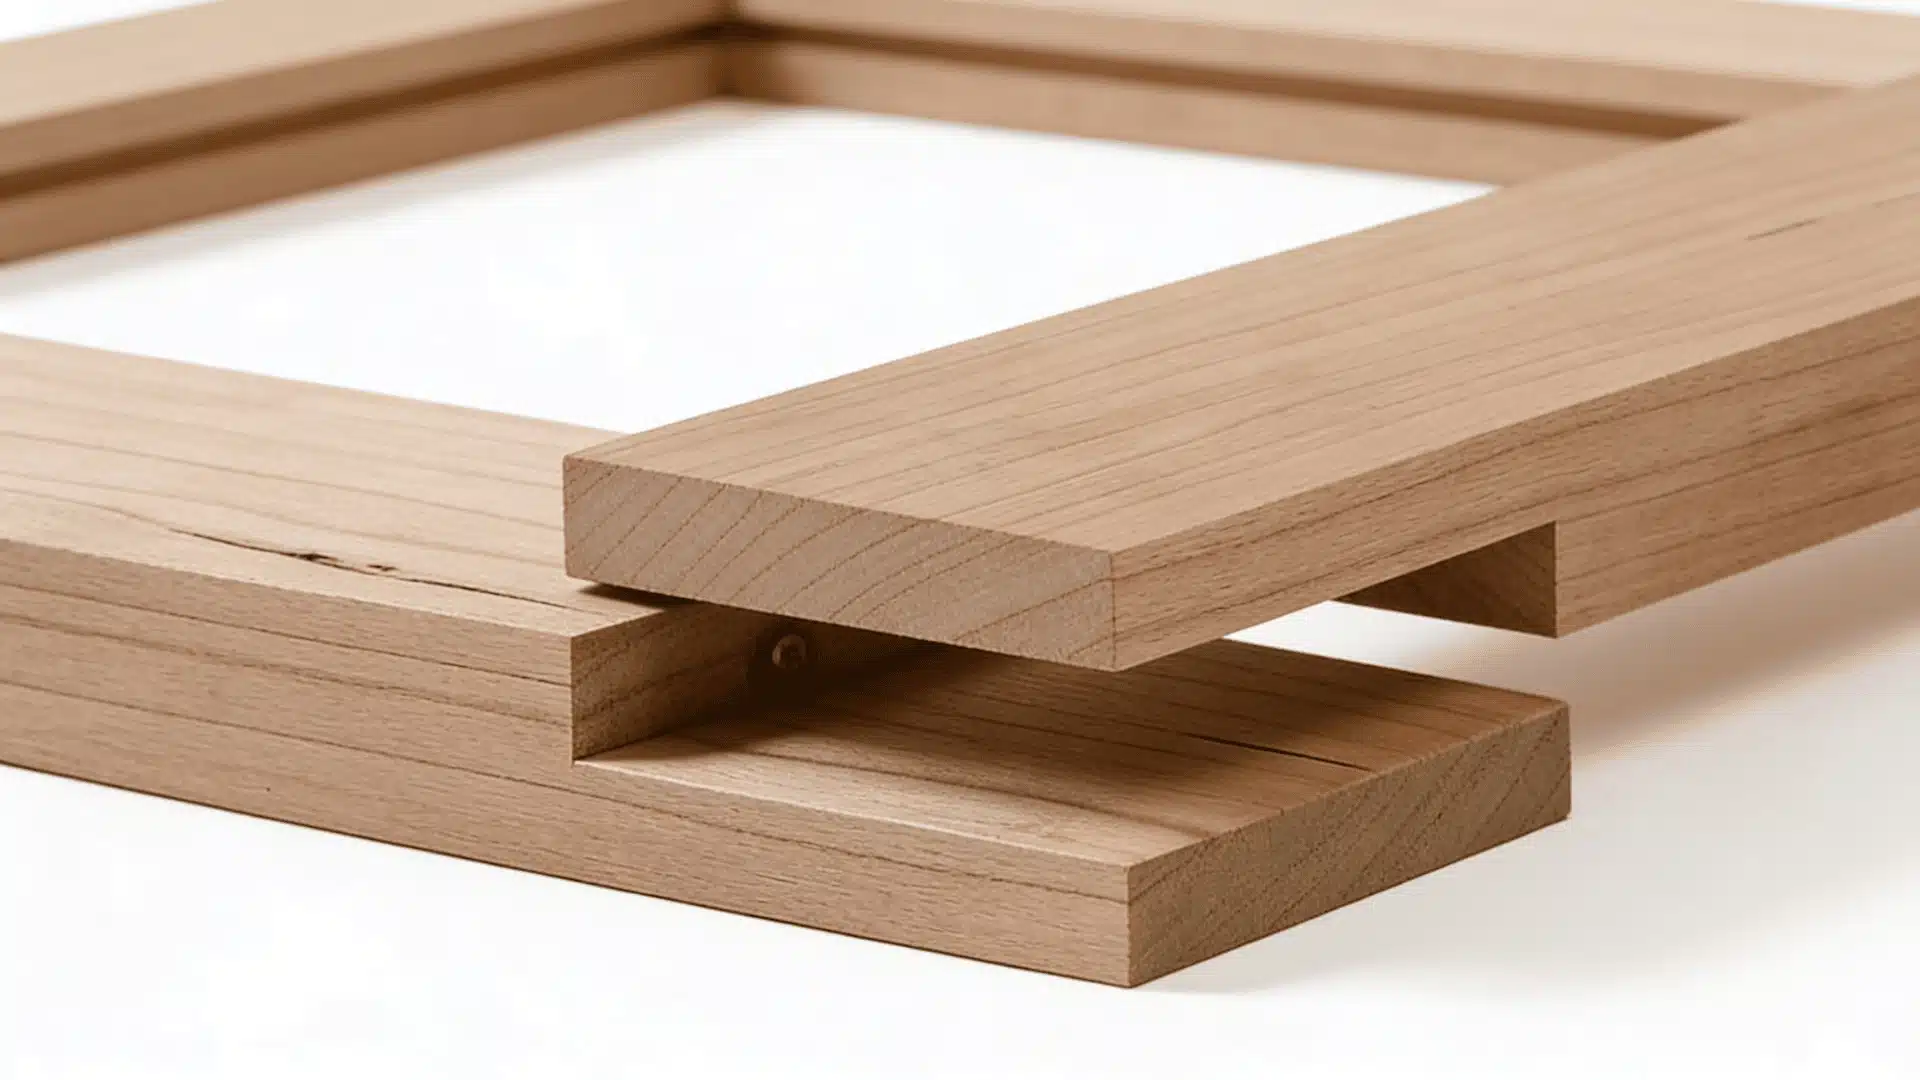
A lap joint is made by overlapping two boards partially over each other and securing them with glue or fasteners. It is a simple and practical choice for framing and utility builds.
| Advantages | Limitations |
|---|---|
| Easy to make with basic tools | Creates uneven thickness where the boards overlap |
| More glue surface than a butt joint | Moderate strength only |
12. Half-Lap Joint
A half-lap joint is made by removing material from both boards so they sit flush when they overlap. It is a common choice for building tables and wooden frames.
| Advantages | Limitations |
|---|---|
| Stronger and cleaner than a standard lap joint | Removes material from both boards |
| Sits flush, making it ideal for frames | Can weaken thinner stock if too much is removed |
13. Mortise-and-Tenon Joint
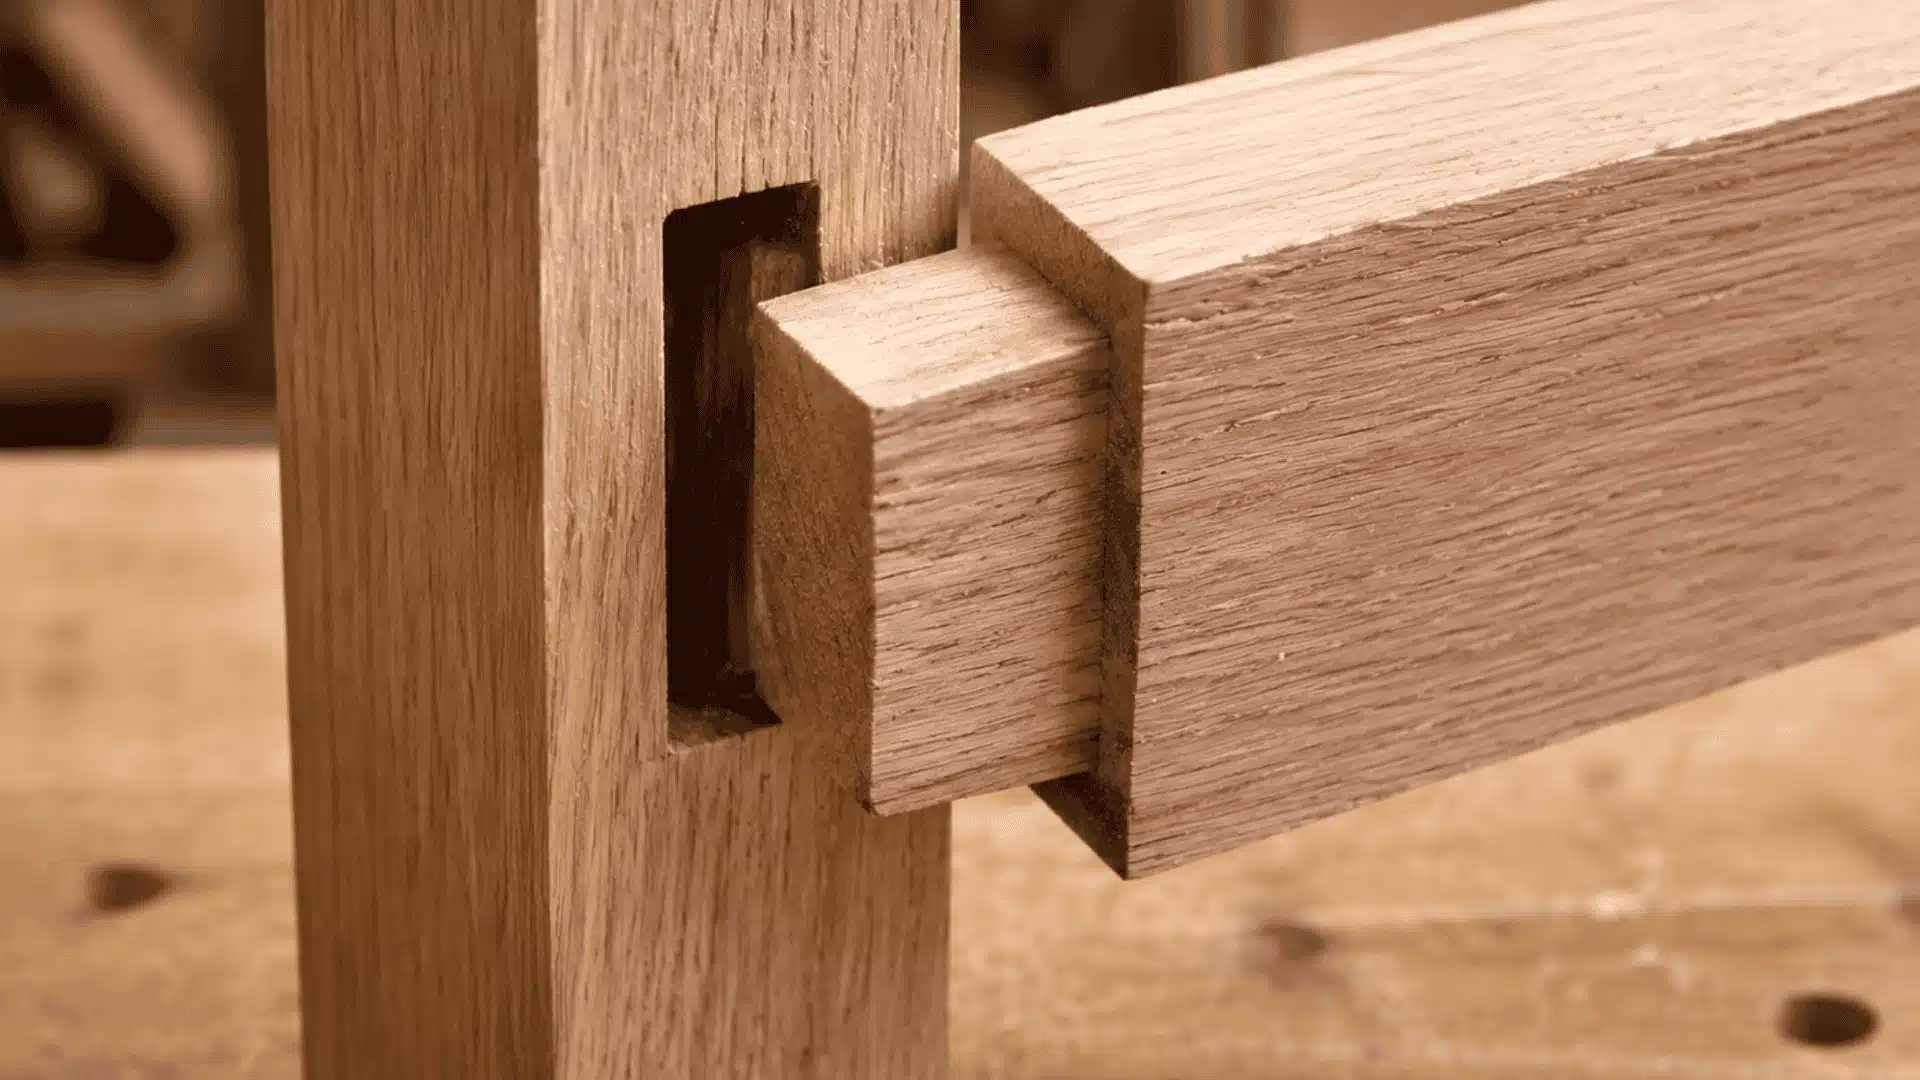
A mortise-and-tenon joint is made by fitting a shaped tenon on one board into a matching opening on another. It has been used for centuries in furniture and structural framing builds.
This joint is commonly found in tables, chairs, doors, and bed frames where the connection needs to handle regular stress and last for years.
| Advantages | Limitations |
|---|---|
| One of the strongest joints in woodworking | Difficult for beginners to cut accurately |
| Highly durable for structural furniture | Requires a precise fit or the joint will be loose |
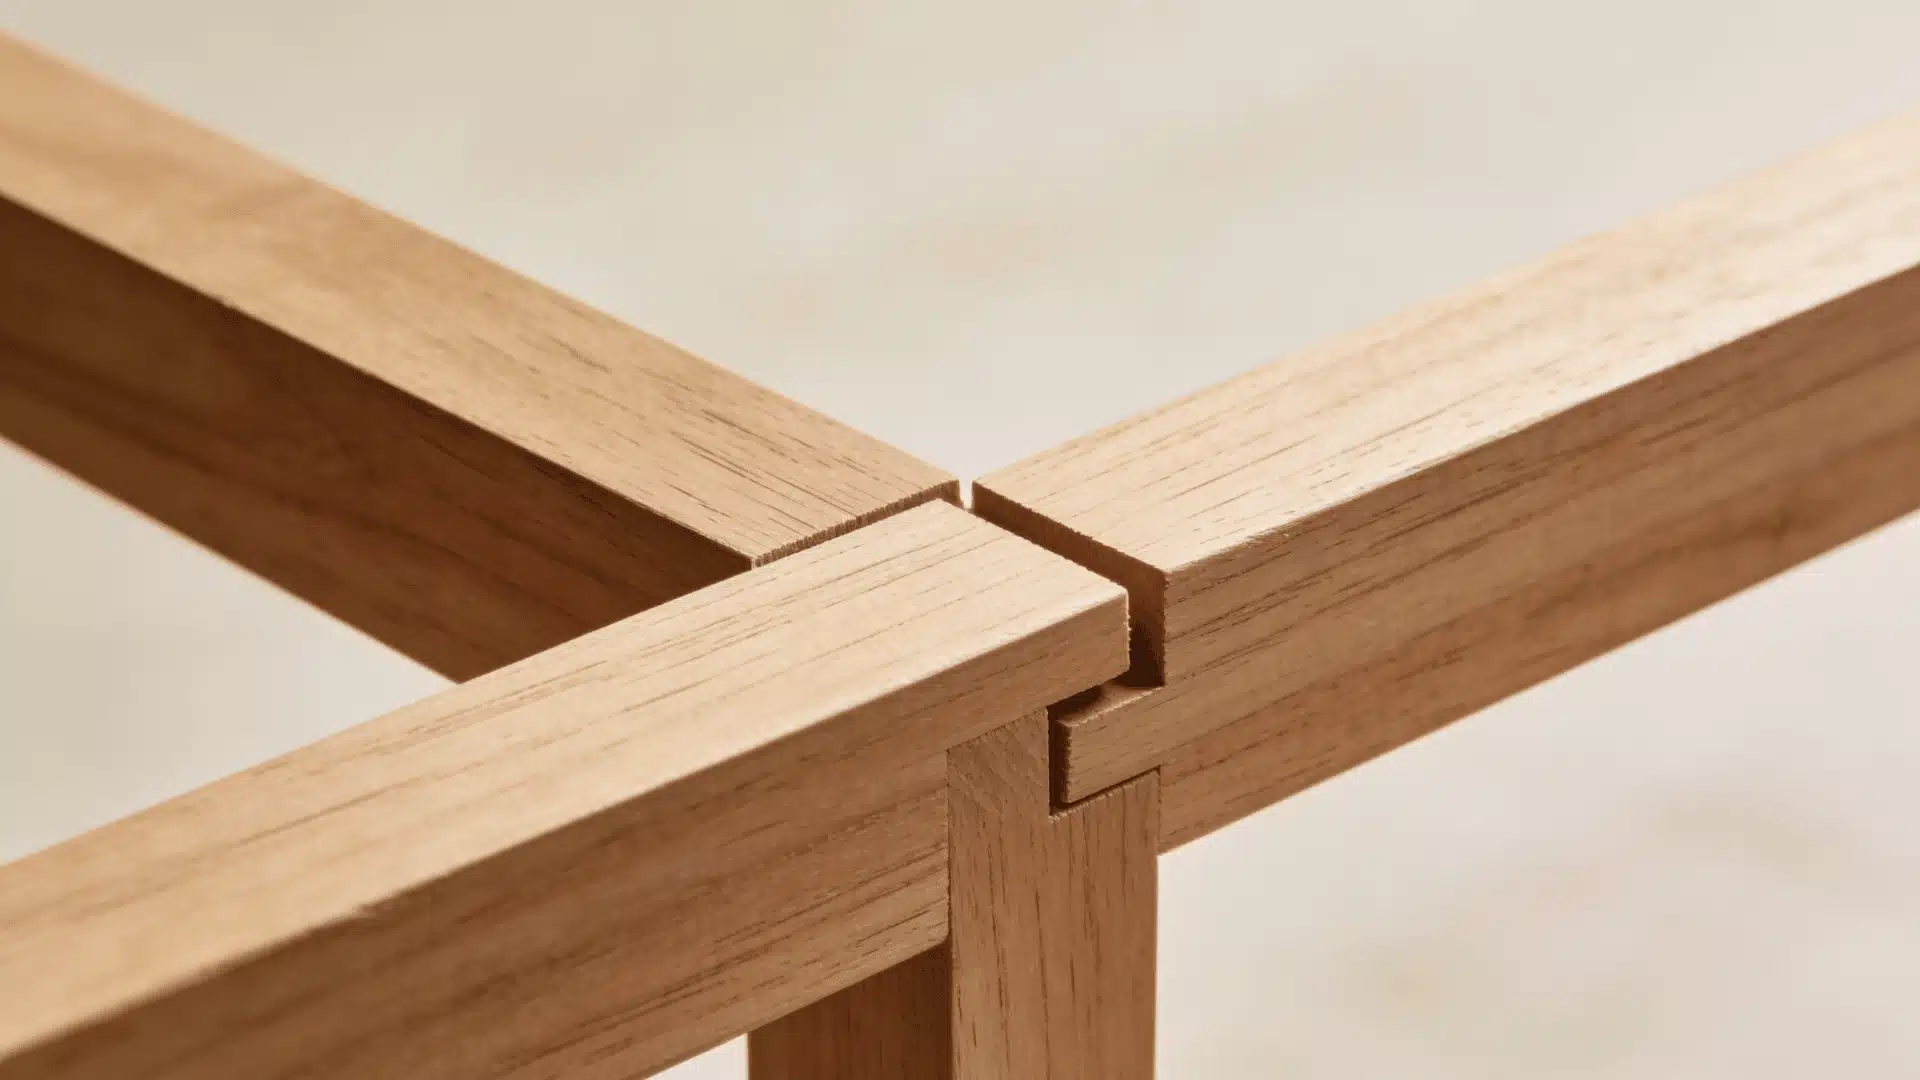
14. Bridle Joint
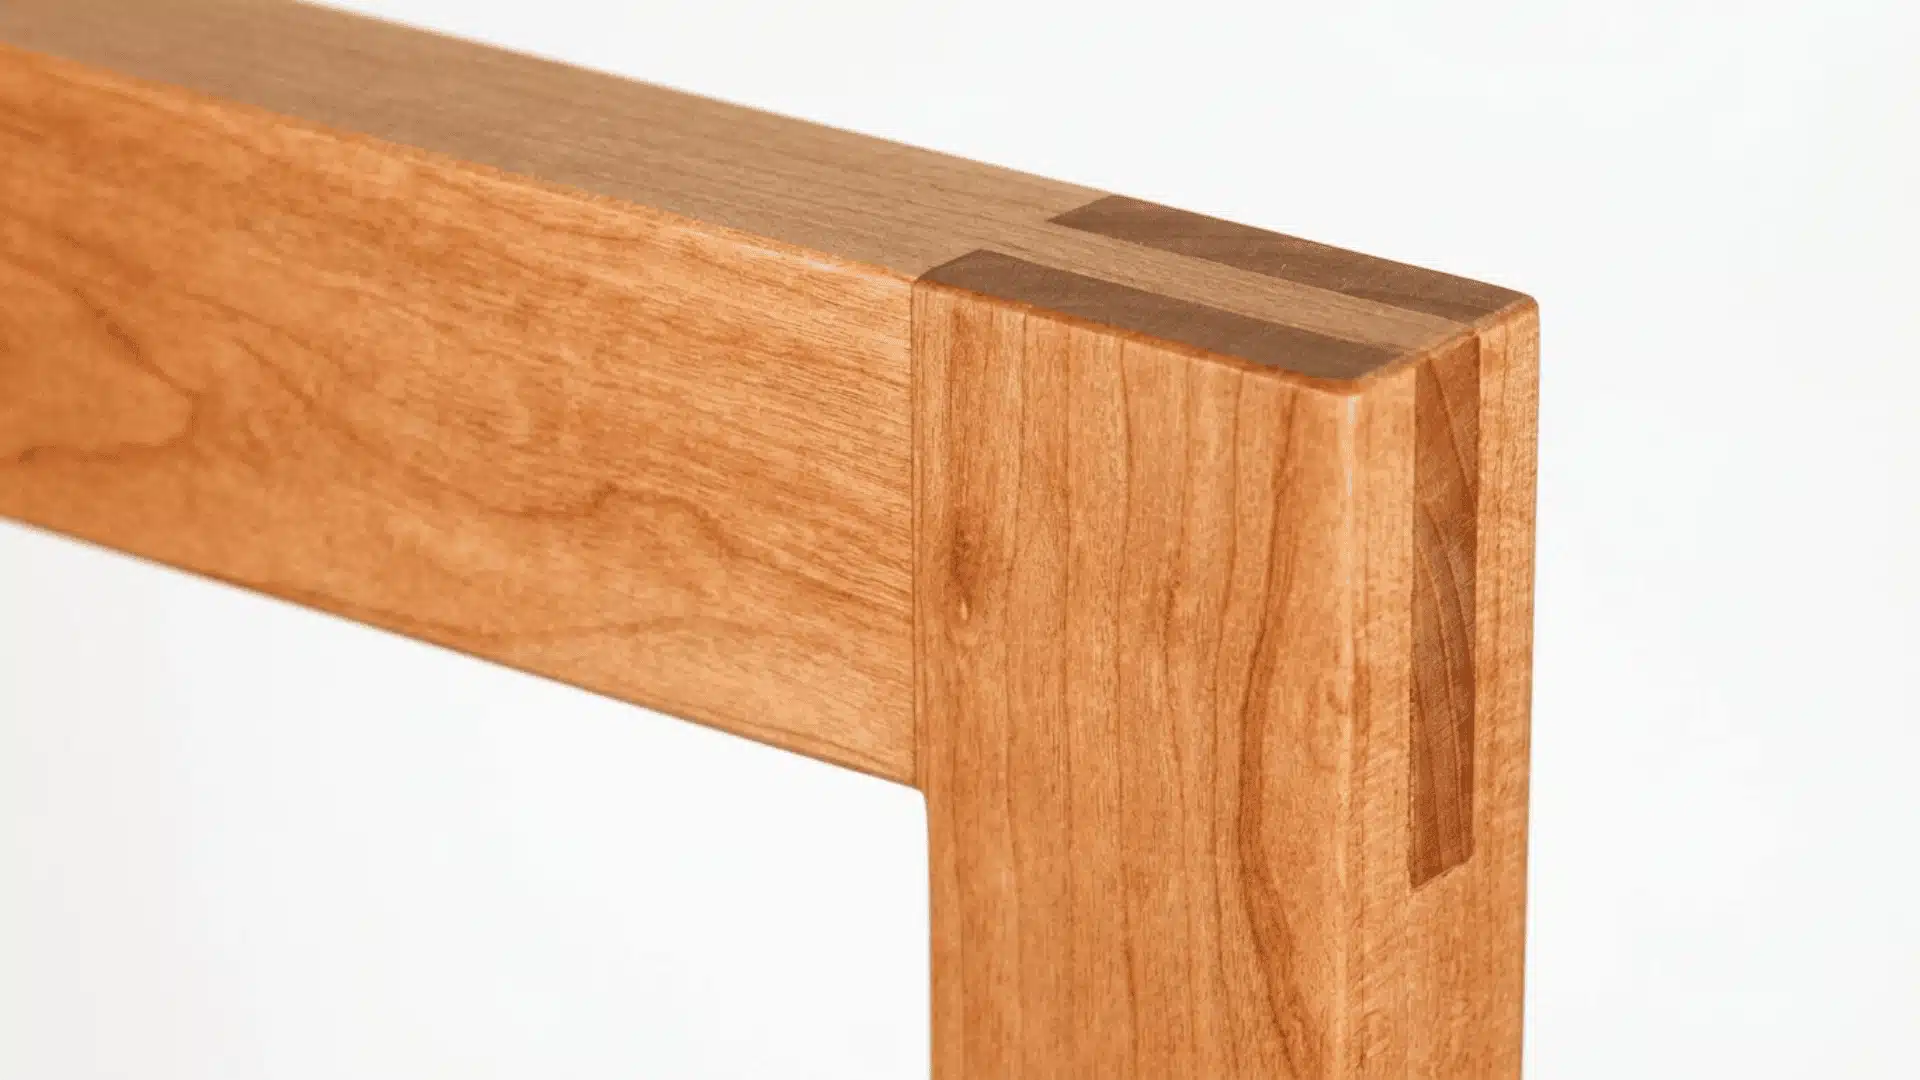
A bridle joint is made by fitting one board into an open slot cut into another. It is commonly used in tables, benches, and frames where strong corner support is needed.
| Advantages | Limitations |
|---|---|
| Provides strong corner support | Joint surfaces are exposed and visible |
| Easier to cut than a full mortise-and-tenon | Requires a precise fit to hold properly |
Decorative and Advanced Wood Joints
These joints take more skill and precision to make but deliver stronger connections and a much cleaner finished look. They are common in fine furniture and detailed woodworking projects.
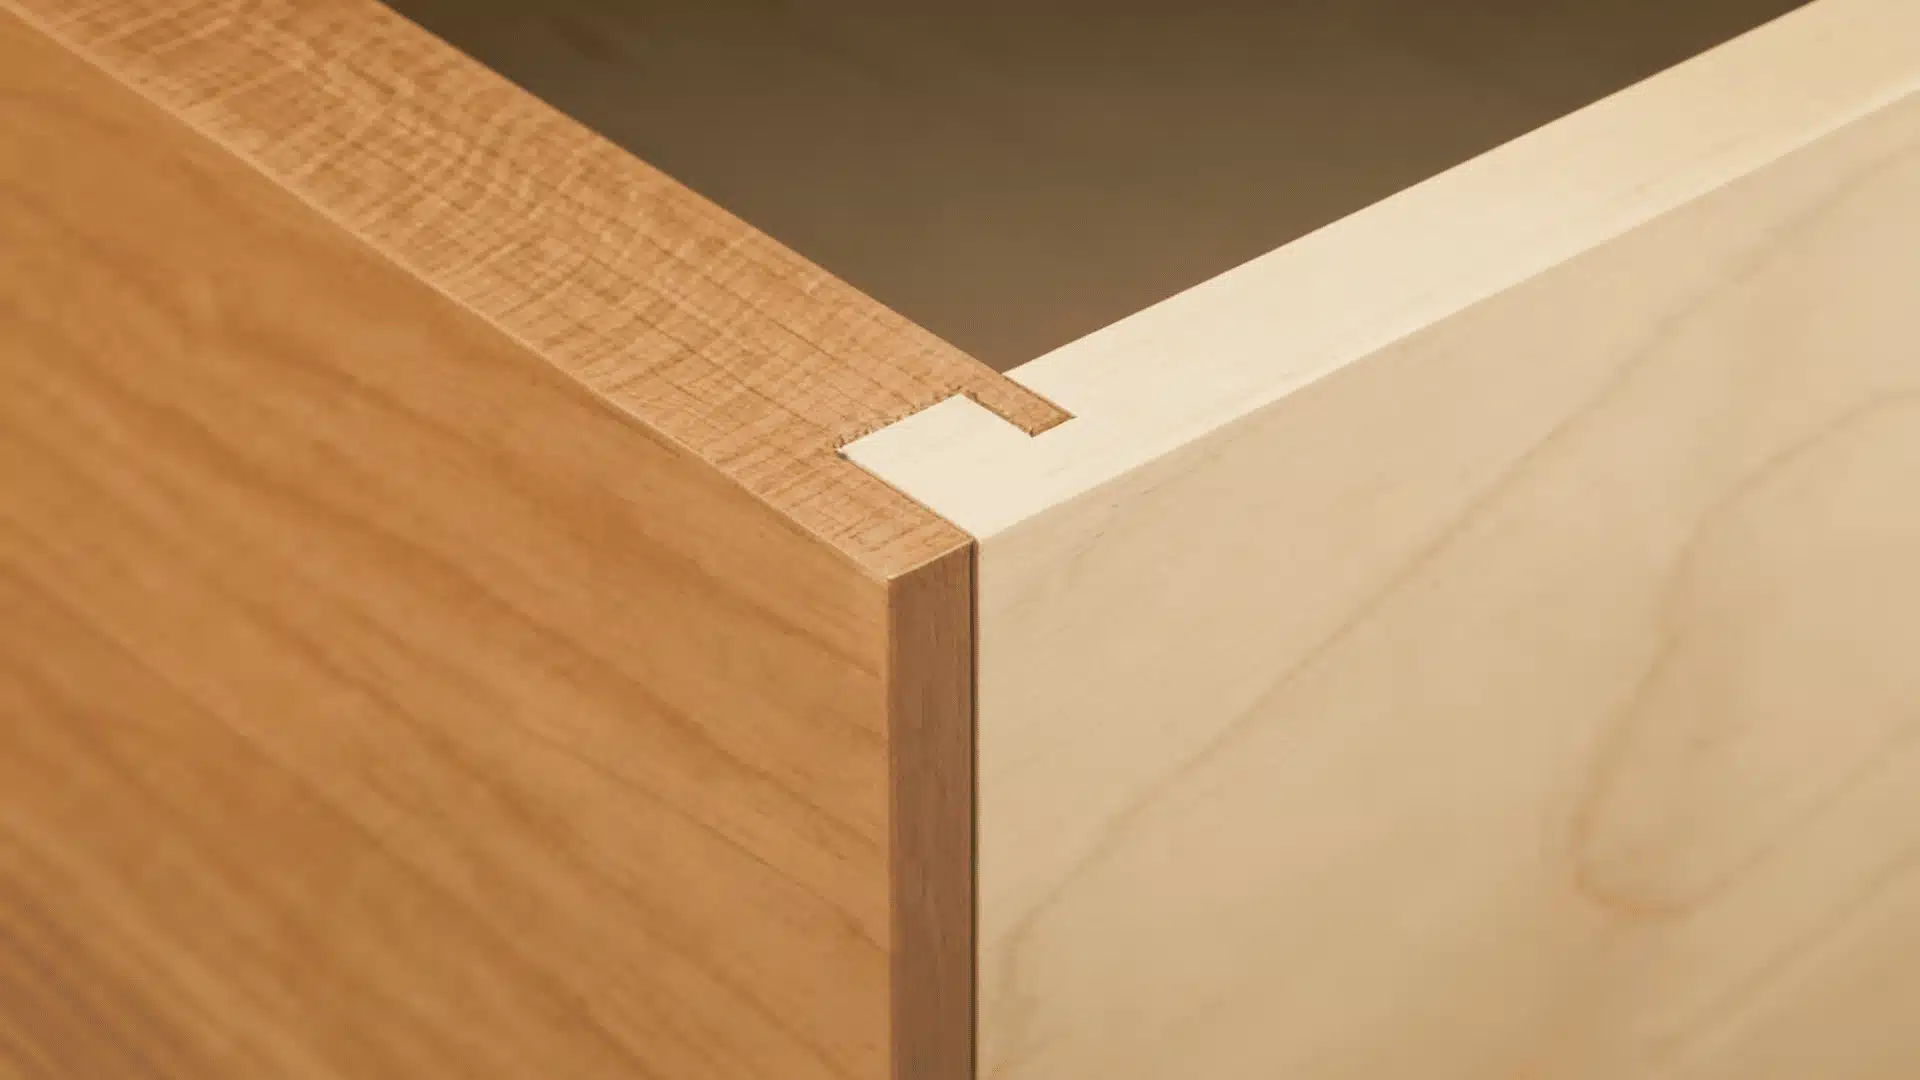
15. Box Joint
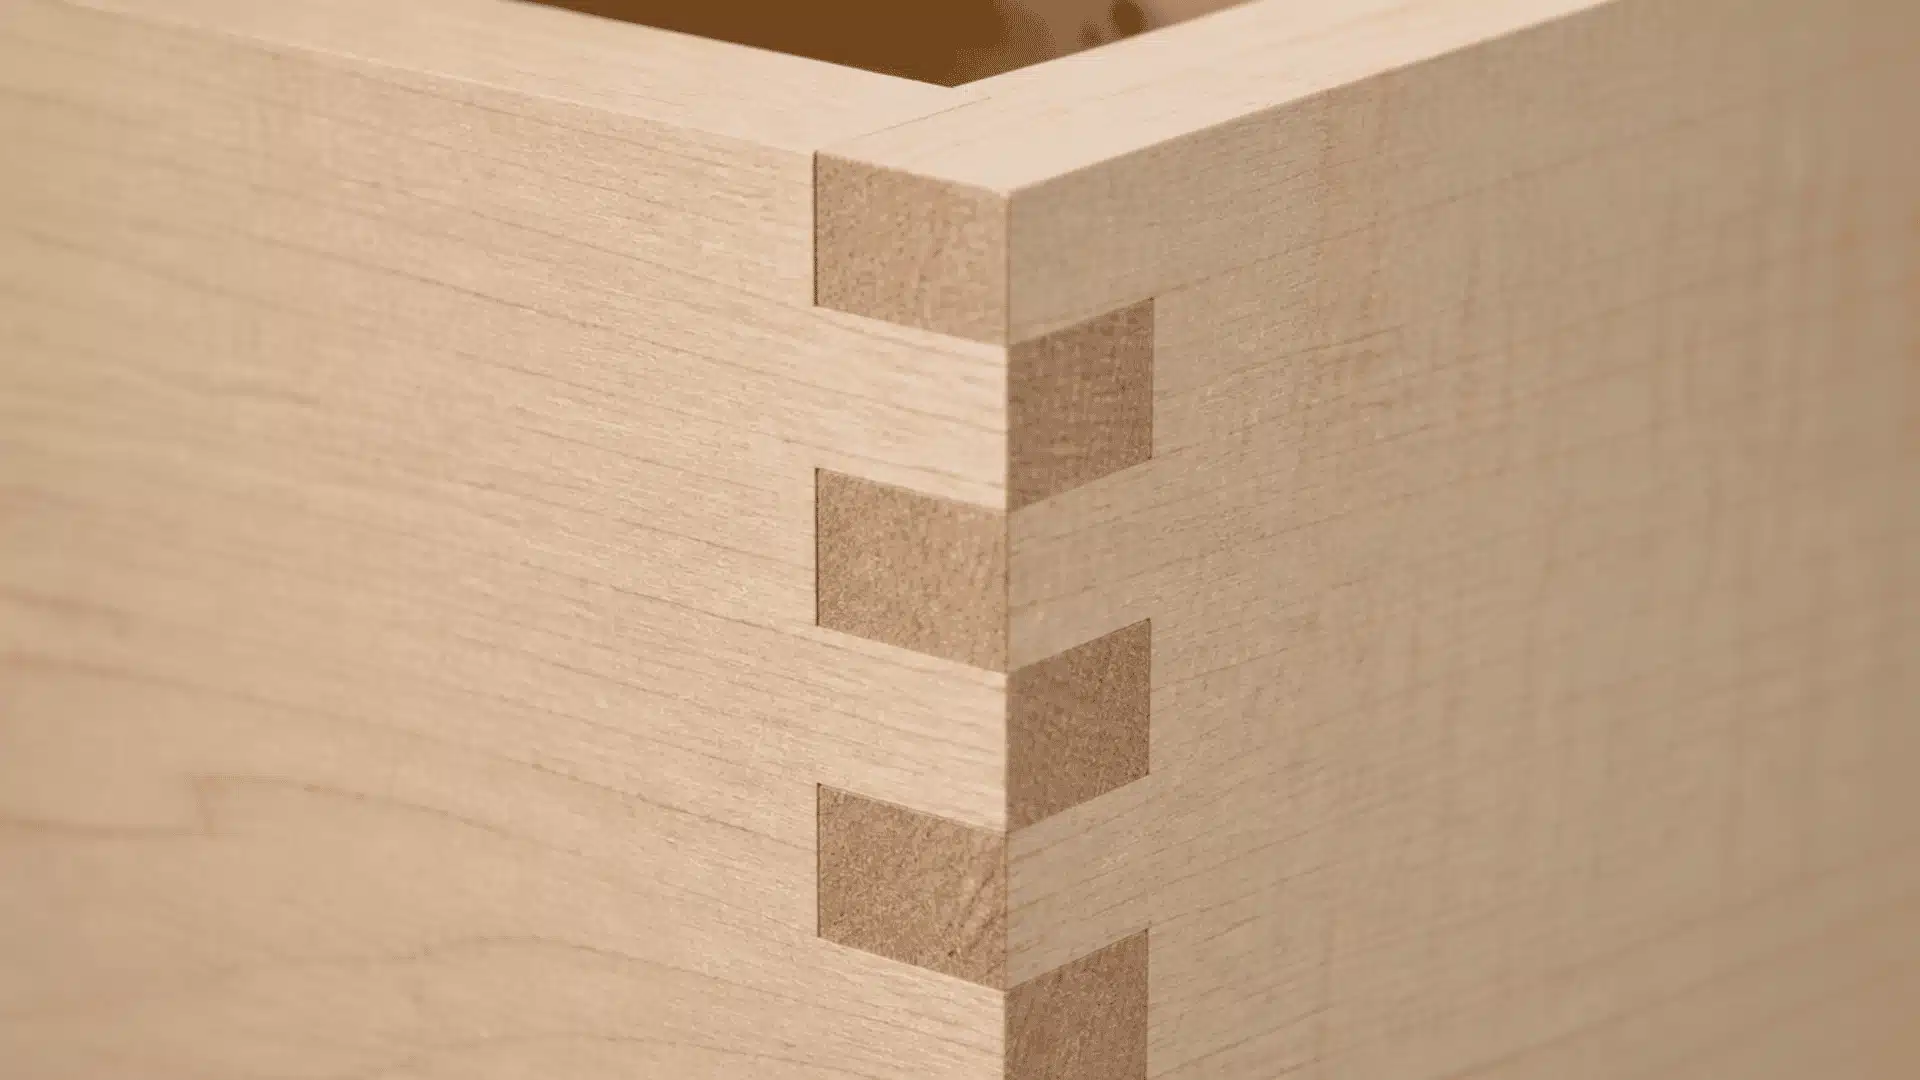
A box joint is made by cutting a series of interlocking square fingers at the corners of two boards. It is a popular choice for drawers and storage boxes where corner strength matters.
| Advantages | Limitations |
|---|---|
| Large glue surface for a strong bond | Requires accurate and evenly spaced cuts |
| Creates a strong corner connection | Less decorative than a dovetail joint |
16. Finger Joint
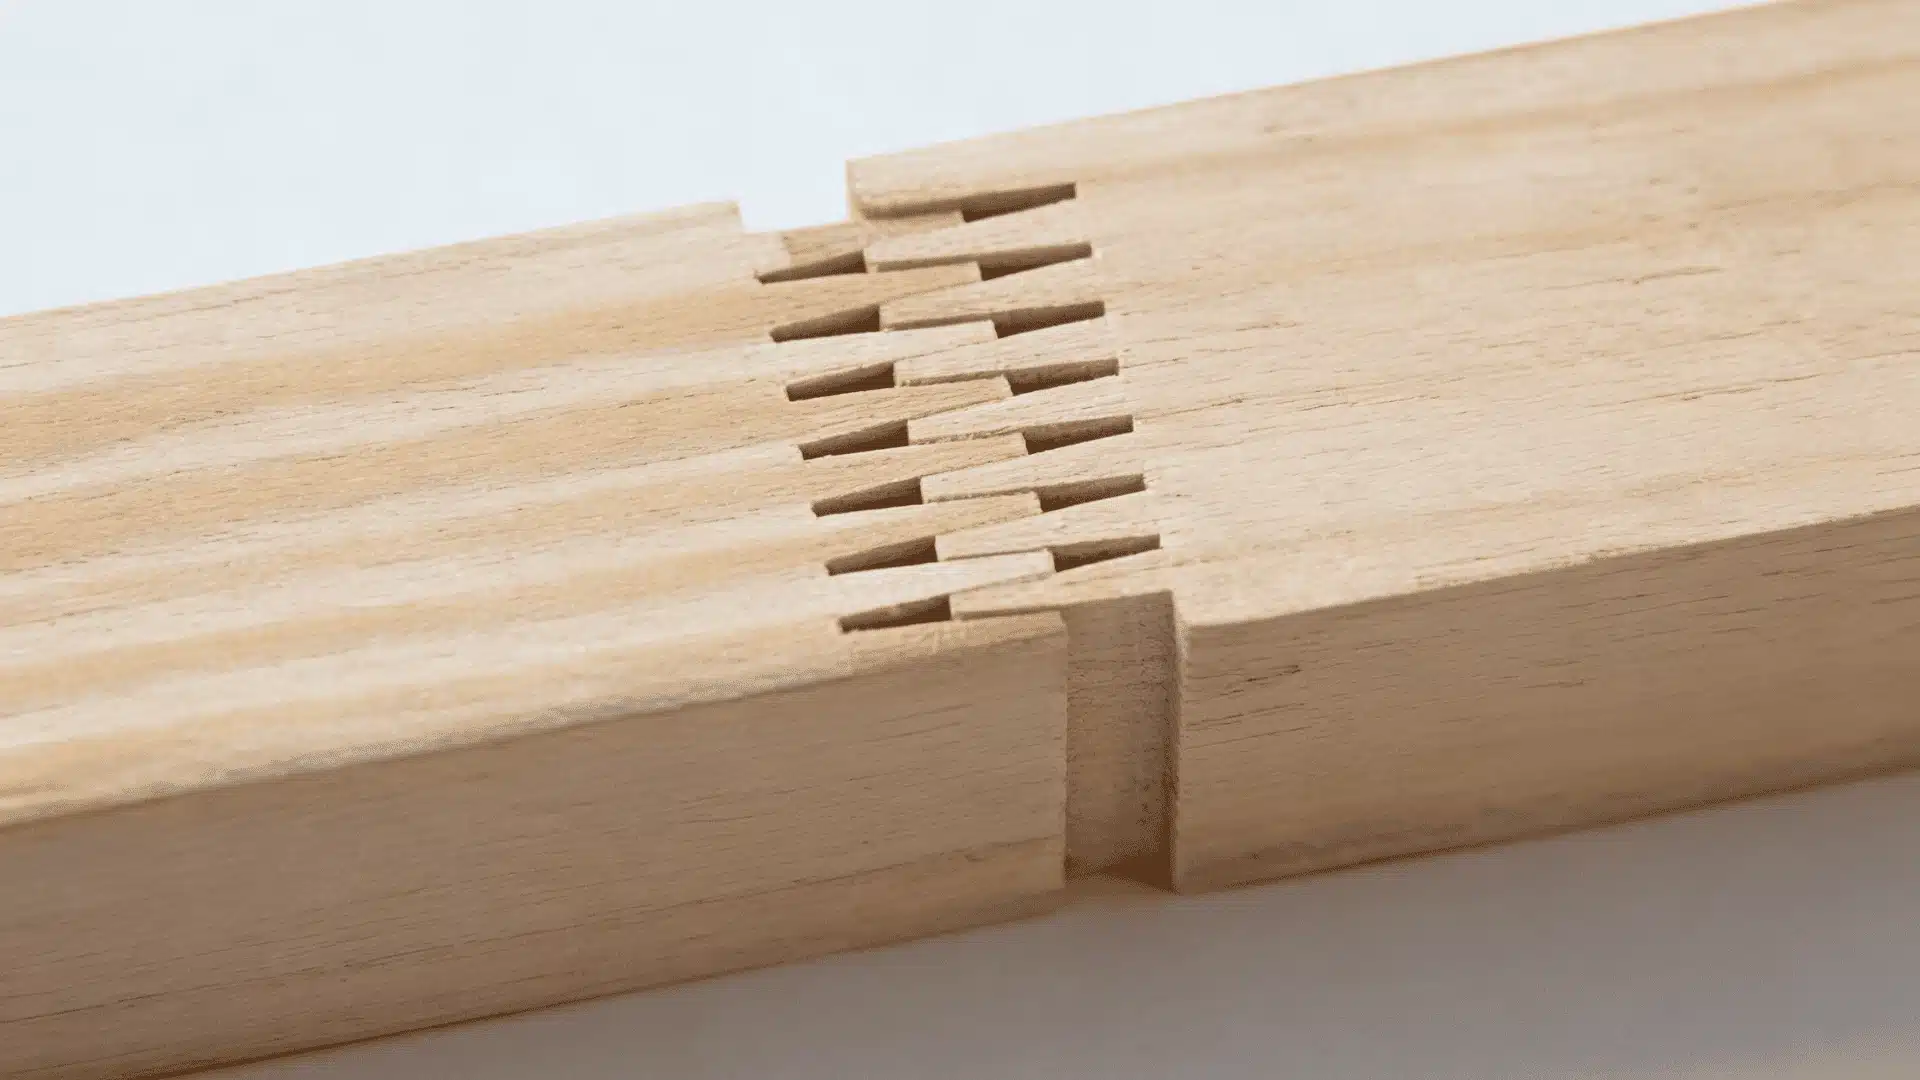
A finger joint uses multiple interlocking cuts on both board ends to increase the bonding surface. It is widely used in manufactured wood products and trim where boards need to be extended in length.
| Advantages | Limitations |
|---|---|
| Makes efficient use of smaller wood pieces | Requires precise machining for a clean fit |
| Creates a strong glue bond across multiple cuts | Usually machine-made rather than hand-cut |
17. Through Dovetail Joint
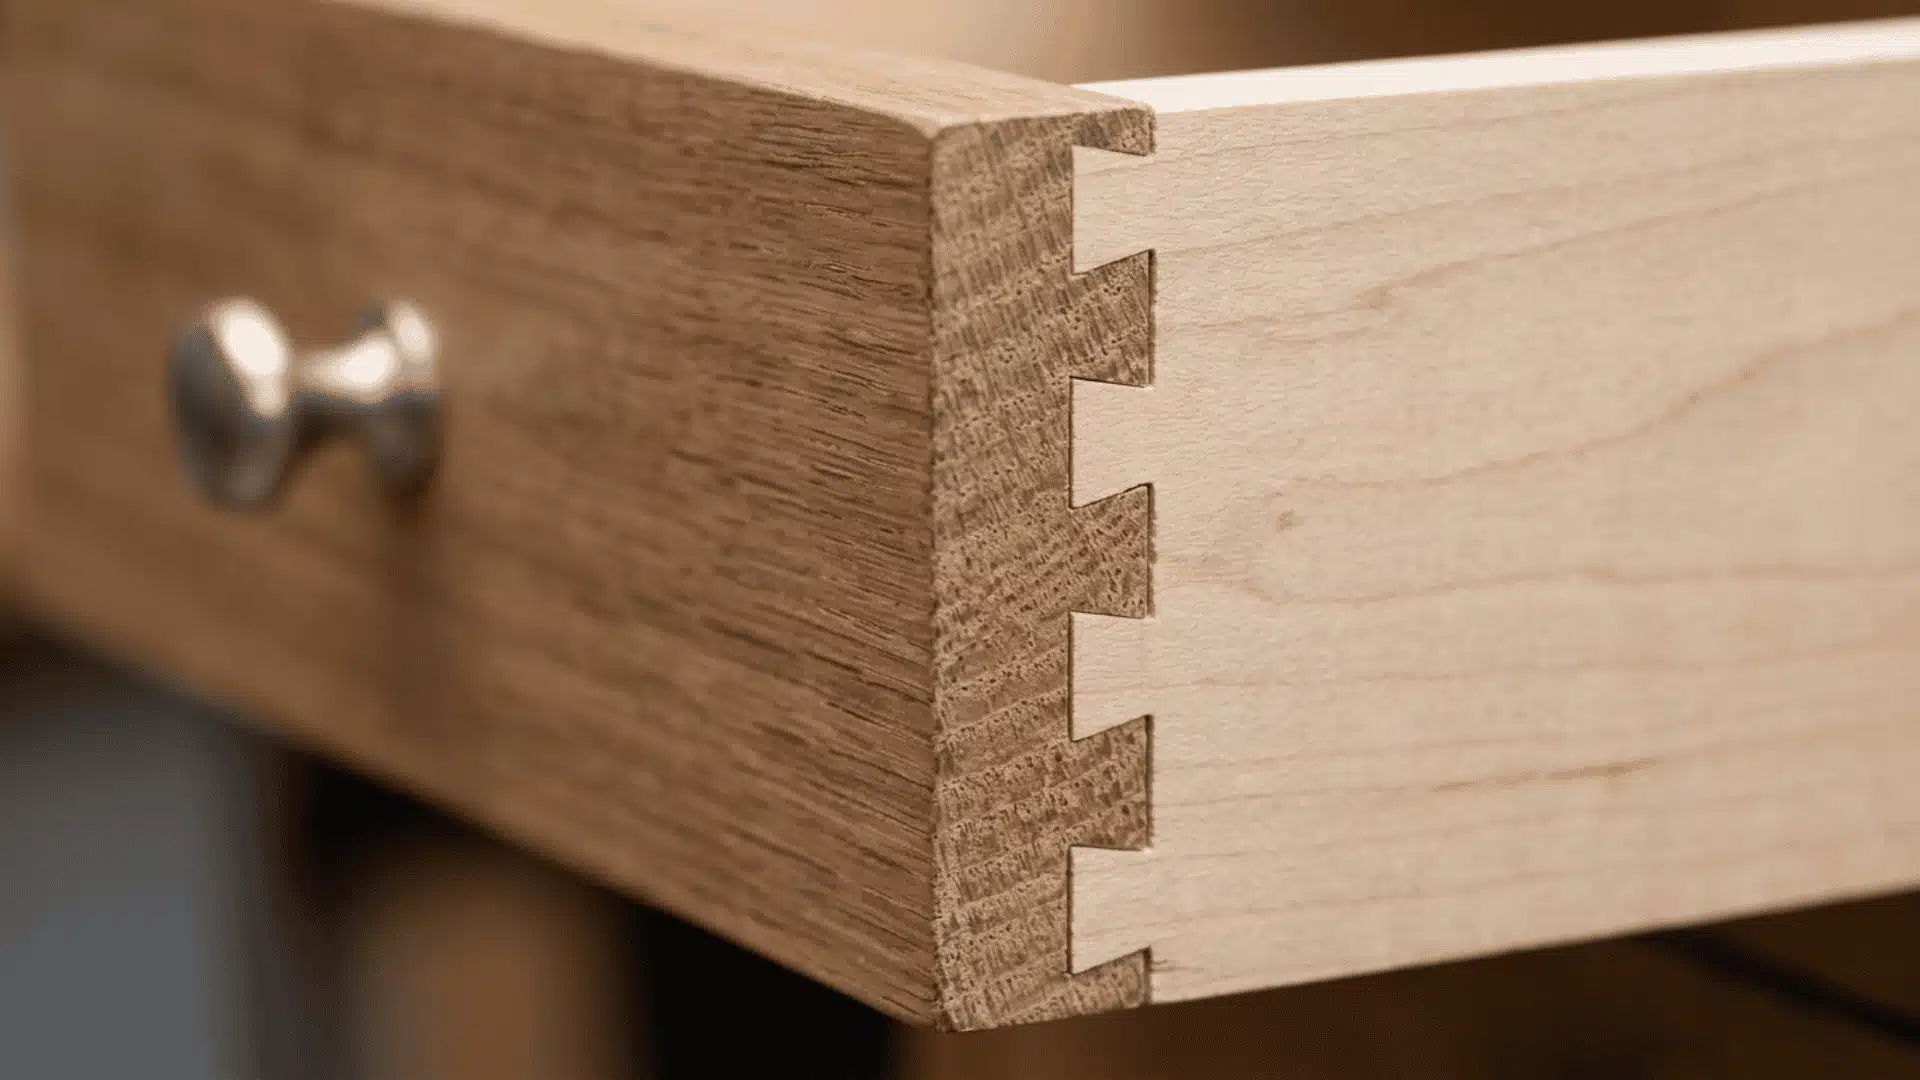
A through dovetail joint is made by cutting interlocking pins and tails that pass completely through both boards. It is highly resistant to pulling apart and is commonly used in drawers, fine boxes, and furniture.
| Advantages | Limitations |
|---|---|
| Extremely strong and resistant to pulling apart | Difficult to cut accurately by hand |
| Adds a decorative craftsmanship detail to the piece | Time-consuming, especially for beginners |
Quick Tip: Practice cutting dovetails on scrap wood before moving to your actual project. Getting the angle and spacing right takes time, and a test run will save you from wasting good material.
18. Half-Blind Dovetail Joint
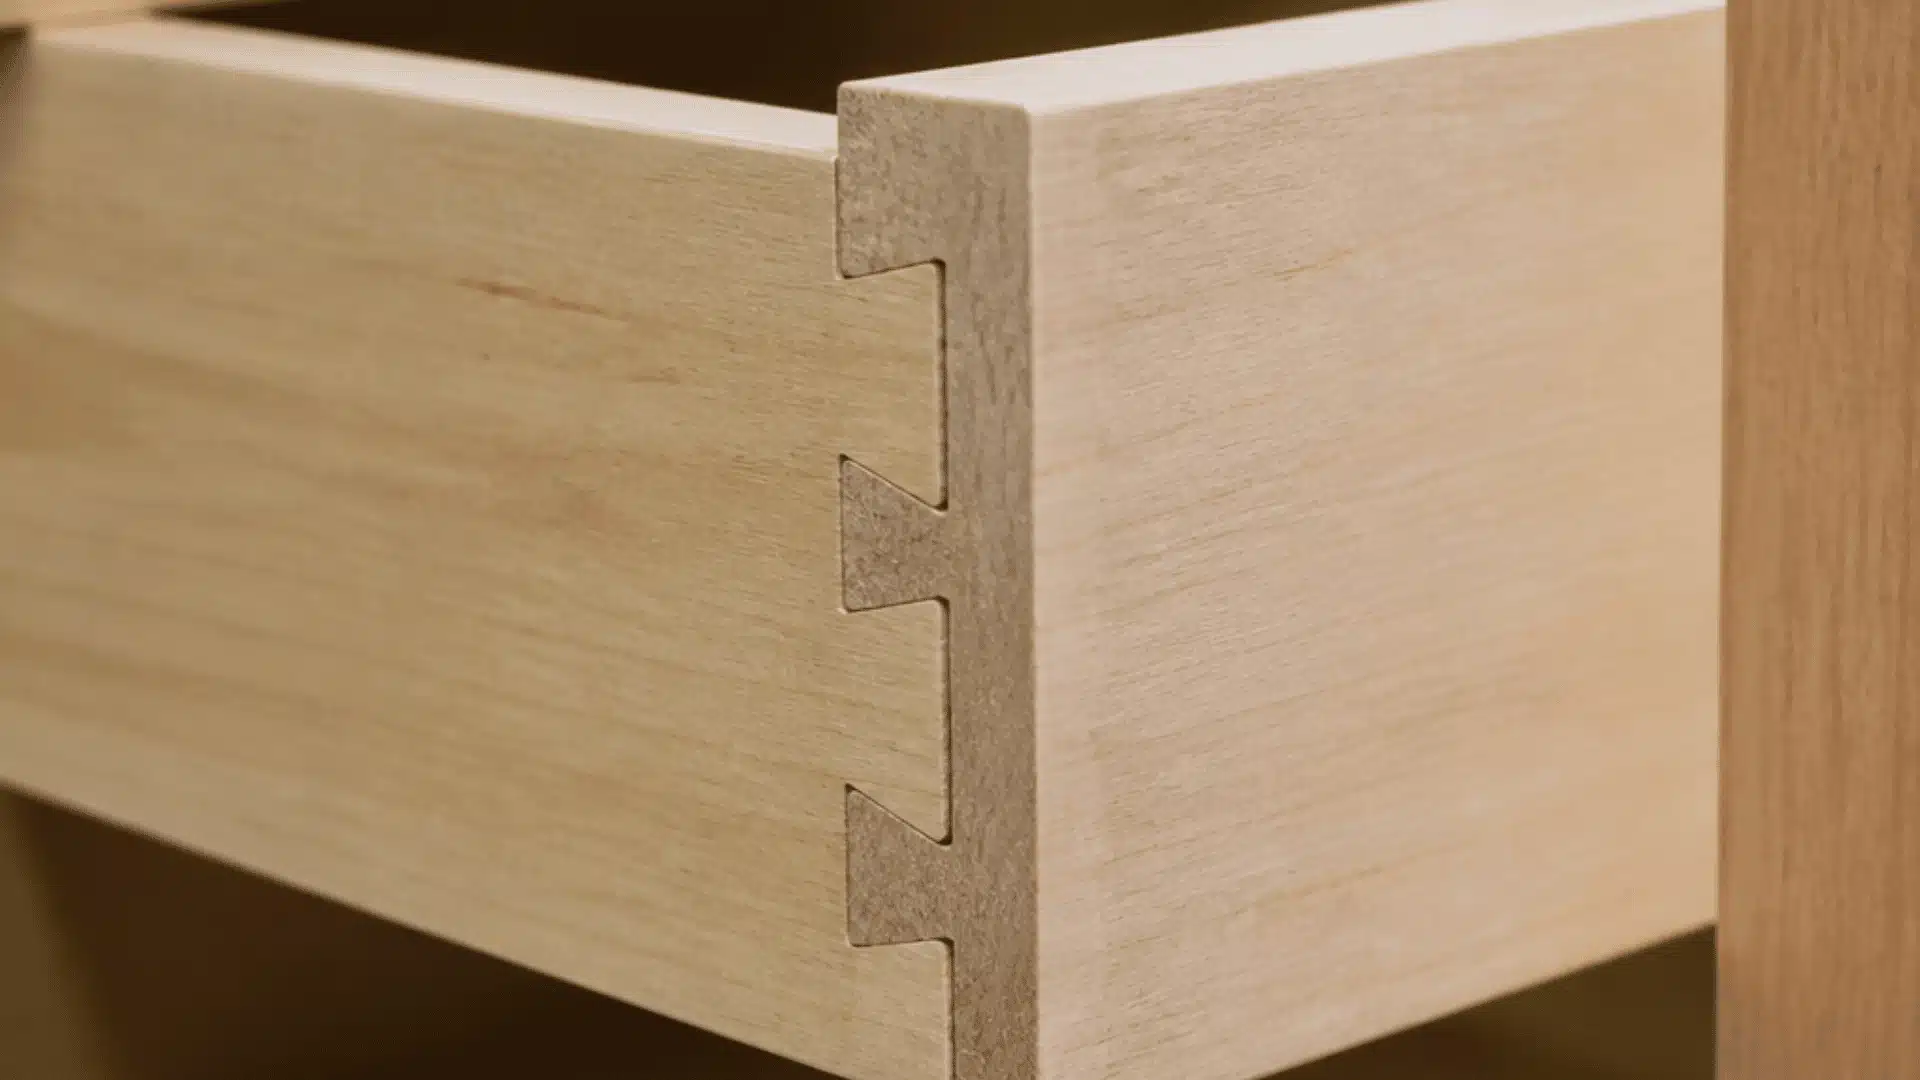
A half-blind dovetail joint works the same way as a through dovetail but the pins and tails are hidden from the front side. It is most commonly used in drawer fronts where a clean face is needed.
| Advantages | Limitations |
|---|---|
| Strong connection similar to a through dovetail | More difficult to cut than a through dovetail |
| Keeps the front face clean and free of visible joints | Requires a very precise layout to get right |
19. Tambour Joint
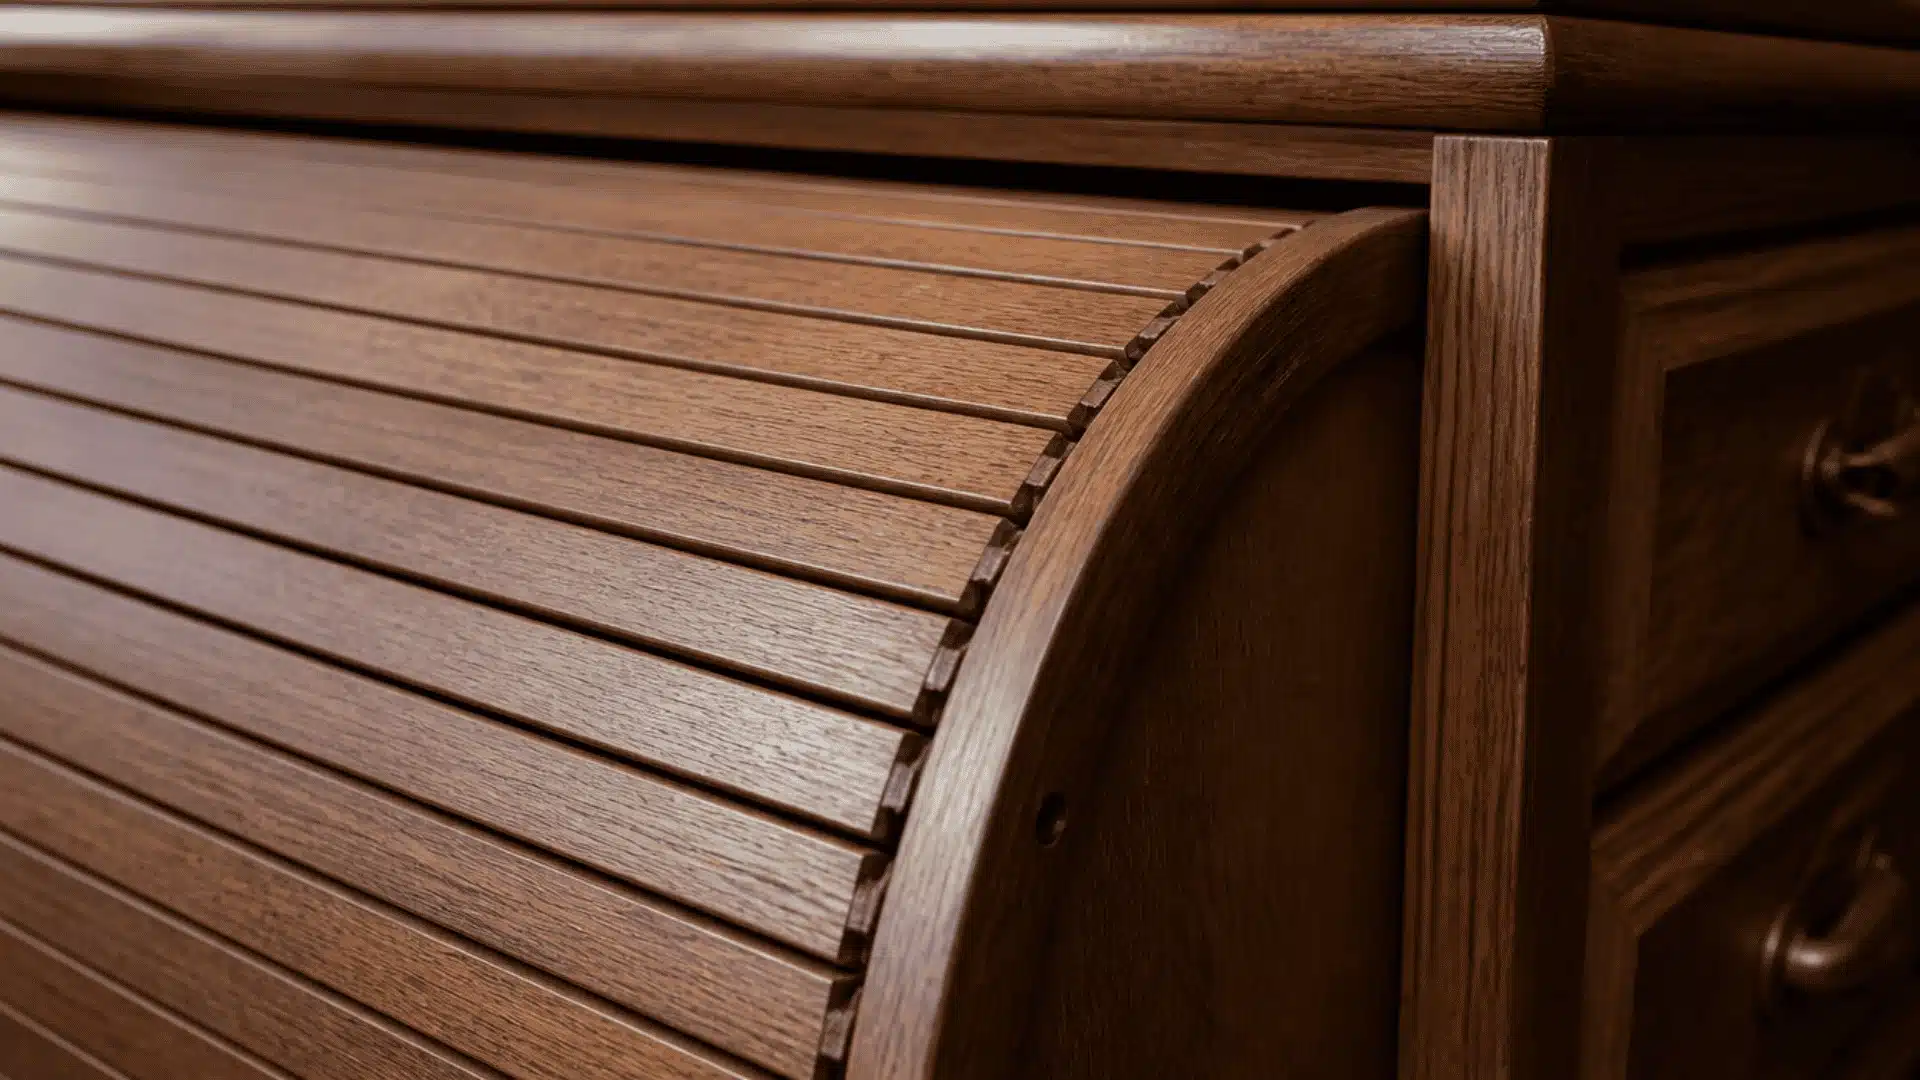
A tambour joint is made by connecting narrow wood slats together so they can flex and move as a unit. It is commonly used in roll-top desks and sliding doors where a surface needs to curve or slide smoothly.
| Advantages | Limitations |
|---|---|
| Allows flexible movement across a curved surface | More difficult to build than most other joints |
| Gives a smooth, clean appearance when closed | Requires accurate spacing and routing throughout |
Quick Tip: Back each slat with a canvas or fabric strip before gluing them together. This keeps the spacing consistent and gives the tambour enough flexibility to move smoothly through its track.
How to Choose the Right Wood Joint?
Choosing the right joint does not have to be complicated. Keeping a few key factors in mind will help you make the right call for any project you take on.
- Strength Needed: Think about how much load the joint will handle. Heavy furniture needs stronger joints than decorative trim.
- Appearance: If the joint will be visible, choose a clean-looking one. Hidden joints like dowels work well for seamless surfaces.
- Skill Level: Match the joint to your experience. Butt and pocket-hole joints suit beginners, while dovetails require more practice.
- Tool Availability: Some joints need specific tools. A biscuit joint needs a biscuit joiner, so always check what you have on hand.
Project Type
- Furniture → Mortise-and-tenon or dovetail for strong, lasting connections
- Shelves → Dado joints for solid and reliable shelf support
- Flooring → Tongue-and-groove for tight, well-aligned boards
- Quick DIY Builds → Pocket-hole joints for fast and practical assembly
- Decorative Corners → Miter joints for a clean, finished look
The right joint is simply the one that fits your project, your tools, and your current skill level best.
Wrapping Up
There are more types of wood joints than most beginners expect, and each one exists for a specific reason rooted in strength, appearance, or function.
Every strong, well-built piece of furniture starts with a joint chosen for the right reasons. The joint is where good planning shows up.
Now you know which joints suit beginners, which ones handle heavy loads, and which ones are built purely for a cleaner finish.
Have a favorite joint or a tip from your own builds? Share your experience in the comments below.
Frequently Asked Questions
What Is the Strongest Joint For Wood?
The mortise-and-tenon and through dovetail joints are considered the strongest in woodworking. Both offer excellent resistance to stress and are built to last for years.
What Is the Weakest Joint for Wood?
The butt joint is the weakest wood joint. It has minimal glue surface and relies entirely on fasteners to hold, making it poor at resisting pulling forces.
Which Wood Joint Hides Screws?
Dowel and biscuit joints hide screws completely since they use no screws at all. Pocket-hole joints can also hide screws using wooden plugs to cover the holes.