How to Install a Thermostat: A Simple Step-by-Step Process

Knowing how to install a thermostat can save you a service call. Most standard swaps are straightforward, but a few common errors trip people up.
Mismatched wiring, a missing C-wire, and the wrong thermostat for your system are the usual problems.
This article covers each step clearly. You will learn what to check before you buy, how to wire correctly, and when to call a professional.
What Does a Thermostat Do and Why Does Installation Matter?
A thermostat controls when your furnace, air conditioner, or heat pump turns on and off. It reads the room temperature and signals your HVAC system once the room drifts from your set point.
Getting the installation right affects your comfort, your energy bills, and your equipment’s lifespan. A loose wire or the wrong terminal connection causes real problems. Your system might run longer than it should. It could also cycle on and off too often, or fail to turn on at all.
Correct wiring also protects your furnace or compressor from the strain that comes with a miscommunication from the thermostat.
What to Know Before Installing a Thermostat
Checking compatibility before you buy saves you a return trip to the store. Here is what to look at first.
Types of Thermostats You Can Install
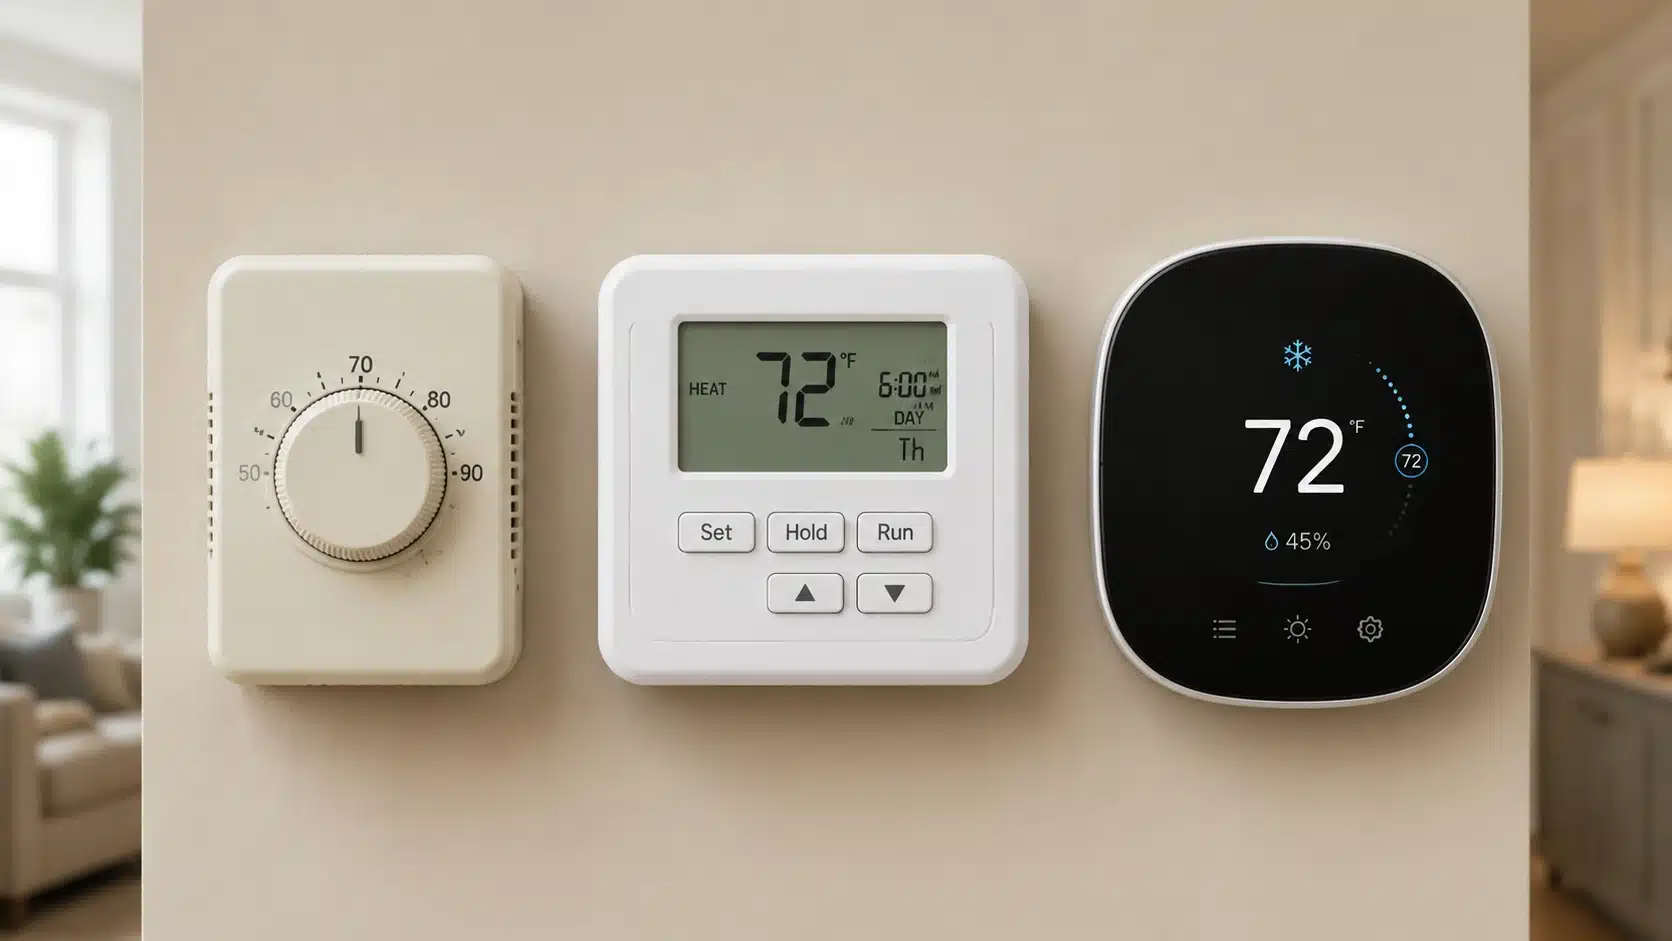
You will run into three main types while shopping. Each fits a different home setup and comfort level with wiring, so pick what matches your needs.
- Manual thermostats give you basic temperature control. You turn a dial or flip a switch, and that is it. They work well with simple heating systems and minimal wiring.
- Programmable thermostats let you set a schedule. You can lower the heat at night and raise it before you wake up, without touching a single button.
- Smart thermostats connect to Wi-Fi and your phone. They learn your habits, track energy use, and often need a C-wire to stay powered around the clock.
Check Thermostat Compatibility Before Installation
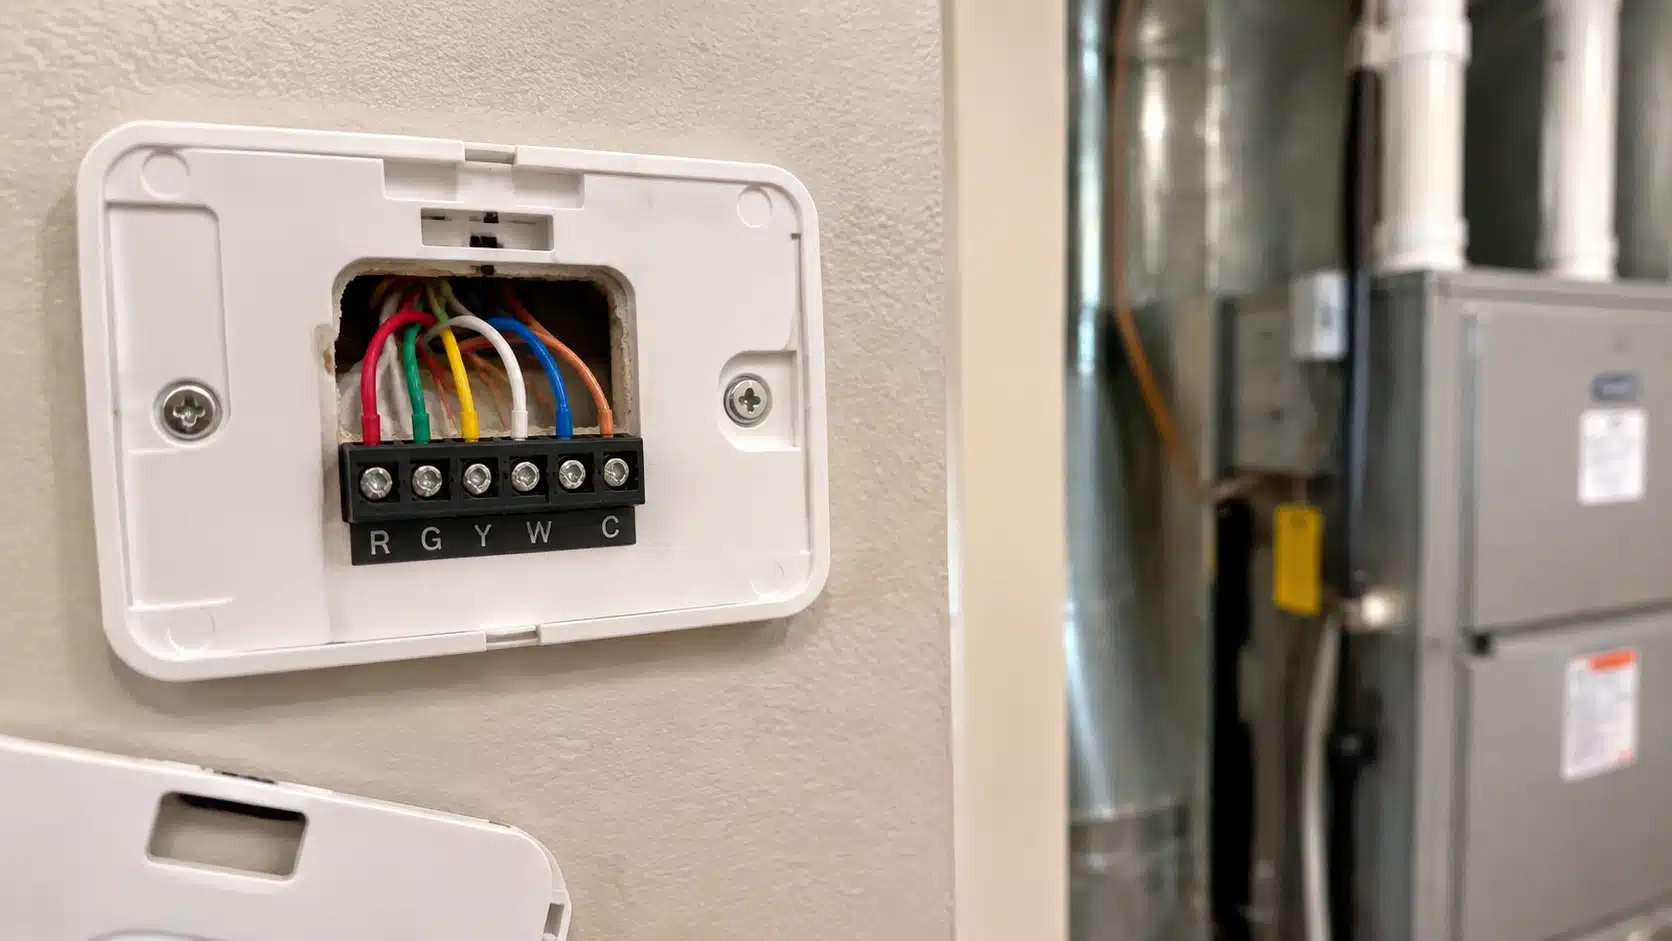
Look at your HVAC system type before you buy anything. Furnaces, central air conditioners, heat pumps, dual-fuel systems, and boilers each wire differently.
Check your voltage too. Most home thermostats run on a low-voltage 24V system. High-voltage systems need a licensed professional, not a DIY job.
Open your current thermostat and count the wires. Note how many terminals are filled and whether a C-wire is already connected. Many installation problems start with buying a thermostat that does not match the system in your home.
Tools and Materials Needed to Install a Thermostat
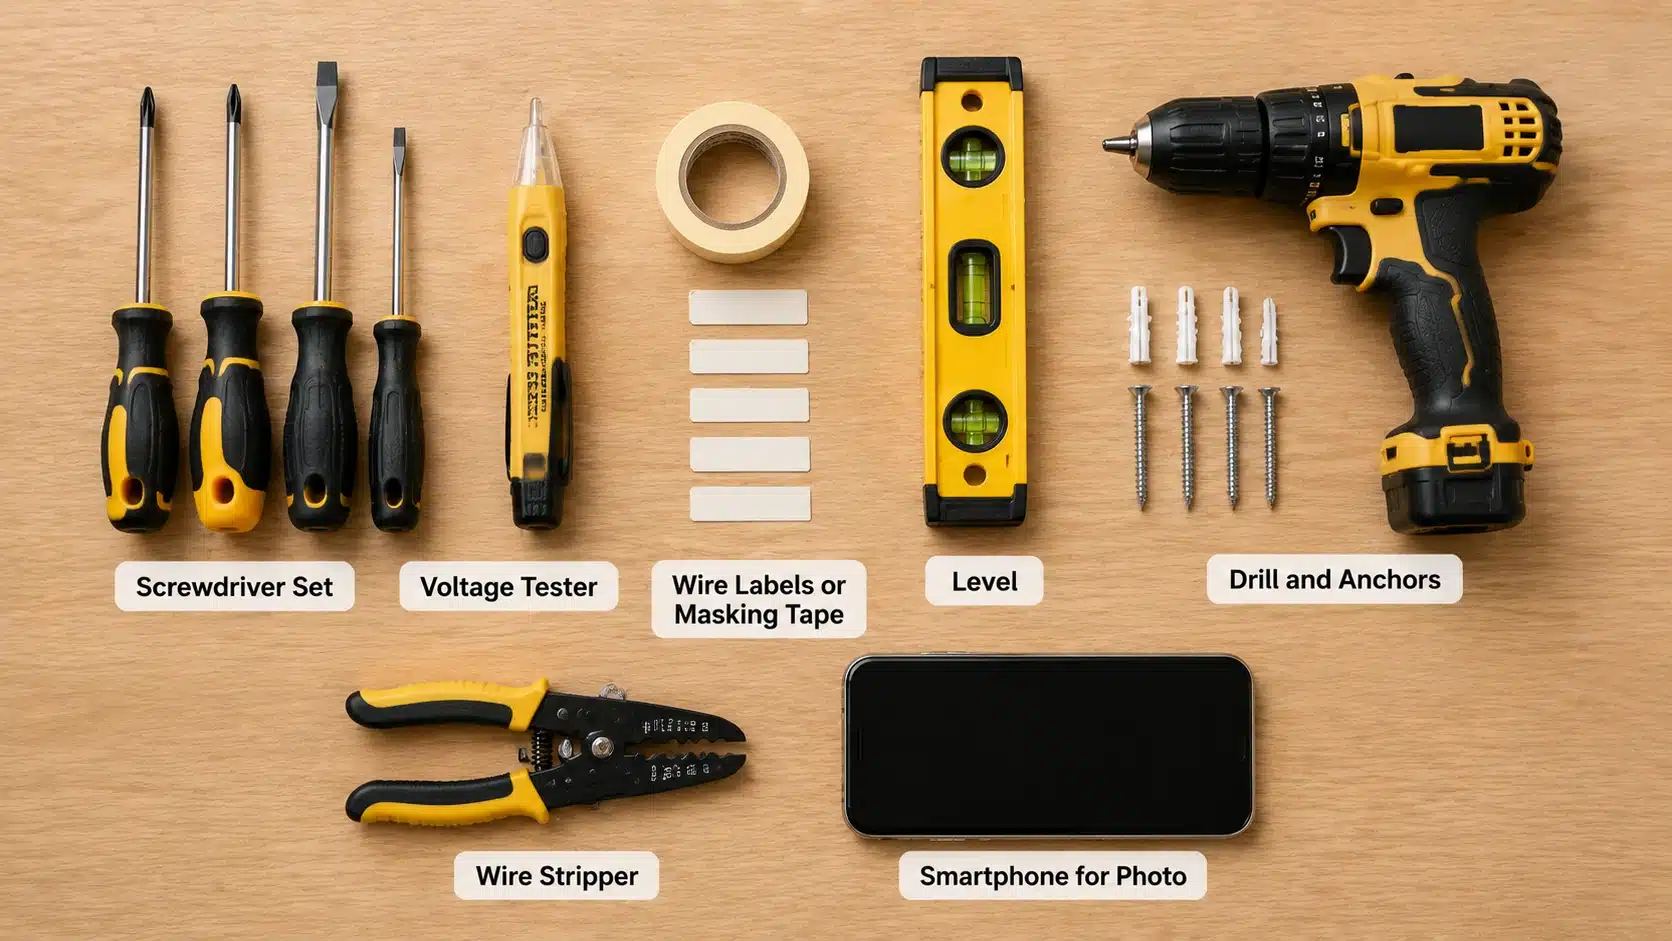
Gather everything below before you start. You do not want to hunt for a screwdriver mid-install with the power off.
- Screwdriver set
- Voltage tester
- Wire labels or masking tape
- Level
- Drill and wall anchors (if the new thermostat needs new mounting holes)
- Wire stripper
- Smartphone, for a quick photo of the old wiring
How to Install a Thermostat Step by Step
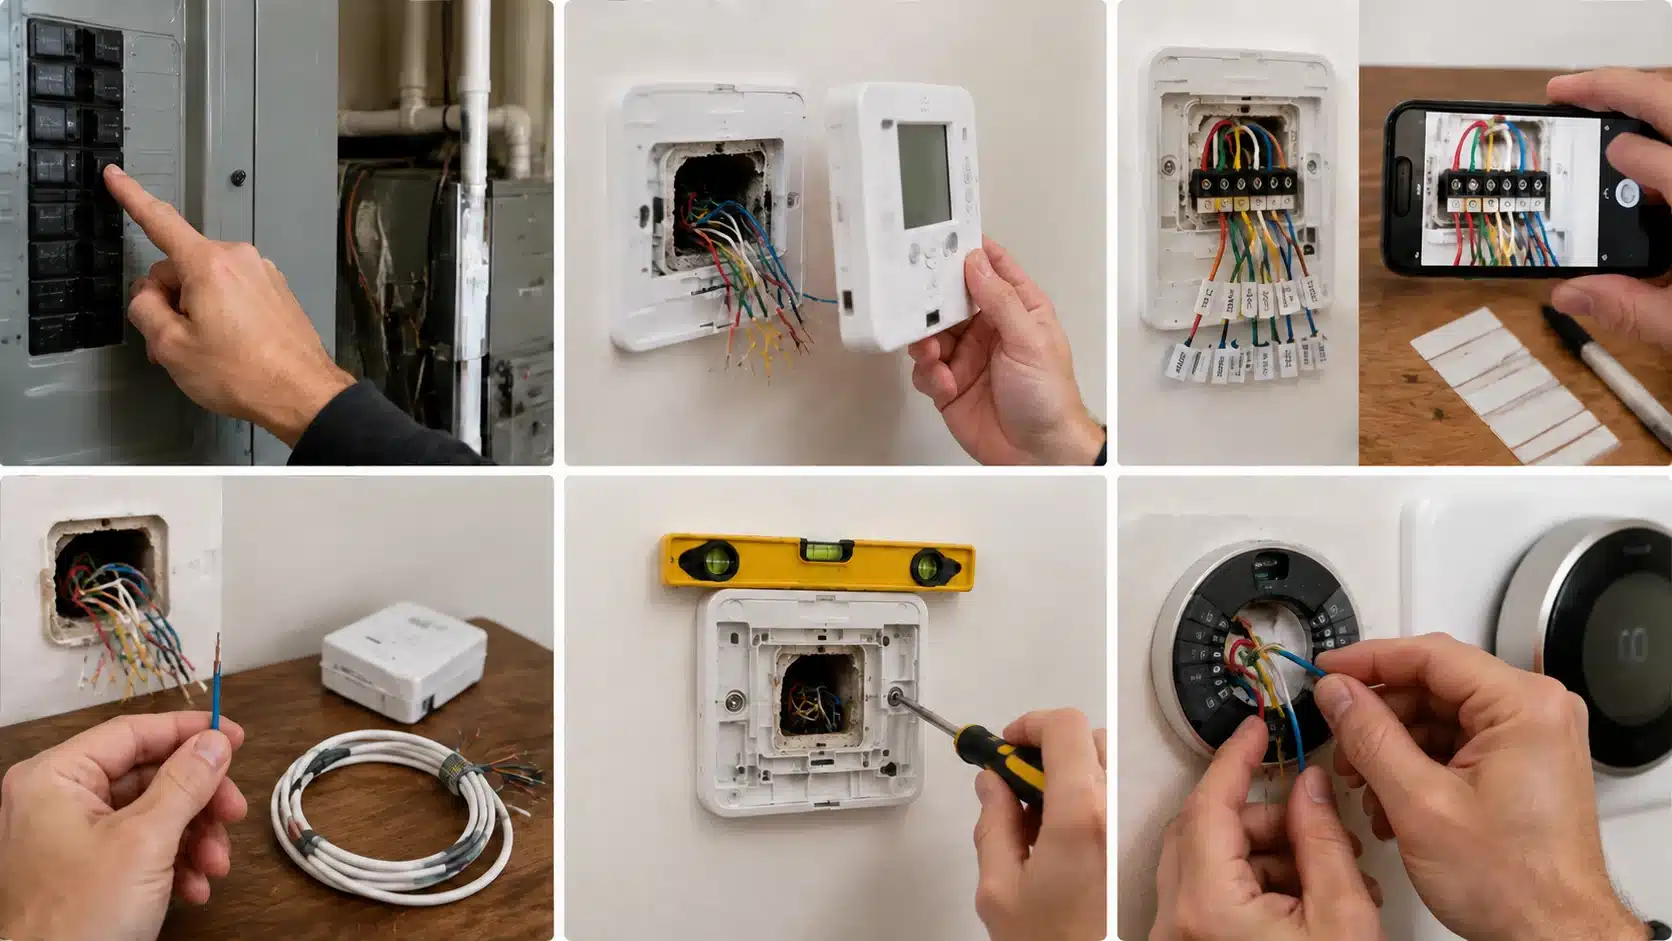
Work through each step in order. Skipping ahead is the fastest way to create a wiring problem that is hard to trace later.
Step 1: Turn Off Power to the HVAC System
Find your HVAC breaker and switch it off. Confirm the furnace or air conditioner is not running before you touch anything. Use a voltage tester on the wires to double-check.
A live wire can damage your new thermostat or your HVAC equipment. This step matters more than it looks.
Step 2: Remove the Existing Thermostat
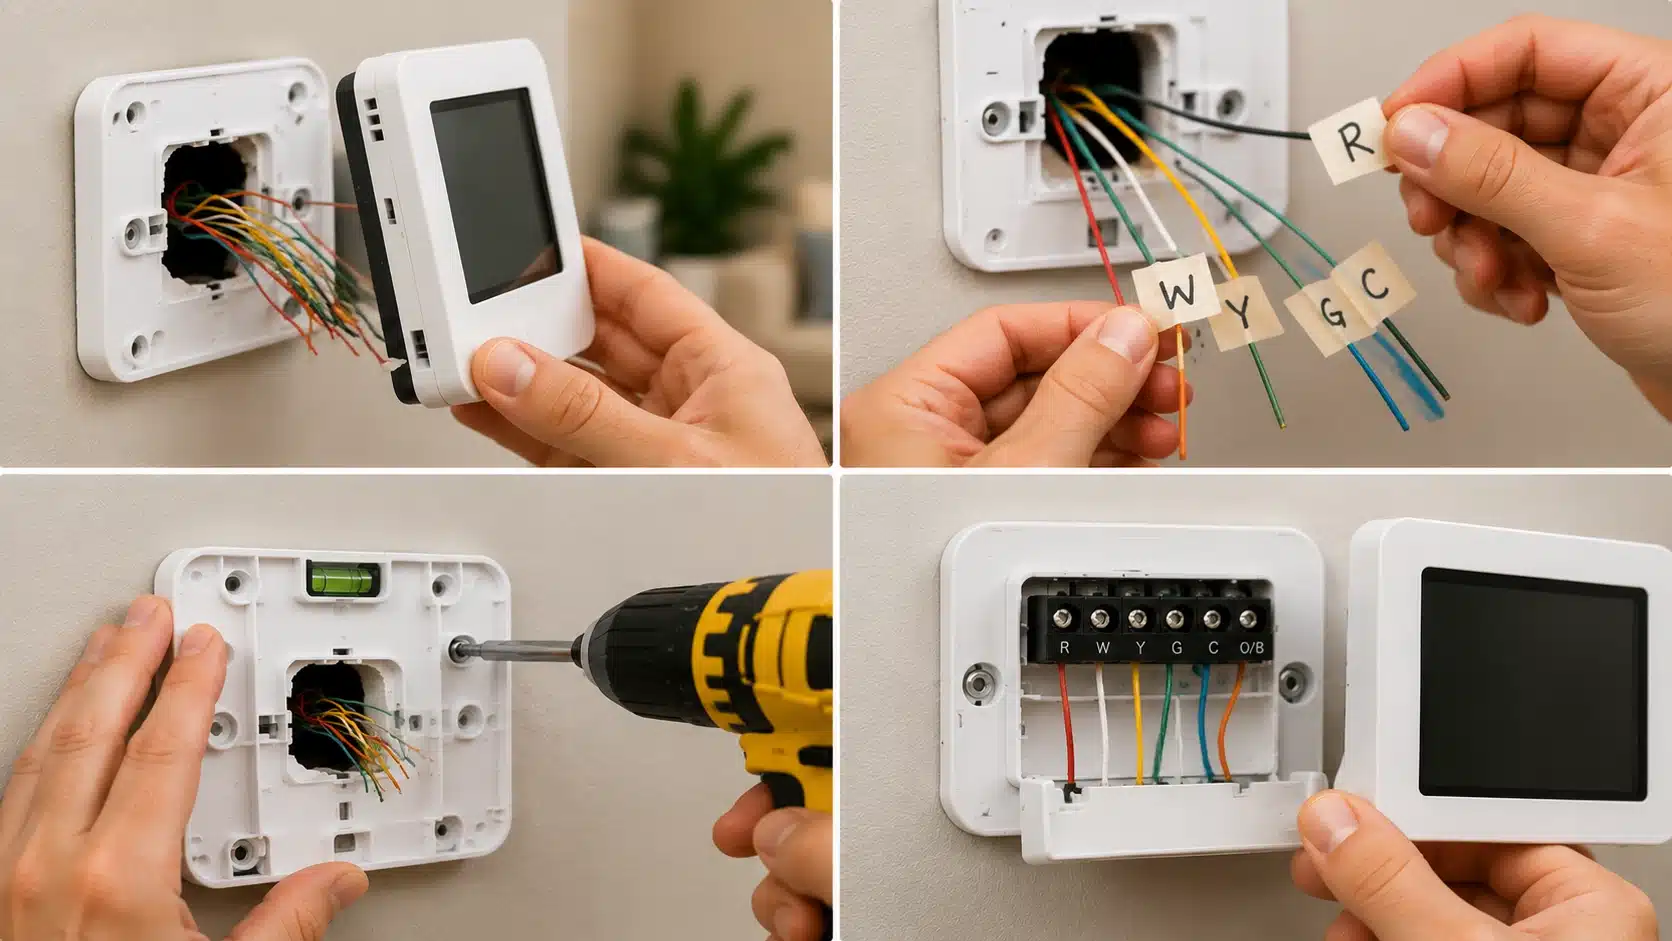
Pop off the thermostat cover and leave the wires attached for now. Be careful not to let any wire slip behind the wall. Fishing one back out is a real hassle.
Once the cover is off, remove the mounting screws and set the old base aside.
Step 3: Label and Document the Existing Wires
Take a clear photo of the wiring before you disconnect anything. Then label each wire with its terminal letter using tape.
Do not rely on wire color alone. Wire colors are not standardized, and a past electrician may have used whatever was available. The terminal letter tells you what the wire actually does.
| Terminal | Function |
|---|---|
| R | Power |
| C | Common wire (steady power supply) |
| W | Heating |
| Y | Cooling |
| G | Fan |
| O/B | Heat pump reversing valve |
Step 4: Check for a C-Wire Before Installing a Smart Thermostat
The C-wire, or common wire, gives your thermostat a steady flow of power. Smart thermostats rely on it for their screen, Wi-Fi radio, and always-on features.
If your wiring has no C-wire, you have four options:
- Use an unused wire already run through the wall
- Install a compatible C-wire adapter
- Run a new wire from your HVAC panel
- Choose a thermostat model built to work without one
Without a C-wire, you may see power drops, spotty Wi-Fi, or a thermostat that drains its backup battery fast.
Step 5: Install the New Thermostat Base
Feed the labeled wires through the opening in the new base plate. Hold the plate against the wall and check it with a level before you mark the screw holes. Secure the screws firmly, but make sure you have not pinched any wire in the process.
Step 6: Connect Thermostat Wires
Match each wire to its labeled terminal on the new thermostat. Press each one in until it holds firm. Check that no stray copper strand touches a neighboring terminal.
Always follow the wiring diagram in your thermostat’s manual. Heat pump systems and standard systems wire differently.
If you are installing a smart thermostat, double-check the C-wire and any adapter connections before closing up the base.
Step 7: Attach the Thermostat Display and Restore Power
Snap the display faceplate onto the mounted base. Go back to your breaker box and switch the HVAC power on. Give the thermostat a minute to boot up, then follow the on-screen setup steps.
How to Set Up a Smart Thermostat After Installation
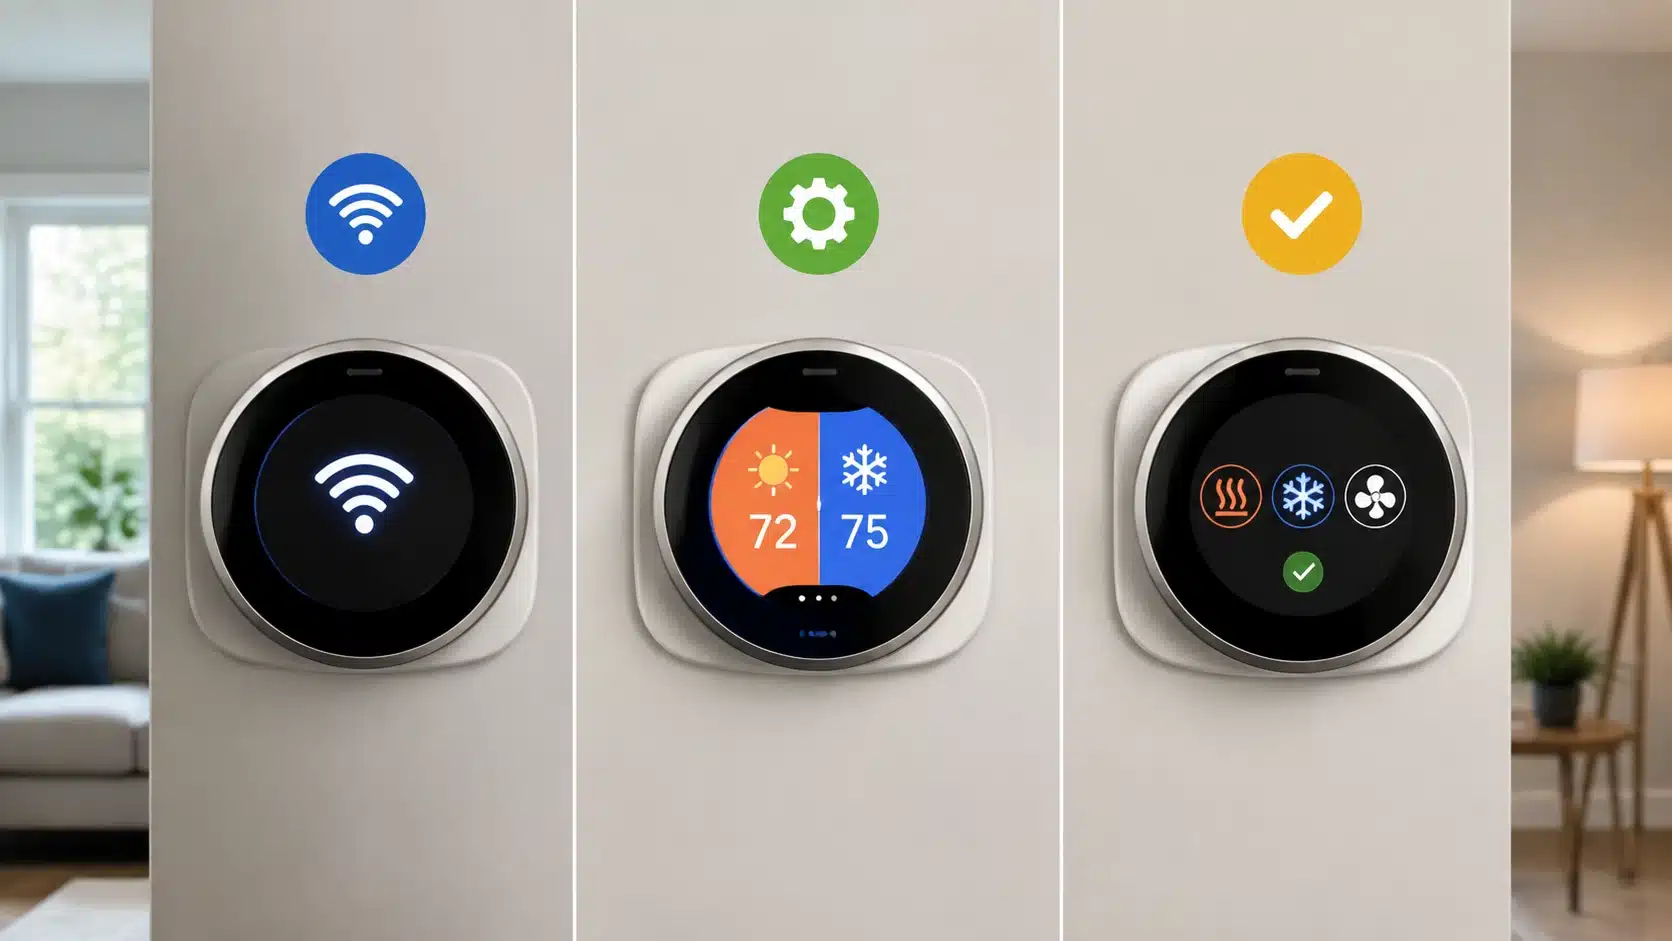
Once your smart thermostat is mounted and wired, the hardware part is done. What is left is getting it online and configuring your daily routine.
- Connect to Wi-Fi: Open the manufacturer’s app and follow its prompts to link the thermostat to your home network.
- Configure Heating and Cooling Settings: Select your HVAC type in the app, set your preferred temperatures, and build a daily schedule.
- Test Heating, Cooling, and Fan Functions: Run the heat for a few minutes, then switch to cooling, then test the fan alone. Confirm the room temperature changes to match what the thermostat shows.
Best Location to Install a Thermostat
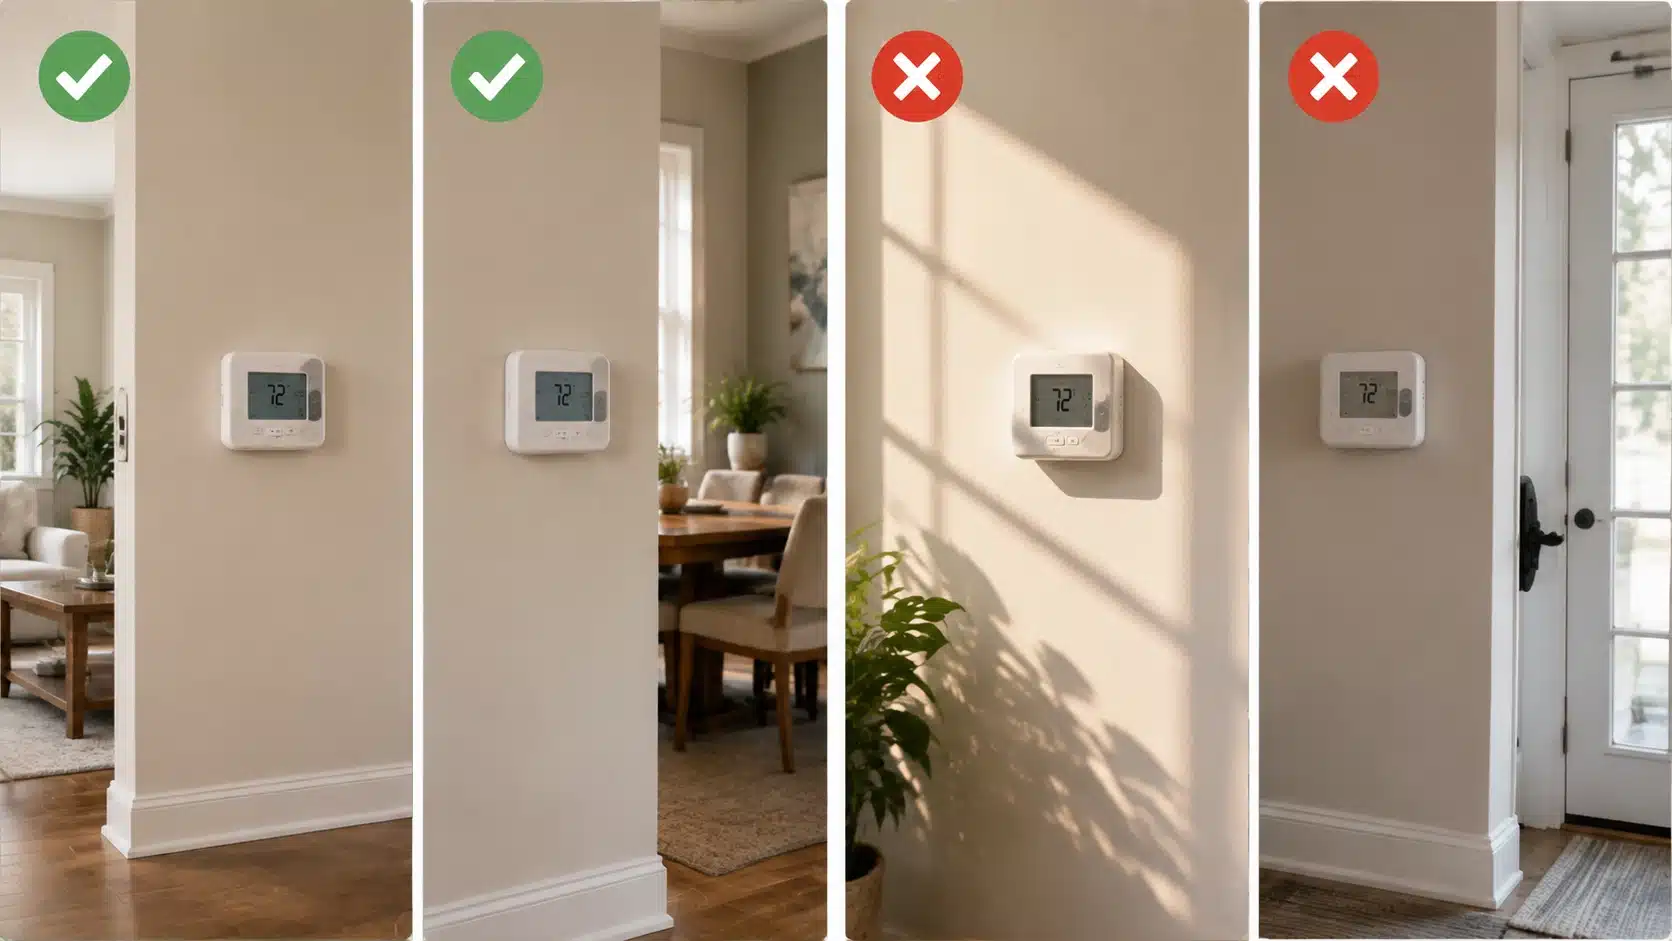
Placement affects accuracy more than most people expect. The table below shows the best spots for your thermostat and the ones to avoid for accurate readings.
| Where to Place It | Where to Avoid |
|---|---|
| Interior wall | Direct sunlight |
| Central, frequently used room | Drafty spots near doors or windows |
| Away from heat-producing appliances | Near lamps, ovens, or electronics |
| Clear of supply and return vents | Directly above or below a vent |
A thermostat near a heat source reads the room as warmer than it is. That throws off your whole schedule and wastes energy over time.
Thermostat Installation Mistakes to Avoid
We’ve seen the same handful of mistakes trip up otherwise careful homeowners. Watch for these five, since each one is easy to avoid once you spot it.
- Forgetting to turn off HVAC power. Working on live wiring risks a short that can damage your system or the new thermostat.
- Connecting wires based only on color. Terminal labels tell you what a wire actually does. Colors do not.
- Skipping the C-wire check on a smart thermostat. Without one, you may see power drops, spotty Wi-Fi, or a thermostat that drains its backup battery fast.
- Choosing the wrong thermostat for your system. Heat pumps, multi-stage systems, and high-voltage setups each need a matching thermostat model.
- Skipping the test after installation. Always run heating, cooling, and fan modes before you consider the job done.
When to Hire an HVAC Professional
Most standard swaps are safe to handle yourself. That said, stop and call a professional if any of these situations apply.
- A high-voltage thermostat system
- Wiring you cannot identify
- Multiple HVAC zones
- A heat pump with unfamiliar wiring
- A boiler system
- Damaged or frayed wiring
- Any sign of an existing HVAC equipment problem
Electrical work connected to HVAC systems carries real risk when the setup is not standard. The U.S. Department of Energy recommends professional installation for complex or high-voltage systems.
Troubleshooting Problems After Installing a Thermostat
If your new thermostat isn’t behaving right after setup, don’t panic. Most issues trace back to one of four problems below, each with an easy fix.
- Thermostat has no power. Check for a missing C-wire, a loose connection, a tripped breaker, or a wiring mistake.
- Heating or cooling does not start. Recheck your terminal connections, confirm the HVAC power is on, and review your system settings in the app or menu.
- Thermostat shows the wrong temperature. Poor placement, a calibration issue, or a nearby heat source are the usual culprits.
- Smart thermostat keeps disconnecting. Look at your Wi-Fi signal strength, your power supply, and whether the C-wire is properly connected.
Frequently Asked Questions
Can I install a thermostat myself?
Yes, in most homes with standard low-voltage wiring. If your system uses high voltage, multiple zones, or wiring you cannot identify, call an HVAC professional instead.
Do I need a C-wire to install a smart thermostat?
Most smart thermostats work best with one. Some models offer workarounds, like an adapter or a battery mode, if your home has no C-wire.
How long does thermostat installation take?
A basic swap usually takes 30 to 60 minutes. Add extra time if you need to run a new wire or troubleshoot compatibility issues.
What wires go where on a thermostat?
R connects to power, C is the common wire, W handles heating, and Y handles cooling. G runs the fan, and O or B controls a heat pump’s reversing valve.
Can I replace an old thermostat with a smart thermostat?
Yes, as long as your HVAC system is compatible and you have enough wires. You will also need a C-wire if the model requires one.
How do I know if my thermostat wiring is compatible?
Open your current thermostat and count the wires. Then check the manufacturer’s compatibility tool using your terminal letters and HVAC system type.
Your New Thermostat, Ready to Go
Installing a thermostat comes down to a few clear steps. Cut the power, label your wires, check for a C-wire, and test every mode once the new unit is on.
A simple swap is well within reach for most homeowners. Complex systems with multiple zones or unfamiliar wiring are best left to a licensed HVAC professional.