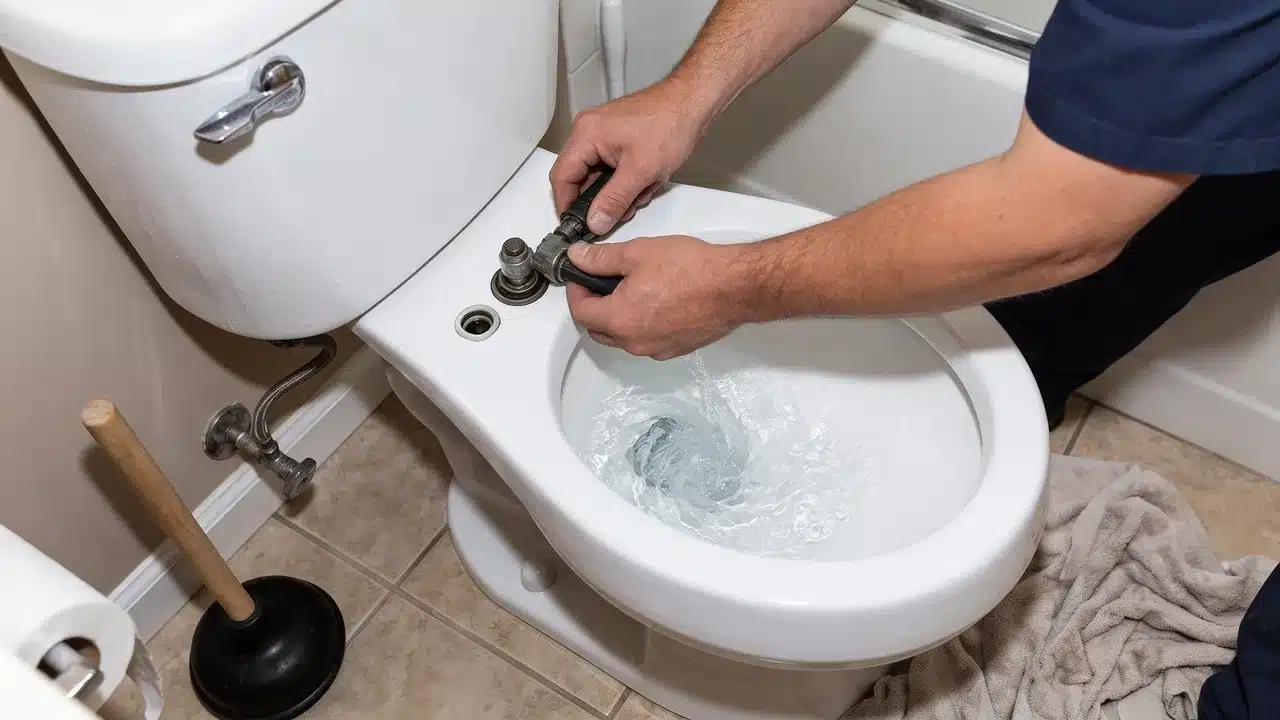
How to Fix a Running Toilet and Why Does It Keep Running?

A running toilet wastes water around the clock and adds up on your monthly bill. Fixing a running toilet is easier than it sounds. The problem usually traces back to a worn flapper, a loose chain, or a float set too high.
This post walks you through each possible cause and the right fix for each one. You will know exactly which part failed and how to replace it before calling a plumber.
Why Does My Toilet Keep Running?
Every flush follows the same basic pattern. You press the handle, and the flapper lifts to let water drain into the bowl. The fill valve then refills the tank until the float shuts it off.
When any part in this chain fails, the toilet keeps running. A worn flapper often lets water leak past its seal. A chain set too tight or too loose stops the flapper from closing properly.
A float set too high sends water into the overflow tube. A faulty fill valve, a misplaced refill tube, or a cracked flush valve can cause the same problem.
Finding the failed part is the first step toward a lasting fix.
Tools and Materials You Will Need
Gather these basic supplies before you start. Having everything ready saves time and reduces the chance of stopping mid-repair.
- Adjustable wrench
- Pliers
- Sponge and bucket
- Old towel
- Rubber gloves
- Food coloring (for leak testing)
- Replacement flapper or canister seal
- Replacement fill valve
Replacement parts are not one-size-fits-all. Match the flapper, seal, or fill valve to your toilet’s exact model. The flush valve size also matters. Most toilets use either a 2-inch or a 3-inch flush valve.
A wrong-size part will not seal well, no matter how carefully you install it. Check your toilet’s brand and model number before you shop. You can also bring the old part to the store for a side-by-side match.
How to Fix a Running Toilet Step by Step
Follow these troubleshooting steps in order. Check each part before moving on to the next. This saves you from buying parts you do not need.
Step 1: Turn Off the Water and Drain the Tank
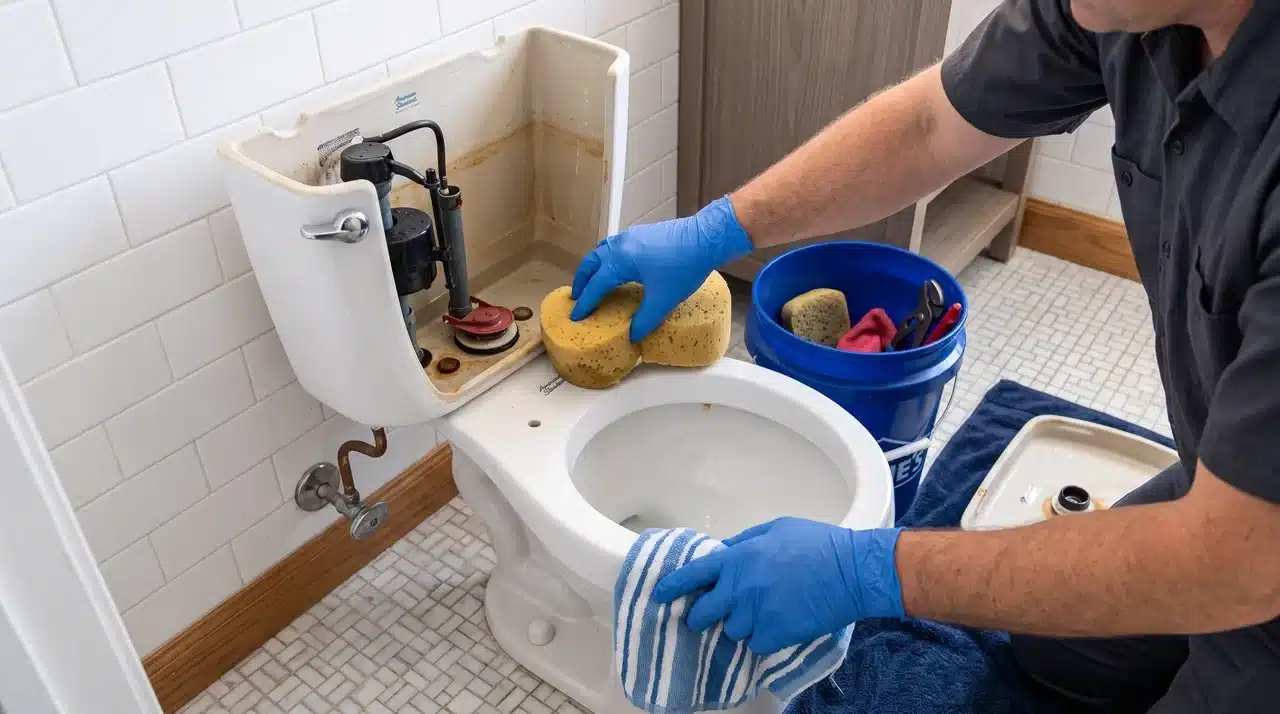
Find the shutoff valve behind or beside the toilet. Turn it clockwise until it stops. Flush the toilet, then hold the handle down to drain most of the tank.
Soak up leftover water with a sponge. Keep a towel and bucket close by for spills. Put on rubber gloves before reaching inside the tank. Draining the tank first keeps your work area dry.
Step 2: Adjust the Flapper Chain
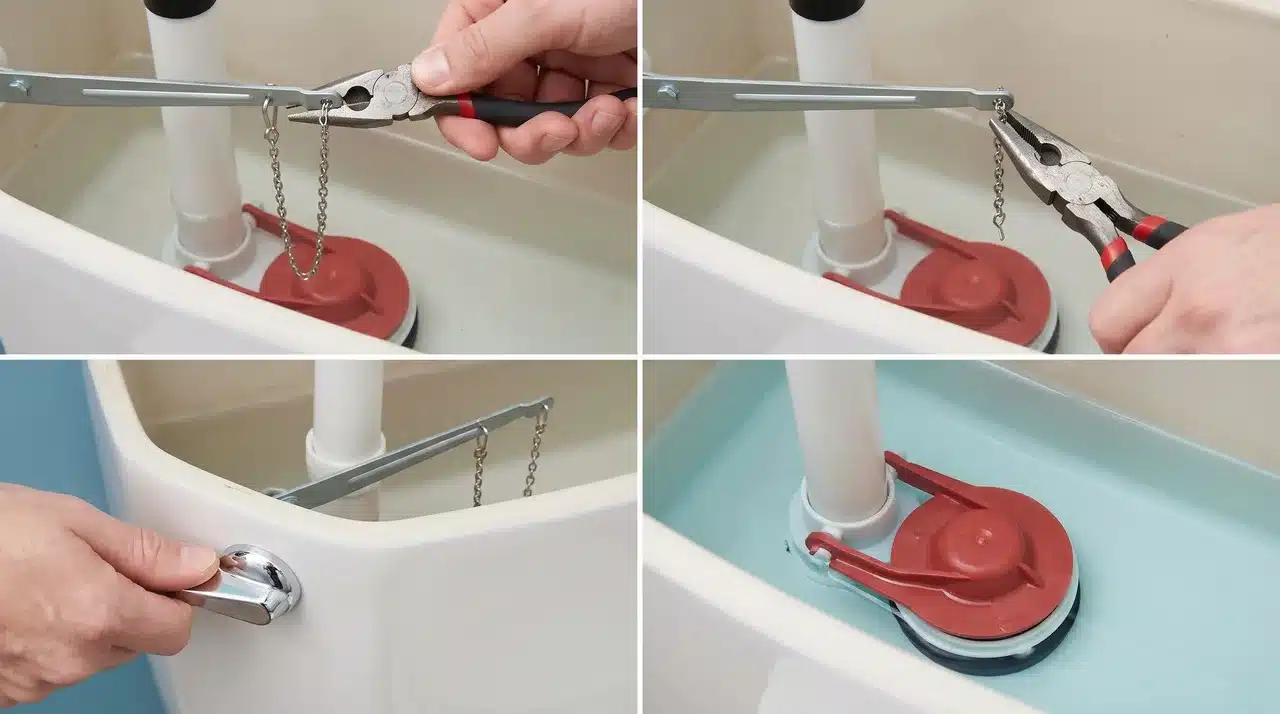
Clip the chain to the flush lever, leaving a small amount of slack when the flapper sits closed. Too much slack lets the chain slip under the flapper. Too little slack holds the flapper open after a flush.
Trim extra links with pliers, leaving about one inch of chain hanging free. Flush the toilet to test. The flapper should drop and seal within a few seconds.
Step 3: Clean or Replace the Flapper
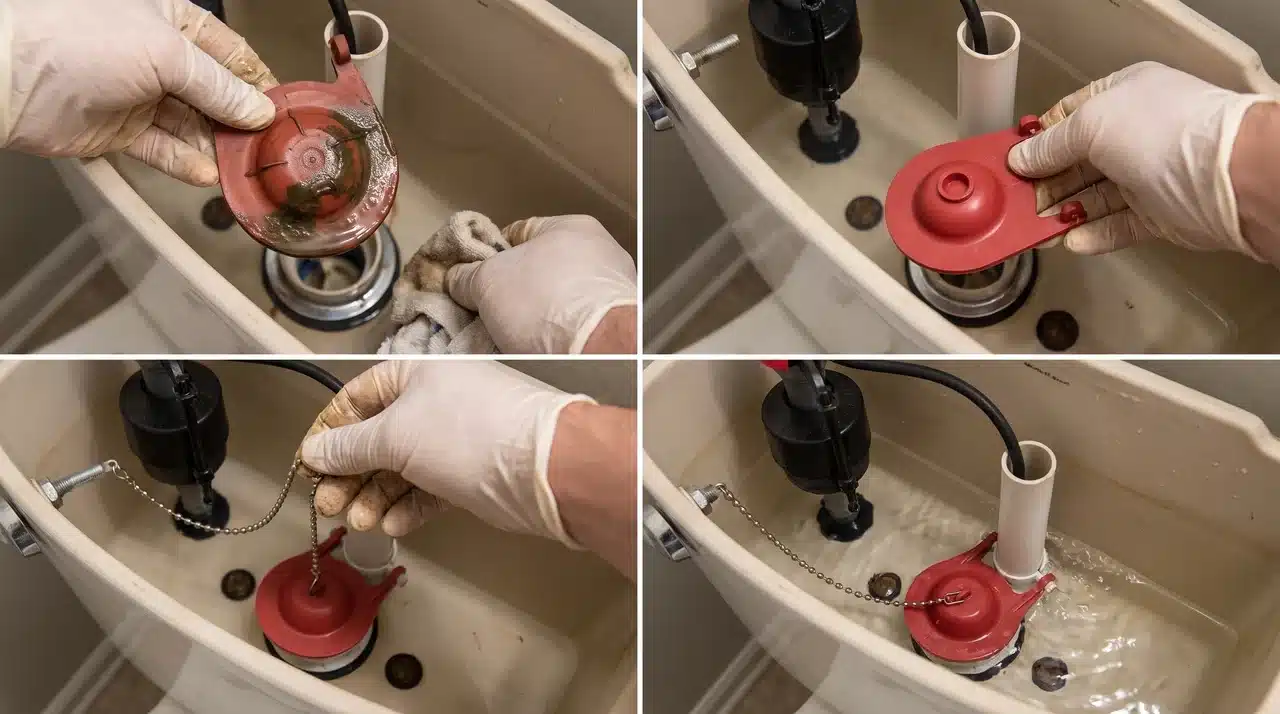
Lift the old flapper off its pegs. Check it for cracks, warping, or a slimy film. Wipe the flush valve seat clean with a cloth before going further.
If the flapper looks worn, install a matching new one. Hook the new flapper onto the flush valve pegs. Reattach the chain with a little slack. Flush a few times to check the seal.
Step 4: Adjust the Float Height
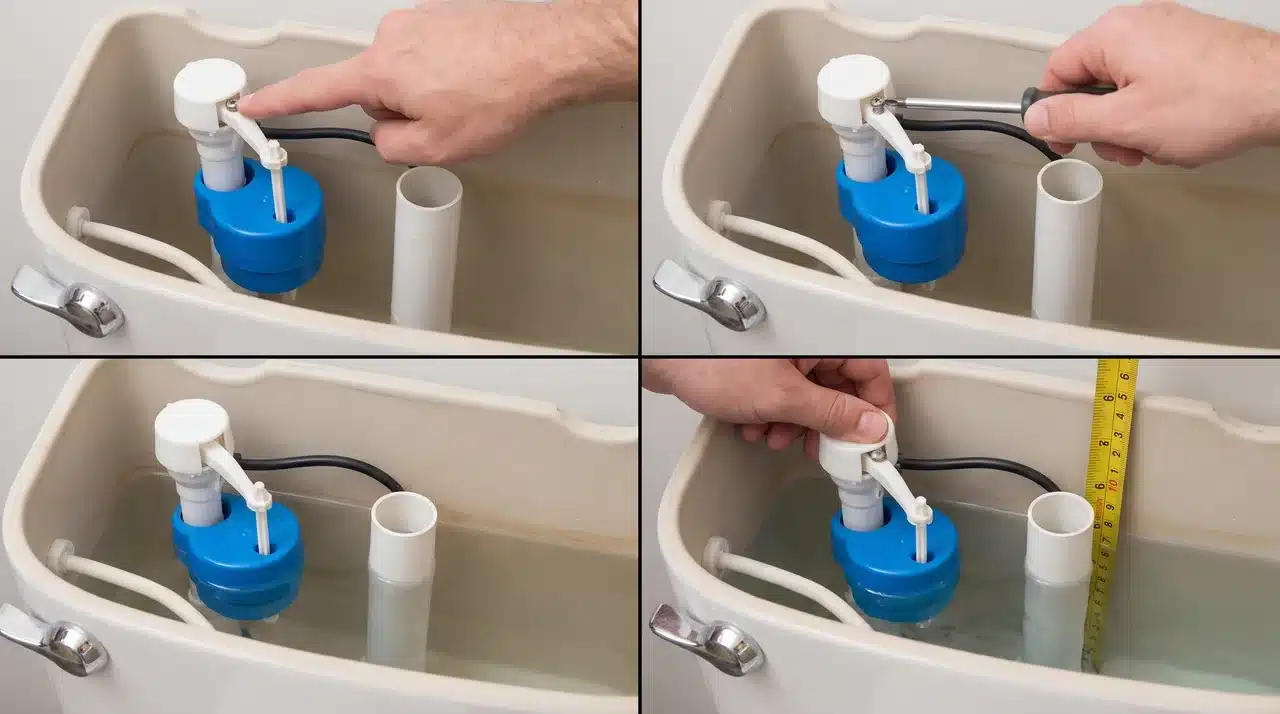
Find the float on the fill valve or on a separate float arm. Locate the adjustment screw or clip near the top of the assembly. Lower the float slightly to drop the water level in the tank.
The water line should sit about 1 inch below the overflow tube. Flush and check the new level. Repeat the adjustment if water still spills into the tube.
Step 5: Clean the Fill Valve
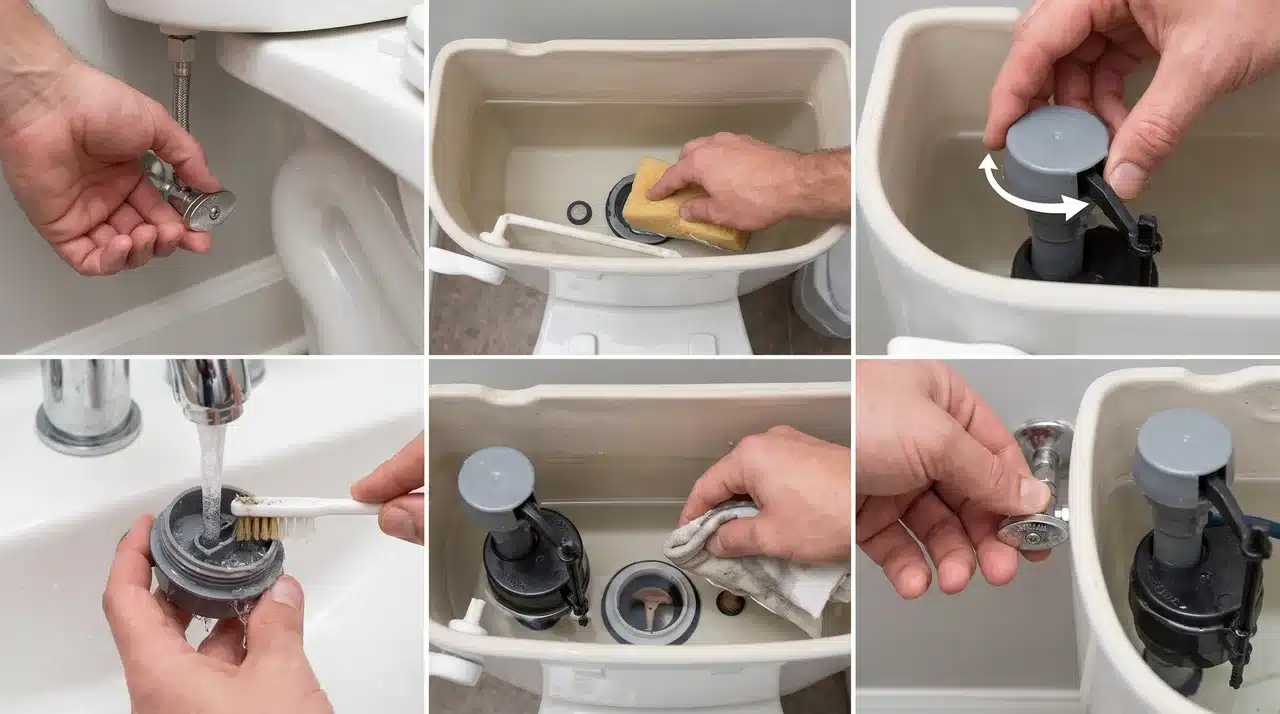
Turn off the water and drain the tank fully before starting. Remove the fill valve cap by twisting or unclipping it from the base. Rinse away any grit, sand, or mineral buildup inside.
Wipe the valve seat with a damp cloth. Snap the cap back into place. Turn the water on slowly and watch the tank refill without trouble.
Step 6: Replace a Faulty Fill Valve
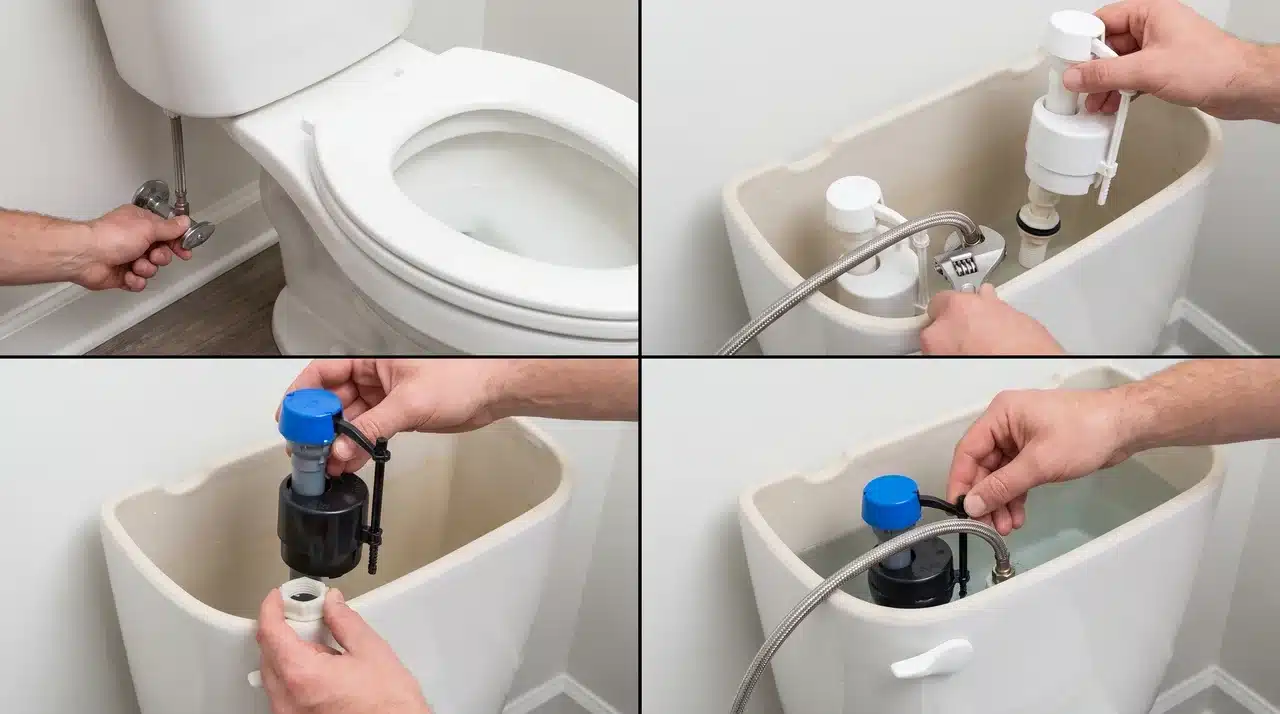
Knowing how to fix a running toilet fill valve can save you from a bigger repair later. Shut off the water and drain the tank before removing any parts. Disconnect the supply line from the base of the old valve.
Unscrew the mounting nut, then lift the old valve straight out. Slide the new fill valve into the same opening and tighten the mounting nut by hand. Reconnect the supply line. Turn the water on and adjust the valve height to match your tank.
Step 7: Correct the Refill Tube Position
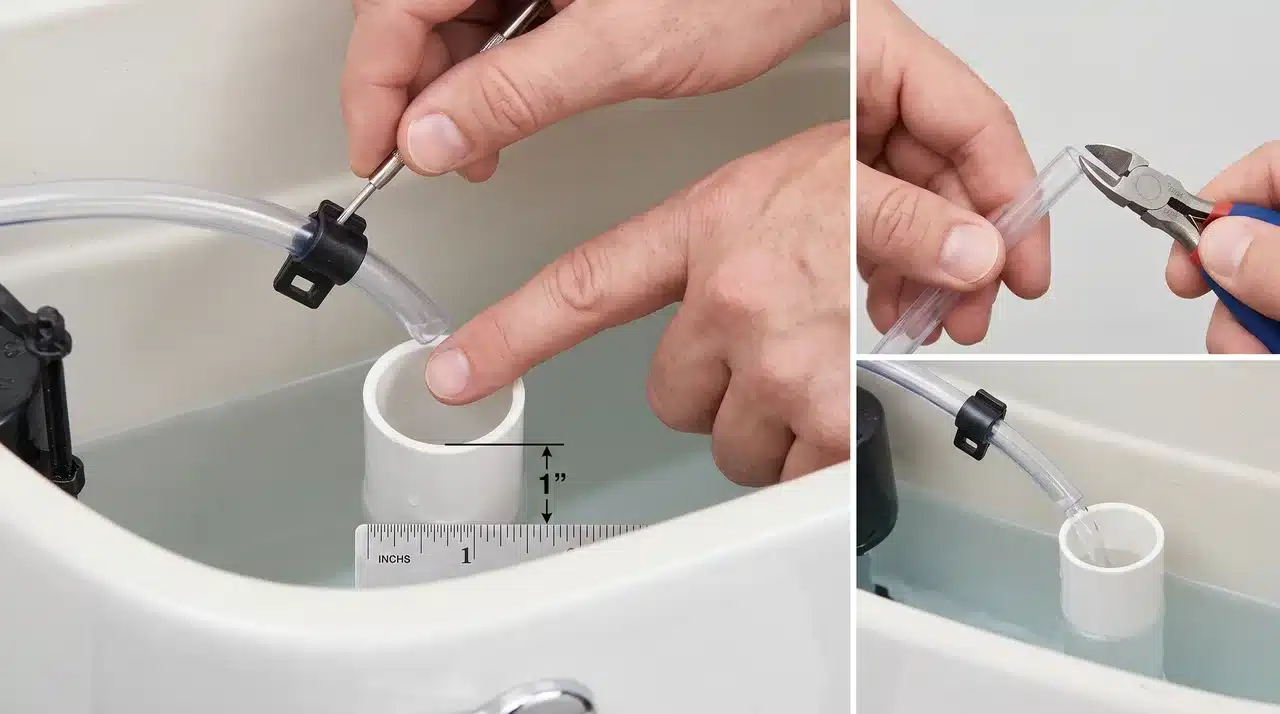
Find the small refill tube that sits near the fill valve body. Check that it clips firmly onto the top of the overflow tube. Position the tube so it points straight into the tube’s opening.
It should sit about 1 inch above the rim, not below it. Trim the tube if it hangs too low. Flush once to confirm a steady bowl refill.
Step 8: Replace a Canister Seal
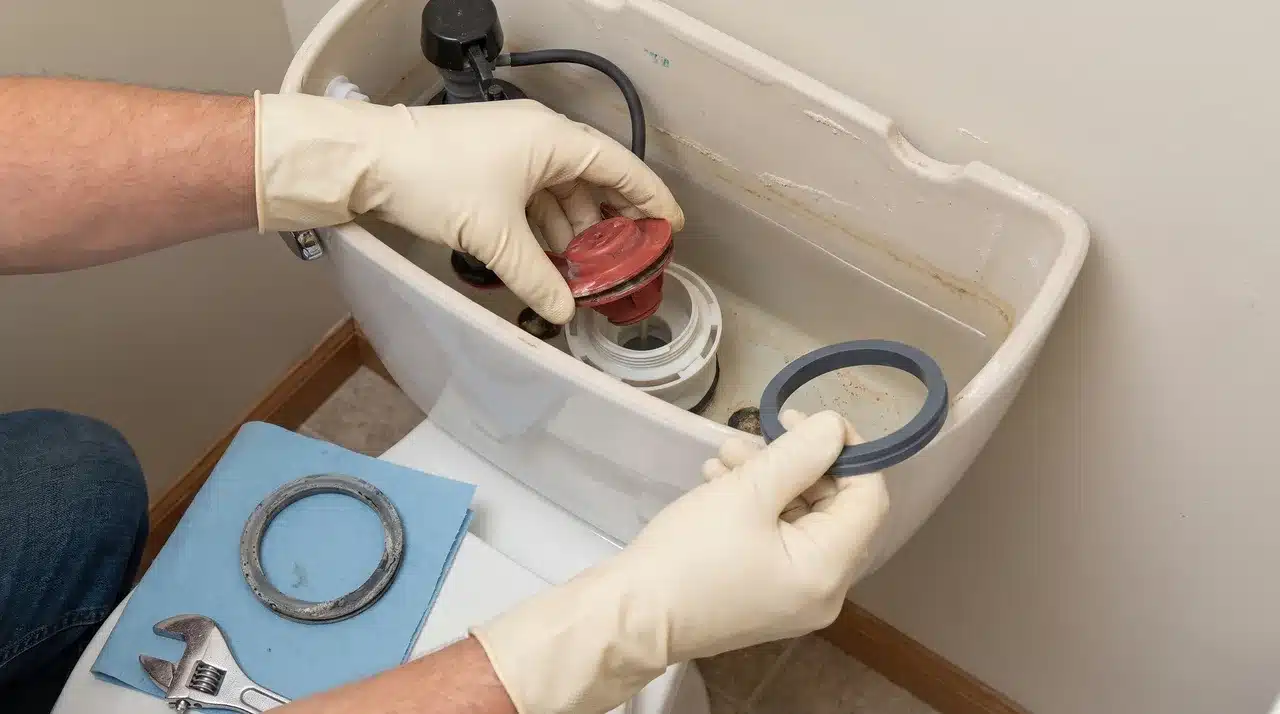
Some toilets use a canister-style flapper rather than a standard rubber flap. Turn off the water and drain the tank completely before starting this repair. Unscrew or unclip the canister from its base at the bottom of the tank.
Lift out the seal ring found underneath once the canister is free. Wipe the flush valve opening clean. Press the new seal and canister into place. Confirm it locks flush against the valve base before testing.
Once the repair is done, small master bathroom upgrades can refresh the whole room without a full renovation budget.
How to Test the Toilet After Repairing It
Run through each check below after you finish. This helps you catch any small issue before it shows up again.
- Restore the water supply slowly.
- Check that the water stops below the overflow tube.
- Flush the toilet several times.
- Add a few drops of food coloring to the tank and wait 10 minutes. If the bowl turns color, the flapper is still leaking.
- Inspect the supply connection and tank for leaks.
- Listen for hissing or intermittent refilling sounds.
Give the toilet a few minutes of rest between each check. A running toilet problem often comes back within the first hour. If everything stays quiet and dry after that, your repair worked.
When to Call a Plumber
Some problems go beyond a basic DIY fix. Call a licensed plumber if you notice any of the following.
- The tank or bowl is cracked.
- Water leaks onto the floor.
- The shutoff valve is stuck or leaking.
- The flush valve repair requires removing the tank.
- The toilet still runs after you replace the flapper and fill valve.
- Several toilets in your home develop the same issue at once.
A cracked tank or bowl is not a do-it-yourself fix. A stuck shutoff valve is not either. Forcing it can cause a bigger leak. If you replaced the main parts and the toilet still runs, a licensed plumber can check for less common problems.
The EPA estimates that household leaks can waste up to 180 gallons of water per week. A fast, correct repair pays off on your next water bill.
Common Toilet Repair Mistakes to Avoid
Small errors often bring the same problem back within days. Watch for these before you close up the tank.
- Installing an incompatible flapper or seal: always match parts to your exact toilet model and flush valve size.
- Leaving the chain too tight or too loose: both prevent the flapper from sealing correctly after a flush.
- Setting the water level too high: water spills into the overflow tube, and the toilet keeps running.
- Placing the refill tube too far into the overflow tube: this slows the bowl refill and creates a siphon effect.
- Overtightening fittings against porcelain: porcelain cracks easily under too much pressure from a wrench.
- Using chemical tank tablets: these corrode rubber parts and shorten the life of your flapper and seals.
- Skipping the test flush: always flush several times and run the food coloring test before calling the job done.
Regular bathroom upkeep can help you spot small problems early. A deep-clean bathroom checklist is a good way to build that habit into your routine.
Stop the Waste Before It Gets Costly
Fixing a running toilet starts with finding the exact part that failed.
Check the flapper, chain, float, fill valve, and refill tube first. Most running toilet problems trace back to one of these five parts. A timely repair cuts water waste and keeps your utility bill in check.
If the tank or bowl is cracked, or water reaches the floor, call a licensed plumber. With the right part and a little patience, most repairs take less than an hour.
Frequently Asked Questions
What Is the Most Common Cause of a Constantly Running Toilet?
A worn or misaligned flapper chain causes most running toilets. Too much slack keeps the flapper from sealing shut properly. Check it first.
Is a Running Toilet an Easy Fix?
Yes, most fixes are simple. Adjusting the chain, float, or flapper takes only basic tools. Tougher problems may need a plumber.
How Can I Stop My Toilet Bowl From Running?
Turn off the water and drain the tank. Check the flapper, chain, and float. Replace any worn parts you find.
Will a Running Toilet Eventually Stop?
No, it will not stop by itself. A running toilet keeps leaking until you fix the flapper, float, or fill valve.
What Happens if I Ignore a Running Toilet?
Ignoring it wastes water and raises your water bill. Left too long, it can damage the flush valve or overflow tube.