DIY Garage Shelves: Build Cheap, Strong Storage in a Weekend

You buy another storage bin every time your garage gets crowded. Then those bins stack up until you have the same problem, just hidden inside plastic boxes.
The real fix is not more containers. It is creating storage that uses the space your garage already has.
DIY garage shelves help you move tools, equipment, seasonal decorations, and storage boxes off the floor and onto a system that actually works. They cost less than many ready-made shelving units, can be built to fit your exact space, and, when built correctly, are strong enough to handle everyday garage storage.
You do not need advanced woodworking skills or expensive equipment. With basic lumber, screws, a few tools, and a weekend, you can build shelves that make your garage easier to use.
This post covers everything from choosing the right shelf design and materials to building, installing, and organizing your new garage storage system.
What Are DIY Garage Shelves?
DIY garage shelves are custom-built storage units made from materials such as lumber, plywood, brackets, and metal supports. They are designed to store garage items while making better use of vertical space.
Unlike fixed store-bought shelving systems, DIY shelves can be adjusted to match your garage layout, storage needs, and budget.
A well-built garage shelf can hold:
- Storage bins
- Power tools
- Gardening equipment
- Automotive supplies
- Paint cans
- Sports gear
- Seasonal decorations
The goal is simple: use empty wall and ceiling space to keep your garage floor clear.
Types of DIY Garage Shelves
The best shelf style depends on your garage size, wall structure, and what you plan to store.
1. Wall-Mounted Garage Shelves
Wall-mounted shelves attach directly to wall studs, keeping the floor completely open.
They work especially well for:
- Small garages
- Workshops
- Areas where floor space matters
Advantages:
- Saves floor space
- Easier garage cleaning
- Creates a built-in look
Limitations:
- Requires secure wall attachment
- Not ideal for walls without proper framing
2. Freestanding Garage Shelves
Freestanding shelves stand on their own legs and do not require wall mounting.
They are a good option for:
- Renters
- Concrete block garages
- Flexible storage layouts
Advantages:
- Easy to move
- Works almost anywhere
- Simple construction
Limitations:
- Takes up floor space
- Tall units may need anchoring for safety
If your garage floor gets wet after rain, nail plastic feet to the bottom of each leg. They cost a few dollars at any hardware store and stop moisture from soaking into the wood over time.
3. Corner Garage Shelves
Corner shelves turn unused corners into useful storage areas.
They are useful for:
- Small tools
- Cleaning supplies
- Small storage bins
Instead of leaving corners empty, they create extra storage without affecting the parking space.
4. Overhead Garage Shelves
Overhead shelves use the space near the ceiling.
They are best for items you do not need regularly, such as:
- Holiday decorations
- Camping equipment
- Seasonal clothing
Avoid storing heavy everyday items overhead because accessing them usually requires a ladder.
Materials and Tools Needed for DIY Garage Shelves
Once you know the shelf’s design and size, the next step is to gather everything needed for the build.
Having the right materials and tools ready will make the project faster and easier.
Materials Checklist:
| Material | Purpose |
|---|---|
| 2×4 lumber | Shelf frames and supports |
| Plywood | Shelf surface |
| Wood screws | Frame assembly |
| Lag screws | Wall attachment |
| Metal brackets | Extra support |
| Sandpaper | Smooth rough edges |
| Paint or sealant | Protect wood |
For most garage shelving projects, 2×4 framing combined with three-quarter-inch plywood creates a strong and reliable structure.
Choosing Between Plywood and OSB
Both materials can work for garage shelves, but they perform differently.
- Stronger edge durability
- Better resistance to moisture
- Good for heavier storage
OSB:
- More affordable
- Works well for lighter-duty shelves
- Can swell if exposed to moisture
For shelves holding heavy storage bins or tools, plywood is usually the better long-term choice.
Tools You Will Need
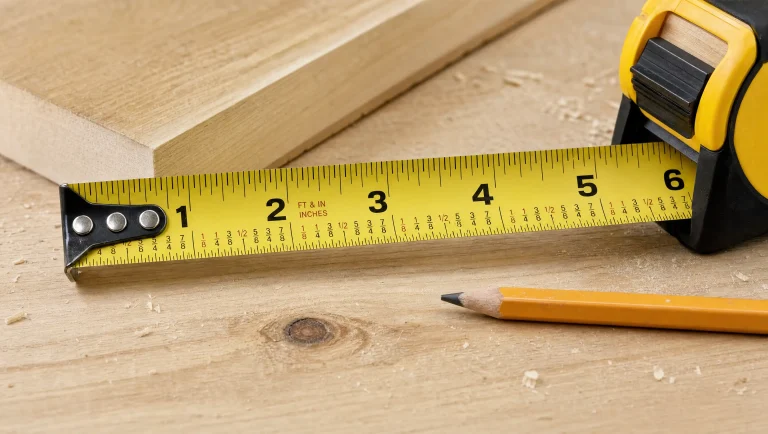
- Measuring tape
- Stud finder
- Drill
- Circular saw
- Level
- Carpenter square
- Pencil
- Safety glasses
- Work gloves
How to Build DIY Garage Shelves Step by Step
Here’s the full process, start to finish. Follow these steps in order, and you’ll have solid shelves by the end of the weekend.
1. Find and Mark Your Wall Studs
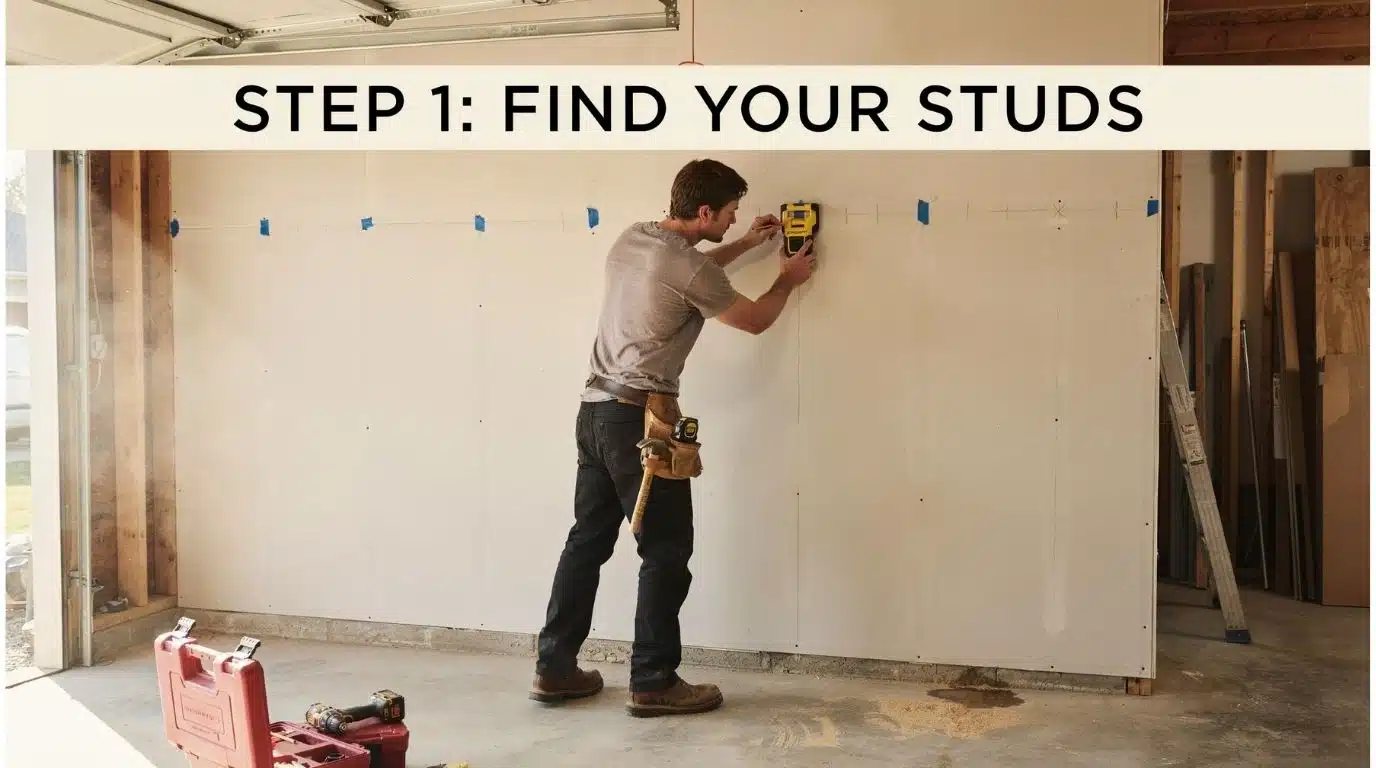
Grab a stud finder and run it along the wall. Mark each stud with a pencil or a piece of tape. Studs sit about 16 inches apart in most homes.
Every screw that holds real weight needs to go into a stud, not just drywall. Miss this step, and your shelf will pull loose from the wall down the road.
2. Cut and Assemble the Shelf Frame
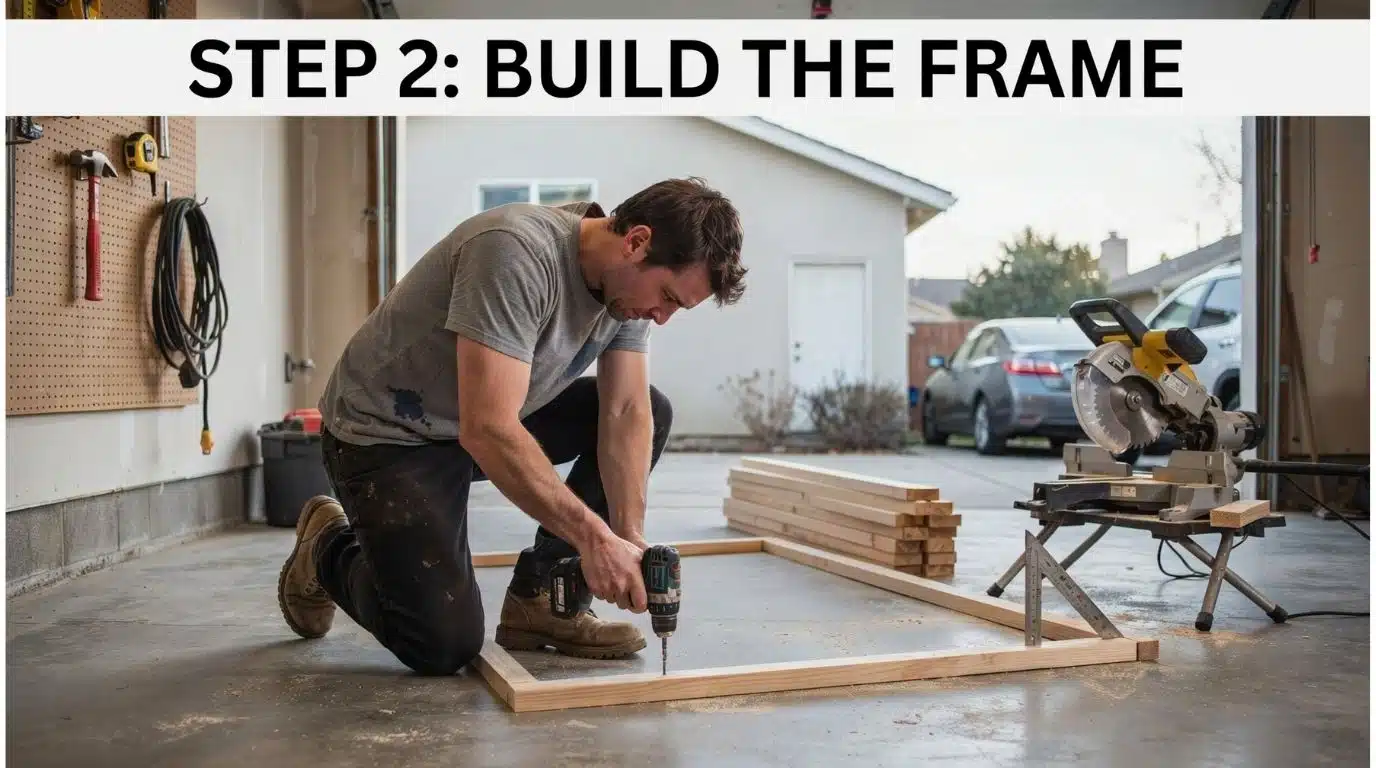
Cut your 2x4s to the length you planned. Lay them out flat on the garage floor before you screw anything together. Check each corner with a carpenter’s square so the frame comes out even, not crooked.
Screw the frame pieces together with two screws per joint. Build the whole frame on the ground first. It beats trying to hold loose boards up in the air while you drill.
3. Mount the Frame to the Wall
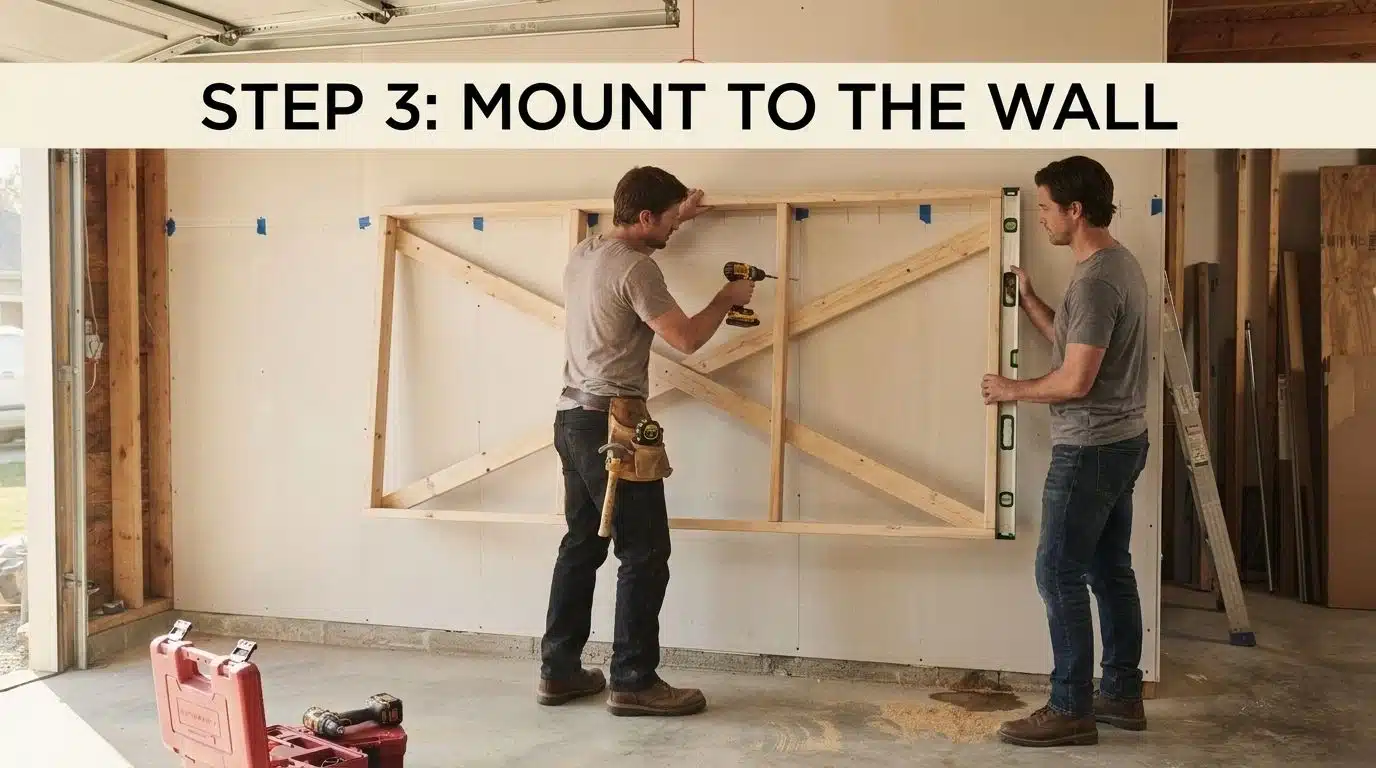
Lift the frame up to the height you want. Rest it on a scrap board, or have a helper hold it steady. Use a level so it sits straight, not tilted.
Drive long screws through the frame and into the studs you marked earlier. Use at least two screws at each stud point. Those screws are the only thing keeping your shelf from falling onto the floor.
4. Attach the Shelf Top
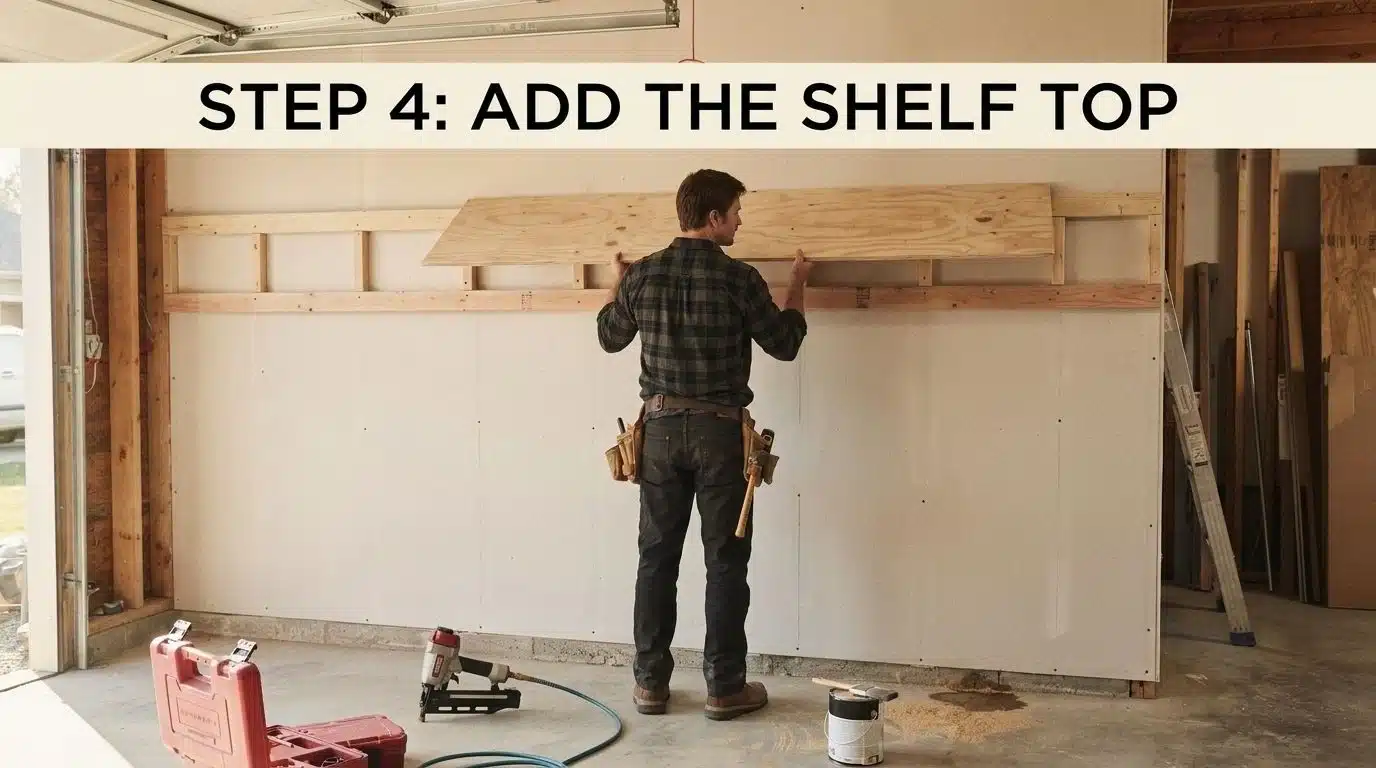
Cut your plywood or OSB to fit the top of the frame. Lay it on top and check that the edges line up on all sides.
Nail or screw it down every few inches so it won’t shift or wobble. Sand the edges and add a coat of paint if you want a cleaner finish.
Paint also helps the wood withstand the damp conditions of a garage over time.
Where Should Garage Shelves Be Installed?

Side walls are the best starting point. They give you the most storage space without encroaching on your parking space or blocking the main door. After that, placement comes down to how often you reach for each item.
- Side Walls: Side walls are often the best location because they provide storage without affecting the parking space. Use them for tools, bins, and household supplies. A clear garage storage layout makes it easy to find what you need without digging through piles.
- Above Work Areas: Shelves above a workbench keep frequently used items nearby. Store hand tools, hardware, and small equipment here for quick access.
- Above the Garage Door: This space works well for items you rarely use. Good choices are holiday decorations, camping supplies, and seasonal equipment. Avoid storing everyday items there because access becomes inconvenient.
DIY Garage Shelves vs Store-Bought Shelving
Both options can work. The better choice depends on your needs.
| Feature | DIY Shelves | Store-Bought Shelves |
|---|---|---|
| Cost | Usually lower | Usually higher |
| Custom sizing | Excellent | Limited |
| Installation | Requires tools | Faster setup |
| Strength | Depends on construction | Standardized |
| Appearance | Fully customizable | Pre-designed |
DIY shelves are best when you need a specific size or want to get the most out of your wall space. Store-bought shelves may make more sense if you need quick installation and do not want to build.
Common Mistakes That Cause DIY Garage Shelves
Small construction mistakes can weaken even a well-built shelf. Choosing the wrong material, poor support placement, or improper installation can cause bending, cracking, and instability over time.
- Choosing OSB over plywood: OSB looks similar to plywood but bends more under heavy weight. Use real plywood for stronger, longer-lasting shelves.
- Spacing supports too far apart: Large gaps between supports make shelves sag faster. Add more supports or use thicker wood for wider spans.
- Skipping stud anchors: Drywall cannot support heavy loads on its own. Secure brackets into wall studs to prevent cracks and loose shelves.
- Overloading the shelf edge: The unsupported outer edge can dip under excess weight. Keep heavier items closer to the supports for better balance.
Avoid these common errors to build shelves that stay strong and safely hold heavy loads.
How Much Does It Cost to Build DIY Garage Shelves?
The cost to build DIY garage shelves depends on the size, design, and materials you choose. A small wall-mounted shelf can cost $50 to $100, while a larger heavy-duty shelving system may cost $150 to $300.
Lumber usually accounts for the largest expense, followed by screws, brackets, and finishing materials.
Using affordable options like 2x4s and plywood can keep costs low, while thicker wood, extra supports, or premium finishes will increase the price.
Even with higher-quality materials, DIY garage shelves are often much cheaper than ready-made storage systems, especially when you need custom sizes for your space.
Conclusion
Building DIY garage shelves is one of those projects that completely changes how a garage feels.
Instead of moving piles of boxes around every time you need something, you create a storage system that keeps everything visible, accessible, and off the floor.
The best shelf is not always the biggest one. It is the one built around your space, your storage habits, and the items you actually own.
Measure your wall, choose the right materials, and build shelves that make your garage work better for years to come.
Frequently Asked Questions
What Is the Ideal Depth and Height for Garage Shelves?
A 24-Inch Depth Works Best for Storage Totes and Fits a Standard Plywood Sheet. Leave 18–20 Inches of Space Between Shelves for Most Bins.
How Do I Ensure My Shelves Are Level on An Uneven Garage Floor?
Wall-Mounted Shelves Avoid Floor Slopes. For Freestanding Units, Use Spacer Blocks and Shims to Level the Legs.
Do I Need to Anchor My Garage Shelves to The Wall?
Yes. Secure tall shelving units to wall studs with heavy-duty screws or lag bolts to prevent tipping.