Easy Cabinet Pull Placement Tips for Every Home
Struggling with handles that feeloff or uneven on your cabinets? Poorly placed pulls can make daily tasks frustrating and throw off your kitchen’s look.
Proper cabinet pull placement ensures drawers and doors are easy to use while keeping your space visually balanced.
With the right positioning, your pulls will feel natural to grab, align perfectly across every cabinet, and complement your kitchen design.
The tips ahead show how to measure, install, and test pulls for a neat and functional finish.
How to Choose the Right Cabinet Pull?
Before installing a cabinet pull, it is also important to choose the right one.Consider these four key factors to get it right.
- Pull Length: Match the pull to the drawer width. Base drawers typically need 5″–8″ center-to-center; upper drawers 3″–4″. Aim for a pull that spans about one-third of the drawer front.
- Style: Choose a pull that complements your cabinet design. Bar or T-bar pulls suit modern kitchens; bin pulls fit farmhouse styles; cup pulls work well for vintage looks.
- Material & Finish: Durable metals such as stainless steel, brass, or bronze withstand frequent use. Match the finish to other kitchen hardware to tie the space together.
- Ergonomics: Ensure pulls are comfortable to grip. For heavy drawers, allow at least ¾” of space between the pull and drawer front so fingers can wrap easily without strain.
By considering length, style, material, and grip, you’ll choose pulls that feel natural to use, and complement your kitchen’s design.
Tools Required for Cabinet Pull Placement
Having the right tools makes cabinet pull installation easier, more precise, and ensures a professional finish. A few essential tools can save time and prevent mistakes.
- A measuring tape for accurate spacing and placement on doors and drawers.
- A pencil or marker to mark drill points for precision.
- A level to keep pulls straight and aligned across multiple cabinets.
- A hardware jig or template that helps maintain consistent hole placement.
- A drill with appropriate bits to make clean screw holes without damaging the cabinet.
- A screwdriver to fasten pulls securely.
With the right tools and preparation, your cabinet pulls will be aligned, functional, and visually consistent throughout the kitchen.
Tip: Use a painter’s tape to mock pull placement before drilling to ensure perfect alignment.
How to Place Pulls on Upper Cabinets
Upper cabinet pulls should feel natural to grab without stretching or straining. And look consistent across every door in the run.
Achieve professional-looking upper cabinet hardware by following this guide.
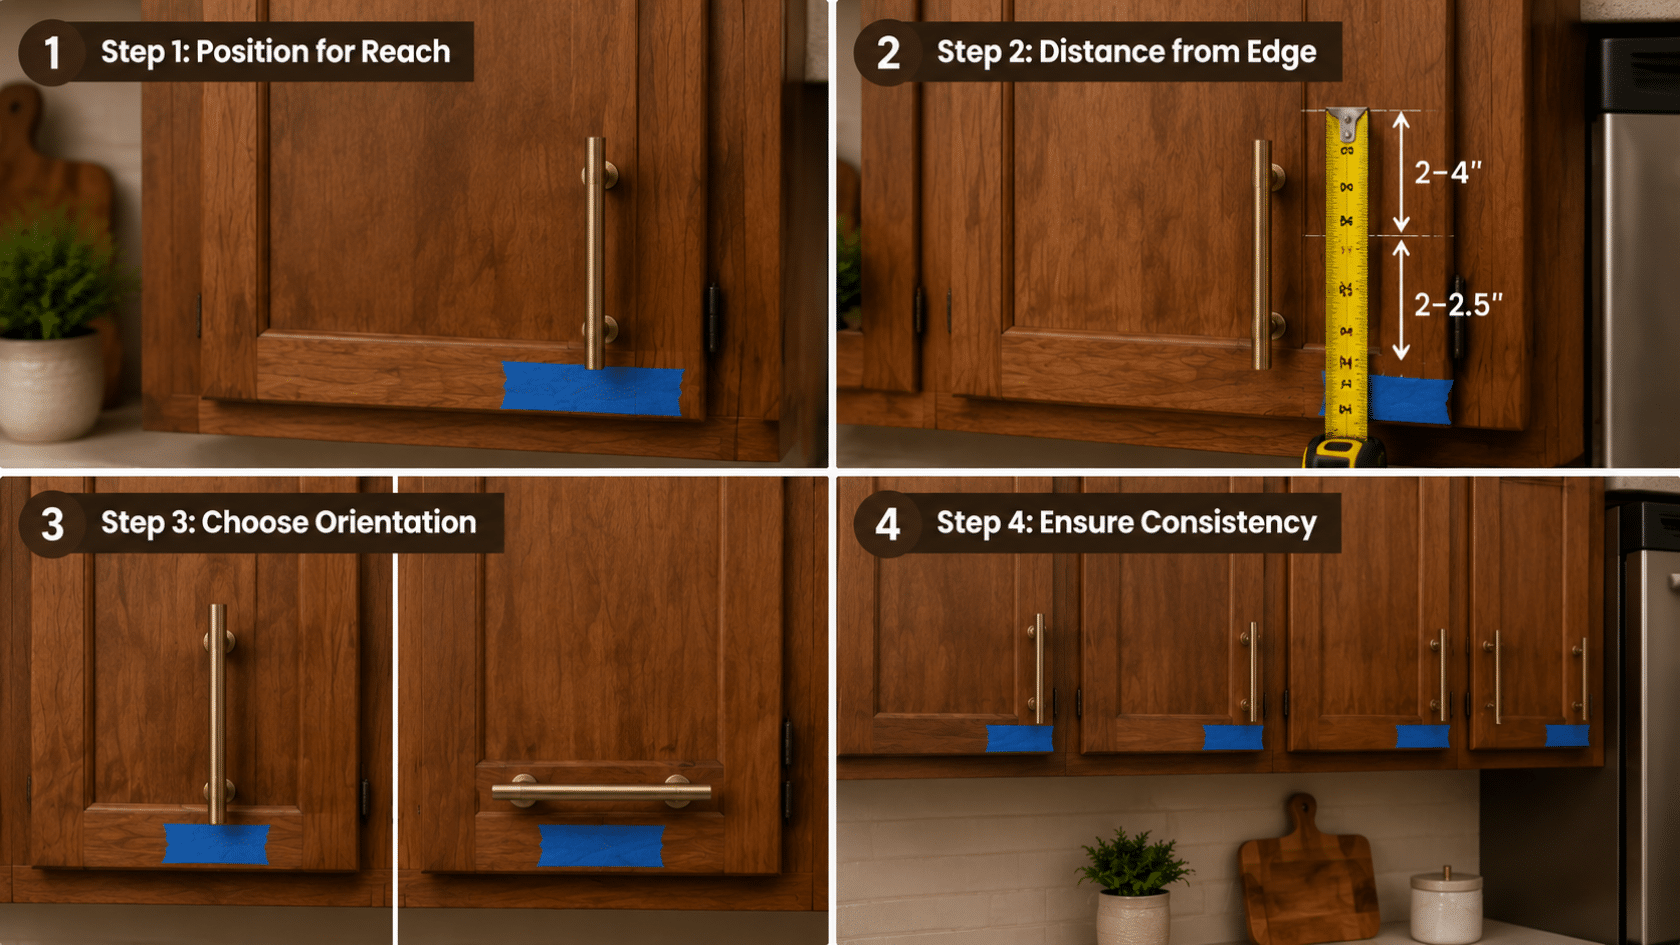
Step 1: Position for Reach
Place pulls near the bottom edge of the door so your hand naturally lands on them. This reduces awkward reaching and keeps daily use comfortable, especially for upper cabinets.
The goal is a natural grip point that works whether you are opening a single door or multiple cabinets in sequence. Keeping the pull low on the door also helps maintain visual balance on taller upper units.
Step 2: Distance from Edge
Standard placement is 2–2.5 inches from the bottom edge to create a consistent “grab zone”. This spacing keeps the pull close enough for easy access but far enough to avoid crowding the cabinet frame.
It also helps prevent finger strain when opening heavier doors. Using a tape measure and marking each point before drilling ensures uniform spacing.
Step 3: Choose Orientation
Vertical pulls are commonly used because they feel intuitive and support a strong, balanced look on taller doors. Horizontal pulls, on the other hand, create a clean linear effect that pairs well with modern or flat-panel designs.
The key is to pick one orientation for the entire upper cabinet run and stay consistent. Mixing vertical and horizontal pulls in the same visual line makes the cabinetry feel uneven.
Step 4: Ensure Consistency
Consistency starts with measuring every cabinet from the same reference point, usually the bottom edge, before marking drill points. Painter’s tape helps create a visible guideline, making errors easy to catch before drilling.
Even small variations can stand out once all doors are installed. Taking time to double-check alignment keeps the entire row visually clean and professionally finished.
Tip: For recessed-panel cabinets, place the pull 2–2.5″ above the bottom rail. For slab/flat-front cabinets, place pulls 2–2.5″ from the bottom and side edge.
How to Place Pulls on Lower Cabinets
Lower cabinet pulls need to be easy to grab from a standing position without bending or finger collisions. Getting placement right is as much about daily comfort as it is about looks.
Follow these four steps to get it right the first time:
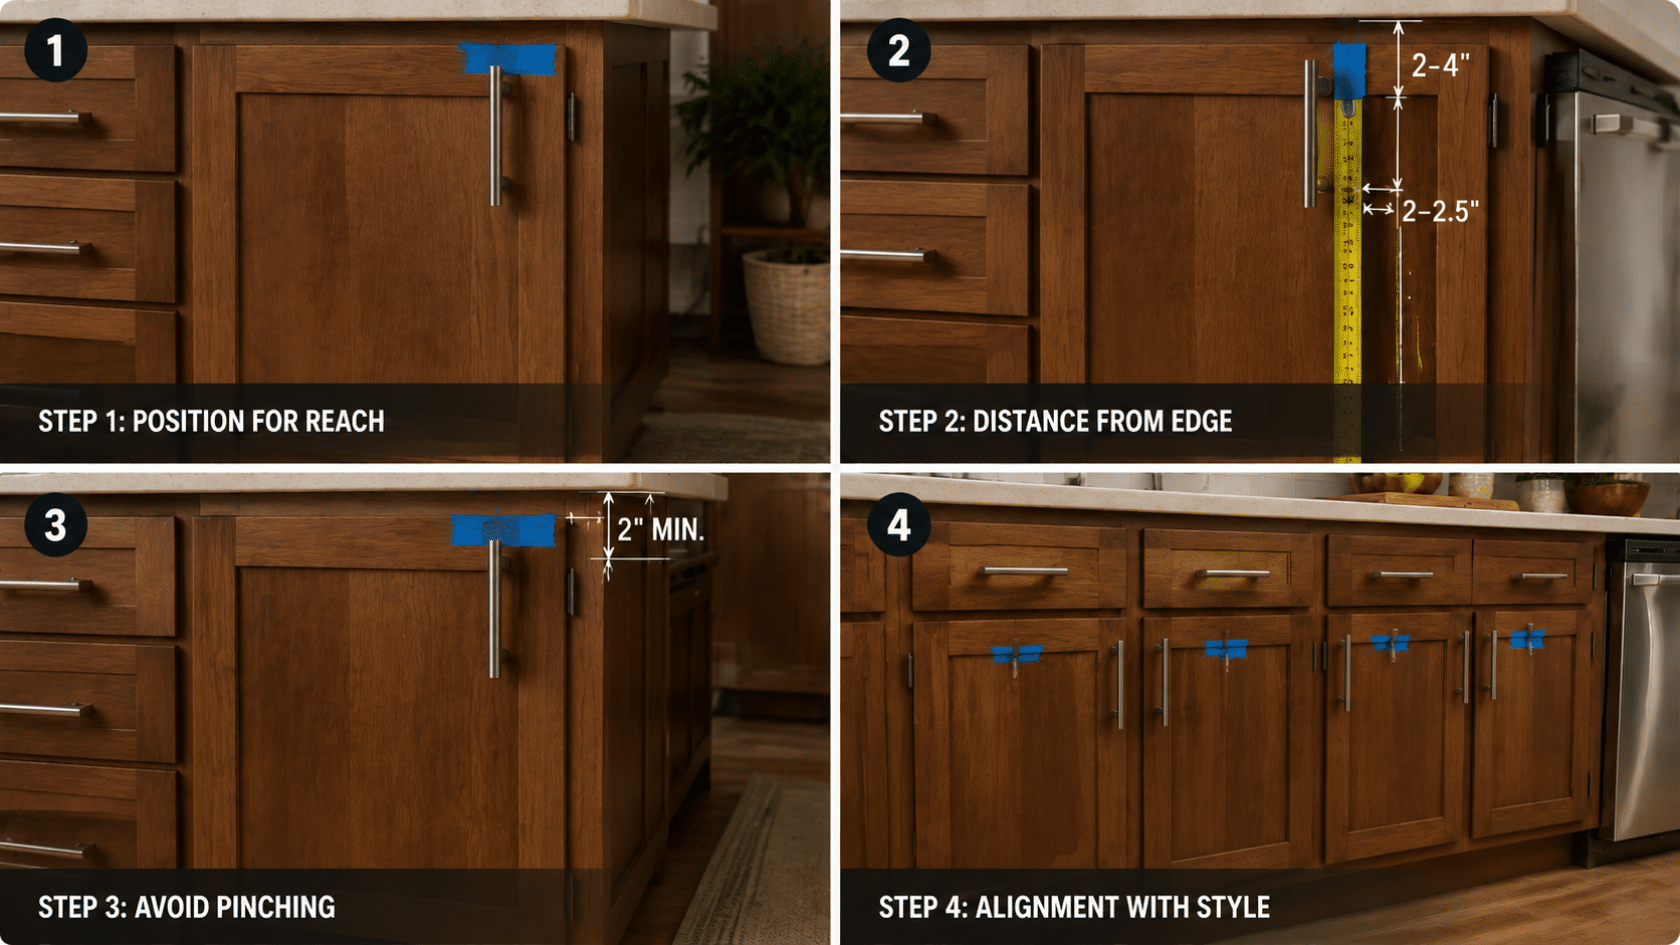
Step 1: Position for Reach
Lower cabinet pulls should be positioned for easy reach and a comfortable grip while standing.
Place them in the top corner opposite the hinge for easy access, keeping them 2–4 inches from the top edge and 2–2.5 inches from the side edge for consistent alignment and usability.
Step 2: Avoid Pinching
Make sure there is at least 2 inches of clearance between the pull and any surrounding surfaces such as countertops, adjacent drawers, or nearby appliances.
This spacing prevents fingers from getting caught during fast opening motions, especially in tight kitchen layouts.
After marking the positions, physically test the clearance by opening and closing nearby doors to ensure smooth, unobstructed movement under real-use conditions.
Step 3: Alignment with Style
For paneled cabinets, align pulls with or just below the top rail. For slab or flat-front cabinets, keep placement consistent from the top edge across all doors to preserve a clean, modern look.
On wider doors, centering longer pulls horizontally improves symmetry and reduces visual imbalance.
Use a level across multiple doors to confirm that all pulls align in a straight line, ensuring the final result looks intentional, structured, and professionally installed.
Tip: For paneled cabinets, place pulls below the top rail, 2–4″ from the top. For slab cabinets, place 2–2.5″ from the top and side. For wide doors, use a longer bar pull centered horizontally.
Placing Pulls on Drawers
Proper placement of drawer pulls ensures both functionality and visual harmony. Placement depends on drawer width and front construction.
Correct placement enhances usability and creates a balanced, professional appearance.
Centered Pulls
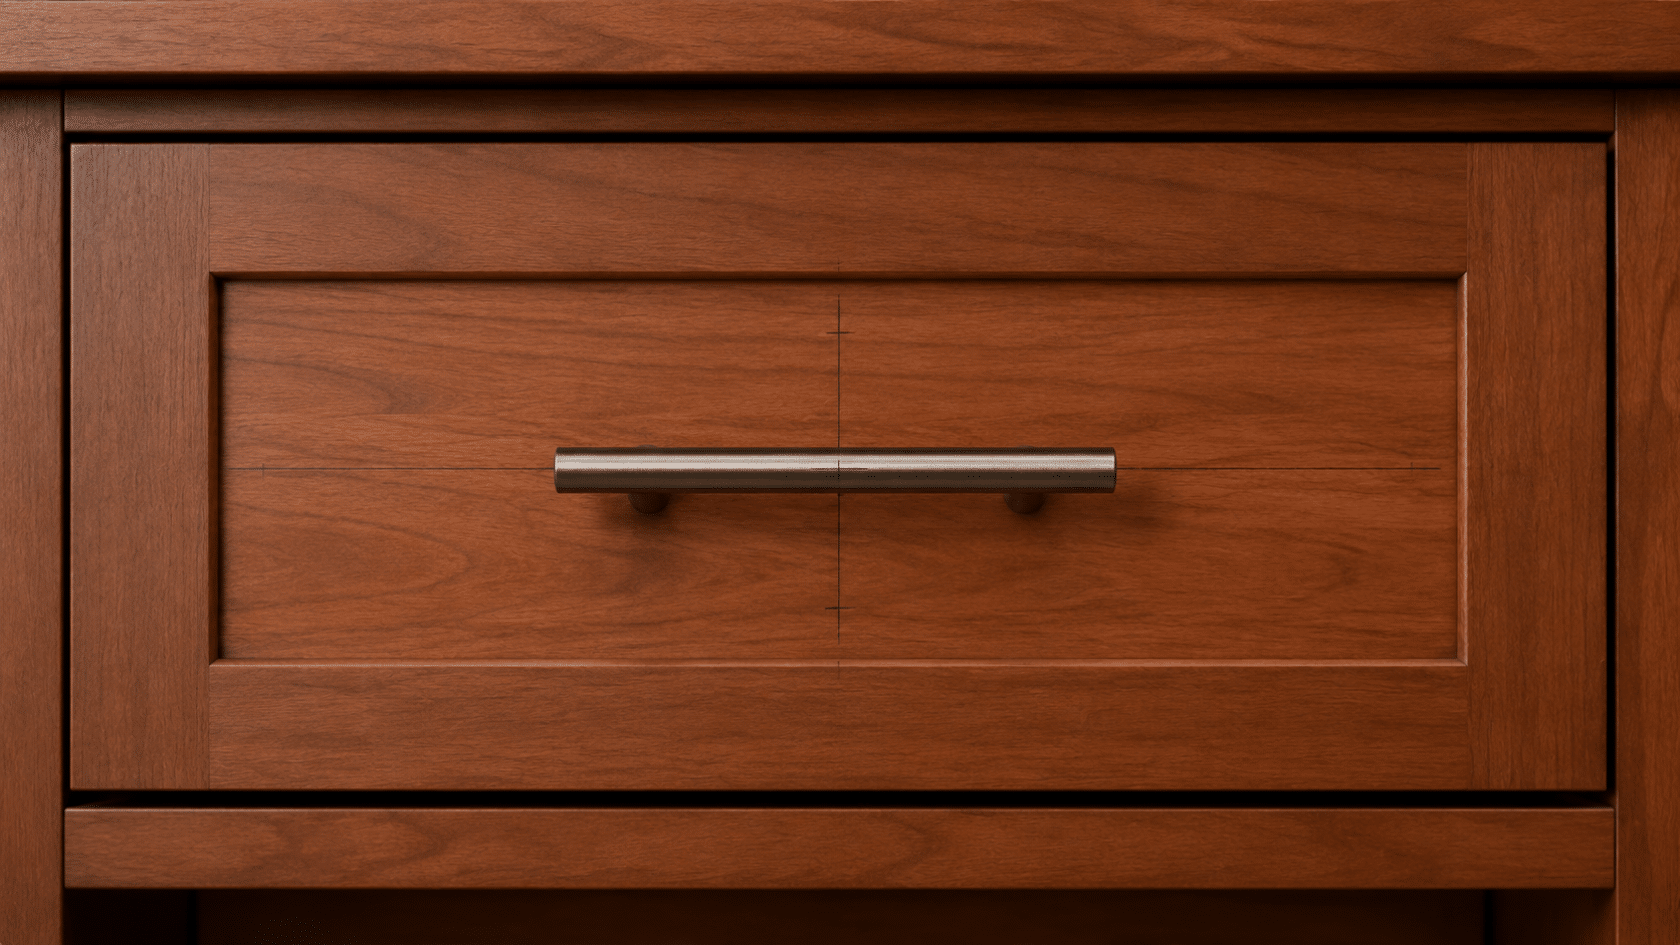
Centered pulls are the most common and reliable choice for most drawers.
- Pull sits at the horizontal and vertical midpoint of the drawer front.
- Works across nearly all drawer sizes and cabinet styles.
- For drawers under 24 inches, a single pull is sufficient.
- Measure carefully before drilling; even a slight deviation appears uneven.
Centered pulls provide a balanced grip and a clean, symmetrical look.
High Pulls
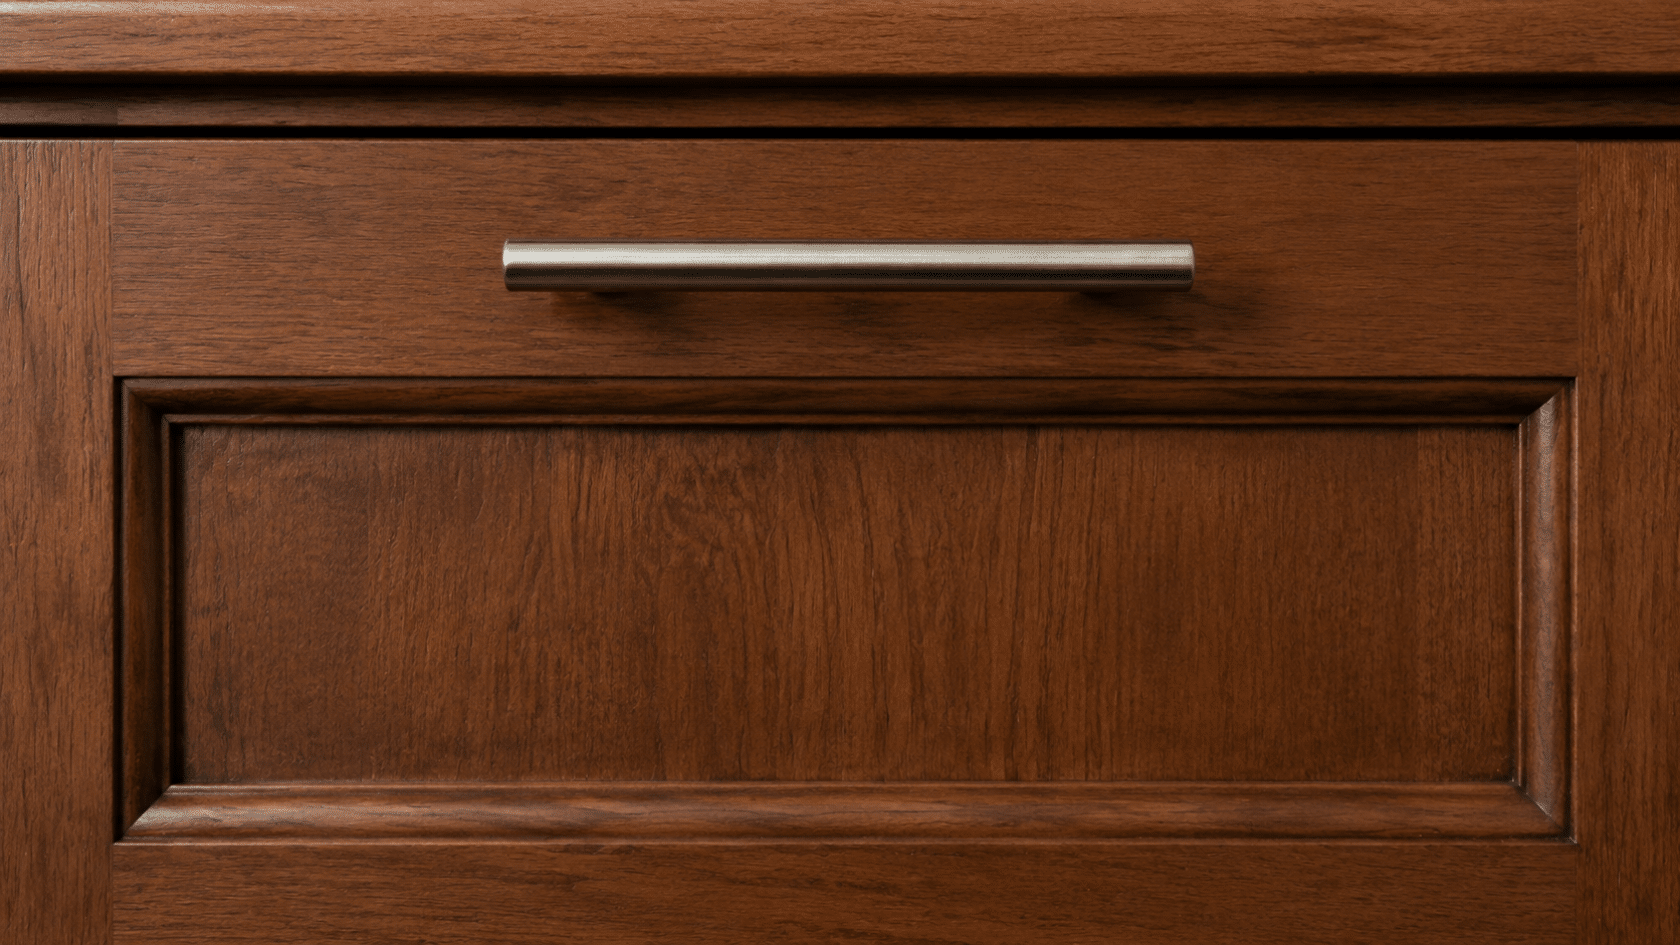
High placement is ideal for certain drawer styles where centered pulls disrupt design.
- The pull is positioned at 2 inches from the top edge.
- Best for paneled or inset fronts; avoids interrupting decorative details.
- Align with door pulls for a consistent visual line across cabinetry.
- Avoid mixing with centered pulls in the same run.
High placement is ideal for certain drawer styles where centered pulls disrupt design. It keeps the drawer front visually balanced for a cohesive look.
Wide Drawers (>24 inches)
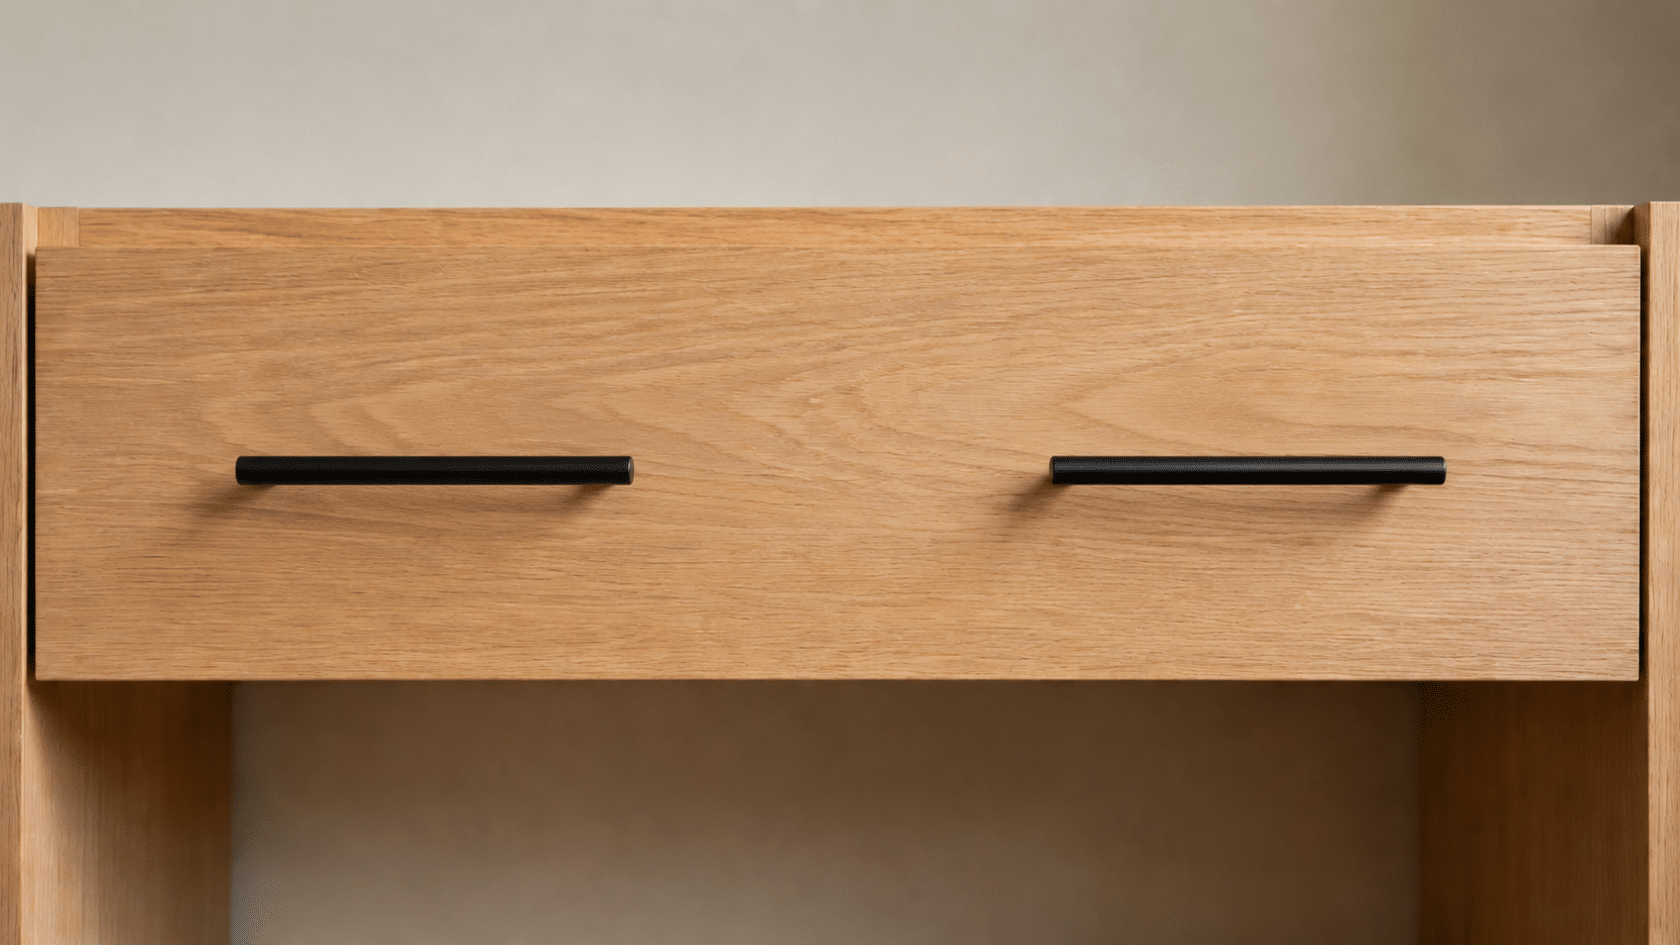
Wide drawers need careful placement to balance function and appearance.
- Use either two pulls or a long bar pull.
- Two pulls: position one-third of the drawer width in from either side (one-third rule).
- Long bar pull: spans ~1/3–1/2 of drawer width, centered horizontally and vertically.
- Prevents uneven resistance and visually underscaled appearance.
Consistent spacing and centering keep your wide drawer fronts looking well-proportioned. Ensure that the the pull feels balanced in your hand every time you open it.
Tips for Proper Cabinet Pull Placement
Cabinet pull placement works best when you focus on preparation, consistency, and testing. These tips cover practical steps and style choices to achieve professional results.
- Use consistent measurements from same reference point for uniform alignment across cabinets.
- Test placement with painter’s tape mockups before final drilling decisions.
- Keep pulls aligned horizontally using a level for clean visual consistency.
- Maintain 2–2.5-inch spacing from edges for a comfortable ergonomic grip.
- Center pulls on wide drawers or use two evenly spaced handles.
Small decisions made carefully before drilling add up to a finished kitchen that looks polished, feels comfortable to use, and holds up to daily life.
Wrapping Up
Getting cabinet pulls in the right place makes a real difference in how your kitchen or bathroom feels and functions.
Proper cabinet pull placement ensures drawers and doors open smoothly, stay aligned, and give the space a polished look. Correct positioning reduces strain, improves usability, and keeps the setup consistent across all cabinets.
Take a few minutes to measure, mark, and double-check placement before installing. It saves time and keeps your hardware looking professional.
Ready to upgrade your cabinets with precision? Grab the right tools and start placing your pulls today.
Have questions or tips of your own? Share them in the comments below!
Frequently Asked Questions
Can I Reposition Existing Cabinet Pulls without Damaging the Doors?
Yes, you can remove and reposition pulls if the holes are pre-drilled. Use wood filler to cover old holes and sand before installing new hardware.
Do Longer Pulls Affect Drawer Functionality?
Longer pulls can improve grip on wide drawers, but ensure they don’t hit adjacent drawers or counters. Measure clearance carefully before choosing length.
How Often Should Cabinet Pulls Be Tightened or Checked?
Check pulls every 6–12 months, especially on heavily used drawers. Loose screws can affect usability and alignment, so tighten as needed.