How to Read a Tape Measure the Right Way

If you have ever pulled out a tape measure for a quick home project and found yourself staring at all those tiny lines, you are definitely not alone.
At first, marks like 5/16 or 7/8 can look confusing, especially when you want a clear measurement and to get back to your task.
The trick is knowing that the same pattern repeats between every inch. Once you recognize the longer and shorter lines, reading them becomes much easier.
This post will show you how to read a tape measure, recognize common fractions, and understand special markings.
Know the Basic Parts of A Tape Measure
Before reading the scale or measure for something you want to DIY, it helps to know which parts control where a measurement begins and ends.
-
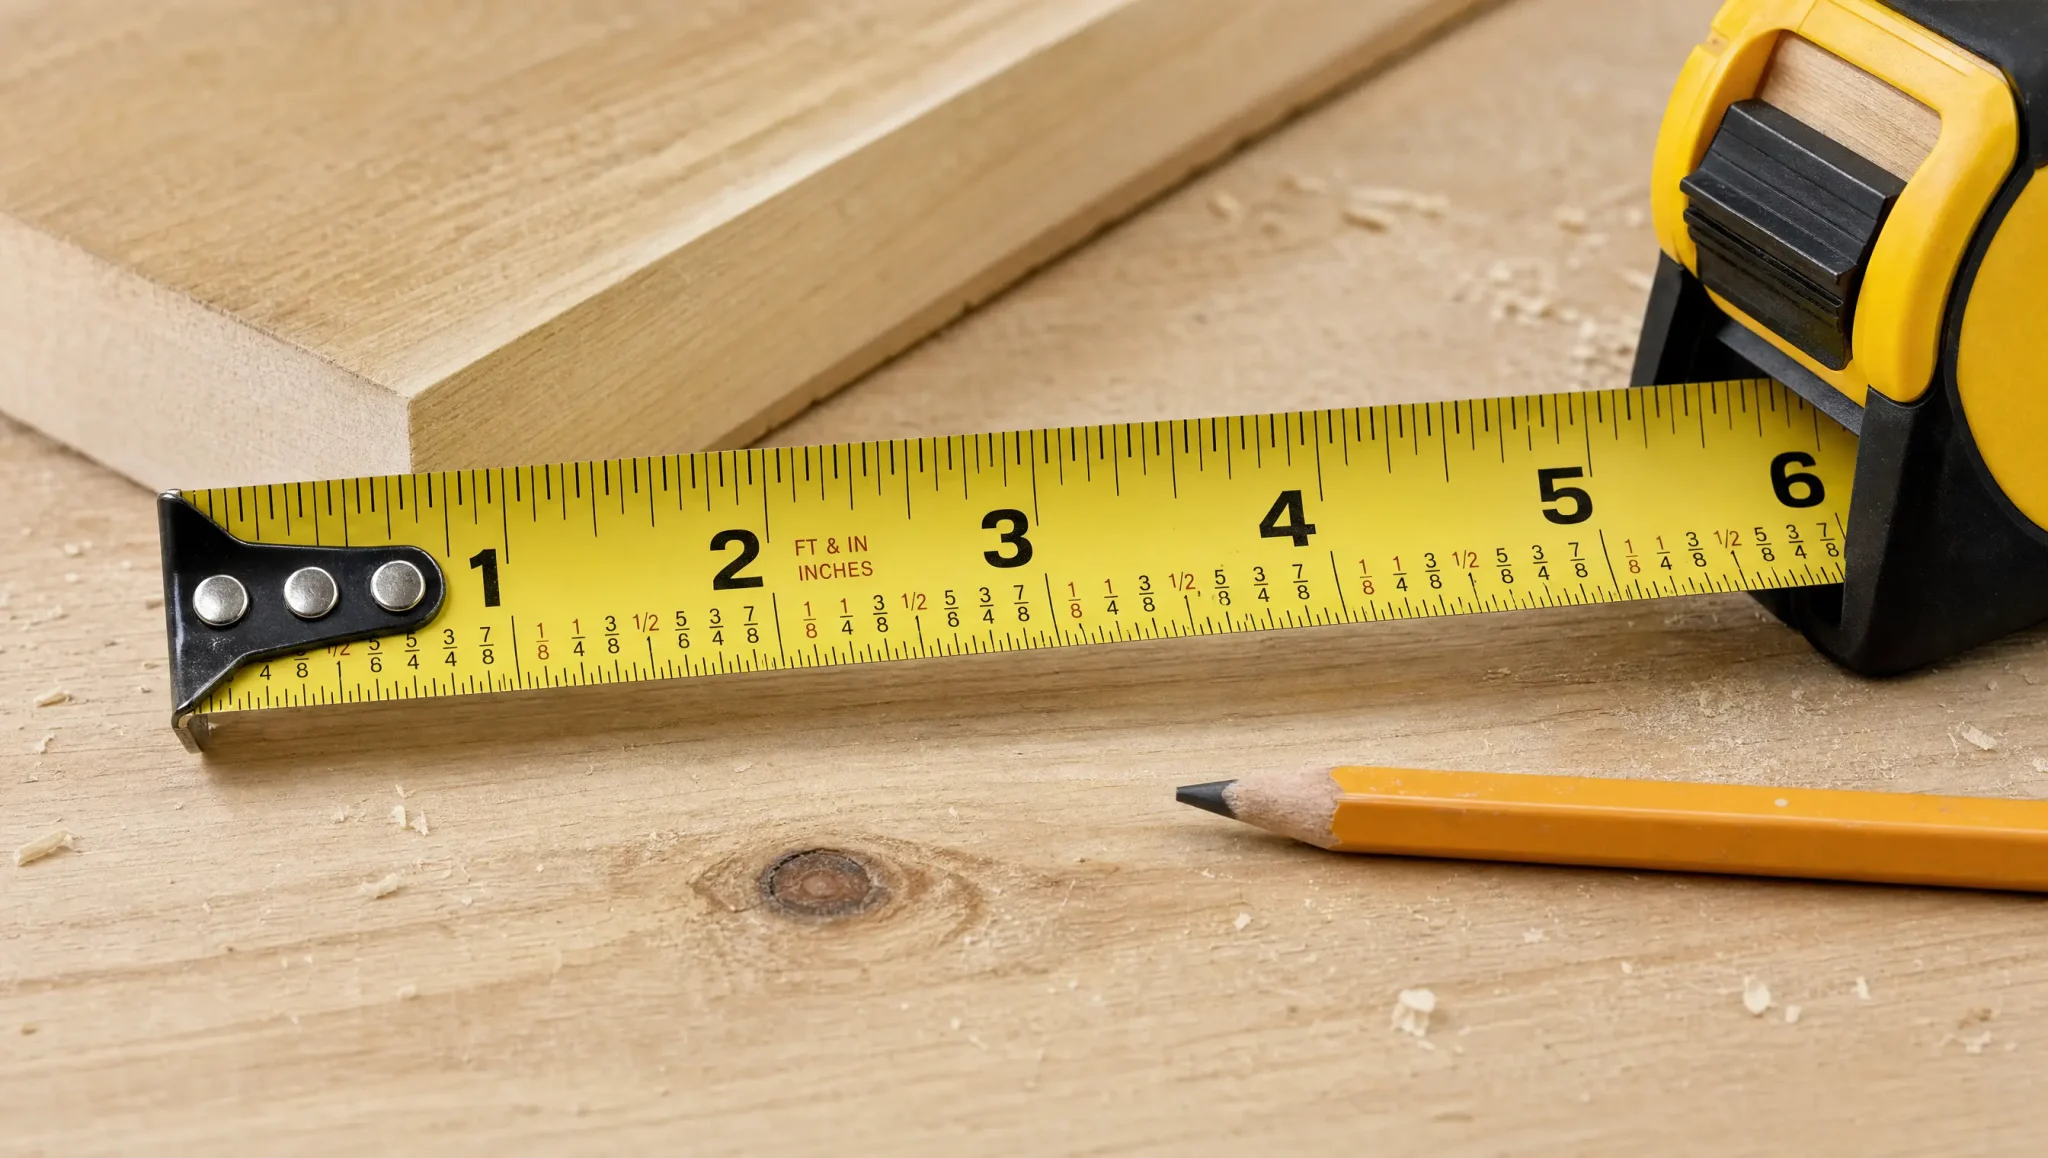
Hook: The metal tab at the end catches an outside edge or presses against an inside surface.
-
Blade: The long metal strip carries the inch, foot, and sometimes metric markings.
-
Housing: The case stores the blade when it retracts.
-
Thumb lock: The lock keeps the blade extended while you read or mark a measurement.
-
Belt clip: This makes the tape easier to carry but does not affect the reading.
For most measuring jobs, the hook and blade are the two parts you will pay closest attention to.
What Do the Lines on a Tape Measure Mean?
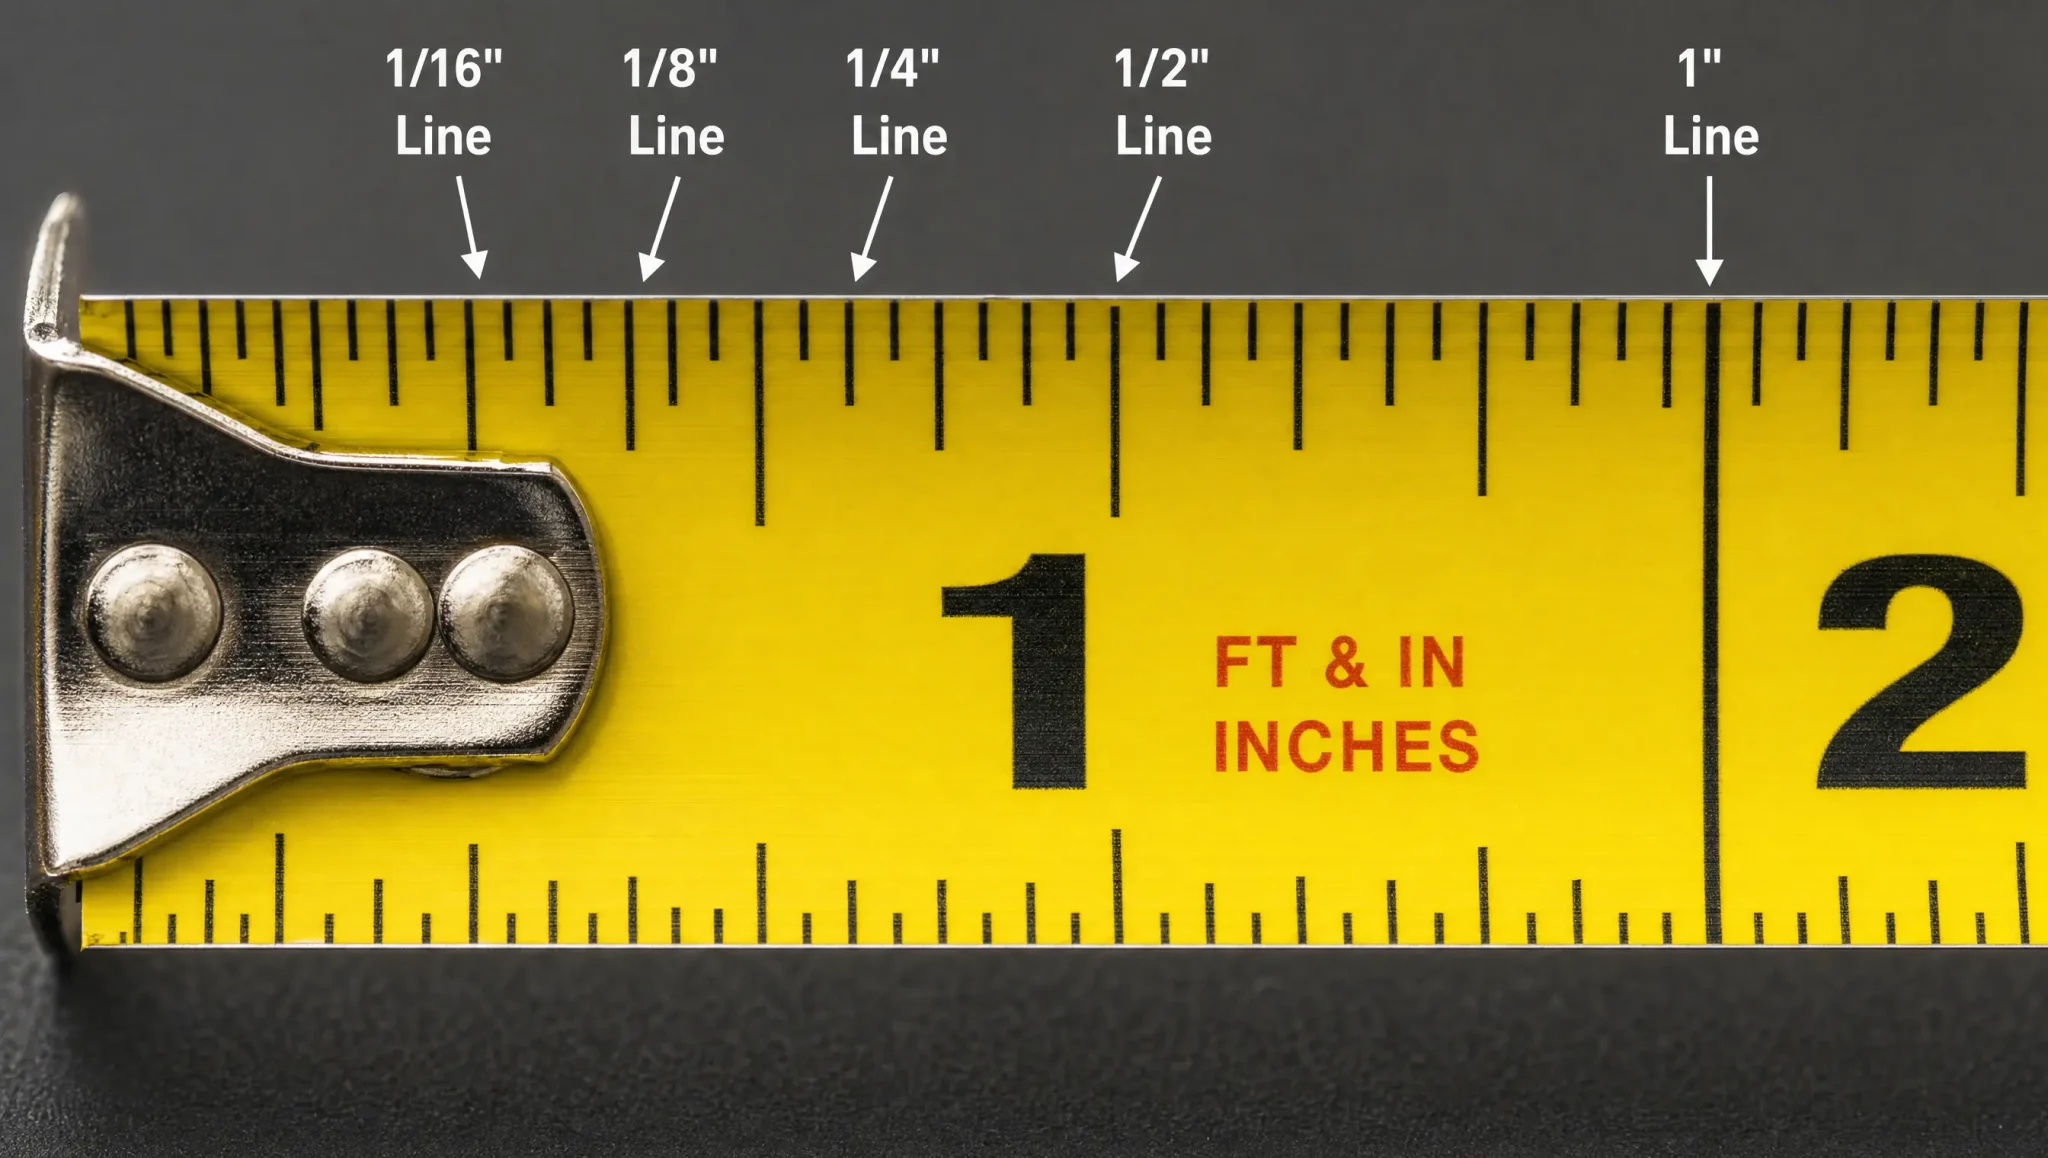
Every inch on a standard U.S. tape measure is divided into smaller fractions, and the length of each line helps you identify its value.
The longest numbered lines mark whole inches. Between them, progressively shorter lines usually represent 1/2, 1/4, 1/8, and 1/16 inch.
|
Mark |
Measurement |
|---|---|
|
Longest numbered line |
1 inch |
|
Long center line |
1/2 inch |
|
Next-longest lines |
1/4 inch |
|
Shorter lines |
1/8 inch |
|
Shortest lines |
1/16 inch |
Think of the markings as a visual hierarchy. Larger fractions get longer lines, while smaller fractions get shorter ones.
The 1/2-inch line is usually the longest mark between two whole inches. The 1/4-inch lines are slightly shorter. Eighth-inch lines are shorter again, and 1/16-inch marks are usually the smallest divisions.
Printing can differ slightly between tape measures, but this basic pattern is common on U.S. fractional-inch tapes.
How to Read a Tape Measure Step by Step
Follow these steps to read a standard U.S. tape measure accurately.
1. Find the Last Whole Inch
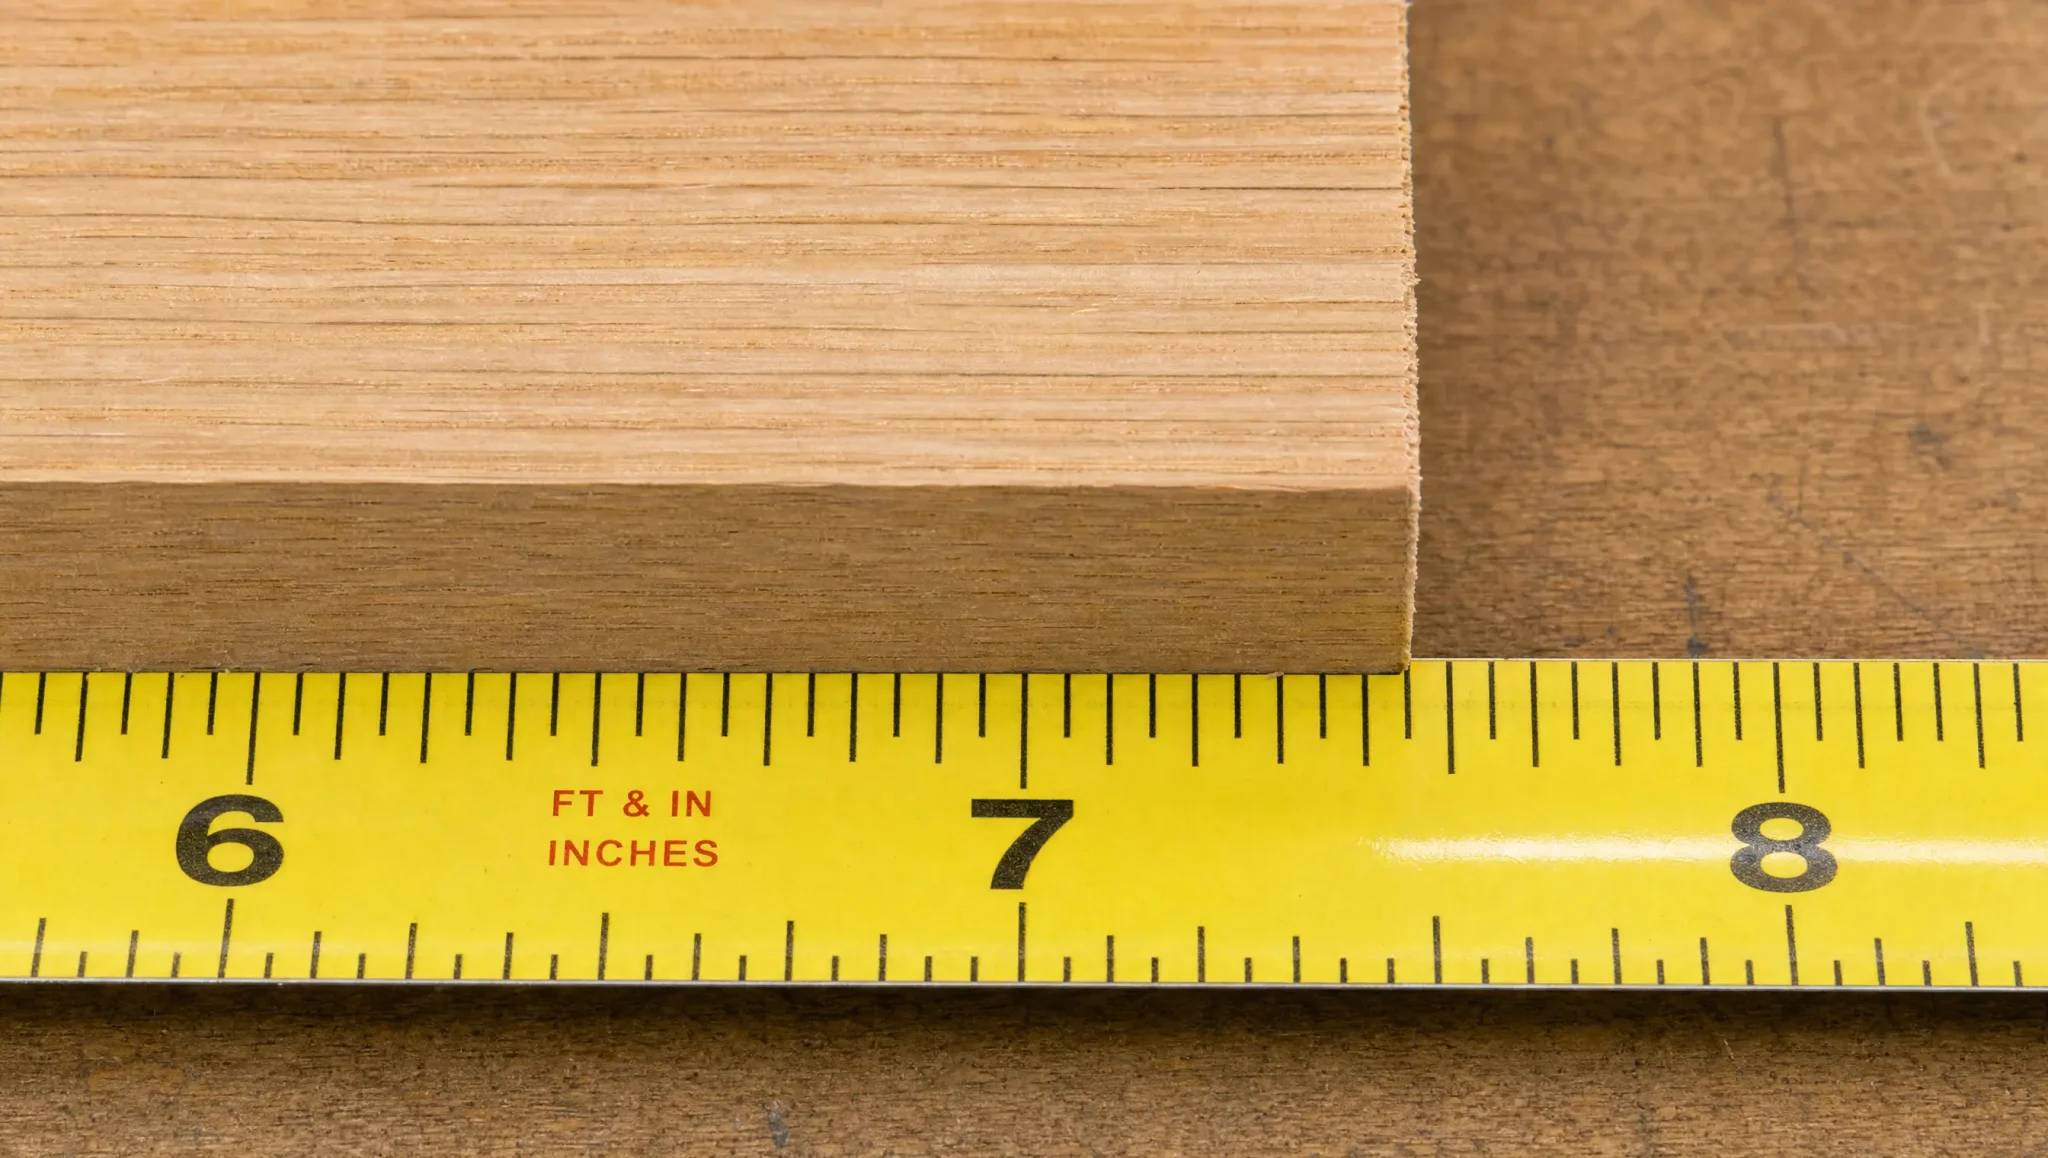
Start by locating the last numbered inch mark before the edge of the object. The large numbered lines represent whole inches. If the object ends between 7 and 8 inches, start your measurement at 7 inches.
Example: If the edge falls after 7, start with 7 inches.
2. Look at the Fractional Line
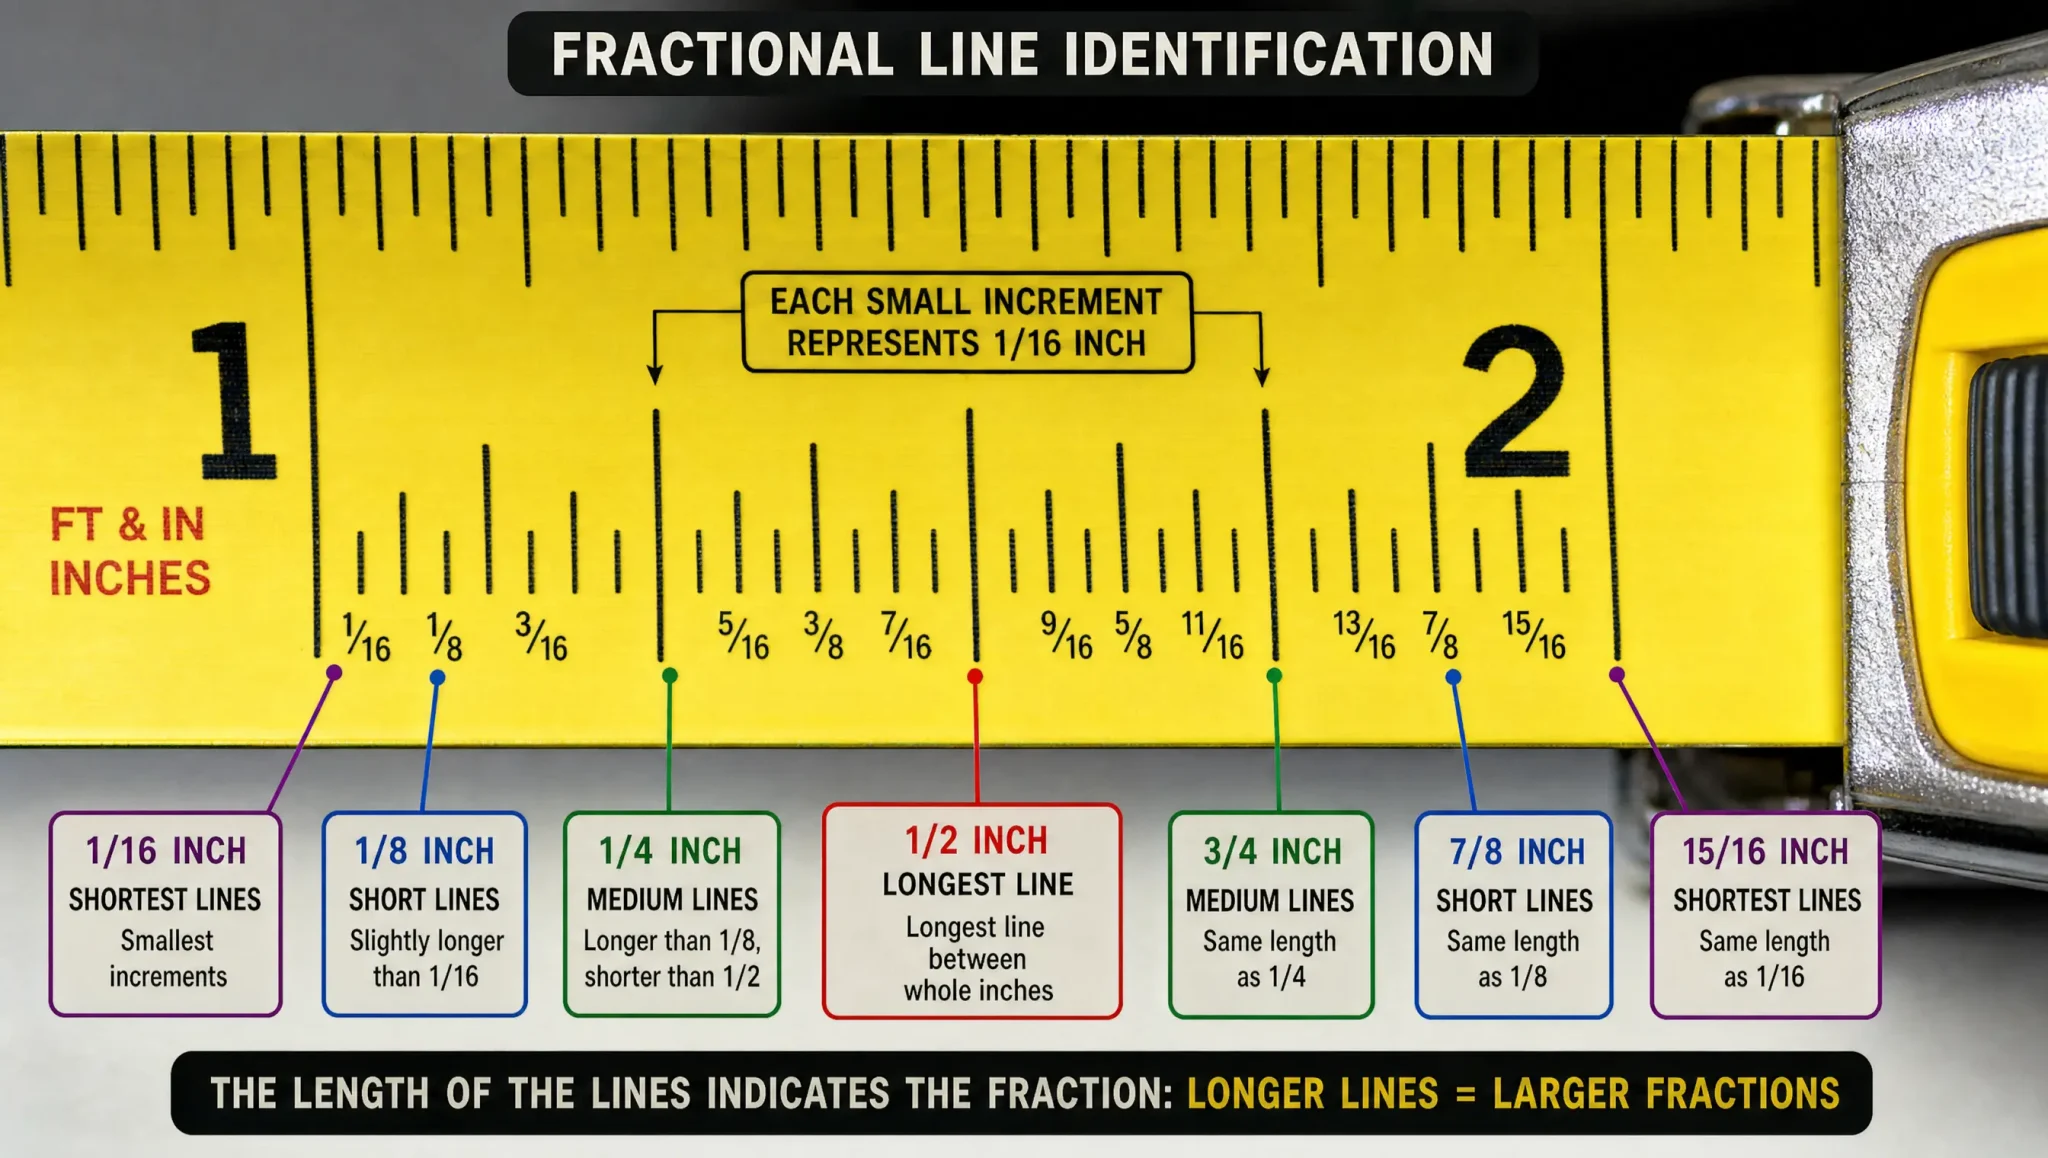
Next, check which small line the object ends on after the whole-inch mark. The line lengths usually follow this pattern:
-
Longest middle line = 1/2 inch
-
Next-longest lines = 1/4 inch
-
Shorter lines = 1/8 inch
-
Smallest lines = 1/16 inch
Use the longer lines as reference points instead of counting every mark from the start.
Example: Third small mark = 3/16 inch.
3. Count the Small Marks if Needed
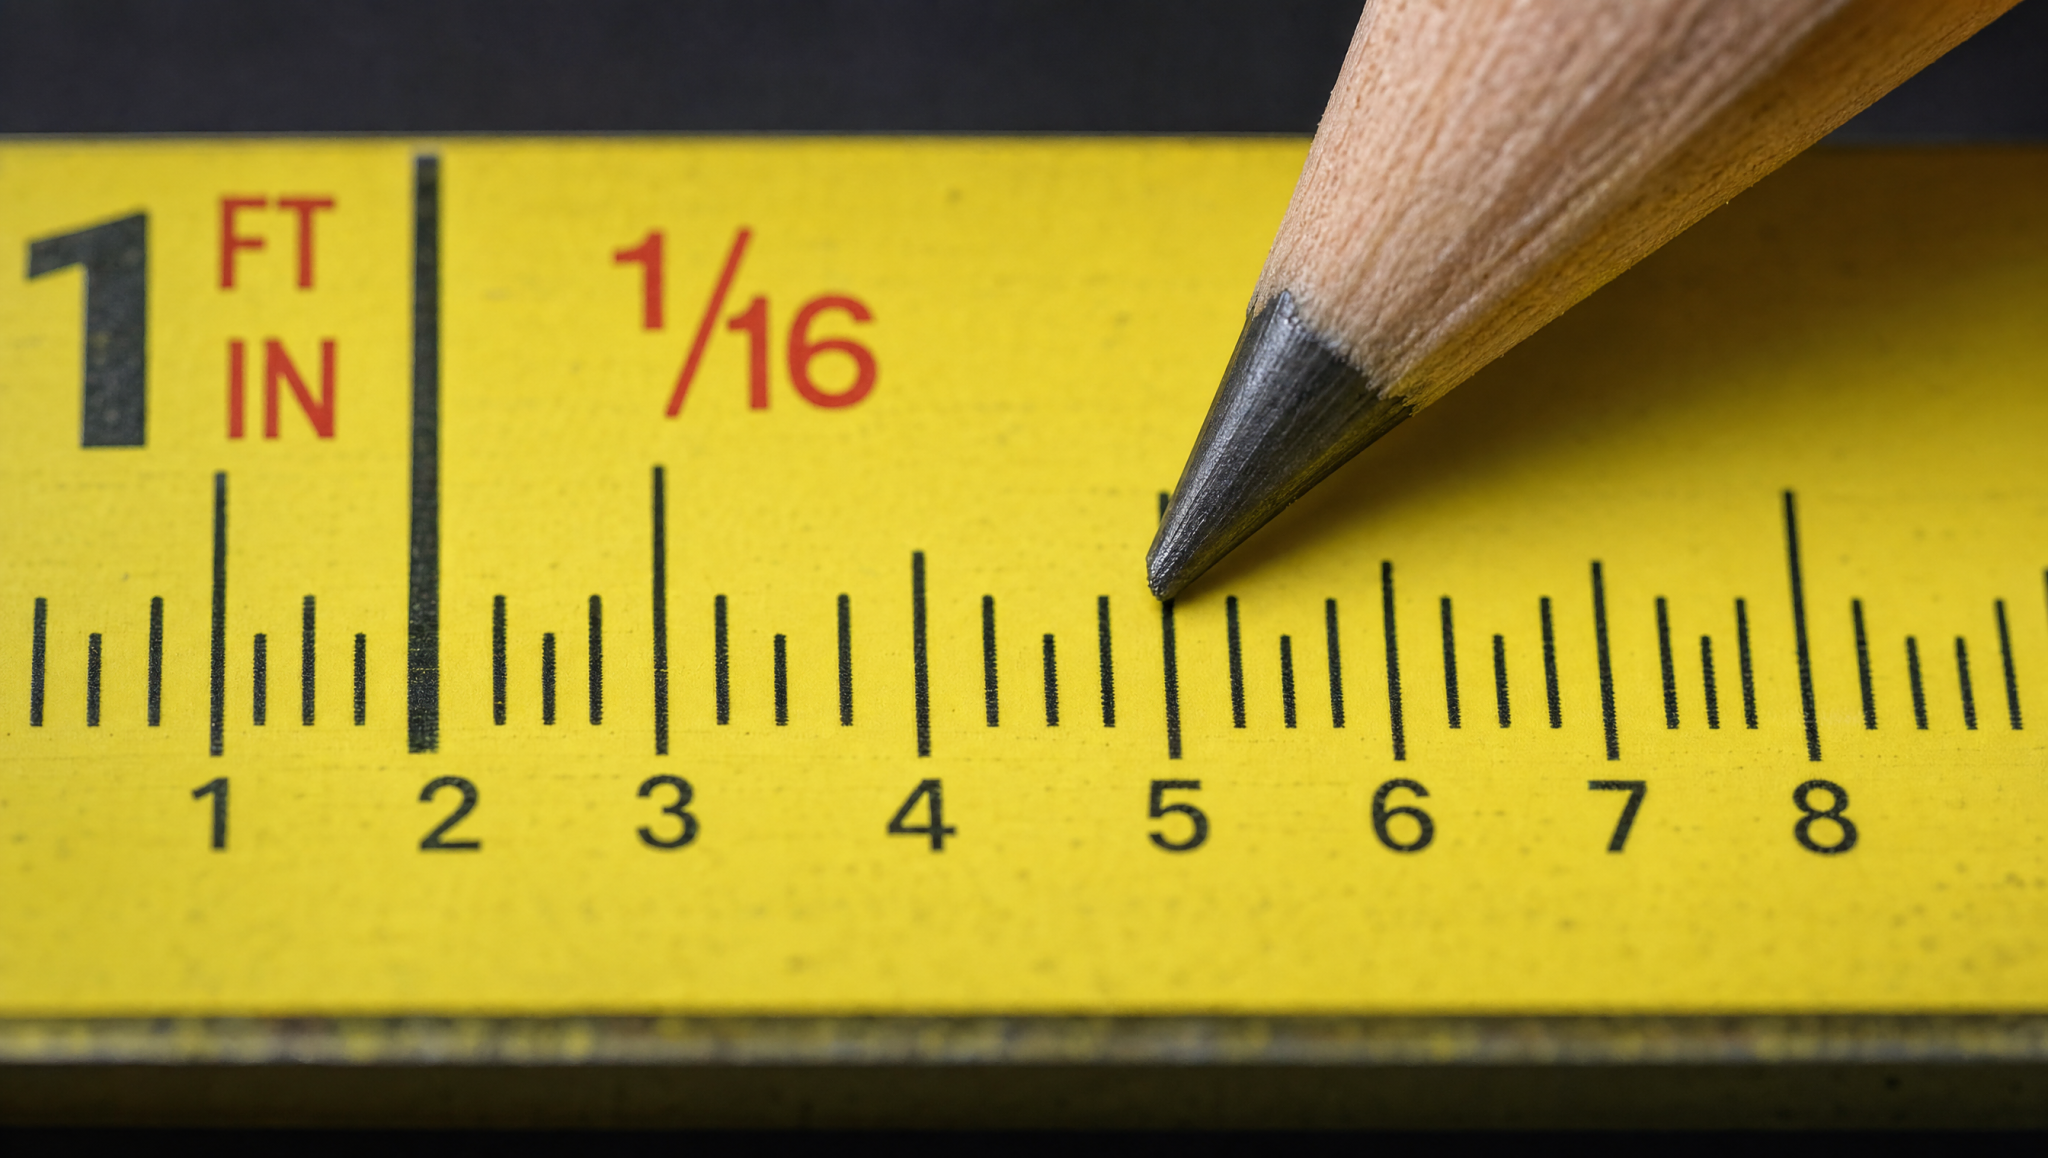
If the edge does not land on an obvious 1/2 or 1/4 mark, count the smaller divisions after the last whole inch. Most standard tape measures divide each inch into 16 equal parts. Each smallest line therefore represents 1/16 inch.
Count from the whole-inch line to the exact mark where the object ends.
Example: Five small marks = 5/16 inch.
4. Combine the Whole Inch and Fraction
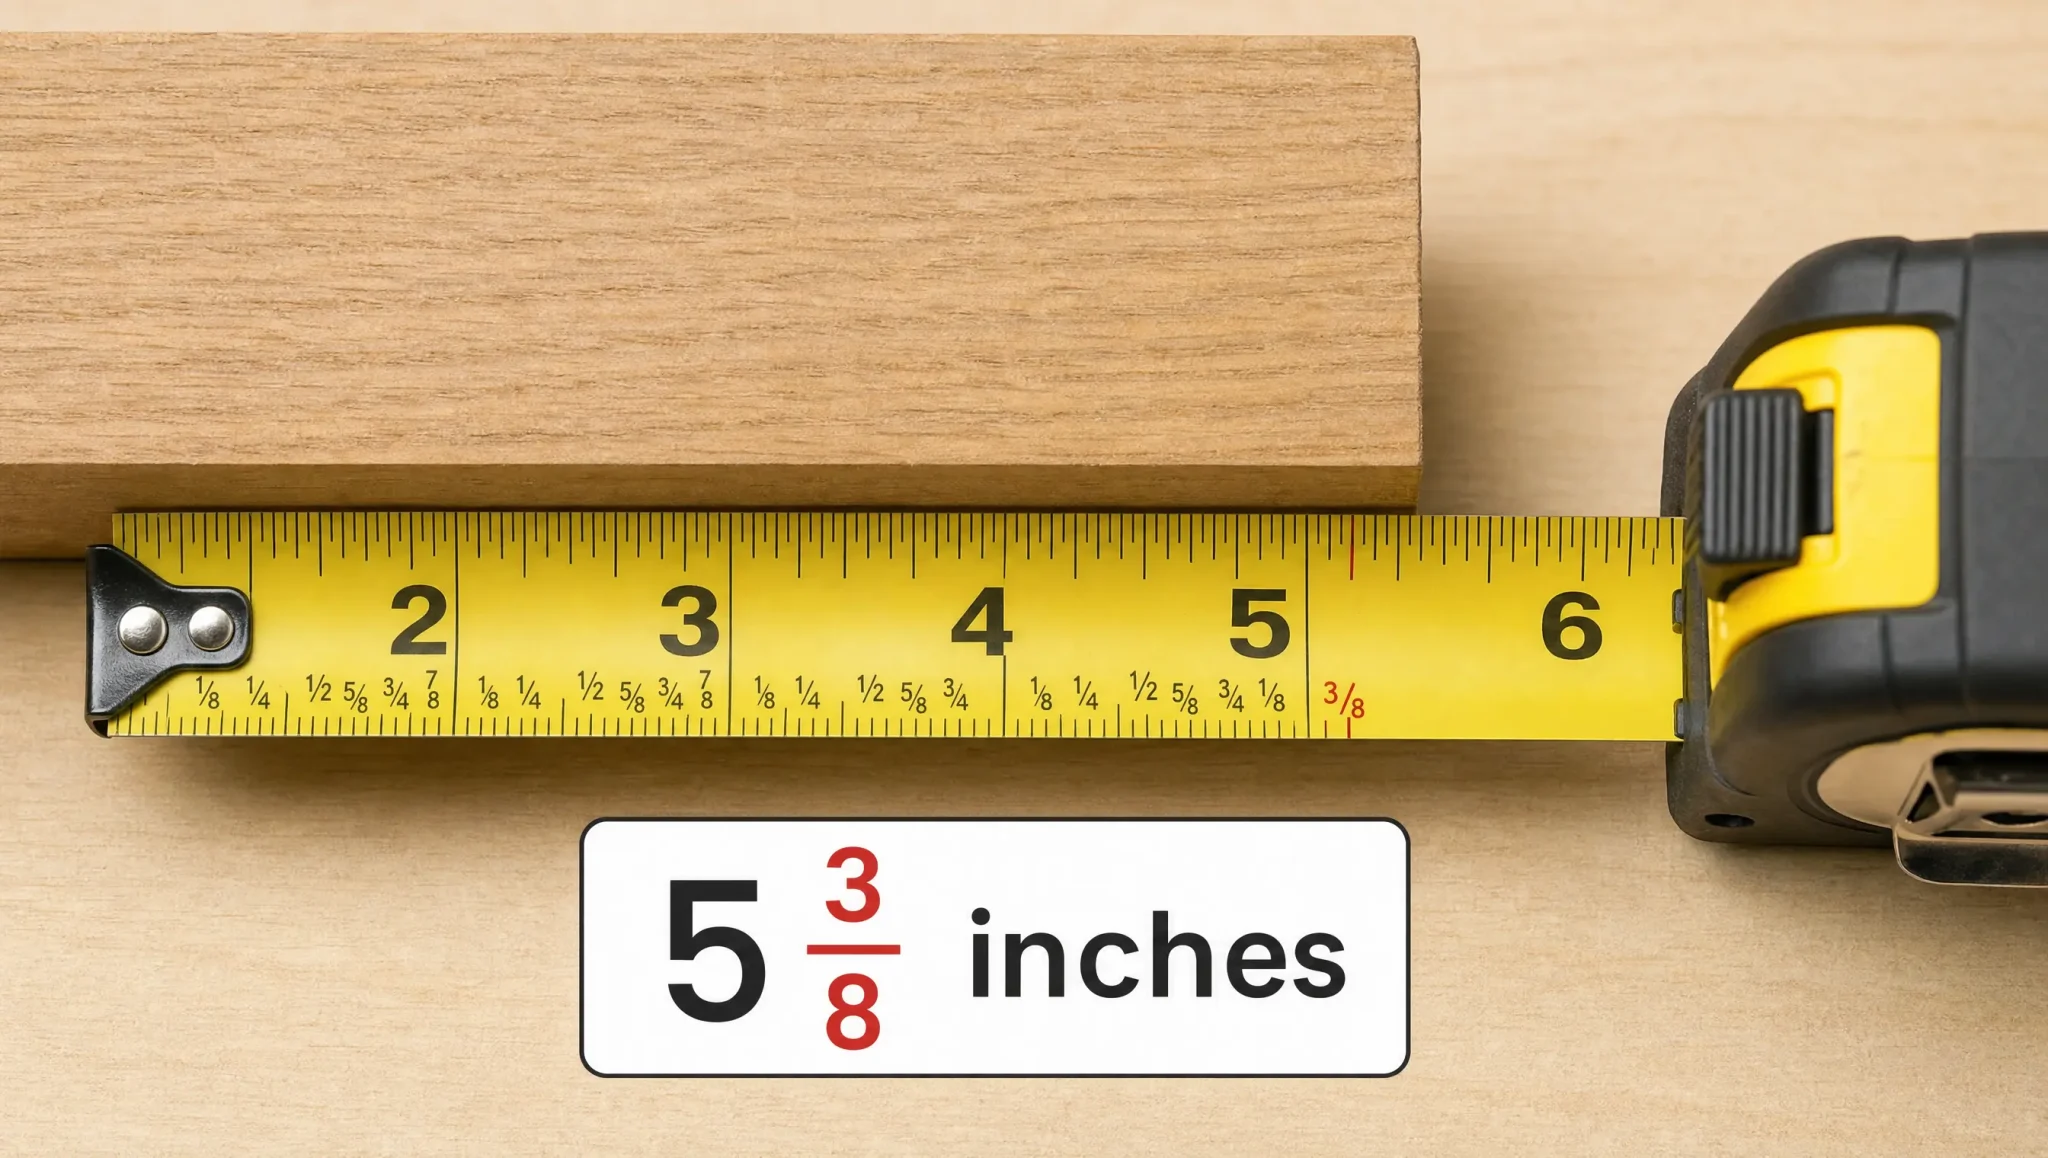
Add the whole-inch number to the fraction you identified. The whole number tells you how many complete inches you have, while the fraction shows the extra distance beyond that point.
Keep both parts together when recording the final measurement.
Example: 5 inches + 3/8 inch = 5 3/8 inches.
5. Simplify the Fraction
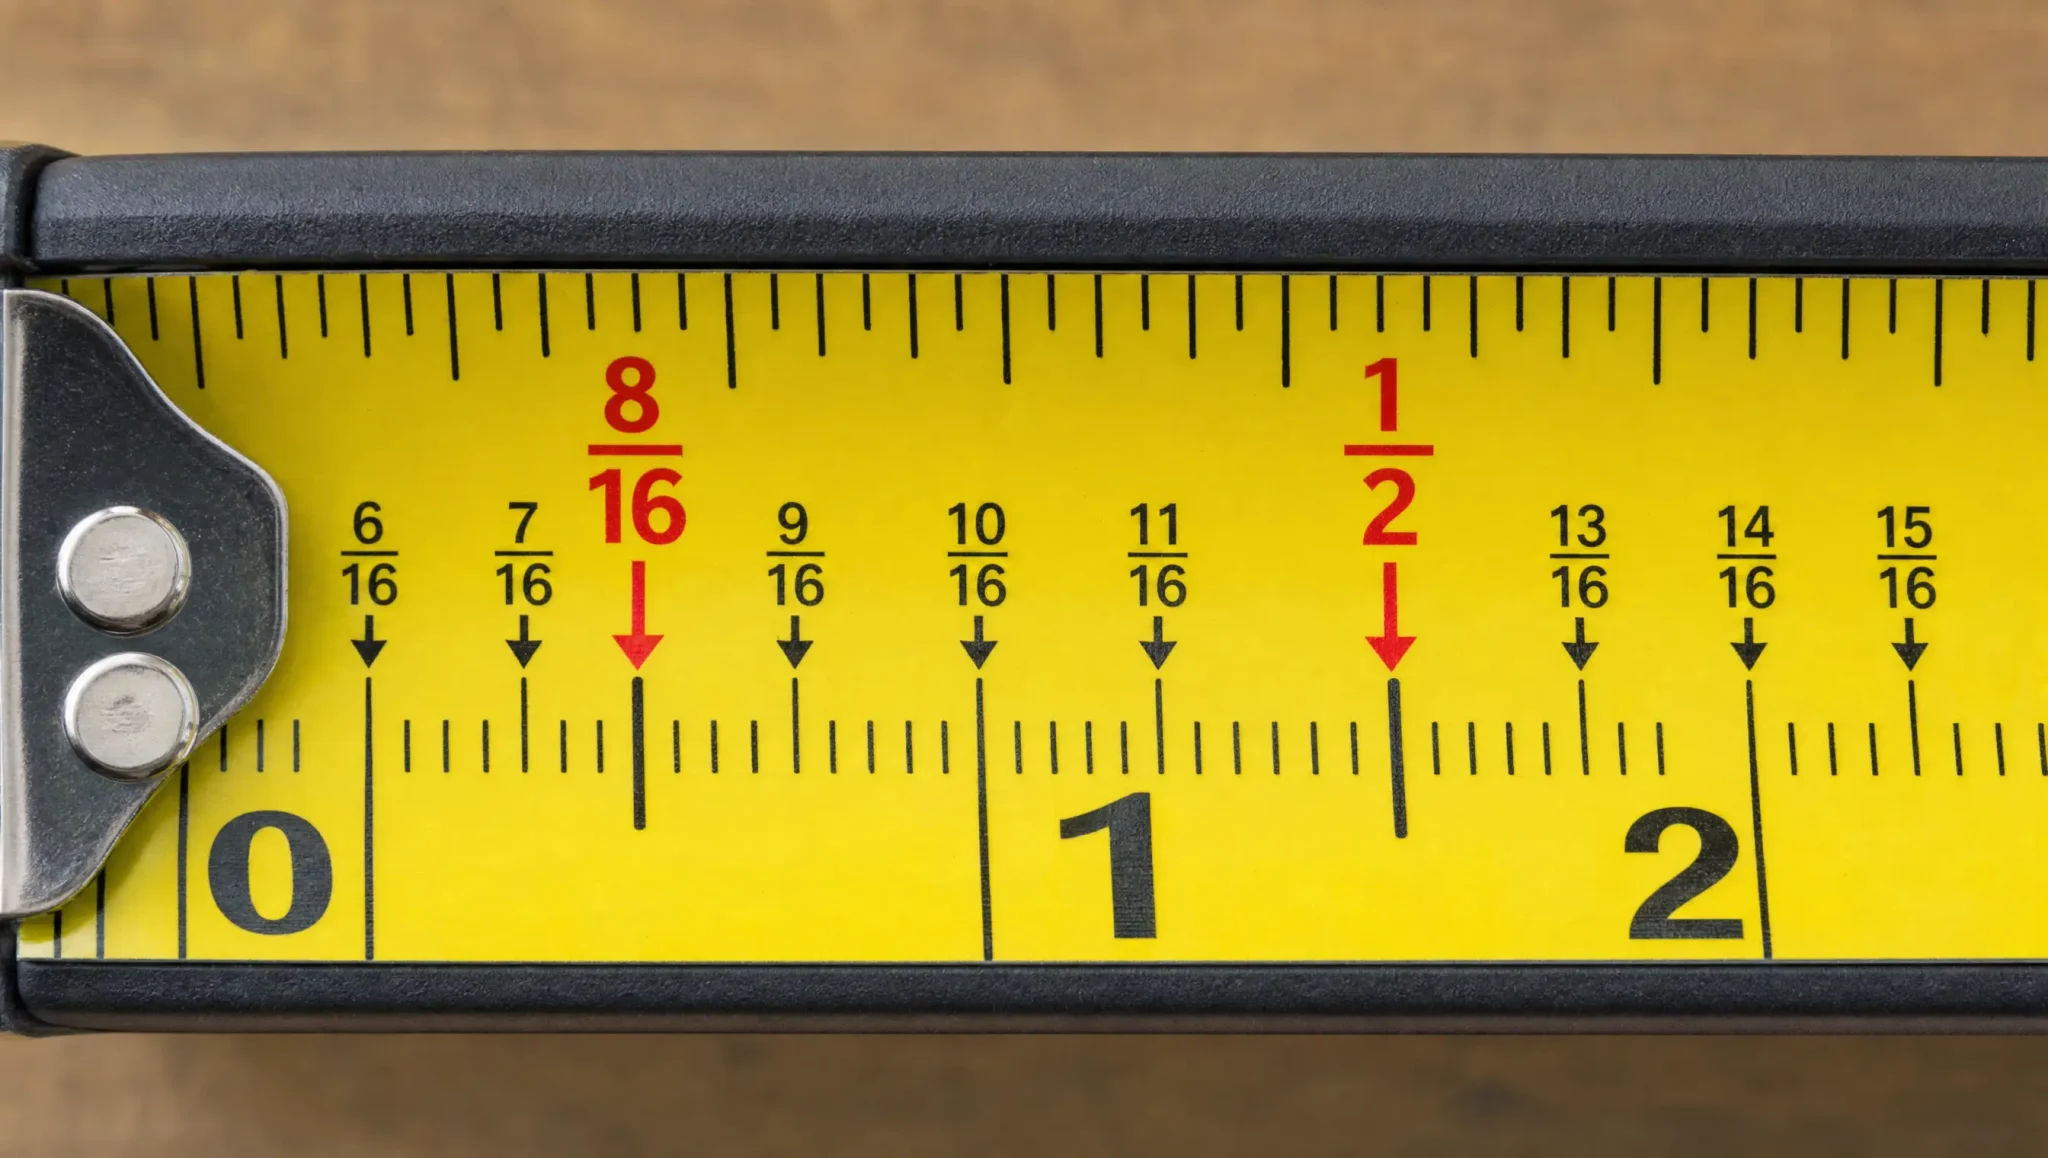
If your fraction can be reduced, write it in its simplest form. This makes measurements easier to read and matches the fractions normally shown on plans, instructions, and project measurements. For example:
-
2/16 = 1/8
-
4/16 = 1/4
-
8/16 = 1/2
-
12/16 = 3/4
You only need to simplify when both numbers can be divided evenly.
Example: 6 8/16 inches = 6 1/2 inches.
Tape Measure Fractions at a Glance
You usually won’t need decimals for basic home projects. However, decimals can be useful when comparing tape measurements with digital measurements, calculators, plans, or equipment that doesn’t display fractions.
A quick fraction reference can make it easier to recognize marks that look almost identical at first.
|
Fraction |
Sixteenths |
Decimal |
|---|---|---|
|
1/16 |
1/16 |
0.0625 |
|
1/8 |
2/16 |
0.125 |
|
1/4 |
4/16 |
0.25 |
|
3/8 |
6/16 |
0.375 |
|
1/2 |
8/16 |
0.5 |
|
5/8 |
10/16 |
0.625 |
|
3/4 |
12/16 |
0.75 |
|
7/8 |
14/16 |
0.875 |
|
15/16 |
15/16 |
0.9375 |
If you are starting, focus first on recognizing 1/2, 1/4, 1/8, and 1/16.
How Do You Read Feet and Inches on a Tape Measure?
Longer tape measures often make every 12-inch interval easy to recognize because 12 inches equals one foot.
The basic conversions are:
-
12 inches = 1 foot
-
24 inches = 2 feet
-
36 inches = 3 feet
-
48 inches = 4 feet
-
60 inches = 5 feet
For example, 38 inches equals 3 feet 2 inches because 36 inches equals 3 feet, with 2 inches remaining. You may also see this written as 3’ 2”. The single mark represents feet, while the double mark represents inches.
A measurement of 38 1/2 inches can therefore be written as 3’ 2 1/2”.
What Do the Special Marks on a Tape Measure Mean?
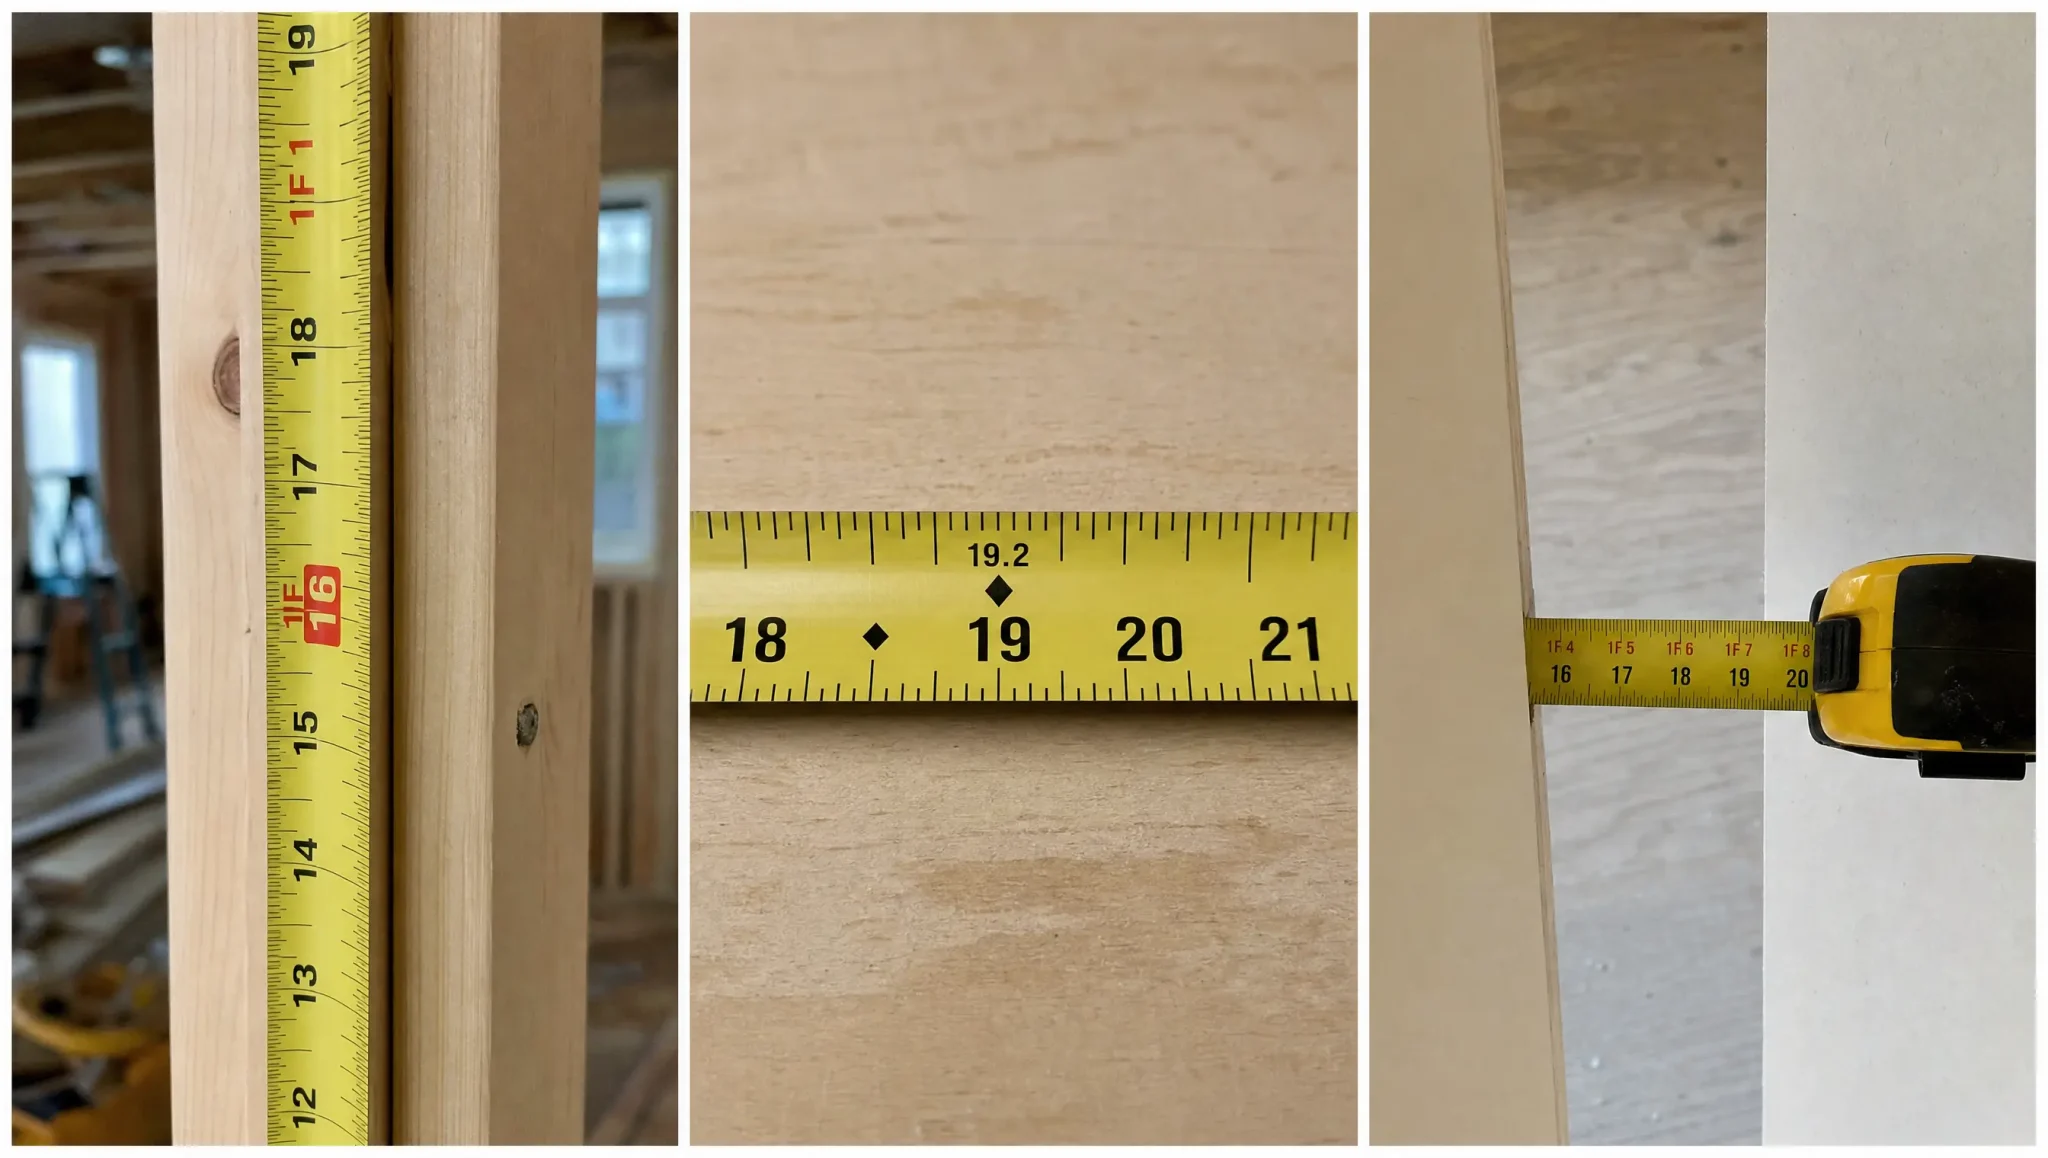
1. Red Marks Every 16 Inches
Many U.S. tape measures highlight 16-inch intervals with red numbers or another noticeable mark. These marks are commonly used to locate wall studs spaced 16 inches on center and help you find each interval without calculating it manually.
2. Black Diamonds Around Every 19.2 Inches
Black diamond marks usually appear about every 19.2 inches and are used for certain joist or truss layouts. Five 19.2-inch spaces equal 96 inches, or 8 feet, which helps divide an 8-foot span into five equal sections.
3. Foot Marks and Case Measurements
Tape measures often highlight every 12 inches, since 12 inches equals 1 foot. Some cases also show their housing length, which can help with inside measurements by letting you add the case length to the blade reading.
How to Read a Metric Tape Measure
Some tape measures include both inches and metric measurements, so it helps to know how the metric side works. Unlike inches, which use fractions, the metric system is based on groups of ten.
There are 10 millimeters in 1 centimeter, 100 centimeters in 1 meter, and 1,000 millimeters in 1 meter. On most metric tape measures, the numbered marks show centimeters, while the smaller lines between them represent millimeters.
To read the measurement, first find the last full centimeter mark before the object ends. Then count the smaller millimeter lines after it.
For example, if an object ends 6 small marks past 12 centimeters, the measurement is 12 centimeters and 6 millimeters, or 12.6 centimeters.
Frequently Asked Questions
How to Read a Ruler for Dummies?
Start with the numbered inch marks, then count the smaller lines between them. On most rulers, the longest middle line represents 1/2 inch, followed by 1/4, 1/8, and 1/16 inch marks.
How to Read a 1-Inch Tape Measure?
One inch on a tape measure is usually divided into 16 smaller marks. The longest mark is 1/2 inch, while shorter marks represent 1/4, 1/8, and 1/16 inch.
What Is the Age Trick With a Tape Measure?
The tape measure age trick is a novelty number trick that uses measurements or numbered marks to calculate or guess someone’s age. The exact steps can vary depending on the version of the trick.
How to Teach a Child to Read a Tape Measure?
Begin with whole inches, then introduce 1/2-inch and 1/4-inch marks using simple objects. Let the child measure toys, books, or furniture to practice reading the tape.
Measure With Confidence
Those tiny marks on a tape measure may look confusing at first, but they follow the same pattern from one inch to the next.
Once you can spot the whole inch and recognize common fractions like 1/2, 1/4, 1/8, and 1/16, measurements such as 5/16 or 7/8 become much easier to read.
With a little practice, you will spend less time counting lines and more time measuring accurately and finishing your project.