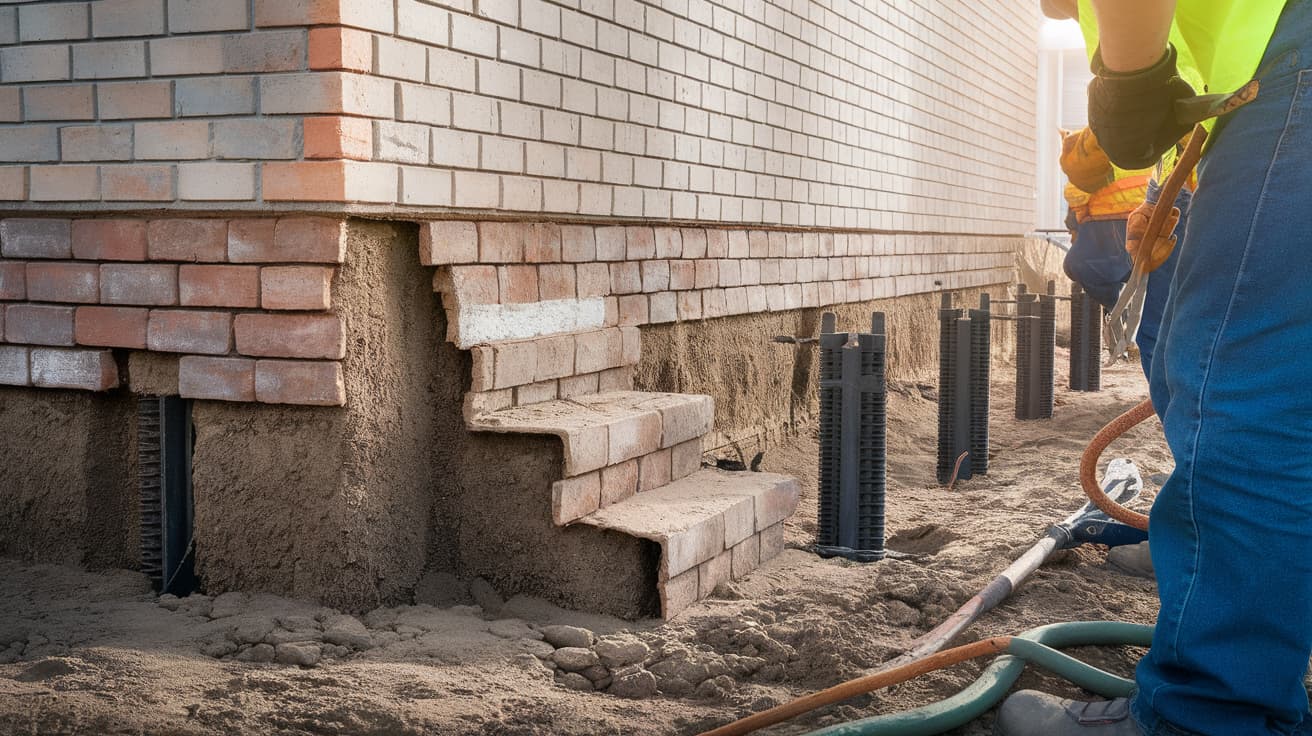
Foundation Settling Repair: Causes, Signs, and Permanent Fixes

Foundation settling can cost you thousands or nothing at all. The difference comes down to catching it early.
A small crack near a door frame might be normal movement from the first year of construction. Or it could be the first sign of soil failure under your home. Most landowners can’t tell the difference, and that gap in knowledge is exactly where repair bills grow.
This post walks you through what foundation settling actually means, what causes it, how to read the warning signs, and what professional repair looks like at each severity level.
You’ll also find realistic cost ranges and prevention tips grounded in real repair scenarios.
What Is Foundation Settling?
Foundation settling is the downward movement of your home’s foundation as the soil beneath it compresses, shifts, or loses moisture over time.
All homes settle. In the first one to three years after construction, soil compacts under the structure’s weight. This is expected and typically stops on its own. What signals a real problem is settling that continues past those early years, moves unevenly, or shows up alongside other structural symptoms.
Engineers draw a key line between uniform settlement (the whole foundation sinks evenly) and differential settlement (one part sinks more than another).
Differential settlement is the cause of cracked walls, sticking doors, and sloping floors because the structure is being pulled in different directions at the same time.
What Causes Foundation Settling?
Settlement rarely has a single cause. It usually starts with a combination of soil conditions, water movement, and the structure’s original construction.
Soil Conditions:
- Clay soil expands when wet and shrinks when dry. This repeated cycle puts stress on the foundation year after year.
- Sandy soil shifts easily under load and offers less long-term support.
- Poorly compacted fill soil is one of the leading causes of settlement in newer homes. If the builder did not compact it thoroughly before pouring the slab, the soil compresses slowly under the home’s weight.
Water and Drainage Problems:
- Clogged gutters dump water directly next to the foundation, softening the soil.
- Poor yard grading lets rainwater pool against the home instead of running away from it.
- Plumbing leaks under the slab can erode soil beneath without any visible signs above ground.
Environmental and Tree-Related Factors:
- Mature tree roots can extend twice the size of the tree’s visible canopy. Roots beneath a home draw hundreds of gallons of moisture from the soil daily, causing the soil to shrink.
- Seasonal drought dries clay soils and pulls them away from the foundation, creating voids below.
- Freeze-thaw cycles in colder regions repeatedly push and pull soil, causing gradual movement.
Construction Issues:
- Shallow or undersized footings cannot handle the load as the home ages.
- Home additions, a second story, a garage, a heavy stone kitchen, add weight that the original foundation was not designed to carry.
The American Society of Civil Engineers estimates that at least one in four homes in the continental United States has experienced some form of damage from expansive soil. This makes soil movement the most common root cause behind foundation repair calls.
How Do You Know If Settling Is Serious?
Not every crack means your foundation is failing. The pattern, location, and rate of change matter more than any single crack in isolation.
Signs That Are Usually Normal:
- Hairline surface cracks in concrete or drywall within the first few years of construction
- Slight plaster separation or minor paint gaps at wall-to-ceiling joints
- Cracks that have not changed size or shape over several months of monitoring
Warning Signs That Need a Professional Look:
- Diagonal cracks spreading from door and window corners
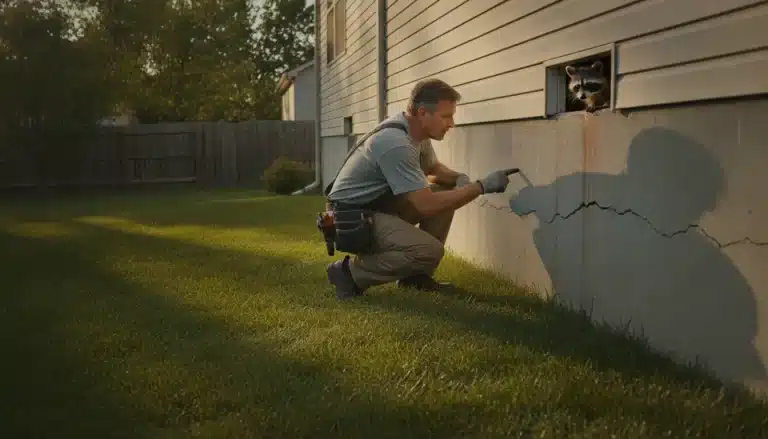
- Stair-step cracks in brick or masonry follow the mortar joints and indicate uneven movement
- Doors or windows that stick, won’t latch, or suddenly feel out of square
- Floors that slope or feel springy in certain areas
- Gaps between wall baseboards and the floor
- Increased moisture, dampness, or mold in the basement or crawl space
Signs That Require Immediate Action:
- Cracks wider than 1/4 inch
- Horizontal cracks in basement walls indicate lateral soil pressure and are the most serious crack type
- A leaning or cracking chimney
- Walls that bow inward or outward
- Cracks that are visibly growing week to week
Key point: A crack is a symptom. A sticking door is a symptom. A sloping floor is a symptom. The diagnosis comes from the pattern these symptoms create together, not from any one sign on its own.
How to Repair Foundation Settling?
It requires specialized tools and materials that only professionals should handle. This equipment needs expert knowledge to operate safely.
Professional Tools Required:
Professional contractors use heavy-duty equipment for these projects. Measuring tools to ensure proper alignment.
| Tool Type | Purpose |
|---|---|
| Excavation Equipment | Dig around the foundation |
| Hydraulic Driving Equipment | Install piers into the ground |
| Pier Installation Brackets | Connect piers to the foundation |
| Concrete Mixing Equipment | Mix concrete for repairs |
| Measuring and Leveling Tools | Check foundation alignment |
Materials Needed:
Substructure repair utilizes various materials, depending on the specific repair method. Waterproofing materials protect against future damage.
| Material | Application |
|---|---|
| Steel Push Piers | Heavy foundation support |
| Helical Piers | Lighter structure support |
| Concrete | Traditional pier method |
| Brackets and Hardware | Connect piers to the foundation |
| Waterproofing Materials | Seal foundation |
| Backfill Materials | Fill excavated areas |
It is not a DIY project. Professional contractors have the expertise to fix the problems safely.
Step 1: Site Preparation
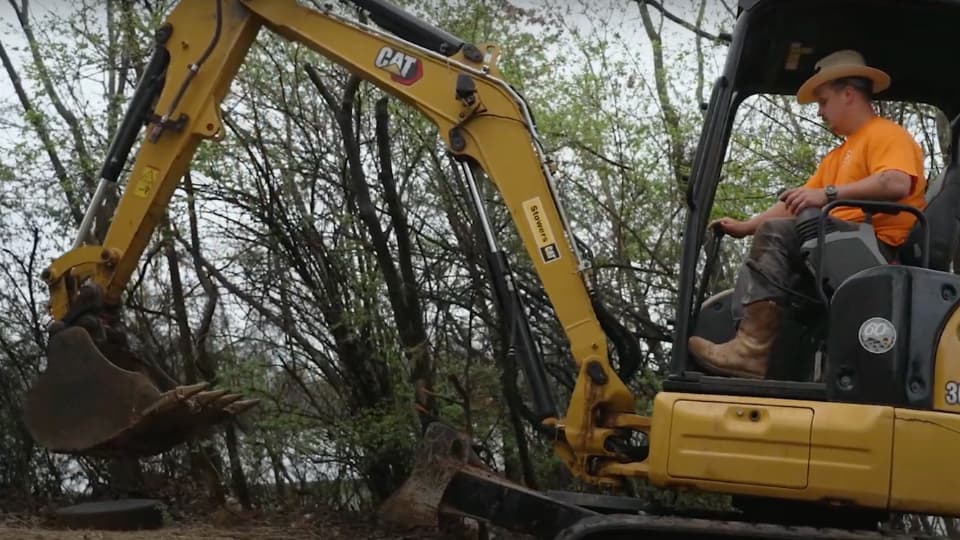
The repair process begins with careful site preparation. Contractors mark all utility lines to prevent dangerous accidents during excavation.
They use special equipment to locate gas, water, and electrical lines before digging begins. Next, workers excavate around to access the work area. This involves removing soil and debris from around the walls.
The team cleans and prepares the entire work area to ensure safe working conditions.
Warning: Never attempt to mark utility lines yourself. Contact your local utility marking service before any excavation work begins.
Step 2: Foundation Exposure
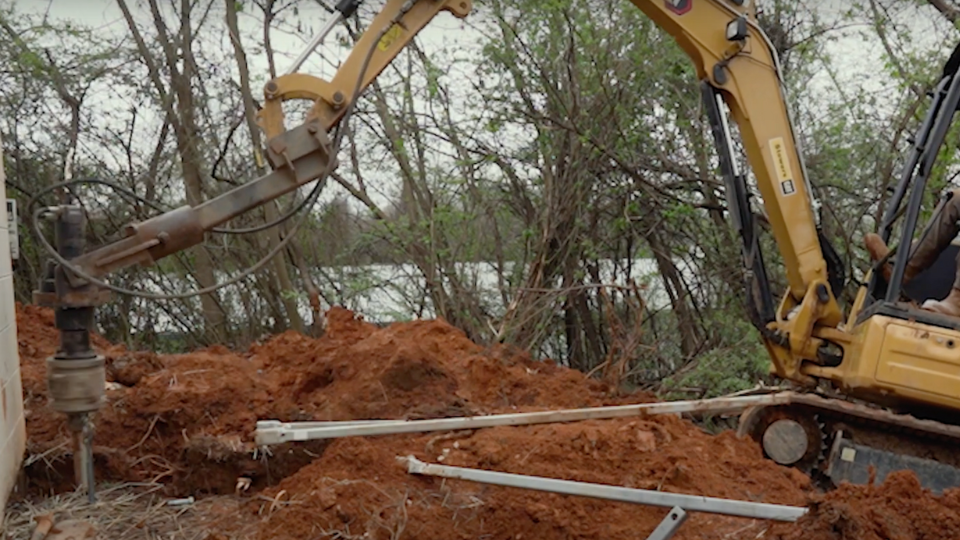
Workers dig precise holes to expose the footer. This step requires careful excavation to avoid damaging the existing structure. The footer surface must be completely clean before pier installation can begin.
The team then undermines the footer to create space for pier placement. This involves removing soil from underneath the footer while maintaining structural support.
Proper undermining ensures piers fit correctly under the foundation.
Warning: Undermining a footer without proper support can cause immediate structural collapse. This step requires professional expertise and safety equipment.
Step 3: Pier Installation
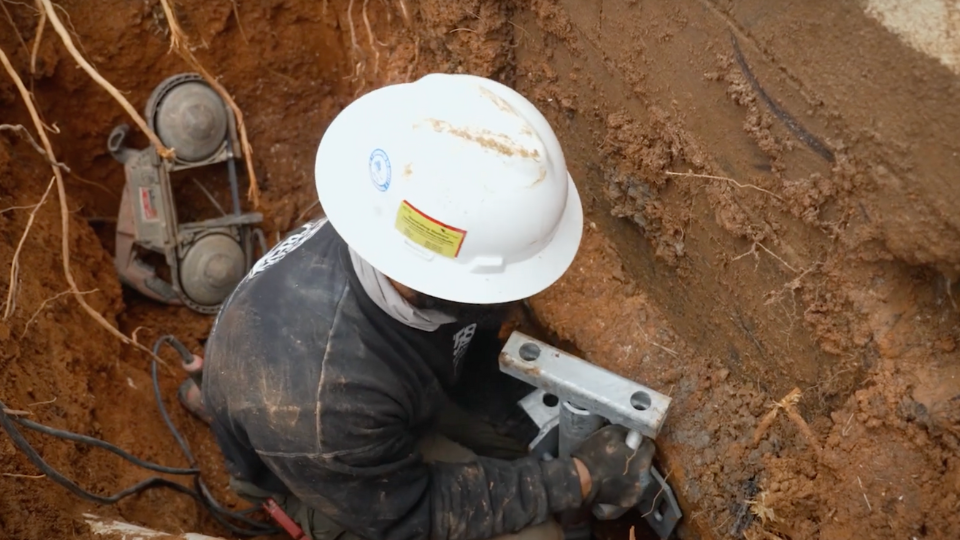
This is the most critical step. Workers drive piers into the ground until they reach the appropriate depth and pressure. Steel piers are driven into bedrock or stable soil layers to provide maximum support.
Installation brackets are placed under the footer to connect the piers to the foundation. These brackets distribute the foundation’s weight evenly across the pier system.
Workers then connect the piers to the structure using hydraulic equipment.
Warning: Pier installation requires hydraulic equipment that can cause serious injury if operated incorrectly. Only trained professionals should handle this equipment.
Step 4: Final Steps
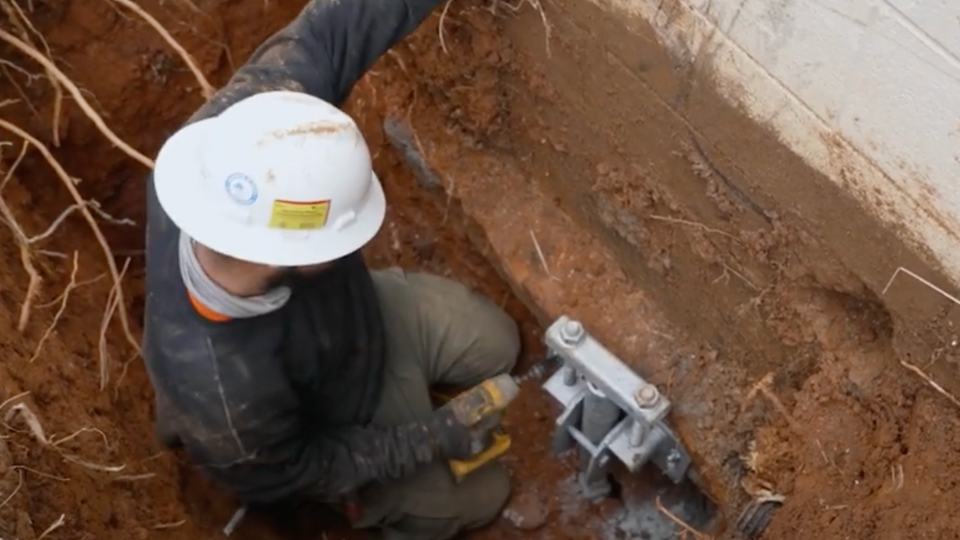
The repair team tests the stability and load-bearing capacity of the pier system. This ensures the settling repair will provide long-term support. All measurements are verified to confirm proper installation.
Finally, workers backfill the excavated areas with appropriate materials. They restore the landscape around the area and complete a final inspection.
The work area is cleaned and returned to its original condition.
Warning: Improper backfilling can cause drainage problems and future issues. Professional contractors know the correct materials and techniques to use.
Video Tutorial
I’d like to give credit to 58 Foundations & Waterproofing for their informative video, which served as a reference for this guide.
Foundation Repair Methods Explained
The right repair depends on the severity of the problem, the type of foundation, and the soil conditions below. A licensed contractor should determine which method fits your specific situation after a site assessment.
1. Steel Push Piers
Driven deep into stable soil or bedrock, push piers transfer the home’s weight away from weak or shifting soil. This is the standard solution for severe or ongoing differential settlement. They can also lift the foundation closer to its original level in many cases.
2. Helical Piers
Screwed into the ground like large anchors rather than driven, helical piers work well in lighter structures and unstable soils where push piers would not achieve adequate resistance. For a full breakdown of how these are installed, see this step-by-step guide on helical pier installation.
3. Mudjacking (Slab Jacking)
A cement slurry is pumped under a sunken slab to lift it back to level. Best for minor, localized sinking in driveways, walkways, and garage floors; not for structural foundation walls.
4. Polyurethane Foam Injection
Expanding foam is injected into voids beneath the slab. It cures faster than mudjacking slurry, causes less surface disruption, and works well for moderate sinking issues on flat surfaces.
5. Drainage Correction
French drains, re-grading, and extended downspouts address the water problems that caused the settlement in the first place. This is often done alongside pier work to prevent future movement after the foundation is stabilized.
6. Underpinning
Traditional mass concrete underpinning pours concrete in staged sections beneath the existing footing to extend it deeper into stable soil. It suits residential foundations that need minor strengthening.
What Does the Professional Repair Process Look Like?
Every professional foundation repair follows a structured sequence. Skipping steps, especially assessment and planning, leads to repairs that address symptoms rather than the causes.
- Structural Assessment: The contractor uses laser leveling and elevation mapping to measure the extent of movement and where it occurred. Soil conditions around the perimeter are also evaluated.
- Planning and Load Mapping: The repair system is selected based on soil type, foundation type, and the location of load-bearing points.
- Site Preparation: Utility lines are marked before any digging begins. Never skip this step — contact your local 811 utility-marking service before any excavation on your property.
- Excavation and Foundation Exposure: Workers dig to expose the footing at the repair locations. The footing surface must be clean before any bracket or pier installation can begin.
- Pier or System Installation: Piers are driven or screwed into the ground to the required depth and pressure. Brackets connect the pier system to the foundation.
- Lifting and Stabilization: Hydraulic equipment raises the foundation back toward its original elevation and locks the system in place.
- Backfill and Cleanup: Excavated areas are filled with appropriate materials and properly graded to direct water away.
Safety note: Pier installation requires heavy hydraulic equipment and precision load calculations. This is not suitable as a DIY project. Errors during underpinning or lifting can cause immediate structural collapse and serious injury.
How Much Does Foundation Settling Repair Cost?
Repair costs vary widely based on the method used, the severity of damage, soil conditions, and your region. The table below reflects typical US ranges:
| Damage Level | Typical Cost Range | Common Methods |
|---|---|---|
| Minor | $300 – $3,000 | Foam injection, crack sealing, drainage fix |
| Moderate | $3,000 – $10,000 | Helical piers, mudjacking, underpinning |
| Severe | $10,000 – $30,000+ | Steel push piers, full structural stabilization |
Costs that often catch homeowners off-guard include permit fees, interior cosmetic repairs (patching drywall, repainting), landscaping restoration after excavation, and drainage correction work that should be done alongside structural repairs.
Insurance note: Many Insurance policies do not cover foundation settling unless it results from a sudden, covered event, such as a burst pipe. Settling caused by soil conditions, drainage, or gradual movement is typically excluded. Check your policy before assuming coverage.
How Do You Prevent Foundation Settling?
Prevention is far cheaper than repair. The steps below target the most common causes of preventable settlement.
1. Control Water Around the Foundation
- Clean gutters at least twice a year; clogged gutters overflow and dump water directly at the foundation line
- Extend downspouts at least six feet from the home
- Regrade the soil so it slopes away from the structure at a rate of about one inch per foot for the first six feet
- Install French drains in areas where water regularly pools near the home
2. Maintain Consistent Soil Moisture
- During extended dry spells, water the soil around the foundation perimeter with a soaker hose to prevent clay soils from shrinking and pulling away from the base
- Avoid both extremes: over-watering softens and weakens soil; under-watering causes it to crack and contract
3. Manage Landscaping
- Keep large trees at least as far from the foundation as their mature height
- Avoid planting moisture-hungry shrubs directly against foundation walls
- Remove stumps near the foundation; decomposing roots create underground voids over time
4. Inspect Regularly
- Walk the perimeter after major rain events or long dry periods and look for new cracks or soil gaps
- Check doors and windows for sudden alignment changes; these can appear before visible cracks do
- Mark any cracks with tape and the date. Check them monthly to see if they grow.
Conclusion
Foundation settling repair starts with knowing what you are looking at. A hairline crack is not a crisis.
A widening stair-step crack combined with sticking doors and a sloping floor is a pattern that needs professional eyes on it quickly.
The most expensive repairs are the ones that get ignored. Catching soil and drainage problems early, before piers are needed, keeps costs manageable and keeps your home’s structure sound.
If you have spotted any of the warning signs in this guide, start with a professional inspection. If the damage is already visible and active, get quotes from at least two licensed foundation contractors and ask whether a structural engineer’s report would benefit your situation before choosing a repair method.
Have you noticed cracks or sticking doors in your home? Share what you are seeing in the comments below; the pattern often tells more than any single symptom.