Water Seeping Through Basement Floor: Causes and Fixes
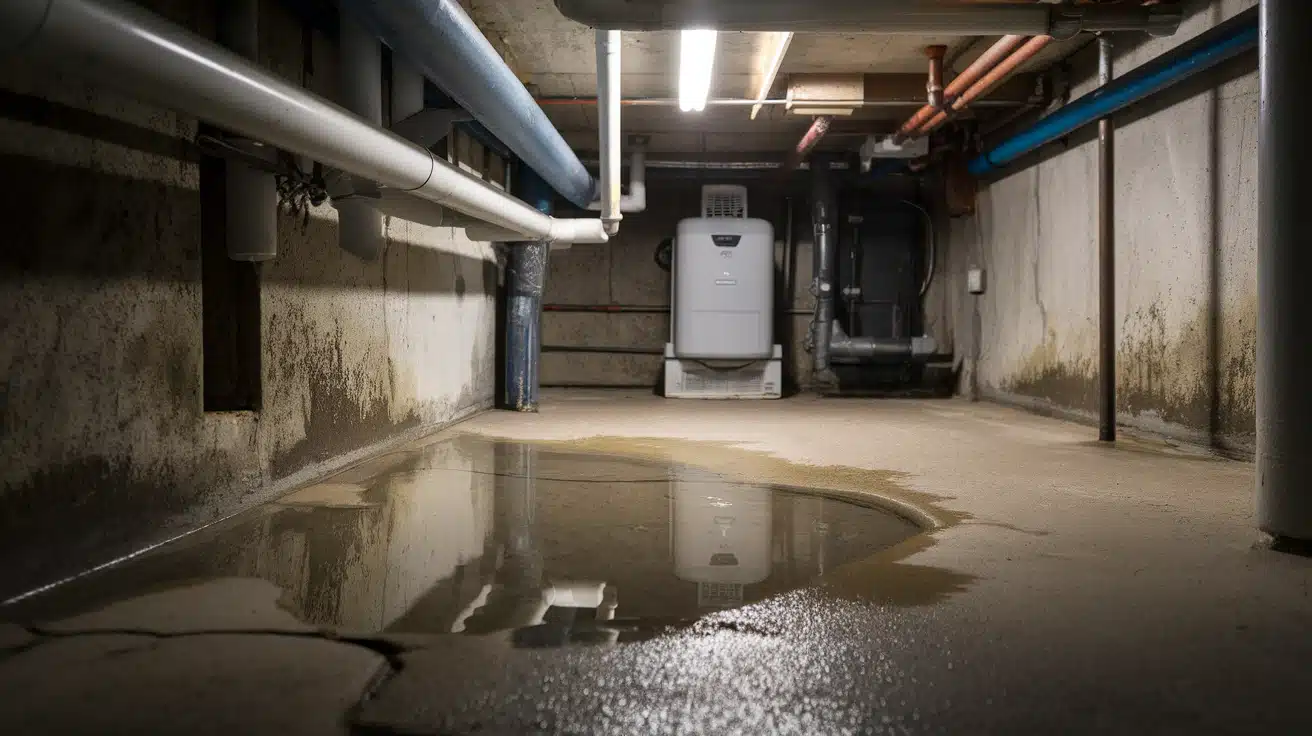
Walking into a wet basement can quickly turn a simple task into a serious concern. Water seeping through the basement floor can damage stored items, weaken concrete over time, and contribute to unhealthy indoor air conditions.
This issue usually starts quietly. Rainfall, melting snow, or saturated soil increases pressure around the foundation until moisture reaches weak points in the concrete or at joints.
Sealants and coatings are often used, but one important concern remains: is polyurethane safe to use indoors, especially in enclosed basement spaces?
Before applying any product, it is important to understand where the moisture is coming from and what solutions are actually safe and effective. A dry basement always starts with an accurate diagnosis, not just surface repairs.
Is Water Seeping Through the Basement Floor?
Water seeping through a basement floor is mainly caused by hydrostatic pressure, where groundwater from rain or melting snow builds up around the foundation and pushes moisture through cracks and joints in the concrete.
Because basements sit below ground level, even small structural weaknesses can allow water entry over time. The cove joint, where the wall meets the floor, is especially vulnerable because it is a natural point of separation in construction.
Poor drainage, clogged gutters, and gradual foundation settling can all increase pressure and make seepage worse over time.
Types of Basement Water Problems
Basement water issues generally fall into a few key categories based on how and where water enters the structure. Identifying the correct type is essential for choosing the right repair method.
| Type | Description |
|---|---|
| Floor seepage | Water rises through cracks or porous concrete in the basement floor |
| Cove joint leakage | Moisture enters where the basement wall meets the floor |
| Wall seepage | Water penetrates through the foundation walls and runs downward |
| Drain backup flooding | Water comes up through the floor drains due to an overwhelmed drainage system |
| Condensation | Moisture forms on cold surfaces due to humidity, not groundwater intrusion |
Common Signs of Basement Floor Seepage
Dampness in a basement often shows early warning signs before visible flooding occurs. Recognizing them early helps prevent structural and moisture damage.
- Damp or wet floor patches: Irregular moisture spots on the concrete surface often indicate water entering through porous areas or hidden cracks in the basement floor.
- Efflorescence (white powder deposits): White, chalky residue appears when water moves through concrete and leaves mineral salts behind after evaporation.
- Musty or damp odor: A persistent earthy smell suggests long-term moisture buildup and poor air circulation caused by ongoing seepage.
- Dark stains near cracks or joints: Discoloration around floor cracks or wall-floor joints shows active water pathways where groundwater is entering.
- High indoor humidity levels: A consistently damp or humid basement environment without visible leaks often signals hidden water seepage through the floor.
How to Identify the Source of Basement Moisture
To identify the source of basement moisture, start by observing when and where the water appears, especially after rainfall or snowmelt, as this often points to groundwater seepage caused by hydrostatic pressure.
Carefully inspect common entry points such as floor cracks, the cove joint where the wall meets the floor, and any visible stains or damp patches to trace the water path.
A simple foil or plastic sheet test can help distinguish seepage from condensation by checking if moisture forms underneath the surface.
It is also important to rule out plumbing leaks and monitor whether the issue worsens during storms, which strongly indicates an external drainage or foundation pressure problem.
Tools and Materials Needed for Repairs
Having the right tools ensures faster and more effective repair of basement water seepage. Below is a quick overview of essential items used for diagnosis, sealing, and drainage improvement.
Water seepage repairs require both diagnostic tools and sealing materials to properly identify and fix the source of the problem.
| Tools / Materials | Purpose |
|---|---|
| Flashlight | Identify damp spots and hidden leaks |
| Chalk | Mark cracks for repair tracking |
| Hydraulic cement | Stop active water leaks in cracks |
| Epoxy crack filler | Seal small structural cracks |
| Waterproof sealant | Seal cove joints and surface gaps |
| Trowel | Apply repair materials smoothly |
| Wet/dry vacuum | Remove standing water before repair |
| Sump pump | Control and remove excess groundwater |
| Drain tile system | Redirect water away from the foundation |
| Waterproof membrane | Provide a long-term protection layer |
- DIY small repairs: $50-200
- Professional drain tile: $3,000-8,000
Start by using assessment tools to identify where water seeps through the roof before purchasing repair materials.
Step-by-Step Fix for Water Seeping Through Basement Floor
This guide shows homeowners how to fix water seeping through the walls using proven methods. Follow these steps to achieve the best results.
Homeowners can often do small repairs, while major drainage work may require professional help.
Step 1: Prepare the Area and Ensure Safety

Before starting any repair work, turn off electricity in affected basement zones to avoid electrical hazards. Remove furniture, boxes, and stored items from wet areas.
Use a wet/dry vacuum to clear standing water and improve visibility of the floor surface. Proper lighting and ventilation are important so you can clearly identify cracks and damp zones before repairs begin.
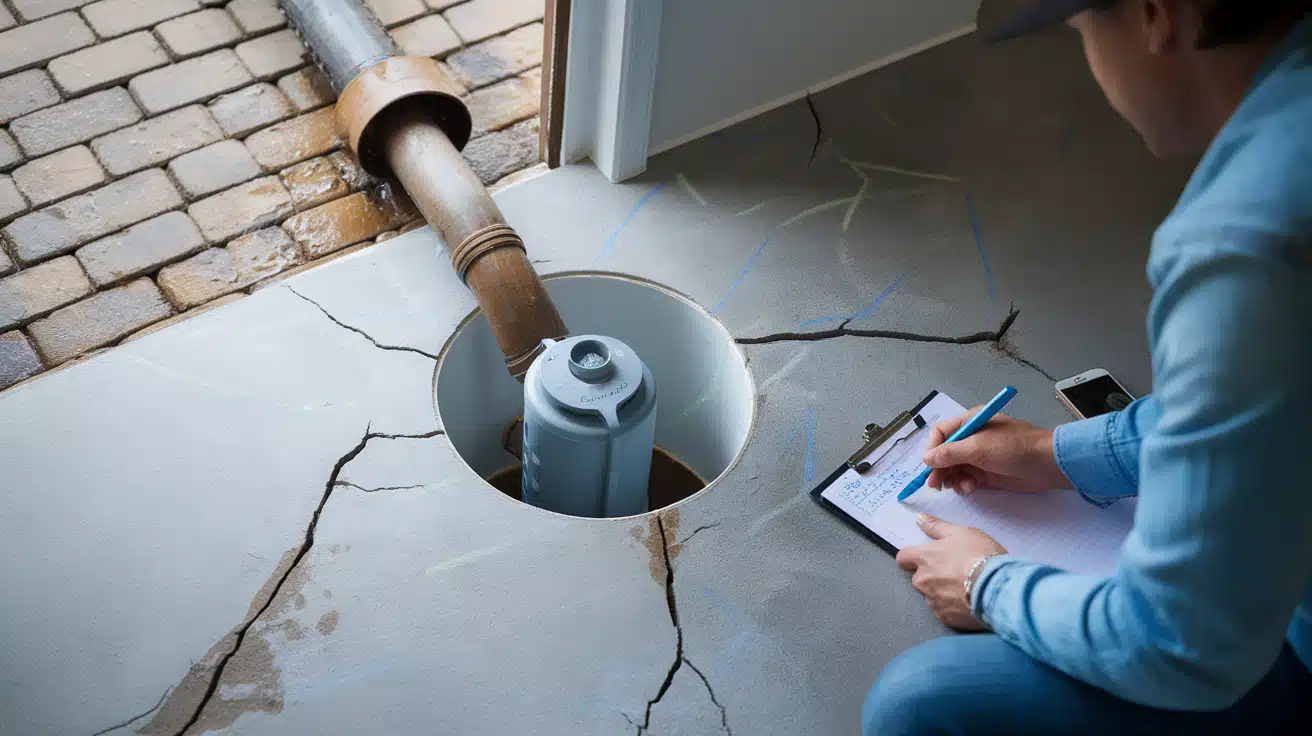
Step 2: Locate the Exact Source of Water Entry
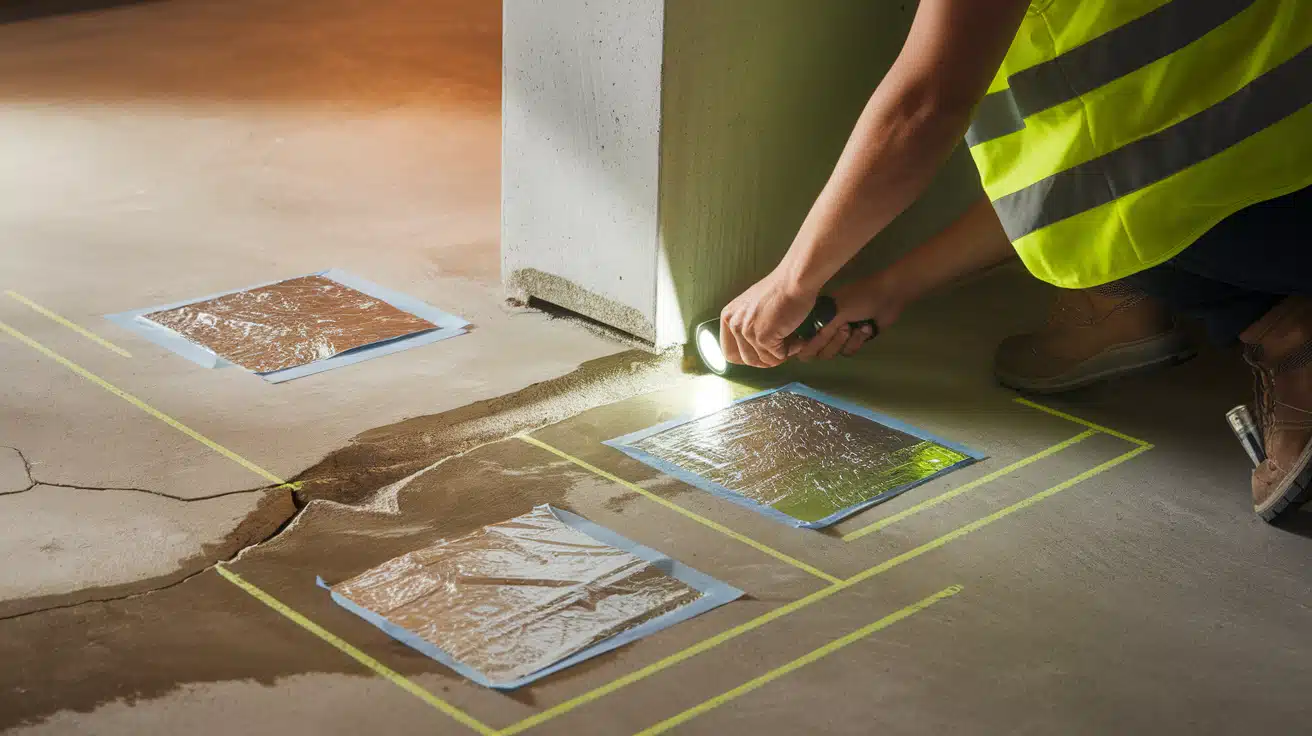
Carefully inspect the basement floor, especially cracks, joints, and the cove joint where the wall meets the floor. Mark all visible damp spots or cracks using chalk.
You can also use a foil or plastic sheet test by taping it over damp areas for 24 hours to determine if moisture is coming through the concrete rather than from humidity in the air. Observing during or after rainfall gives the most accurate results.
Step 3: Clean and Prepare the Surface
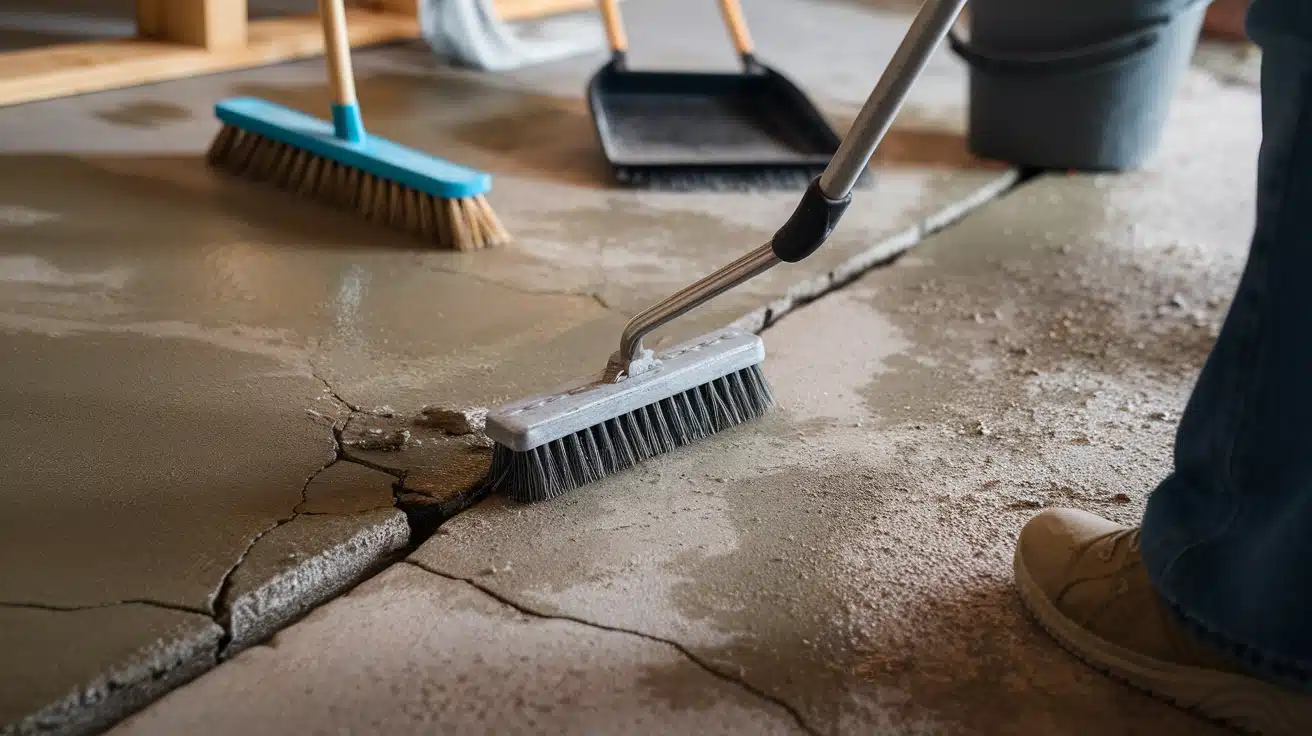
Once the source areas are identified, clean the surface thoroughly. Remove loose debris, dust, and weakened concrete using a wire brush or scraper.
This ensures proper bonding of repair materials. Allow the area to dry as much as possible before sealing, using fans or a dehumidifier if needed.
Proper surface preparation is critical because sealants and cement will not adhere well to wet or dirty surfaces.
Step 4: Seal Active Cracks and Leaks
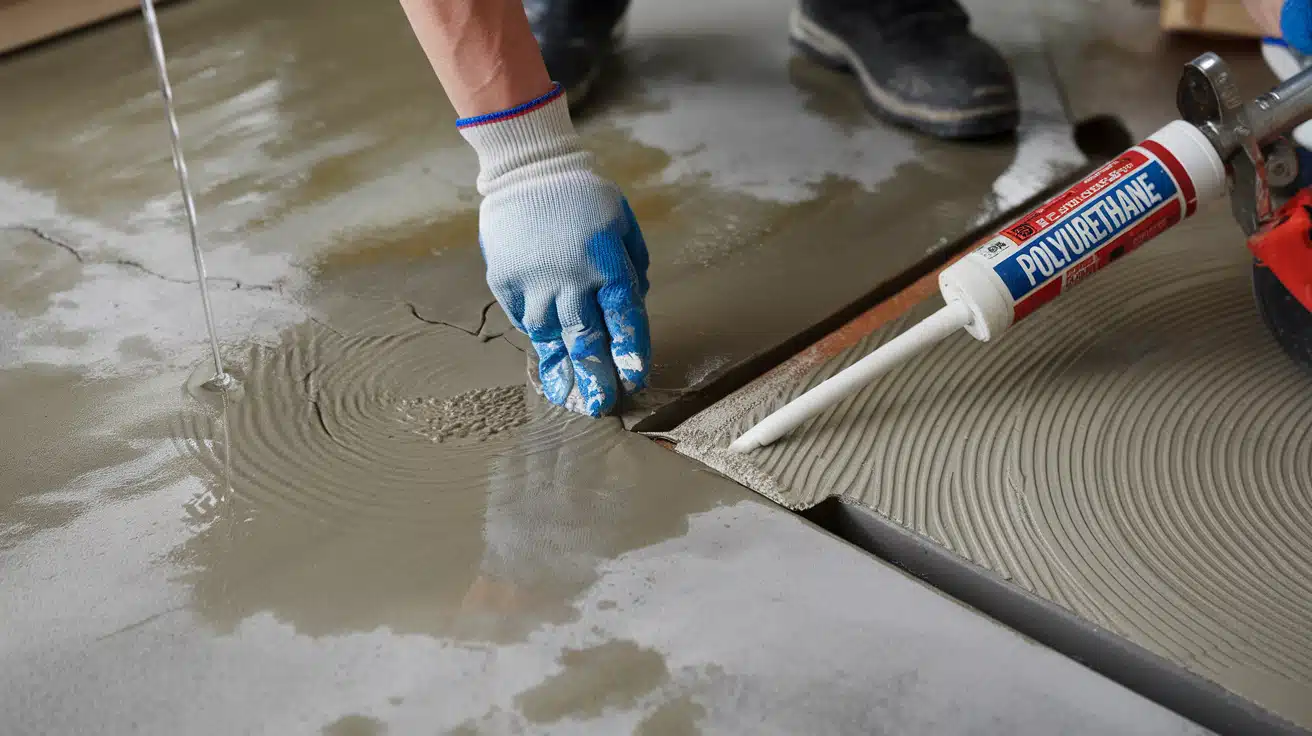
For cracks where water is actively entering, use hydraulic cement because it can set even in wet conditions. Press the cement firmly into the crack to stop the immediate flow of water.
For smaller or dry cracks, epoxy crack filler provides a stronger and longer-lasting seal. At the cove joint, apply a continuous bead of waterproof sealant to block moisture entry along the wall-floor connection.
Step 5: Improve Drainage and Install Water Control Systems
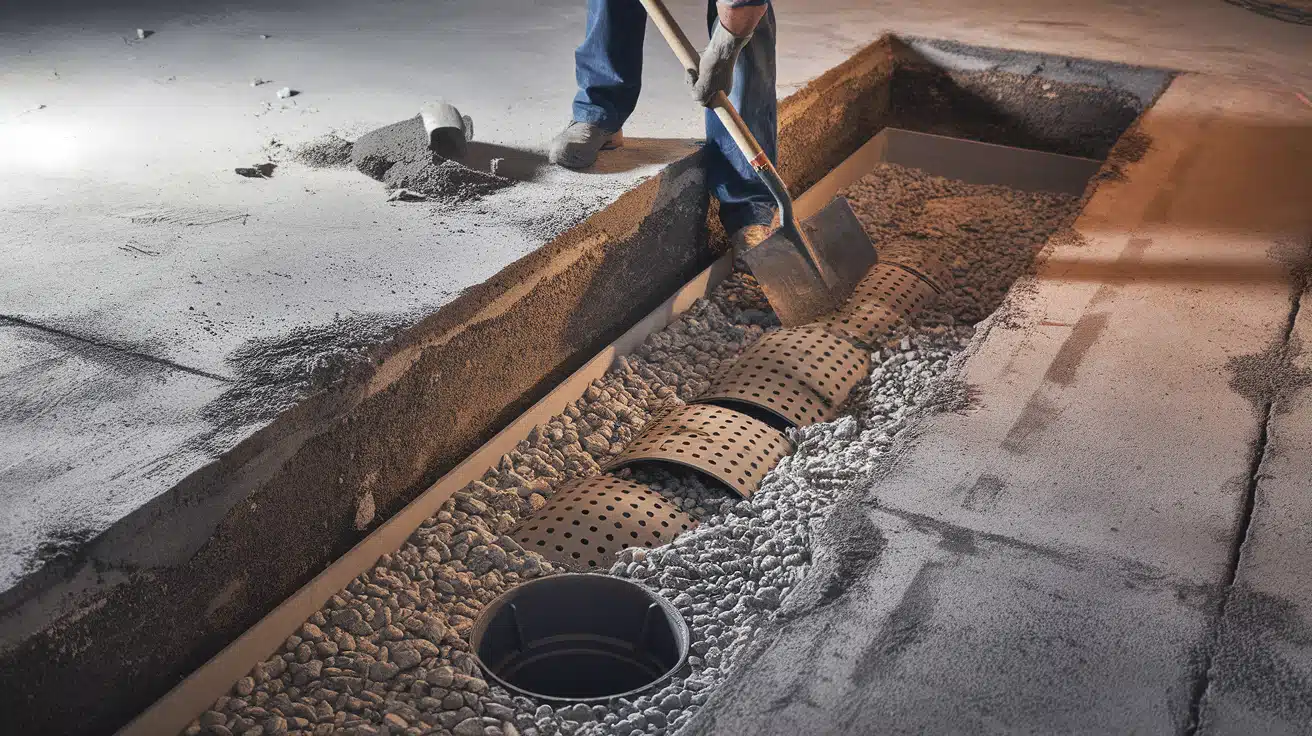
If seepage continues after sealing, the issue is likely caused by water pressure around the foundation. In such cases, install or inspect a sump pump system to remove excess water.
An interior drain tile system can also be added around the basement perimeter to redirect groundwater away from the floor. These systems address the root cause instead of just treating surface symptoms.
Step 6: Apply Waterproofing Protection
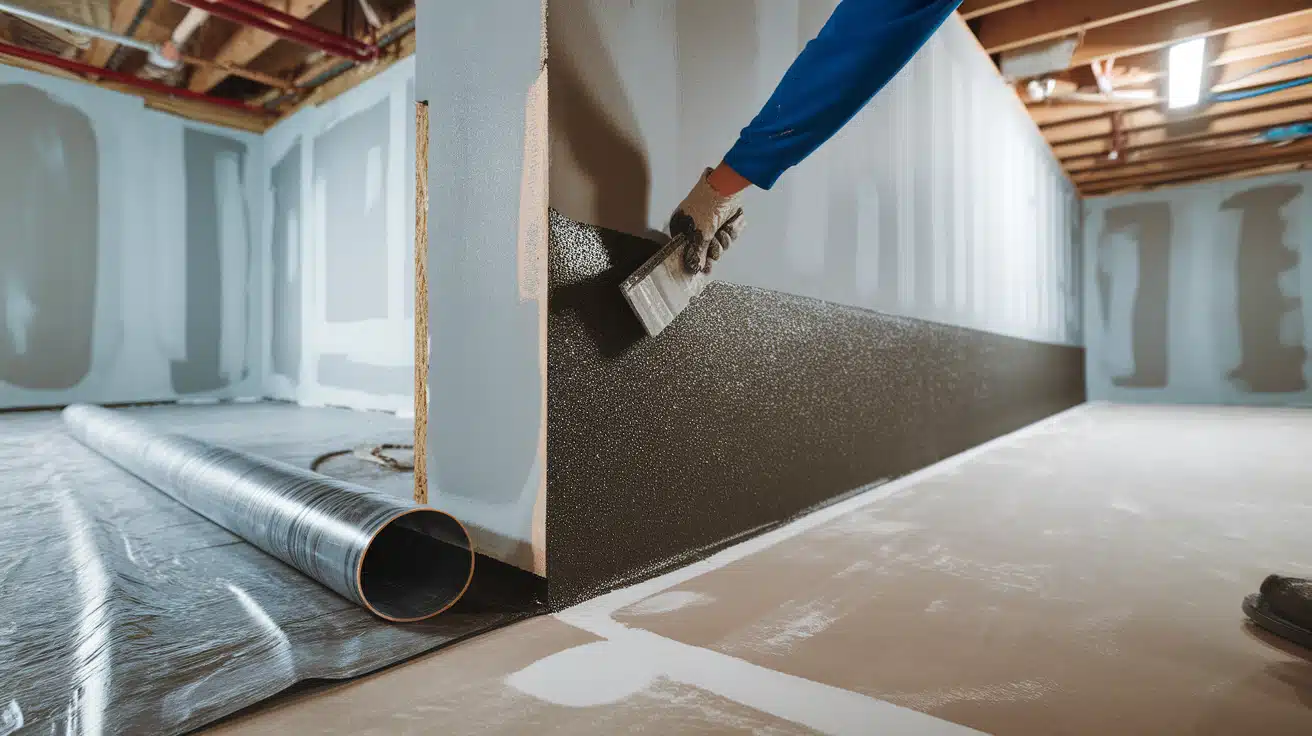
Once repairs and drainage improvements are complete, apply a waterproof membrane or coating to the basement floor and lower walls. This adds a protective barrier against moisture penetration.
Ensure even application and proper coverage, especially along joints and edges where water commonly enters. This step strengthens long-term resistance against future seepage.
Step 7: Test the System and Monitor During Rain
After repairs are complete, observe the basement during the next rainfall. Check whether any new damp spots appear and ensure the sump pump activates correctly if installed.
Monitor repaired cracks and joints for any signs of recurring moisture. Consistent observation over time helps confirm whether the fix is successful or if additional drainage improvements are needed.
Interior vs Exterior Waterproofing (What Actually Works Long-Term)
Both methods aim to stop basement water intrusion, but they work in very different ways. The best solution often depends on the severity of hydrostatic pressure and the condition of the foundation.
Interior Waterproofing
Works by controlling water after it enters the basement through drainage and sealing systems.
- Installed inside the basement without excavation
- Includes sump pumps and interior drain tile systems
- Relieves hydrostatic pressure by redirecting water
- More cost-effective and faster to install
- Does not fully stop water from entering the foundation
Exterior Waterproofing
Works by preventing water from reaching the foundation walls and floor in the first place.
- Requires excavation around the foundation
- Applies waterproof membranes and protective coatings
- Improves soil grading and drainage outside the home
- Stops water before it enters the structure
- Higher cost but more permanent long-term solution
Cost of Fixing Basement Water Seepage
The cost of fixing basement water seepage depends on the severity of the problem, the repair method used, and whether drainage systems need to be installed or only surface sealing is needed.
For minor cracks and early-stage seepage, costs are relatively low, but long-term solutions involving drainage or waterproofing systems can be significantly higher.
| Repair Type | Estimated Cost (USD) |
|---|---|
| Crack sealing (DIY or minor repair) | $50 – $300 |
| Waterproof sealants and coatings | $200 – $1,000 |
| Sump pump installation | $800 – $2,500 |
| Interior drain tile system | $2,000 – $6,000 |
| Exterior waterproofing system | $5,000 – $15,000+ |
Costs increase mainly due to excavation work, foundation depth, soil conditions, and the severity of hydrostatic pressure acting on the basement structure.
When to Call a Professional for Basement Water Seepage
You should call a professional when basement water seepage becomes persistent, spreads across large areas of the floor, or recurs even after sealing visible cracks, as this usually indicates a deeper issue such as hydrostatic pressure or drainage failure.
Expert help is also necessary if you notice widening foundation cracks, recurring flooding after heavy rain, mold growth over a significant area, or moisture appearing near electrical systems, since these conditions can affect both structural safety and indoor air quality.
A contractor can properly assess whether you need exterior waterproofing, a sump pump system, or a full drainage solution, rather than temporary surface fixes.
Conclusion
Water seeping through a basement floor is more than a surface-level issue; it usually signals an underlying problem with groundwater pressure, drainage, or foundation weaknesses.
While small cracks and early signs of moisture can sometimes be managed with basic repairs, long-term success depends on correctly identifying the source and addressing the root cause, not just the symptoms.
A combination of proper sealing, improved drainage, and moisture control can significantly reduce the risk of recurring seepage. However, when the problem persists or spreads, professional intervention becomes important to prevent structural damage and mold-related concerns.
With timely action, regular maintenance, and the right approach to repairs, a basement can remain dry, stable, and safe for long-term use.
Frequently Asked Questions
How Serious Is Water Seepage in A Basement?
This allows you to explain the risks of ignoring the problem, such as mold, air quality issues, and structural weakening, which align well with your blog’s purpose but aren’t detailed in a standalone section.
Does Homeowners Insurance Cover Water Seepage in The Basement?
Since your blog discusses costs but doesn’t address coverage or claims, this question fills an important gap for readers seeking financial options or protection plans.
How to Stop Water from Coming up Through the Basement Floor Drain?
While floor cracks and cove joints are covered, drain-specific seepage hasn’t been addressed. This is a common concern, and a short answer could give readers a practical solution or a red flag.