How To Build A Deck For Beginners Step By Step?
Many homeowners assume building a deck is simple, but small mistakes can quickly lead to uneven boards, wasted materials, and extra costs.
Knowinghow to build a deck properly requires planning, accurate measurements, and the right materials, issues that often appear in real-world DIY projects.
This guide provides clear measurement tables, DIY material cost estimates, and step-by-step instructions, making it beginner-friendly.
This approach helps you confidently plan, build, and enjoy a durable and functional deck.
Measure the Site Before Building the Deck
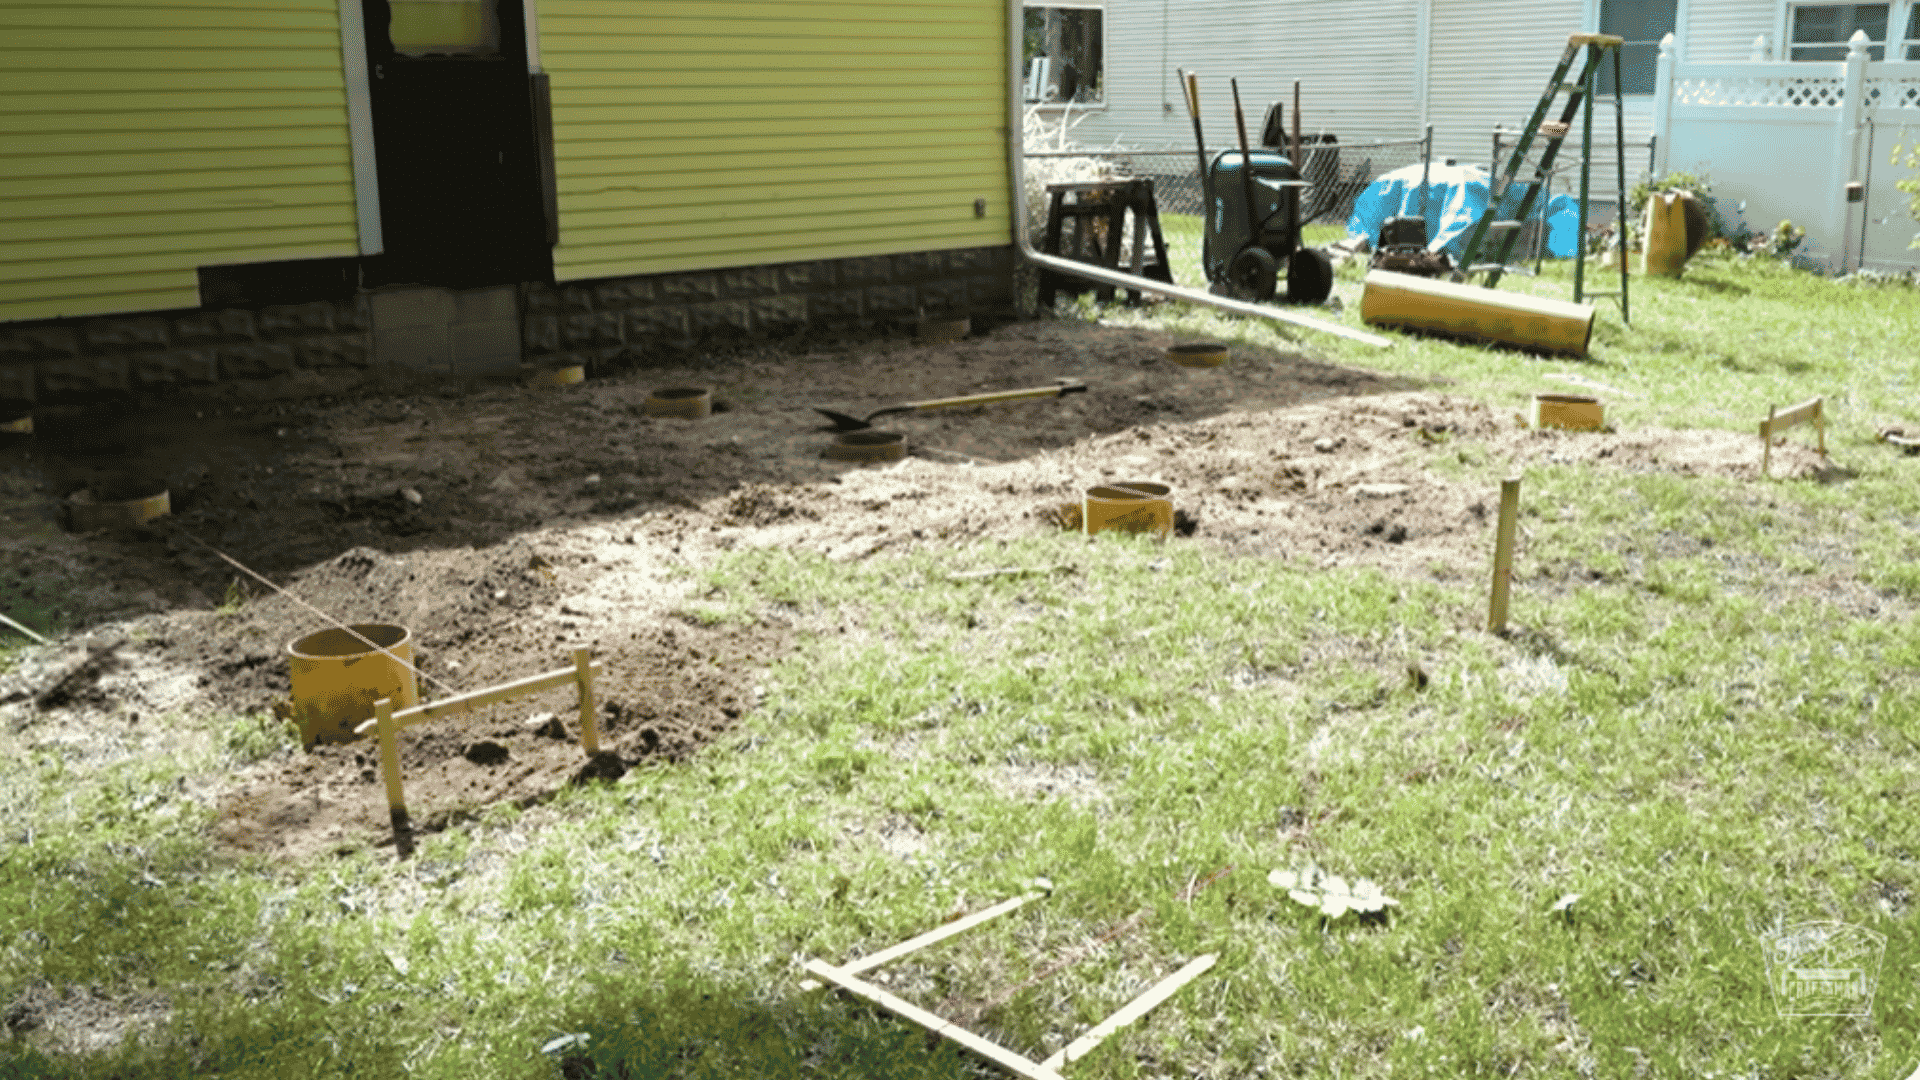
Start by clearing the area where your deck will go. Remove rocks, roots, and any obstacles that could interfere with construction. Make sure the ground is as level as possible, or note slopes if your deck will be raised.
Next, measure and mark the deck’s footprint. Use stakes and string lines to outline the exact dimensions.
This helps you visualize the space and ensures your deck will fit your yard as planned. Check the corners with the 3-4-5 method to make sure they are square.
Beginner Tip: Walk the site with a tape measure and mark all corners clearly before buying lumber or starting construction.
Materials & Tools for Building a Deck
Essential materials and tools for building a deck include structural lumber, fastening hardware, concrete for footings, core construction tools, and basic safety equipment.
| Category | Items Included |
|---|---|
| Lumber | 6×6 posts, 2×8 beams, 2×6 or 2×4 joists, decking boards, 2×12 boards (skirt & railing caps) |
| Fasteners & Hardware | Screws, 10d galvanized nails, carriage bolts (washers & nuts), joist hangers, beam brackets, post anchors, hurricane brackets |
| Concrete & Forms | Concrete mix, footing forms, concrete mixer (optional) |
| Tools | Drill, circular saw, miter saw, hammer, tape measure, level, chalk line, speed square, post hole digger or auger |
| Extras | Landscape fabric, rocks for drainage, temporary support blocks |
| Safety Gear | Gloves, safety glasses, ear protection, respirator for concrete dust |
Check Permits
Before you build, check whether your local building codes require a permit. Most municipalities do.
Permits ensure your deck meets safety standards and helps avoid fines or having to redo work. Contact your local building office or visit their website to confirm requirements.
Beginner tip: Even if you plan a simple ground-level deck, verify permit requirements to avoid surprises later.
How to Build a Deck: Step-By-Step Guide
Creating a deck can enhance your backyard and provide extra space for relaxing or entertaining.
This guide walks through each step, using pressure-treated wood for the framing, beams, joists, posts, and decking boards.
Step 1: Design Your Deck
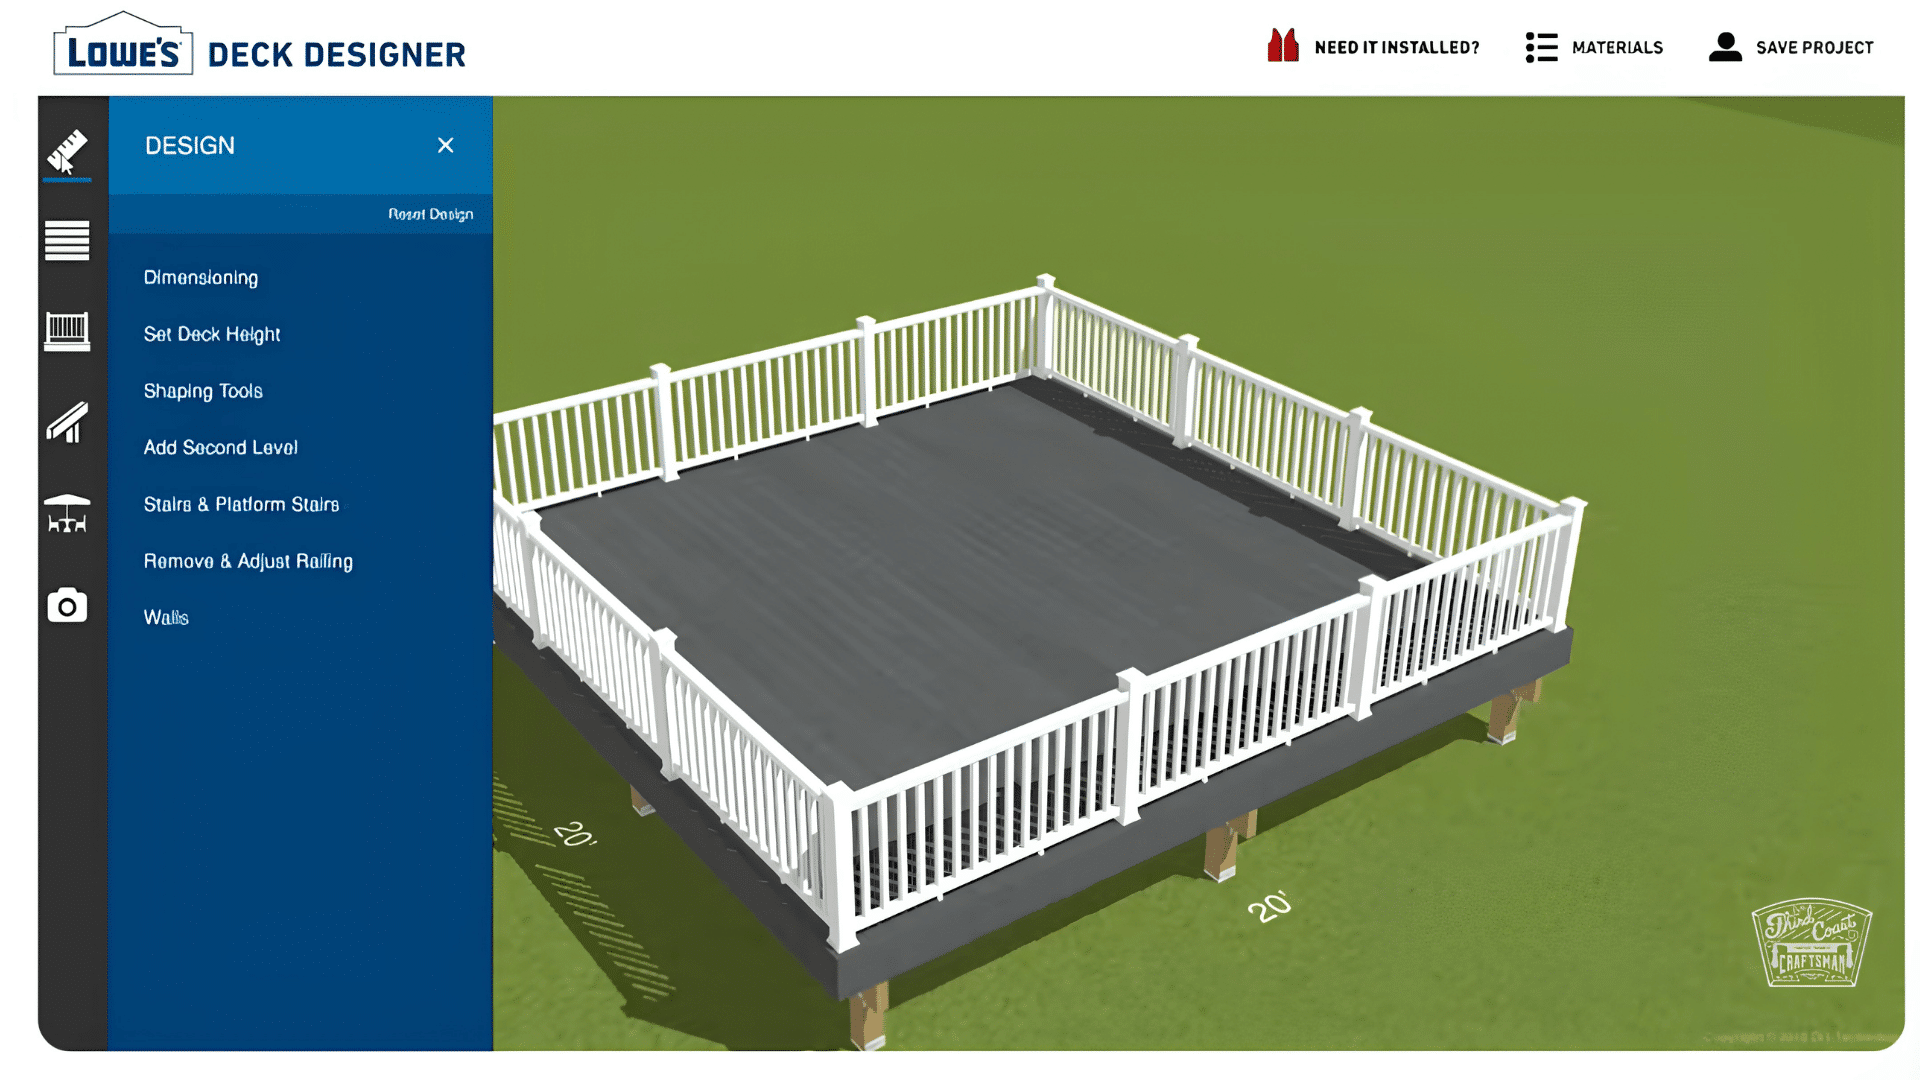
Use a Deck Designer to plan your deck, either with a template or from scratch. Customize the size, shape, levels, stairs, decking material, and railing style.
The tool gives a material estimate and a full plan with layouts and a materials list. Check with your local building assessor, get your permit, and order the materials.
Step 2: Lay Out Your Deck
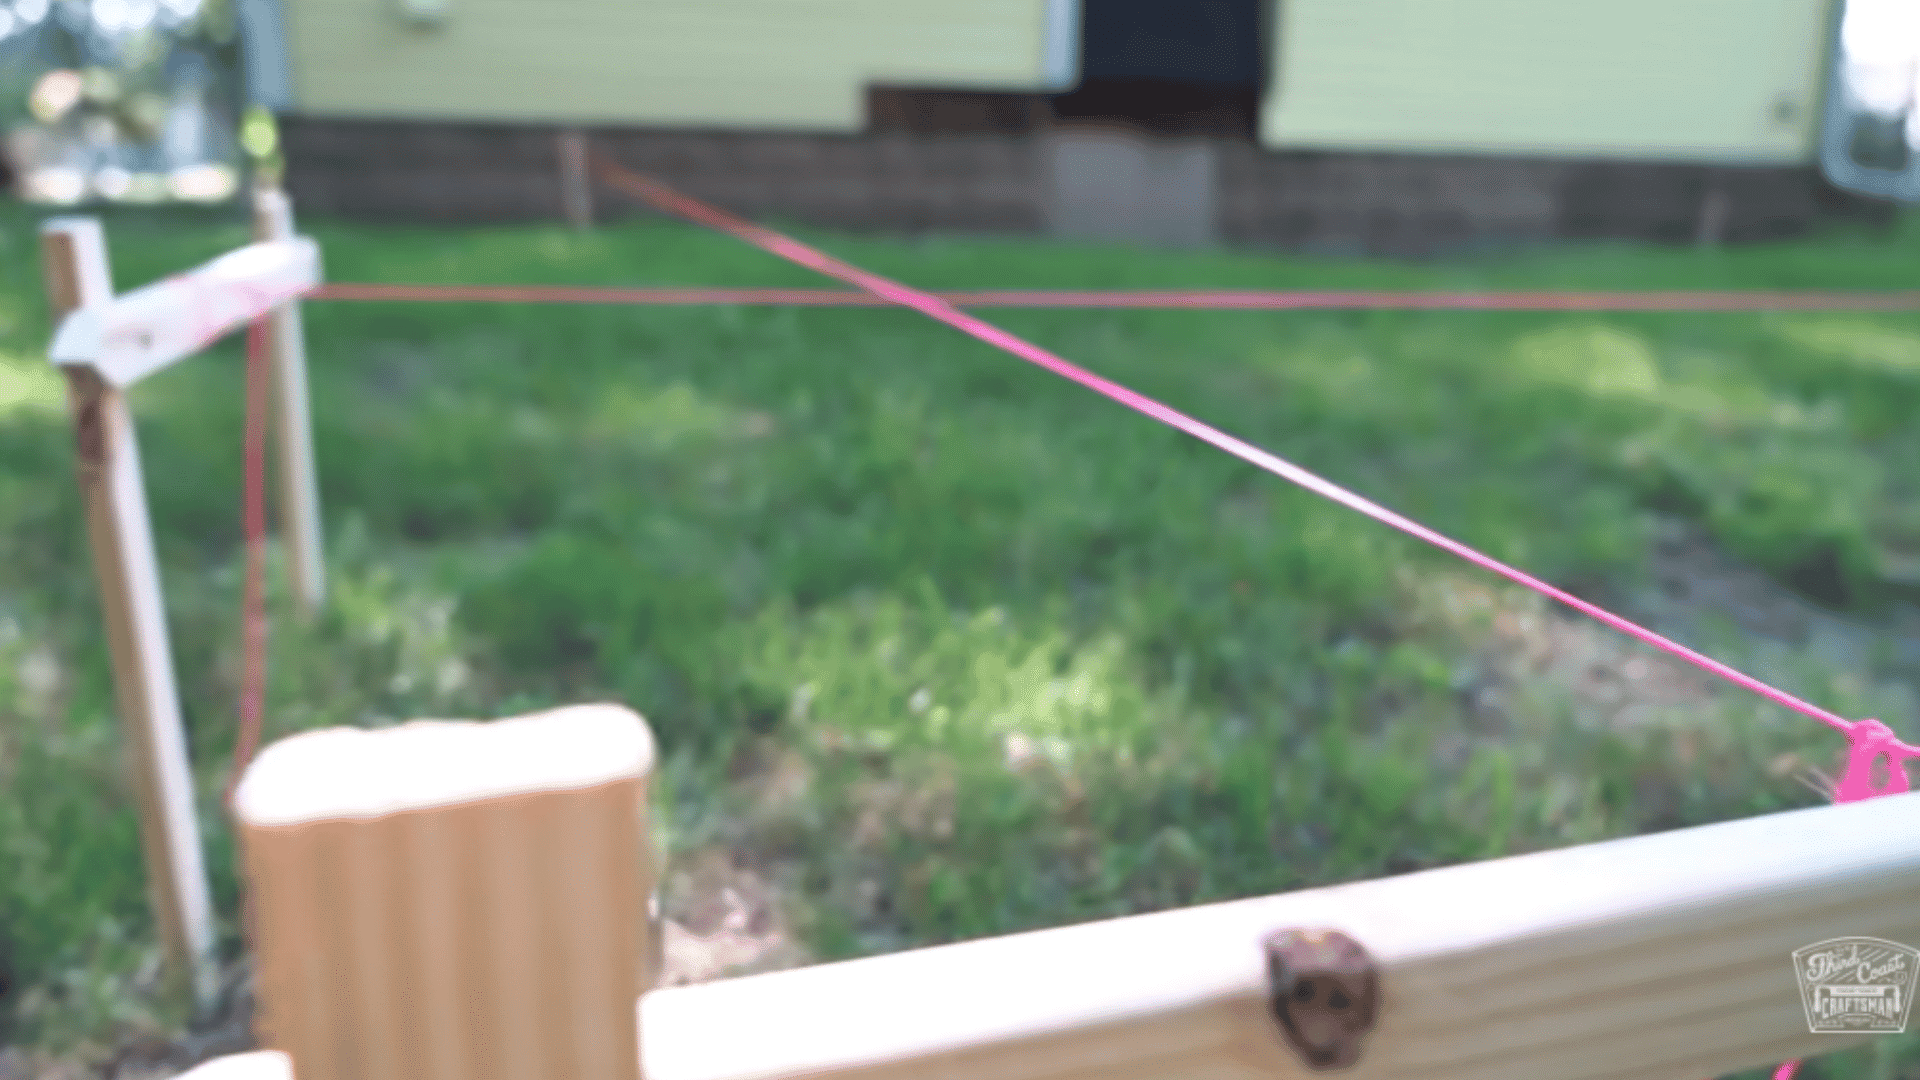
Proper layout is key to a stable deck. Stake the corners and use battens and string to mark the boundaries.
Measure from the house to each post and between posts to form a square layout. Check the diagonals to ensure it’s square, adjust if needed, and mark where each post will go.
Step 3: Dig Footings and Set Post Anchors
Dig holes for the footings using a post hole digger or auger, following local code for depth (42 inches in this example).
Pour concrete into the forms and set post anchors on top. Backfill and tamp the dirt, then add landscape fabric and rocks for drainage and weed control.
Step 4: Determine Post Heights
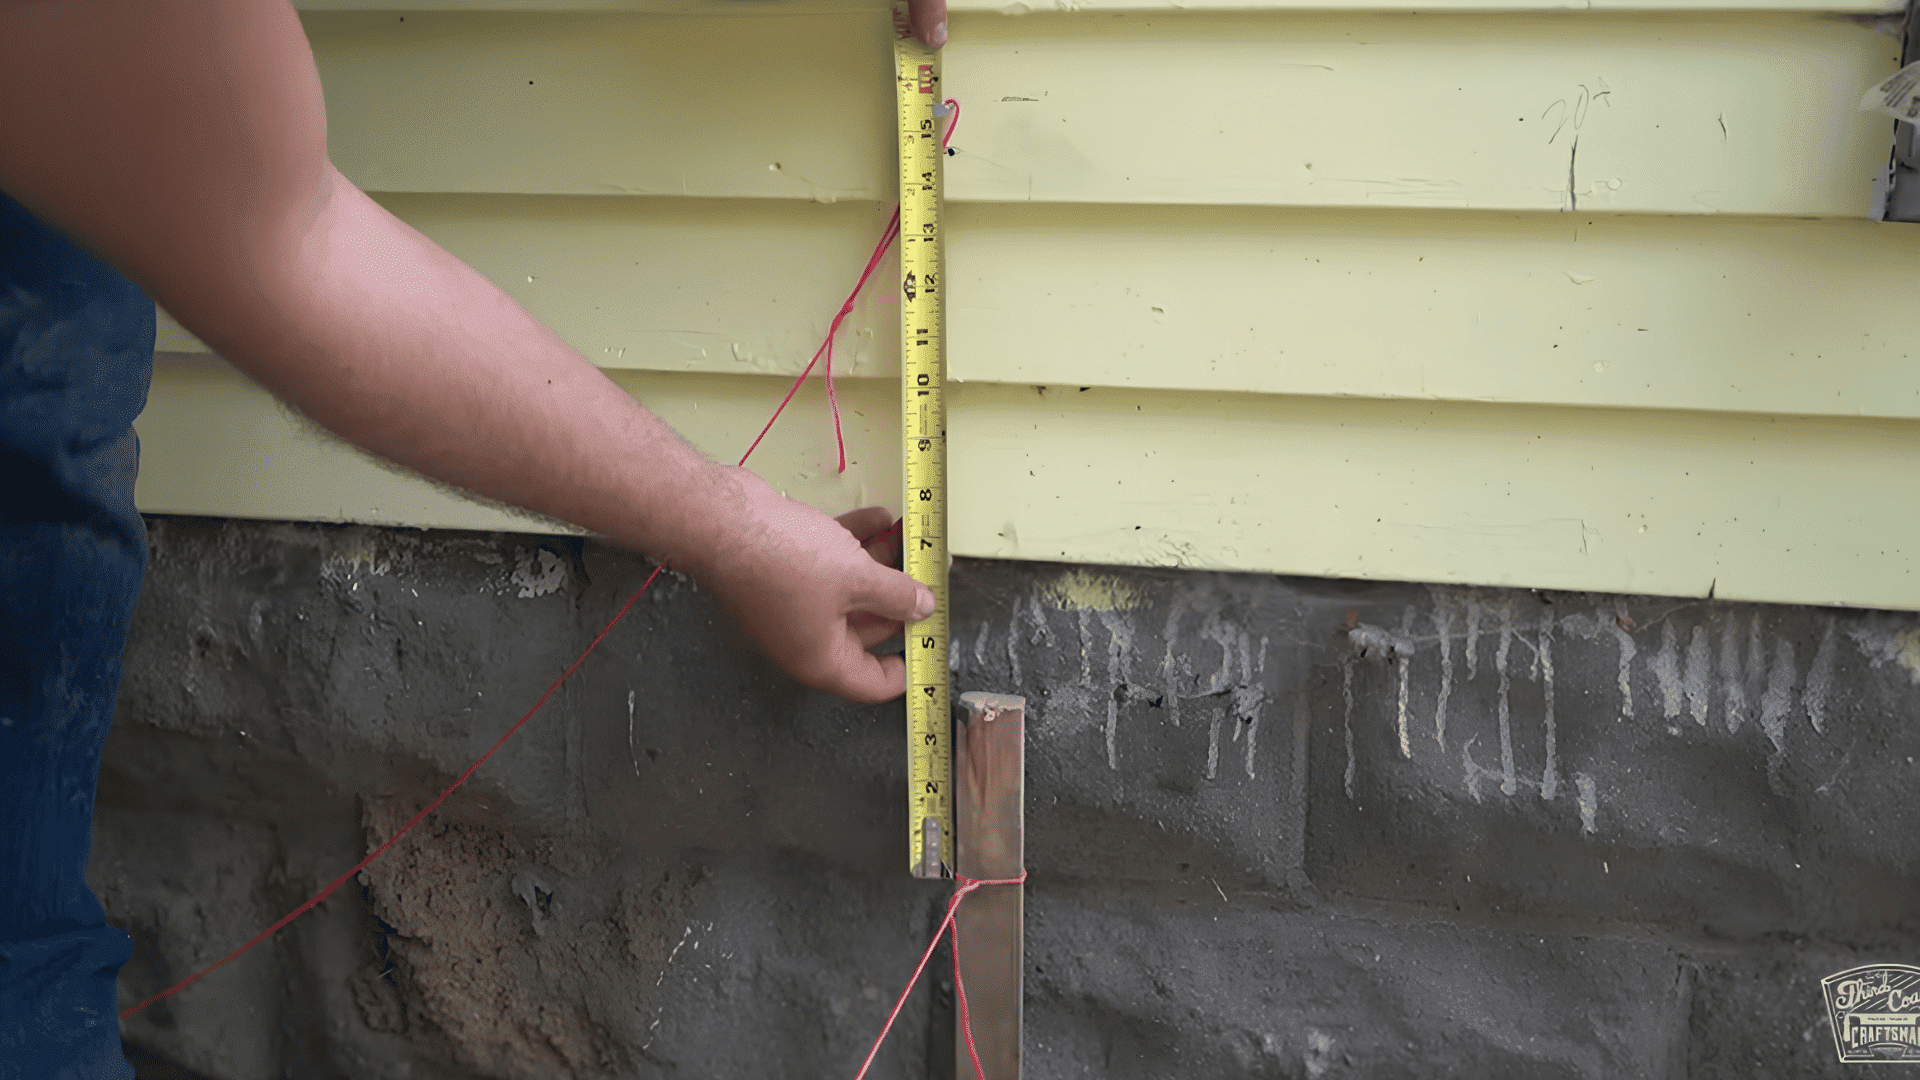
Measure from the house to set the deck height, then subtract the combined thickness of the decking boards, beams, and joists.
Run a level line across all posts to ensure consistency. Adjust slightly for a slight slope to allow rainwater runoff.
Cut each post to the correct height using a miter saw, making sure all measurements are accurate before installation.
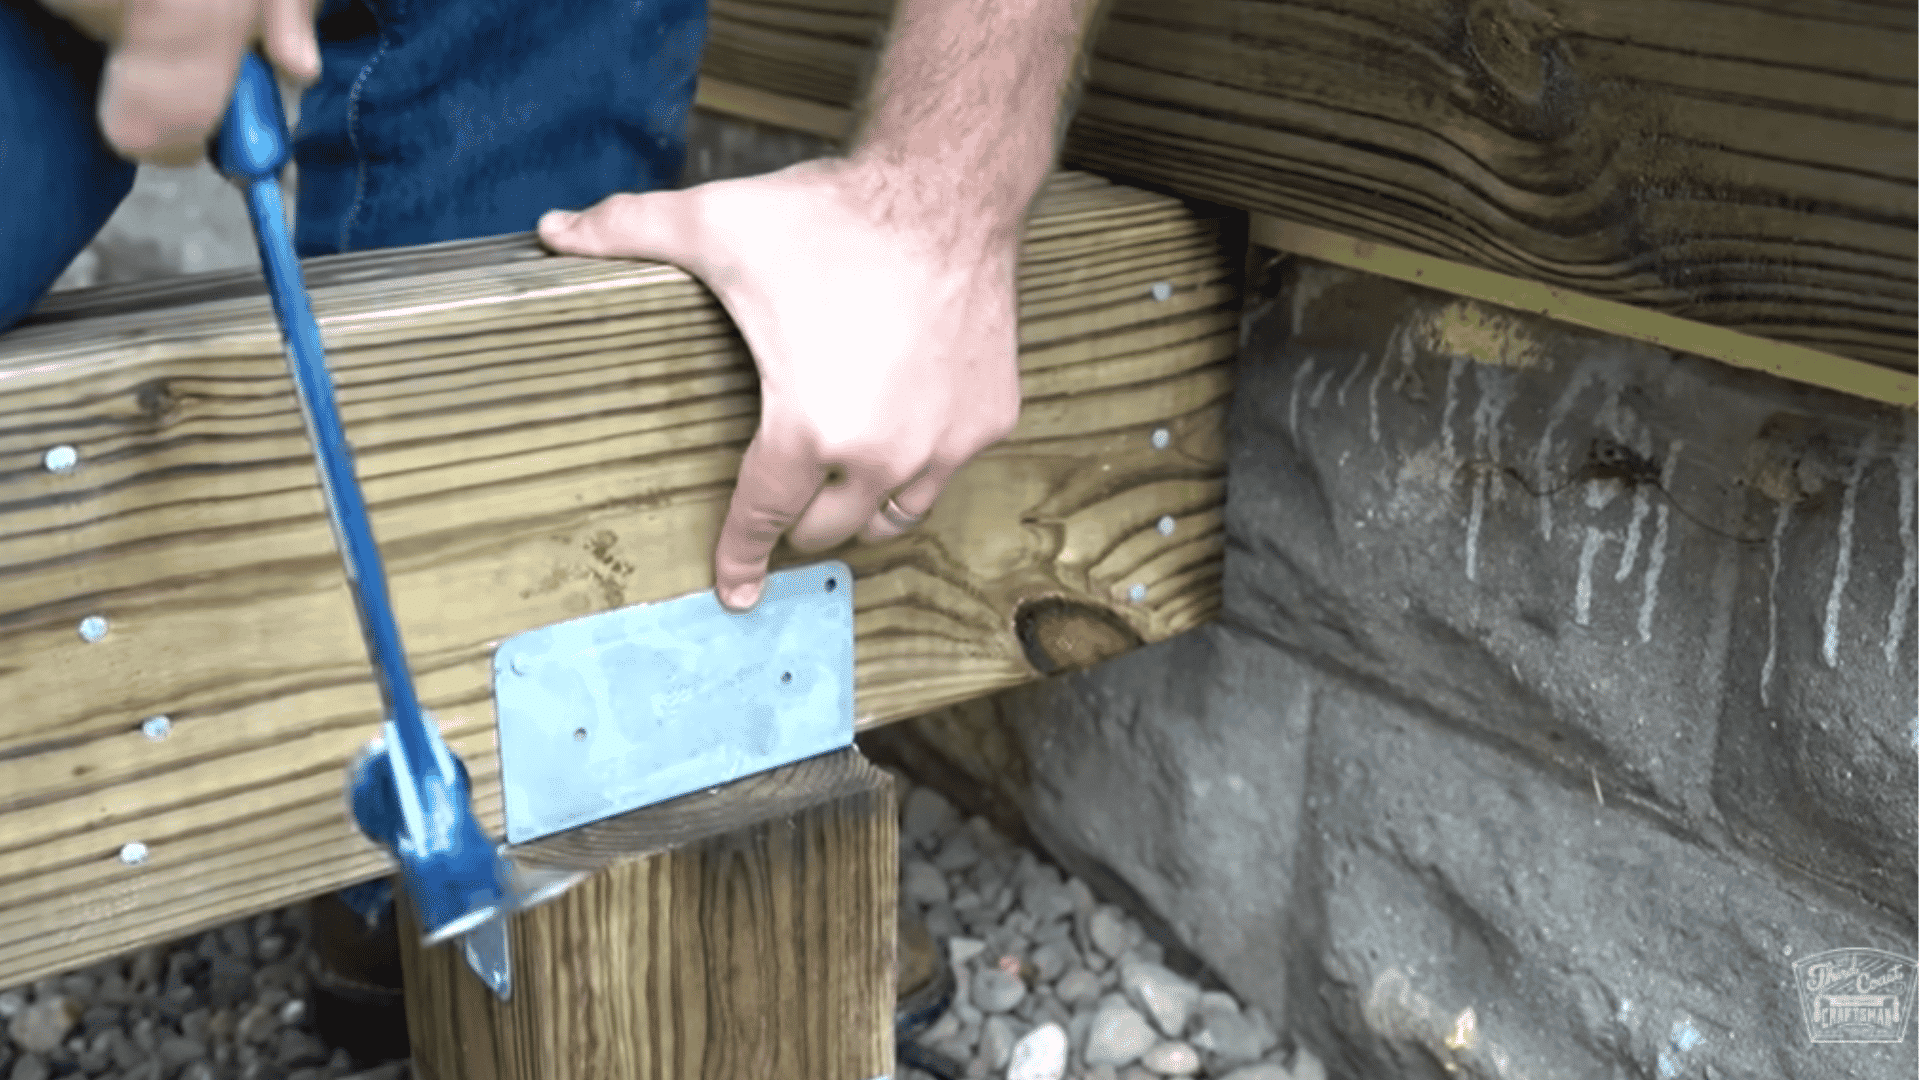
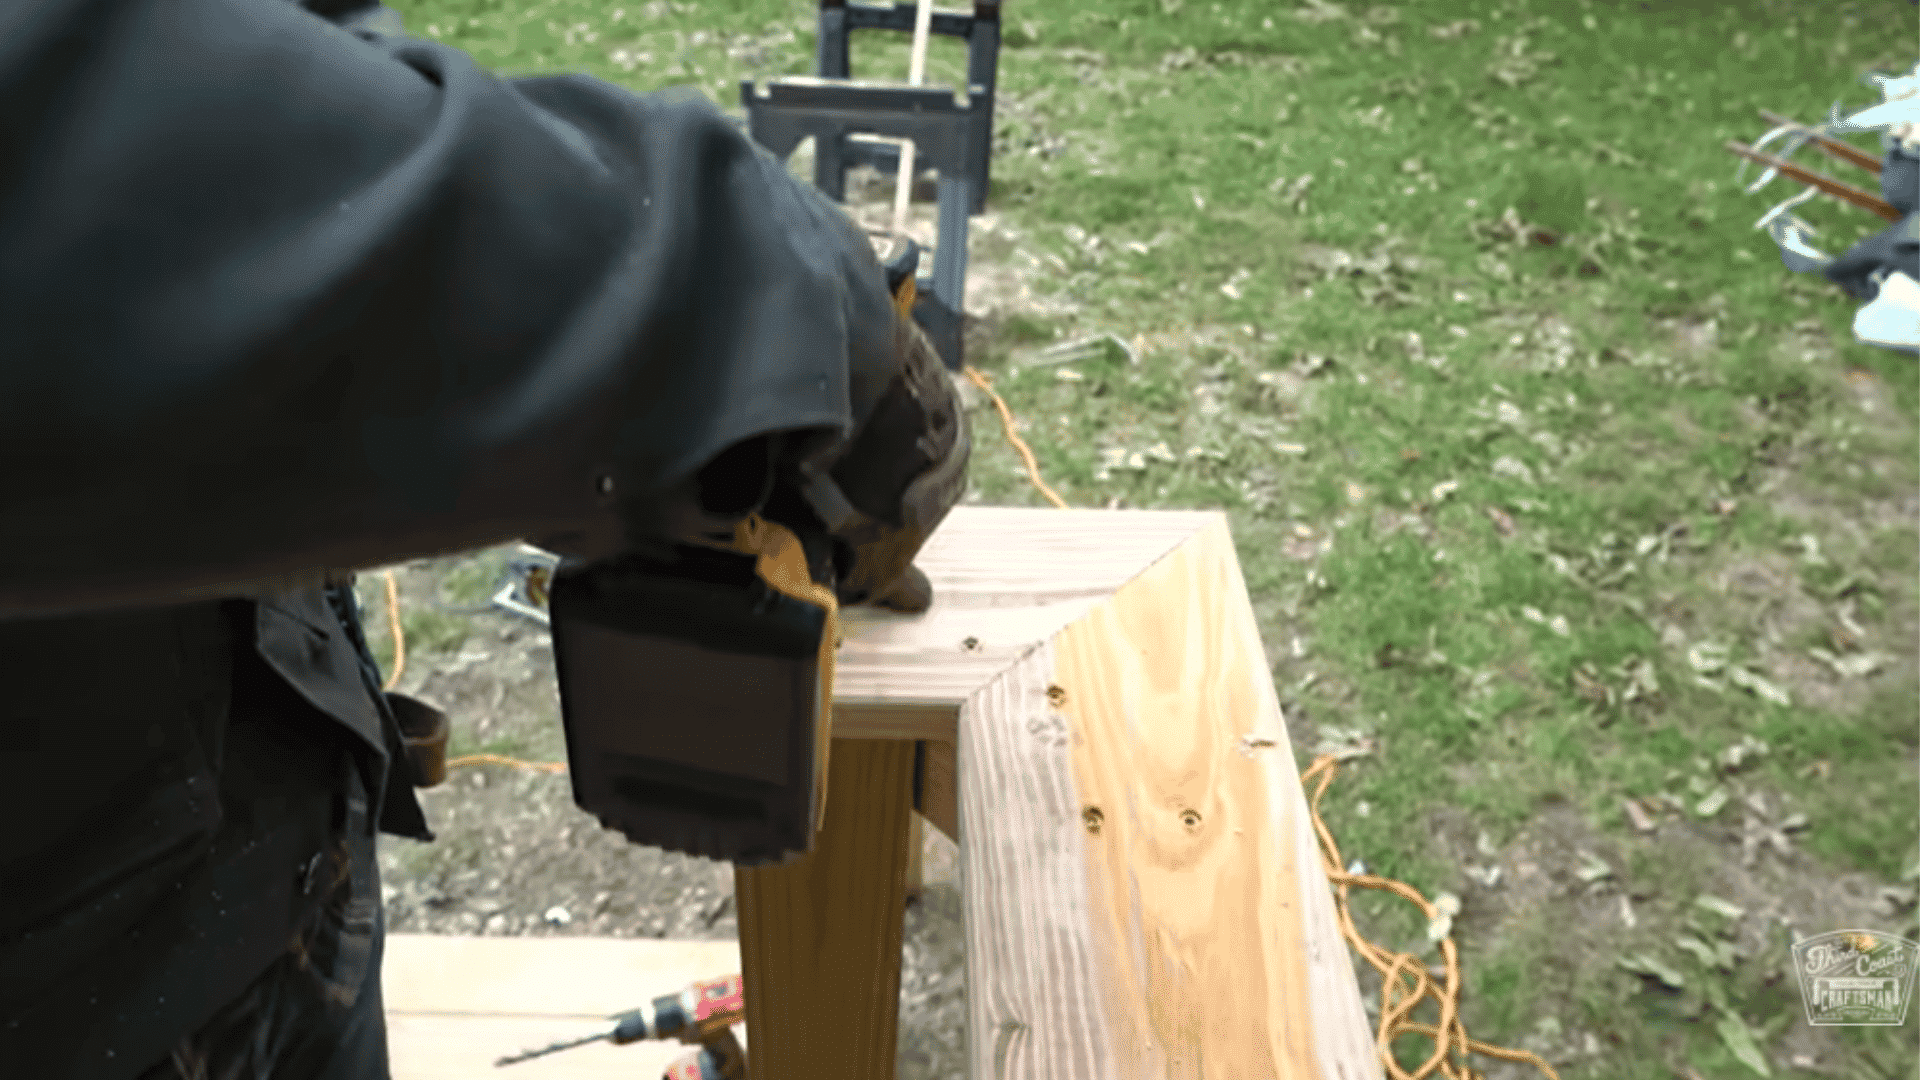
Step 5: Install Beams and Posts
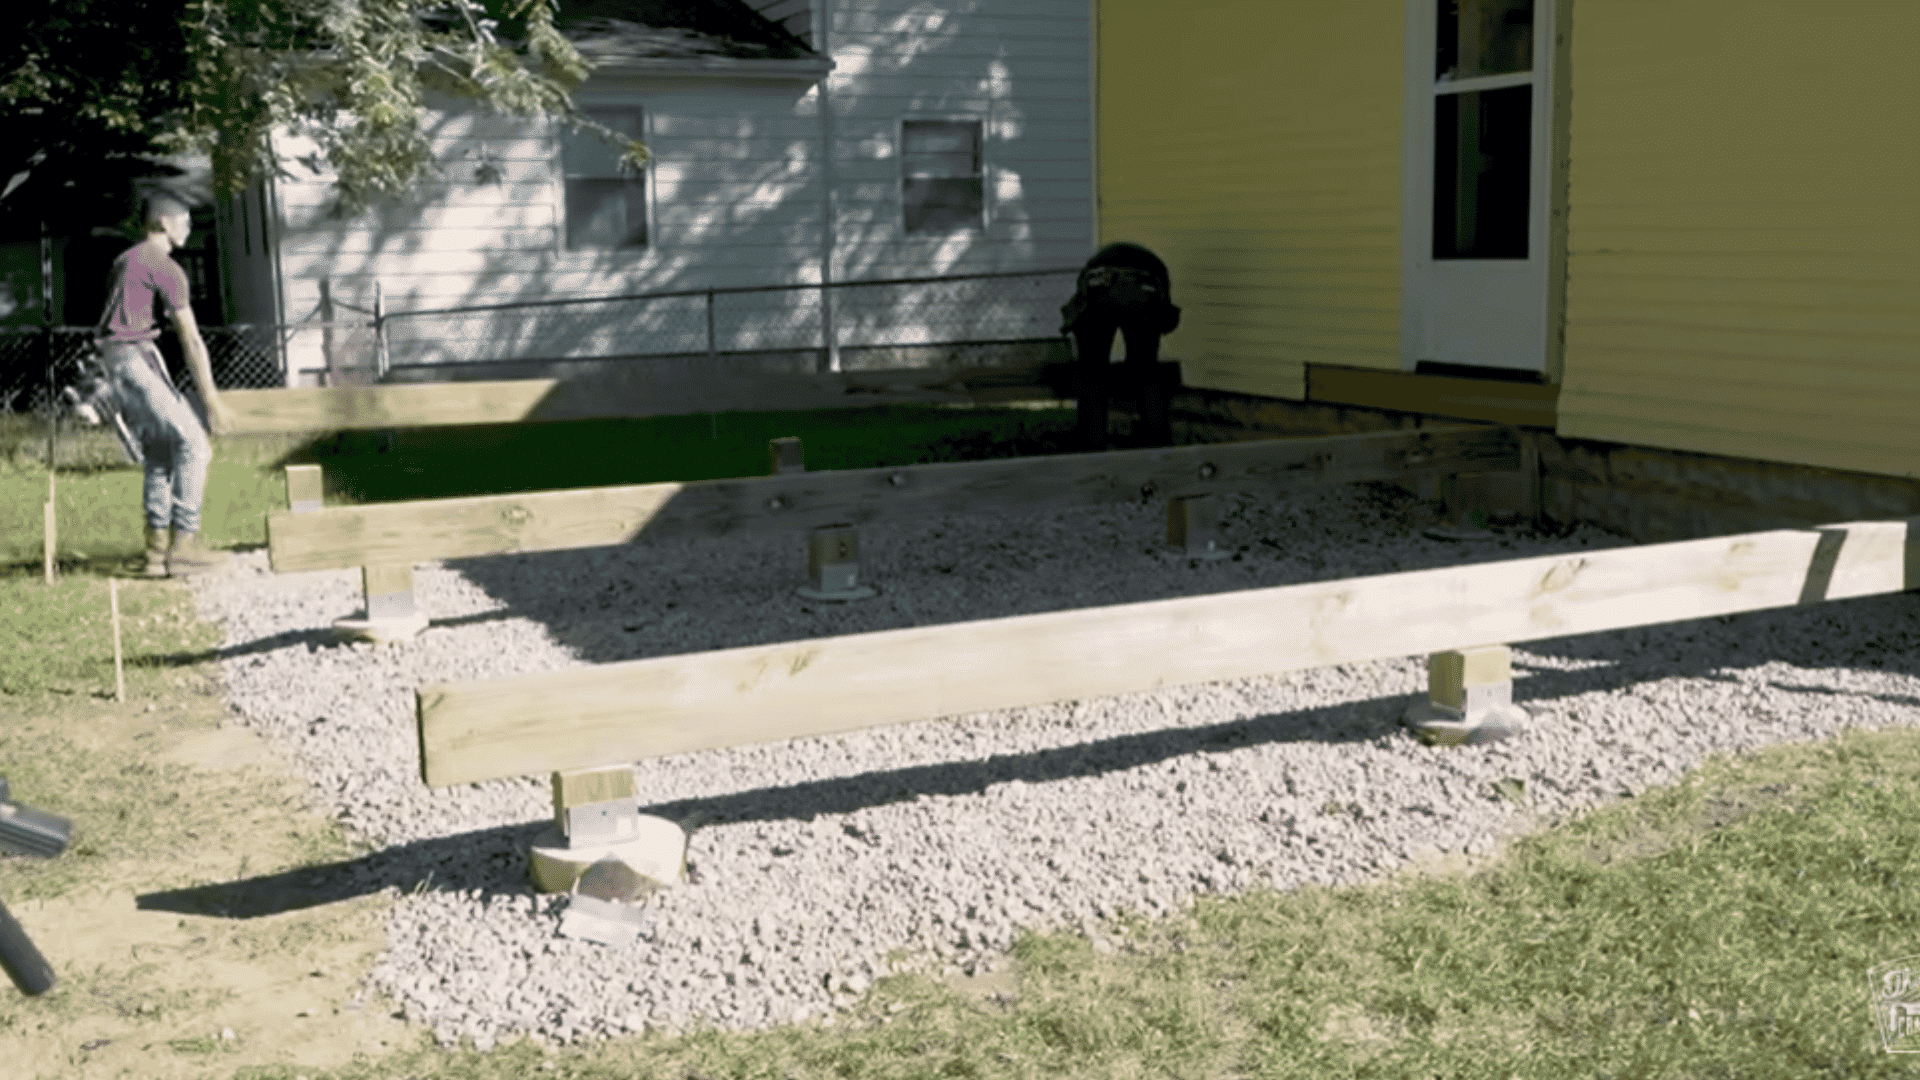
Beams are created by nailing two 2×8 boards together with nails spaced evenly.
Secure the beams to the posts using brackets, checking for level and square alignment before final attachment. This ensures a strong foundation for your joists and deck boards.
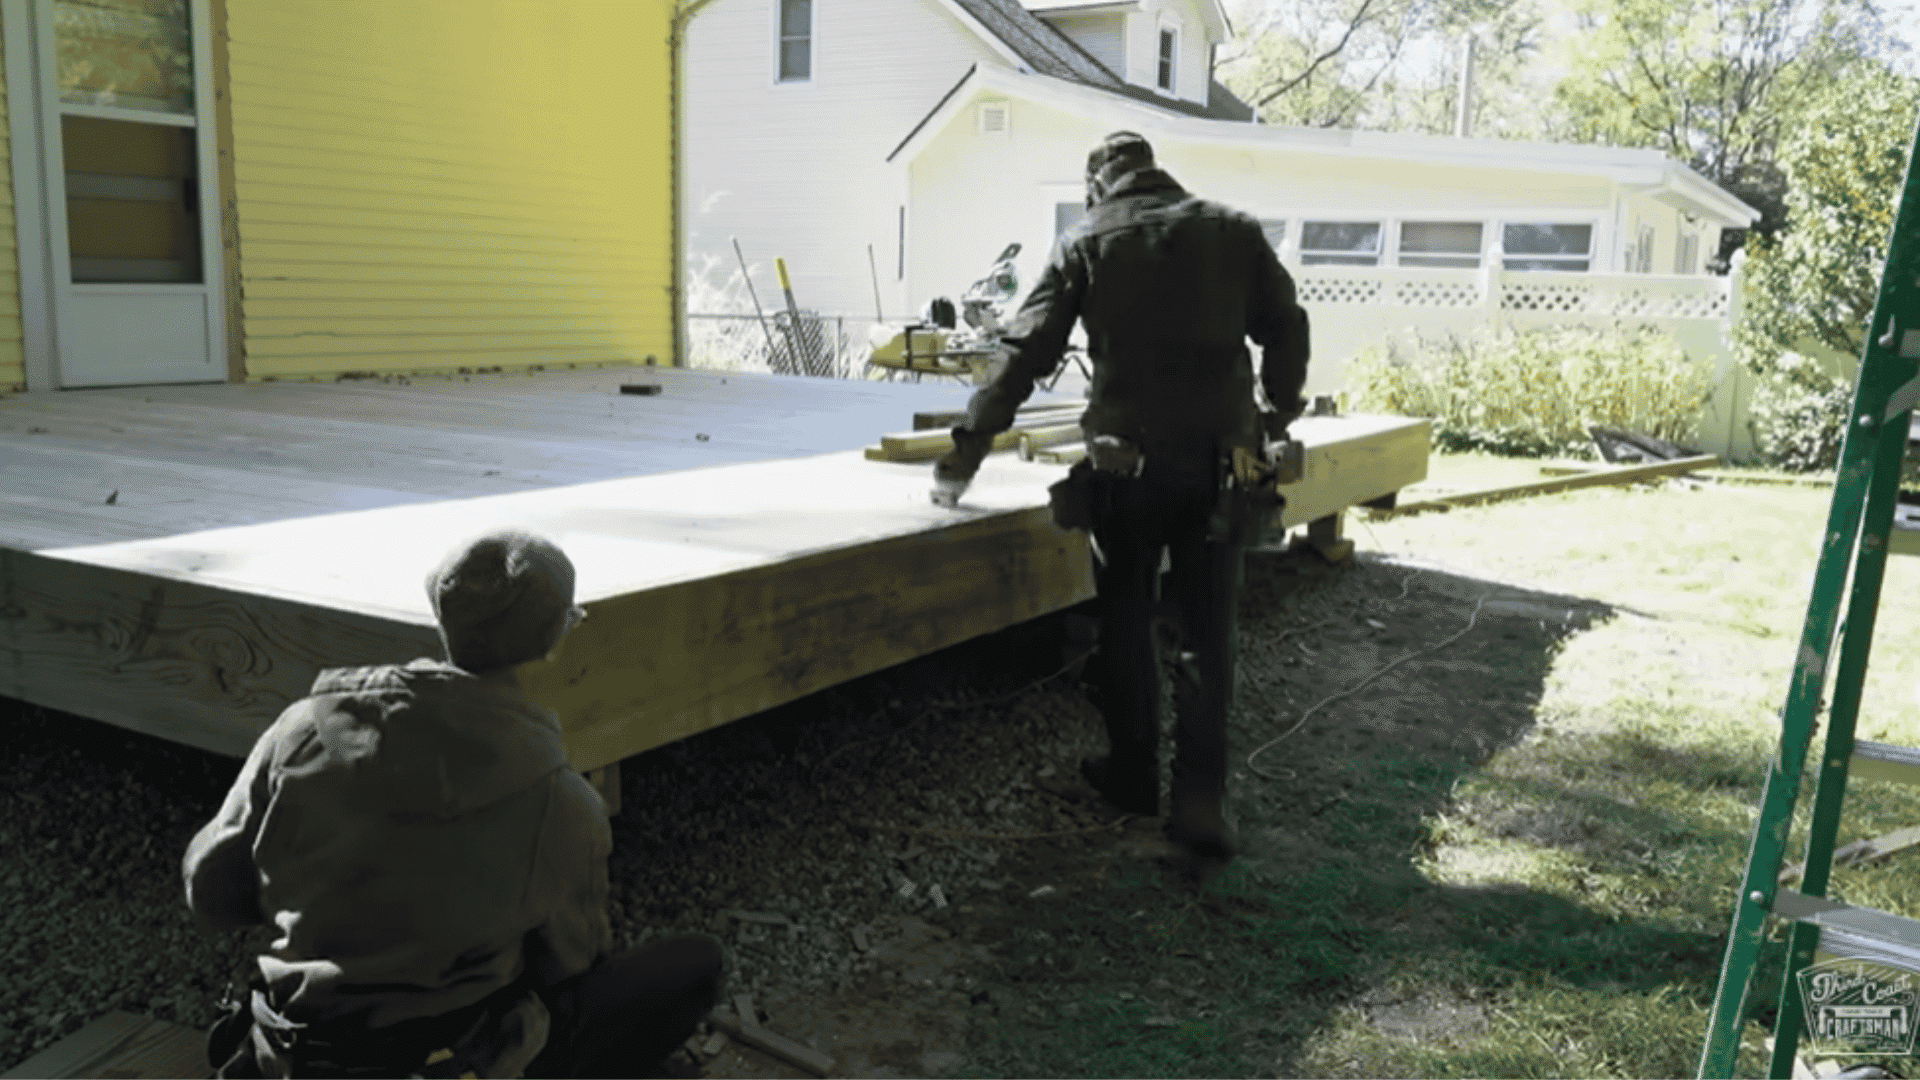
Step 6: Lay Out and Attach Joists
Position the joists 16 inches apart, starting next to the house. Mark spacing with chalk or pencil to maintain alignment.
Toenail the joists temporarily and attach hurricane brackets for extra strength. Add blocking along the center beam to prevent twisting and ensure the deck remains rigid.
Install the rim joist on the outside edge to support the decking boards.
Step 7: Install Decking Boards
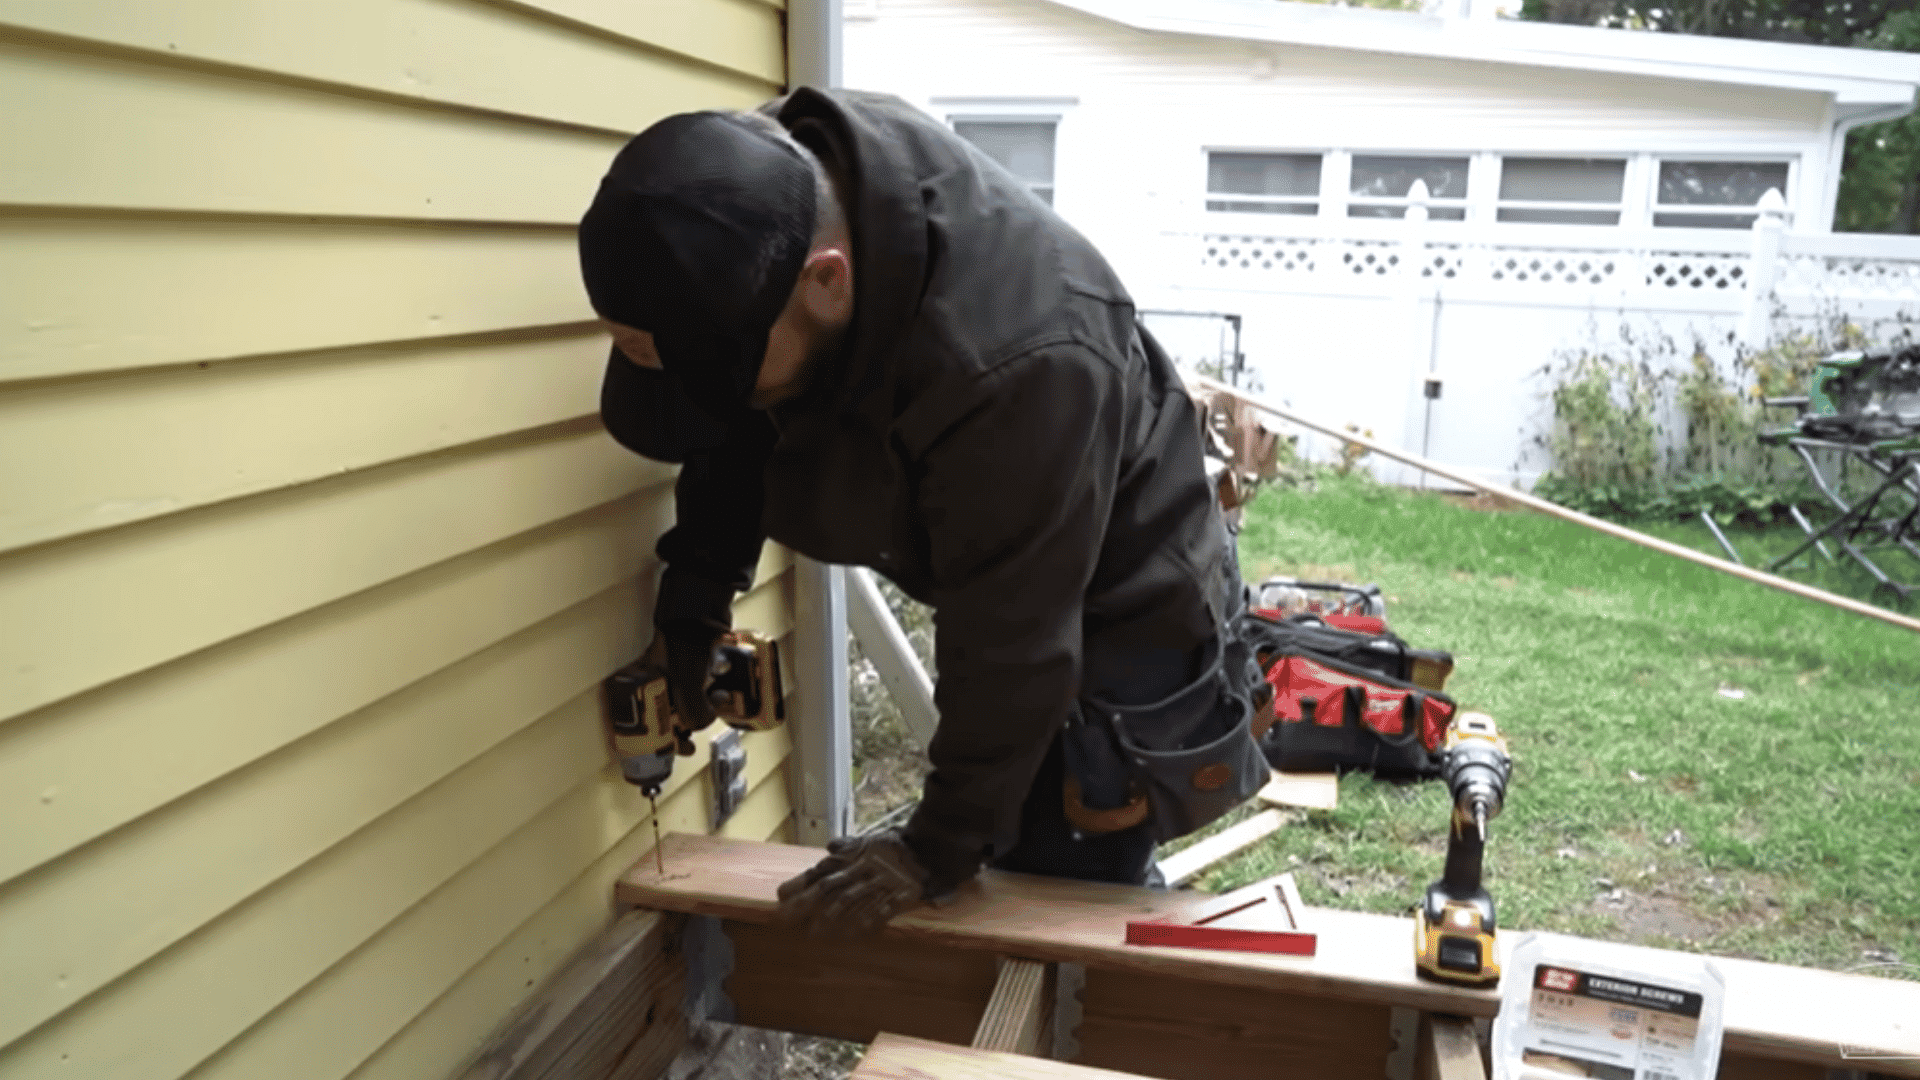
Pre-drill holes near the edges of the deck boards to prevent splitting and attach them using screws every 16 inches into the joists.
Check regularly to ensure boards remain square across the deck. For wet boards, push them snugly together, and for dry boards, leave a small gap to allow for expansion.
Install the outside rim joist last so that the final deck boards align perfectly with the edge.
Step 8: Add Skirt
Install a 2×12 skirt around the perimeter of the deck to give it a clean, finished appearance. This also helps hide the structural components underneath.
Step 9: Install Posts for Railings
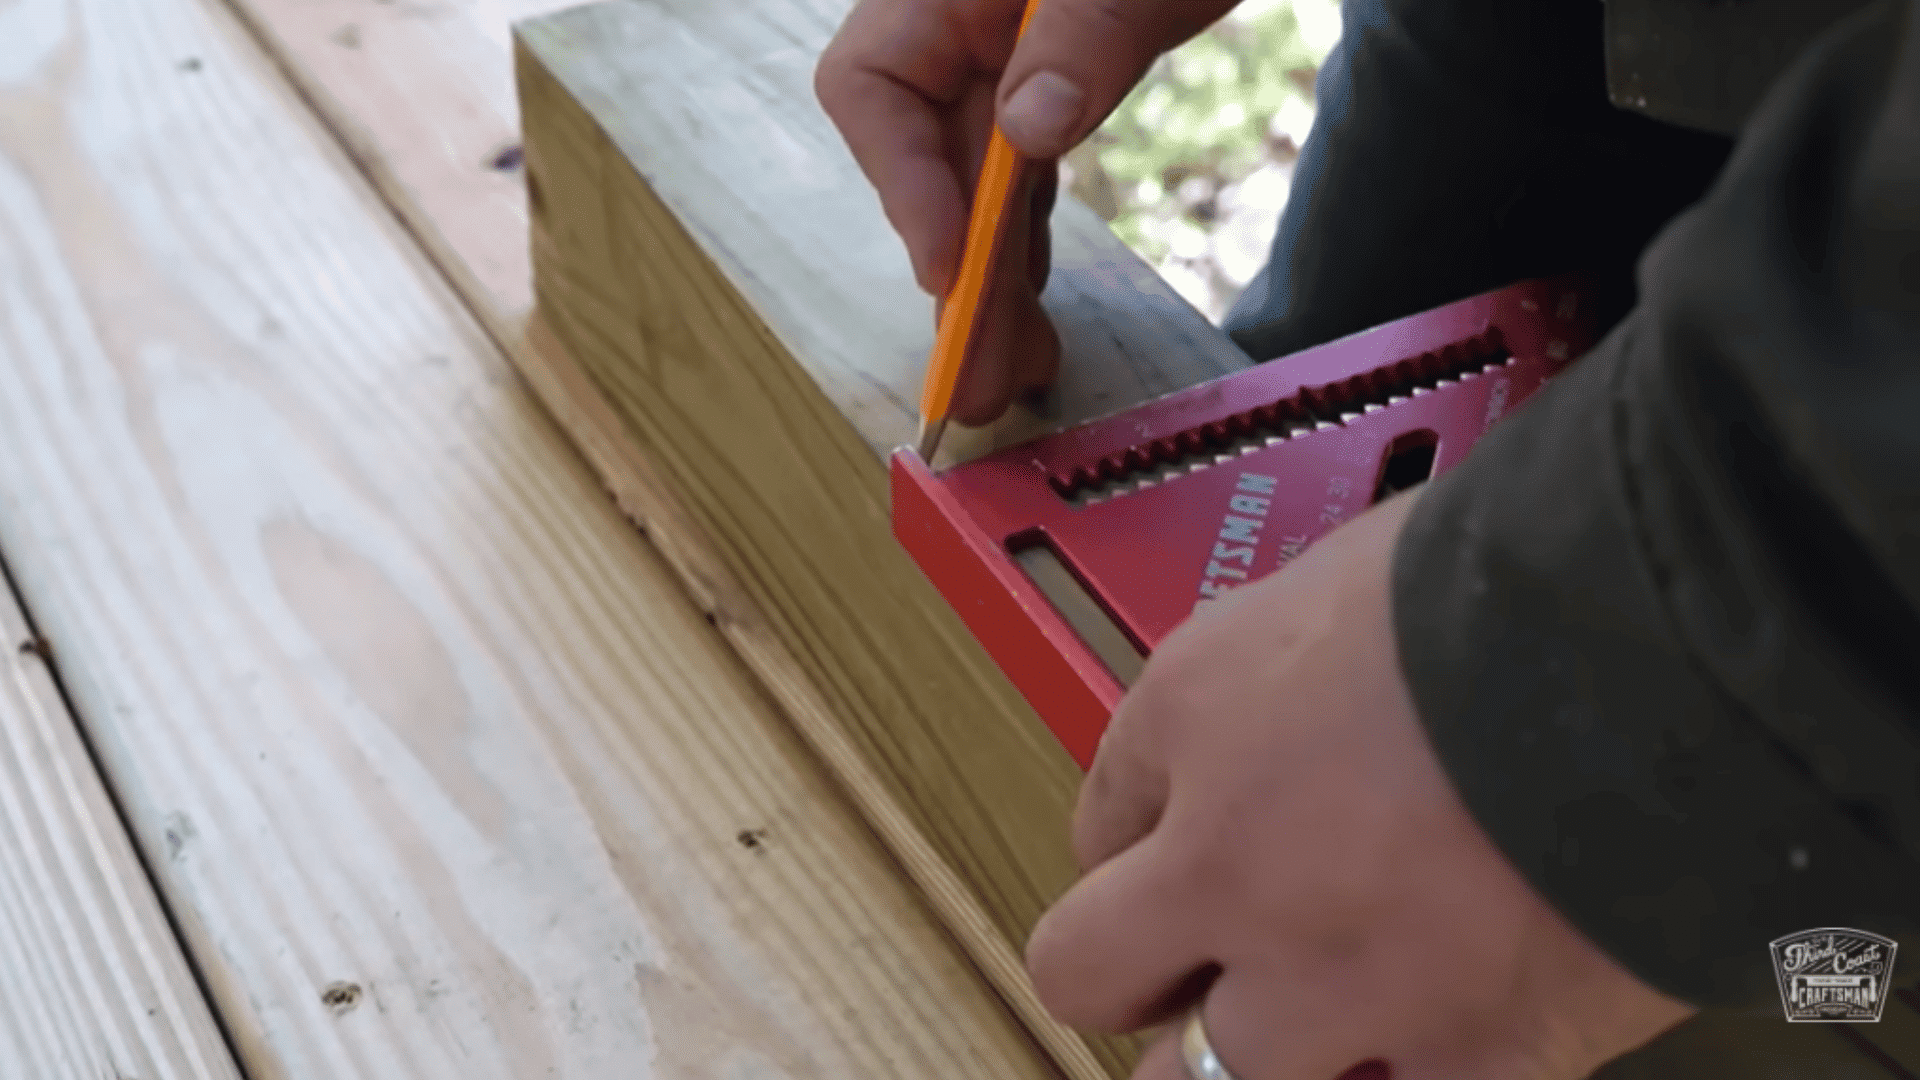
Mark the locations for railing posts according to code. Cut notches in the posts using a saw, hammer, and chisel. Bevel the tops for a clean finish.
Drill holes and secure each post with carriage bolts, washers, and nuts, checking that every post is plumb and square before tightening.
Step 10: Add Top and Bottom Rails
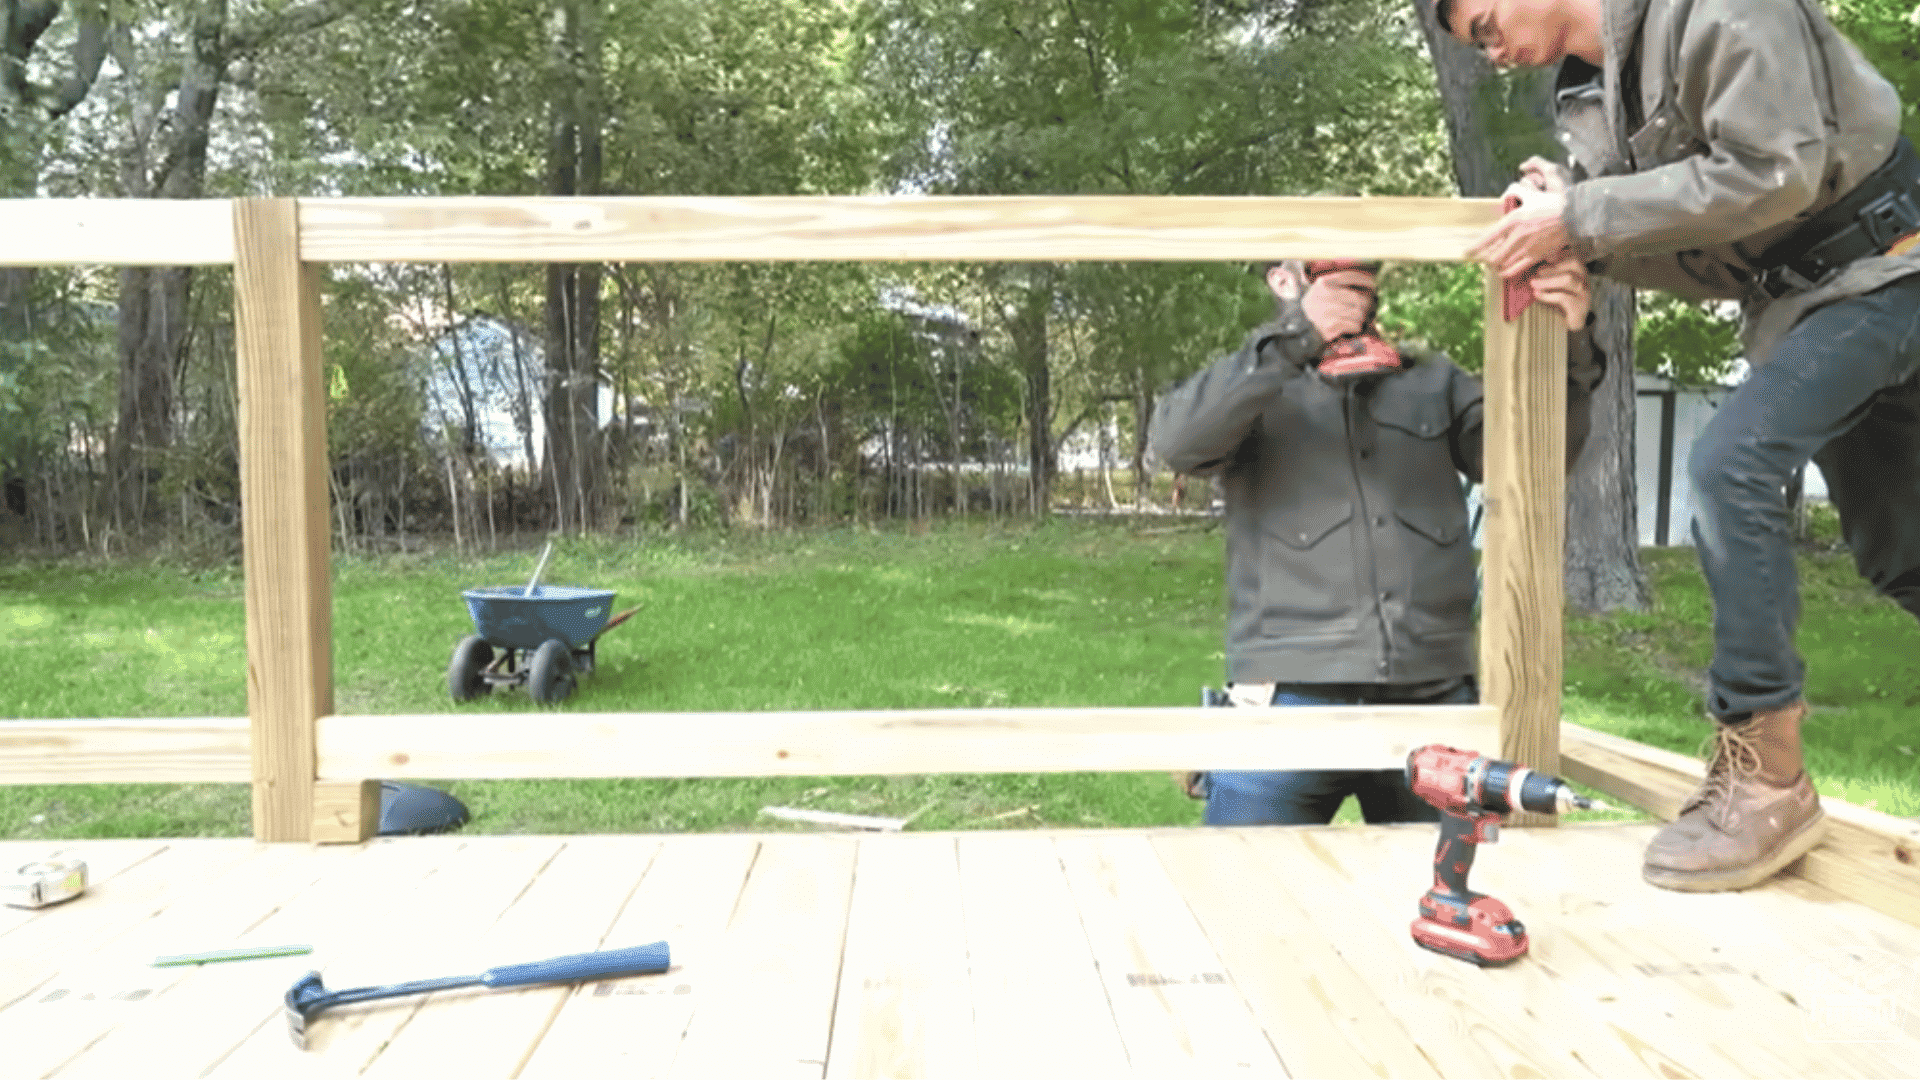
Measure the distance between posts and cut 2x4s for the top and bottom rails. Space the balusters evenly using cut-offs or speed squares.
Bevel the balusters if desired and attach them using countersunk screws at both top and bottom for a clean, sturdy railing system.
Step 11: Build Stairs
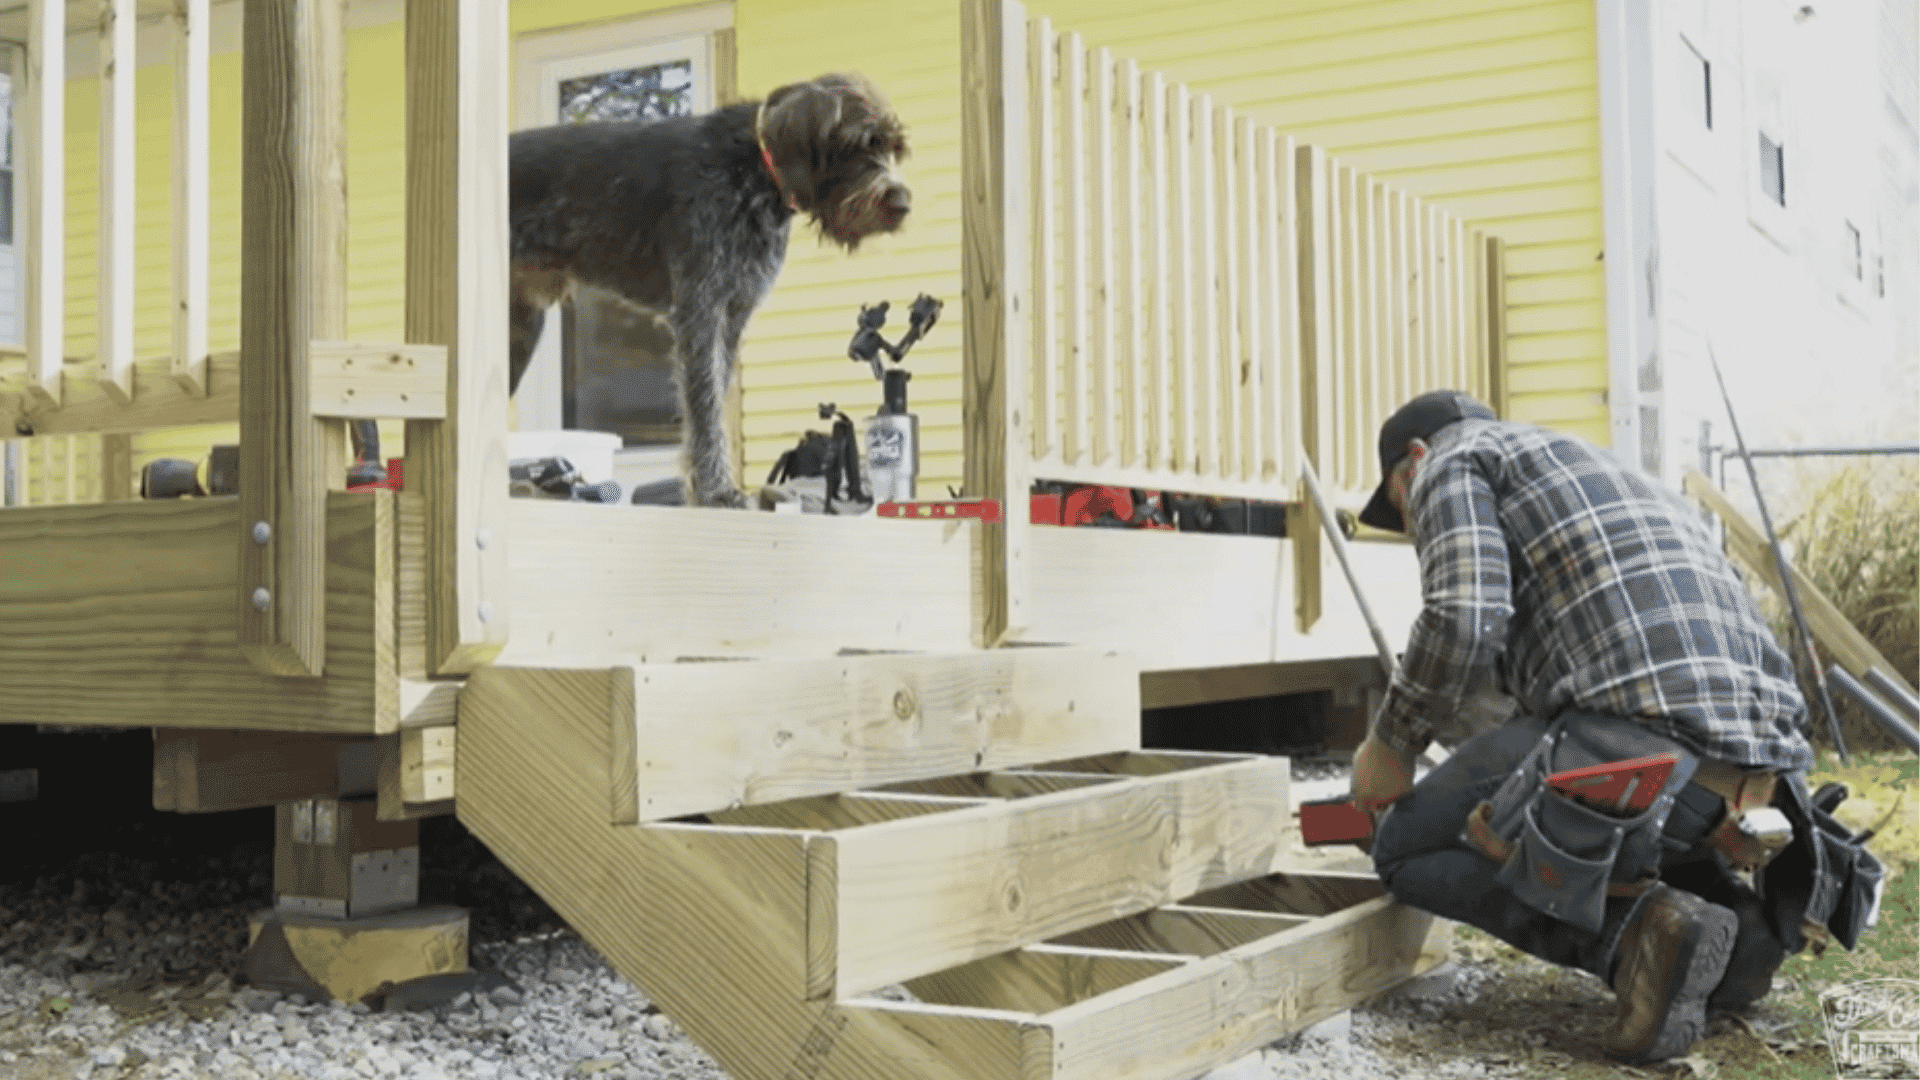
Prepare the foundation for the stairs with gravel and concrete footers to support the stringers.
Cut stair stringers following local code requirements, then attach kicker boards, stair treads, and railings just like on the main deck.
Step 12: Install Railing Caps
Use deck boards for the railing cap, cutting 45-degree miters at corners to complete the look.
This provides a finished and professional appearance for the deck.
Step 13: Finishing Touches
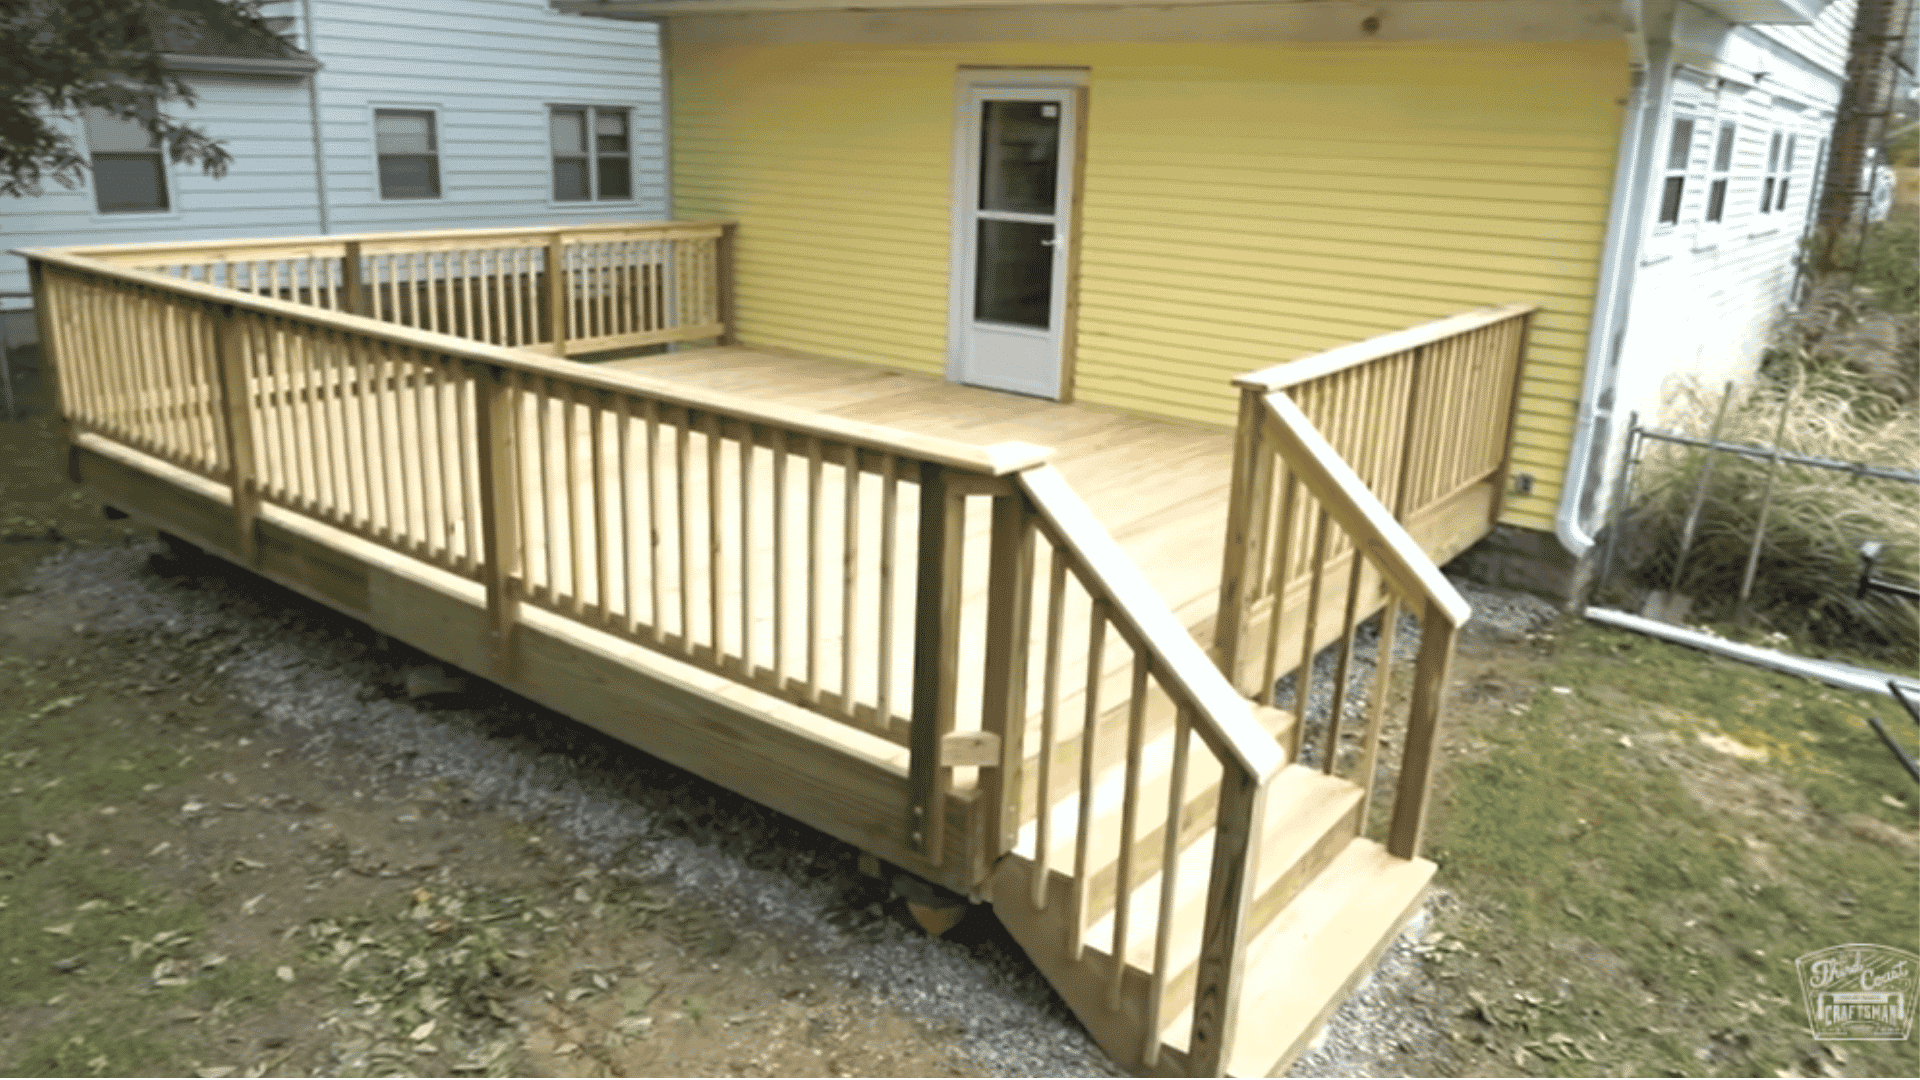
Allow the deck to dry and season before applying stain. Add lattice and landscaping around the base to complete the outdoor area.
With proper planning and care, your deck will last for many years and provide a comfortable, functional space for your home.
For an in-depth walkthrough of the whole process, check out the complete video tutorial by Third Coast Craftsman below:
Quick Measurement Table
Use it as a reference to plan your materials and ensure each component fits correctly.
| Component | Size / Measurement | Notes |
|---|---|---|
| Posts | 6×6 | Cut to height based on deck height minus deck board, beam, and joist thickness |
| Beam boards | 2×8 | Two boards nailed together to form each beam |
| Joists | 2×8 | Spaced 16 inches on center |
| Rim joist | 2×8 | Installed along outer edge to support deck boards |
| Deck boards | 2×6 | Screwed every 16 inches into joists |
| Skirt boards | 2×12 | Installed around deck perimeter |
| Railing posts | 6×6 | Spaced according to code, not specific distance given |
| Top/bottom rails | 2×4 | Balusters attached between them |
| Baluster spacing | ~4 inches | Minimum per code, calculated per span for even distribution |
| Stair stringers | Varies | Cut per rise/run, foundation set on concrete footers |
| Footing depth | 42 inches | To meet frost line requirement |
| Concrete form height | 12 inches above footing | Allows for water runoff |
| Post anchors | N/A | Positioned ~1 inch above concrete |
| Deck slope | ~1/2 inch over length | Slight slope away from house for drainage |
DIY Tips and Tricks
These tips help make your deck build easier, safer, and more accurate. Following them can save time and prevent common problems.
- Adjustable Pedestals for Floating Decks: Use adjustable pedestals to level a floating deck on uneven ground. They allow fine height adjustments without digging deep footings.
- Recommended Tools: Essential tools include a laser level for overall flatness, a 6-ft level for smaller sections, and a stair calculator to ensure safe step dimensions.
- Common Mistakes to Avoid: Double-check measurements before cutting, maintain consistent spacing for joists and boards, and don’t rush leveling. Early mistakes can cause uneven decking.
These small steps improve accuracy and prevent frustration during your deck project.
Cost to Build a Deck
Deck costs vary depending on size, materials, and complexity.
The figures provided here reflect DIY material costs only, not the full installed cost that would include labor, which can significantly increase the total.
| Deck Size | Approx. DIY Cost (Pressure‑Treated Wood) |
Approx. DIY Cost (Composite) |
|---|---|---|
| 10×10 (100 sq ft) | $1,500–$2,500 | $3,500–$6,000 |
| 12×12 (144 sq ft) | $2,160–$3,600 | $5,040–$8,640 |
| 12×16 (192 sq ft) | $2,900–$6,700 | $5,800–$11,500 |
| 16×16 (256 sq ft) | $3,840–$6,400 | $8,960–$15,360 |
| 16×20 (320 sq ft) | $6,000–$10,000 | $14,000–$24,000 |
| 20×20 (400 sq ft) | $8,000–$14,000 | $20,000–$34,000 |
Using this information, you can budget for lumber, fasteners, hardware, and decking boards.
Pressure-treated wood is best for standard DIY projects and framing, while composite is ideal when long-term durability with minimal upkeep is preferred.
Conclusion
Building a deck requires planning, the right materials, and careful execution, but the results are worth it.
Preparing your site, using the measurement table, and budgeting with DIY material costs ensures a safe and durable build. Choosing pressure-treated wood is ideal for most DIY projects, while composite works well for low-maintenance decks.
Following each step, from posts and joists to decking and railings, creates a functional and attractive outdoor space.
Gather your tools, plan carefully, and start building a deck that will enhance your backyard for years to come.
Frequently Asked Questions
What Is the 3 4 5 Rule for Decks?
The 3-4-5 rule is a method for checking whether your deck layout is square. Measure 3 units along one side, 4 units along the other side, and the diagonal should be 5 units. If it matches, the corner forms a right angle.
Should I Use 2×4 or 2×6 for Deck Joists?
Use 2×6 joists for strength and longer spans; 2x4s are only for very short or light decks.
Can I Change the Spacing Between Deck Posts?
Spacing can vary depending on deck size and materials. Always ensure it meets structural requirements and code specifications.