Do you often find yourself looking for a craft that stands out from the crowd?
Paper quilling might be just what you need. This age-old art form turns simple paper strips into stunning designs that catch everyone’s eye. The results look complex, but the basic methods are simple to learn.
I’ll show you how to start quilling with just a few tools and materials. You’ll learn shapes, methods, and tips to create your first projects. Additionally, I’ll share ways to grow your skills once you master the basics.
Quilling offers both fun and practical results – from cards to wall art to jewelry. Let’s explore this paper craft together.
Understanding Quilling: The Basics
Quilling is an art form that uses narrow paper strips rolled and shaped to create designs. The name comes from the original method of wrapping paper around quills – the feather pens used long ago.
The craft dates back hundreds of years. People first used it to make fancy book covers and religious items. Now, artists use it for cards, wall art, and much more.
What makes quilling special is how simple materials transform into complex art. With just paper, glue, and a few tools, you can make intricate patterns and pictures that pop off the page.
The basic method stays the same: roll paper strips, shape them, and glue them in place. The magic happens in how you combine these simple shapes into wonderful designs.
Exploring Fundamental Quilling Shapes
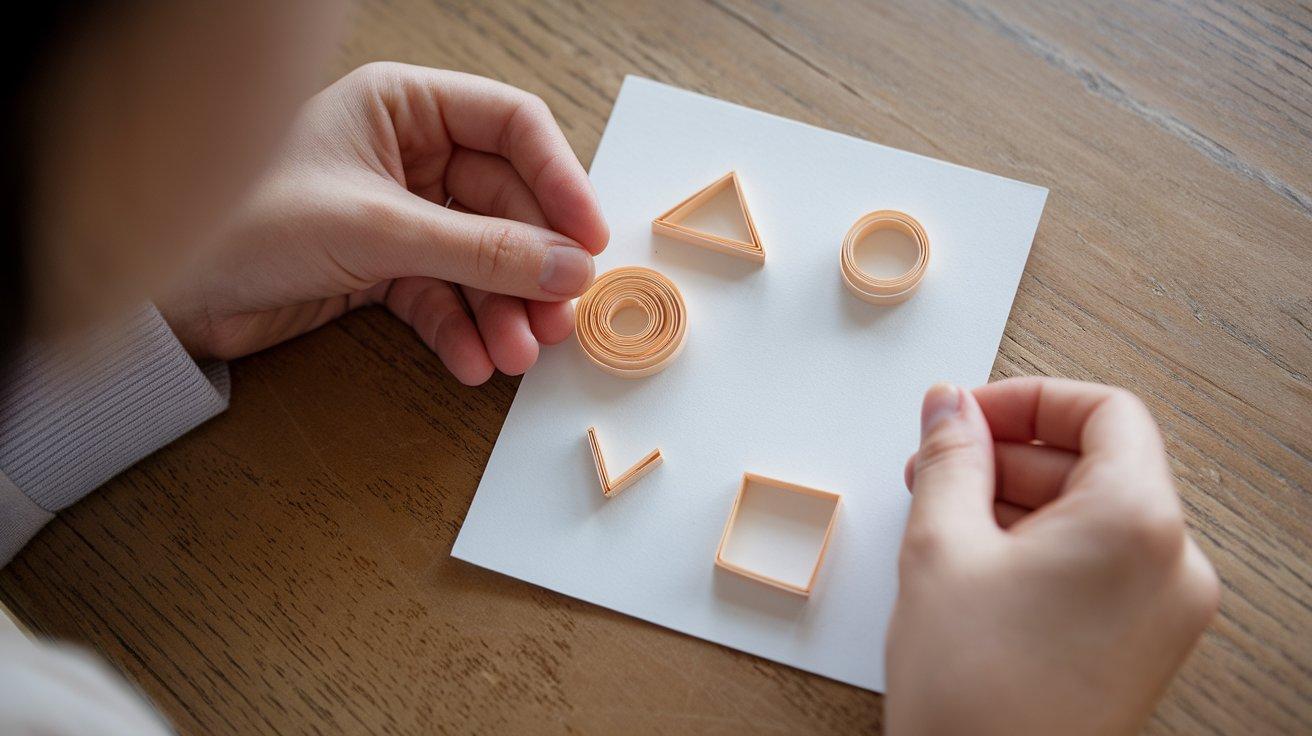
The beauty of quilling comes from mixing basic shapes into complex designs. Here are the main shapes you’ll use:
Tight Coil: A basic spiral used in various designs. Make this by rolling a strip tightly and gluing the end.
Loose Coil: A relaxed version of the tight coil, offering a different look. Roll the paper and let it expand before gluing.
Teardrop: Formed by pinching one end of a loose coil, resembling a droplet. This shape works great for flower petals.
Marquise (Eye Shape): Created by pinching both ends of a loose coil. Use these for leaves and eye shapes.
Scrolls: Open-ended coils that add flair to designs. These look like the letter “S” or “C” and add movement to your work.
Techniques for Crafting Basic Quilling Shapes
1. Rolling Techniques
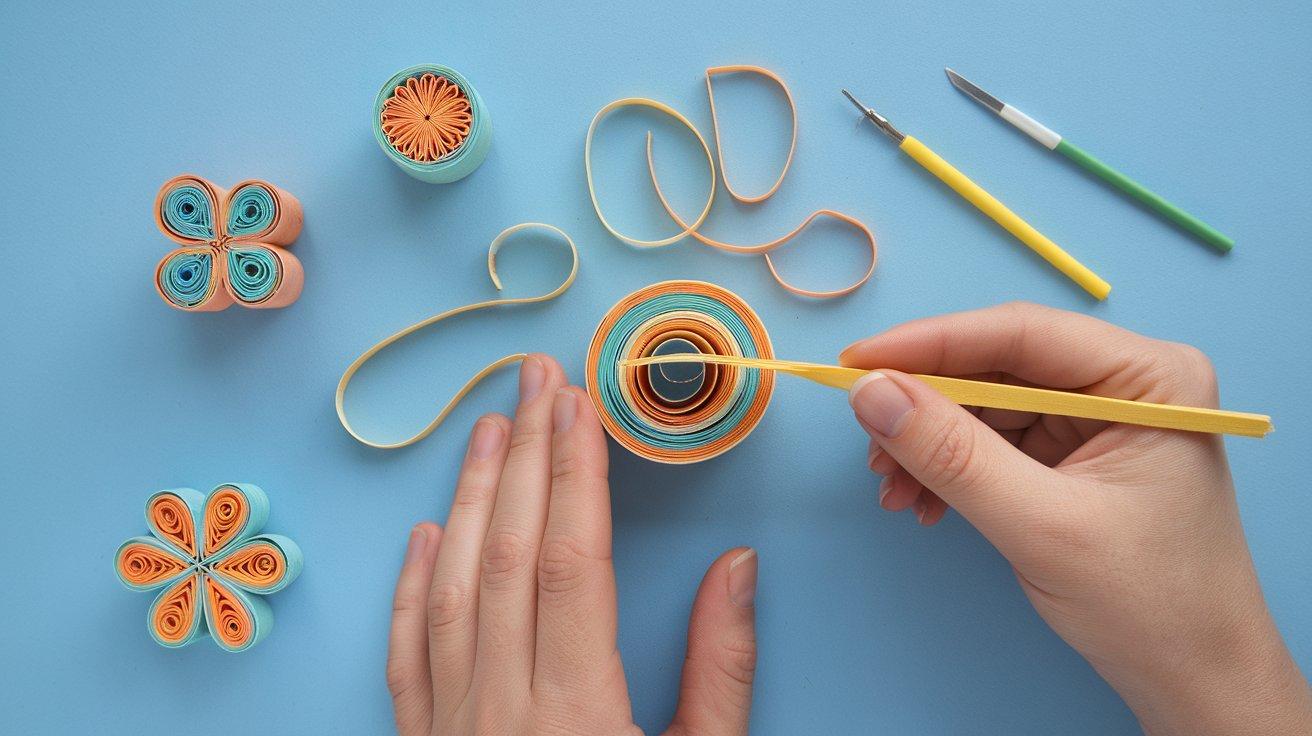
- Hold the paper strip between your thumb and index finger.
- Wind the strip evenly, keeping the tension the same throughout.
- For better control, use a slotted tool to start your rolls.
- Practice makes perfect – your first coils may look uneven.
2. Pinching Methods
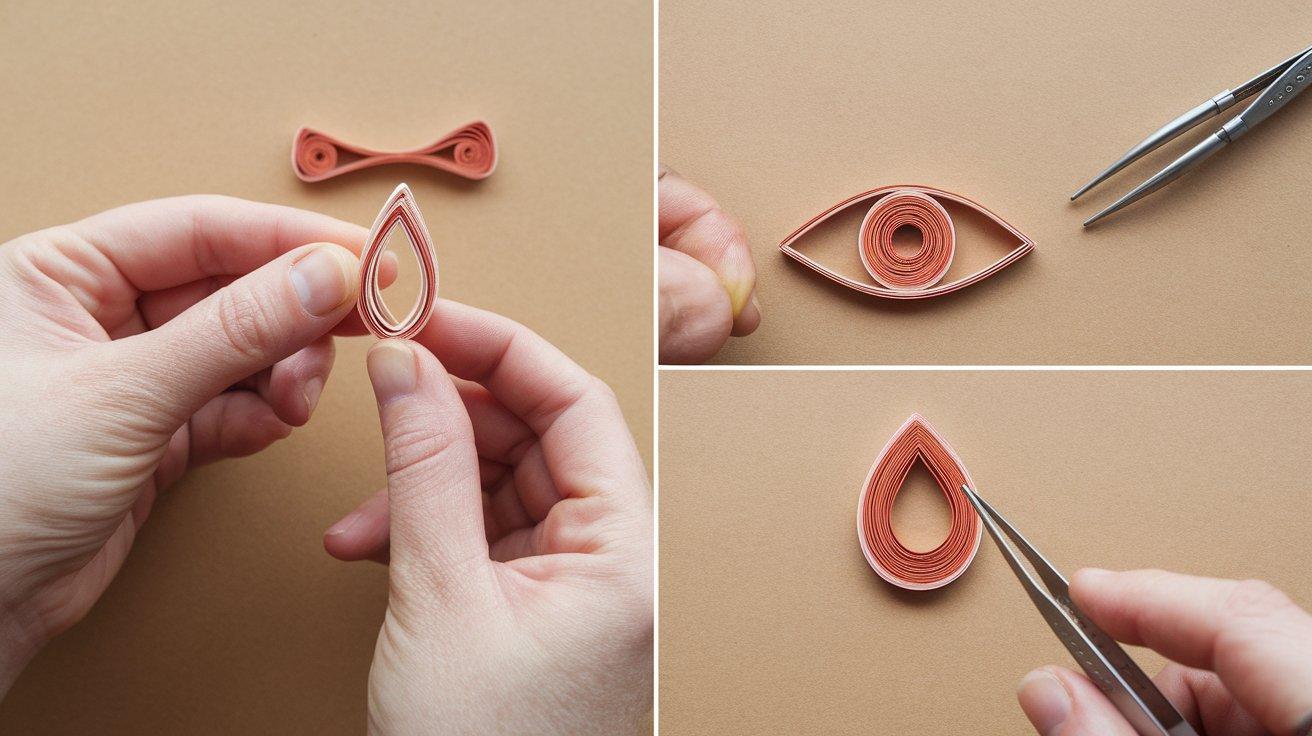
- Let a loose coil expand to the size you want.
- Pinch one spot for teardrops or two spots for marquise shapes.
- Use your fingertips for gentle shaping.
- Try tweezers for tiny shapes that need exact pinching.
3. Combining Shapes
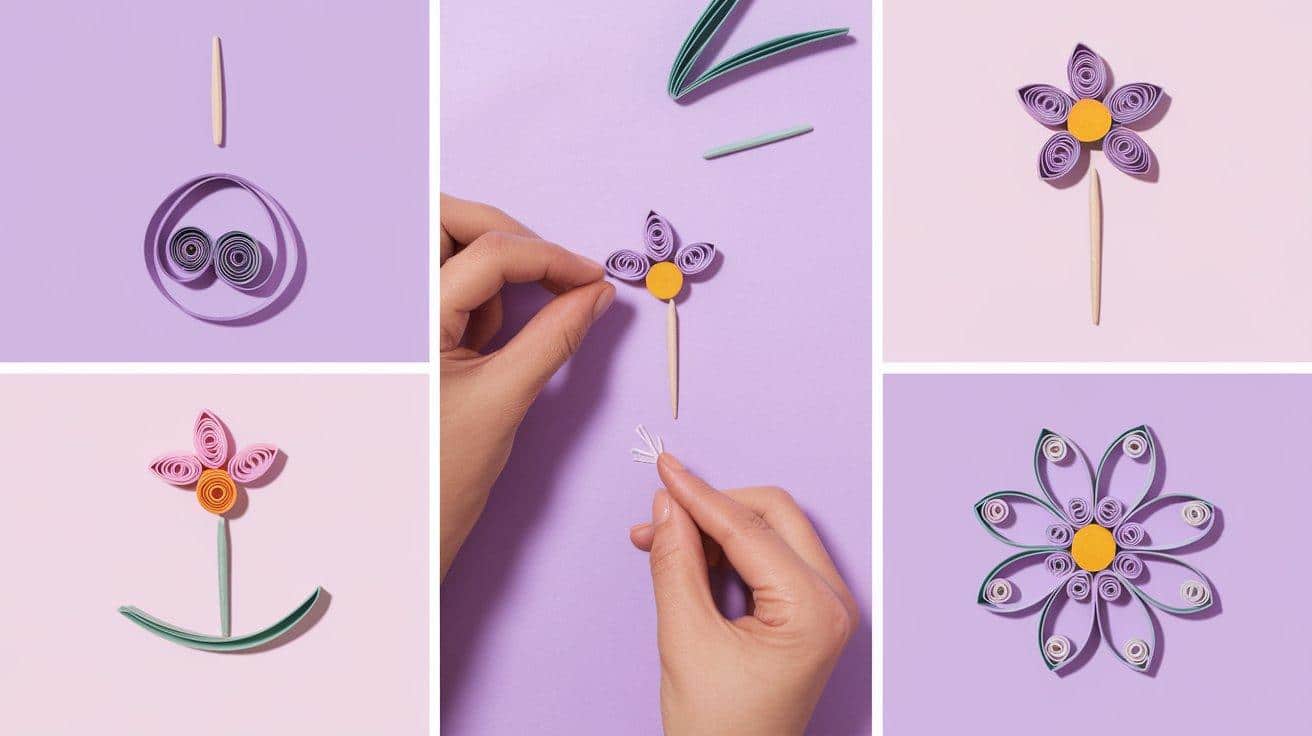
- Plan your design before gluing shapes together.
- Use small dots of glue where shapes touch.
- Build from the center outward for flowers and circular designs.
- Don’t worry about gaps – they add charm to the finished piece.
Essential Tools and Materials
Before you start quilling, you’ll need some basic tools and materials. Here’s what to gather:
| Item | Description |
|---|---|
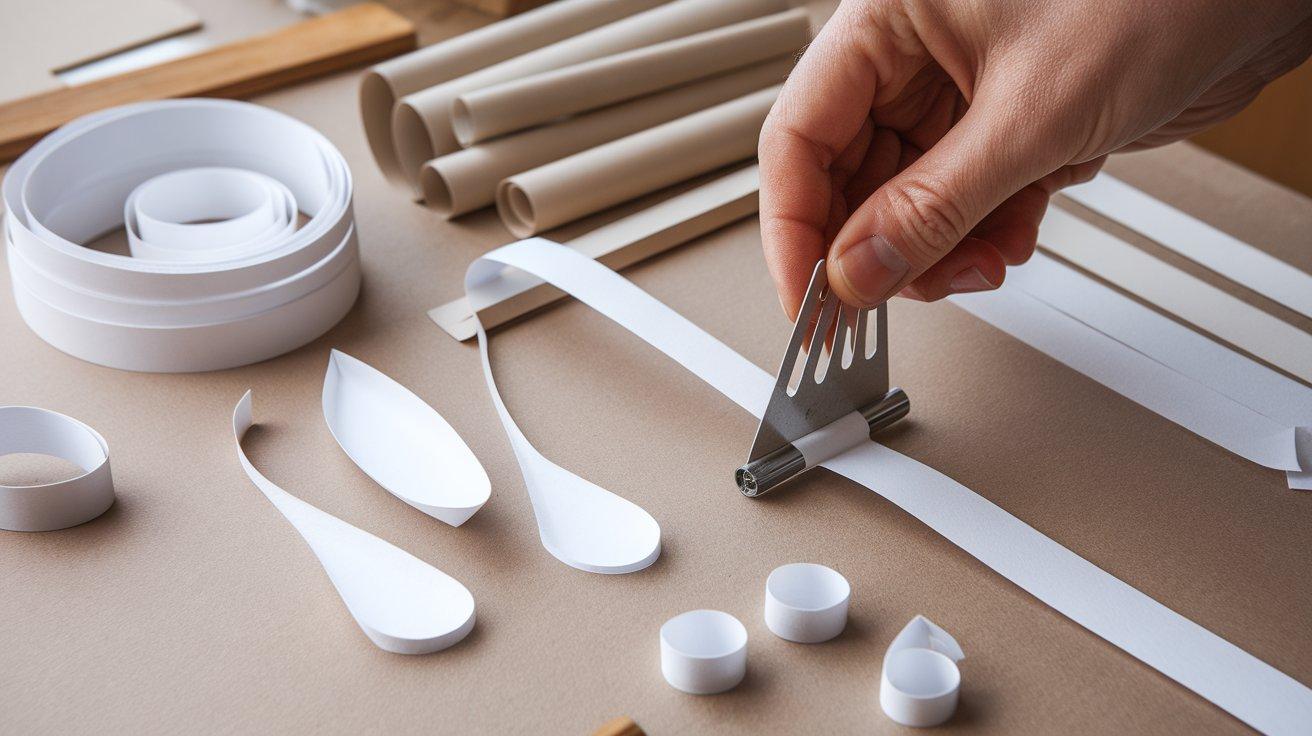
| Quilling Paper | Thin, pre-cut strips in various colors (1/8″ or 1/4″ width) |
| Quilling Tool | A slotted tool or needle tool to help roll paper strips |
| Glue | Clear-drying craft glue or glue stick |
| Scissors | Small, sharp scissors for cutting paper strips |
| Tweezers | Fine-tipped tweezers for handling small pieces |
| Circle Template | A board with circles of various sizes for making even coils |
| Pins | For holding shapes in place while the glue dries |
| Cork Board | A soft surface to pin your work onto while it dries |
| Ruler | For measuring and cutting paper to custom lengths |
| Storage | Small containers to keep shapes and tools organized |
How to Start Quilling: A Step-by-Step Guide
Learning to quill is a fun process that anyone can master with some practice and patience. Follow these five simple steps to begin your quilling journey and create your first beautiful paper art projects.
Step 1: Prepare Your Workspace

Finding the right space makes quilling much easier. Look for a flat, clean area with good lighting where you can spread out your materials without worry.
Having everything ready before you start saves time and frustration. Set out all your tools and papers in an organized way so you can focus on creating rather than searching.
- Choose a clean, well-lit area.
- Gather all necessary tools and materials.
- Find a flat surface where your work can sit undisturbed
Step 2: Learn Basic Shapes
Basic shapes form the building blocks of all quilling designs. Start with simple coils and practice until you can make them with ease and consistency.
Your first shapes might not look perfect, and that’s okay. The more you practice, the better your muscle memory becomes for rolling and shaping paper strips.
- Practice creating tight coils, loose coils, teardrops, and marquises
- Make at least 5-10 of each shape to build muscle memory
- Try different paper lengths to see how they affect size
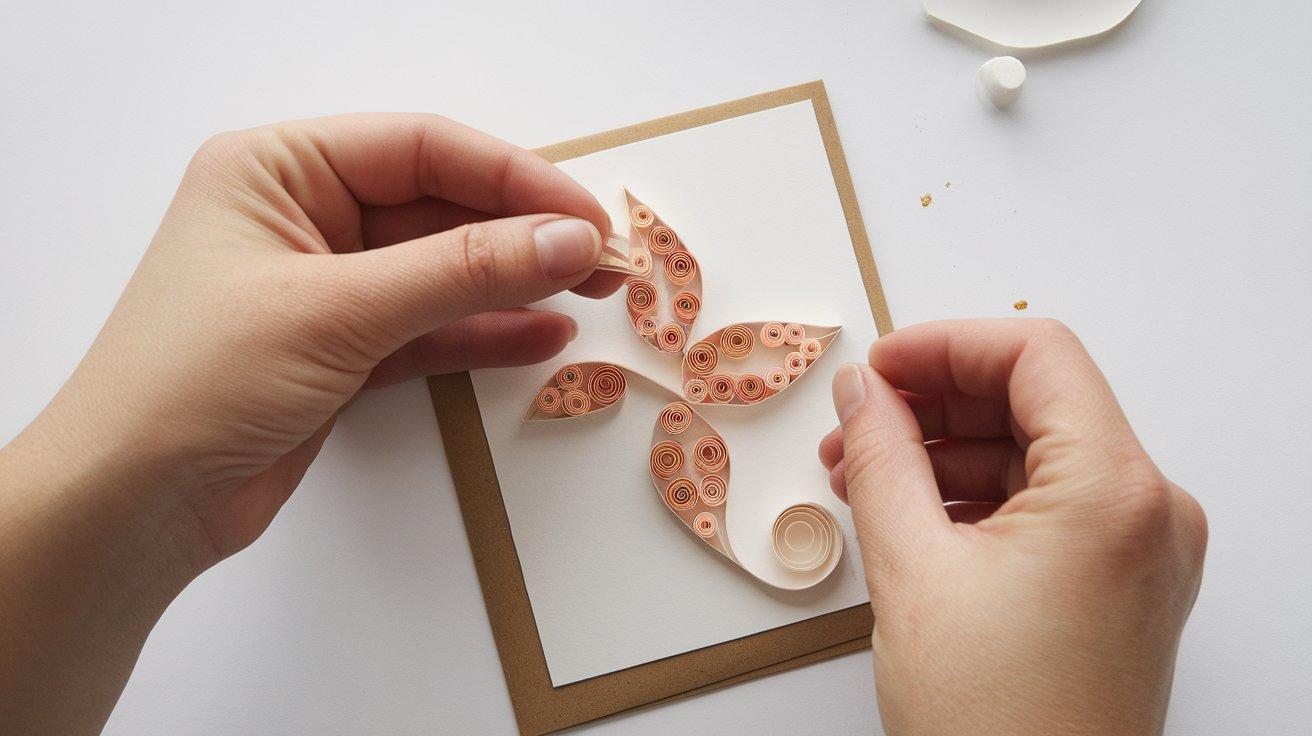
Step 3: Practice Combining Shapes
Once you master basic shapes, try putting them together. Simple flowers made of teardrop petals around a tight coil center make great practice pieces.
Play with different colors and sizes to see how they work together. This helps you understand design basics before moving to bigger projects.
- Create simple designs by combining basic shapes, such as flowers or leaves
- Start with a small project like a flower with 5-7 petals
- Try various color combinations to see what works best
Step 4: Design Your First Project

Planning ahead saves frustration when working on your first real project. Sketch your design on paper and list all the shapes you’ll need to complete it.
Start with something small like a greeting card or simple wall hanging. This gives you a quick win and builds your confidence for larger projects.
- Plan a simple project like a greeting card or decorative motif
- Sketch the design and determine the shapes needed
- Count how many of each shape you’ll need
Step 5: Assemble and Finish
Putting your project together takes patience and care. Apply small amounts of glue to attach your shapes to the base, working from the center outward.
Give your finished piece enough time to dry fully before handling it. Taking photos helps you see your progress and share your work with others.
- Glue the shapes onto your base material following your design
- Allow the project to dry completely before handling
- Take a photo of your finished work
Video Tutorial
I’d like to give credit to HGTV Home for their informative video, which served as a reference for this guide.
Advanced Quilling Techniques and Innovations
3D Quilling
This method takes quilling off the flat surface. You can build structures that stand up or hang in space. Try making small boxes, ornaments, or jewelry. The key is to create a strong base that supports your design. Start with simple forms like balls or cubes before trying complex shapes.
Combining Quilling with Other Crafts
Quilling pairs well with many other crafts. Add quilled elements to cards, scrapbooks, or photo frames. Mix quilling with painting for textured wall art. Join quilled pieces with beads for unique jewelry. The paper strips can add texture and interest to almost any craft project.
Digital Design and Quilling
Use computers to plan complex quilling projects. Draw your design first in a simple art program. Print it out as a template to follow. This works well for exact patterns or when you want to copy a specific image. Many quillers share digital templates online for others to use.
Innovative Materials and Techniques
Try different papers for new effects. Metallic papers catch light and shine. Textured papers add visual interest. Some artists use fabric strips instead of paper. Others try plastic, foil, or even thin metal. The basic rolling method works with many flat, flexible materials.
Quilling Patterns and Design Inspirations
Exploring Pattern Libraries
Find quilling patterns in books at craft stores or libraries. Look online for free patterns on craft blogs and Pinterest. Join quilling groups on social media to see what others create. Many sites offer both free and paid patterns for all skill levels.
Creating Custom Designs
Start by tracing simple shapes like flowers or animals. Fill in the outlines with quilled pieces. Learn about color theory to make your designs pop. Use grid paper to plan geometric patterns. Take photos of things you like and turn them into quilling designs.
Seasonal and Thematic Ideas
Make holiday ornaments or cards with themed designs. Spring calls for flowers and butterflies. Summer themes include beach scenes and sunshine. Fall brings leaves and pumpkins. Winter offers snowflakes and holiday motifs. Think about events like birthdays and weddings, too.
Showcasing Notable Works
Look at work by expert quillers for ideas. Ask to display your art in local shops or galleries. Enter craft fairs or contests to share your work. Post photos online to connect with other quillers. Seeing what others create can spark new ideas for your own projects.
Building a Career in Quilling
Quilling can grow from a hobby into a profitable business with the right approach and dedication. Many artists have turned their paper craft skills into full-time careers through selling, teaching, and connecting with the larger craft community.
1. Monetizing Your Craft
Sell your quilled items online through sites like Etsy or eBay. Set up at local craft fairs and art shows. Take custom orders for special events like weddings.
Price your work based on time, materials, and skill level. Start with small items that sell quickly, like cards or jewelry.
2. Workshops and Teaching
Offer classes at community centers or craft stores. Create kits with tools and materials for students. Make step-by-step guides for common projects.
Film tutorials to share online. Teaching others helps you master your own skills while earning money.
3. Networking
Join quilling groups online and in person. Attend craft shows to meet other artists. Collaborate with different types of crafters on joint projects.
Share your work and comment on others’ creations. Building connections helps you learn and find new chances to grow.
Conclusion
Quilling turns simple paper strips into beautiful art with just a few basic tools.
I showed you the main shapes, methods, and steps to start your first projects. The craft offers both fun hobby time and a possible way to earn money.
What matters in quilling? Practice. Your first coils may look messy, but keep trying. Each project will look better than the last. The hours spent rolling and shaping paper lead to works that amaze friends and family.
Why not try quilling today? Start with basic shapes, then build to more complex designs.
Your craft box probably has most tools you need already. Pick up some paper strips and see what you can create!
Frequently Asked Questions
How Long Does It Take to Become Good at Quilling?
Most people can master basic shapes in 2-3 weeks of regular practice. More complex designs may take a few months to perfect, depending on how often you practice.
Can Children Do Quilling Safely?
Yes! Children ages 8 and up can enjoy quilling with supervision. For younger kids, pre-cut strips and child-safe glue make it easier and safer to try.
Will My Quilled Artwork Last Over Time?
With acid-free paper and proper display (away from direct sunlight and moisture), quilled artwork can last for decades without fading or falling apart.