
I know how frustrating it can be when you want to enjoy fresh air without dealing with bugs flying into your home.
Store-bought screen doors either don’t fit properly or cost way more than they should.
You deserve a custom solution that fits your door frame perfectly and matches your home’s style.
I’m going to show you exactly how to build a professional-quality screen door from scratch using basic tools and materials.
This isn’t just another generic tutorial – these are the same techniques I use to create doors that last for years and look great.
In this guide, I’ll walk you through every step, from measuring and cutting materials to installing the final trim pieces that give your door a polished finish.
What is a Screen Door?
A screen door is a lightweight secondary door that sits in front of your main entrance. It features a frame with mesh screening that allows fresh air inside while keeping insects and debris outside.
The basic components include a frame made from wood, aluminum, or vinyl, plus mesh screening for the barrier.
Wood offers customization, while aluminum provides durability. Mesh options include fiberglass, aluminum, and pet-resistant varieties.
Essential hardware includes hinges for operation, spring mechanisms for automatic closing, handles for grip, and weather stripping for sealing.
These components create an effective barrier that enhances home comfort and security.
Primary Functions of Screen Doors
1. Air Circulation: Screen doors improve ventilation throughout your home. They let cool breezes enter while maintaining security. This natural airflow reduces reliance on air conditioning during mild weather. Better air circulation also helps prevent moisture buildup inside.
2. Insect Protection: The mesh barrier keeps flying and crawling insects outside. Fine mesh prevents even small bugs from entering your home. This protection allows you to enjoy open doors without pest problems. Quality screening remains effective for several years.
3. Security Benefits: Screen doors add an extra layer of security to your entrance. They allow you to see visitors before opening the main door. Some models include locks for additional protection. The barrier also prevents small children or pets from wandering outside unsupervised.
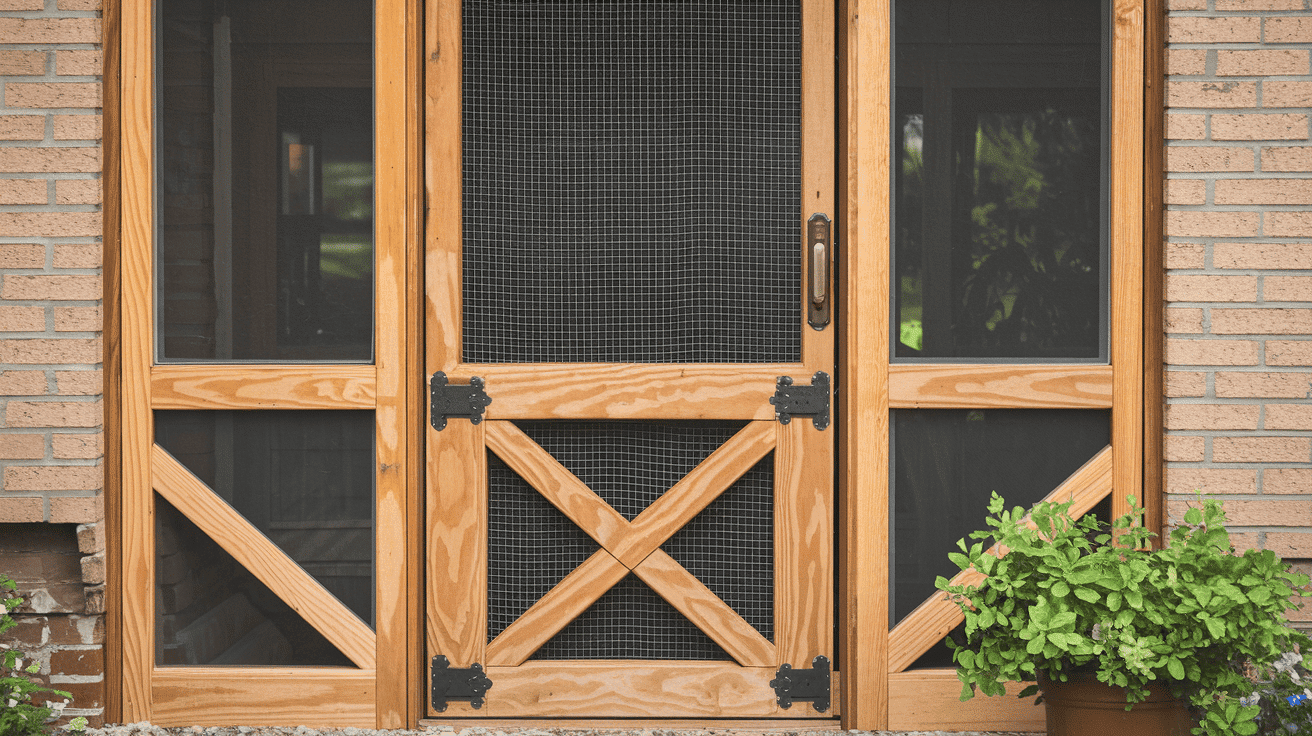
Common Types of Screen Doors
Screen doors come in several designs to match different home styles and functional needs. Each type offers unique benefits for ventilation, weather protection, and visual appeal.
1. Full-View Screen Doors

These doors feature a large screen area with minimal frame visibility. They maximize view and airflow through your entrance while maintaining a clean look.
Full-view doors work well for homes with attractive outdoor views and complement most home styles. They cost less than other options and are easier to install but offer less weather protection.
2. Storm Screen Doors

Storm doors combine screen panels with glass inserts that switch based on weather conditions. Use screen panels for airflow during warm months and glass inserts for insulation in cold weather.
These doors provide year-round functionality and superior weather protection. They cost more than basic models but offer better versatility and durability.
3. Retractable Screen Doors
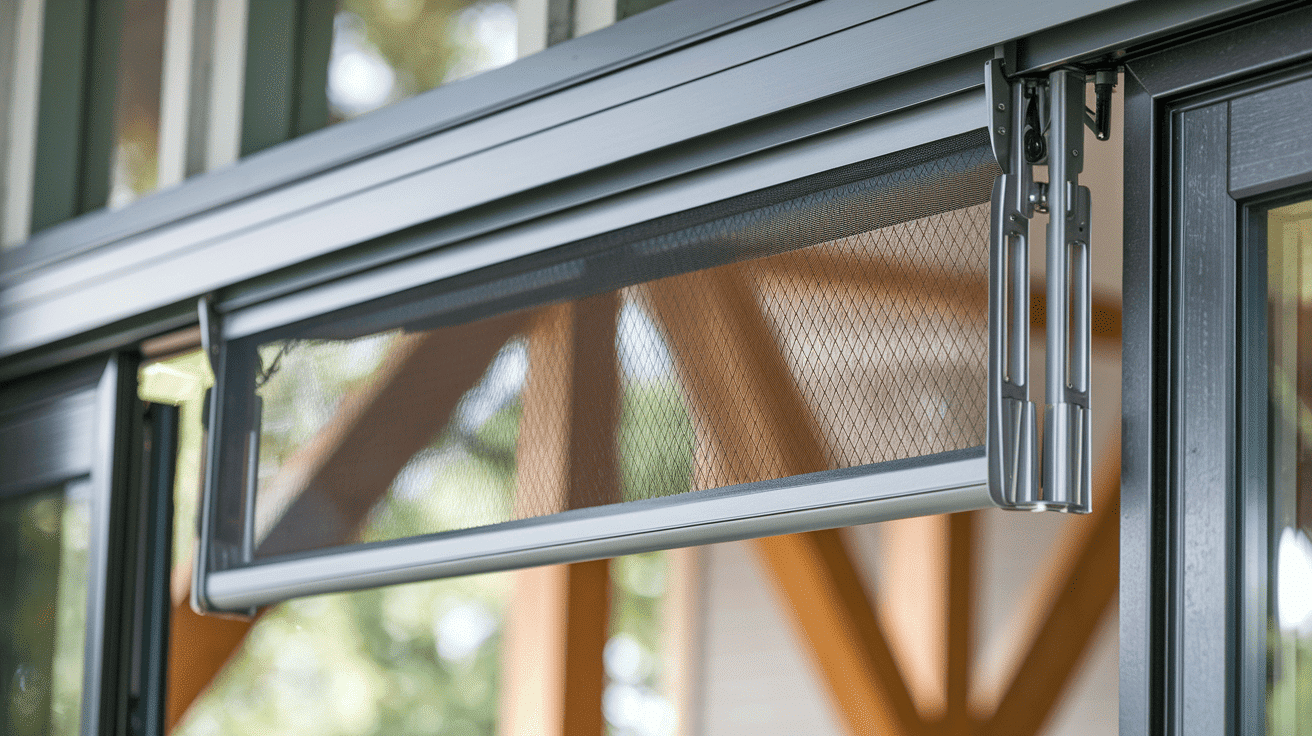
These doors roll up completely when not in use, creating a clean appearance. They mount to the door frame and extend when needed for protection.
Retractable screens work well for wide openings, French doors, or sliding doors. They require more maintenance than fixed screens but offer ultimate flexibility without permanent visual impact.
Step-by-Step Instructions to Make a Screen Door
Building a custom screen door requires careful planning and proper execution of each construction phase. Follow these detailed steps to create a functional and attractive screen door that fits your home perfectly.
Tools Required:
| Tool | Purpose |
|---|---|
| Miter saw | Cut boards to size. |
| Table saw | Trims edges to square. |
| Pocket hole jig (Kreg) | Creates pocket holes for strong joints. |
| Face clamp | Holds pieces during assembly. |
| Drill | Drills holes and drives screws. |
| Random orbit sander | Smooths surfaces. |
| Multi-tool | Trims pocket hole plugs. |
| Staple gun | Secures screen mesh. |
| Brad nailer | Attaches trim. |
Materials Required:
| Material | Purpose |
|---|---|
| Quarter-sawn lumber | Makes the frame. |
| ¼-inch trim pieces | Adds trim to the door. |
| Screen mesh | Keeps bugs out. |
| Wood filler | Fills pocket holes. |
| Paint | Finishes the door. |
| Staples | Attaches screen mesh. |
Step 1: Prepare and Cut Frame Materials

Getting the right measurements is the foundation of any successful screen door project. Accurate cuts ensure proper fit and alignment throughout the entire build process.
- Cut boards one inch longer than the final length.
- Remove rounded edges at the table saw.
- Rip boards to the desired width.
- Cut ¼-inch thick pieces for trim.
- Double-check all measurements.
Pro Tip: Mark all pieces with chalk before cutting to avoid confusion during assembly. Keep cut pieces organized by size to speed up the building process.
Step 2: Create Pocket Holes for Assembly

Pocket holes provide strong, hidden connections that keep the frame sturdy. The Kreg K5 jig makes this process simple and ensures consistent hole placement every time.
- Set up the Kreg K5 jig for board thickness.
- Drill two holes at the ends of the narrow boards.
- Create three holes for wider pieces.
- Clean out wood shavings from holes.
Pro Tip: Test the jig setup on scrap wood first to ensure proper depth and angle. Use a shop vacuum to remove all debris from holes for better screw fit.
Step 3: Assemble the Frame and Add Support
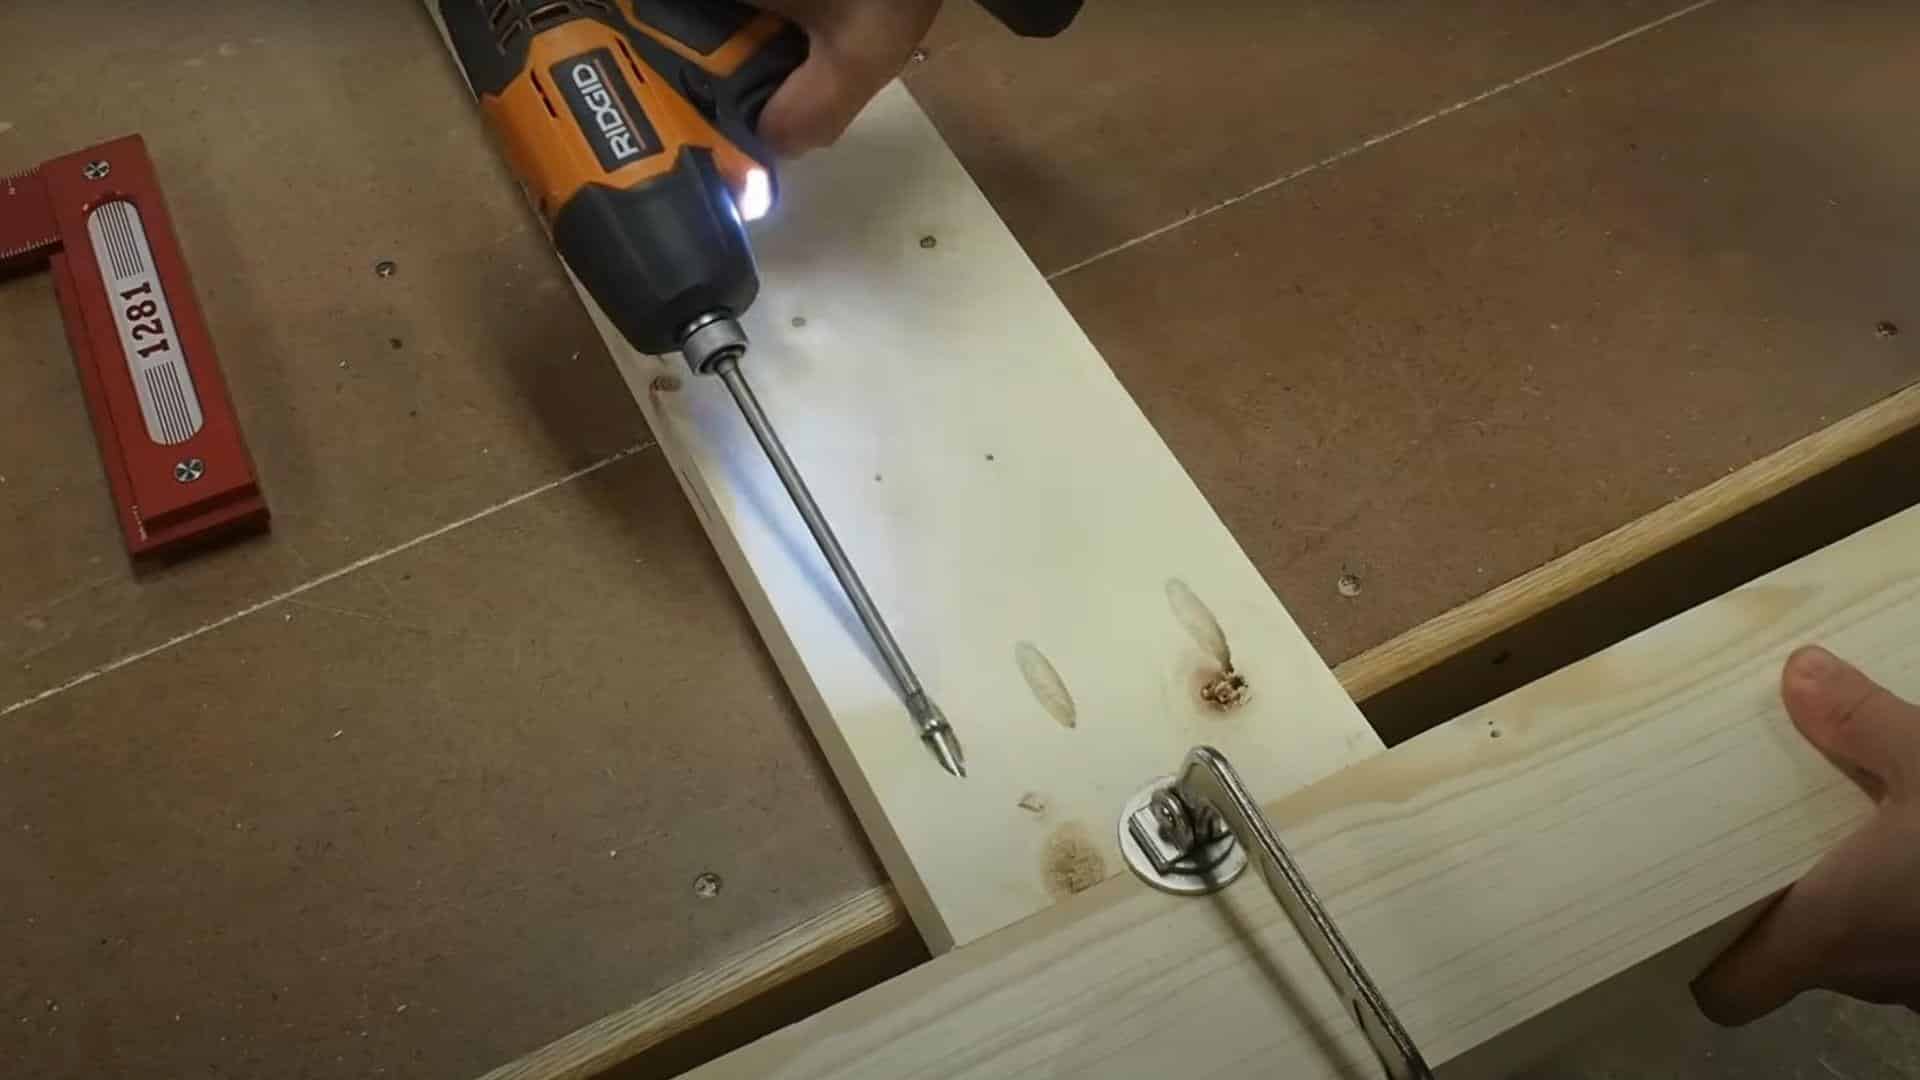
Building the frame requires careful attention to squareness and alignment. The cross member adds essential structural support that prevents sagging and extends the door’s lifespan.
- Connect frame pieces with clamps and screws.
- Measure diagonally to check the square.
- Position the cross member at the bottom.
- Secure the cross-member with screws.
- Verify frame stays square.
Pro Tip: Work on a flat surface to prevent twisting during assembly. Check measurements frequently as small errors compound quickly in frame construction.
Step 4: Hide Pocket Holes with Plugs
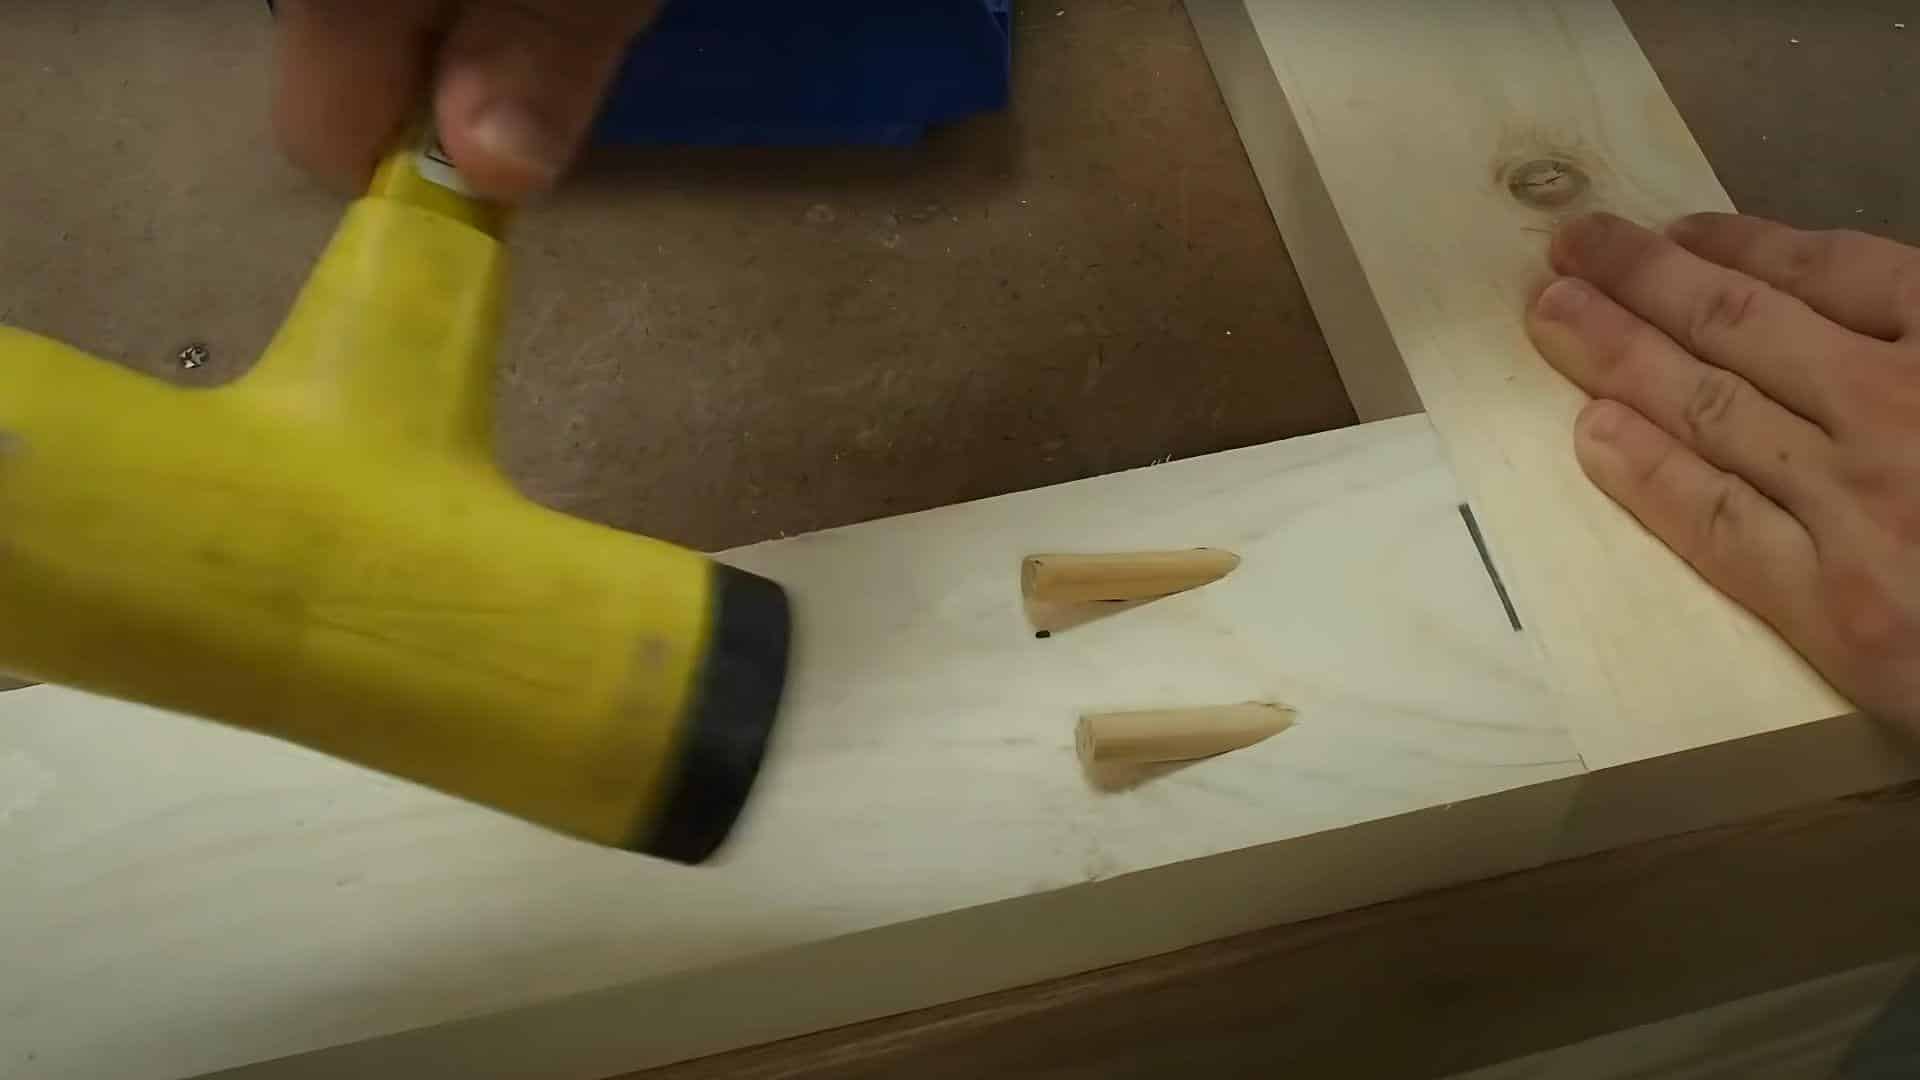
Concealing pocket holes gives the door a clean, professional appearance. Properly installed plugs blend seamlessly with the wood grain when trimmed and finished correctly.
- Cut 3/8-inch dowel plugs to length.
- Apply wood glue to plugs.
- Insert plugs into pocket holes.
- Trim excess with multi-tool.
Pro Tip: Choose dowel plugs that match your wood species for better camouflage. Allow glue to cure fully before trimming to prevent loose plugs.
Step 5: Sand and Shape the Edges
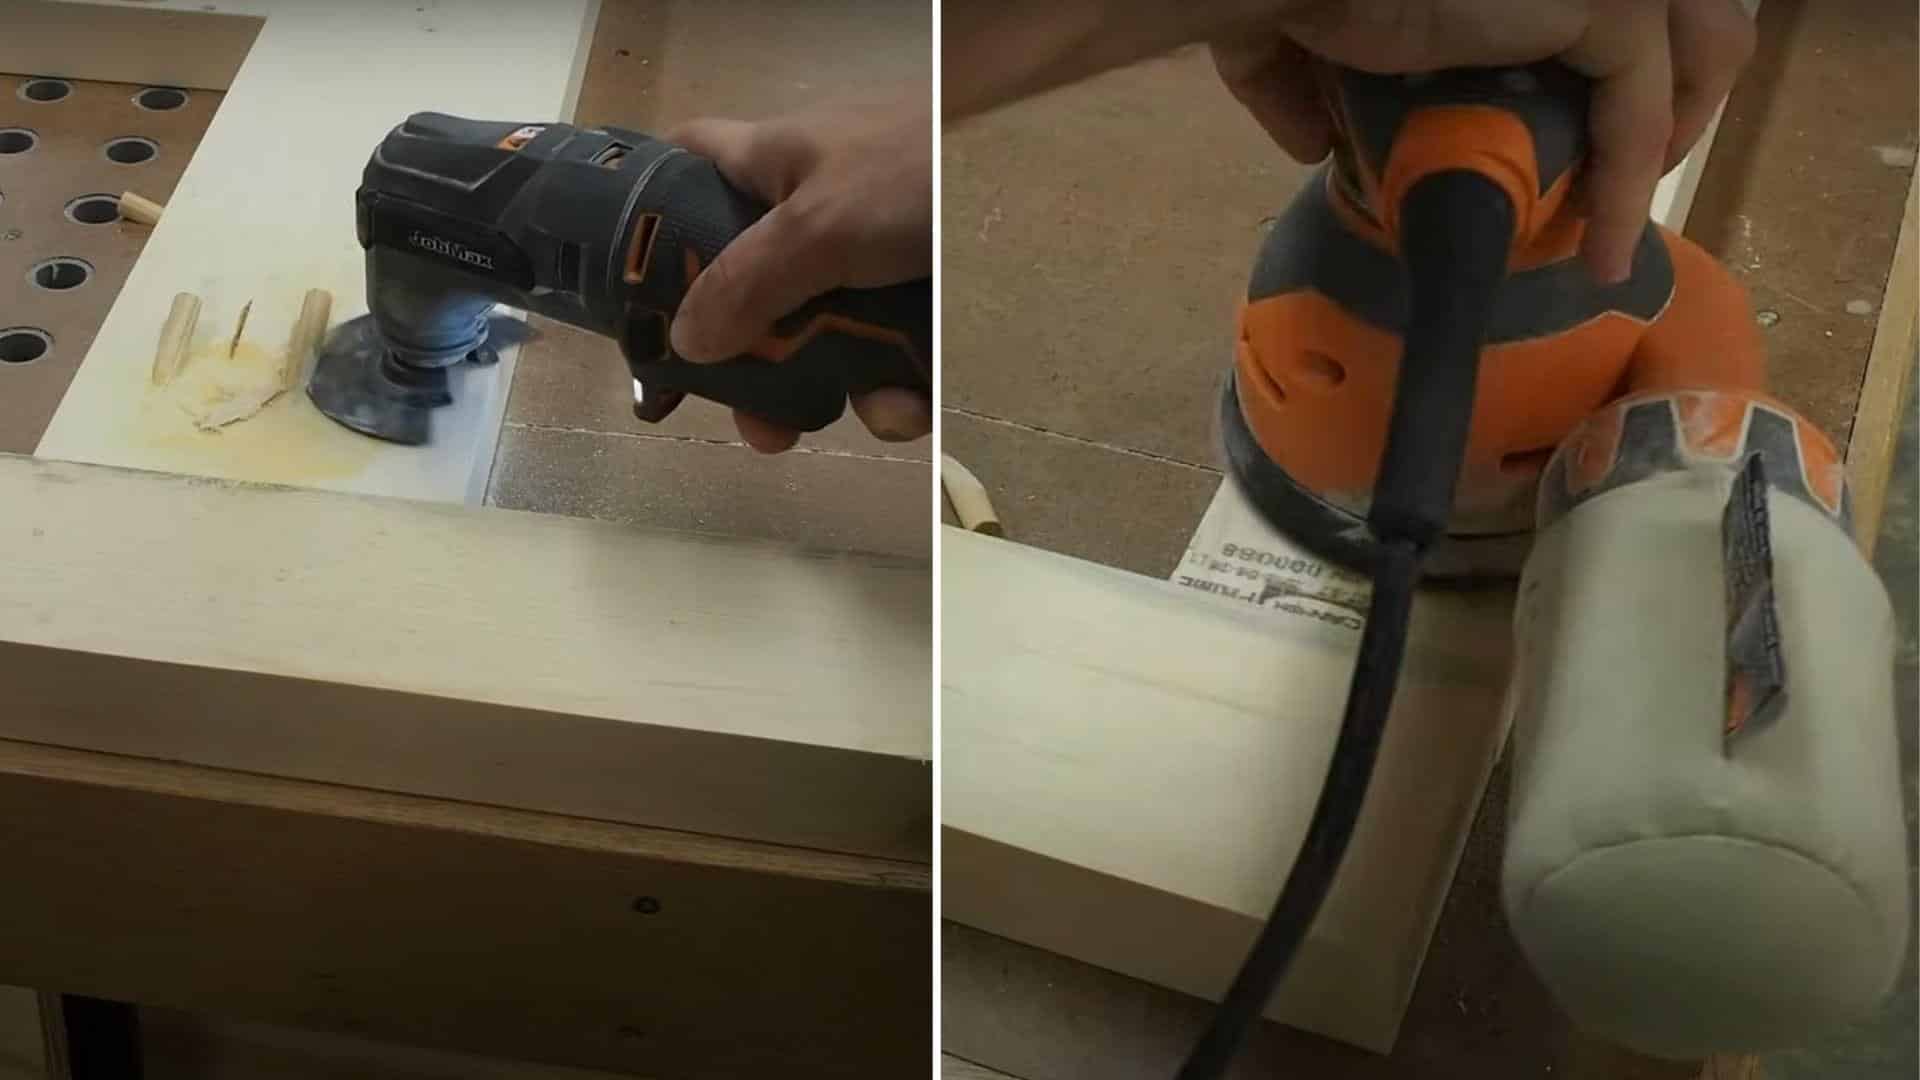
Smooth surfaces and rounded edges create a professional finish that feels good to touch. This step prepares the wood for paint and prevents splinters.
- Sand entire door with random orbit sander.
- Progress from coarser to finer grits.
- Use ⅛-inch roundover bit on edges.
- Remove all dust before painting.
Pro Tip: Sand with the grain direction for the smoothest finish possible. Use tack cloth between grit changes to remove all dust particles.
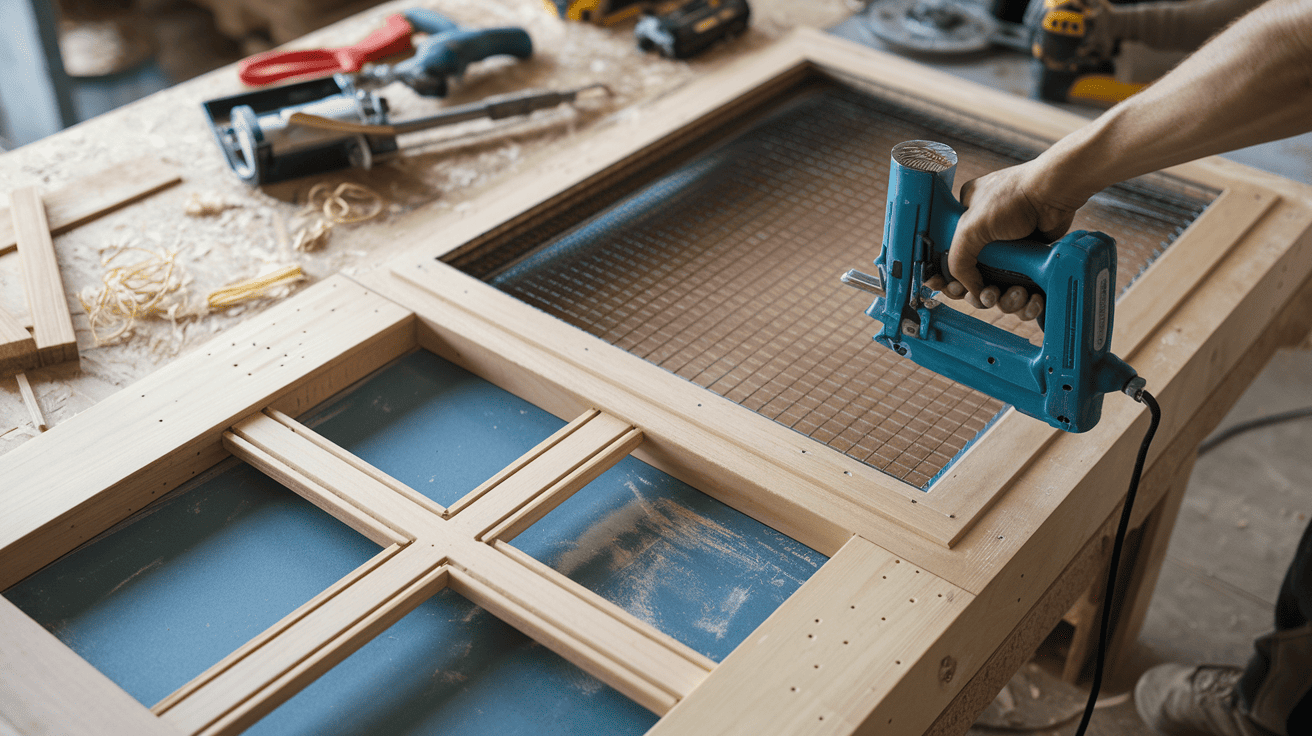
Step 6: Apply Paint and Attach Screen
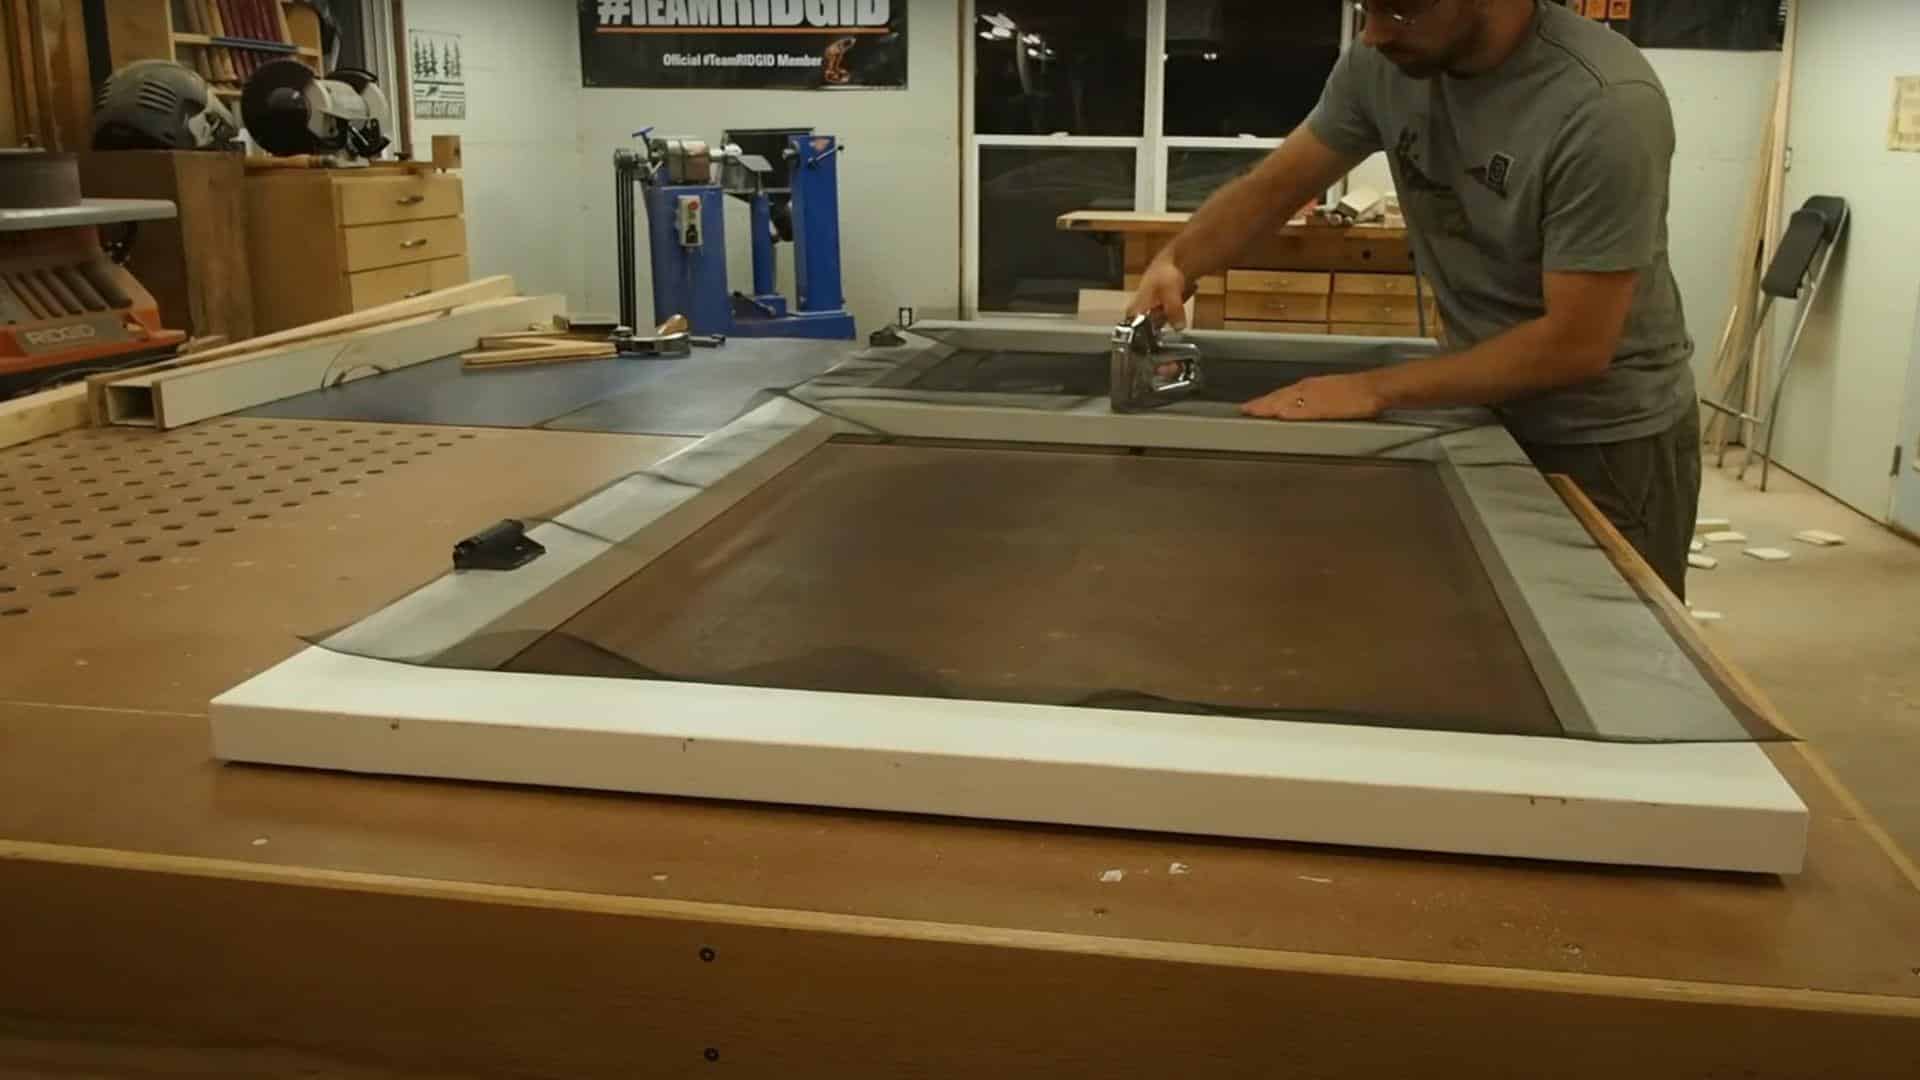
Proper painting protects the wood from weather damage while the screen mesh provides the functional barrier. Quality materials in this step ensure long-term performance.
- Apply primer to all surfaces.
- Paint frame with exterior paint.
- Stretch screen mesh across opening.
- Secure mesh with staples.
- Keep mesh taut.
Pro Tip: Use a screen rolling tool to ensure even mesh tension without tears. Start stapling from the center of each side and work toward corners.
Step 7: Install Finishing Trim

The trim pieces hide the screen attachment points and give the door a polished, store-bought appearance. Precise cuts and careful installation make all the difference.
- Cut trim pieces with 45-degree angles.
- Test-fit all pieces before installation.
- Attach trim using Brad nailer.
- Ensure trim covers staples and edges.
- Check corner alignment.
Pro Tip: Use a miter box for consistent 45-degree cuts on trim pieces. Pre-drill nail holes in hardwood trim to prevent splitting during installation.
Video Tutorial
Special thanks to Woodshop Mike for providing valuable insights in their video, which I referenced while creating this guide.
Troubleshooting Common Issues
Even well-built screen doors can develop problems over time. Here are solutions to the most frequent issues you might encounter during construction or after installation.
1. Sagging Screen: Remove loose staples and re-stretch mesh material firmly across the frame. Add more staples around the perimeter with closer spacing for a better hold. Work from the center outward to maintain proper tension and alignment.
2. Wrinkled Screen: Remove the affected section and reinstall with proper tension. Work from center to corners, keeping the mesh square with the frame. Ensure material stays aligned during the installation process.
3. Loose Trim: Check the Brad nailer’s penetration depth and add more nails at the corners. Pre-drill holes in hardwood trim to prevent splitting. Focus extra nails on high-stress areas for better security.
4. Wobbly Frame: Check and tighten all pocket screws in frame joints. Verify the frame is square using diagonal measurements. Add corner braces if needed for additional support.
5. Small Tears: Use clear nail polish for tiny holes or screen repair tape. Cut matching mesh patches for larger tears. Secure the patch with staples around all edges.
6. Sticky Hardware: Clean hinges and handles with mild soap and water. Apply light oil to moving parts for smooth operation. Remove dirt and debris, then test the hardware function.
Conclusion
Building your own screen door brings together functionality and craftsmanship in one rewarding project.
You’ve learned the essential steps from measuring and cutting materials to installing the finishing touches that create a professional appearance.
This custom approach saves money while ensuring a perfect fit for your specific doorway dimensions.
The skills you’ve developed through this project extend far beyond just screen doors.
You now understand pocket hole joinery, proper sanding techniques, and precision measuring, valuable abilities for future woodworking endeavors.