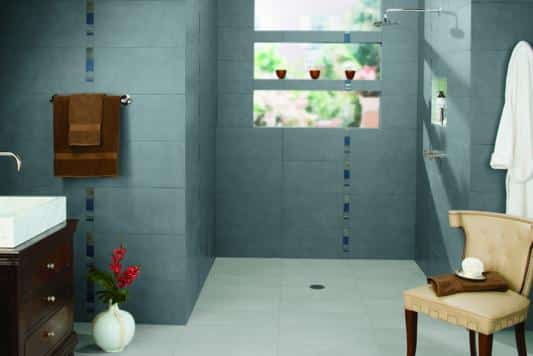
When it comes to creating a modern and accessible bathroom, a curbless shower has always ranked all the charts. Open up your bathroom space and boosts your daily routine with a curbless shower haven, where entering your bathroom feels like stepping into a fancy spa without the high price.
Say goodbye to those annoying shower curbs that always hurt your toes. Fantasize a shower that doesn’t have a high step and lets you get in easily. No more tripping over the curb, which always seems to surprise you. This shower adds beauty and style to your space, making your bathroom a peaceful and refreshing haven. You can choose from simple, modern designs to excessive ones that make you feel like you’re in a rainforest.
So, get ready to move forward from those toe-hurting curbs and join us on a fun journey to discover how to build a curbless shower that will make your friends jealous.
Step 1. Determine the Location of The Base

Once you have figured out the best spot for the shower in your bathroom, the next step is to check the plumbing and drainage needs. Ensure the chosen area is easily accessible to the existing water and drainage pipes. It’s important to get help from a professional plumber to make the necessary adjustments for the shower plumbing. Also, think about the materials and how the shower will look to fit with your bathroom’s design.
Pick materials that look nice and can stand water. This will make the curbless fall look good and last a long time. Additionally, consider safety. Adding non-slip flooring and grab bars can make the shower safer, especially for people with mobility issues or the elderly. By thinking about these things and talking to professionals when needed, you can successfully build a shower that works well and looks great in your bathroom.
Step 2. Cut the Subfloor

After you have marked where you want the shower base to be on the floor, get the tools you need, like a circular saw or jigsaw with the right kind of blade for cutting through the floor material. It’s really important to wear safety gear like goggles and gloves to protect yourself while you cut. Start by making small cuts along the marked lines to guide the saw and prevent damage to nearby areas.
Take your time and go slowly, letting the saw do the work while you keep your hand steady. Be careful of any plumbing or electrical lines on the floor, and make sure you don’t cut into them. Once the cut area is done, double-check its size to make sure it matches the shower base correctly. Now that the floor is cut, you can move on to the next steps of installing the curbless shower.
Step 3. Reinforce the Floor
Another way to strengthen the floor near the depressed area is by using a cement backer board, along with pressure-treated lumber. A cement backer board is a strong and stable material made specifically for supporting tiles, making it a great choice for a curbless shower. It can handle moisture well and is very strong, which is important in a shower.
By combining pressure-treated lumber and cement backer board, you can make sure the floor around the shower is really strong and can handle a lot of use over time. This inclusive approach to strengthening the floor not only makes the whole structure safe and stable but also reduces the risk of future water damage.
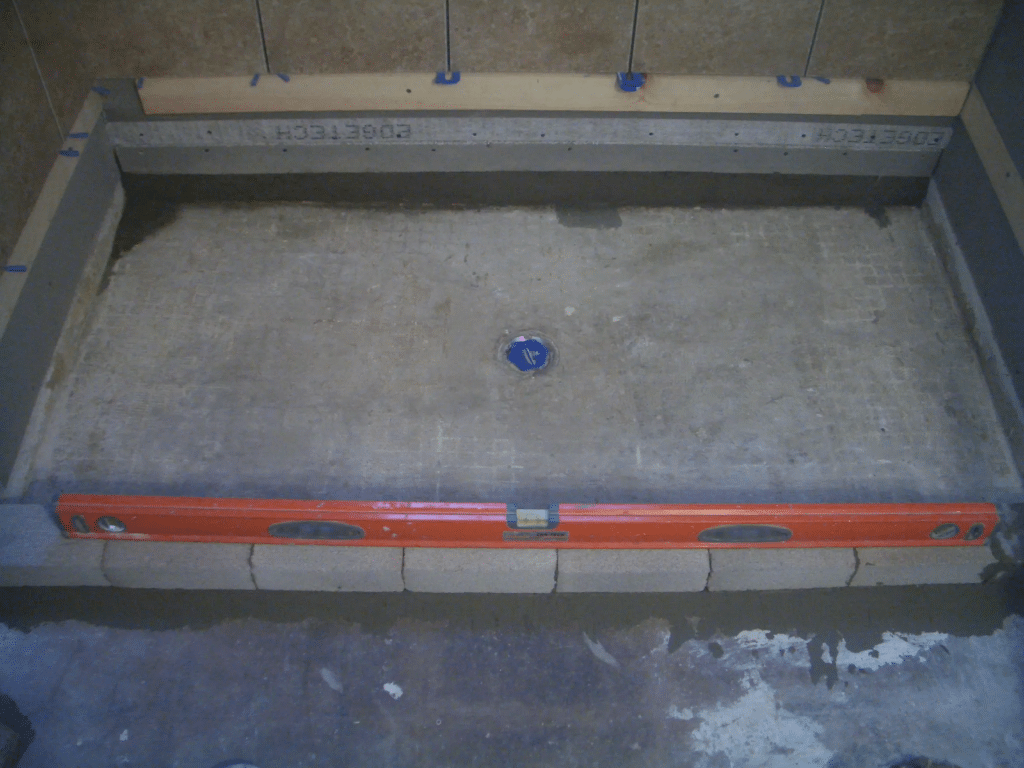
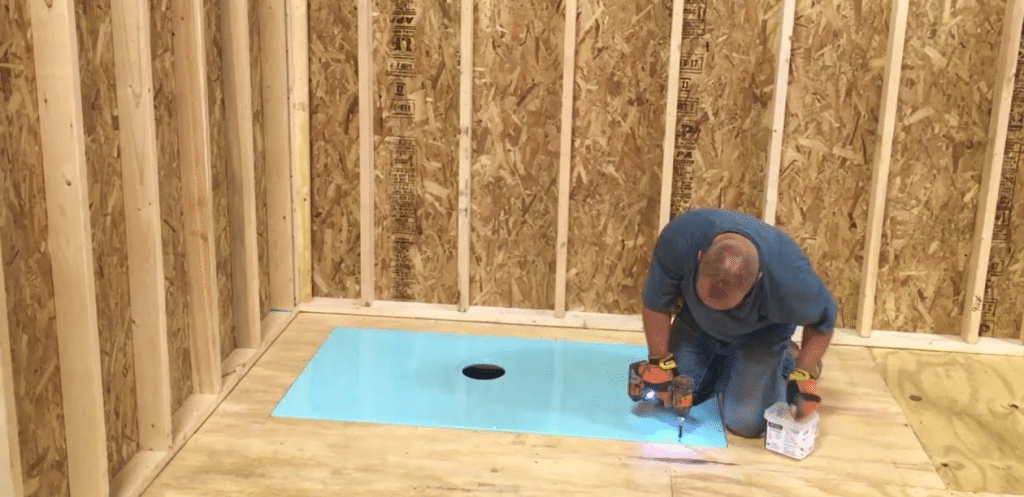
Step 4. Fasten Pan to The Floor
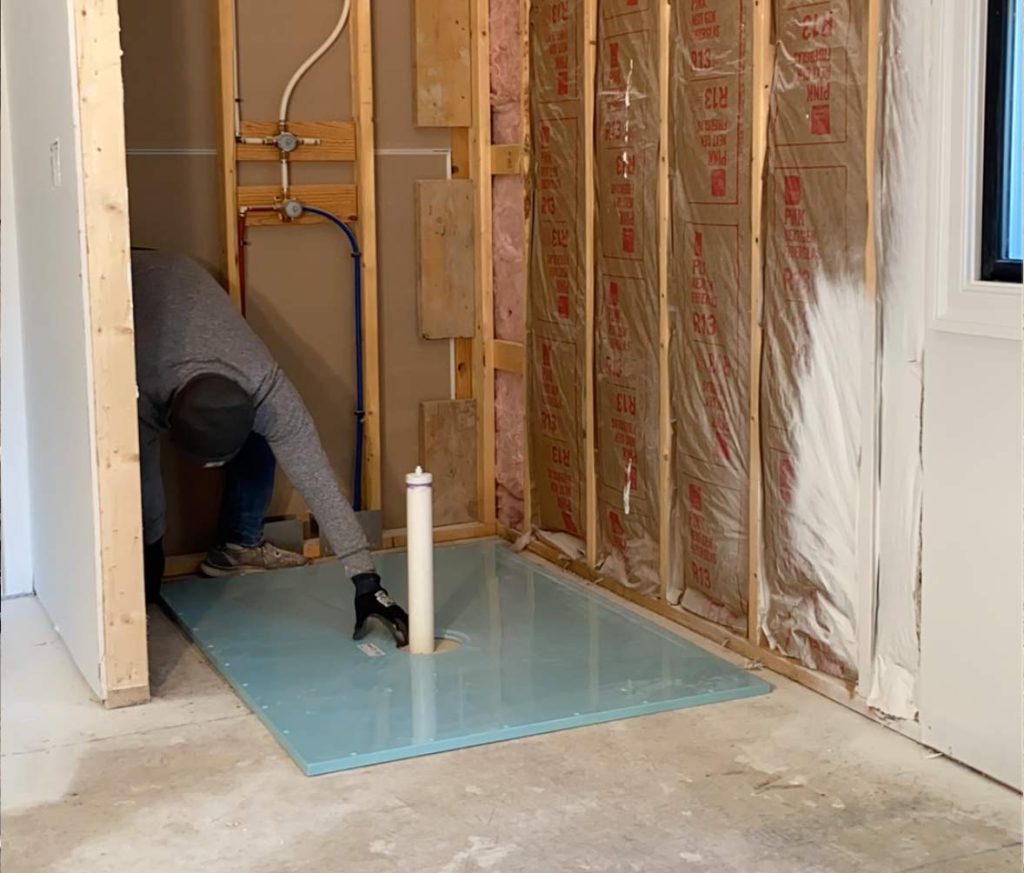
When setting up a curbless shower, attaching the pan to the floor is essential. This makes sure the shower is stable and safe. Before you begin, check that the floor is strong enough to hold the weight of the shower pan and the people who will use it. Carefully place the shower pan into the recessed area on the floor. It should fit perfectly, creating a smooth and nice-looking surface.
Follow the instructions from the manufacturer closely. They will give you detailed guidance based on the specific shower pan model you have. Also, make sure to use the recommended sticky or fasteners to secure the pan to the floor firmly. This adds extra stability and prevents any movement or shifting of the shower pan over time. It’s an important step for a long-lasting and safe installation.
Step 5. Install Backer Board on Floor
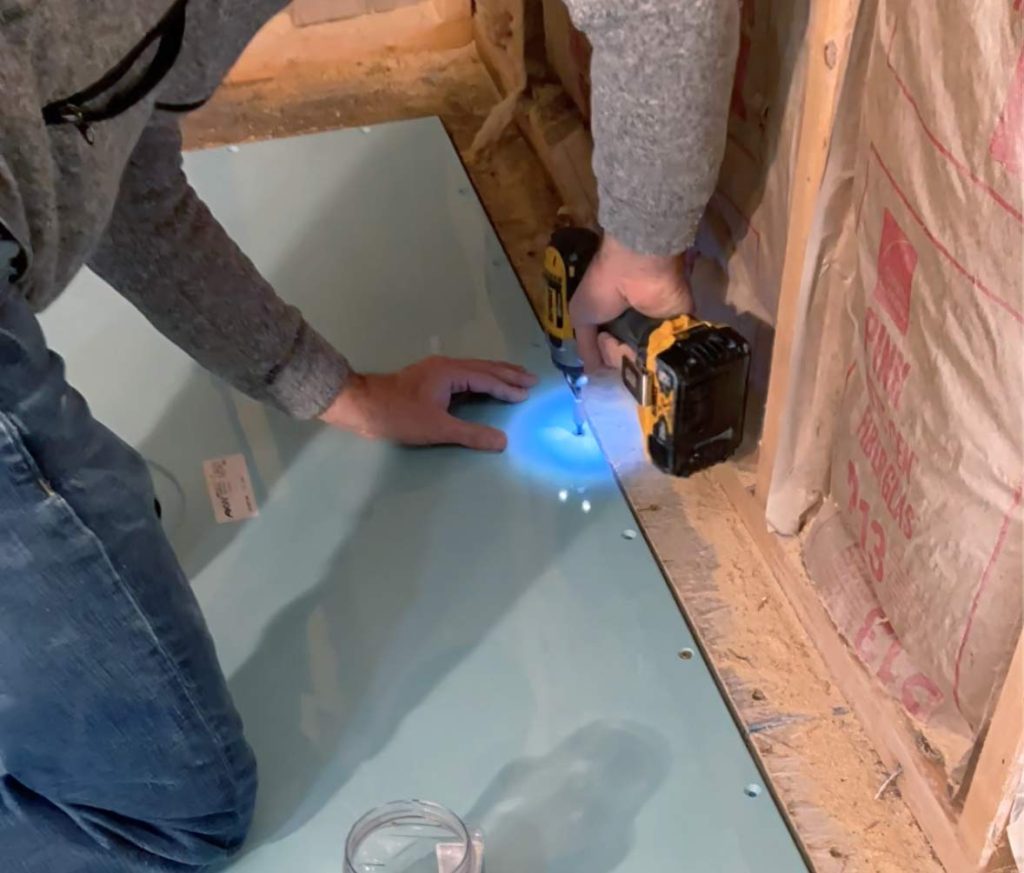
After securely placing and leveling the shower pan, the next important step in building the shower is to install a strong backer board on the entire floor. The backer board is crucial because it provides a stable and solid surface for the tiles or other flooring materials to stick to, ensuring that the shower structure is durable and long-lasting.
Start by measuring and cutting the backer board panels to fit the floor area precisely, considering any necessary holes for drains or fixtures. Backer boards are usually made of water-resistant materials like cement or fiber-reinforced gypsum, perfect for wet areas such as showers because they resist water and remain strong.
Step 6. Apply Waterproofing to The Curbless Shower
To make sure your fall stays strong and works well for a long time, it’s really important to use a good waterproofing solution. If water leaks out, it can cause big problems in your bathroom, like damage to the structure, mold growing, and making everything look bad.
That’s why it’s important to put on a special waterproof coating on all the surfaces in the shower. This means the floor, walls, and the part where you walk into the shower with no limitations. The coating acts like a barrier that water can’t get through, so it keeps the shower area sealed and stops water from getting out into the rest of the bathroom.
Step 7. Install the Drain
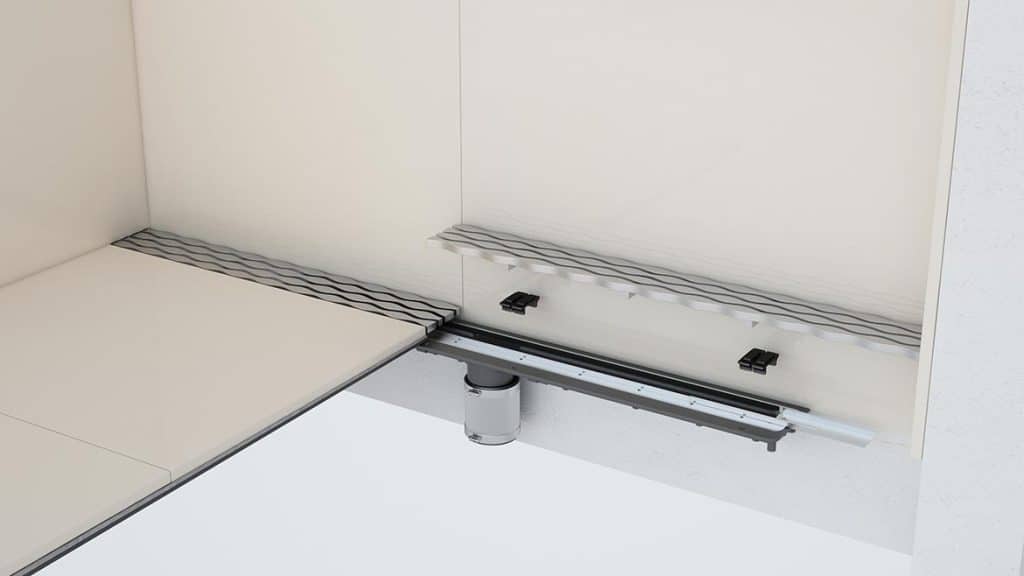
Installing the drain is a very important and crucial step when building your curbless shower. It needs to be done with great care and attention to detail. First, you need to pick the right spot for the drain, which should be in the exact middle of the shower base. This way, the water will flow out properly, and there won’t be any areas where it collects, making the shower safe and usable.
When choosing a drain, make sure it matches the design and layout of your fall. There are different types available, like long straight drains or the more traditional round ones, each with special features that can make your shower look great and work well.
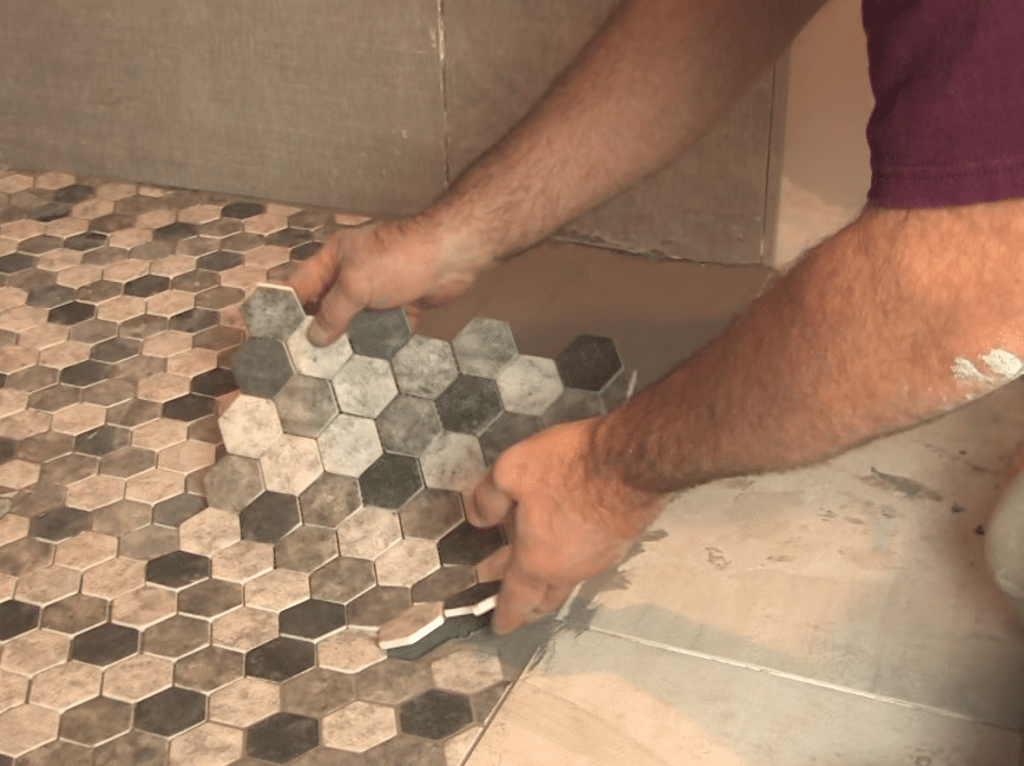
Step 8. Lay the Tile
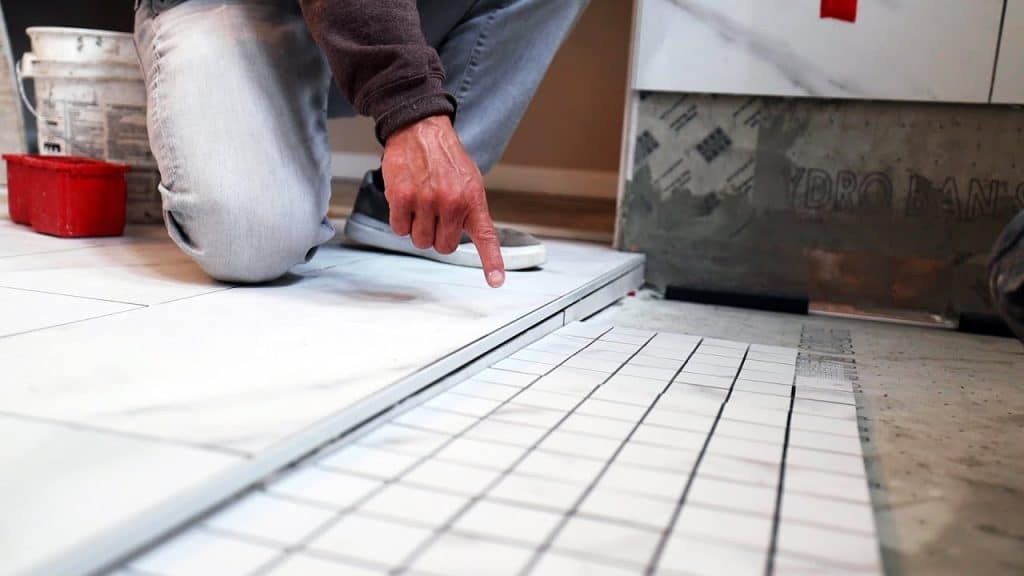
The first step to making a curbless shower is to lay down the tiles. Picking the right tiles is important for making a safe and good-looking shower space. Choose tiles that won’t make you slip, like porcelain tilesor natural stone, to avoid accidents and keep them easy to clean.
When you put the tiles, start from the middle of the shower area and go outward. This way, the layout will look smooth and balanced, making your bathroom nicer. To make a smooth transition from the shower to the rest of the bathroom floor, think about using a linear drain system. It will not only make it easier to get in and out but also make your curbless look fancy.
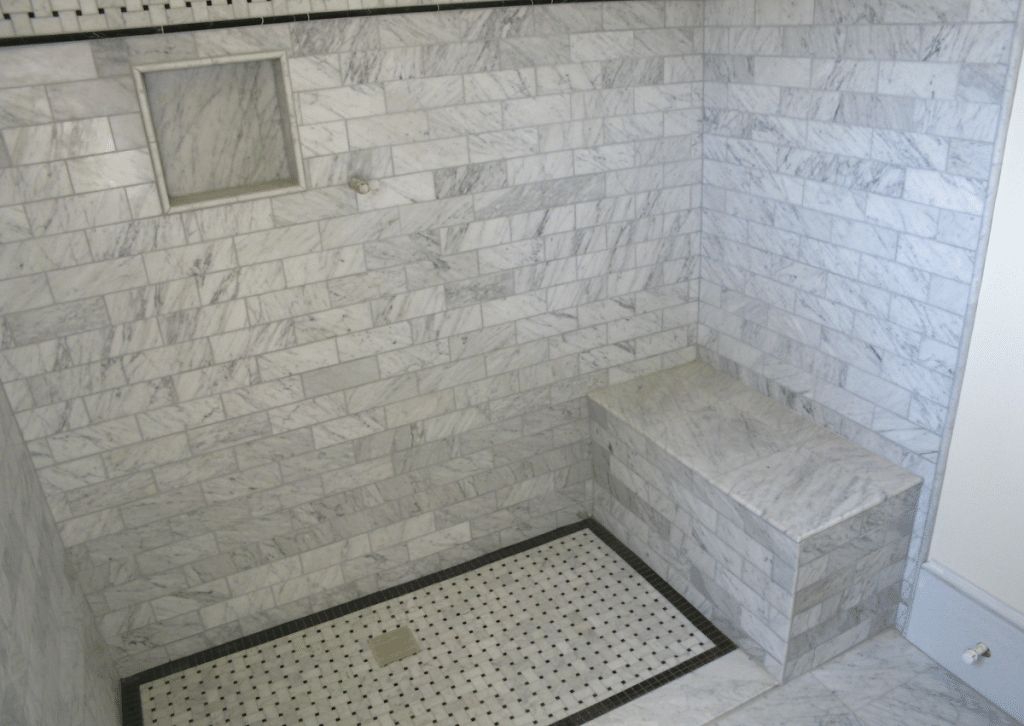
Step 9. Stylish Shower Walls
Make your curbless shower look more attractive by paying close attention to the details of your shower walls. Choose large tiles to give your shower a modern and luxurious appearance that will impress anyone who enters.
These big tiles look fancy and make cleaning easier because there are fewer lines where dirt can get stuck. This means you can spend more time enjoying your luxurious shower instead of scrubbing it. To make your shower walls even more special, think about adding decorative accents or a combination of tiles to the design. This will give your shower a personal and stylish touch that makes it truly unique.
Step 10. The Final Touch to Curbless Shower
Creating a curbless fall for your bathroom is a great idea for a modern and natural look. To finish it perfectly, you need to pay attention to some important details. First, choose slip-resistant tiles or textured flooring to make it safe and stylish. Next, install a good drain system that efficiently removes water.
Make sure the floor is sloped and sealed properly to prevent water from pooling. Pick suitable bathing fixtures and fittings that add both functionality and beauty. Lastly, apply a waterproof coating on the walls and floor to keep it safe and durable. By taking care of this final touch, your shower will become the highlight of your modern bathroom.
Step 11. Prefabricated Bases for Curbless Showers
Building shower bases is a fantastic solution for curbless showers, making modern bathrooms more accessible and functional. These ready-made bases are specially designed to remove the traditional shower curb, creating a smooth and level entry into the shower. They are made from strong materials like fiberglass, acrylic, or composite, which keeps them durable and resistant to water damage.
By removing limits, they make bathrooms look better and easier for people with mobility challenges, seniors, and those with disabilities to use. Installing them is simple, saving time and money on construction. With different size options available, these prefabricated shower bases fit various bathroom layouts and designs. They bring together style, accessibility, and convenience, making them a popular choice for falls that are both inclusive and modern.
Conclusion
All in all, building a fall is like giving your bathroom a fancy upgrade, with no barriers, just easy access. By getting clear of the annoying curb, you’re making it super convenient and safe for everyone to get in and out.
It adds a feel of beauty to your bathroom, leaving guests impressed and maybe a little envious. Who needs a red carpet when you have a shower? Lastly, let’s not forget how easy it is to clean. Without a curb to scrub, you can spend less time battling soap scum and more time enjoying yourself. Singing in the shower without slipping becomes a breeze.
In a nutshell, building a curbless shower gives your bathroom a fancy makeover.
Frequently Asked Questions
What is a Curbless Shower, and Why is it Good?
A curbless shower is a flat bathroom floor without any raised edges. It’s great because it’s easy for everyone to use, especially older people or those who have trouble moving. Plus, it makes the bathroom look modern and spacious.
How Do I Make Sure the Water Goes Away in a Curbless Shower?
To avoid water puddles, the shower floor should slope slightly towards the drain in the middle. You can use special materials to stop water from leaking and ensure it drains properly.
What Materials Are Best for a Curbless Shower?
For the shower floor, you can use tiles, stone, or concrete. To prevent slipping, choose porous materials like pebbles or mosaics. Make sure to use waterproof materials like liquid membranes and cement boards to protect the bathroom from water damage.
Do I Need Help from Experts to Build a Curbless Shower?
While some people can try building it themselves, it’s better to ask a professional contractor, especially if it involves plumbing, structure changes, or waterproofing. They know how to do it safely and properly, following all the rules.
Are There Any Other Things to Think About with Curbless Showers?
Sure, You need to create a gentle slope at the shower entrance and pick a good shower door or curtain to keep water in. Also, consider installing grab bars for safety and support. Regular cleaning and good airflow are essential to keep the bathroom fresh and free from mold.