
Do you have an old desk sitting unused in your home? That worn-out piece of furniture might seem ready for the trash, but it holds hidden potential. Many homeowners toss out old desks when they could turn them into something fresh and useful with just a few steps.
A desk makeover can save you money while giving you a one-of-a-kind piece that fits your style perfectly. With some basic tools and materials, you can change that forgotten desk into something you’ll love using every day.
In this guide, I’ll show you a complete desk makeover from start to finish. You’ll learn simple methods to fix, clean, and update an old desk into a beautiful, functional workspace that looks brand new.
Let’s get started!
Why You Should Consider a Desk Makeover?
A desk makeover offers more benefits than you might think. When you update an old desk, you get more than just a nicer-looking piece of furniture.
- Improved Aesthetics: Updating your desk can give your workspace a modern, personalized look. A fresh coat of paint or new hardware can match your room’s color scheme. This small change can make your entire space feel new and put-together.
- Increased Functionality: A makeover can add useful features like extra storage and improved workspace organization. Adding shelves, dividers, or pull-out trays helps keep supplies neat and within reach. This means less time hunting for things and more time getting work done.
- Enhanced Comfort: A comfortable desk encourages better posture and productivity, making it a worthwhile investment. Adjusting the height, adding a keyboard tray, or creating a custom layout for your needs can reduce strain. Better comfort leads to longer focus and fewer aches at the end of the day.
These changes don’t need to cost much money or time, but they can make a big difference in how you use your desk every day.
5 Before and After Desk Makeover Ideas
Let’s look at some real desk transformations that show what’s possible with a little work and imagination.
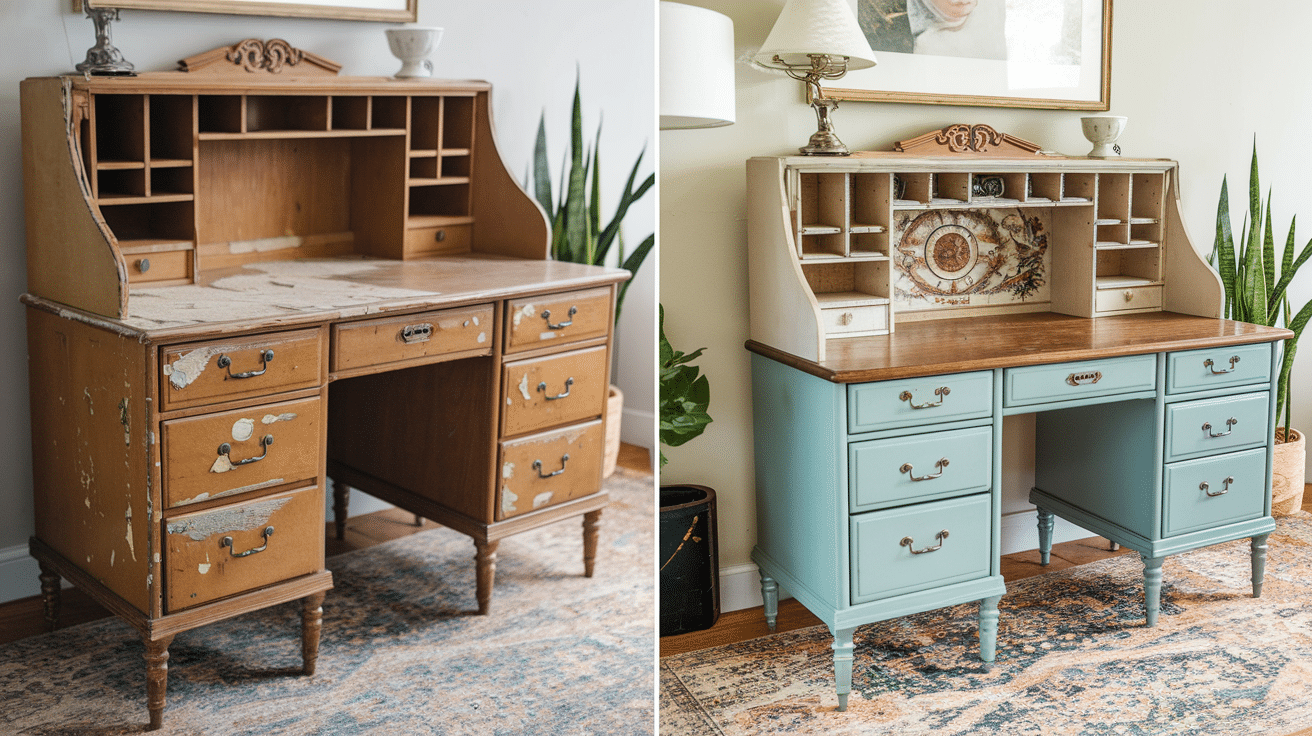
1. Before: Worn-Out Look | After: Fresh and Modern Design
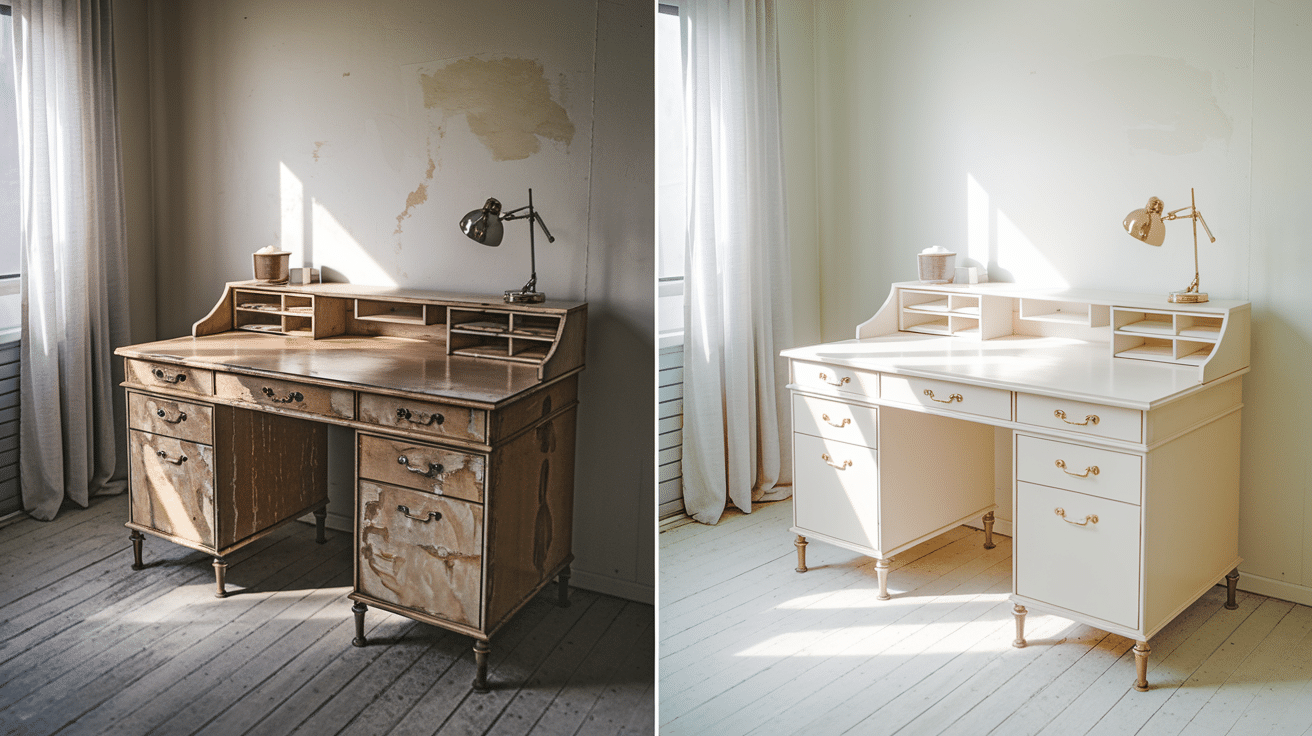
- Before: The desk had an outdated, worn appearance. The wood finish was faded in spots, with visible water rings and sun damage. The style looked like it belonged in the past.
- After: A new coat of paint and updated hardware gave it a sleek, modern look. The clean white finish brightened the whole room, while brass handles added a touch of class without being showy.
Pro Tip: Sand between paint coats for a smooth finish. This small extra step keeps brush marks from showing and makes your desk look store-bought rather than homemade.
2. Before: Cluttered and Inefficient | After: Smart Organization

- Before: Limited storage space, causing a cluttered surface. Papers, pens, and office supplies took up most of the usable space, making work difficult.
- After: Added functional drawers and shelves for better organization and more workspace. The new layout included spots for each item, with hidden storage for things used less often.
Pro Tip: Use drawer dividers made from scrap wood or sturdy cardboard. They cost almost nothing but make a huge difference in keeping small items sorted.
3. Before: Scratched and Damaged Surface | After: Smooth, Polished Finish

- Before: The desk surface was scratched, damaged, and rough. Years of use left marks from pens, cups, and computer equipment.
- After: Sanded down and refinished for a smooth, durable surface. The new finish resists stains and can be wiped clean easily, making it both good-looking and practical.
Pro Tip: Apply at least three thin coats of polyurethane on work surfaces. Thin coats dry faster and create a more water-resistant finish than one thick coat.
4. Before: Uncomfortable Setup | After: Ergonomic Comfort

- Before: The original desk was paired with an uncomfortable chair. The height wasn’t right, causing back pain after short work periods.
- After: Switched to a comfortable, ergonomic chair that improved both style and comfort. The desk height was also adjusted to create the perfect typing position.
Pro Tip: The ideal desk height puts your elbows at 90 degrees when typing. Measure this before making any height changes to your desk to avoid wasted effort.
5. Before: Plain and Uninspired | After: Customized Design

- Before: The desk lacked character and personal style. It was functional but boring, with nothing that made it special.
- After: Added custom touches like paint, hardware, and decorative accents to reflect personal taste. The finished desk now feels one-of-a-kind rather than mass-produced.
Pro Tip: Test decorative techniques on scrap wood first. This helps you perfect your method before working on the actual desk, saving you from costly mistakes.
Common Mistakes to Avoid
When making over an old desk, knowing what not to do is just as important as knowing what to do. Here are some mistakes many people make during desk makeovers:
Skipping the Prep Work: Rushing through sanding or cleaning the desk before starting the transformation. This shortcut often leads to paint that peels off or won’t stick well to the surface. Taking time to clean, sand, and prime your desk pays off with a finish that lasts for years instead of months
Using the Wrong Paint or Finish: Not selecting the proper paint for wood surfaces can result in chipping or uneven coverage. Regular wall paint isn’t made to handle the wear and tear that desks face daily. Use furniture paint or add a clear top coat to protect your work from scratches and water damage.
Ignoring Ergonomics: Not adjusting desk height and chair position for comfort can lead to back or neck strain. A beautiful desk that hurts to use won’t be helpful. Test the height and comfort before you finish the project to make sure you’ll want to sit there for hours.
Underestimating Time and Effort: Some makeovers take longer than expected, so it’s important to budget enough time for each step. What seems like a weekend project can stretch into a week when you count drying time between coats. Plan for each step, including time for paint and finish to dry fully.
Overloading the Desk with Accessories: While customizing is fun, overcrowding the desk with too many decorative items can hinder its functionality. Keep the main work area clear and limit accessories to a few meaningful items. Your desk should work well, not just look good in photos.
5 Pro Tips for a Perfect Desk Makeover
Making over your desk doesn’t need to be hard. These simple tips will help you get better results with less stress:
1. For a Smooth Finish: Always sand between paint coats to avoid brush marks and ensure a flawless surface. Use fine-grit sandpaper (220 or higher) and wipe with a damp cloth after sanding to remove all dust. This small step makes a big difference in how your desk looks when done.
2. Ergonomics Matter: Measure desk height to ensure your elbows are at 90 degrees when typing to avoid discomfort. If your desk is too high, you might need to raise your chair or add a keyboard tray. If it’s too low, try adding sturdy blocks under the legs. Your body will thank you after long work sessions.
3. Customize Smartly: Add one or two standout custom touches, like unique drawer pulls or a pop of color, to make the desk reflect your personal style without overdoing it. These small changes often have the biggest impact on how your desk looks and feels.
4. Use Drawer Dividers: Simple, inexpensive dividers can help keep office supplies organized and easily accessible. You can buy them or make your own from cardboard, wood scraps, or even plastic food containers. This keeps small items from getting lost in big drawers.
5. Test Decorative Techniques: Experiment on a scrap piece of wood first to perfect your painting or distressing technique before applying it to your desk. This lets you work out any issues before you start on your actual desk, saving time and preventing costly mistakes.
Conclusion
A desk makeover can change both how your workspace looks and how you feel while working. With some basic tools and a bit of time, you can turn an old, forgotten desk into something useful and personal.
We’ve covered the key steps and tips for transforming a desk, from picking the right paint to making it comfortable to use. The most important part is to plan ahead and take your time with each step.
Have you fixed up an old desk? We’d love to hear about what worked for you. Share your stories or questions in the comments below.
Don’t forget to subscribe for more home project tips and ideas. If you found this helpful, please share it with friends who might also want to update their workspace.
Happy desk making!