How to Organize a Kitchen Pantry in One Afternoon

Quick Answer: Empty your pantry, group items by category, assign fixed spots, adjust shelves, label storage areas, and remove excess items to keep everything organized.
The pantry always looks fine until you open it. Then the lids fall out. The mugs crowd each other. The pasta you just bought turns out to be the fourth bag you own.
Organizing a kitchen pantry does not require new cabinets or expensive bins. It takes one focused session and a system that assigns every category a fixed spot.
This post covers how to organize a kitchen pantry in ten steps, in the right order. The results hold without weekly maintenance.
What You Need to Organize a Kitchen Pantry
Have every supply ready before the session starts. A mid-project store run kills momentum and adds at least an hour to the job.
| Tool or Material | Purpose |
|---|---|
| Small handheld vacuum | Clean drawers and shelves before replacing items |
| Microfiber cloths and all-purpose cleaner | Wipe shelf and cabinet interiors clean |
| Expandable cutlery tray | Keep utensils sorted and separated in drawers |
| Spring-loaded drawer dividers | Separate cooking utensils by size and function |
| Vertical divider insert | Store cutting boards upright for easy access |
| Clear square food storage containers | Store pantry items with lids off for visibility |
| Small clear containers | Organize work drawers by category |
| Long container or organizer | Store tea bags in a drawer-like setup on a shelf |
| Accordion storage system | Fold and store tea towels and dishcloths vertically |
| Metal pull-out drawer insert | Convert lower shelves into pull-out storage |
| Ziploc bags | Store overflow utensils away from main drawers |
| Category labels | Mark drawer and cabinet fronts before placing items |
| Painter’s tape | Temporarily mark shelf positions during planning |
How to Organize a Kitchen Pantry in 10 Steps
The best ways to organize a pantry follow a fixed sequence. Work through each step completely before moving to the next one. Skipping ahead creates more work, not less.
Step 1: Empty, Vacuum, and Wipe Every Drawer and Shelf
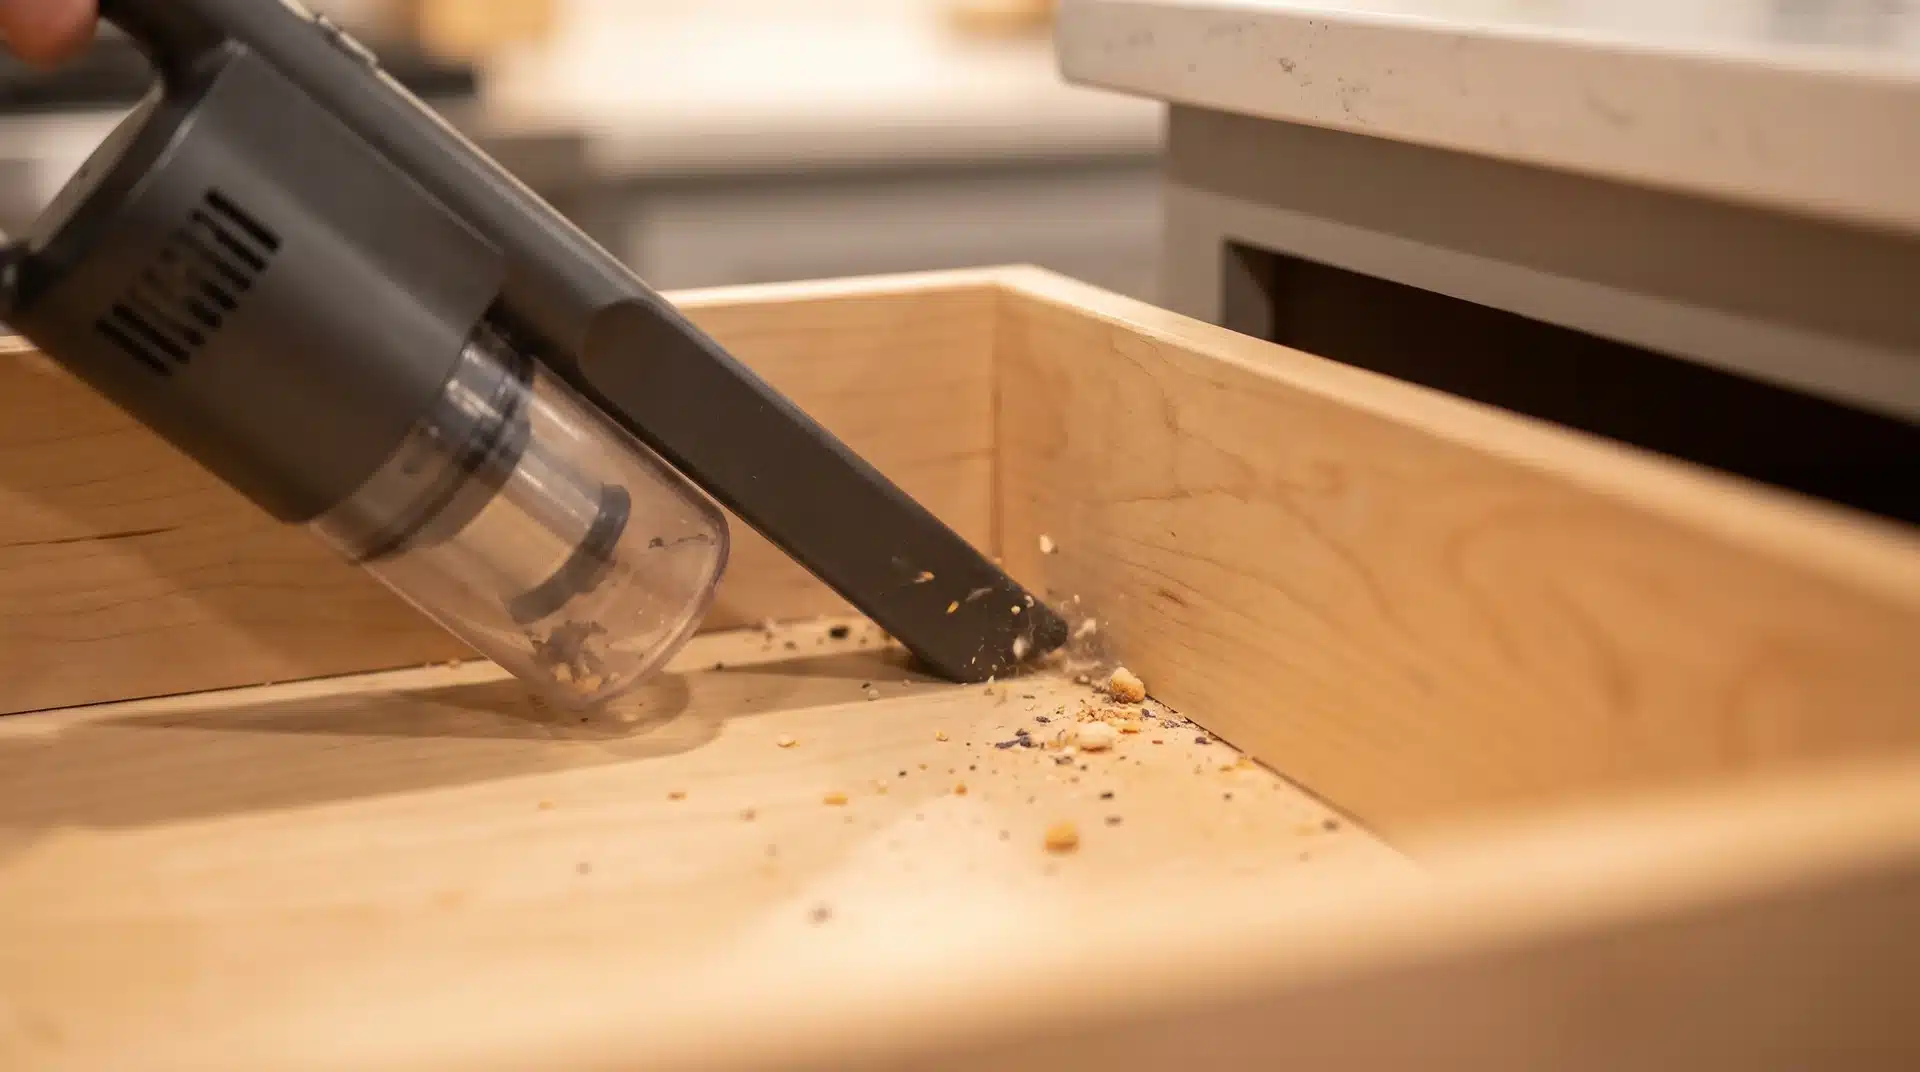
Every drawer and shelf needs to be empty, vacuumed, and wiped before anything goes back. This is the only time the space is fully accessible.
Use a small handheld vacuum on corners and edges. Follow with a damp microfiber cloth and an all-purpose kitchen cleaner on every interior surface.
Skipping this step means you are organizing on top of a problem rather than solving it.
Step 2: Sort Every Item Into Categories Before Placing Anything Back
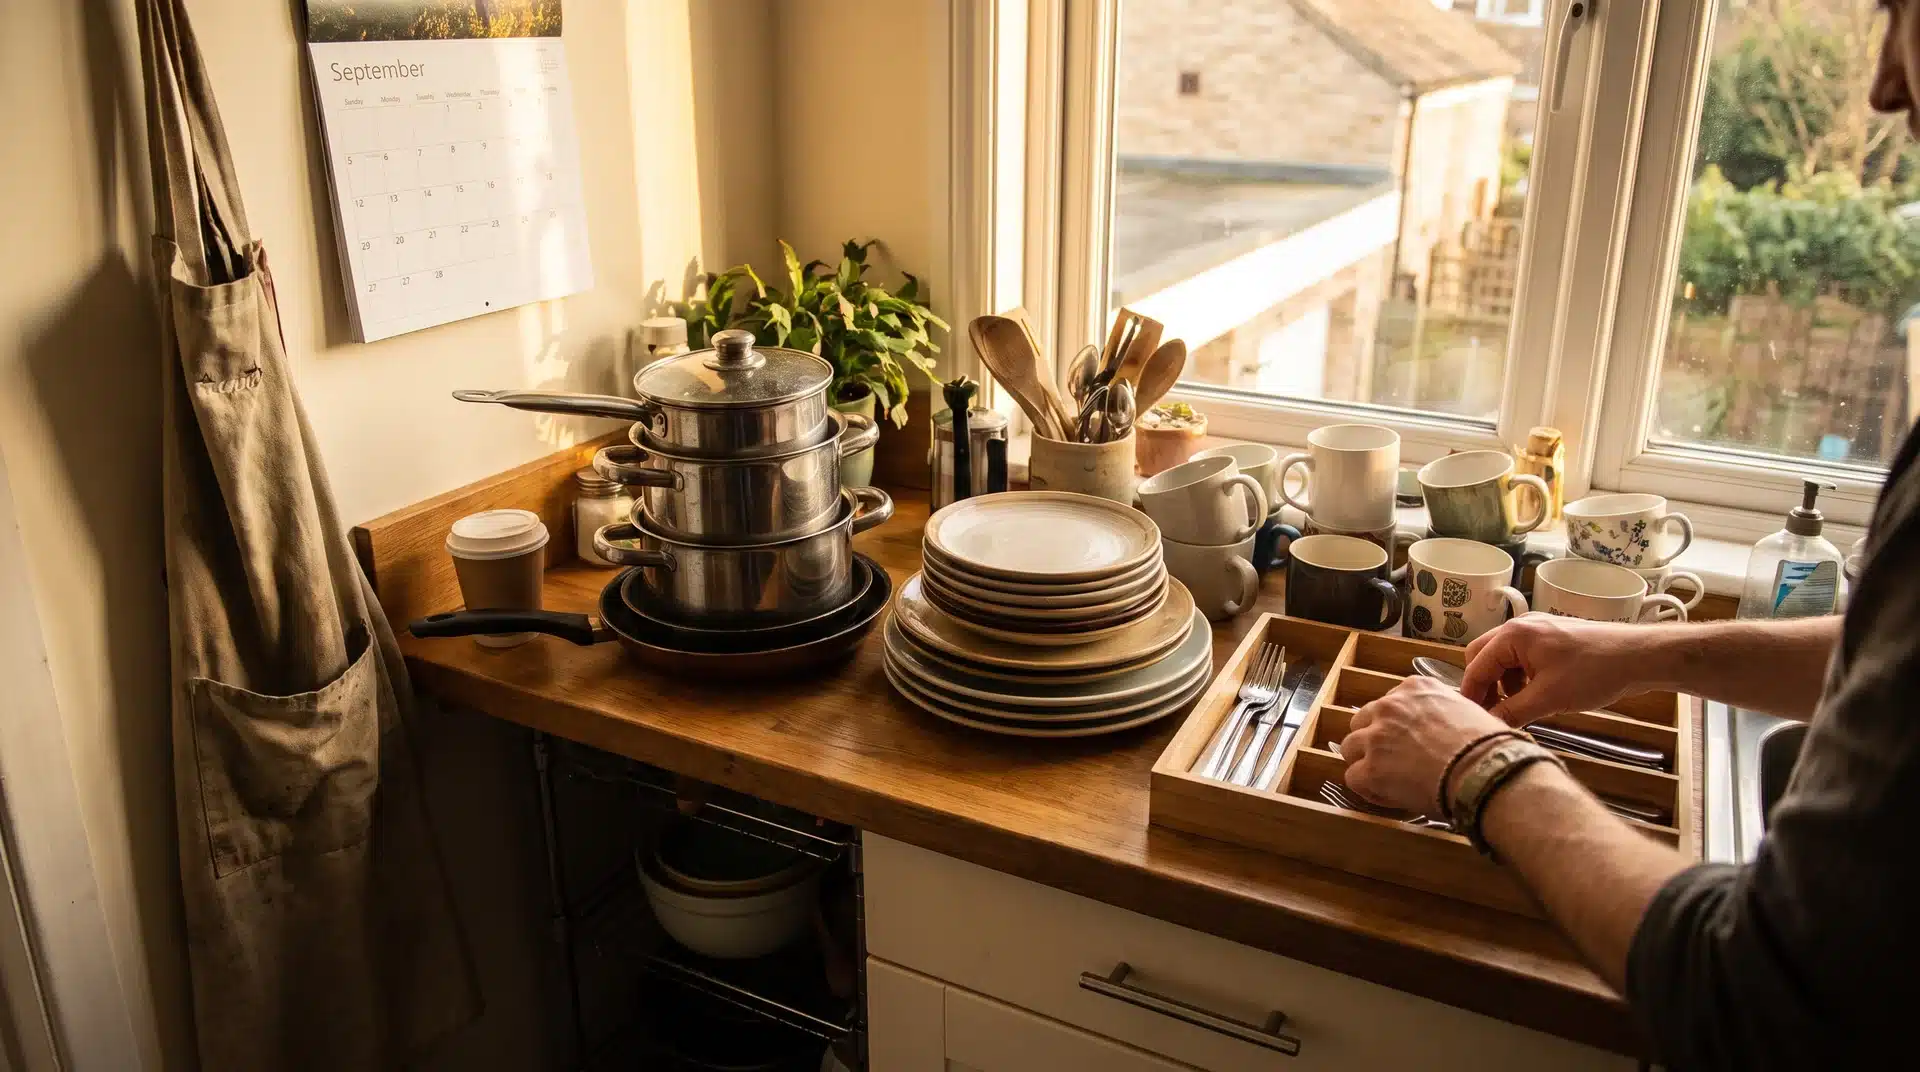
Pull everything out and group items by category before any piece goes back. This step shows you exactly how much you own and how little you regularly use.
Ask three questions for every item:
- Do I really love this? If not, it does not earn its space.
- Do I really use this? Rarely used items belong in overflow storage, not the main kitchen.
- Would I buy this again today? If not, donate it now rather than moving it to a higher shelf.
Cutting the collection down at this step is the single most important decision in the whole process.
Step 3: Adjust Every Shelf Height Before Placing Items Back
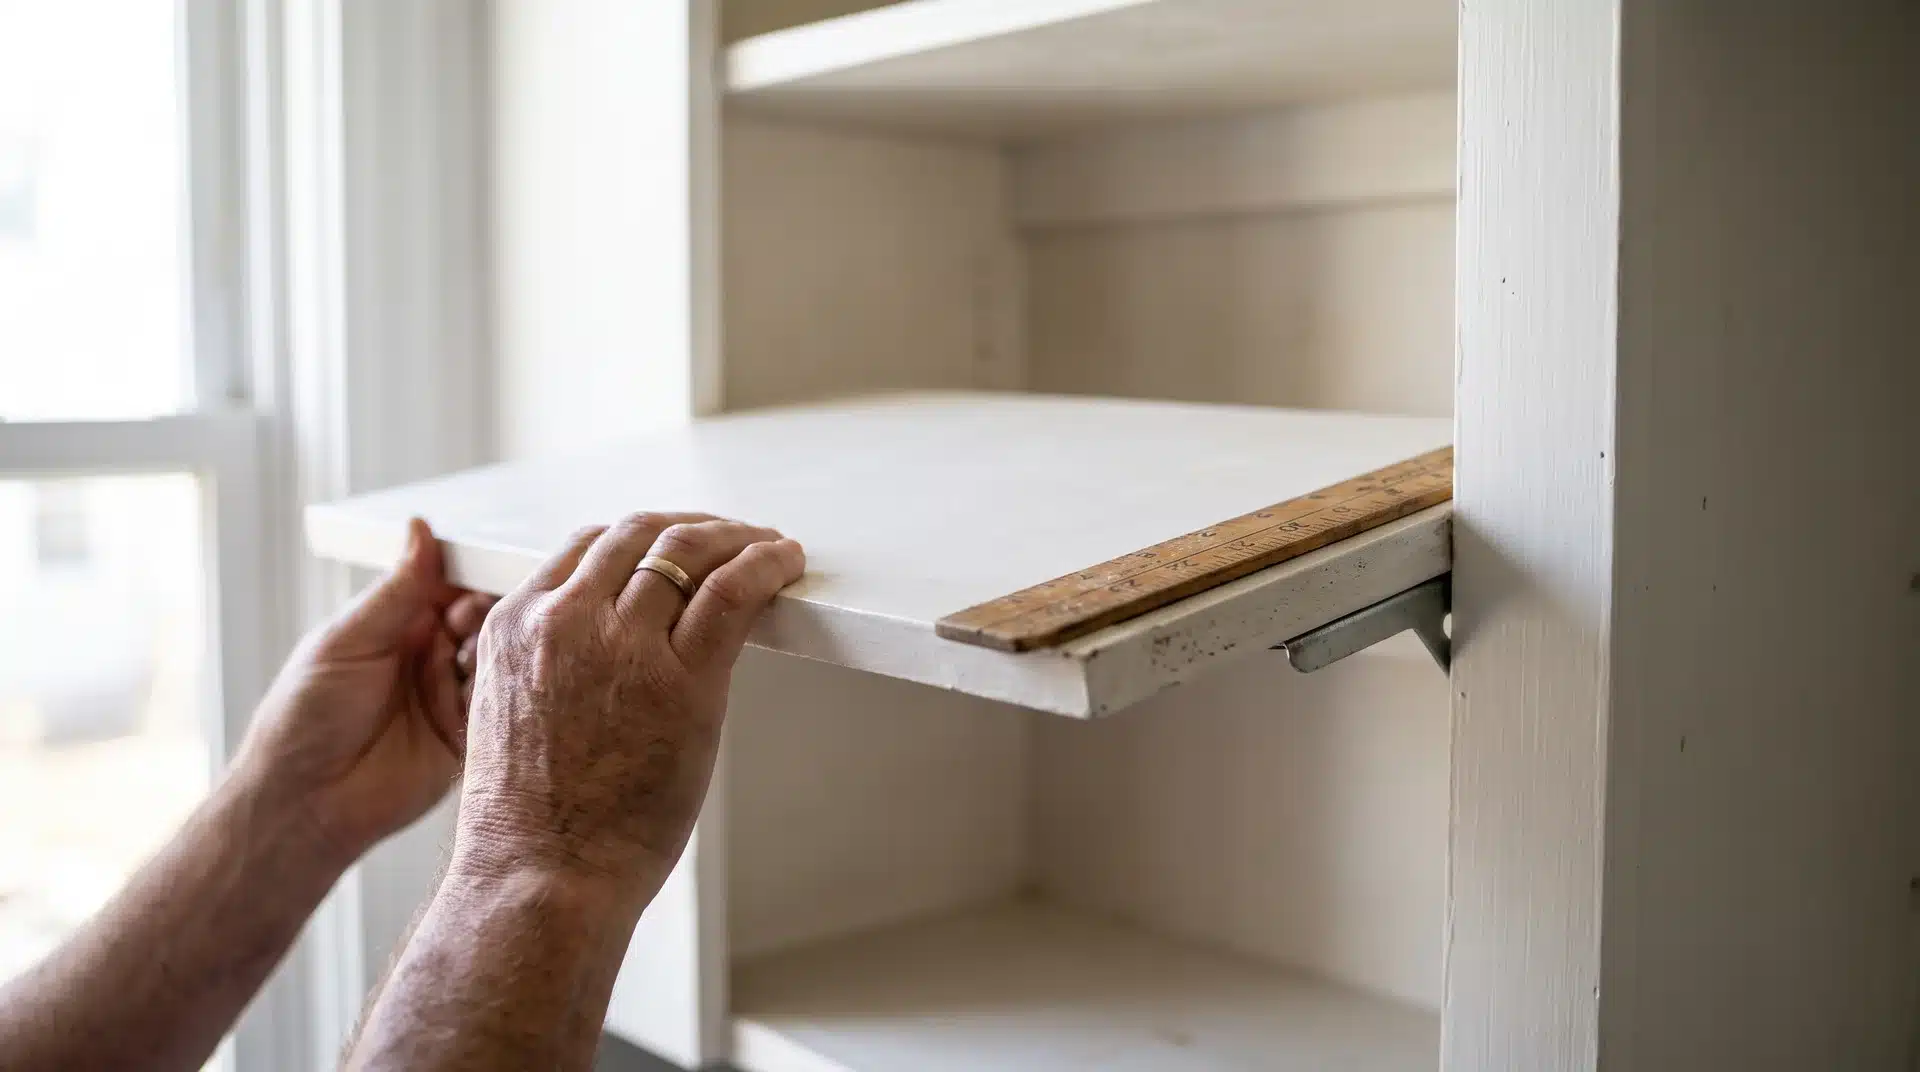
Most shelves sit at factory height and never get moved. This leaves large amounts of vertical space unused above shorter items in every cabinet.
- Start from the bottom: Place the tallest item first. Raise the shelf above it to clear by one finger-width.
- Work upward: Repeat shelf by shelf until you reach the top of the cabinet.
- Add a shelf if space allows: Hardware stores cut shelves to size. Drill new holes in the side gables if needed.
One finger-width clearance is enough to grab items easily without wasting the space above them. Kitchens with standard factory shelving typically gain at least one extra shelf per cabinet this way.
Step 4: Place Eating Utensils and Everyday Plates Near the Dishwasher
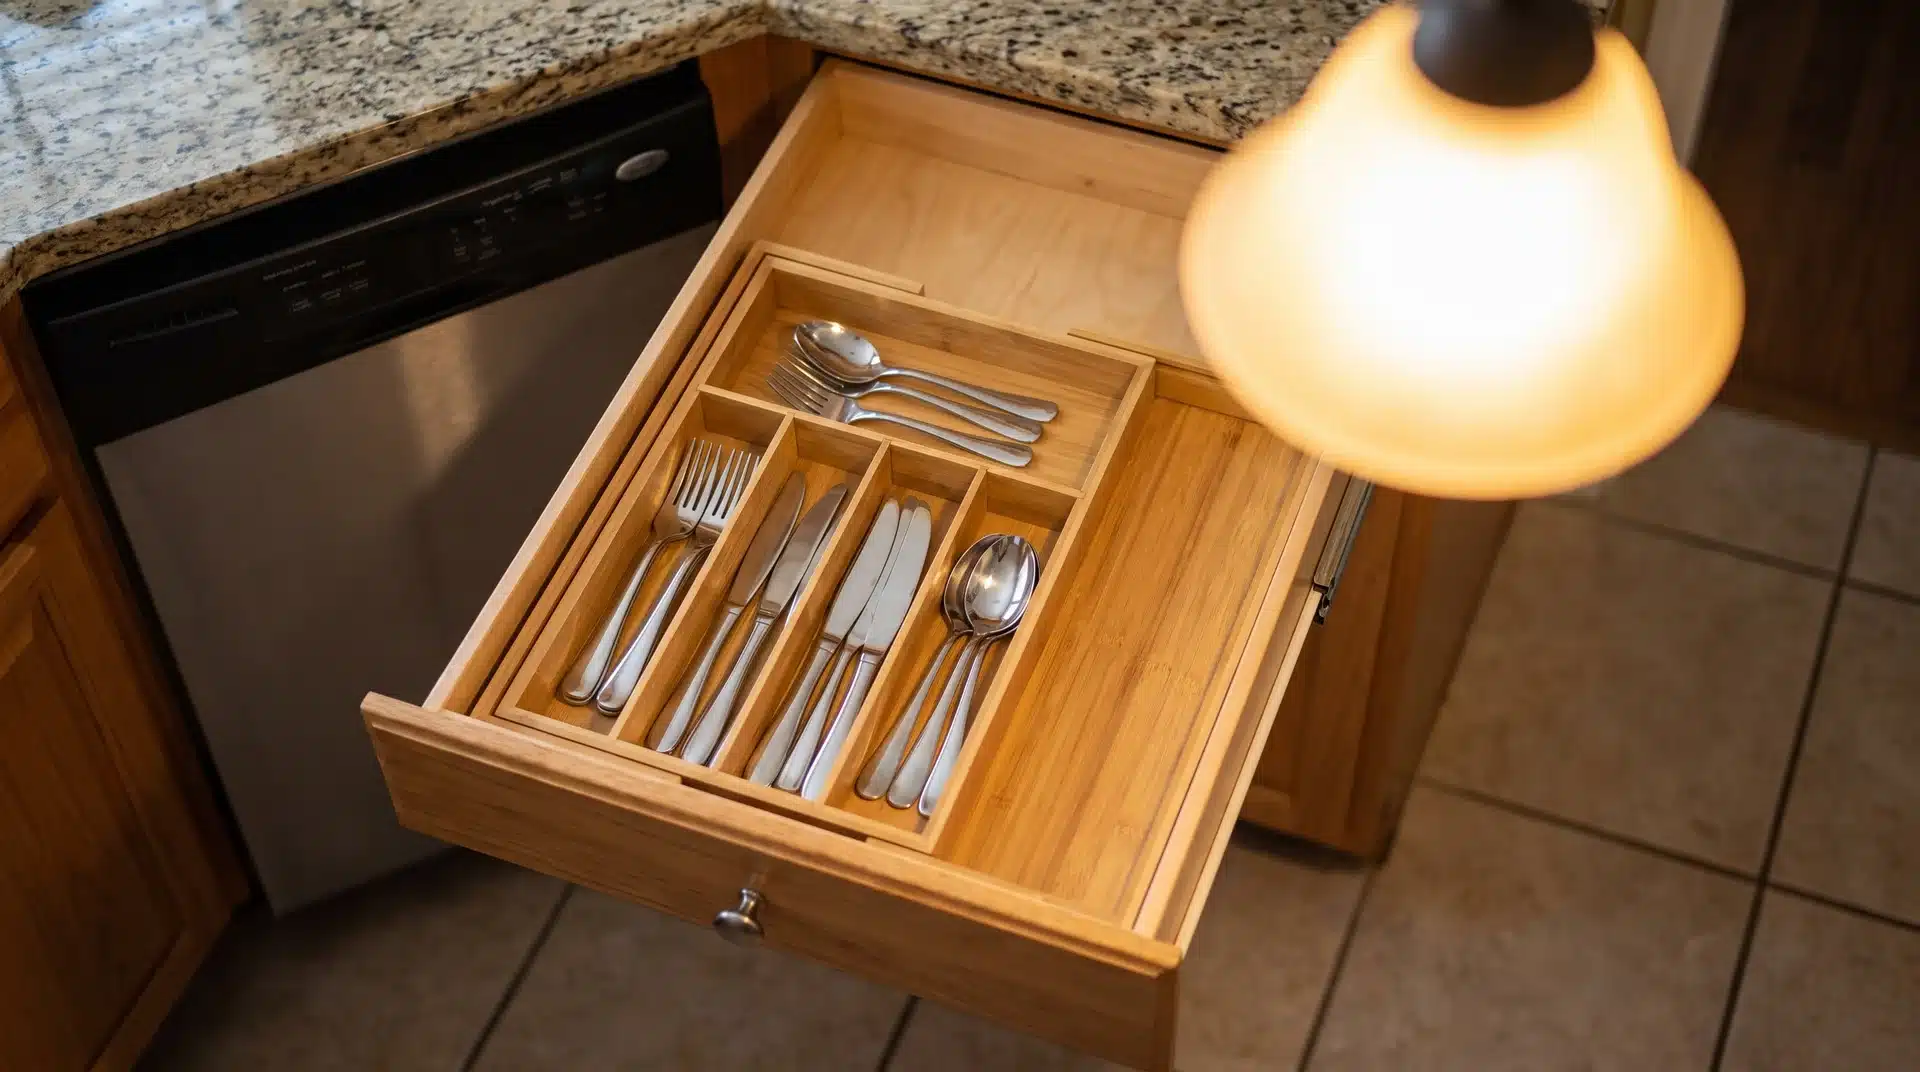
Keep the highest-use items closest to where they get cleaned. Here is where each category belongs:
| Category | Location | Quantity |
|---|---|---|
| Cutlery and serving spoons | Top drawer near dishwasher, expandable tray | 8 to 10 pieces |
| Everyday plates and bowls | Lower shelf of upper cabinet near dishwasher | Adjust shelf to clear top dish |
| Drinking glasses | Cabinet near sink, most-used on lowest shelf | 8 to 10 in two sizes |
| Wine glasses | High shelf above drinking glasses or bar area | As few as needed |
Overflow cutlery goes into a Ziploc bag stored elsewhere in the house, not back into the main drawer.
Step 5: Keep Pots, Pans, and Cooking Tools Near the Stove
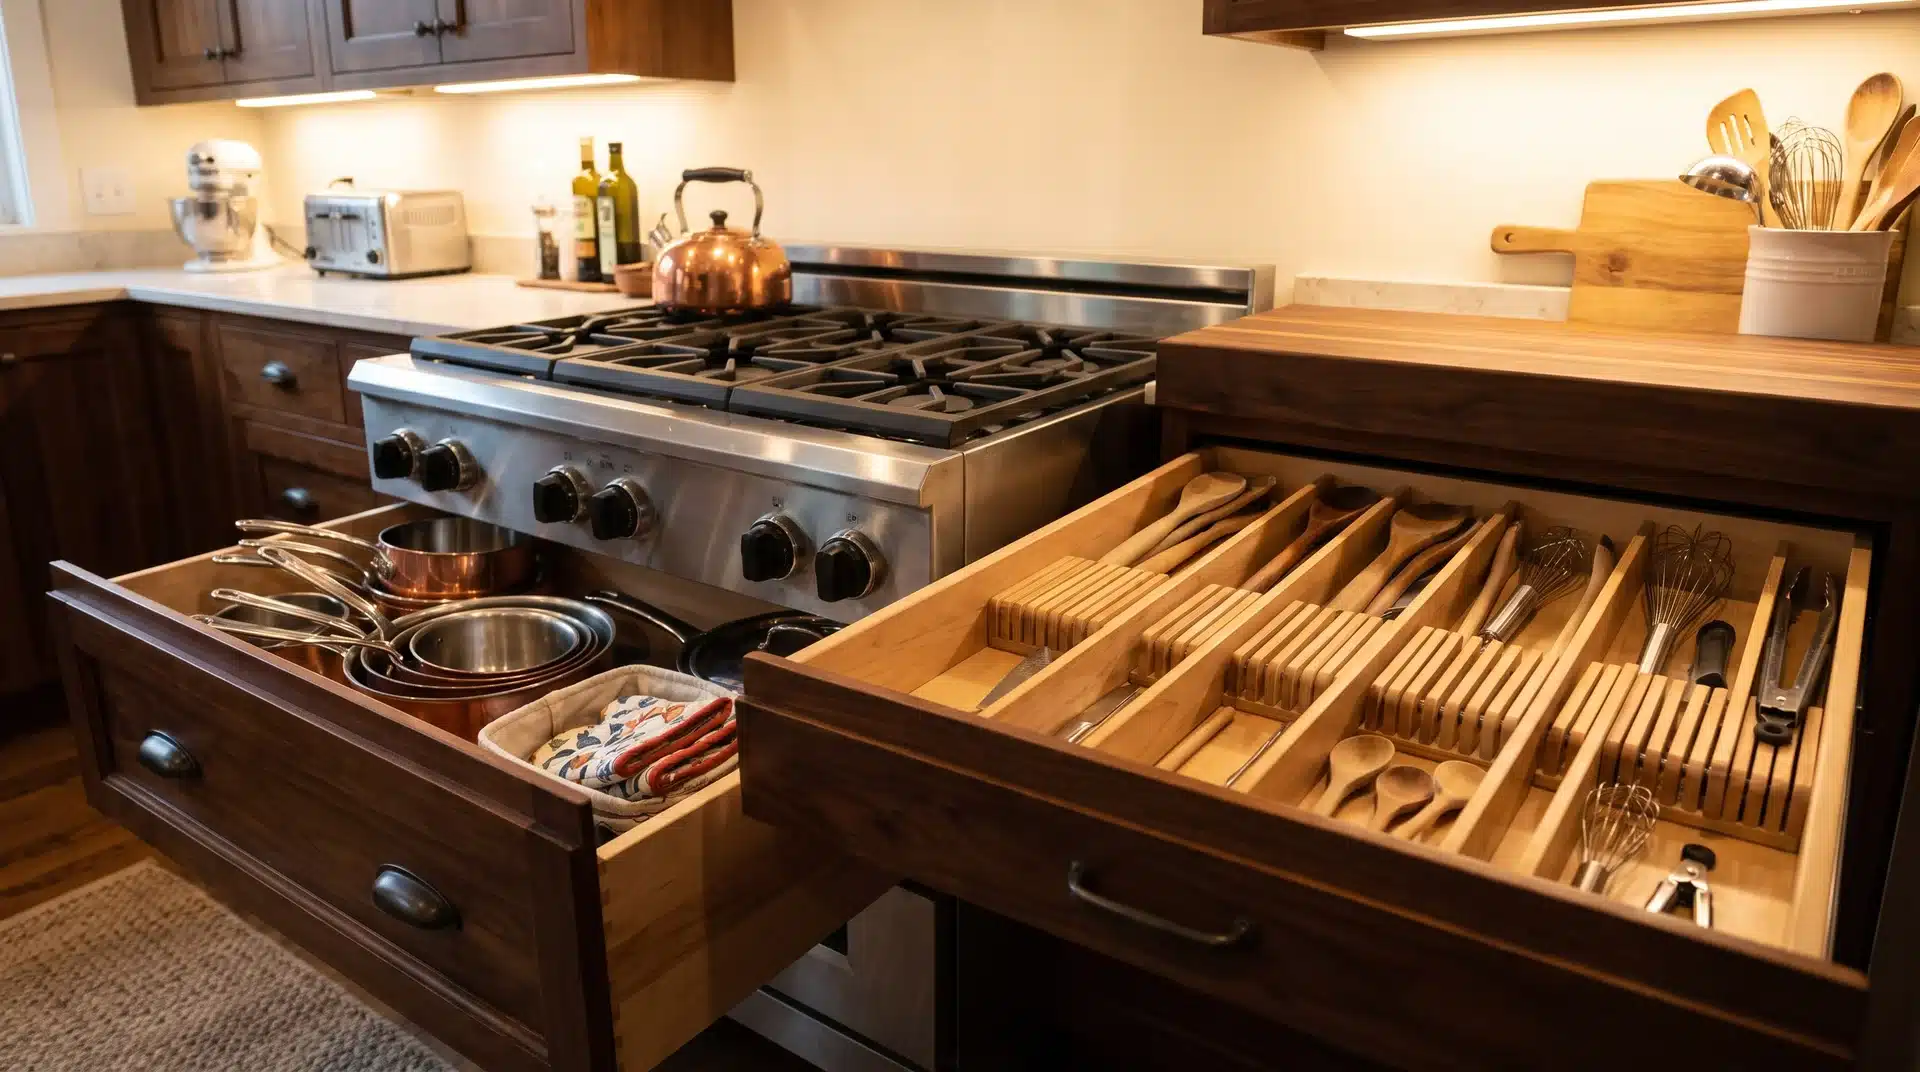
Two deep drawers as close to the stove as possible handle pots and pans. Closeness to the stove matters more here than anywhere else in the kitchen.
- Pots and pans: Six to eight pieces maximum. Rarely used pieces go to basement or garage storage.
- Oven mitts: Keep in a small soft container inside one of the two pots-and-pans drawers.
- Long cooking utensils: One top drawer near the stove with spring-loaded dividers.
- Short utensils: A second top drawer near the stove, separated from the long ones.
If three drawers are needed to fit all pots and pans, the collection needs to be reduced, not accommodated.
Step 6: Set Up a Dedicated Coffee and Tea Station
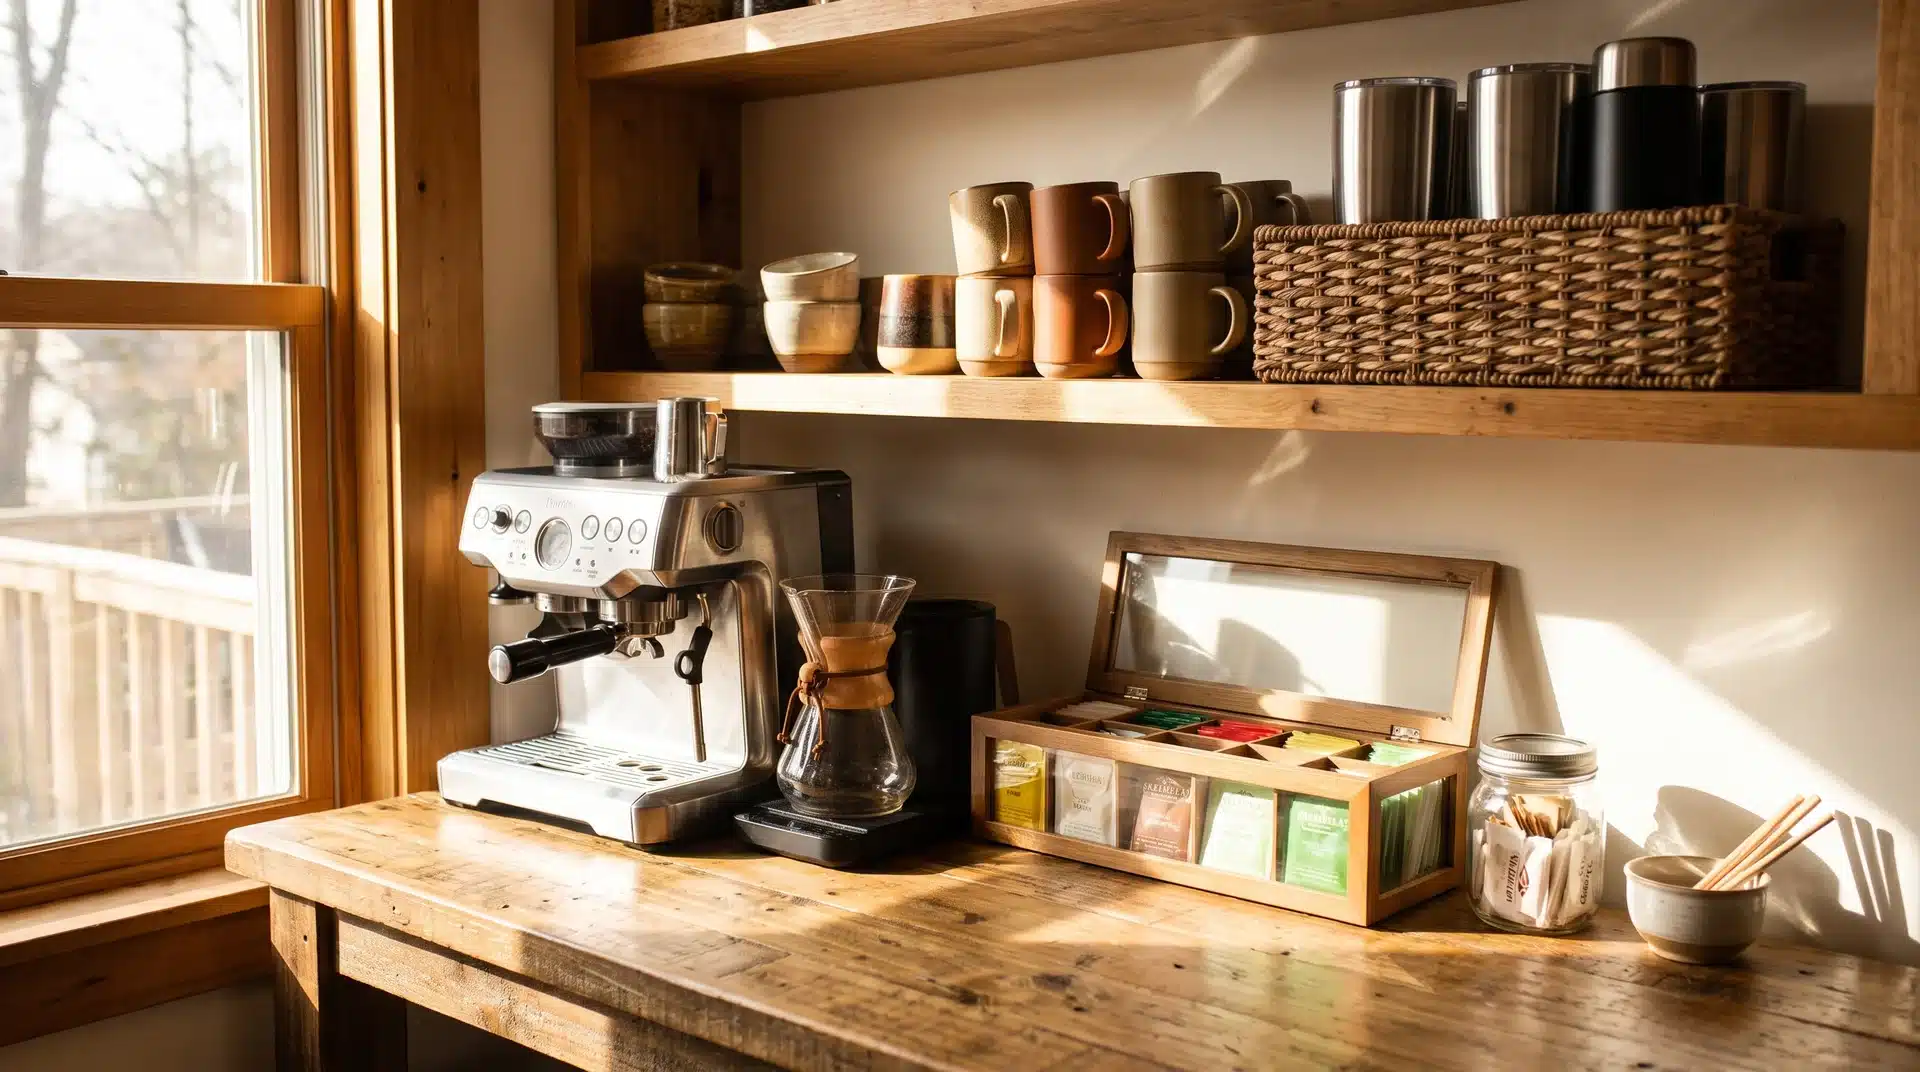
A dedicated station saves more time in the morning than almost any other single change in the kitchen. Everything for coffee and tea stays in one spot.
| Item | Location | Quantity |
|---|---|---|
| Coffee cups | Near coffee maker, lower shelf above or nearby drawer | 8 to 10 mugs |
| Travel mugs | Same area, contained together | 3 to 4 maximum |
| Tea | Long container on shelf, drawer-like setup | One container |
| Coffee sweeteners | Same spot as mugs and tea | Only what is used daily |
| Teapot or French press | Shelf directly above the coffee cups | 1 each if used regularly |
Mugs beyond 8 to 10 belong in secondary storage, not in prime kitchen space.
Step 7: Store Knives and Cutting Boards Together in One Area
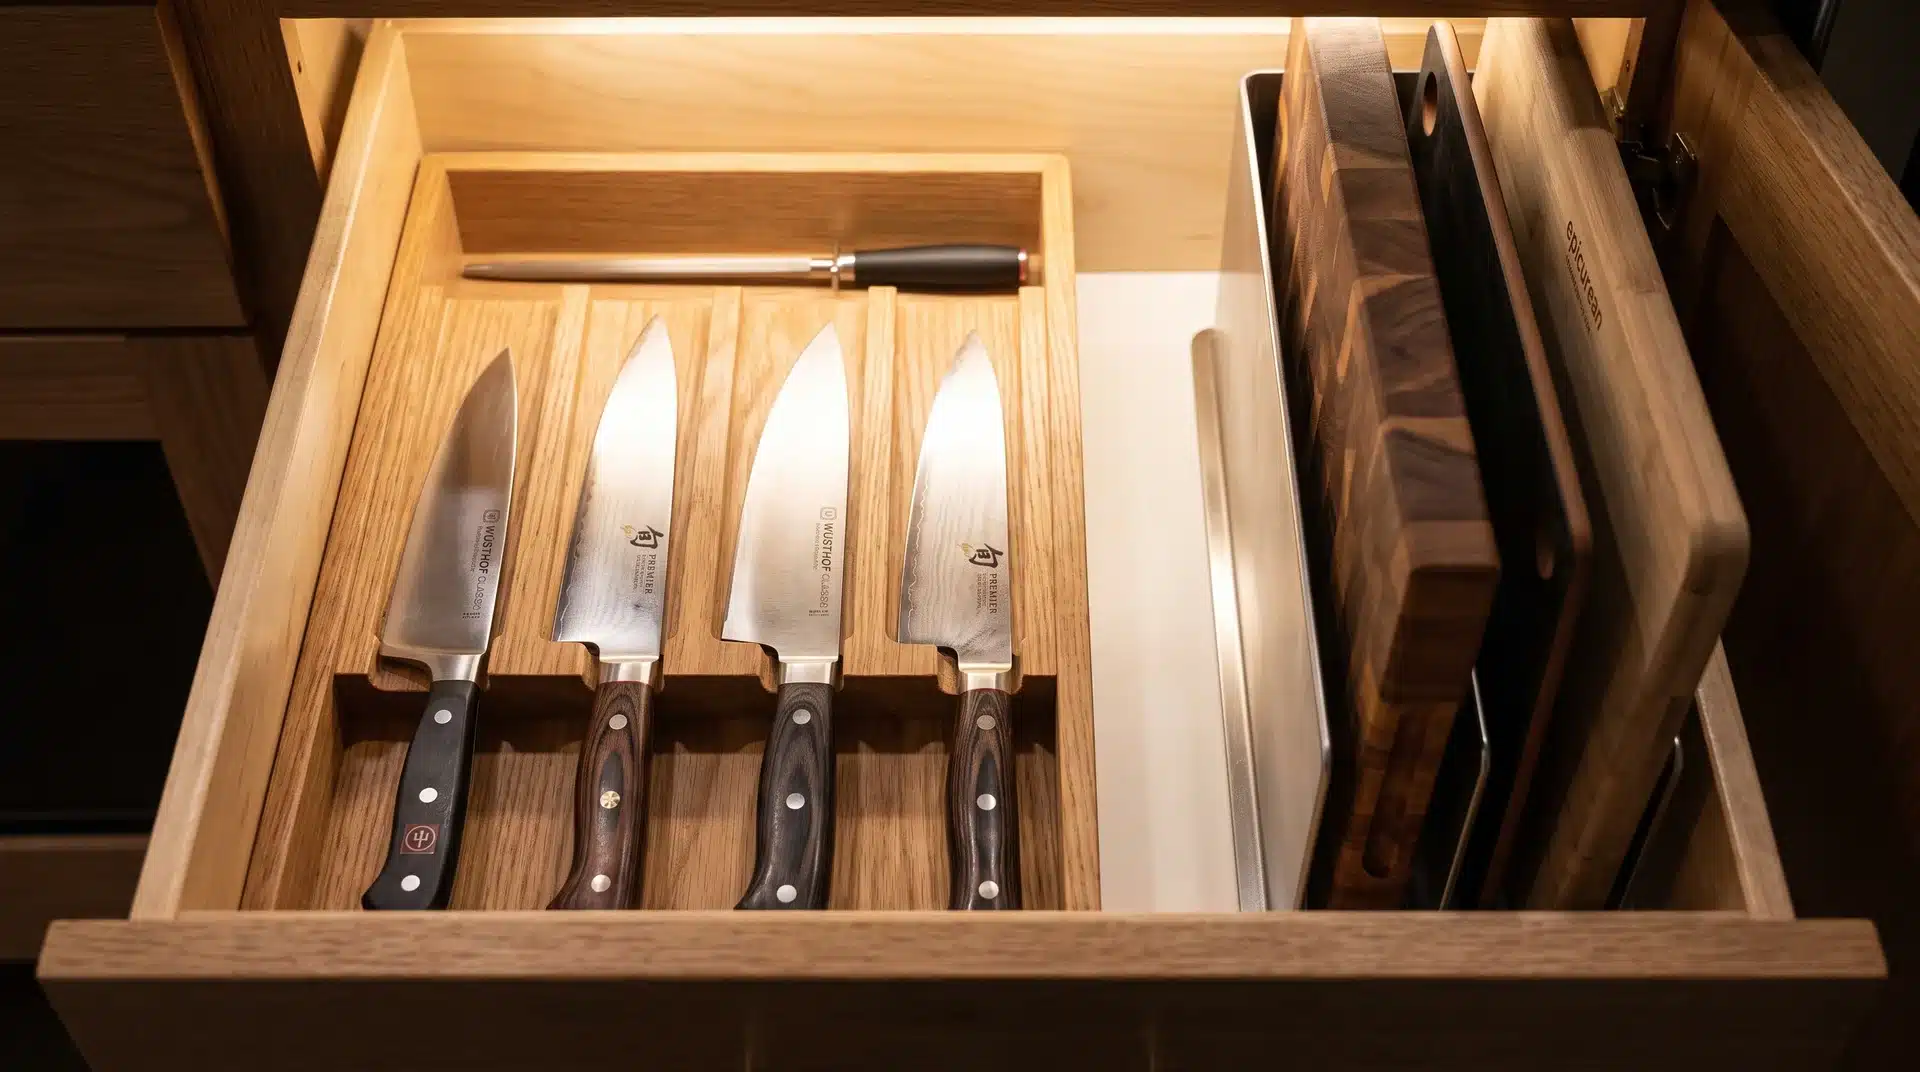
Knives and cutting boards are used together, so store them together. Use a knife organizer sized to the drawer dimensions. Keep a sharpener tucked at the back of the same drawer.
For cutting boards, use a vertical metal divider insert in a cabinet. It keeps all boards visible and individually reachable.
Keep two to four knives and two to four cutting boards. More than four of either is a collection, not a working tool set. A countertop knife block is a clean option when drawer space is limited.
Note: In homes with young children, an upper drawer placement for knives is the right call.
Step 8: Organize Food Storage Containers by Shape
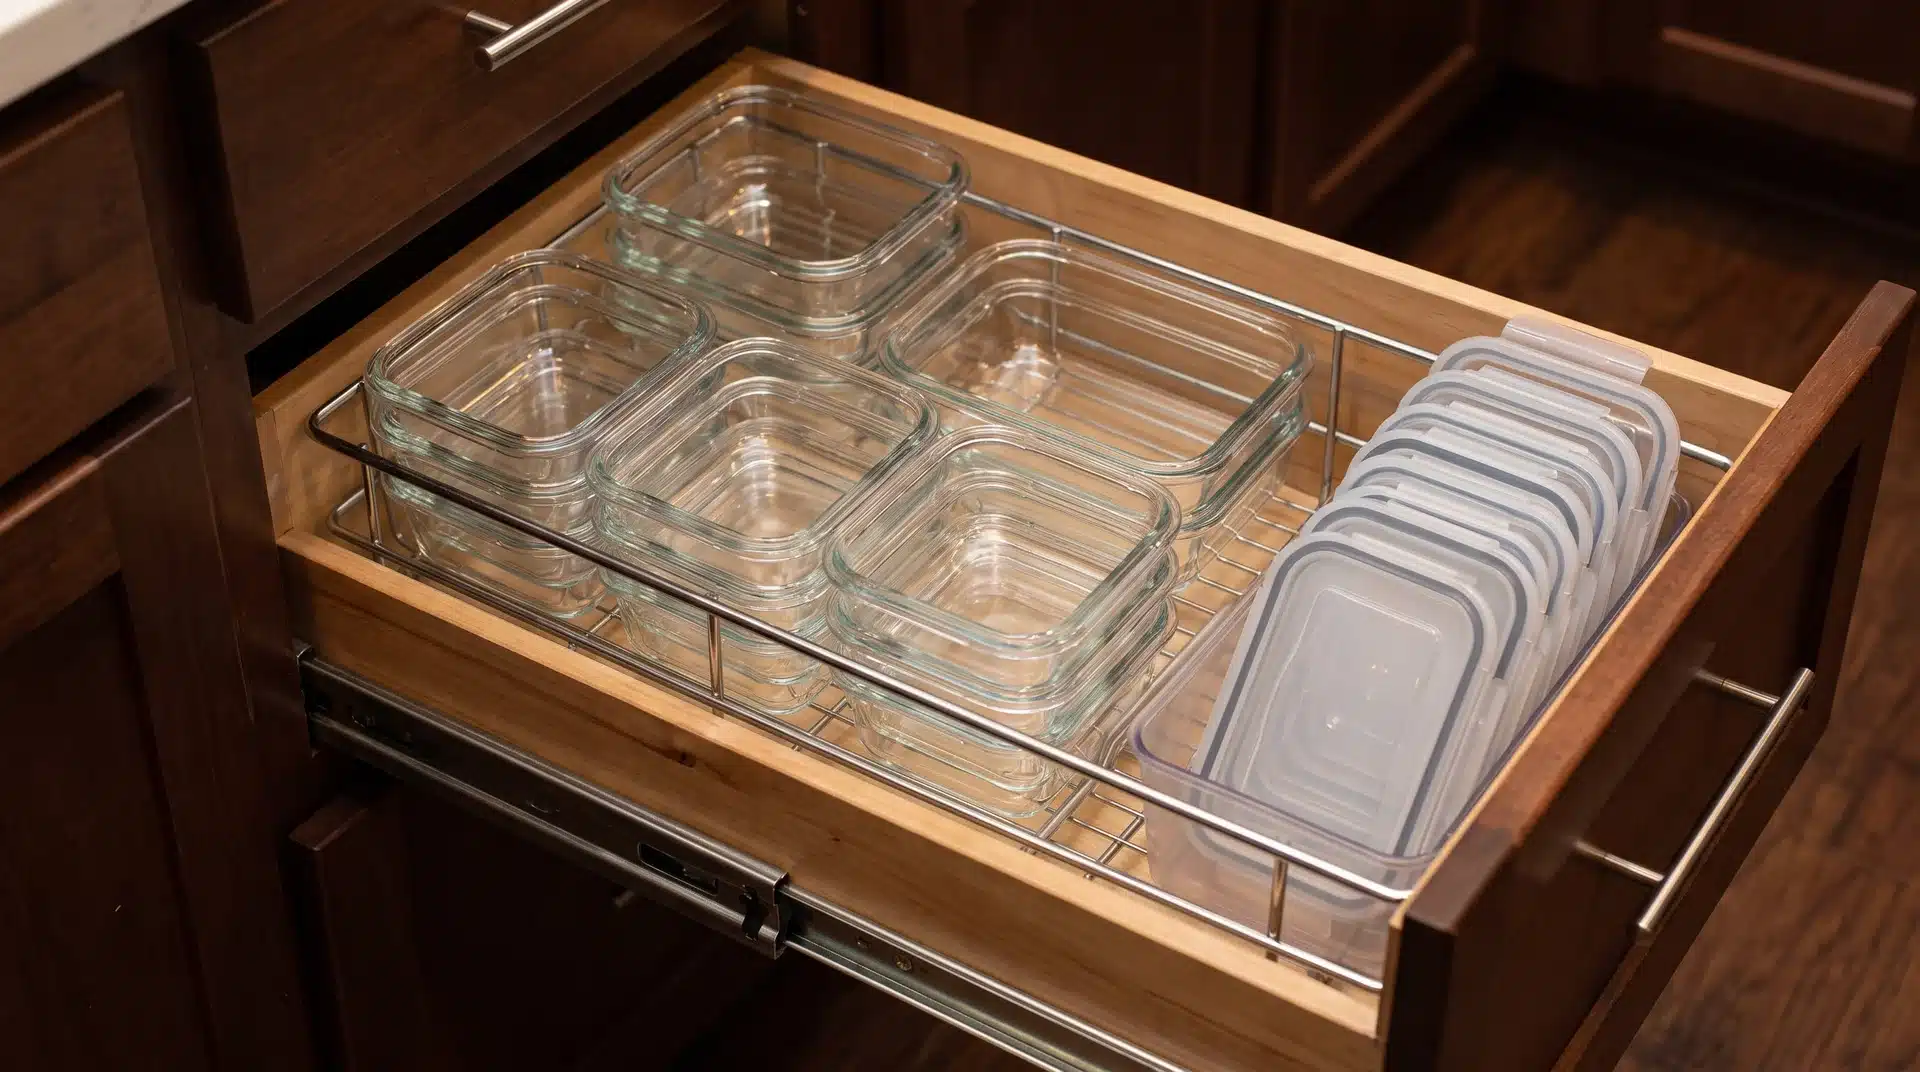
The right quantity of food storage containers is enough to fill a fridge if it were fully loaded with leftovers. For most families of four, that is 8 to 12 pieces total.
- Square containers only: They stack without wasted corner space, unlike round containers that leave gaps on every shelf.
- Lower drawer placement: Easy to reach without overhead stretching or crouching to see inside.
- Metal pull-out insert: Makes containers at the back of deep shelves reachable without removing everything in front.
- Lids stored separately: Keep in a container inside the same drawer so matching takes seconds, not minutes.
- Lids without a match: Discard immediately. Keeping them just in case adds clutter without adding function.
- Large event containers: Top shelf only, out of the daily-use drawer.
Step 9: Label Every Drawer and Cabinet Front
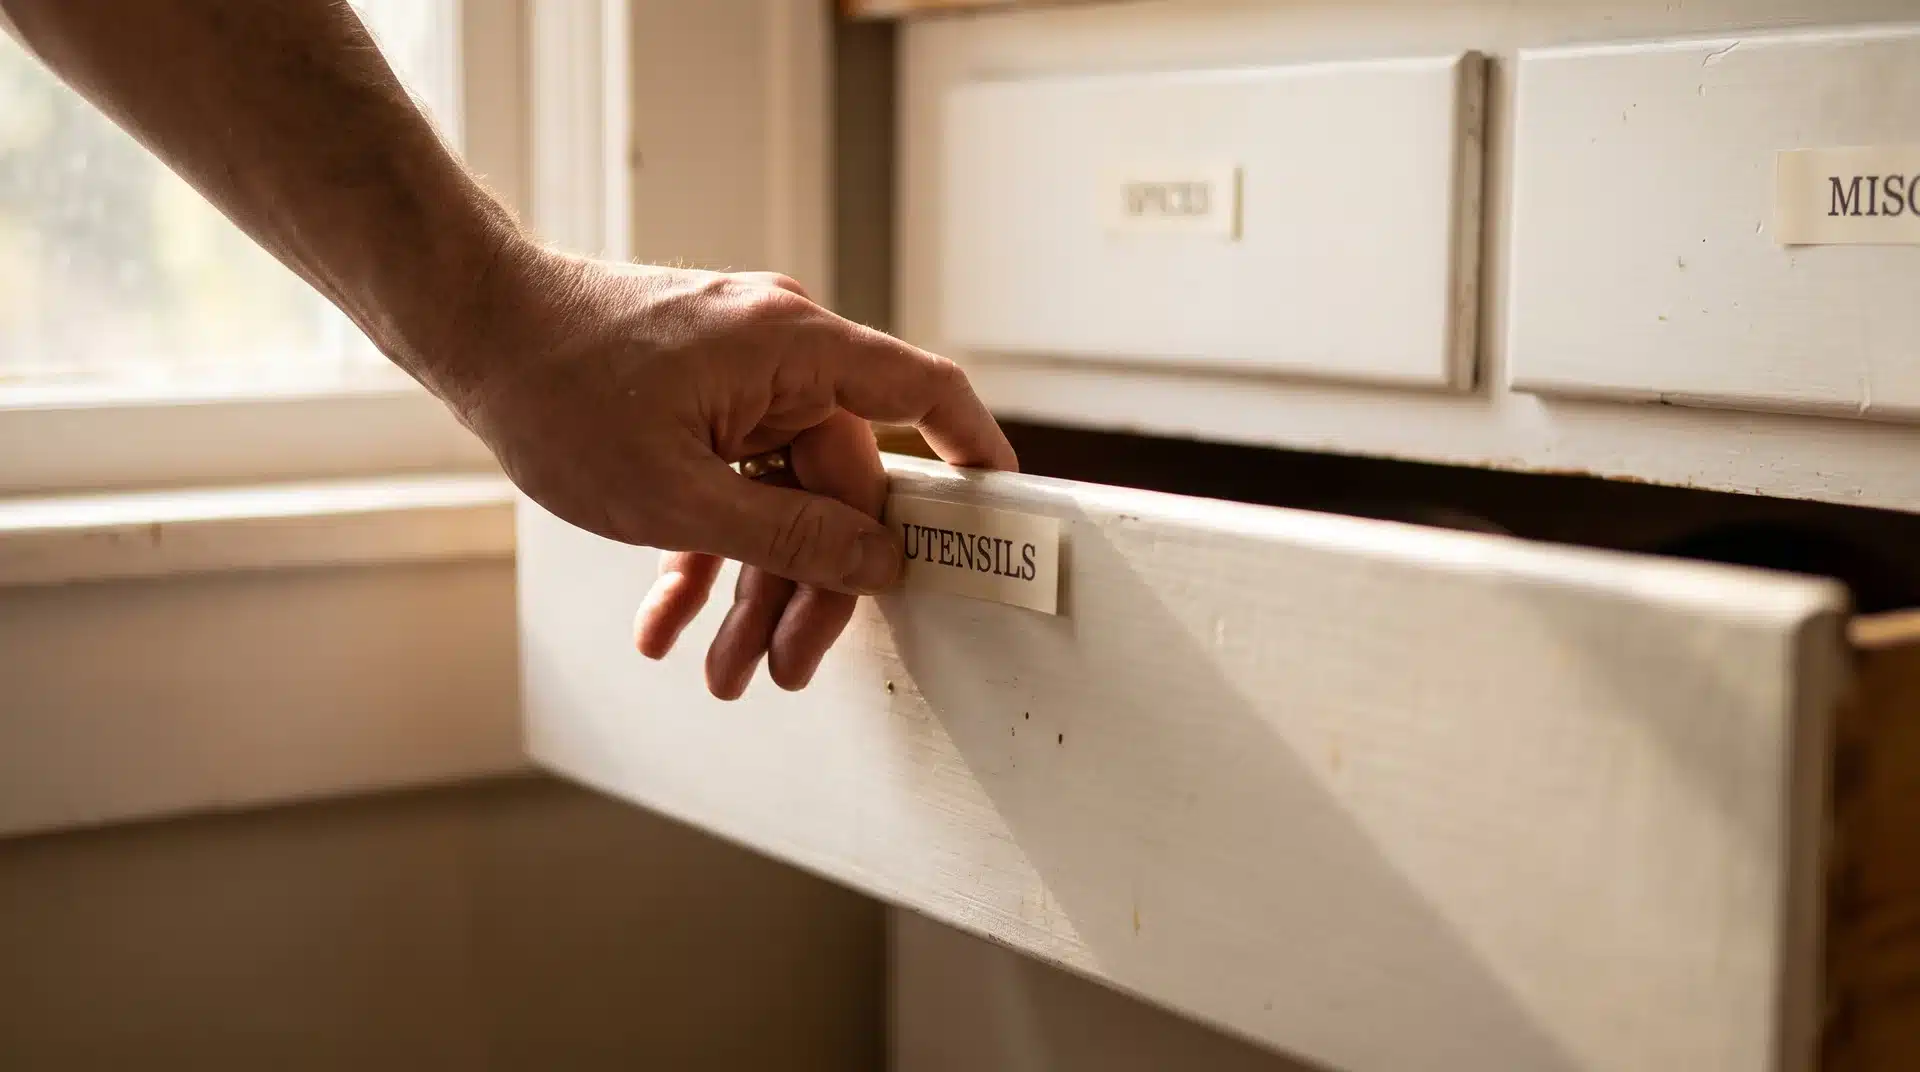
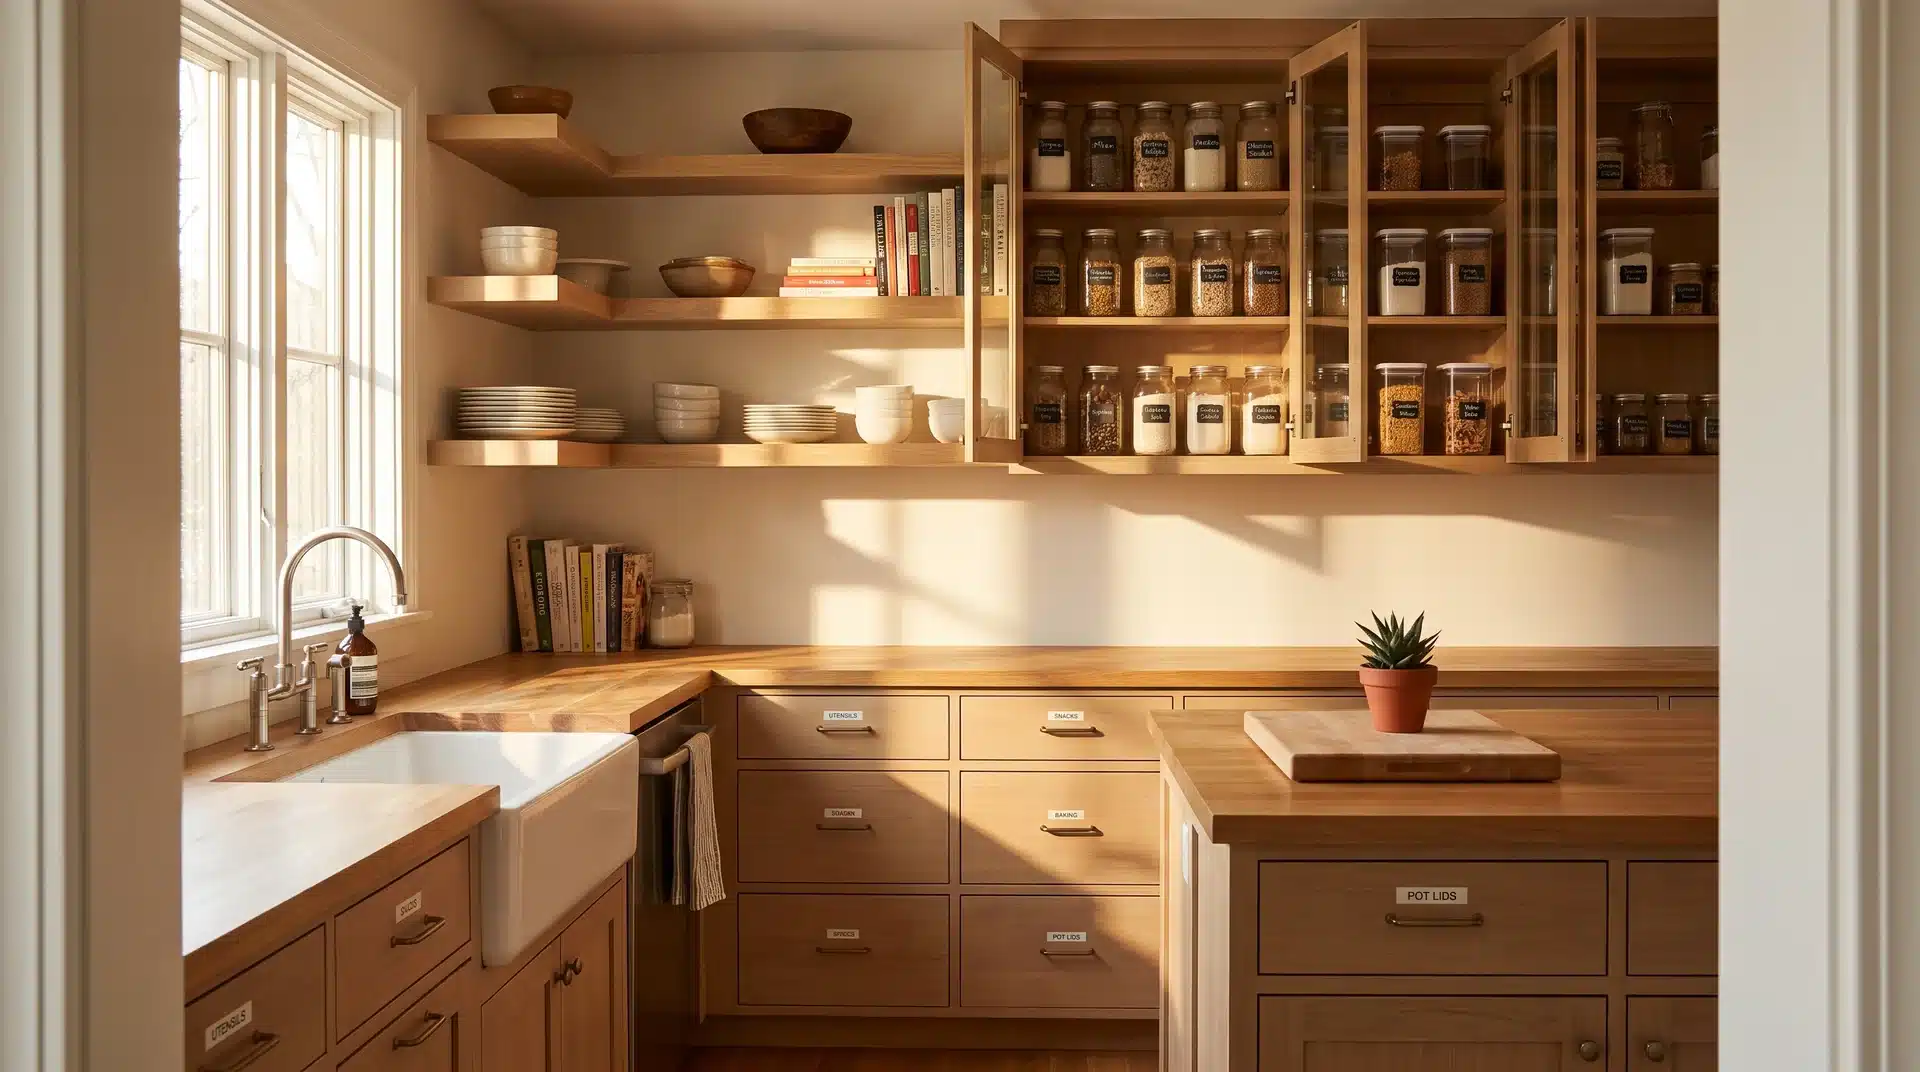
Labels turn a one-time session into a setup that holds over time. Use printed category labels on the front lip of each drawer and cabinet door before the session ends.
This removes daily guesswork for adults. For children who can read, it works like a classroom system. Everyone gets a clear answer about where things go back, without asking.
Before walking away, take every household member through the new layout. When people understand the reasoning behind the setup, they maintain it. Skipping this walkthrough is what lets the kitchen return to its old state within weeks.
Step 10: Remove Everything That Does Not Fit
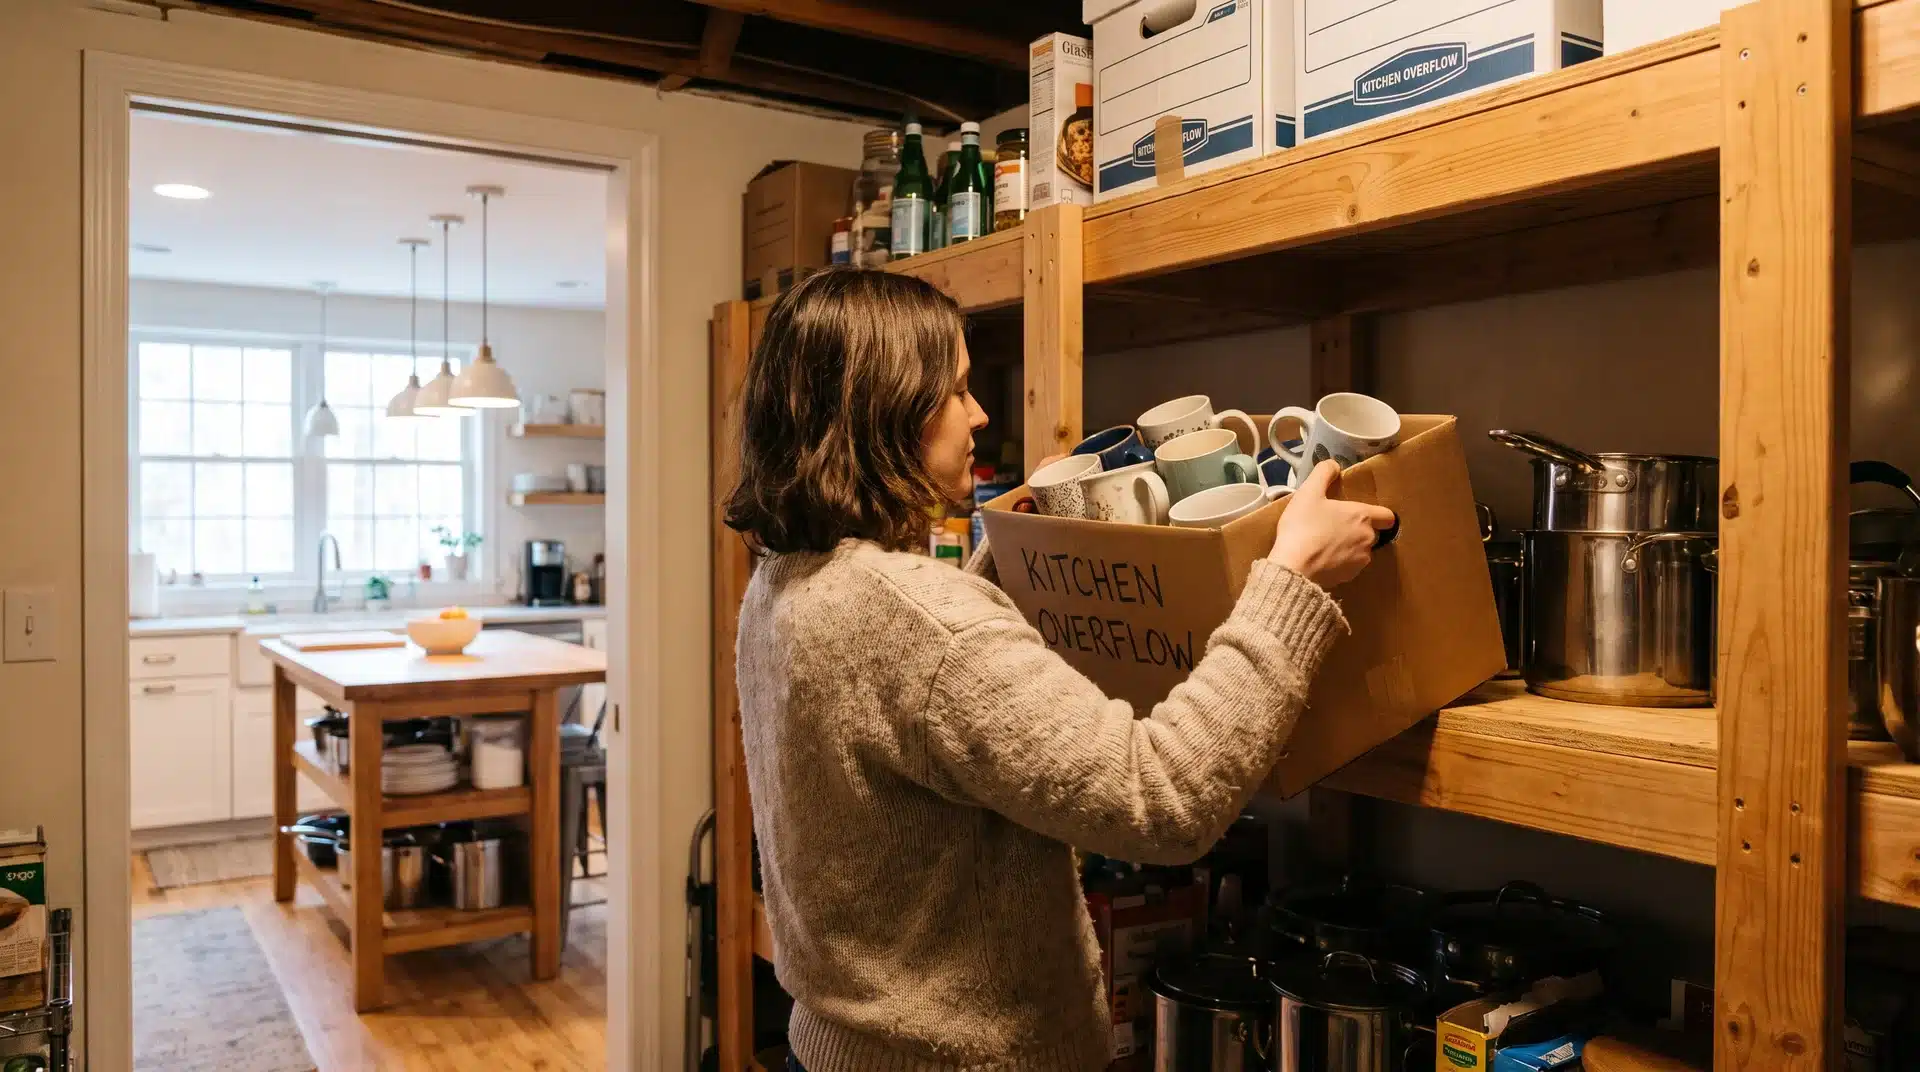
Anything that does not fit in its assigned space does not belong in the kitchen. This is the most important step, and the one that gets skipped most often.
The test is direct: if removing an item creates a real problem in daily cooking, it stays. If removing it creates no problem, it moves to overflow storage.
After a few weeks, you will likely find you never reach for the overflow and are ready to donate it. Any item that only fits by forcing a drawer shut has already answered the question.
Good home organization habits carry real benefits in time, energy, and mental load. Letting the space set the limit, rather than the attachment to an item, is how those costs stop.
How Long Does It Take to Organize a Kitchen Pantry?
A focused session with everything removed first takes four to six hours for a standard kitchen. Larger kitchens or heavily stocked pantries can run a full day without rushing.
Having every supply ready before you start is key. A mid-session store run adds at least an hour and breaks the focus that keeps the session moving forward.
Frequently Asked Questions
What is the best container for kitchen pantry organization?
Square, clear containers are the best choice. They stack without wasted corner space, show contents at a glance, and are easier to label consistently than round containers.
How do I get my family to keep the pantry organized?
Walk every household member through the new layout when the session is done. When people understand where things live and why, they return items correctly. Labels help everyone, including children, without the need to ask each time.
How many pots and pans should I keep in the kitchen?
Six to eight pieces is the right number for most kitchens. If you need more than two deep drawers to fit your collection, the collection is the problem, not the space.
Should I organize pantry shelves from top to bottom or bottom to top?
Start from the bottom. Place the tallest item first, then adjust the shelf above to clear it by one finger-width. Work upward from there, shelf by shelf, until you reach the top.
Do I need to buy new storage products to organize a kitchen pantry?
No. The method in this guide works across thousands of kitchens without new cabinetry or special bins. The setup relies on sequence, category discipline, and trimming down what you keep to what the space can actually hold.
Where should canned goods and dry food be stored in a pantry?
Group them by category in a fixed zone and adjust shelf height to fit them without wasted space above. Keep the most-used items at eye level and the rarely used ones on higher shelves.
Organize Your Kitchen Pantry and Keep It That Way
A kitchen that works is not one with more storage. It is one where every item has a set category, a fixed location, and a clear quantity limit.
The steps in this article for organizing a kitchen pantry work in every kitchen size and layout. They rely on sequence and category discipline, not bins and cabinetry.
Follow the steps in order, label everything before you walk away, and involve the full household in the final walkthrough. That is what makes the results last.