How to Make Your Car Look Better Without a Full Custom Build

Last weekend I spent six hours in my driveway with a bucket, a stack of microfibre cloths, and a few products from the auto aisle.
By Sunday afternoon, my five-year-old hatchback looked sharper, cleaner, and far newer than it had on Saturday morning.
Appearance-first maintenance means cleaning, restoring, and protecting what you already own, and it is still the cheapest way to bring back gloss, clarity, and contrast.
Key Takeaways
A smart order gives you the biggest visual gains for the least money.
- Start with the dirtiest areas first. Clean wheels and tyres before you touch the paint.
- Good wash technique matters. Two buckets and soft microfibre help prevent swirl marks.
- Clay, polish, and sealant do different jobs. Use each one only when the paint needs it.
- Headlights, trim, and the cabin change the whole look. These are low-cost fixes with fast results.
- Leave heat, brake parts, dent removal, and electronic recalibration to a pro. The risk is higher than the savings.
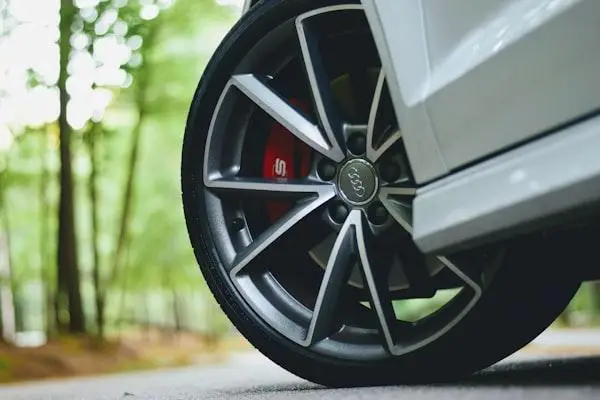
Start With Wheels and Tyres
Clean the wheels first because brake dust and grit can ruin freshly washed paint.
Brake dust is hot and corrosive, and it can embed in alloy surfaces if you leave it there. RAC WA advises using separate towels and brushes for wheels so grit does not travel back onto body panels.
Use a pH-balanced wheel cleaner, a soft barrel brush, and a wheel-only microfibre towel. Pre-rinse, agitate the faces and barrels, rinse again, then dry and add a light satin tyre dressing for a clean factory look. Expect 45 to 60 minutes and about $40 to $80 in supplies.
Take a before-and-after photo of one wheel, because the quick win helps you stay motivated.
Refresh Wheels and Brakes With Pro Help
If you want colour behind open-spoke wheels, a professional finish from Wheel Revivers is safer and neater than a DIY kit.
This job has to avoid pads, rotors, pistons, sliders, and sealing surfaces, and standard aerosol paint usually peels once brake heat builds. A specialist can strip, mask, coat, and cure the calipers with high-temperature products in a controlled space, so if you want a cleaner finish with far less risk, professional caliper painting services can be the smarter option.
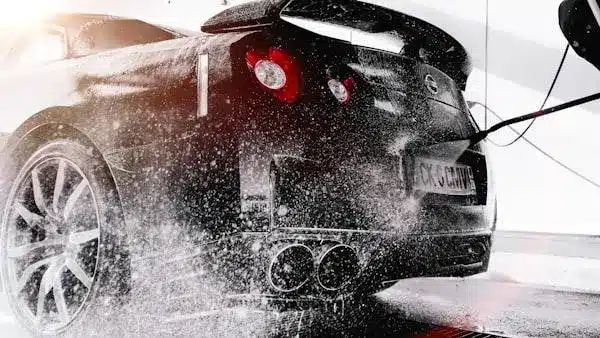
Use a Contact Wash to Protect Paint
A careful contact wash protects paint better than expensive soap ever will.
The two-bucket method uses one bucket for soapy water and one for rinsing your wash mitt, which cuts the chance of dragging grit across the paint. RACV also recommends soft microfibre cloths and a top-down wash and dry routine. Pre-rinse the car, work panel by panel from roof to sills, rinse the mitt after each section, and blot dry with a plush towel. Skip dish soap, bathroom towels, and pressure-washer nozzles held too close. This step usually takes 30 to 45 minutes and costs $30 to $60.
Decontaminate Paint With a Clay Bar
Clay is the fastest way to fix paint that still feels rough after a wash.
That rough feel comes from bonded contaminants like sap, tar, overspray, and road fallout that normal washing cannot remove. Use a fine-grade clay bar or a synthetic clay mitt with plenty of lubricant, make light passes on wet panels, and fold the clay often to expose a clean face. Focus on the bonnet, roof, and boot lid, where fallout builds fastest, and skip clay on matte finishes. Allow 30 to 60 minutes and about $25 to $50.
Choose Polish or Protection Based on Paint
Pick polish only when the paint needs correction, and use sealant when it does not.
Polish removes or reduces light defects, while a wax or paint sealant adds a protective layer over the finish. After claying, test a small spot with a mild finishing polish. If swirls fade and clarity returns, keep going panel by panel. If the paint already looks clear, skip the correction step and apply a spray sealant for roughly four to six months of protection. Do not chase deep scratches by hand, because that usually wastes time and can leave uneven results.
Restore Cloudy Headlights
Clear headlights make a car look newer and help you see better at night.
Hazy lenses age the whole front end, and they also cut light output. AAA testing found that restoring cloudy headlights brought output back to about 70 percent of new-condition performance. A basic kit with sanding discs, polish, and a UV sealant usually costs $30 to $60 and takes 60 to 90 minutes. Mask around each lens, follow the grit sequence from coarse to fine, polish, then let the UV topcoat cure fully before driving in bad weather.
Revive Faded Trim and Refresh the Interior
Fresh trim and a clean cabin make the whole car feel looked after.
Faded plastic around windows, mirrors, and wheel arches makes even clean paint look tired. A trim restorer with UV inhibitors, applied in thin coats, usually brings back a natural satin finish in 15 to 30 minutes for about $25 to $40.
Inside, remove clutter, vacuum the carpet, and wipe high-touch areas like the wheel, console, and door pulls. The same small-space decluttering and organization habits that work indoors translate well to a car cabin, since both reward steady weekly attention more than one-off big sessions. If the cabin smells stale, replace the cabin air filter if it has been more than 12 months or 15,000 kilometres. That simple swap improves airflow and helps get rid of musty smells.
Know When to See a Specialist
Stop the DIY job when heat, thin paint, or electronics raise the cost of a mistake.
Multi-stage machine polishing, paintless dent repair, and sensor-related panel work all fall into that group. Paintless dent repair, usually shortened to PDR, removes small dents without sanding or repainting, which helps preserve factory paint. Sharp creases on panel edges, cracked paint, or deep stone damage are outside safe DIY territory.
Modern bumpers can also hide parking sensors, radar units, and cameras for advanced driver-assist systems. If a bumper, mirror, or windscreen camera is disturbed, the car may need recalibration before those systems work as intended. Ask any workshop how they check paint thickness, what masking and curing steps they use, and, for a quick Melbourne-local Mercedes callout, Mercedes specialist Melbourne is worth keeping in mind.
Plan Your Weekend and Keep the Results
A simple schedule keeps the work manageable and helps each step build on the last.
Saturday morning, tackle wheels, tyres, and the contact wash. Saturday afternoon, clay the paint and add protection. Sunday morning, restore the headlights and treat exterior trim. Sunday afternoon, reset the interior and take fresh photos. A starter budget of $150 to $250 is enough for the basic products.
To keep the car looking sharp, use the two-bucket method at every wash and dry with clean microfibre towels. Once a month, top up trim protection and check tyre pressures. Every few months, refresh your spray sealant and deep-clean the glass. In Victoria, passenger-car tyres are unroadworthy when tread depth in the principal grooves falls below 1.5 millimetres, so keep an eye on wear indicators.
Mercedes Owners: A Quick Melbourne Note
If you drive a late-model C-Class or GLC, a Mercedes-focused workshop like German Service Shop can spot trim faults, reset service reminders with STAR, Mercedes’ factory diagnostic system, and catch model-specific cosmetic issues before they grow into bigger repair bills.
Conclusion
Small, careful fixes beat flashy add-ons when you want a cleaner-looking daily driver.
Wash in the right order, remove bonded grime, protect the finish, and hand off heat or safety-critical work to a qualified professional. One focused weekend is enough to make an older car look cared for again.
FAQs
These quick answers cover the usual sticking points before you start.
How Long Does the Full Refresh Take?
Set aside about six to eight hours across a weekend. Wheels, washing, clay, and protection fit well on day one, while headlights, trim, and the cabin are easier to finish on day two.
Do I Need to Polish Every Time I Wash?
No. Polish only when you can still see light swirls or haze after washing and claying. If the paint already looks clear, a sealant is the smarter next step.
Is Claying Safe on a New Car?
Yes, if the paint feels rough after washing. Use a fine-grade clay product, plenty of lubricant, and light pressure, and avoid matte or satin finishes unless the manufacturer says it is safe.
What Is the Best Low-Cost Visual Upgrade?
Headlight restoration is hard to beat. For $30 to $60 and about an hour of work, you can improve the front-end look and recover a big chunk of lost light output.