
Ever tried to speed up air dry clay projects? Many crafters ask this common question when waiting for their creations to set. Air dry clay is popular for its ease of use, but the drying time can test your patience.
Unlike oven-bake varieties, air dry clay works differently. Using heat on these materials might not give you the results you want. In fact, it could ruin your hard work.
But don’t worry – there are safe ways to help your clay dry faster without damaging it. This guide will show you what happens when you try to bake air dry clay and share better methods to finish your projects sooner.
Keep reading to learn how to handle your air dry clay correctly.
Understanding Air Dry Clay
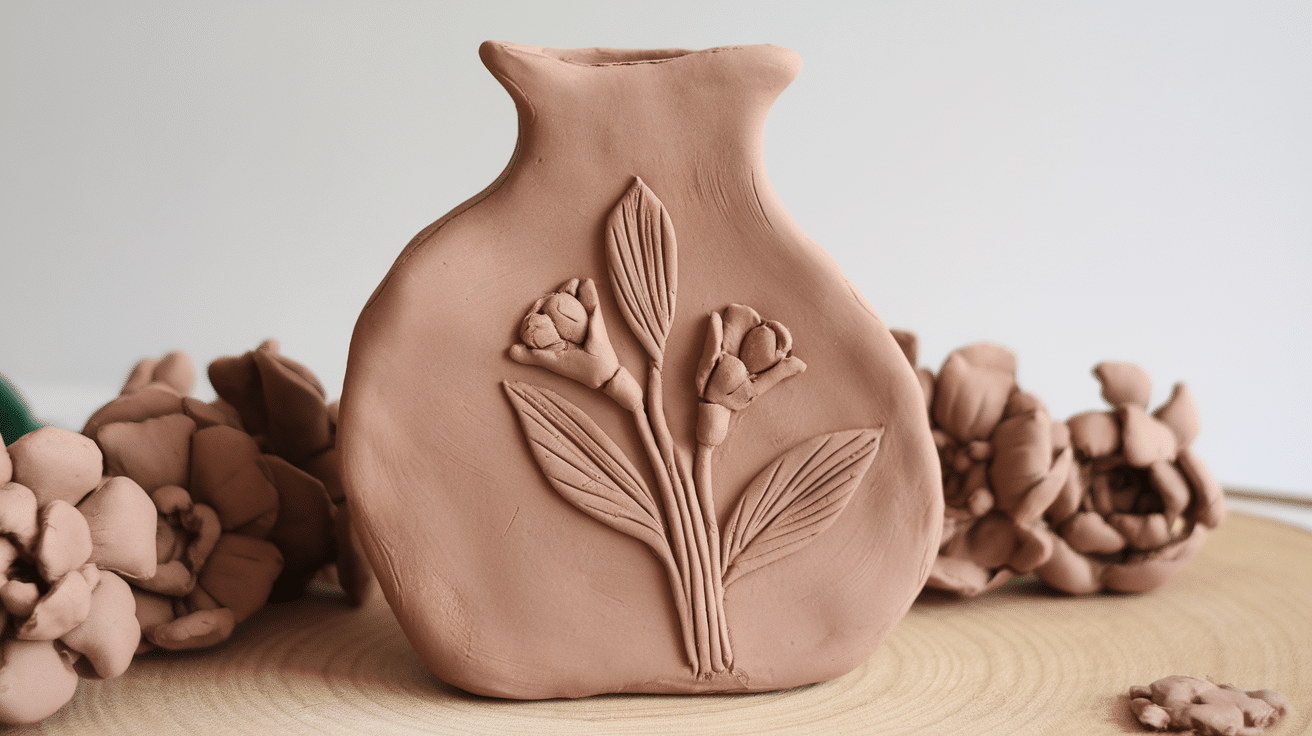
Air dry clay is a modeling material that hardens when left exposed to air, without needing heat.
Unlike polymer clay, which must be baked to cure, or ceramic clay, which requires firing in a kiln at high temperatures, air dry clay sets on its own.
This clay type is made from natural clay mixed with paper fibers or other binding agents.
Many crafters choose air dry clay for home projects, school activities, and hobby work because it needs no special equipment.
It works well for sculptures, jewelry, ornaments, and small figurines. The clay is easy to shape, mold, and carve with basic tools.
For beginners, air dry clay offers a simple entry point into clay crafting without the cost of kilns or ovens.
You can find it in most craft stores in white, terracotta, or colored versions.
Can You Bake Air Dry Clay?
Technically, you can put air dry clay in an oven, but it’s not recommended by most makers. The name itself hints at how it’s meant to dry – in open air. Many crafters try baking air dry clay hoping to speed up their projects.
They get tired of waiting the typical 24-72 hours for their work to set fully.
Here’s why some people try to bake air dry clay:
- They want to finish projects faster for gifts or sales
- They hope heat will make the clay harder or stronger
- They’re used to working with polymer clay that needs baking
Most clay brands clearly state on their packaging that baking isn’t needed or helpful. Companies like Crayola, DAS, and Activa all warn against using heat with their air dry products. When you check the instructions, you’ll see they recommend room temperature drying for best results.
Going against these guidelines might ruin your project and waste your time and materials.
What Happens If You Bake Air Dry Clay?
Putting air dry clay in the oven often leads to problems. Here are five key issues you might face:
1. Cracking and Breaking
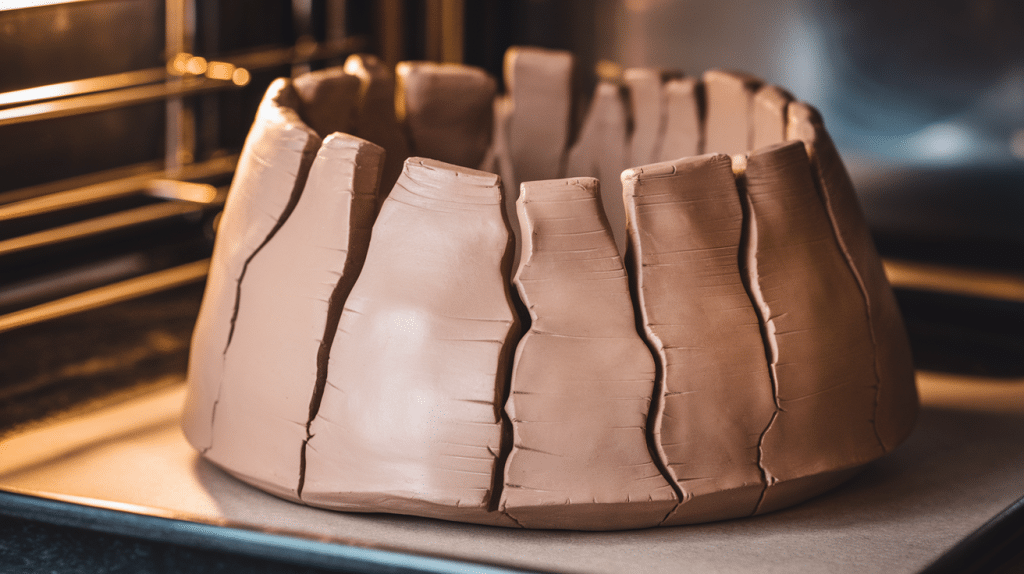
Air dry clay loses moisture too quickly in high heat. This fast drying shrinks the clay unevenly, causing stress throughout your piece. Thin sections dry faster than thick areas, creating tension that results in cracks.
- Small cracks might appear first at edges and corners
- Larger pieces tend to crack more severely than tiny ones
- Cracks can form inside the clay where you can’t see them
Pro Tip: If you find small cracks after drying naturally, you can repair them with a mixture of clay dust and water paste.
2. Warping and Distortion
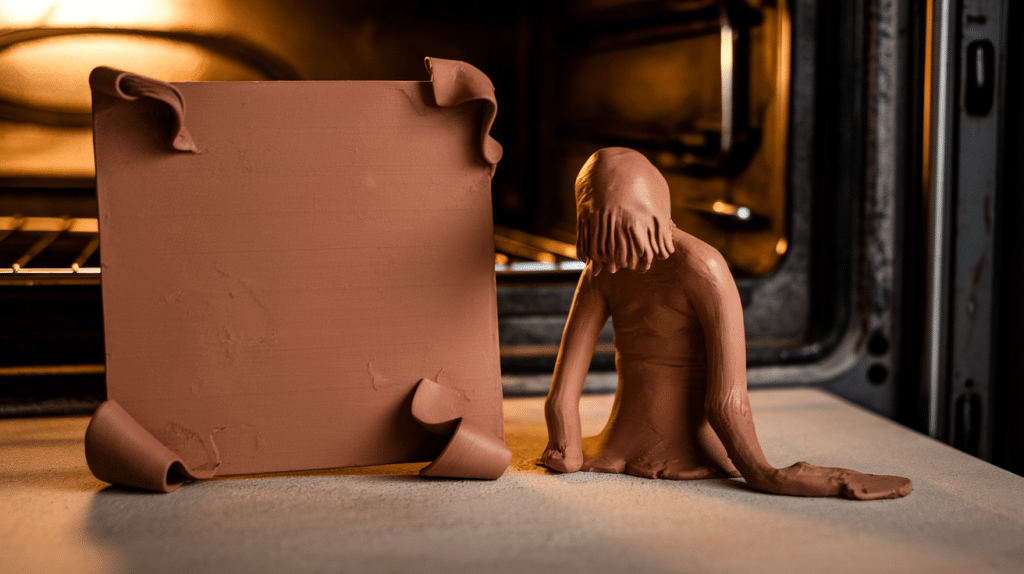
Heat causes air dry clay to lose its shape. Your flat pieces might curl up at the edges, and standing sculptures could lean or tilt. The clay structure weakens as moisture leaves too quickly.
- Thin, flat pieces like tiles warp more noticeably
- Unsupported extensions (arms, legs, etc.) may droop
- Original details and textures can become less defined
Pro Tip: Always support your air dry clay pieces with aluminum foil cores or armatures while they dry naturally.
3. Bubbling and Blistering
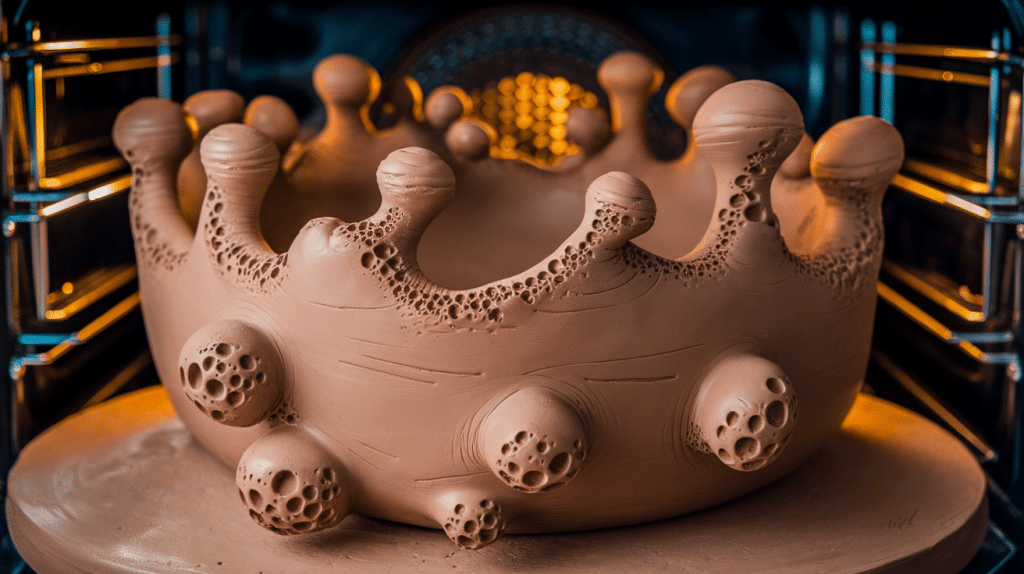
Air trapped inside the clay expands when heated. This creates bubbles that push up through the surface of your work. Once these bubbles form, they’re impossible to fix without starting over.
- Bubbles appear most often in thicker sections
- Kneading clay thoroughly before use reduces air pockets
- Bubbling ruins surface details and paint
Pro Tip: Remove air bubbles before drying by poking your piece with a needle tool while the clay is still wet.
4. Color Changes
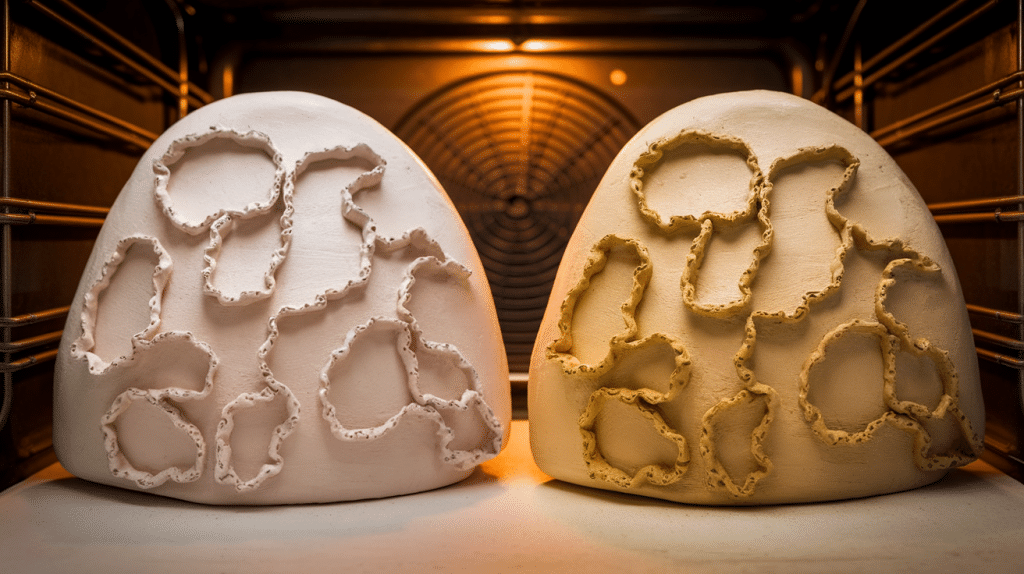
Many types of air dry clay change color when exposed to heat. White clay often turns yellow or beige, while colored clay may fade or darken unpredictably.
- Natural clay types tend to brown or darken
- White clay commonly develops a yellowish tint
- Color changes can’t be reversed once they happen
Pro Tip: Test a small sample of your specific clay brand if color matters for your project.
5. Increased Brittleness
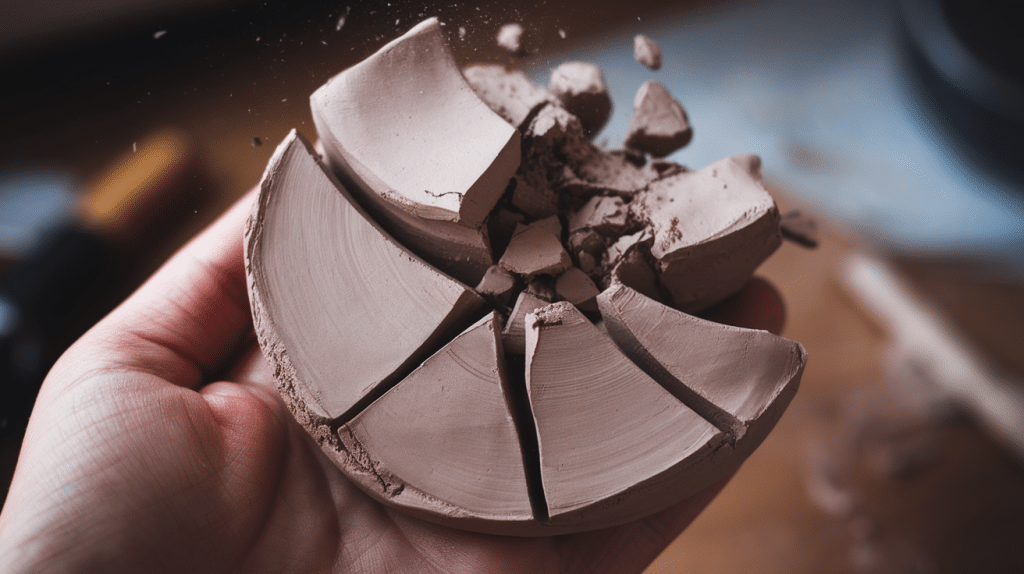
While you might think baking makes clay stronger, it actually does the opposite with air dry varieties. The heat removes essential moisture that helps maintain flexibility in the dried piece.
- Heat-dried pieces break more easily when dropped
- Thin sections become particularly fragile
- Projects may crumble when handled roughly
Pro Tip: For stronger air dry clay projects, mix in a small amount of white glue before shaping.
Safer Alternatives to Speed Up Drying
Looking for faster ways to dry your air dry clay without baking? Try these safer methods.
1. Using a Fan or Dehumidifier:
A gentle fan creates air movement that helps moisture evaporate faster from your clay.
Place your project on a wire rack and position the fan to blow across, not directly at it.
Set the fan on low or medium speed and turn your piece every few hours for even drying.
Keep at least 2-3 feet distance between the fan and clay to prevent fast, uneven drying.
2. Placing in a Warm, Dry Area
Find a spot in your home with consistent warmth and low humidity.
The steady conditions help clay dry without the stress that causes cracks.
Choose areas away from kitchen steam or bathroom moisture for best results.
Use a room with good natural ventilation and keep clay off cold surfaces like metal or stone.
3. Breaking Projects into Thinner Parts
Working with smaller, thinner sections cuts drying time significantly.
Large, thick pieces might take days, while thin parts can dry overnight.
Keep clay thickness to 1/4 inch or less when possible for faster drying.
Make hollow forms instead of solid ones and use armatures inside to reduce clay volume.
Pro Tip: Join dried pieces later with fresh clay slip (clay mixed with water) or craft adhesive.
Final Tips for Working with Air Dry Clay
1. Sealing and Finishing After Drying
• Smooth first: Sand dried clay with fine-grit sandpaper to remove bumps before applying any finishes.
• Seal completely: Apply 2-3 thin coats of acrylic sealer, mod podge, or varnish to protect your work from moisture.
• Avoid thick layers: Thin, even coats of sealer prevent bubbling and ensure proper drying throughout.
2. Painting and Decorating
• Prime the surface: Apply white gesso or acrylic primer for better paint adhesion and brighter colors.
• Choose acrylics: Water-based acrylic paints work best on air dry clay and come in many finishes.
• Seal your artwork: Always add a final protective coat after painting to prevent chipping and extend life.
3. Storage and Longevity
• Store unused clay properly: Keep raw clay in plastic wrap and airtight containers to prevent drying out.
• Protect finished pieces: Display clay items away from high humidity and direct sunlight to prevent damage.
• Handle with care: Even sealed air dry clay remains somewhat fragile compared to kiln-fired ceramics.
Conclusion
Now you know the truth about baking air dry clay. While putting it in the oven might seem like a good idea, letting it dry naturally is your best choice.
The name tells you exactly how to use it – just let the air do its work. With the tips we’ve shared, you can speed up drying time safely without risking cracks, warping, or color changes.
Air dry clay offers a simple way to create without special equipment. By using fans, finding warm spots, working with thinner pieces, and following good drying practices, you’ll get better results.
Remember to seal your finished pieces for protection and longevity. Have you tried any of these methods with your clay projects?