Step-By-Step Flower Printing Guide: An Eco-Friendly Art Form
Ready to make art with flowers and paper? Flower printing lets you turn garden blooms into lasting wall art. This simple technique uses fresh flowers to create one-of-a-kind prints that bring nature indoors.
Making flower prints needs just a few items from your home and garden. The process is quick, yet the results look like they took hours to create. Each print captures the unique shapes and textures of real flowers.
What makes flower printing special is its gentle impact on nature. You can use flowers from your garden or even fallen petals. The materials are basic, and the process creates no waste.
In this guide, we’ll show you how to make beautiful flower prints. From picking the right flowers to getting clear impressions, you’ll learn everything needed to start this creative hobby.
What is Flower Printing?
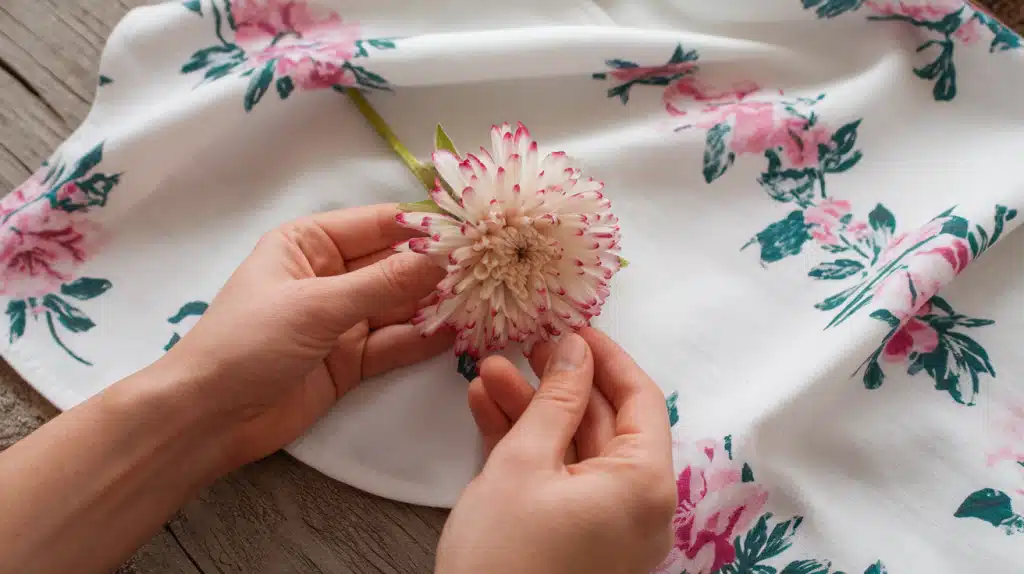
Flower printing turns real flowers into artwork on paper or fabric. This method creates lasting images of plants through direct contact between the flower and your chosen surface. Each print shows nature’s details in a way photos can’t match.
Think of flower printing as taking a flower’s signature. When you press a bloom against paper, it leaves its shape, texture, and sometimes even its natural color behind. The process feels like uncovering a secret way to keep flowers forever.
A Walk Through History: Roots of Flower Printing
People have used plants to make art for thousands of years. Early artists noticed how flowers left marks on their hands and clothes. This simple observation led to purposeful flower printing techniques.
In Japan, artists pressed cherry blossoms into silk scrolls. Indian craftspeople used marigolds to stamp patterns on fabric. European botanists made detailed flower prints to study plants. Each culture added its touch to flower printing methods.
Today’s flower printing builds on these old practices. Artists combine traditional methods with new materials, but the basic idea stays the same: letting flowers tell their stories through prints.
Techniques for Flower Printing
1. Hammered Flower Printing: From Petals to Paper
The hammering method lets you make prints in minutes. Begin by choosing fresh flowers in full bloom. Place your flower between two sheets of clean paper. A wooden mallet works best for this step. The tapping starts from the middle and moves outward, helping release the flower’s natural colors into the paper.
Your pressure matters when making hammered prints. Too soft will not release the colors, while too hard might damage the design. Watch how the color spreads through the paper. When you see clear shapes forming, you’re doing it right. After printing, use small tweezers to carefully remove the petals.
2. Eco-Printing with Flowers: Nature’s Press
Eco-printing combines flowers and fabric through steam. This method requires more time but creates lasting images. The process starts with laying flowers on fabric. The fabric is then rolled around a wooden stick, making what artists call a bundle.
The bundle needs tight string ties to hold everything in place. Steam opens the flowers’ colors and helps them move into the fabric. This process often takes about an hour of steaming.
Many items from your kitchen can help set the colors. Simple things like vinegar, salt, or tea make the prints last longer.
3. Flower Dye Printing: Painting with Petals
Making dyes from flowers opens up new ways to print. Different flowers give you different colors. Marigolds make yellow shades, while roses offer soft pinks. The process starts by boiling flowers in water. This pulls out their natural colors into a liquid you can use for printing.
Here’s a comparison table of flower printing methods:
| Method | Time Needed | Best Materials | Color Stay | Skill Level |
|---|---|---|---|---|
| Hammering | 30 mins | Fresh flowers, paper | 6-12 months | Beginner |
| Eco-printing | 2-3 hours | Dried flowers, silk | 2+ years | Intermediate |
| Dye printing | 1-2 hours | Any flowers, cotton | 1+ years | Beginner |
These methods work well alone or together. You might start with simple hammered prints. As you learn more, try mixing methods. Each piece of art shows your growing skills with flower printing. The fun comes from trying new ideas and seeing what works best for you.
Step-by-Step Guide to Eco-Printing with Flowers
Step 1: Gather Your Items
For the best results, start with silk fabric. You’ll need fresh flowers from your garden or store, string, a wooden stick, and a plastic sheet. Set up your steamer or a large pot with water.
Step 2: Ready Your Fabric
Wet your silk and run it through a spin cycle. This removes extra water but keeps the fabric damp. Spread it on a flat table and fold it in half to mark where the flowers will go.
Step 3: Set Up Your Design
Place flowers on one side of your folded silk. Some flowers face up, others down. Try mixing flower heads and stems for different print effects. Press them gently into place.
Step 4: Make Your Bundle
Fold the silk’s empty half over your flowers. Cut a plastic sheet to match your fabric size. Place it on top. Roll everything around your wooden stick, pressing firmly as you go.
Step 5: Steam Time
Tie your bundle with string – make it tight. Steam for 20-30 minutes. Check once at the 10-minute mark to see how colors develop.
Step 6: The Big Reveal
Let your bundle cool. Unwrap it slowly to see your flower prints. Each flower type makes its pattern and color on the silk.
Watch BillyNou’s full video guide on YouTube to see these steps in action. Her detailed walkthrough shows extra tips for getting clear, bright prints.
Conclusion
Flower printing lets you bring bits of your garden into your home in a new way. This method turns each petal and leaf into lasting artwork on silk. You can choose what works best for you, from the gentle hammer technique to the steam-based eco-print method.
As you try flower printing, you’ll notice how each bloom makes its mark differently.
Coreopsis might give you sharp details, while cosmos creates soft color spots. Your prints will never look exactly like anyone else’s, making this craft so special.
Starting with silk makes learning easier since it takes flower colors well. Once you understand the basic steps, you can try other natural fabrics.
Each print tells the story of a flower frozen in time on cloth.
Frequently Asked Questions
Is Flower Pounding Permanent?
With proper care, flower-pounding prints can last 6-12 months. Keep your prints away from direct sun and wash them gently. Colors may fade over time, but storing them in a dark place helps.
What is the Best Fabric for Flower Pounding?
Cotton and silk work best for flower pounding. These fabrics absorb flower pigments well. Light-colored or white fabric shows prints more clearly than dark ones.
What are the Hardest Flowers to Press?
Thick, fleshy flowers like orchids, lilies, and succulents are hard to press. They hold too much water and often turn brown. Flat flowers like daisies and pansies work much better.


