How to Fix a Chipped Tile in Under an Hour

Quick answer: Clean the chip, fill it with two-part epoxy, sand it smooth, match the color with touch-up paint, then seal it. Most chips are fixed in under an hour.
A dropped cast-iron pan. A dining chair dragged across the floor. A curling iron that slipped out of your hand in the bathroom. That is usually all it takes to chip a tile.
You notice it every single time you walk past now. It is small, but it bothers you more than it should.
You do not need to rip out the tile or call a contractor. Grab a few basic tools, set aside about an hour, and you can fix this yourself.
This post walks you through the repair itself, how to tell if your chip is even fixable, and what it should cost you either way.
What Really Causes Tile Chips
Several everyday factors can make tile more likely to chip, especially in busy areas of the home:
- Dropped objects: Heavy cookware, tools, appliances, or other sharp items can chip the tile when they hit the surface with enough force. Corners and edges are especially vulnerable.
- Dragging furniture: Moving chairs, tables, or other furniture across the floor can scrape the surface or put pressure on tile edges. Over time, repeated contact may lead to small chips.
- Exposed edges and corners: Tile edges receive more direct impact than flat surfaces. Steps, countertops, and outer corners are often the first places to show visible damage.
- Loose grout: Cracked or missing grout can allow a tile to move slightly when weight is applied. This extra movement stresses the edges and may eventually cause chipping.
Supplies You’ll Need to Repair a Chipped Tile
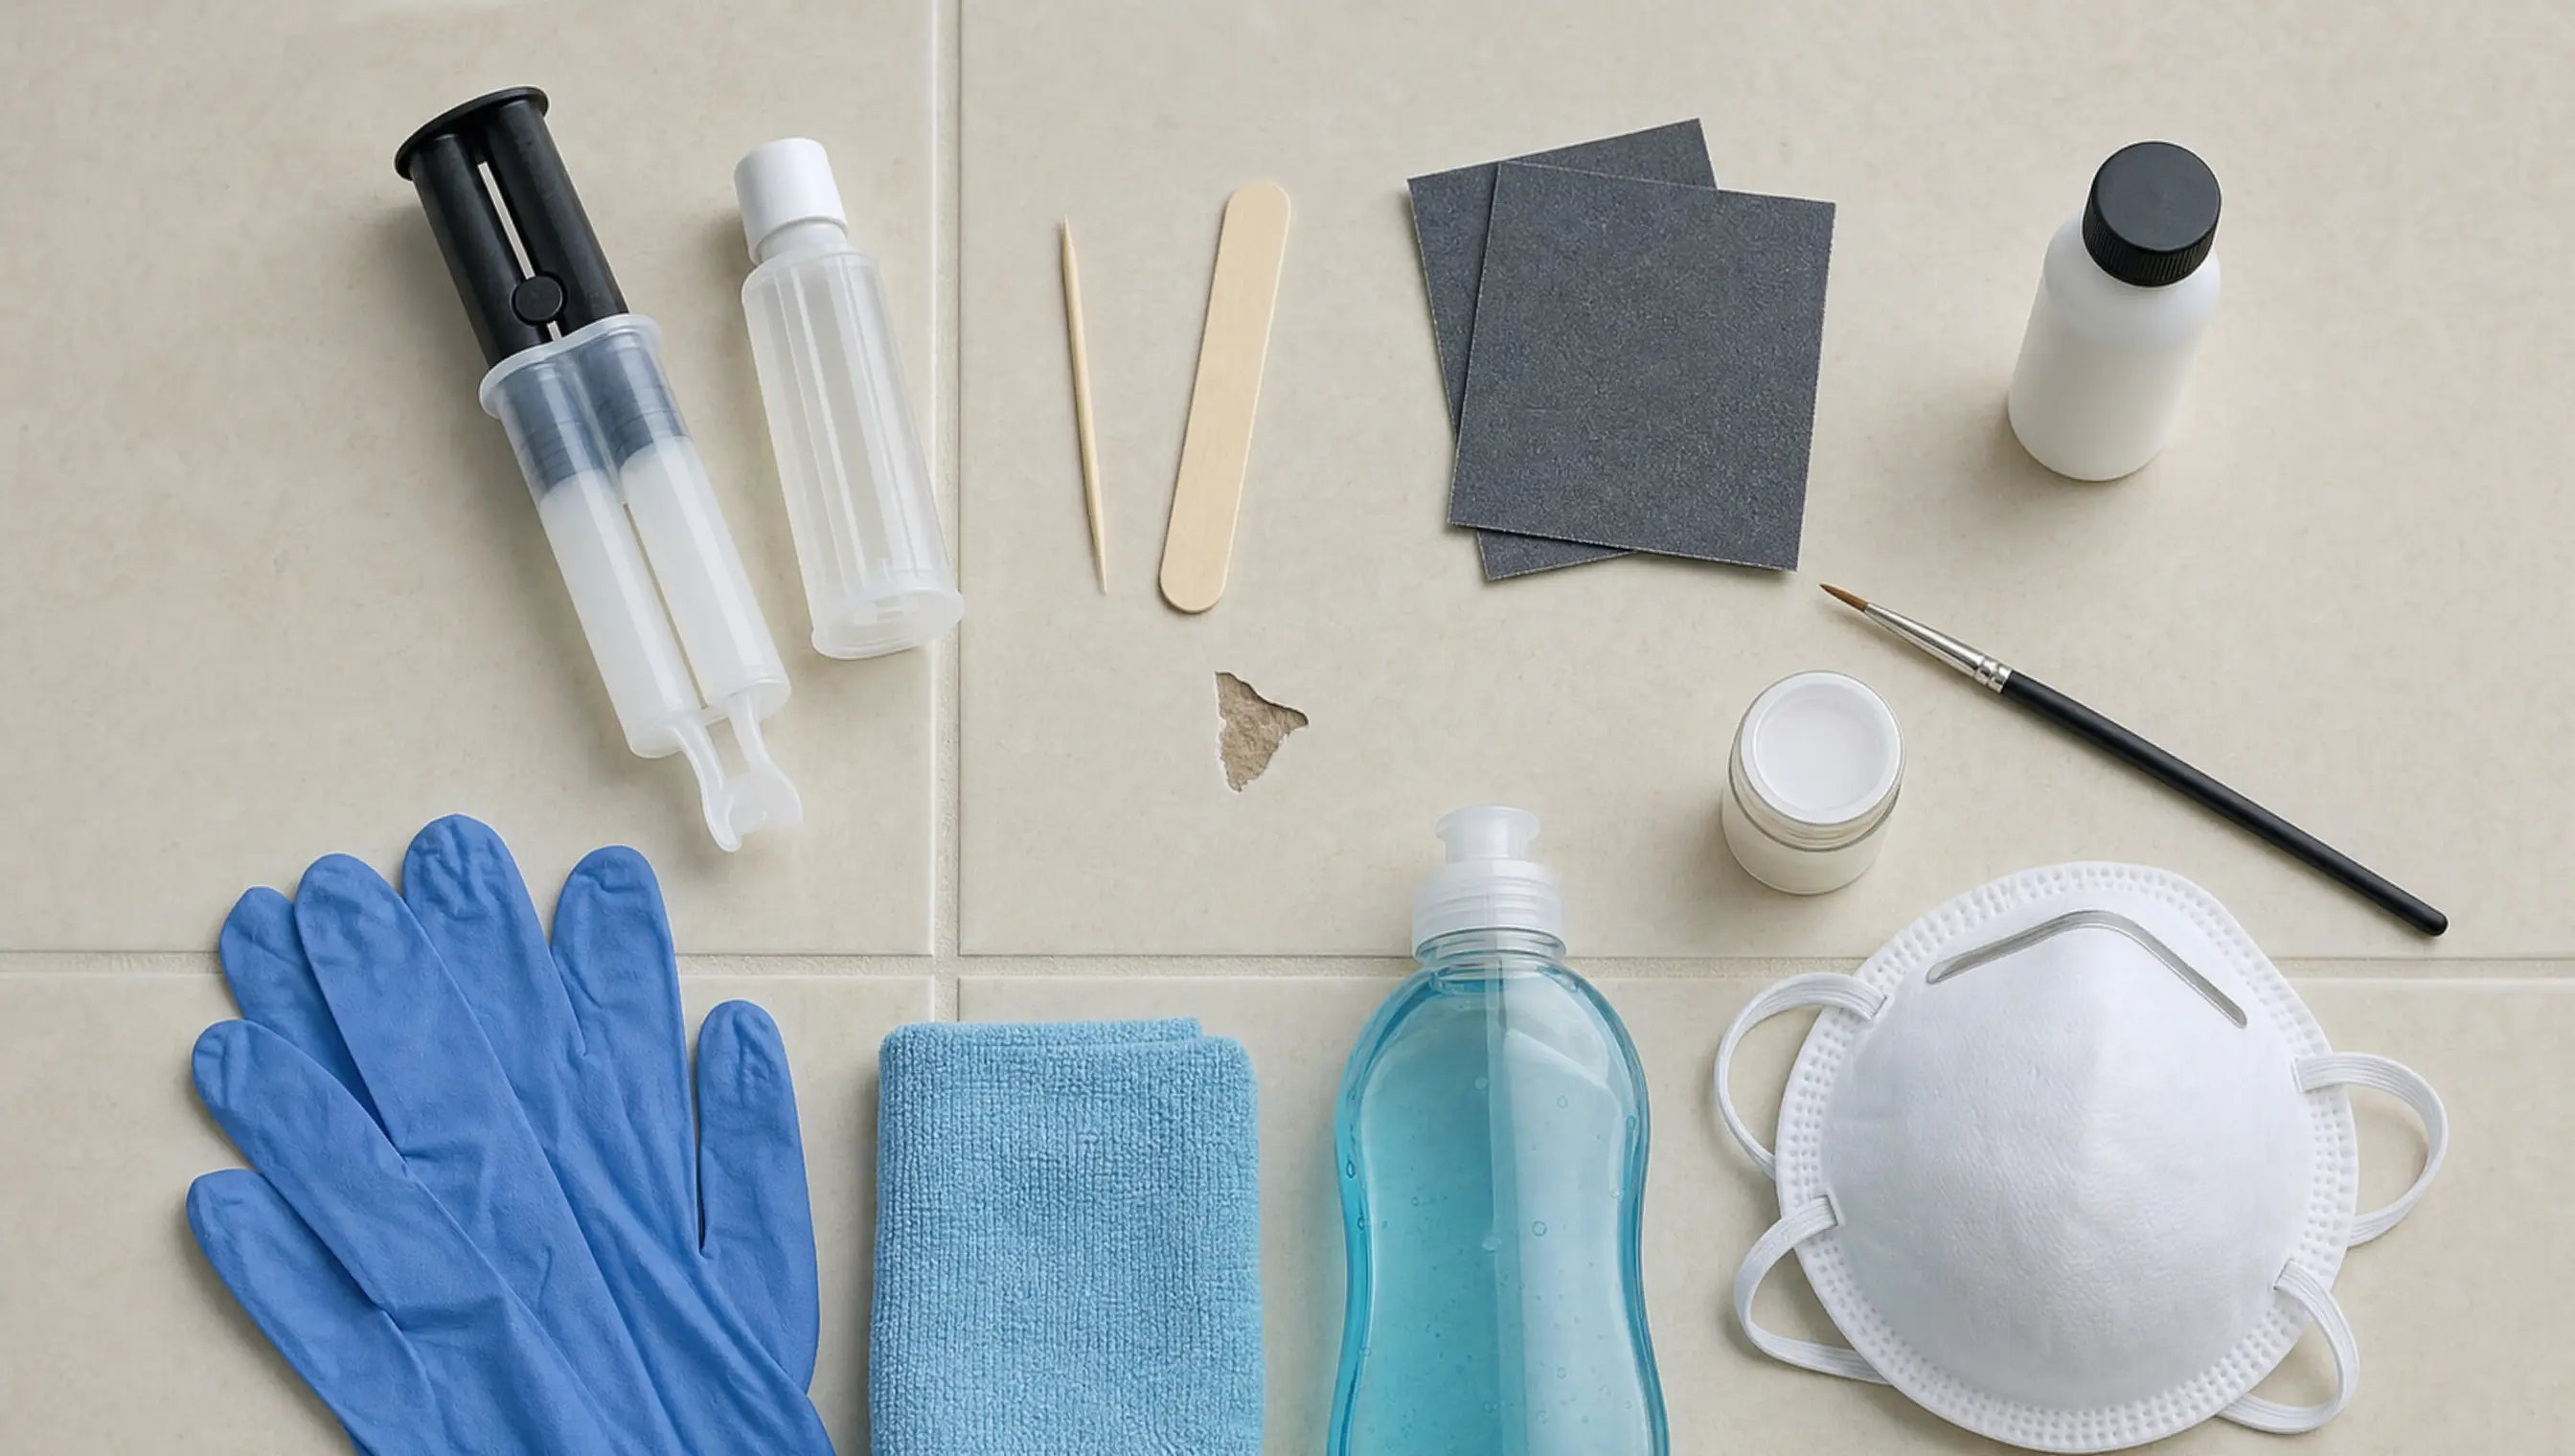
Gather these first so you don’t mix epoxy with wet hands halfway through. This covers repair only; replacement supplies are listed below.
- Two-part clear or color-matched epoxy, such as Gorilla 2 Part Epoxy, which sets in five minutes and bonds to ceramic and tile
- A toothpick for small chips, or a craft stick for larger ones
- Fine-grit sandpaper
- Tile touch-up paint that matches your tile, such as Ceramifix touch-up paint, made for tile and appliance surfaces
- A small artist’s brush
- Urethane sealer
- Dish soap or tile cleaner and a microfiber cloth
- Gloves and a face mask
How to Fix a Chipped Tile, Step by Step
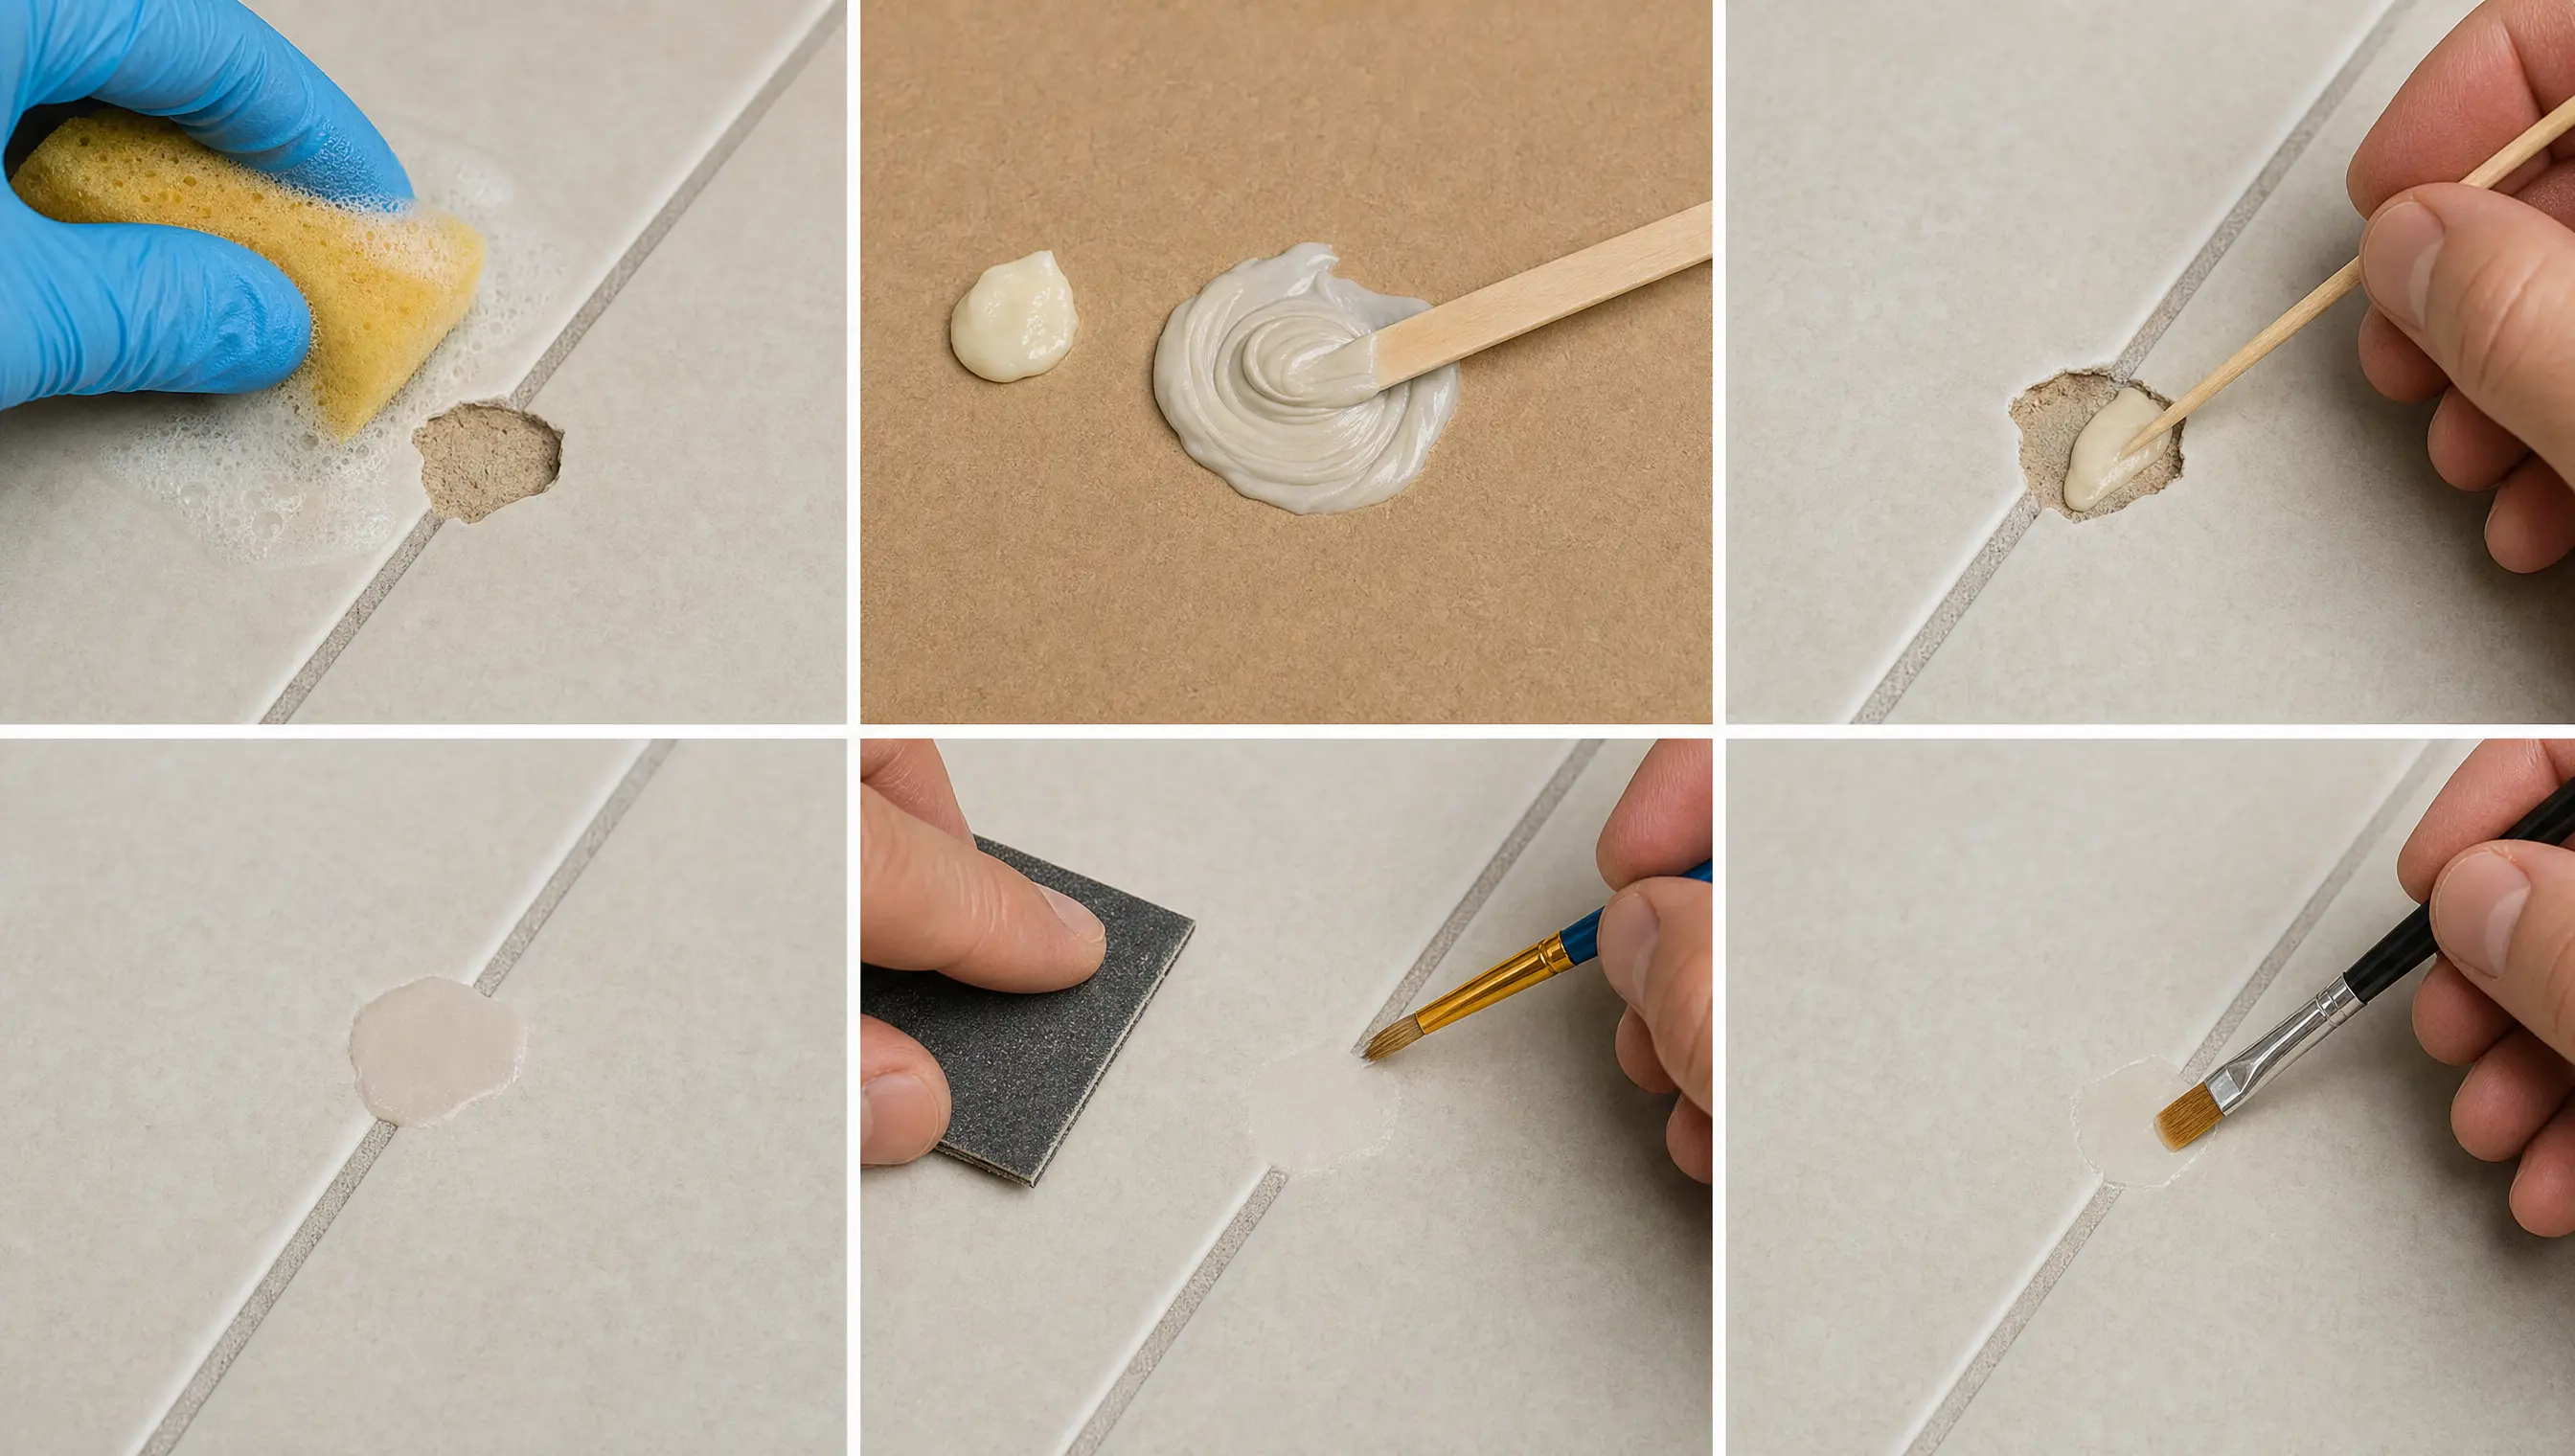
1. Clean the Chipped Area
Wash the damaged spot with dish soap or tile cleaner, then let it dry completely. Remove dust, grease, and loose fragments so the epoxy can stick properly.
Use a soft cloth or small brush to clean inside the chip. Make sure no moisture remains before moving to the next step.
2. Mix the Epoxy
Prepare a small amount of epoxy according to the product instructions. Mix the components on a scrap piece of cardboard until the texture and color look even.
Mix only what you can use within the working time. Once epoxy starts hardening, it becomes harder to spread smoothly.
3. Fill the Chip
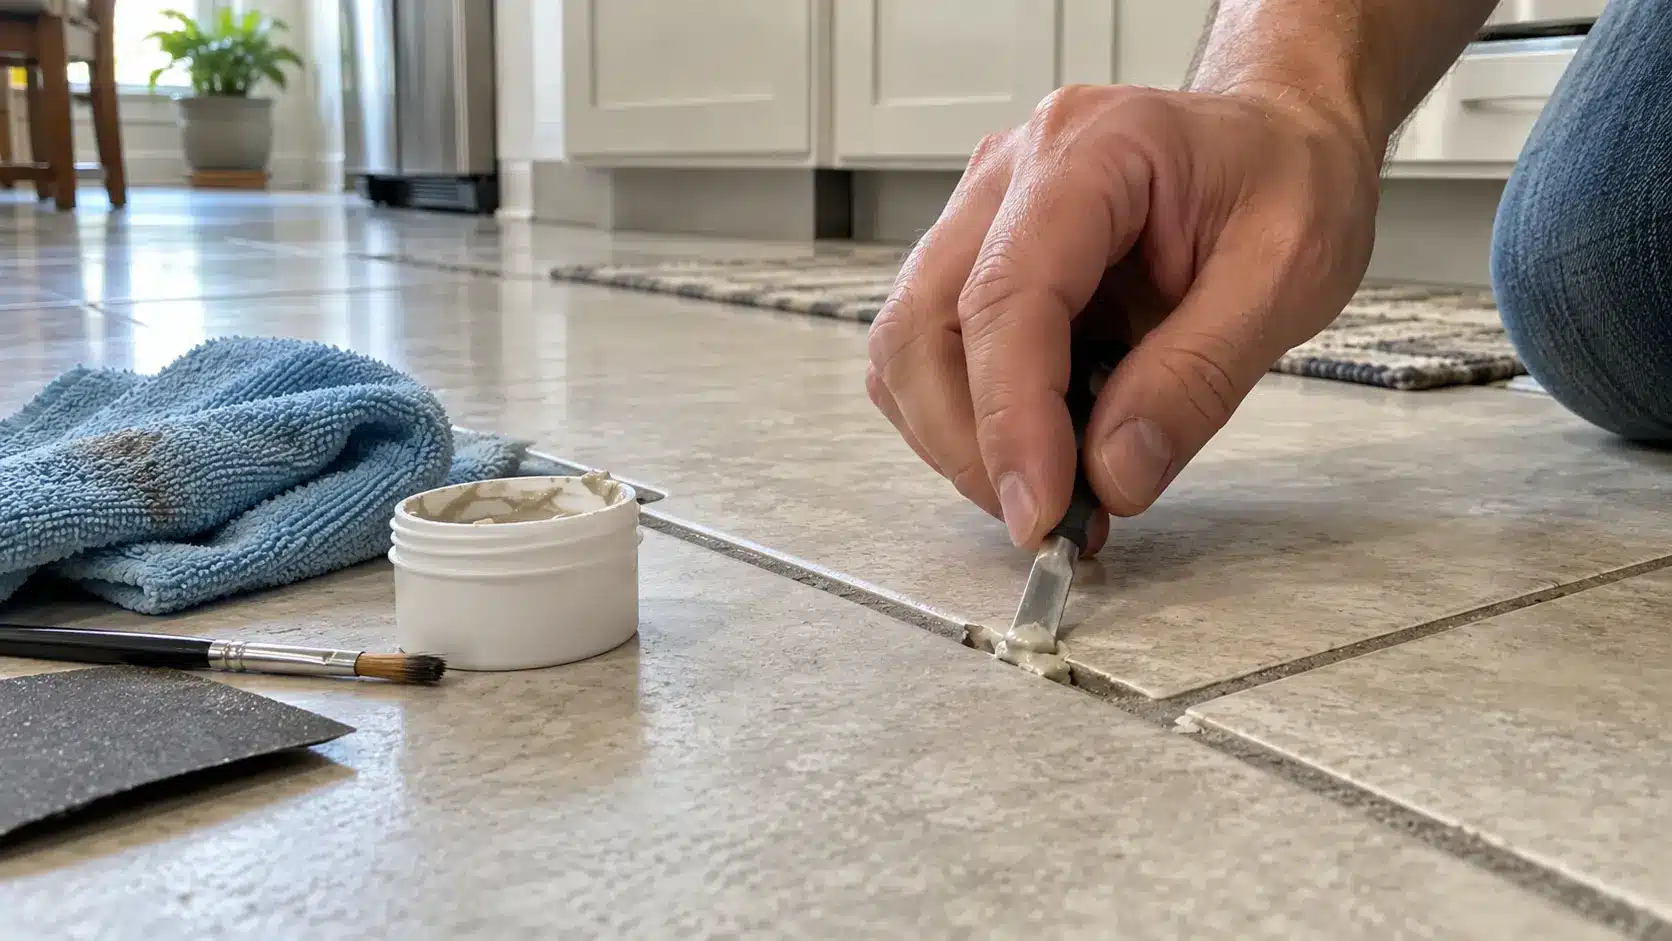
Use a toothpick, craft stick, or small applicator to press the epoxy into the damaged area. Apply it in thin layers and keep it away from nearby grout lines.
Slightly overfill the chip so you have enough material to sand flush later. Smooth the surface as much as possible before the epoxy sets.
4. Let the Epoxy Cure
Leave the repair untouched until the epoxy has fully hardened. Depending on the product, curing may take anywhere from 30 minutes to several hours.
Avoid walking on the tile or pressing on the repaired spot during this time. Full curing improves the patch’s strength and durability.
5. Sand and Match the Color
Once the epoxy is hard, gently sand it with fine-grit sandpaper until it sits level with the surrounding tile. Wipe away the sanding dust before adding color.
Apply thin layers of matching touch-up paint if needed. Check the repair from different angles and lighting to see whether the color blends well.
6. Seal the Repair
After the paint has dried completely, apply a thin coat of clear urethane sealer over the repaired area. Keep the layer smooth and limited to the patched section.
Let the sealer cure fully before washing the tile or exposing it to moisture. This final layer helps protect the repair from wear, stains, and water.
How to Know Whether to Repair or Replace a Tile
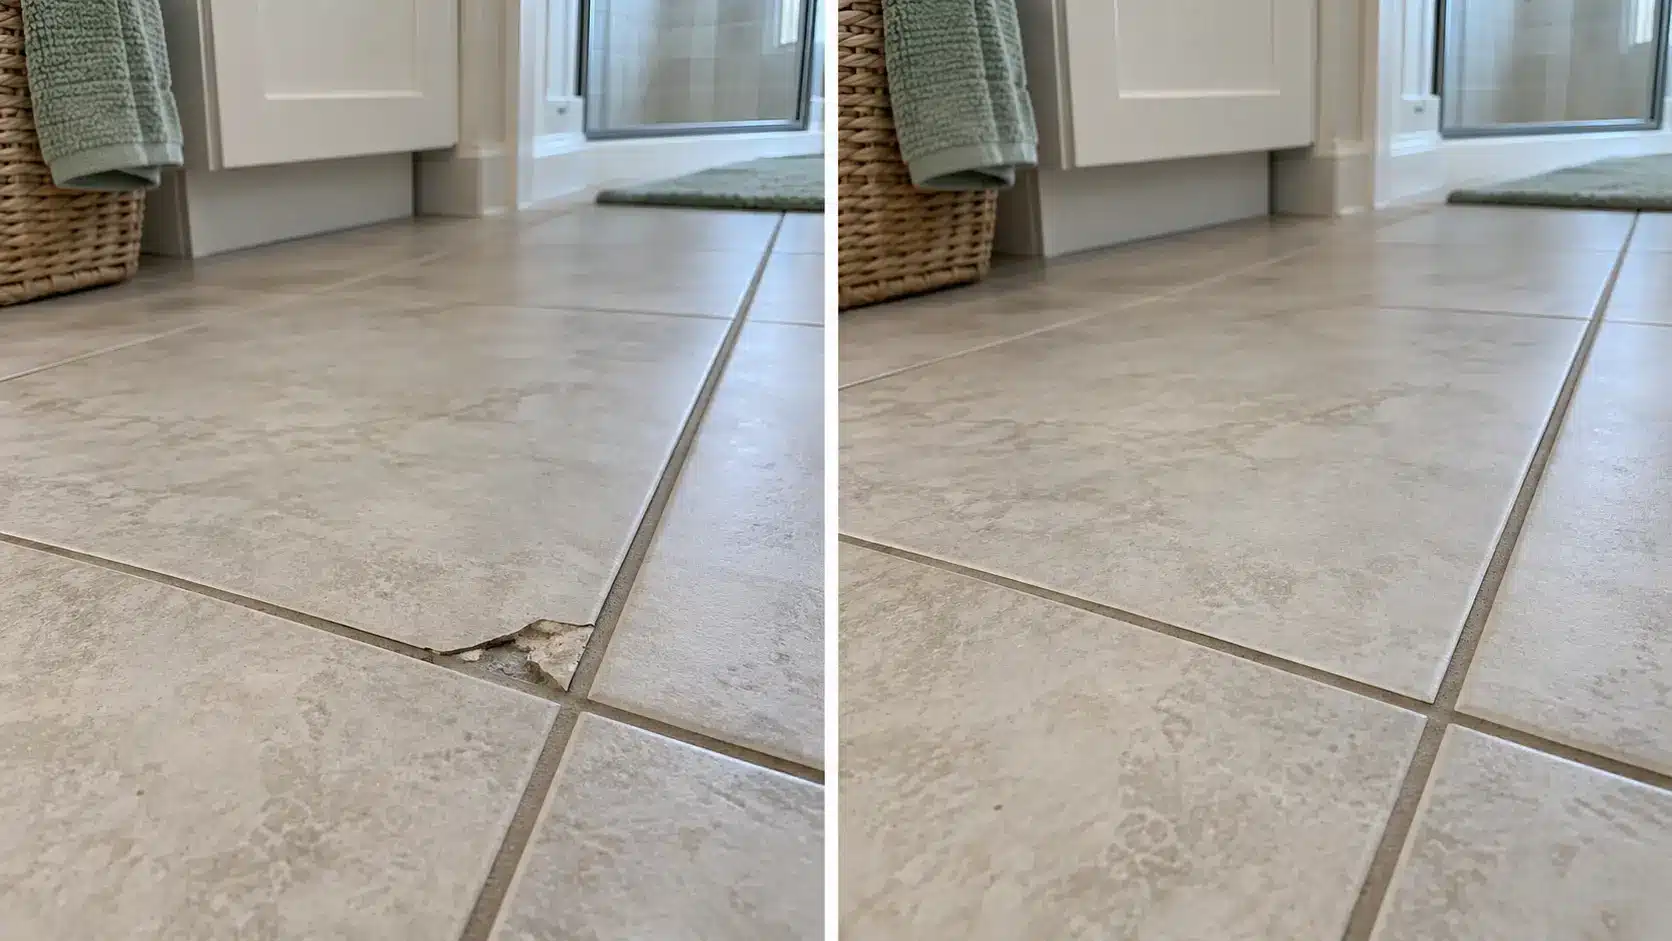
Not every chipped tile needs the same solution. A small chip, especially one smaller than a coin, can often be patched with epoxy or tile filler.
Damage along an edge is usually easier to repair, while a chip in the center may be harder to disguise and more likely to worsen. Gently tap the tile as well; if it sounds hollow or feels loose, you may have a deeper installation issue.
Visibility matters too, since a hidden chip can tolerate a less-perfect repair than damage in the middle of a busy floor.
Final: If your chip fails more than one of these checks, skip ahead to the replacement steps below.
How to Replace a Chipped Tile, Step by Step
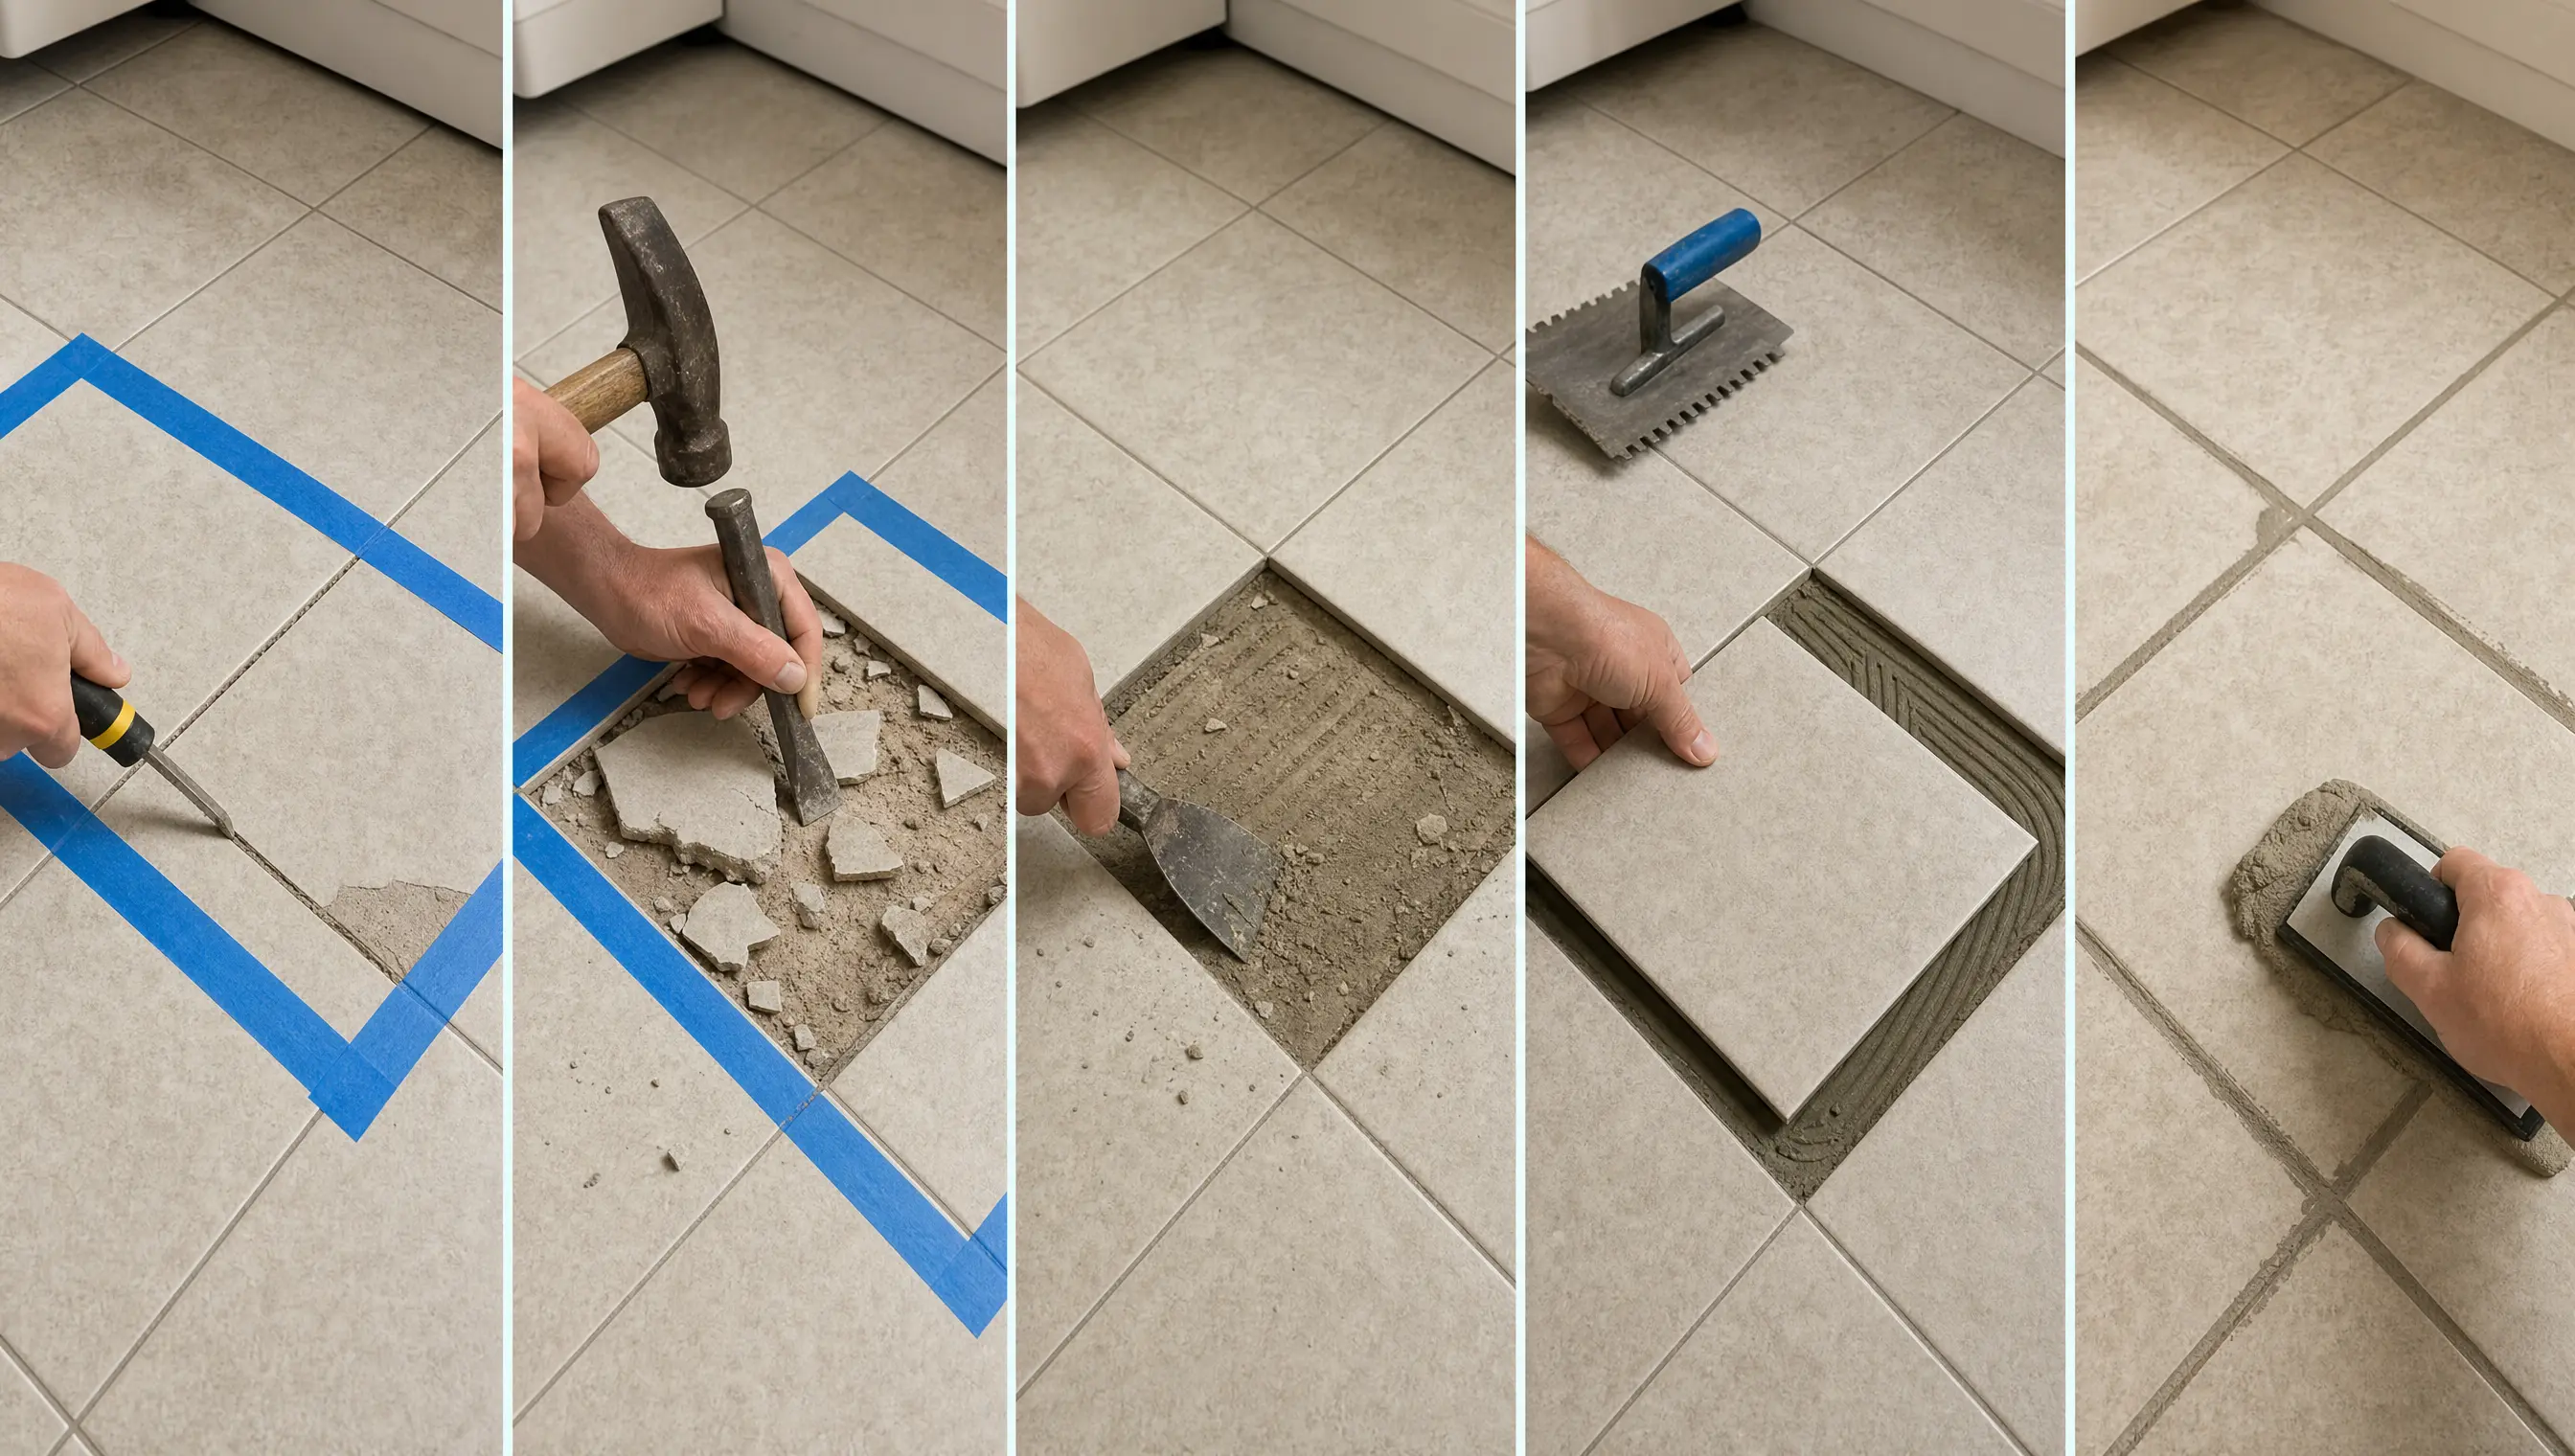
If your chip failed the earlier checks, replacing the tile is the safer option. You will need a spare tile, a grout saw, a hammer and chisel, thin-set mortar, a trowel, and grout.
- Protect and remove old grout. Tape off the surrounding tiles, then scrape out the old grout along all four edges with a grout saw or utility knife.
- Break up and remove the tile. Drill a few holes to loosen it, tap it apart from the center outward with a hammer, then pry out the pieces with a chisel.
- Clean the surface. Chisel off any leftover adhesive so the new tile can sit flat and flush.
- Set the new tile. Spread thin-set mortar with a notched trowel, place the new tile evenly, and let it cure for at least 24 hours.
- Apply grout. Work grout into the seams with a rubber float, wipe away the excess with a damp sponge, and avoid pressure on the tile for another 24 hours.
Different Types of Tile and How They Chip
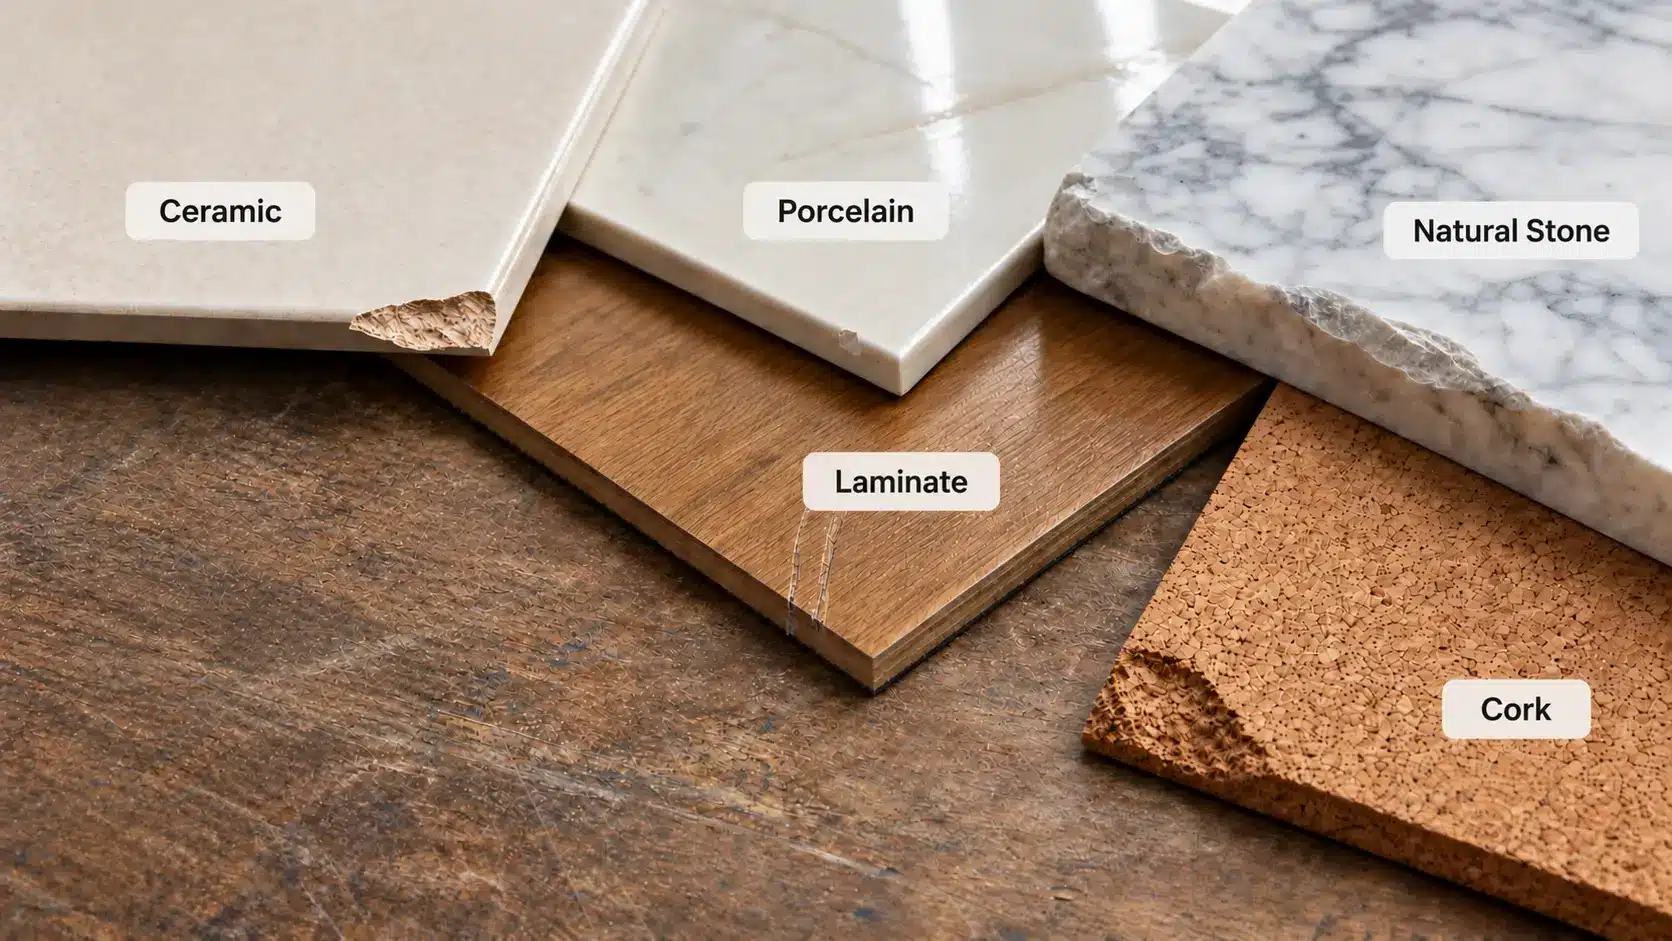
Not all tile materials chip the same way, so the right repair depends on the surface. Knowing the material first can help you avoid using the wrong repair method.
|
Tile Type |
How It Chips |
Best Fix |
|---|---|---|
|
Chips easily from impact |
Fill with epoxy and touch-up paint |
|
|
Porcelain |
Denser and harder to chip |
Use epoxy for small chips |
|
Natural Stone |
Can chip or crack deeply |
Professional repair is often best |
|
Laminate |
Surface layer may chip |
Fill small spots or replace plank |
|
Cork |
More likely to scratch or dent |
Replace badly damaged sections |
Small chips are often repairable, but deep cracks or large damaged areas may need replacement. Always match the repair material to the surface for a cleaner, longer-lasting result.
Tips for a Better Color Match When Repairing a Tile
A close color match helps the repaired area blend in and keeps the chip from standing out after the fix.
- Test the paint first: Try the color on a hidden edge of the tile before applying it to the repaired chip. This keeps any mismatch out of sight.
- Check the tile in daylight: Photograph or compare the tile in natural daylight, since indoor lighting can make colors appear warmer, cooler, or darker.
- Build the color in layers: For wood-look, veined, or patterned tile, start with a lighter base and add darker strokes on top to copy the original pattern.
- Avoid using one flat shade: Textured and patterned tiles usually contain several tones, so blending two or more shades often creates a more natural finish.
- Remember, this applies to repair paint: If you are replacing the tile completely, focus on finding the closest matching tile rather than mixing paint.
When to Call a Tile Pro Instead
Some damage is better left to someone who repairs tile for a living.
Call a pro if the chip runs deep into the tile body, not just the glazed surface; if the tile is natural stone like marble or slate; or if the damage spreads across more than one tile.
Large-format or expensive tile is also worth handing off, since one bad patch attempt can be costly to redo.
A pro is also worth calling if you notice several chips appearing in a short span, since that can point to a bigger issue underneath, like a cracked subfloor or a bad original installation.
If you have already tried a DIY patch and it did not hold or blend well, a professional can often fix both the tile and whatever caused the first attempt to fail.
How Much Does It Cost to Fix a Chipped Tile?
Fixing a chipped tile usually costs between $10 and $500, depending on whether you do it yourself, hire a pro, or replace the tile. Cost is often the deciding factor between doing it yourself and calling a pro.
|
Option |
Estimated Cost |
What It Covers |
|---|---|---|
|
DIY repair kit |
$10 to $40 |
Epoxy, touch-up paint, and sealer |
|
Professional repair |
$50 to $400 |
Labor and materials, depending on tile type and damage |
|
Full tile replacement |
$120 to $500 |
New tile, mortar, and grout for one or more tiles |
How to Prevent Future Chips
A little prevention goes a long way toward keeping your tile chip-free.
- Add felt or rubber pads under furniture legs, especially anything with metal feet
- Lift heavy items instead of dragging them across the floor
- Keep a few spare tiles from your original installation, so future repairs match perfectly
- Use a rug or mat in high-traffic spots, like in front of the sink or stove, where dropped items are most common
None of these steps take much time or money, but they add up over years of daily wear. A few small habits now can save you another round of epoxy and paint later.
Fix the Chip, Keep the Floor
A chipped tile is a small problem with a fast, low-cost fix, not a reason to tear up your floor. With basic tools, about an hour, and a bit of patience for the color match, most chips disappear from view.
Once your patch is dry and sealed, walk through the rest of the room. Smaller chips are easy to miss until you look closely, and fixing a few at once saves you from repeating the setup later.
A little maintenance now can also help prevent minor damage from becoming more noticeable over time.
Frequently Asked Questions
How to Touch Up Chipped Ceramic Tile?
Clean the chip, fill it with tile epoxy or repair filler, then apply matching touch-up paint once the filler has dried.
Is There a Filler for Chipped Tiles?
Yes. Tile repair fillers, epoxy putty, and ceramic repair compounds can fill small chips and create a smoother surface.
Can I Use Epoxy to Repair Chipped Tile?
Yes. Epoxy works well for many small ceramic and porcelain tile chips because it creates a hard, durable patch.
Does Lowe’s Offer a Tile Repair Kit?
Yes. Lowe’s currently carries tile and ceramic chip repair kits, including filler and color-matching options; availability can vary by location.
How to Disguise a Chipped Tile?
Fill the chip and use matching paint or glaze to blend it with the surrounding tile and make the damage less noticeable.