Some porch ceilings stay solid and attractive for years, while others start to sag, crack, or separate within months.
The difference isn’t always in the materials; it often comes down to how they were installed. Skipping key steps, such as ventilation, proper spacing, or sealing, can lead to serious problems, especially in areas exposed to moisture.
This walkthrough outlines what you need to know before getting started.
From selecting the right wood and tools to establishing proper airflow and avoiding contact with concrete or masonry, each step plays a crucial role in maintaining the integrity of your ceiling.
Whether you’re hiring a pro or doing it yourself, following these practical methods will help you get lasting results without the frustration of repairs down the road.
Let’s start with one of the most important decisions: selecting the right type of wood for your ceiling.
Choosing the Right Wood for Porch Ceilings
The type of wood you choose makes a significant difference in how well it holds up over time.
Thermally modified wood, such as LunaWood, performs well because it resists rot, warping, and insect damage for 20–30 years.
Cedar is another excellent choice because it naturally resists moisture and insects while handling temperature changes well.
Pine and other softwoods should be avoided because they shrink significantly and create gaps between boards.
Pre-finished wood performs better than site-finished options because it creates a more durable coating.
- Thermally modified wood benefits: LunaWood gets heated during manufacturing to remove sugars, preventing insect damage and moisture problems for decades.
- Cedar vs. other wood options: Cedar naturally resists moisture and insects better than pine, making it a more reliable option.
- Pre-finished vs. site-finished materials: Pre-finished wood has factory-applied coatings under controlled conditions, lasting longer than site-applied finishes.
- Tongue and groove considerations: Use 1×6 tongue and groove boards for installation, providing better coverage and easier installation.
- Moisture resistance factors: Choose wood with natural oils or thermal modification that repel moisture and prevent rot in humid conditions.
Now that you understand the key factors, here’s a breakdown of popular wood species to help you compare options more easily.
Top Wood Types for Porch Ceilings
Choosing the right species affects durability, appearance, and cost. This table outlines common choices and their characteristics.
| Wood Type | Benefits | Drawbacks | Cost Range | Best For |
|---|---|---|---|---|
| Cedar | Weather-resistant, repels insects | Higher cost, color changes | $5-8 per sq ft | Humid climates, traditional looks |
| Pressure-Treated Pine | Affordable, widely available | Can warp, needs maintenance | $3-5 per sq ft | Budget projects, painted finishes |
| Cypress | Naturally rot-resistant, beautiful grain | Regional availability, costly | $6-9 per sq ft | Southern climates, natural finishes |
| Redwood | Premium appearance, natural resistance | Expensive, limited availability | $8-12 per sq ft | High-end projects, West Coast |
| Thermally Modified Wood | Superior moisture resistance, insect protection | Highest cost, newer technology | $8-12 per sq ft | Maximum longevity, low maintenance |
Take time to consider what matters most: weather resistance, visual appeal, or cost. Choosing the right wood now saves time, money, and upkeep in the long run.
Once you’ve chosen the best wood for your space, it’s time to gather the tools and materials you’ll need for the installation.
Tools and Materials Needed
Before beginning installation, gather the following items for an efficient and smooth process.
| ITEM | TYPE | PURPOSE |
|---|---|---|
| Tape measure & level | Tool | Measure accurately and ensure straight, even ceiling lines |
| Nail gun with stainless steel finish nails | Tool/Material | Secure boards quickly without leaving rust stains |
| Saw (miter or circular) | Tool | Cut tongue and groove planks to fit your ceiling dimensions |
| Wood planks (1×6 tongue and groove) | Material | Serve as the main surface |
| Furring strips & Coroplast rain screen | Material | Provide airflow and a secure nailing base for the planks |
| Flexible caulk (plus backer rod) | Material | Fill and seal gaps between wood and masonry edges |
Having these items prepared ahead of time helps avoid delays and ensures a cleaner, more efficient build.
Always wear safety gear and double-check your materials before installation begins.
With everything ready, here’s how to install your ceiling step by step for lasting performance and fewer issues down the line.
Step-by-Step Wood Porch Ceiling Installation Guide
Follow these six steps to prevent common issues like buckling, warping, and trapped moisture. Each step supports proper airflow and structure.
Step 1: Install Rain Screen System
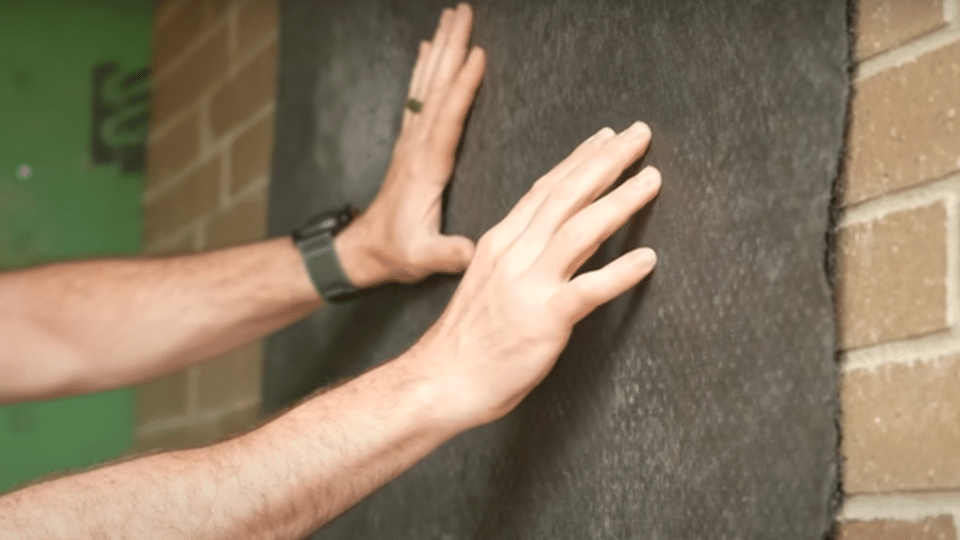
Create the foundation for long-lasting ceiling performance with proper ventilation.
Rain screens prevent moisture problems by creating airflow. Install horizontal Coroplast strips with 3/8″ to 3/4″ air gaps for proper ventilation and drainage.
Pro Tip: Orient Coroplast cells vertically to maximize airflow and drainage through your rain screen system.
Step 2: Create Ventilation Spaces
Proper ventilation prevents moisture buildup that destroys ceiling installations.
Install Core Vent strips along the perimeter. Leave gaps to allow air circulation and prevent unventilated spaces that cause moisture buildup.
Pro Tip: Cut Core Vent strips to half-width for better fit and improved airflow the edges.
Step 3: Install Furring Strips
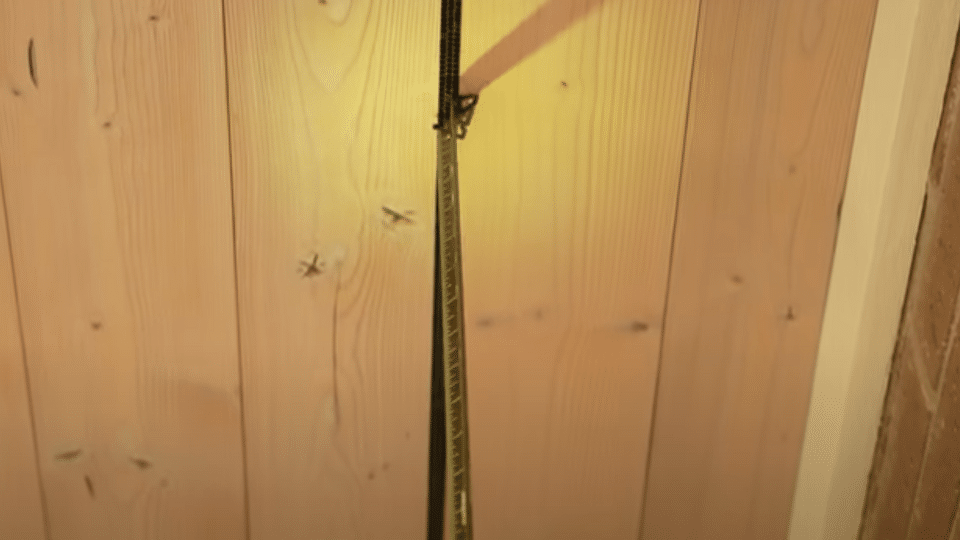
Furring strips provide the stable foundation your ceiling needs for proper installation.
Space furring strips evenly across your ceiling structure using a level for straight installation. These strips create the nailing surface for your ceiling boards.
Pro Tip: Use 1x material for furring strips to ensure adequate nail penetration through your ceiling planks.
Step 4: Install Wood Planks
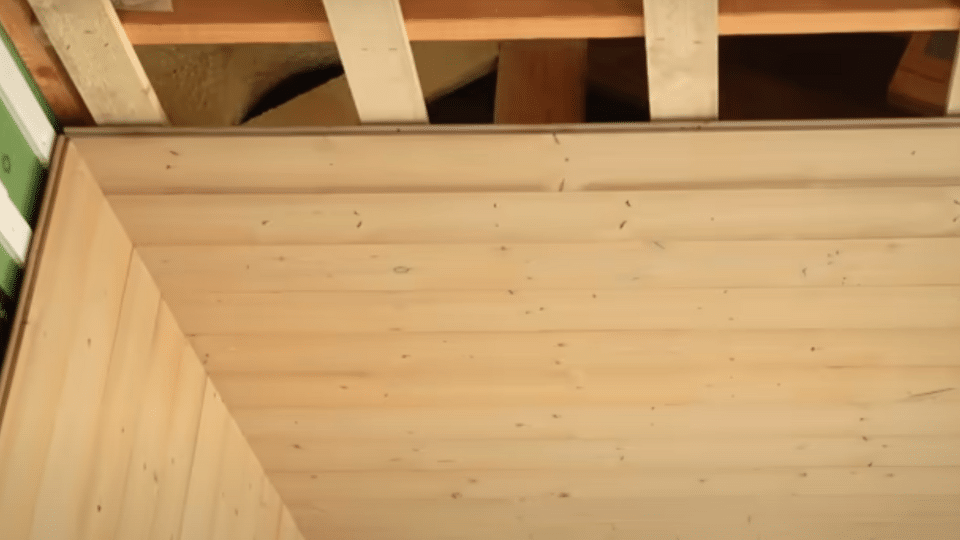
Proper plank installation determines the final appearance and longevity of your ceiling.
Start with your first board placement, ensuring tongue and groove alignment is perfect. Nail through the tongue portion to maintain consistent spacing throughout it.
Pro Tip: Use stainless steel finish nails at the tongue to prevent rust stains on your ceiling surface.
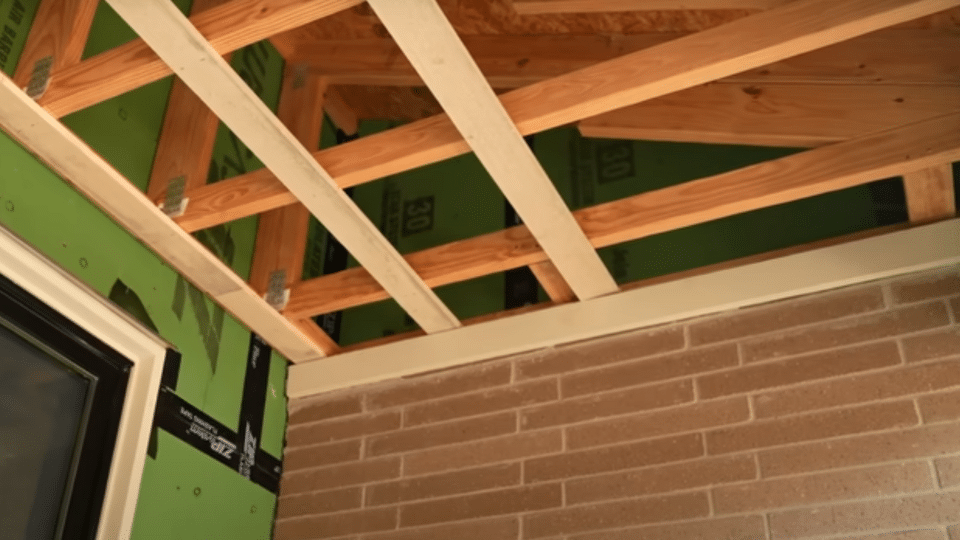
Step 5: Handle Transitions and Edges
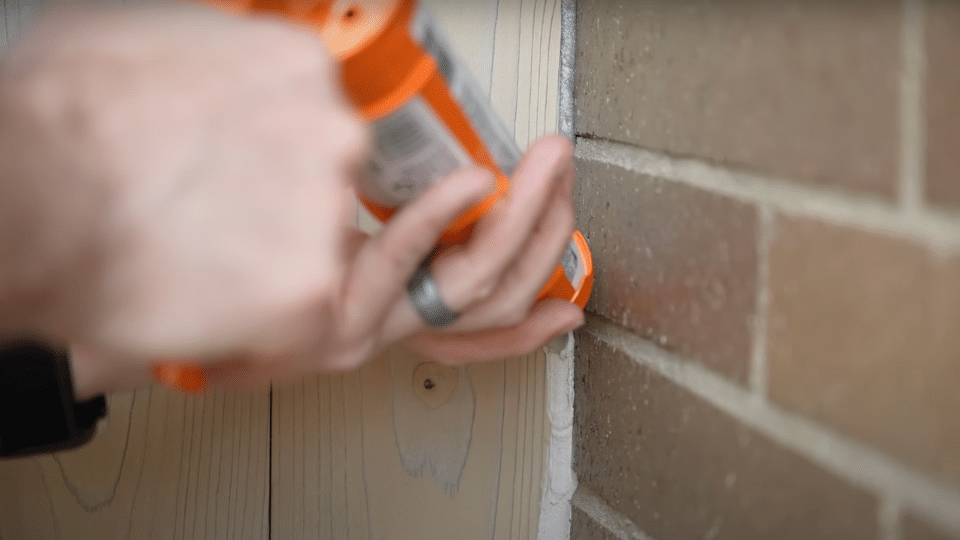
Proper edge treatment prevents moisture transfer and maintains your ceiling’s structural integrity.
Deal with brick and masonry connections by creating flexible joints with backer rods and caulk. Never let your ceiling touch concrete or stone surfaces directly.
Pro Tip: Leave a quarter-inch gap between wood and masonry, then seal with flexible caulk for lasting protection.
Step 6: Final Details and Trim

Finishing touches make your ceiling installation look professional and complete.
Install edge trim pieces and seal necessary joints for a finished look. Complete your final inspection checklist and clean up all debris from the work area.
Pro Tip: Face-screw trim pieces for easy removal during future maintenance or window replacement on it.
Video Tutorial
I’d like to give credit to Matt Risinger for their informative video, which served as a reference for this guide.
Wood Porch Ceiling Cost: What to Expect
Understanding costs helps you budget appropriately for your project and choose the right materials for your needs.
| ITEM | COST RANGE | NOTES |
|---|---|---|
| Thermally Modified Wood | $8-12 per sq ft | Best for ceiling longevity |
| Cedar Wood | $5-8 per sq ft | Good moisture resistance |
| Pine Wood | $3-5 per sq ft | Budget option, not ideal |
| Installation Materials | $1-3 per sq ft | Rain screen, furring strips, fasteners |
| Professional Labor | $4-8 per sq ft | Contractor installation |
| DIY Installation | $0-2 per sq ft | Tool rental and supplies |
| Total Project Cost | $15-35 per sq ft | Full installation with materials + labor |
Wood Porch Ceiling Maintenance and Longevity Tips
Regular maintenance keeps it looking great and prevents costly repairs. Simple care routines extend the life of your installation and protect your investment for years to come.
- Check your ceiling twice a year for signs of problems.
- Clean it gently with a soft brush and a mild soap solution.
- Avoid pressure washers that can damage the wood surface or force water into joints.
- Pre-finished ceilings typically require refinishing every 5-7 years, depending on the level of weather exposure.
- Monitor your ceiling for warping, buckling, or gaps between boards.
- Check caulk joints around edges for cracking or separation.
- A properly installed system should last 20-30 years with regular maintenance.
Take time to consider what matters most: weather resistance, visual appeal, or cost. Choosing the right wood now saves time, money, and upkeep in the long run.
Conclusion
A strong, long-lasting finish starts with the right materials and correct installation techniques. Moisture-resistant wood, such as thermally modified boards or cedar, performs best in outdoor conditions.
Add proper ventilation using rain screens and furring strips to prevent trapped moisture, warping, or gaps. Stainless steel fasteners and flexible caulk at masonry joints help seal edges and reduce long-term wear.
These small choices make a big difference in durability and appearance.
Planning a project soon? Keep this guide handy or share it with someone getting ready to update their porch.
With the right prep, you’ll avoid common issues and enjoy a finished ceiling that holds up season after season.