The Ultimate Checklist for Garage Floor Renovations
A garage floor renovation can make your space look clean and fresh. It can also make your garage safer and easier to use. Many homeowners forget how important the floor is.
A strong and smooth surface can last for many years. This checklist will guide you step by step. It will help you plan and complete your project with ease.
Plan Your Garage Floor Project
Start by making a clear plan. Think about how you use your garage. Do you park your car there, or use it as a workshop? This will help you choose the right materials. Set a simple budget so you do not overspend. Measure your garage floor to know how much material you need. Planning early can save time and money.
Also, check the current condition of your floor. Look for cracks, stains, or uneven spots. These issues must be fixed before any new coating is added. A good plan will make the next steps easier and faster.
Choose the Right Flooring Material
There are many flooring options to choose from. Epoxy coatings are popular because they are strong and shiny. Polyurethane coatings are also a good choice because they resist damage. Tiles can give your garage a neat and modern look.
When choosing a material, think about durability and maintenance. Some floors are easy to clean, while others need more care. It is important to pick a surface that fits your lifestyle. Many homeowners prefer quality residential garage floor installations because they offer long-term value and better performance.
Prepare the Surface Properly
Preparation is one of the most important steps. A clean surface helps the new floor stick better. Start by removing dust, oil, and dirt. You can use a degreaser for tough stains. Wash the floor and let it dry fully.
Next, repair any cracks or holes. Use a filler to make the surface smooth. If the floor is uneven, you may need to level it. Skipping this step can lead to poor results. A well-prepared surface ensures a strong and lasting finish.
Apply the Coating or Flooring
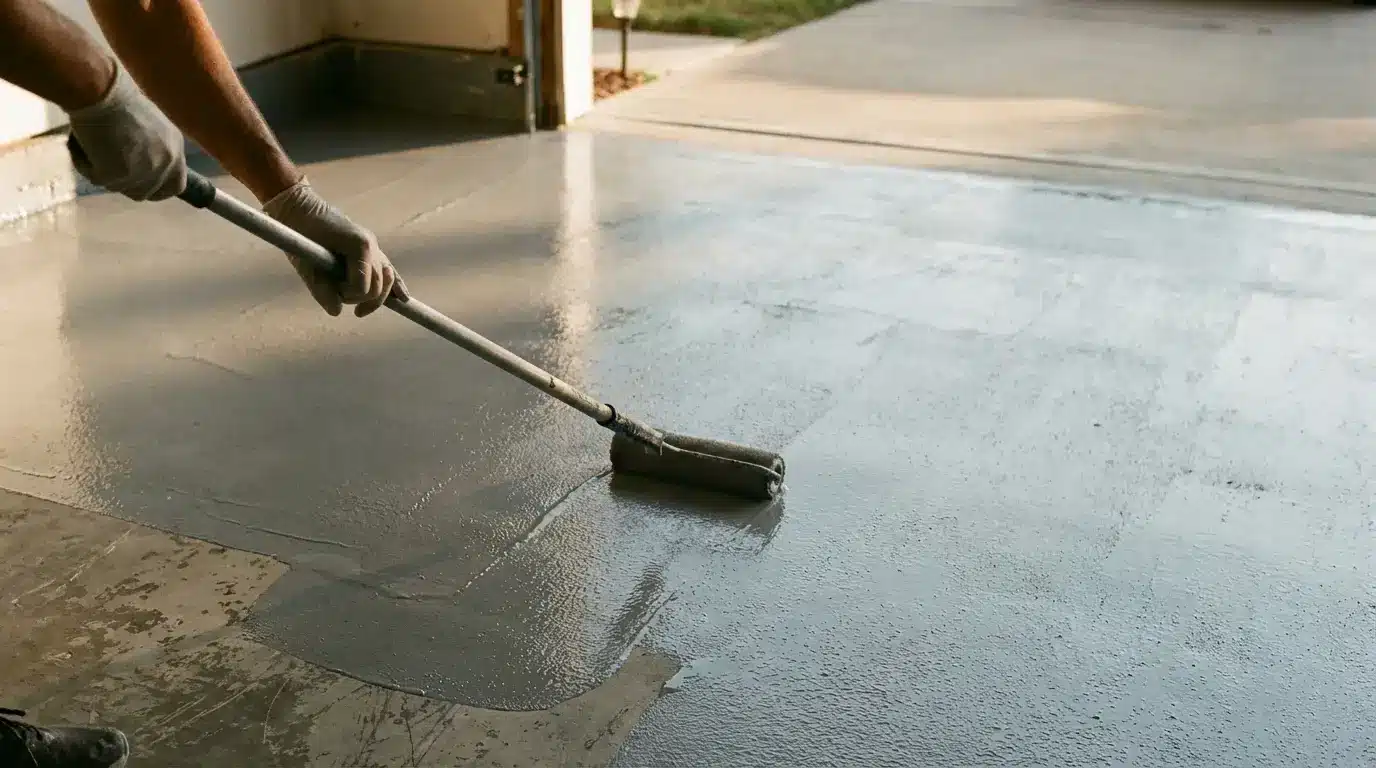
Once the surface is ready, you can start applying the coating. Follow the instructions on the product label. Use the right tools like rollers or brushes. Work in small sections to keep the finish even.
If you are installing tiles, place them carefully and check alignment. Take your time during this step. Rushing can cause mistakes. Make sure the coating dries fully before using the garage. This can take a few hours or even a few days.
Maintain Your New Garage Floor
After the renovation, proper care is key. Clean your garage floor regularly to keep it looking new. Sweep away dust and dirt often. Wipe spills as soon as they happen to prevent stains.
Avoid dragging heavy items across the floor. This can cause scratches or damage. You can also use mats in high-traffic areas for extra protection. Regular maintenance will extend the life of your new floor.
Learn More About Garage Floor Renovations
A garage floor renovation does not have to be hard. With the right steps, you can achieve a clean and durable surface. Planning, choosing the right material, and proper preparation are all important.
Take your time during installation and follow simple care tips after. This checklist will help you create a garage floor that looks great and lasts for years.
If you’d like to learn more, check out more articles on our blog.