
Are you tired of shoes cluttering your hallway? Do you need extra sitting space in your bedroom? A DIY storage bench might be the answer to your problems.
We all know the struggle of small spaces. Items pile up. Stuff gets lost. The mess grows.
But what if you could build something useful with your own hands?
Many people think making furniture is hard. It’s not. With basic tools and some wood, you can create a useful bench this weekend.
This guide will show you how to build a storage bench from scratch. You’ll learn which materials work best, and we’ll cover the steps in order. By the end, you’ll have a practical piece that stores your things and looks good, too.
Ready to start your first woodworking project?
What is a DIY Storage Bench?
A DIY storage bench is a piece of furniture you can build at home that serves two main functions. It provides a place to sit and offer hidden storage space inside.
The bench usually has a lid that lifts up, showing a roomy area below for storing items you want to keep out of sight.
These benches work well in many spots around the house. You might place one in an entryway for shoes, in a bedroom for extra blankets, or in a playroom for toys. The beauty of making your own bench is that you can size it to fit your exact space.
Benefits of Building Your Own Storage Bench
1. Stylish Addition to Your Home
- You can pick colors and finishes that match your existing decor
- Custom size options fit any space in your home
- Add trim, molding, or paint for a personal touch
- Choose fabrics for cushions that reflect your style
2. Highly Functional Piece
- Hides away clutter in plain sight
- Creates extra seating for guests
- Helps organize items that often get scattered
- Makes use of wall space that might otherwise go unused
3. Perfect Project for Beginners
- Requires basic tools most homeowners already have
- Uses simple cutting and assembly methods
- Can be completed in a weekend
- Builds confidence for future DIY projects
What You’ll Need (Tools & Materials)
Before starting your DIY storage bench project, gather all the necessary tools and materials. Having everything ready will help the building process go smoothly.
| Tool | Purpose |
|---|---|
| Circular Saw or Hand Saw | For cutting wood to size |
| Power Drill | For making holes and driving screws |
| Staple Gun | For attaching fabric to cushion |
| Measuring Tape | For accurate measurements |
| Pencil | For marking cut lines |
| Sanding Block | For smoothing rough edges |
| Level | To ensure your bench sits flat |
| Screwdriver | For tightening screws |
With these tools and materials on hand, you’ll be ready to build a sturdy and useful storage bench that will last for years to come.
DIY Storage Bench: Step-By-Step Build Guide
Building a DIY storage bench is simpler when broken down into clear steps. Follow this guide to create your bench without confusion. Each stage builds on the previous one, creating a sturdy and useful piece of furniture for your home.
Step 1: Make the Upholstered Bench Top First
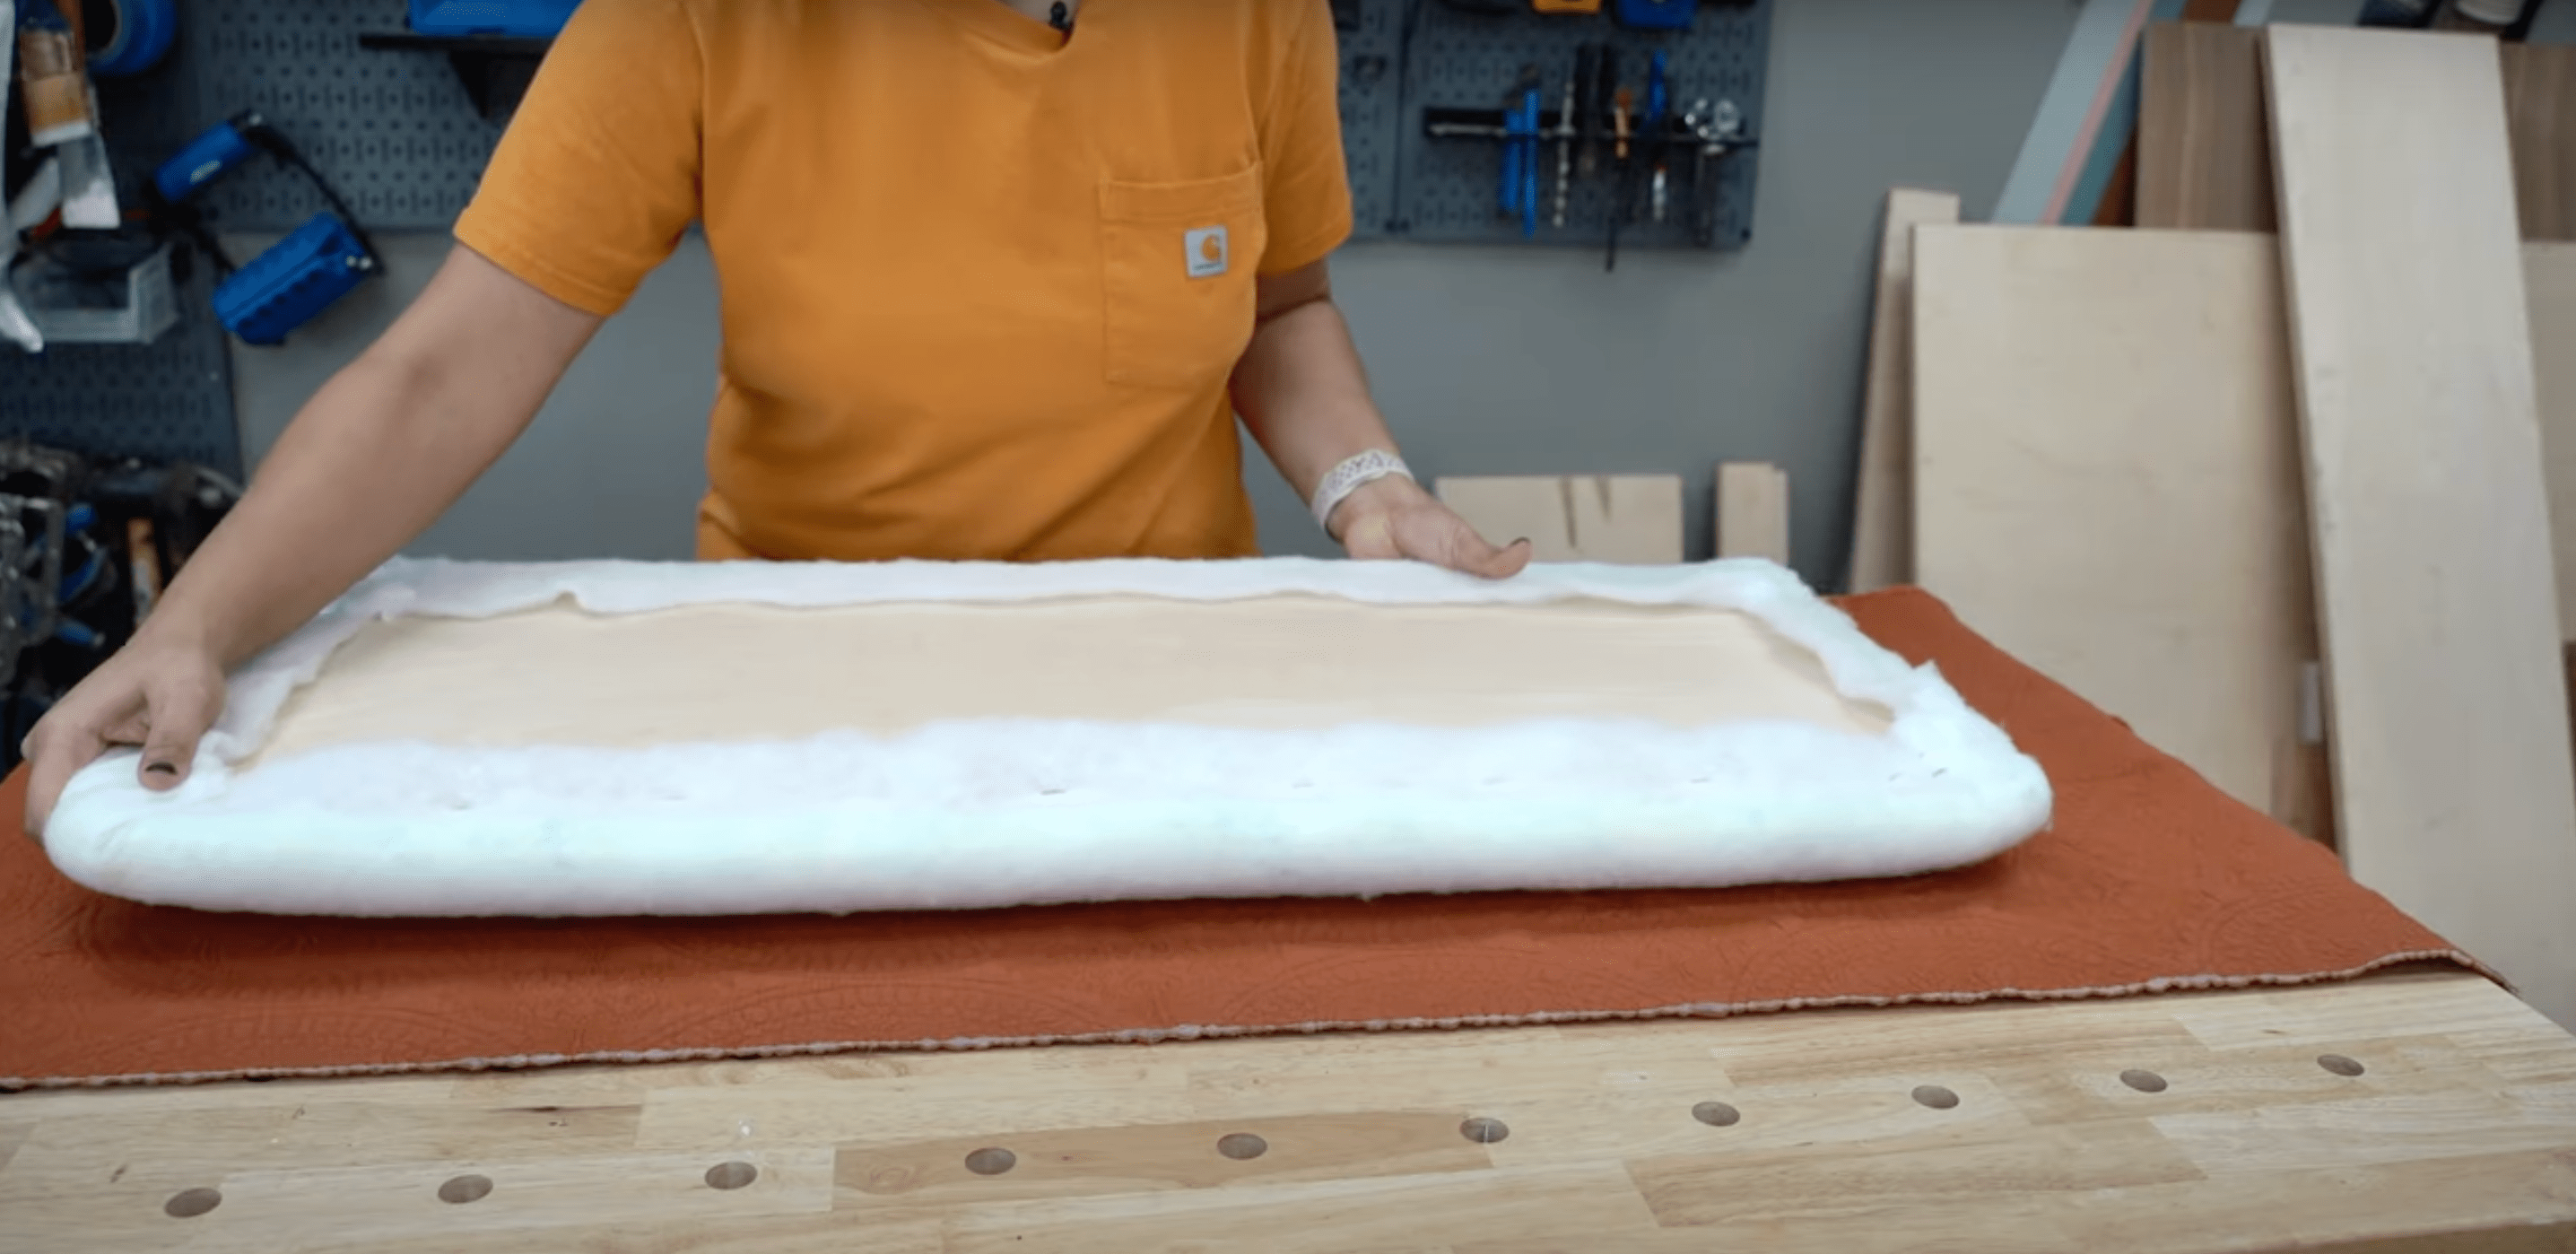
Start with the cushioned top before cutting any wood. This ensures your bench body fits perfectly with your finished lid.
Working on the top first gives you exact measurements for the rest of your project, avoiding size mismatches later. Plus, it’s satisfying to complete this part early so you can visualize the finished bench.
- Cut a piece of plywood to your desired bench size
- Layer foam mattress topper on the plywood
- Add a layer of batting over the foam for softness
- Wrap your chosen fabric around all layers
- Staple fabric to the plywood underside, pulling tight at corners
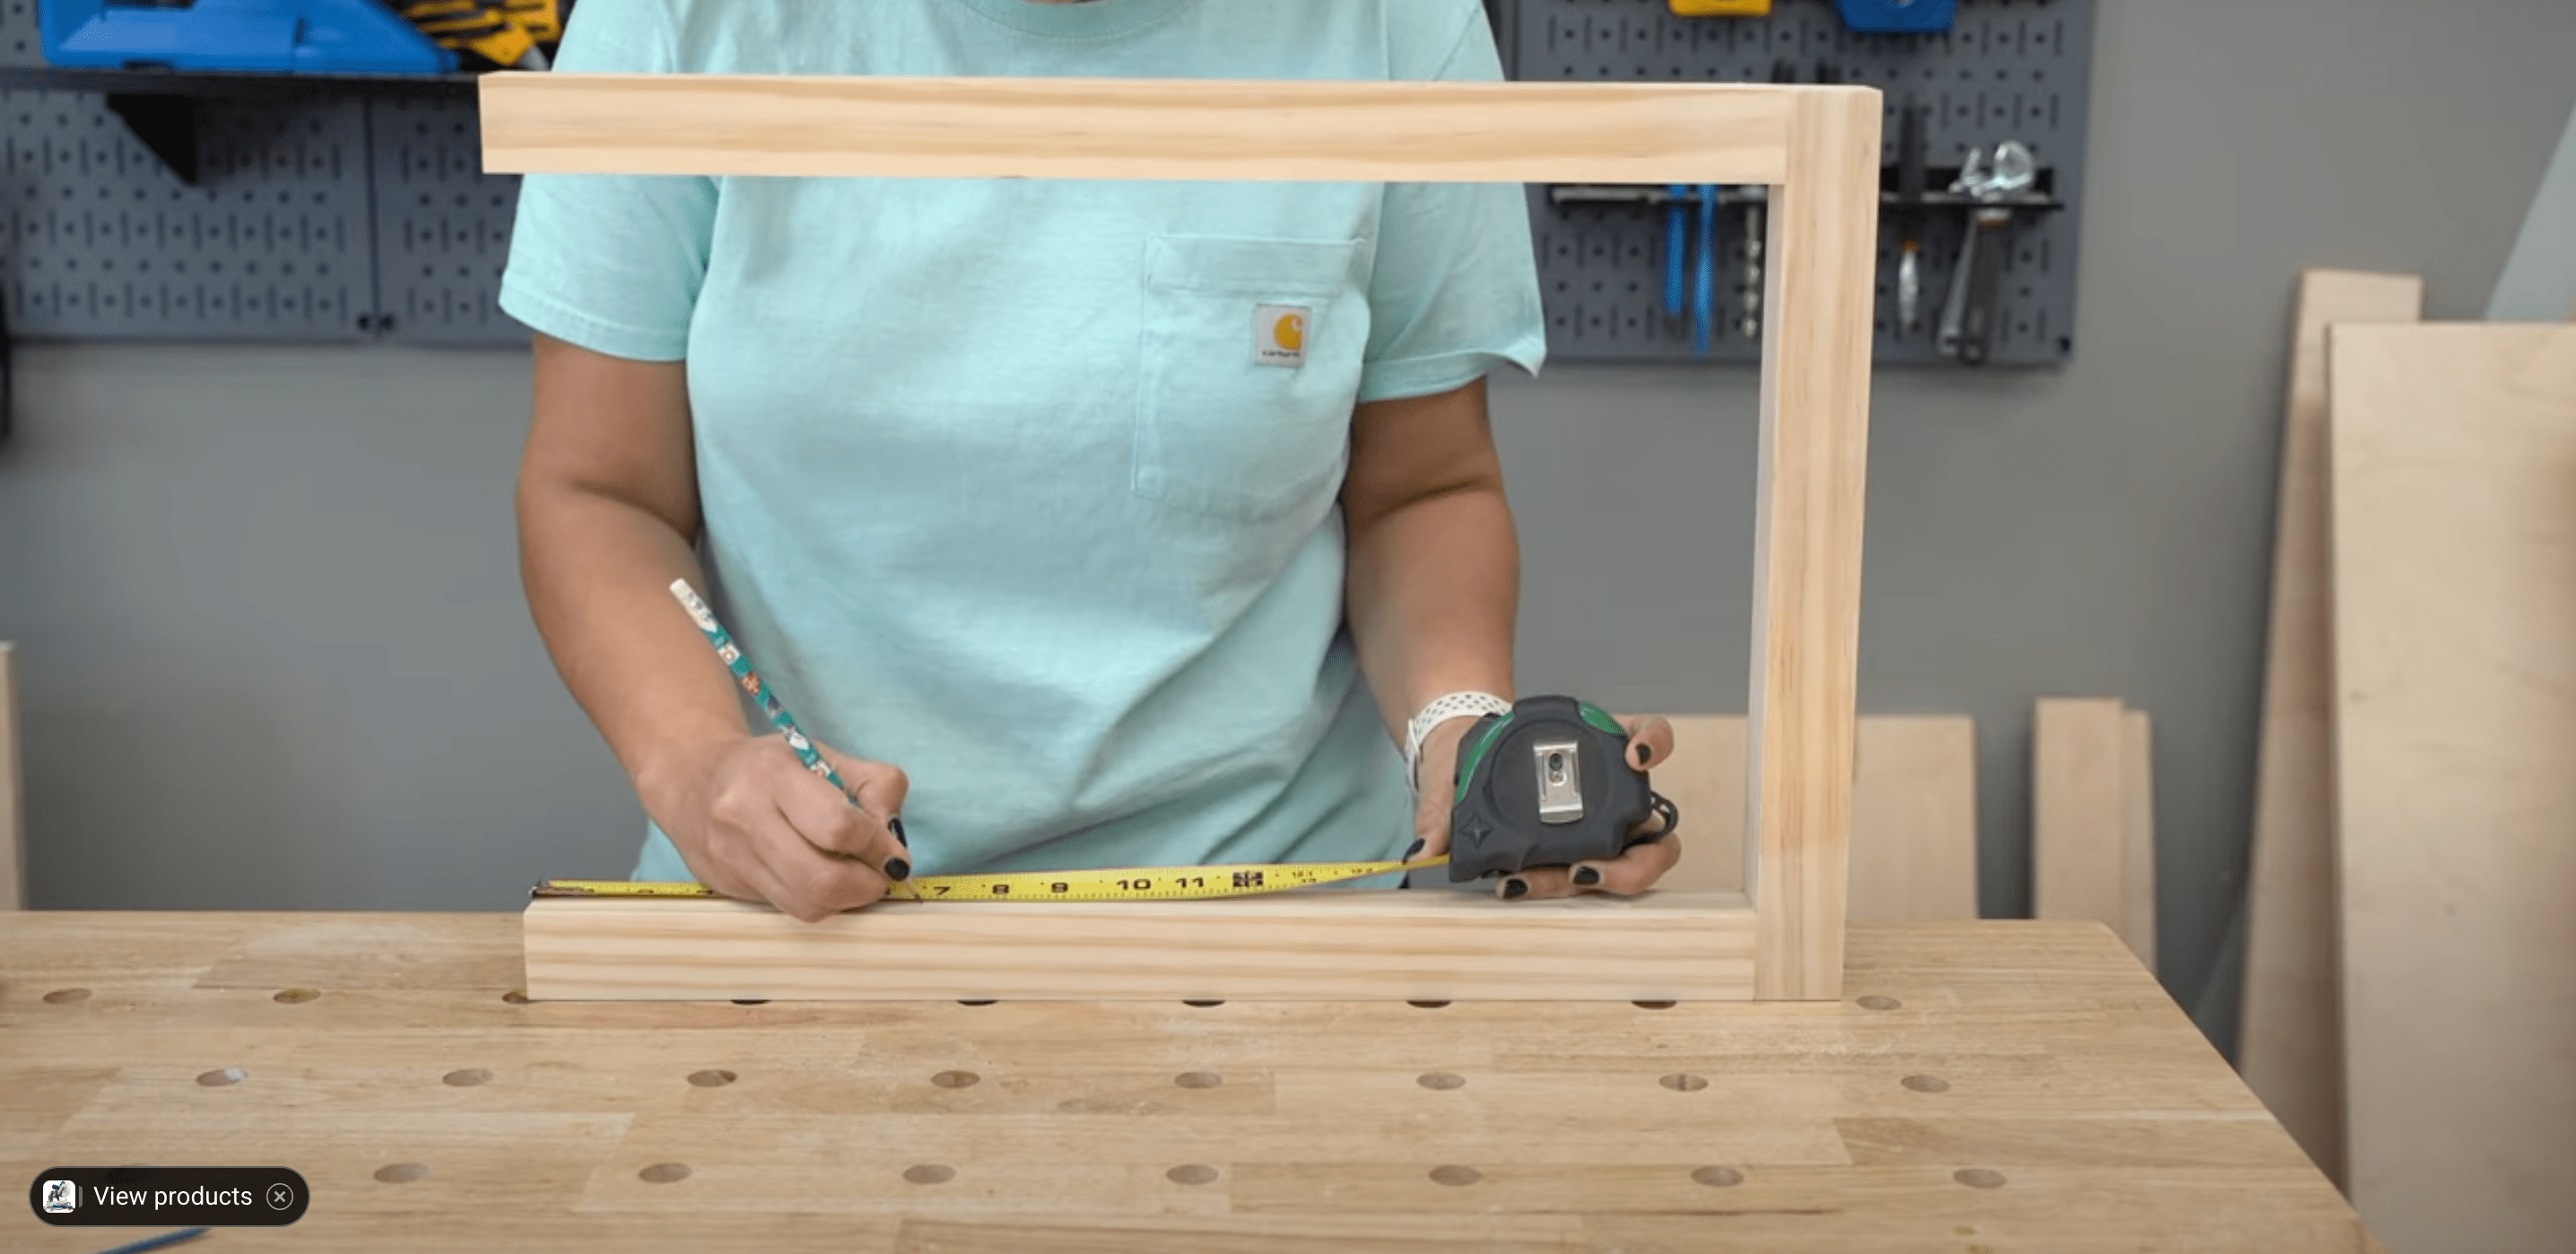
- Measure your completed top’s exact dimensions
Step 2: Cut All Wood Based on Top
Use your finished top measurements as a guide for the rest of your bench parts. This method ensures everything fits together perfectly at the end.
Unlike store-bought furniture, your custom bench needs precise measurements. Taking time during this step prevents headaches later. Remember to account for the thickness of all materials when planning your cuts.
- Add 1/4 inch to top dimensions for the inner frame
- Cut plywood pieces for two sides and two ends
- Prepare 2×2 lumber for corner supports and legs
- Cut 1×2 boards for trim and support pieces
- Sand all edges smooth before assembly
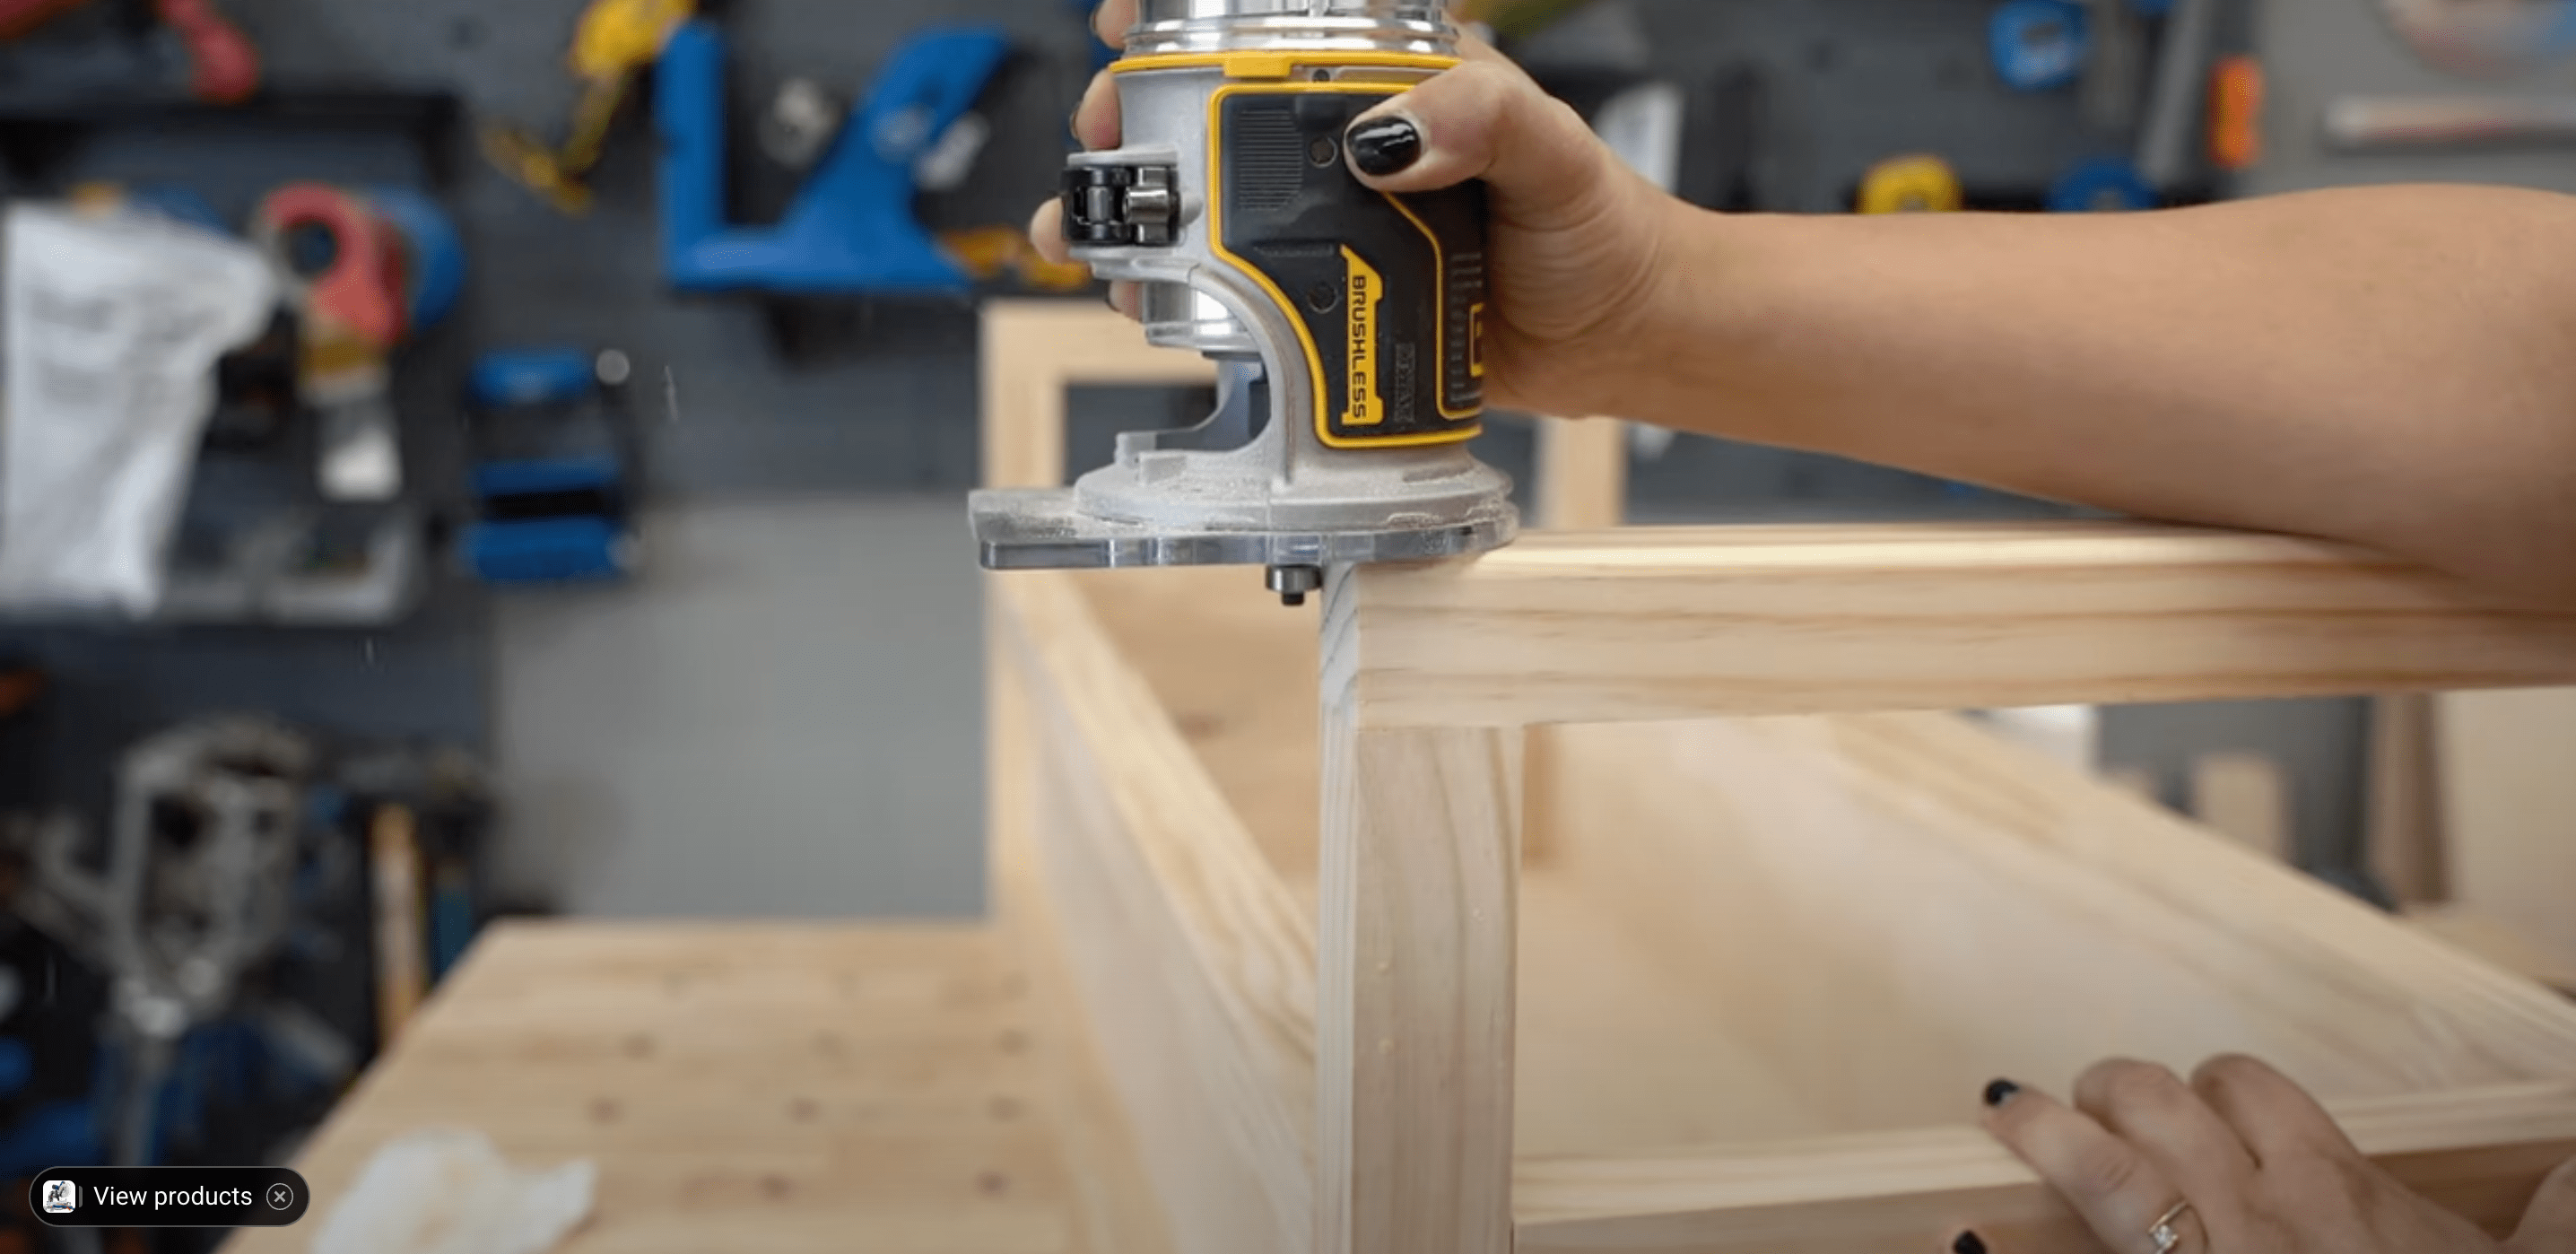
Step 3: Build the Panels
Create the four sides of your bench by combining plywood with wood trim. These panels form the walls of your storage space.
Each panel needs to be sturdy enough to support weight when someone sits on the bench. The trim not only adds strength but also gives your bench a finished, professional look that friends might mistake for store-bought.
- Attach 1×2 trim to the top edge of each plywood panel
- Create two longer panels for front and back
- Make two shorter panels for the sides
- Pre-drill holes to prevent wood splitting
- Check panels for square corners before moving on
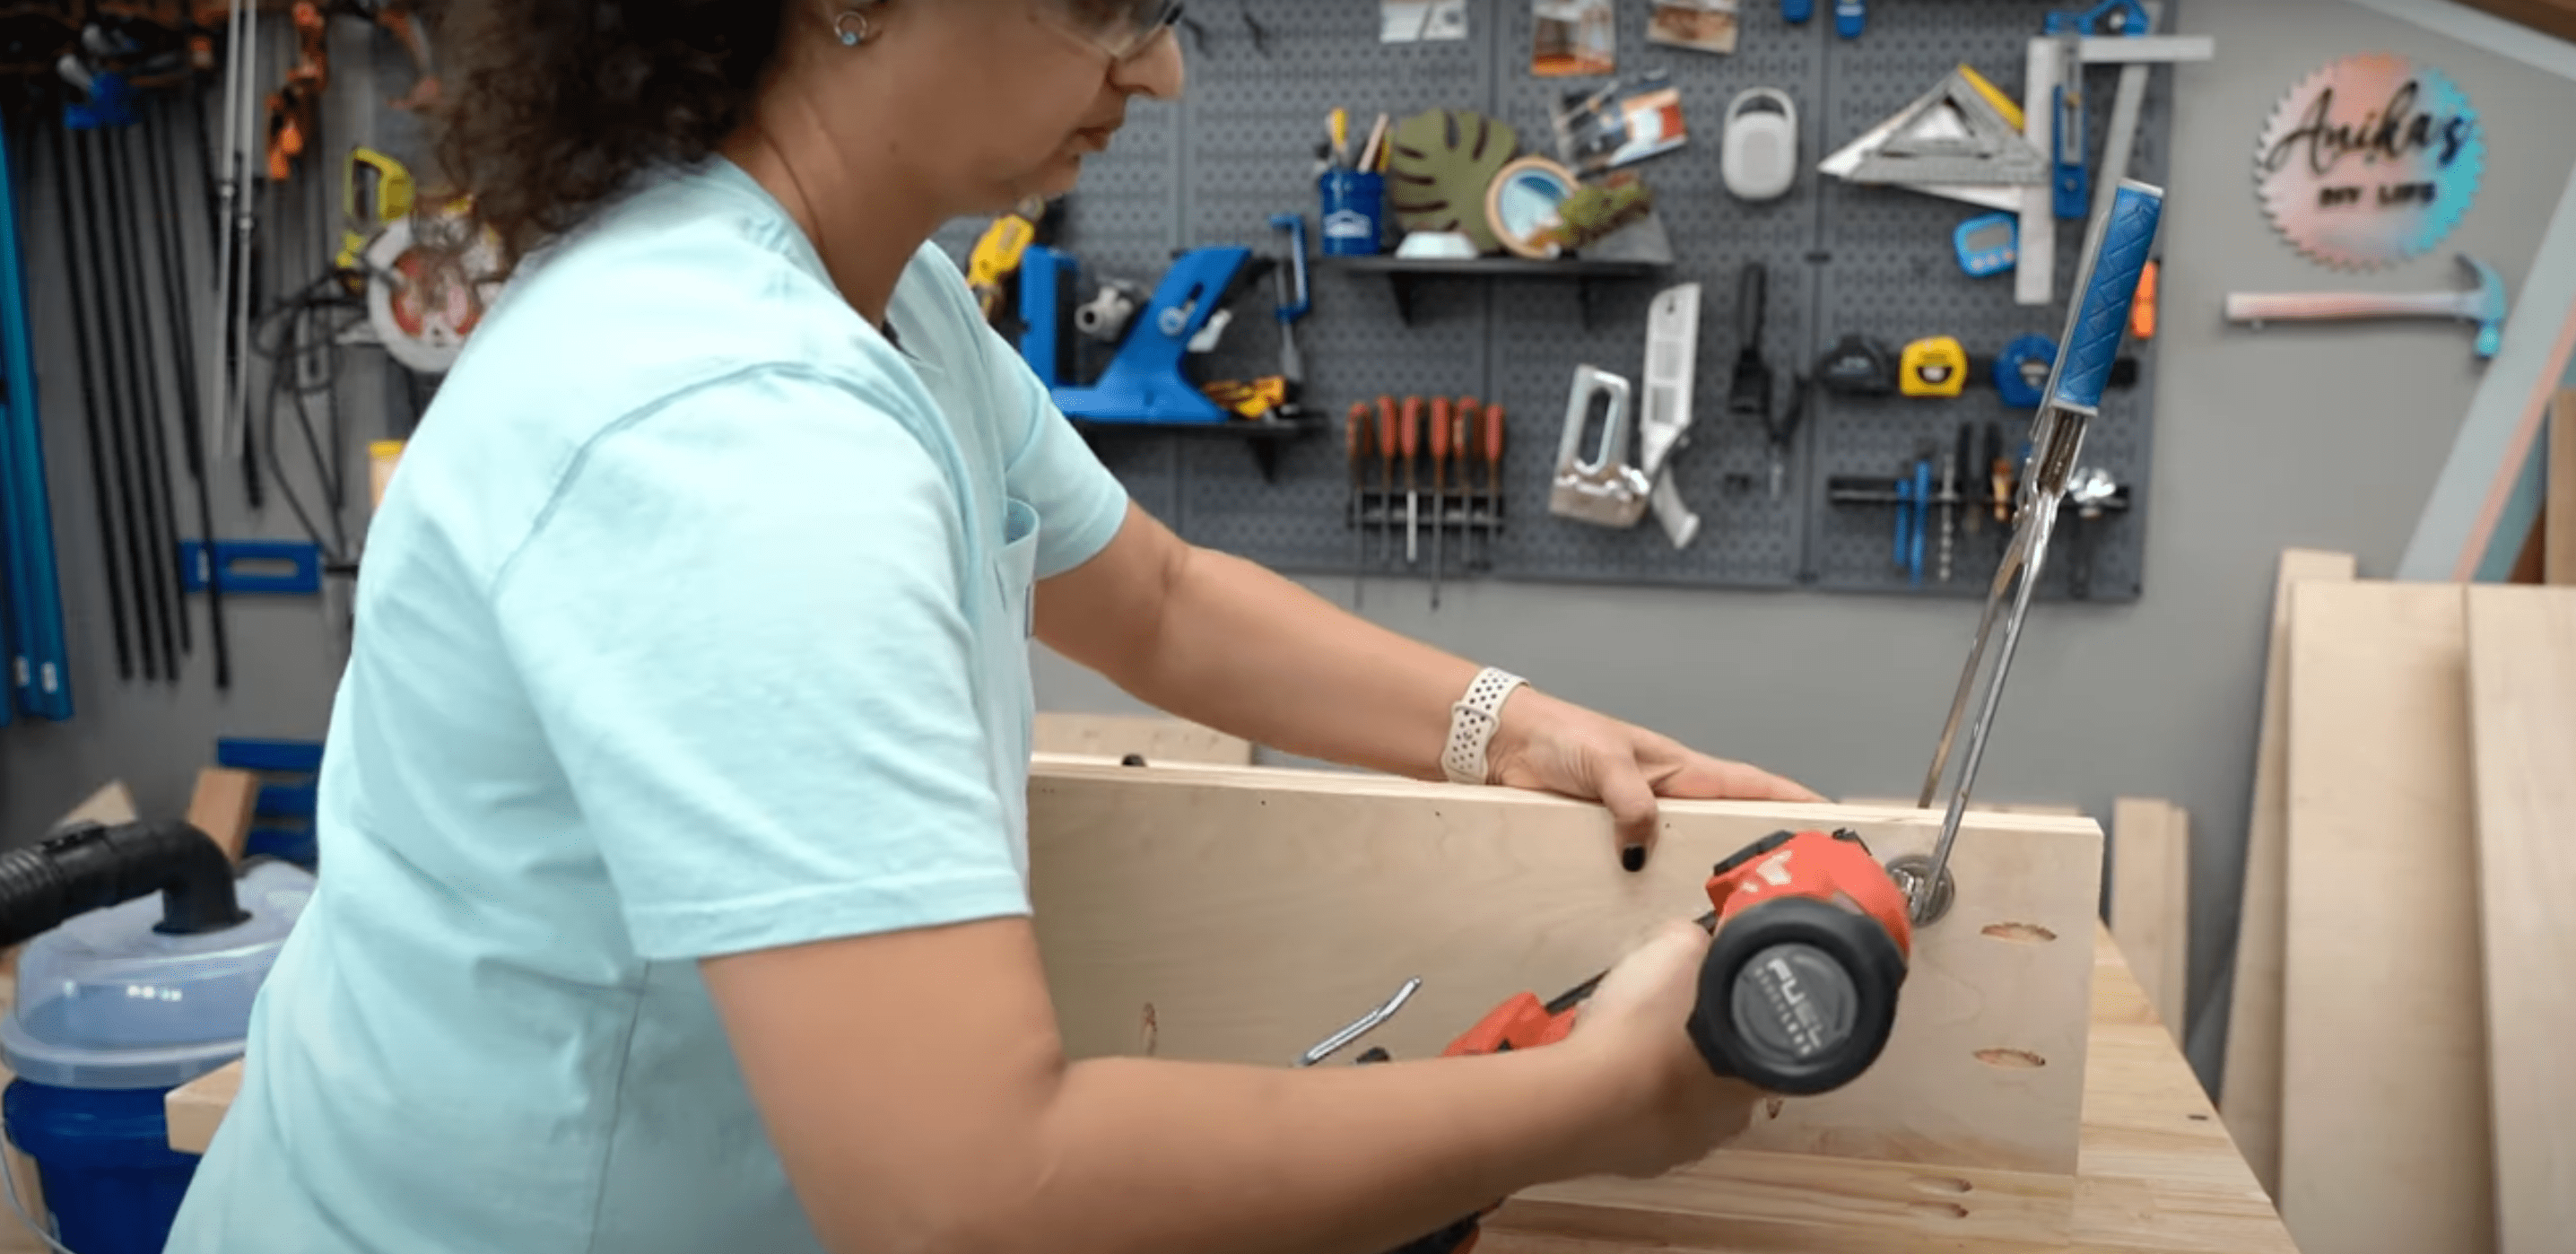
Step 4: Assemble Frame with Legs
Connect all panels to form the main body of your storage bench. This step transforms flat pieces into a three-dimensional structure.
Take your time to ensure everything lines up correctly. A properly assembled frame means your bench will be stable and strong enough for daily use. Check your work frequently with a level to prevent wobbling.
- Add 2×2 legs to corners of side panels
- Use pocket holes for strong, hidden connections
- Attach front and back panels to the sides
- Check that the box sits level on the floor
- Make sure the top edge forms a perfect rectangle
Step 5: Final Assembly

Complete your bench with final touches for a professional look. This last step brings all your hard work together. Adding the bottom provides extra support and creates a solid storage space.
The hinge allows easy access to items stored inside. Proper finishing protects your work and helps it match your home decor, making it truly yours.
- Cut and attach a plywood bottom board
- Install piano hinge to connect lid to bench body
- Wipe away excess glue with damp cloth
- Fill visible screw holes with wood filler
- Apply paint or stain to match your home decor
Video Tutorial
I’d like to acknowledge Anika’s DIY Life for the insightful video, which was a key reference in putting this guide together.
Helpful Tips for DIY Storage Bench Success
Building your first storage bench can come with a few challenges. These tips will help you avoid common mistakes and achieve better results. Each suggestion comes from the experience of many home woodworkers who learned these lessons the hard way.
1. Measure Twice, Cut Once
Always double-check your measurements before making any cuts. This old woodworking rule exists for good reason. A mistake of even half an inch can cause pieces to fit poorly or not at all.
Use a sharp pencil for marking and keep your measuring tape flat against the wood. For critical measurements, mark both ends and connect with a straight edge before cutting.
2. Pre-drill All Screw Holes
Wood tends to split when screws are driven too close to edges. Pre-drilling creates a path for the screw and prevents this problem. Choose a drill bit slightly smaller than your screw diameter.
This simple step takes a few extra minutes but saves wood, prevents splits, and results in stronger joints. It’s worth the time, especially for plywood edges.
3. Pay Extra Attention to Corners
The corners of your bench need to be perfectly square for the lid to fit properly. Use a carpenter’s square to check each corner during assembly.
If you find your frame is slightly off, now is the time to fix it—before adding the bottom and top. Adjust by loosening screws, squaring the frame, and retightening. Your bench will look more professional with square corners.
4. Consider Adding Lid Supports
Without proper support, a heavy lid can slam shut unexpectedly. This poses a safety risk, especially with children around.
Install lid supports (similar to those used in toy chests) to hold the top open while you access items inside. These supports also prevent damage to the hinges from the weight of an open lid, extending the life of your bench.
5. Create a Dust-Free Finish
For a smooth painted finish, sand between coats with fine-grit sandpaper. Wipe away all dust with a slightly damp cloth before applying the next coat.
This removes tiny bumps and creates a glass-smooth result. Allow proper drying time between coats according to the paint manufacturer’s instructions. Your patience will be rewarded with a professional-looking finish.
6. Plan for Fabric Stretch
Fabric tends to stretch over time when used for seating. Allow a bit of extra fabric when upholstering your bench top, and pull it very tight when stapling.
Consider using upholstery-grade fabric designed for furniture. These fabrics resist stretching and wear better than standard decorative fabrics. Pre-wash fabric before using to prevent shrinkage later.
7. Add Feet for Floor Protection
Consider adding felt pads or rubber feet to the bottom of your bench legs. This prevents scratches on wood floors and makes the bench easier to move when needed.
Screw-in feet also allow for minor adjustments if your floor isn’t perfectly level. This small addition greatly improves the user experience and protects both your bench and floors.
Conclusion
Now you know how to build your own DIY storage bench! This simple project solves two problems at once: where to sit and where to store your stuff.
We’ve walked through each step, from making the cushioned top to putting on the finishing touches. The process isn’t hard, just a matter of following each step in order.
Remember to take your time with measurements and ask for help if you need it. Your first woodworking project doesn’t have to be perfect—it just has to be useful.
Why not try building your storage bench this weekend? The materials won’t cost much, and the pride of making something yourself is worth the effort.
Have questions about the process? Let us know in the comments.