That worn-out ottoman sitting in your corner doesn’t have to stay an eyesore forever.
I’ve found that reupholstering furniture at home isn’t just for professional craftsmen; it’s something anyone can master with the right guidance and a weekend to spare.
Imagine converting that tired piece into a stunning focal point that perfectly matches your décor, all while saving hundreds of dollars compared to hiring professionals.
I’m going to walk you through my proven 8-step process that turns flea market finds into furniture showstoppers, complete with insider tips that’ll make your restoration look professionally done.
Recast your vintage ottoman from flea market find to stunning furniture piece with this comprehensive 8-step restoration process, complete with professional tips and techniques.
What Is an Ottoman and Its Significance?
An ottoman is a versatile, upholstered furniture piece that serves multiple functions in modern homes. Originally named after the Ottoman Empire, this low-profile furniture was traditionally used as a footrest or seat without back support.
Today, ottomans have evolved into essential home accessories that combine comfort with practicality.
Key Functions and Benefits
- Multi-functional seating – Perfect for extra guests or casual seating arrangements
- Footrest comfort – Ideal companion for armchairs and recliners
- Storage solution – Many designs feature hidden compartments for blankets, magazines, or toys
- Coffee table alternative – Soft surface that’s safe for families with children
- Space-saving design – Compact size fits easily in small rooms or apartments
The significance of ottomans lies in their adaptability to various interior design styles, from traditional to contemporary. They’re particularly valuable in small spaces where furniture must serve multiple purposes.
Vintage ottomans, especially those found at flea markets, often feature superior craftsmanship and unique designs that become statement pieces when properly restored.
Complete Ottoman Restoration Guide
Alter your vintage ottoman from a flea market find into an attractive furniture piece with this comprehensive 8-step restoration process, complete with expert tips and techniques.
Materials
| Item | Purpose |
|---|---|
| Upholstery fabric | Main covering |
| Faux leather vinyl | Bottom covering |
| Upholstery batting | Cushioning layer |
| Upholstery foam | Main padding |
| Spray adhesive | Securing foam |
| Rit Dye | Wood staining |
| Rust-Oleum spray paint | Hardware finishing |
| Staples | Fabric attachment |
| Decorative nails | Finishing touches |
Tools:
| Tool | Use |
|---|---|
| CS Osborne combination tool | Staple/tack removal |
| Staple gun | Fabric attachment |
| Serrated knife | Foam cutting |
| Screwdriver | Hardware removal |
| Hammer | Nail installation |
| Scissors | Fabric cutting |
| Sandpaper blocks | Surface preparation |
| Awl/hole punch | Creating holes |
Step 1: Disassemble and Prepare Hardware
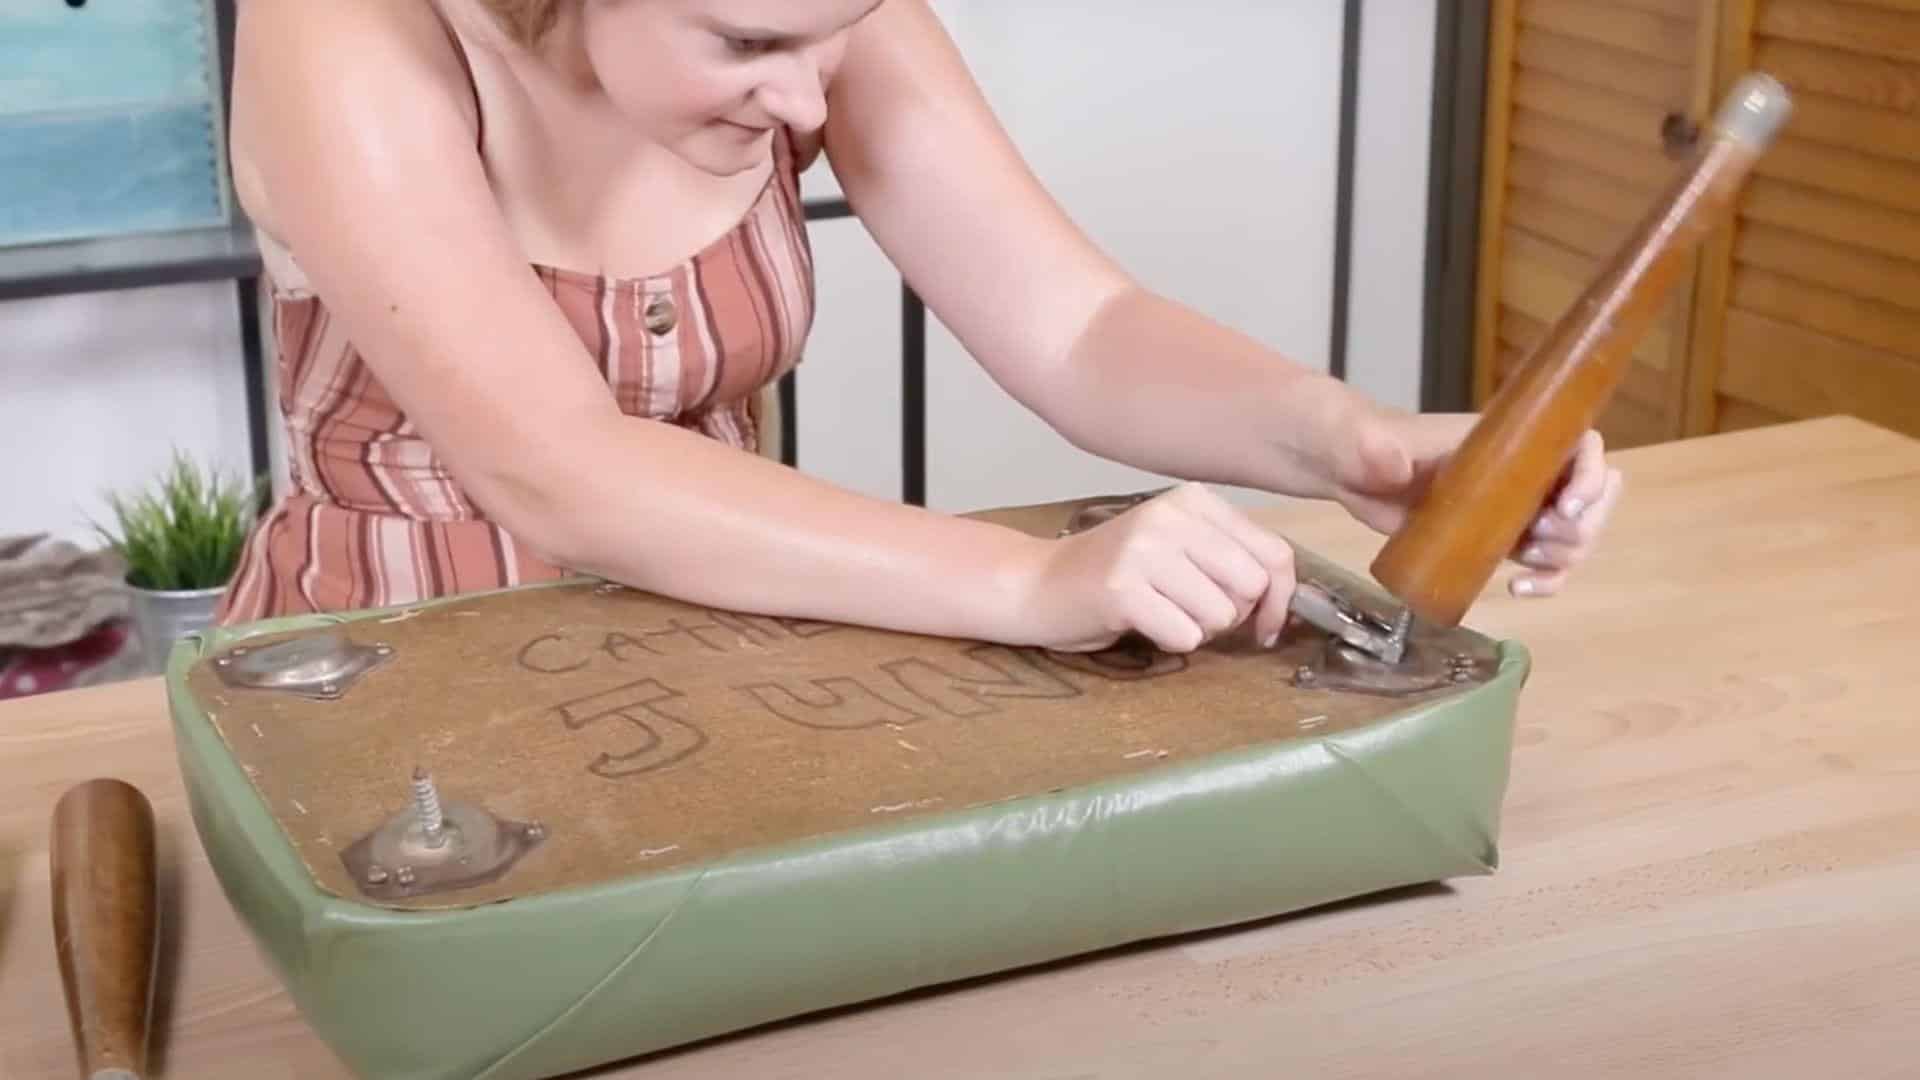
Remove all legs and hardware carefully, placing screws in a small dish to prevent loss. Clean the hardware thoroughly to remove dirt and rust buildup.
If changing the finish (such as silver to gold), lightly sand the surface to create better paint adhesion. Tape around wooden areas to protect them from overspray. Apply thin, even coats of metallic spray paint, allowing proper drying time between coats for a professional finish.
Pro Tip: Always do a second coat of paint for durability and better coverage, even if the first coat looks adequate.
Step 2: Stain and Seal the Legs
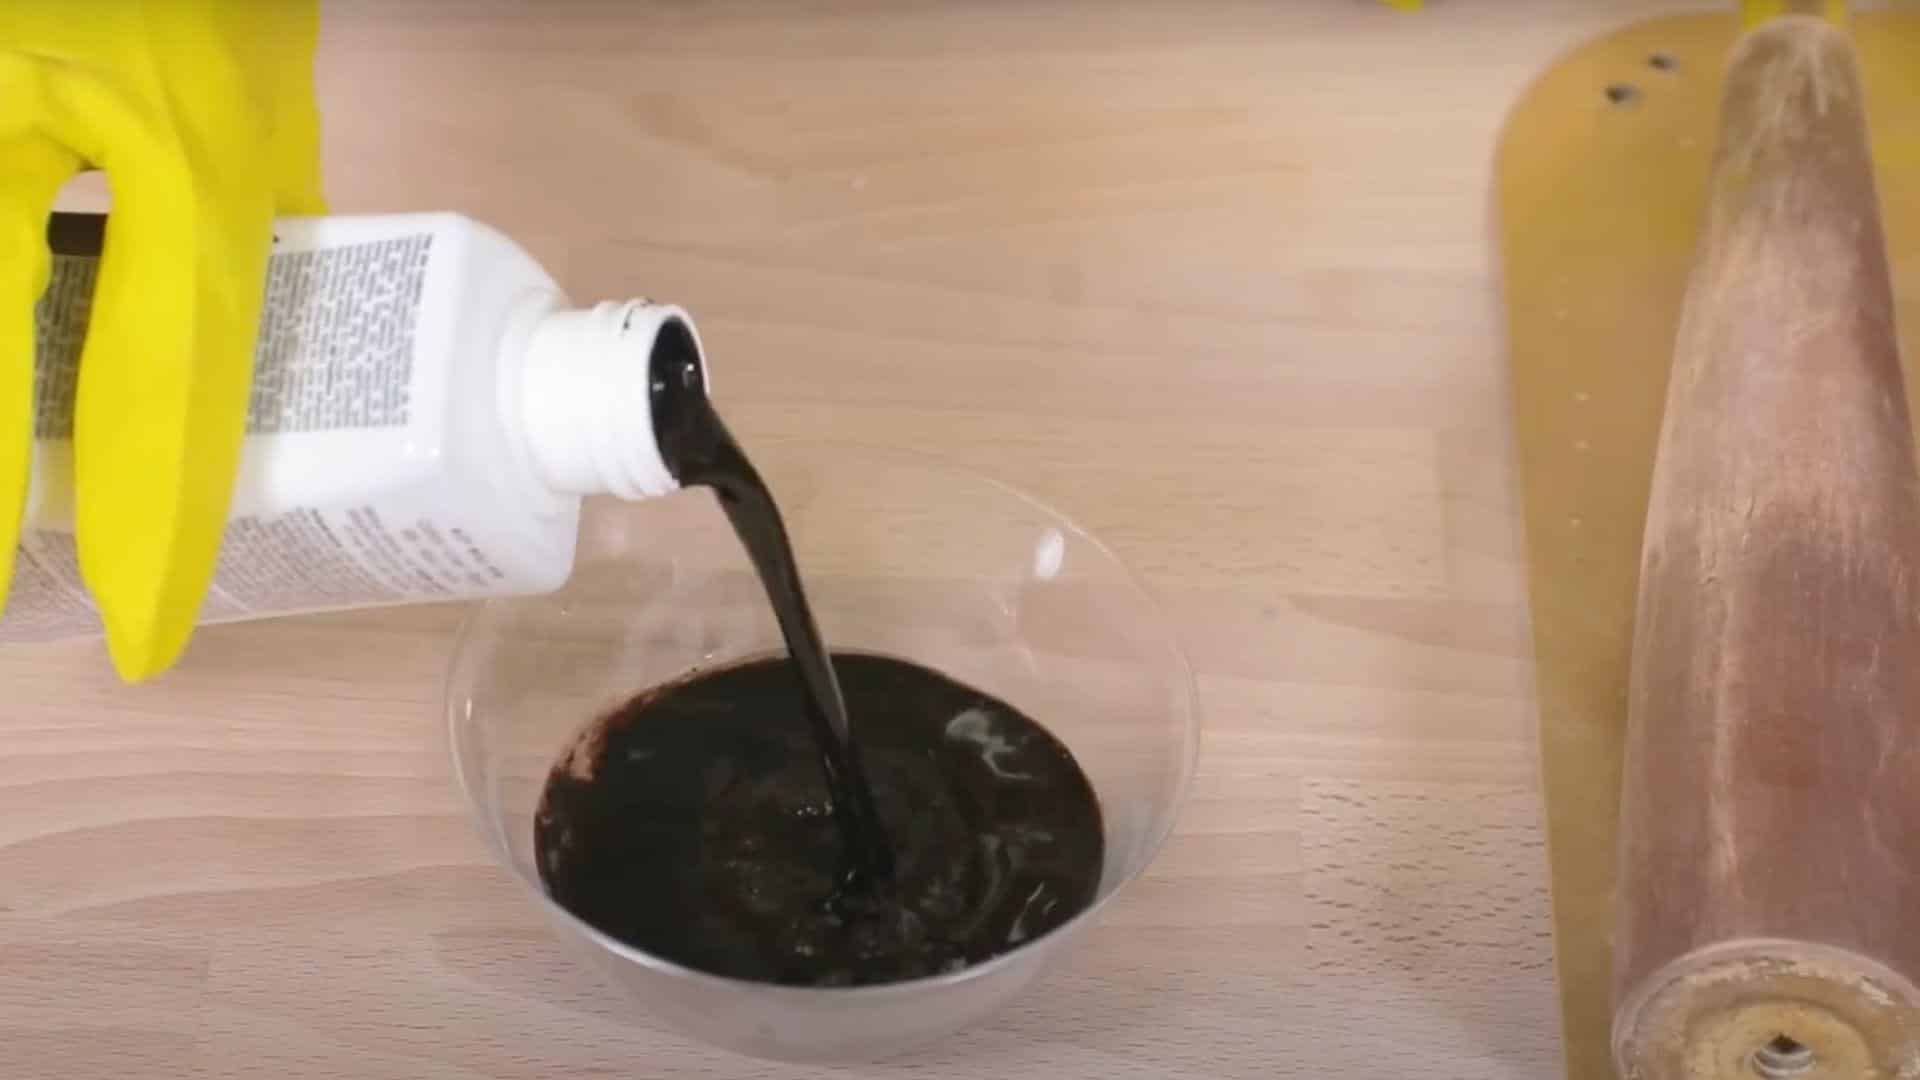
Mix Rit Dye with salt and hot water according to package directions. For richer color, gradually add more concentrated dye until you achieve the desired shade.
Using a rag, rub the dye mixture generously over all wooden leg surfaces, working in the direction of the wood grain.
Allow to penetrate for 30 minutes, then wipe excess. Once completely dry, apply Rust-Oleum Ultra Cover Spray to seal and protect the new stain from wear and moisture damage.
Pro Tip: Test the dye mixture on a hidden area first to ensure you’re happy with the color intensity before applying to visible surfaces.
Step 3: Remove Old Upholstery Materials
Before applying new materials, make sure your wooden frame is spotless. If you’re new to wood cleaning, check out our Guide to Refurbishing Wood Furniture for Beginners for expert tips on stripping, cleaning, and prepping wood surfaces.
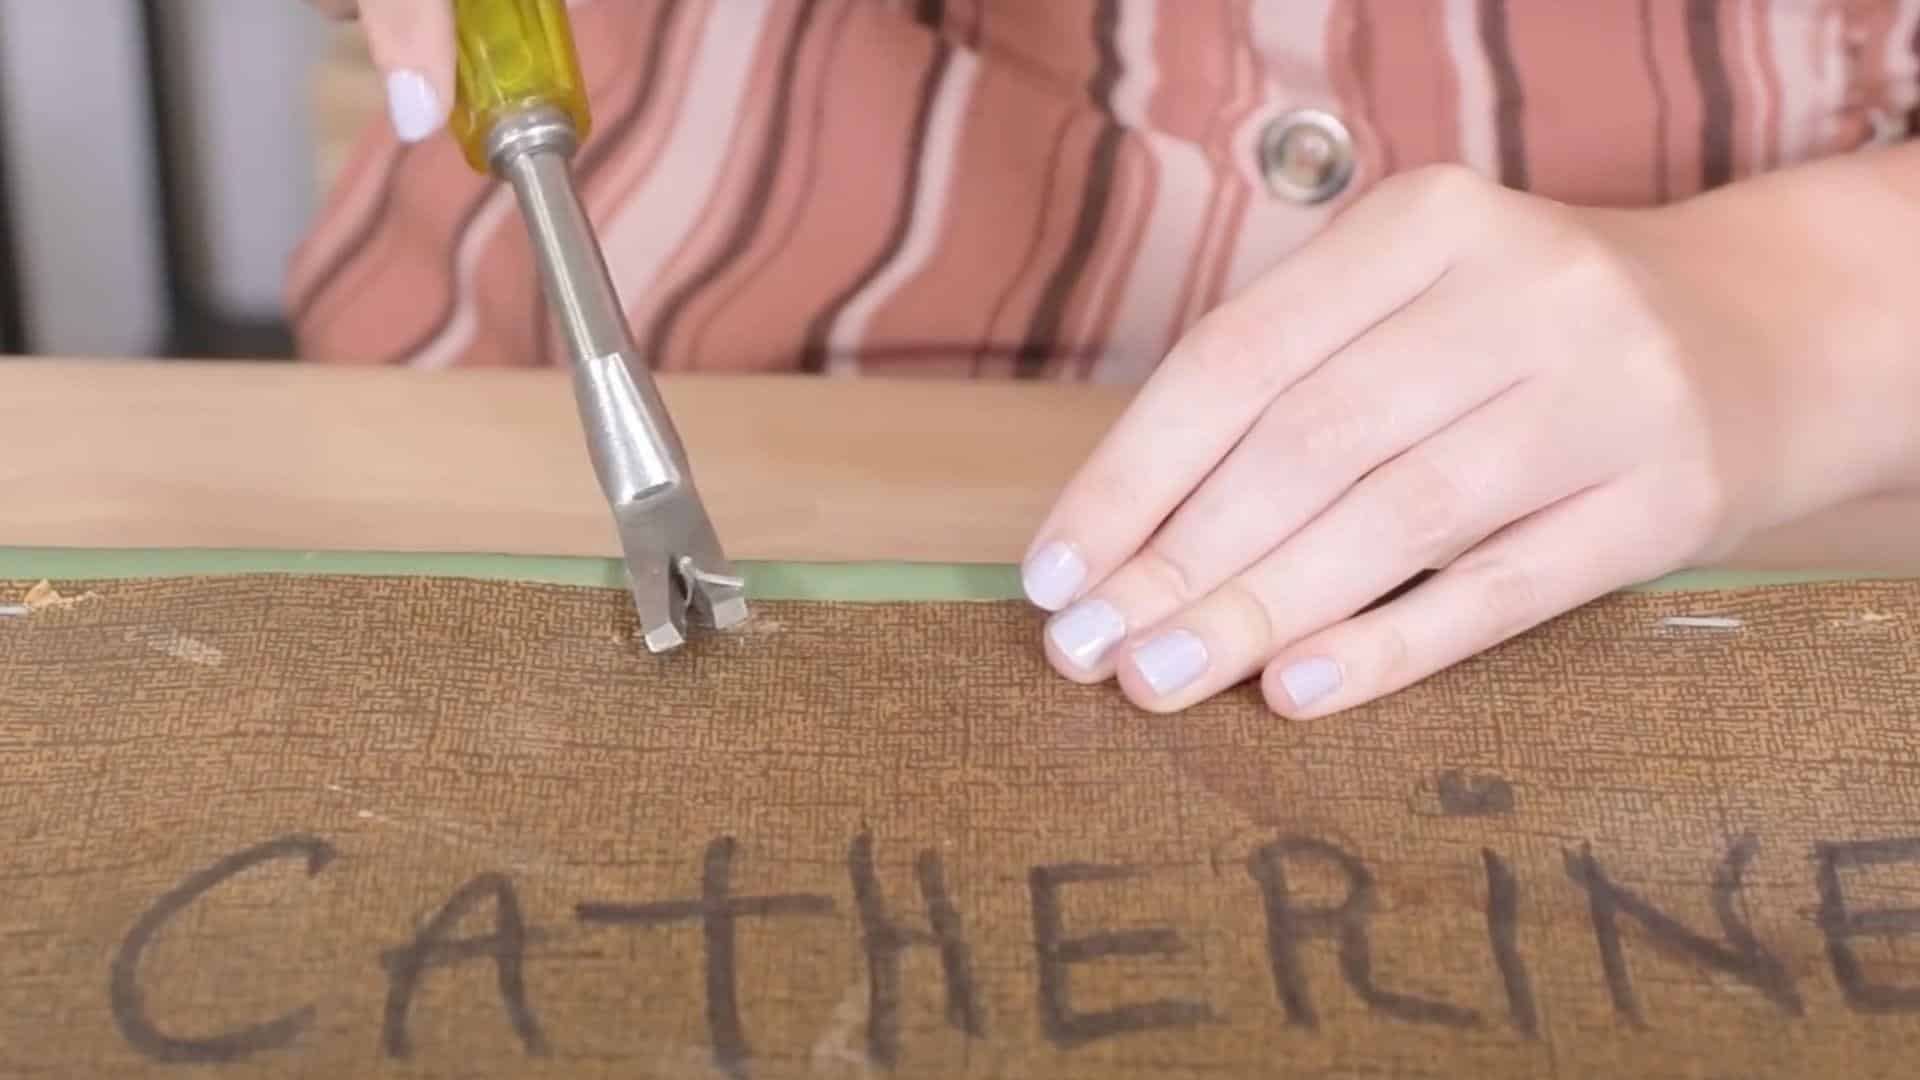
Use the combination tool to carefully remove all tacks, nails, and staples from the frame. Work systematically around the perimeter to avoid missing any fasteners.
Once all hardware is removed, pull away the old fabric to expose the internal structure. Remove all old batting, foam, and stuffing materials, especially dusty horsehair padding common in vintage pieces.
Clean the wooden frame thoroughly to prepare for new materials and ensure proper adhesion.
Pro Tip: Take photos before removing old fabric to reference the original construction method and fabric placement patterns.
Step 4: Cut and Install New Foam
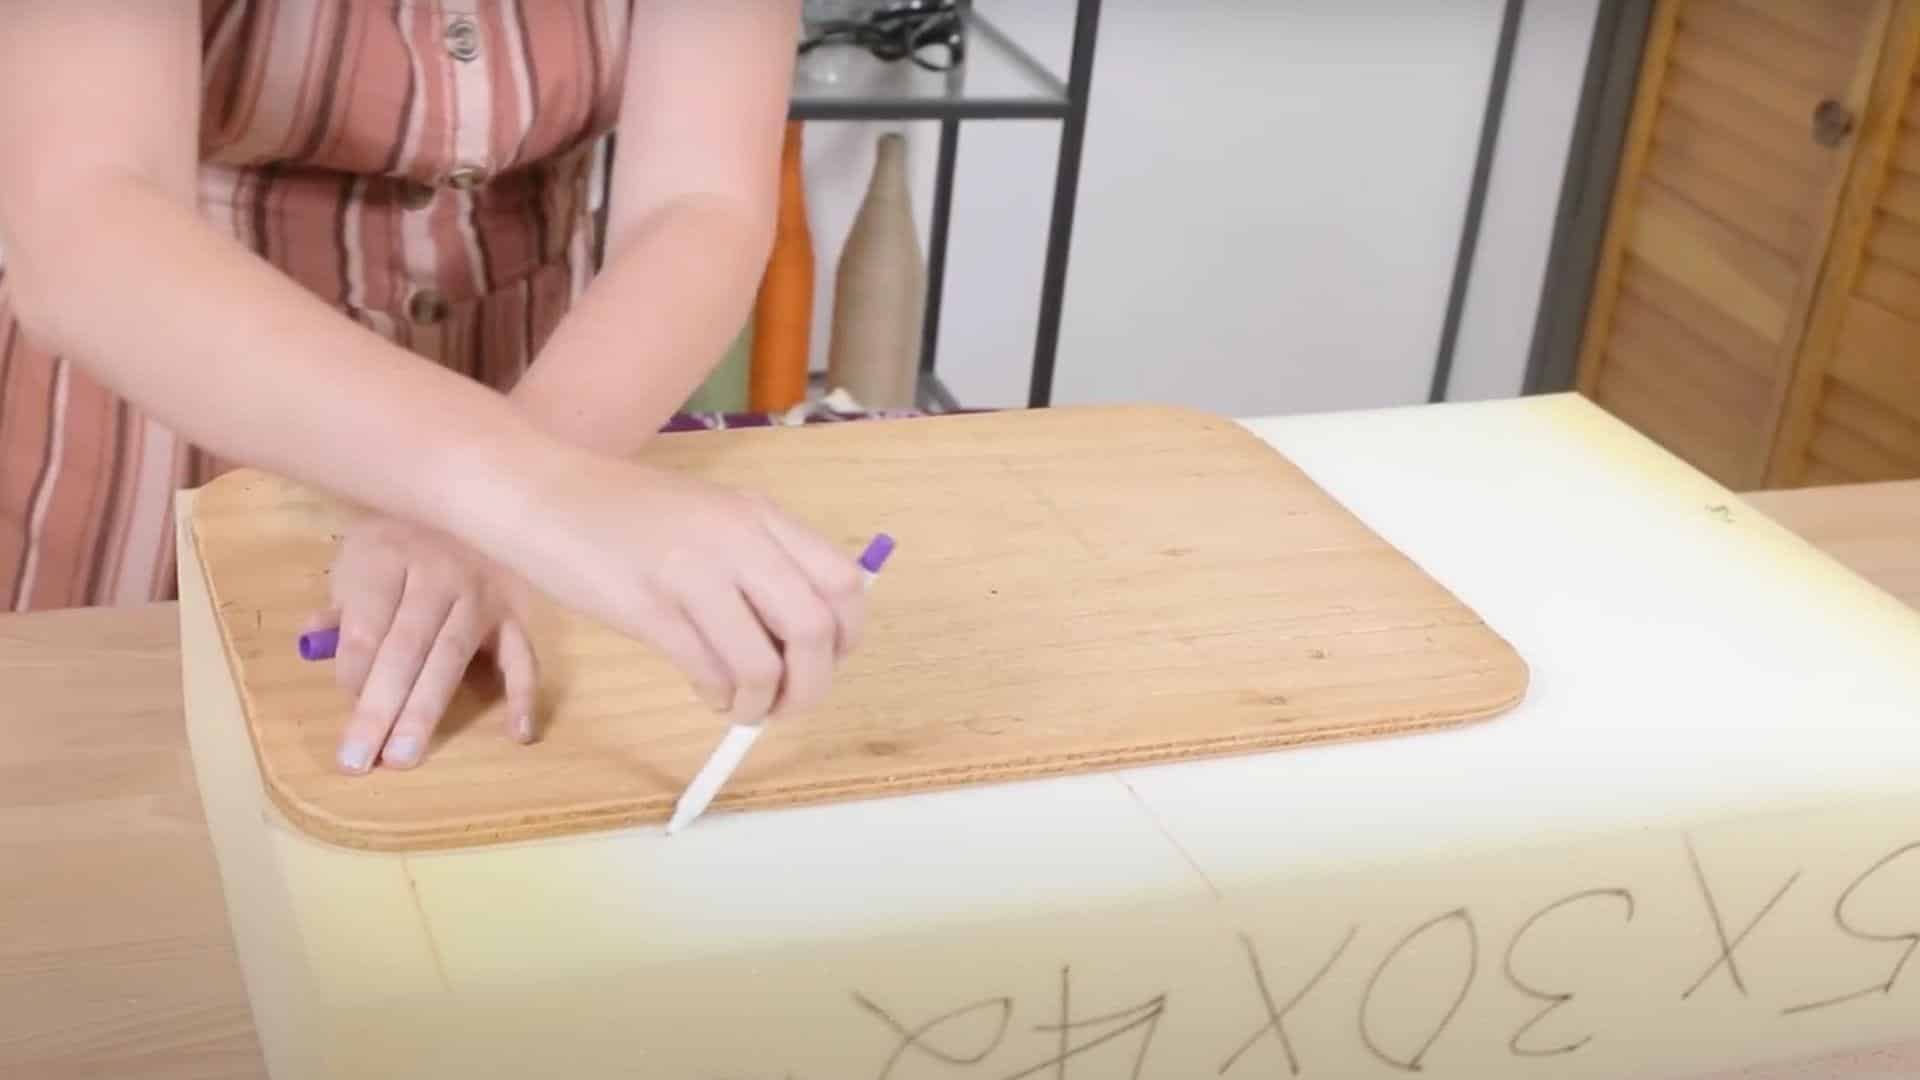
Place the wooden base directly on top of your new upholstery foam and trace around it with a marker. For thick foam, trace both the top and bottom surfaces to ensure straight, perpendicular cuts.
Use a sharp serrated knife to cut through the foam in one smooth motion rather than sawing back and forth.
Apply spray adhesive evenly to the wooden base, then carefully position the foam, ensuring perfect alignment. Press firmly and allow the adhesive to set completely.
Pro Tip: Cut foam slightly larger than your trace line, then trim to exact size for a perfect, snug fit without gaps.
Step 5: Add Batting and Create Cushioning
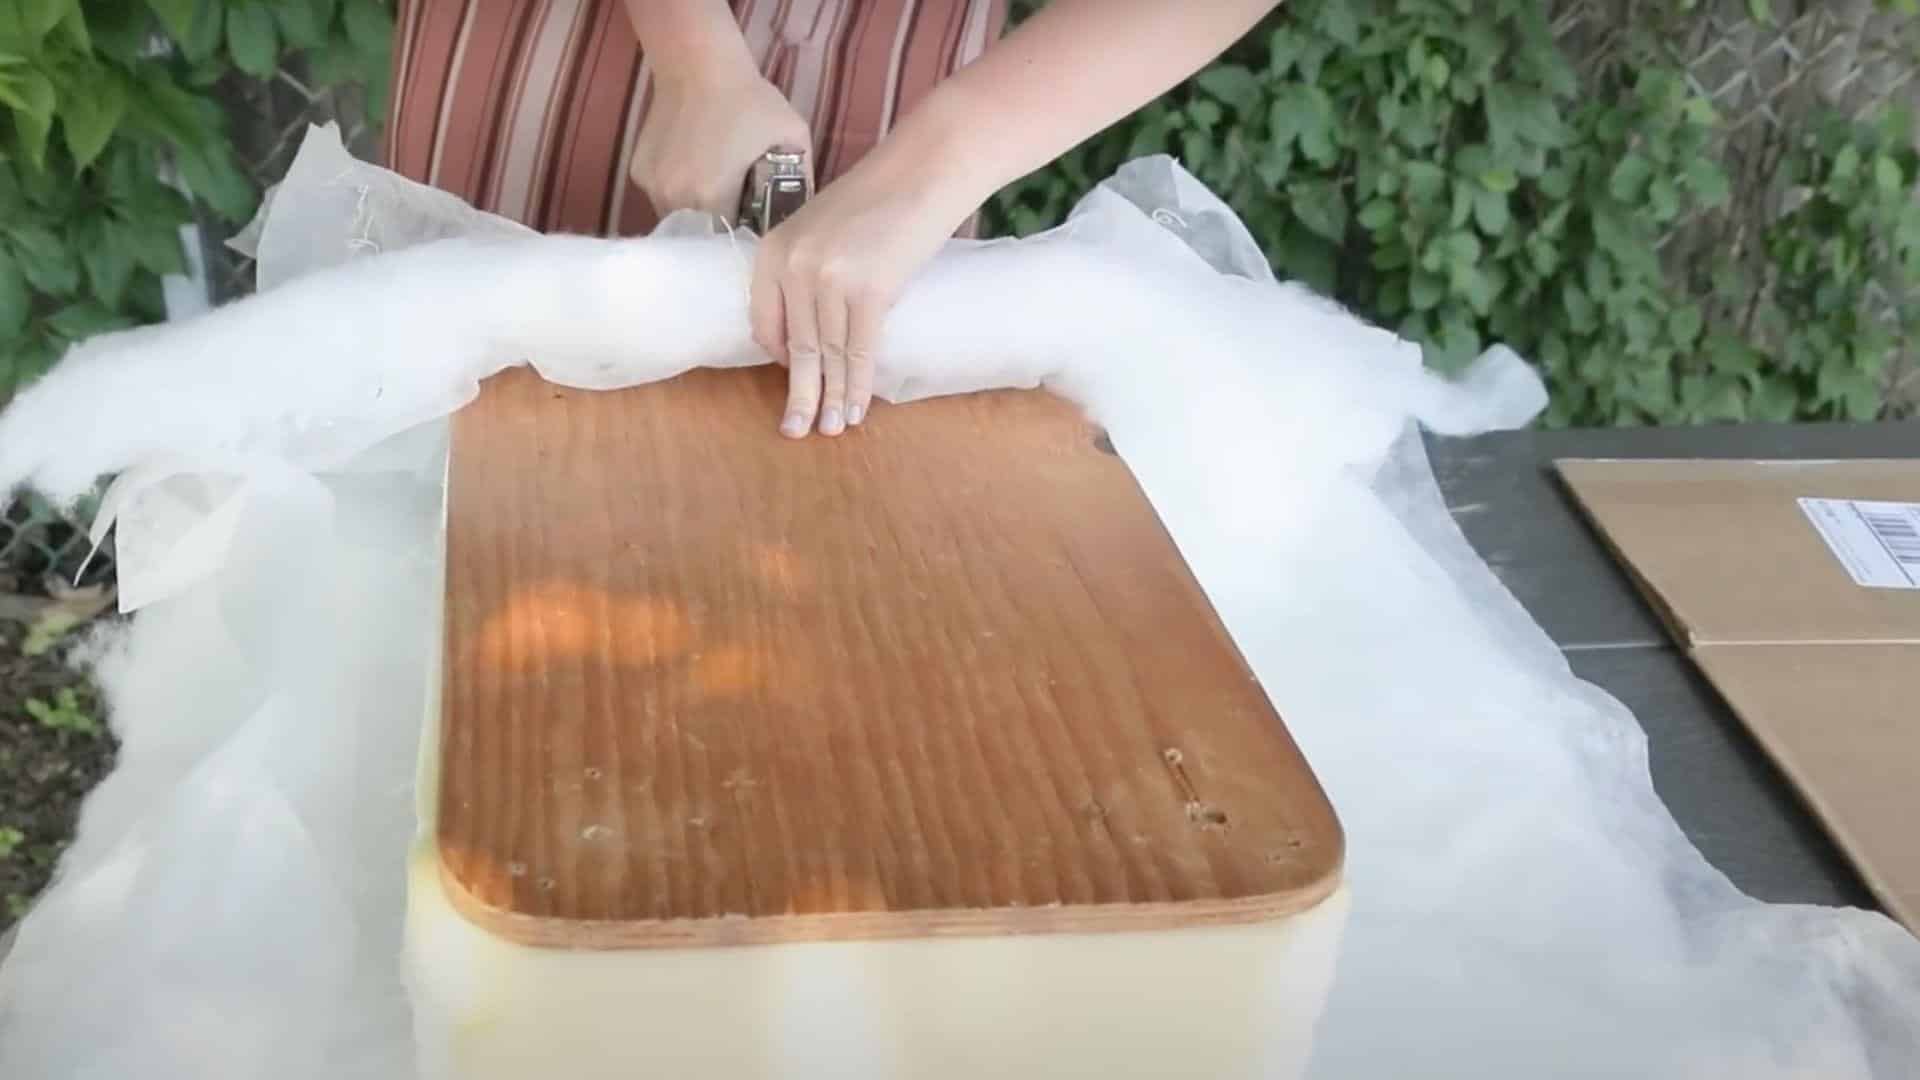
Cut upholstery batting large enough to wrap completely around your foam-covered base with several inches of overhang on all sides. Spray the top of the foam with adhesive, then position the batting centered over the piece.
Flip the assembly over and pull the batting tight around to the underside of the frame. Begin stapling in the center of each side first, then work outward toward the corners, maintaining even tension to prevent bunching or loose areas.
Pro Tip: Always staple opposite sides alternately (top, bottom, left, right) to maintain even tension and prevent the batting from shifting during installation.
Step 6: Install Main Upholstery Fabric
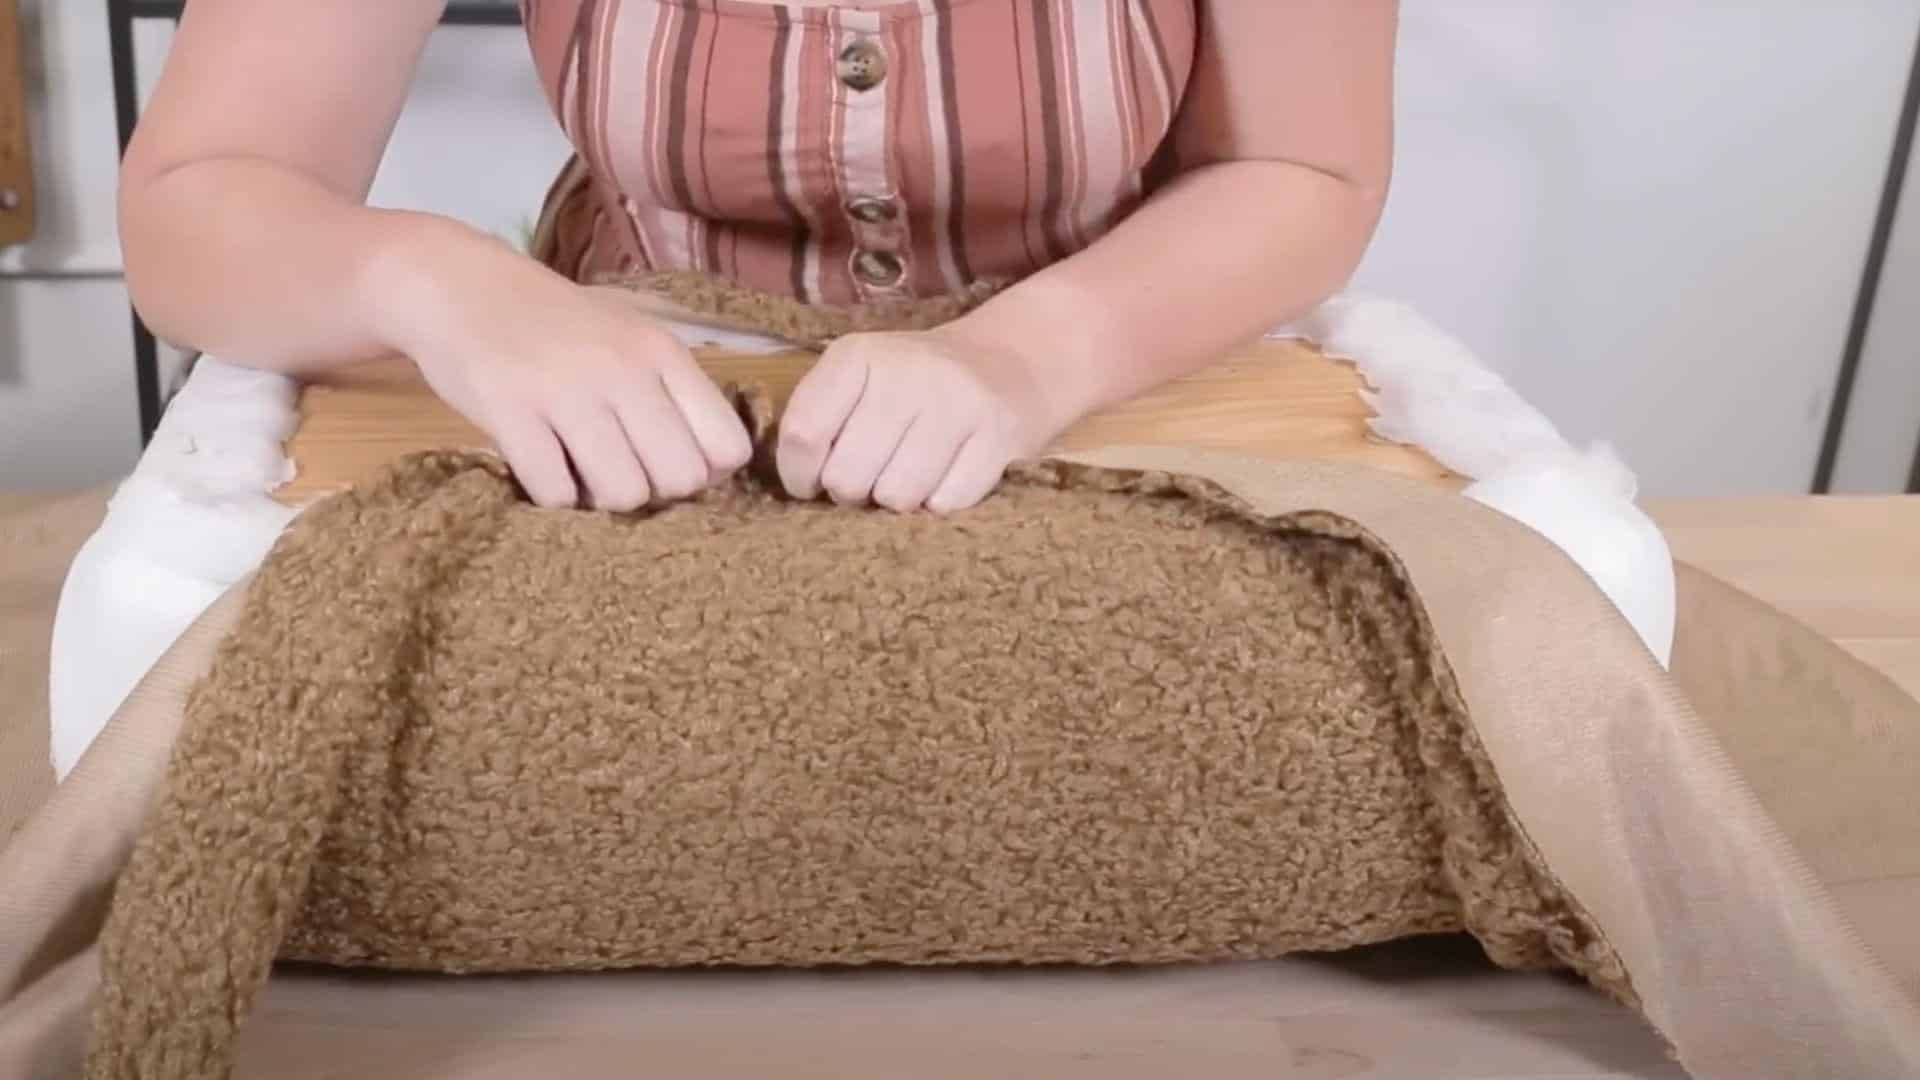
Cut your decorative fabric with approximately 4 inches of excess on all sides for proper wrapping and stapling room. Place the fabric face down on the work surface and center the cushioned ottoman on top.
Pull fabric taut around edges and staple to the underside, starting with the center points of each side. Work systematically between existing staples and corners, maintaining consistent tension.
For neat corners, stop stapling 2 inches from the corners, then fold the excess fabric toward the shorter edges and staple it securely.
Pro Tip: Use a cardboard template to ensure decorative nails are evenly spaced if you plan to add them for a professional finished appearance.
Step 7: Attach Bottom Covering and Hardware
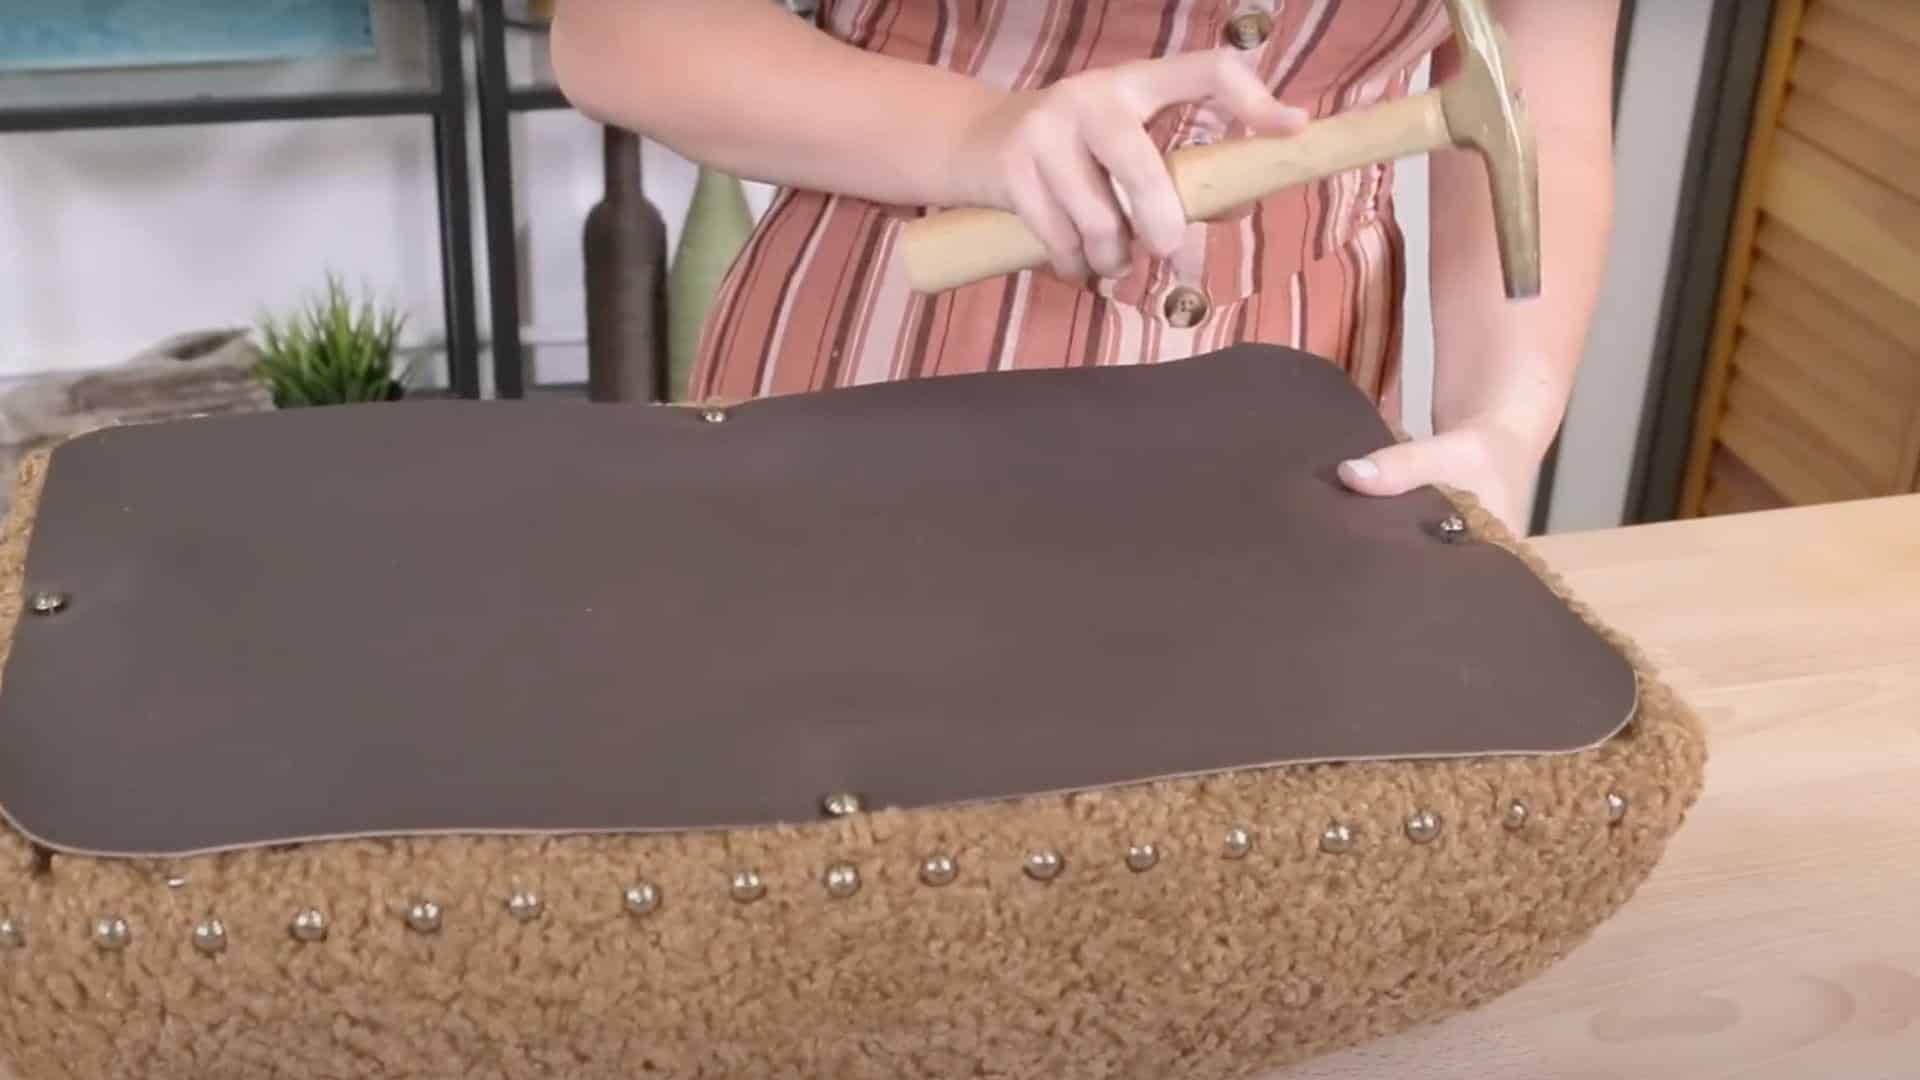
Cut faux leather or dust cover fabric to fit the bottom with a slight overhang for stapling. If your piece had a cardboard template, use it as a guide for screw hole placement. Otherwise, carefully measure hole positions from frame edges and mark on your fabric.
Use an awl or hole punch to create precise holes for hardware screws. Staple the bottom fabric as close to the edges as possible, then trim excess material for a clean finish.
Pro Tip: Test-fit hardware through holes before final stapling to ensure proper alignment and prevent having to redo this step.
Step 8: Final Assembly and Finishing Touches

Install decorative nails starting from the center of each side and working outward to maintain symmetry and even spacing. Stretch the bottom fabric slightly as you add nails to prevent sagging when the ottoman is flipped upright.
Reattach all legs and hardware through the fabric holes, ensuring screws are properly tightened. Check all connections and decorative elements for security. Clean the finished piece with appropriate fabric cleaner and admire your professionally restored ottoman.
Pro Tip: Keep some matching fabric scraps and extra nails for future repairs, and take a final photo to document your restoration success.
Video Tutorial
Special thanks to Online Fabric Store for providing valuable insights in their video, which I referenced while creating this guide.
Don’t Do This: Common Errors in Ottoman Reupholstery
Avoid these costly mistakes that can ruin your restoration project and waste valuable time and materials.
- Skipping hardware cleaning – Always clean and sand all surfaces before painting to ensure proper paint adhesion and a professional finish.
- Cutting the foam too small – Cut foam slightly larger than your traced outline, then trim to exact size for a perfect, snug fit without gaps.
- Uneven stapling pattern – Always start at the center of each side and work outward to maintain consistent tension and prevent fabric shifting.
- Insufficient fabric overhang – Cut fabric 4+ inches larger on all sides to provide adequate material for proper wrapping and secure stapling.
- Forgetting screw hole locations – Measure and mark hole positions before cutting fabric to avoid having to redo this critical step.
- Rushing the adhesive drying – Allow full cure time per manufacturer specifications to ensure strong, lasting bonds between materials.
Following these guidelines will ensure your ottoman restoration looks professional and lasts for years to come.
Project Budget Breakdown
Transform your ottoman affordably with this comprehensive cost analysis for a typical restoration project.
| Category | Item | Estimated Cost |
|---|---|---|
| Fabric & Materials | Upholstery fabric (1-2 yards) | $25-60 |
| Faux leather vinyl | $15-25 | |
| Upholstery foam | $20-35 | |
| Upholstery batting | $10-20 | |
| Hardware & Fasteners | Staples (box) | $5-8 |
| Decorative nails | $8-15 | |
| Spray adhesive | $8-12 | |
| Finishing Supplies | Rit Dye | $3-5 |
| Rust-Oleum spray paint | $8-12 | |
| Sandpaper blocks | $5-10 | |
| Tools (if needed) | Staple gun | $15-30 |
| Combination tool | $12-20 | |
| Serrated knife | $8-15 |
Total Project Cost: $140-270
Cost Comparison- Professional reupholstery services typically charge $200-500 for similar work, making DIY restoration a budget-friendly option that saves 30-60% while gaining valuable skills.
Conclusion
Your ottoman restoration journey proves that professional-looking furniture makeovers are absolutely achievable at home.
By following these detailed steps, you’ve gained the skills to change any tired piece into a lovely focal point while saving hundreds compared to professional services.
The techniques you’ve learned, from proper foam installation to achieving perfectly tensioned upholstery, apply to countless other furniture pieces waiting for revival. Every flea market visit now becomes an opportunity to discover your next restoration project.
Ready to tackle another piece? Browse our comprehensive furniture restoration guides for chairs, benches, and headboards. Your newly restored ottoman is just the beginning of creating a home filled with unique, personally crafted furniture that reflects your style perfectly.