Are you tired of plain windows that lack personality? Many homeowners feel the same way. Your windows need a touch of style that shows your taste and fits your home.
A wooden valance can fix this problem without breaking the bank. With basic tools and some wood, you can create a window treatment that adds warmth and style to any room.
This guide will show you how to build a DIY wood valance from start to finish. You’ll learn which materials work best, how to measure correctly, and simple ways to finish your project.
Ready to turn your boring windows into eye-catching focal points? This simple home project is for anyone.
What is a Wood Valance?
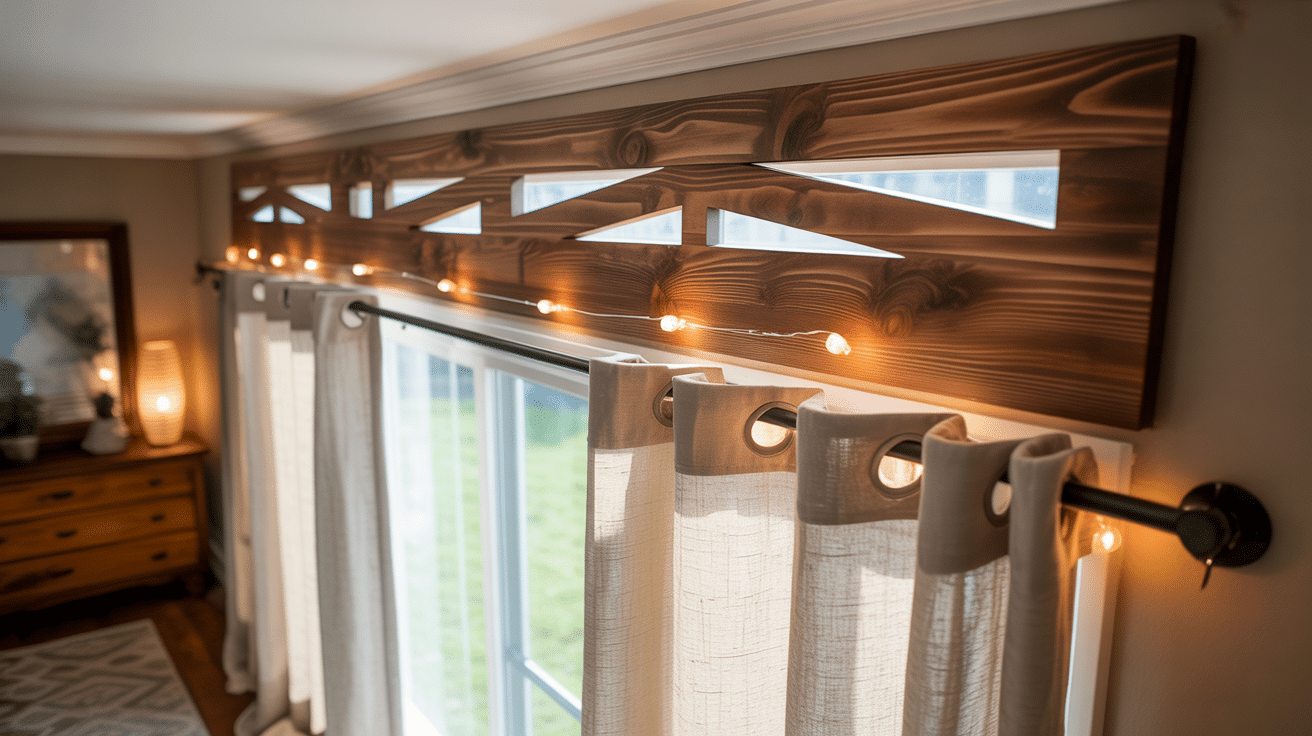
A wood valance is a short curtain or piece of wood that sits at the top of a window. It is used as a decorative cover for curtain hardware and to add style to windows while hiding curtain rods and brackets.
Wood valances are made from solid wood or MDF and come in many shapes and finishes. Compared to fabric options, they create a more solid, lasting look.
Homeowners often install wood valances above kitchen sinks, living room windows, or bedroom windows. They offer a clean, tidy look that brings warmth to any room.
You can buy ready-made wood valances or have them custom-built. For proper scale, a good wood valance should be about one-fifth the height of your entire window treatment.
Different Styles of Wood Valances
1. Traditional Wood Valances: Traditional valances often feature crown molding and detailed trim work. They add a formal touch to dining rooms and living areas. These valances usually come in dark wood tones or painted white.
2. Modern Wood Valances: Modern designs focus on clean lines and simple shapes. They use smooth wood with minimal details. These valances often come in light colors or natural finishes to match today’s home styles.
3. Rustic Wood Valances: Rustic valances use reclaimed or distressed wood. They show natural grain patterns and knots. These fit well in country, farmhouse, or cabin-style homes where a warm, lived-in feeling matters.
4. Custom Wood Valances: You can make valances in any size or shape to fit your windows. Some people add special touches like carved designs or metal accents to match their homes’ looks.
Wood valances help tie a room together by framing windows and adding texture to walls. They work in any room, from kitchens to bedrooms, making windows look complete and well-designed.
Why Choose a DIY Wood Valance?
1. Cost Savings:
- Store prices: Pre-made valances cost $50-$200, depending on size and quality
- DIY materials: Wood, screws, and finish typically total only $20-$40
- Tool advantage: Using tools you already own cuts costs even more
2. Customization Benefits:
- Perfect Fit: Make exact measurements for your windows
- Color Match: Paint or stain to match existing furniture
- Material Choice: Select pine, oak, or other woods that fit your budget
3. Personal Touch:
- Add unique carvings or patterns not found in stores
- Include family initials or meaningful symbols
- Create a piece that tells your story and fits your home perfectly
A homemade valance gives you both the pride of craftsmanship and a window treatment that’s yours alone.
Step-By-Step Building Guide Of DIY Wood Valance
Building a DIY wood valance is a simple project. It’s an affordable way to update your windows. This guide walks you through measuring, cutting, and installing your custom wood valance.
Materials required:
| Material | Purpose |
|---|---|
| Wood (pine, oak, or MDF) | The main building material for the valance structure |
| Wood screws or nails | To join wood pieces together |
| Wood glue | For added strength at joints |
| Paint or wood stain | To color and protect the wood |
| Clear sealer or polyurethane | To protect the finished wood surface |
| Sandpaper (medium and fine grit) | To smooth rough edges and prepare for finishing |
| L-brackets | To mount the valance to the wall |
| Curtain rod or mounting hardware | If planning to hang curtains from the valance |
Tools required:
| Tool | Purpose |
|---|---|
| Saw (hand saw or miter saw) | To cut wood to needed lengths |
| Drill with bits | To create pilot holes and drive screws |
| Measuring tape | To measure wood and window dimensions |
| Pencil | To mark cutting lines and measurements |
| Level | To ensure the valance hangs straight |
| Square | To check and mark right angles |
| Paintbrush | To apply stain, paint, or sealer |
| Safety goggles | To protect eyes during cutting and drilling |
| Work gloves | To protect hands from splinters and cuts |
| Clamps | To hold pieces together while glue dries |
Step 1: Preparing the Wood for Your Valance
Proper preparation sets the stage for a successful project. The right cuts and wood choice will make your valance look like it belongs in your home.
Measure your window width and add 6-8 inches for a proper fit. This extra space allows the valance to frame the window nicely. Mark your measurements clearly with a pencil on the wood pieces.
- Use a tape measure to mark the exact length needed for the front piece
- Cut side pieces 4-5 inches deep to create the box shape
- Mark all cuts with a square tool to ensure straight lines
- Double-check measurements before making any cuts
Note: Always wear safety goggles when cutting wood. Make cuts in a well-lit area, and never rush through this step. Accurate measurements now prevent headaches later.
Step 2: Assembling the DIY Wood Valance
Putting the pieces together requires patience and attention to detail. A well-built valance will last for years and look good from every angle.
Start by laying out all cut pieces on a flat surface to check their fit. Apply wood glue to the edges where pieces will join, then secure with screws or nails for added strength.
- Place the front panel face down and attach side pieces at right angles
- Use clamps to hold pieces together while the glue sets
- Add the top piece to complete the box structure
- Consider adding trim pieces to the bottom edge for extra style
Note: Pre-drill holes for screws to prevent the wood from splitting. If you want to add decorative elements, now is the time to plan their placement.
Step 3: Sanding, Staining, and Painting the Wood
Surface preparation makes the difference between an amateur and professional look. Taking time with finishing touches will make your valance stand out.
Begin with medium-grit sandpaper to smooth rough spots, then switch to fine-grit for a silky finish. Wipe away all dust with a damp cloth before applying any finish.
- Sand with the grain, not against it, to avoid scratches
- Apply wood conditioner before staining to ensure even color
- Use thin coats of stain or paint, allowing proper drying between layers
- Finish with a clear sealer for long-lasting protection
Note: Test your stain or paint on a scrap piece first. This helps you see the true color and avoid surprises on your finished valance.
Step 4: Installing the DIY Wood Valance
Proper installation ensures your valance stays in place and looks its best. A level valance makes all the difference in the final appearance.
Using a stud finder, locate the wall studs above your window. Mark these spots lightly with a pencil, as they provide the strongest mounting points for your valance.
- Position the valance at the desired height above the window
- Use a level to ensure the valance is perfectly straight
- Attach L-brackets to the wall at stud locations
- Secure the valance to the brackets with short screws
Note: If you can’t find studs, use appropriate wall anchors rated for the weight of your valance. Leave enough room below the valance if you plan to hang curtains.
Step 5: Decorating with Your DIY Wood Valance
Your valance serves as both a functional window treatment and a design statement. The right decorative touches will make it shine.
Consider how your valence works with the rest of your room. It should complement other wood tones and colors while adding interest to your windows.
- Pair with light, flowing curtains for a soft look
- Add small accent lights above for a warm glow
- Match the finish to other wood elements in the room
- Take photos of your completed project to share with friends
Note: Change your curtains seasonally to keep the look fresh while maintaining your valance as a constant design element. Simple updates can transform the feel of your windows.
For a visual tutorial, refer to this video by The Family Woodworker
5 Troubleshooting and Common Mistakes to Avoid
1. Uneven Cutting: When wood pieces don’t align perfectly.
Fix: Use a miter box or saw guide for straight cuts. Mark all cut lines with a square tool first, and cut slowly to follow the line.
2. Gaps Between Pieces: When assembled, pieces don’t fit tightly together.
Fix: Use wood filler to close small gaps. For larger gaps, re-cut pieces or add thin wood strips as fillers.
3. Splitting Wood: When wood cracks during nailing or screwing.
Fix: Always pre-drill holes slightly smaller than your screws. Keep nail or screw placement at least 3/4 inch from any edge.
4. Stain Looking Blotchy: When wood stain absorbs unevenly.
Fix: Apply wood conditioner before staining. Sand thoroughly between coats, and wipe off excess stain quickly.
5. Valance Not Level: When the installed valance tilts to one side.
Fix: Use a level during installation. Mark the wall studs clearly, and check the level again after securing the first bracket.
Conclusion
Making your wood valance adds a special touch to your windows. This project combines simple woodworking skills with your style.
By following the steps in this guide, you can create a window treatment that fits your space perfectly. From choosing the right wood to final installation, each step builds toward a finished piece you’ll be proud to show off.
Remember to measure twice and cut once. Take your time with finishing details. If you catch most issues early, they have simple solutions.
Your DIY wood valance will frame your windows for years to come. Why not start planning your project today?