Did your rug get wet after cleaning or a spill? Waiting for it to dry can be frustrating. Wet rugs left too long can grow mold and develop bad smells that linger for weeks.
Most people don’t know that different rugs need different drying times. A thin cotton rug might dry in hours, while a thick wool rug could take days. Using the wrong drying method might damage your rug or leave hidden moisture behind.
The good news is that you can cut drying time with a few simple steps. With the right methods, you’ll prevent mold growth, avoid bad odors, and keep your rug in top shape for years.
Ready to learn the best ways to dry your rug quickly and safely? Keep reading for expert tips and techniques.
How Long Does a Rug Take to Dry?
Proper rug drying is essential to prevent musty smells, mold growth, and long-term damage. But how long should you expect to wait? The answer depends on several factors, including the rug’s material, thickness, and the environment in which it’s drying.
Average Drying Time
-
Standard rugs: 6–12 hours in well-ventilated areas
-
Thicker rugs (shag, wool, or layered): 12–24 hours
-
Flooded or heavily soaked rugs: 24–48 hours or longer
This timeframe assumes some effort to help the drying process along—like airflow, blotting, or sunlight. Leaving a rug in a stagnant room can double the drying time and increase the risk of odor.
Factors That Affect Drying Time
1. Rug Material
The type of material plays a big role in how quickly a rug dries. Wool and cotton rugs are highly absorbent, meaning they hold onto moisture and take longer to dry. In contrast, synthetic rugs made from materials like polypropylene or nylon are more water-resistant and typically dry much faster.
2. Thickness and Padding
Thicker rugs and those with dense fibers or built-in padding naturally take more time to dry. Moisture gets trapped deep within the layers, especially if there’s an underpad, which can slow the drying process significantly compared to flat, lightweight rugs.
3. Airflow and Ventilation
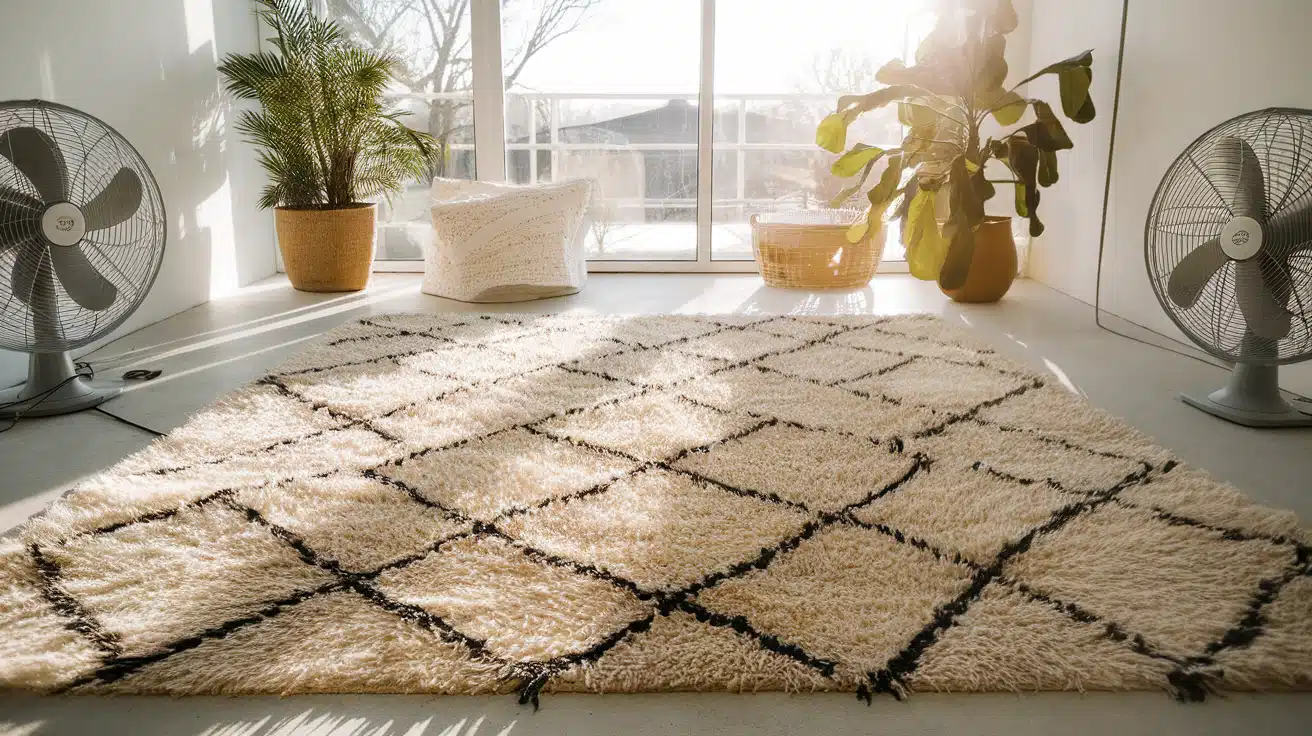
Proper airflow is essential for drying. Rugs in well-ventilated rooms with fans or open windows will dry much faster than those in closed-off or poorly ventilated areas. Using a fan or placing the rug near a breezy window can make a noticeable difference.
4. Sunlight Exposure
Direct sunlight can accelerate drying by pulling moisture out of the rug quickly. However, natural fiber rugs like wool or jute may fade if exposed to intense sunlight for too long. It’s best to rotate the rug occasionally during sun-drying to ensure even exposure and prevent discoloration.
5. Humidity Levels
High humidity in the air can drastically slow the rug’s drying time. In especially damp environments, the moisture from the rug has nowhere to go. Using a dehumidifier in these conditions helps draw out the water and promotes quicker, odor-free drying.
How to Dry a Rug – Do’s and Don’ts
Drying a rug properly is essential to avoid odors, mold, and damage to both the rug and your floors. Below is a clearly structured guide outlining what you should and shouldn’t do when drying a rug.
Do’s
1. Blot Out Excess Water Immediately
Use clean, absorbent towels or a wet/dry vacuum to remove as much moisture as possible right after a spill or cleaning.
2. Ensure Good Air Circulation
Position fans around the rug or open windows to create cross-ventilation. This accelerates the drying process and reduces the risk of mildew.
3. Use a Dehumidifier in Humid Conditions
In damp or poorly ventilated spaces, a dehumidifier can significantly reduce drying time and prevent lingering odors.
4. Dry Both Sides of the Rug
Periodically flip the rug to ensure the underside dries fully. This helps prevent trapped moisture that can cause smells or mold growth.
5. Use Sunlight with Caution
If weather permits, placing the rug in direct sunlight can help it dry faster. However, limit exposure time to avoid fading or fiber damage—especially on natural fiber rugs.
Don’ts
1. Do Not Leave the Rug on Hardwood or Carpet
Placing a wet rug on flooring can trap moisture underneath, damaging both the floor and the rug. Always elevate the rug or move it to a suitable drying area.
2. Do Not Use High Heat Tools
Avoid using hairdryers, heat guns, or other high-temperature devices. These can shrink the rug, warp fibers, or cause color distortion.
3. Do Not Skip the Odor Check
Even if a rug feels dry on the surface, it may still retain moisture deep within. If a musty smell lingers, further drying is necessary.
4. Do Not Roll Up the Rug Too Soon
Rolling a damp rug prevents airflow and traps moisture inside, creating the perfect environment for mold. Always wait until it is completely dry.
5. Do Not Ignore the Backing or Padding
Rug pads and backing materials often take longer to dry. Ensure these components are fully dried before placing the rug back in use.
How to Speed Up Rug Drying
Want your rug to dry faster? There are several useful methods you can try at home. First, always start by removing excess water. Use clean, dry towels and press them firmly onto the rug surface. Avoid rubbing, as this can damage fibers. Replace wet towels with fresh ones and keep going until the towels come away just slightly damp.
Creating good air flow is key to faster drying times. Set up fans around your rug to move air across the surface. Position them at different angles for better coverage.
This constant air movement helps water leave the fibers more quickly than still air. On less humid days, open windows and doors to create cross-breezes. This natural ventilation pulls moisture out of the room and speeds up the drying process.
Adding a dehumidifier can make a big difference, especially in damp spaces. These machines work by pulling moisture from the air, which in turn helps your rug release water faster. Place the dehumidifier close to your rug and remember to empty the water tank regularly.
For smaller rugs, consider hanging them up. This allows air to reach both sides of the rug at once. Use a sturdy clothesline or dedicated rug rack for this purpose. Make sure the rug hangs evenly to prevent stretching or distortion of the shape.
Professional vs. DIY Rug Drying – Comparison Table
When your rug gets wet—whether from cleaning, spills, or flooding—you’ll need to decide between handling the drying process yourself or hiring a professional. Each option has its benefits and limitations, depending on the rug’s material, level of saturation, and your timeframe.
| Feature | DIY Rug Drying | Professional Rug Drying |
|---|---|---|
| Cost | Low – mostly free if tools are available | Higher – service fees apply based on rug size and condition |
| Convenience | Immediate – can be done at home anytime | Requires scheduling, pickup/drop-off, or on-site service |
| Drying Speed | Slower – depends on home airflow and weather | Faster – uses industrial fans, dehumidifiers, and drying chambers |
| Effectiveness | Varies – may leave moisture or odor if not done properly | High – deep, thorough drying prevents odors and mold |
| Equipment Required | Towels, fans, wet/dry vacuum, baking soda, dehumidifier | Commercial dryers, moisture meters, disinfectants |
| Best For | Small spills, synthetic rugs, light cleaning | Flood damage, antique or wool rugs, deep-cleaning follow-up |
| Risk Level | Moderate – risk of incomplete drying or floor damage | Low – handled by professionals with material-specific expertise |
5 Pro Tips for Preventing Odor in the Future
Keeping your rug fresh and odor-free is all about consistent care and moisture control. Follow these expert tips to keep bad smells at bay:
1. Never Let Rugs Sit Wet for More Than an Hour
Act quickly after spills or cleaning. Damp rugs are a breeding ground for mold and mildew. Drying them within the first hour drastically reduces the chance of lingering odors.
2. Use Rug Pads That Promote Airflow
Choose high-quality rug pads made with breathable materials. These pads elevate the rug slightly off the floor, encouraging ventilation and faster moisture evaporation.
3. Stick to a Regular Cleaning Schedule
Vacuum weekly and deep clean every few months. This removes trapped dirt, allergens, and moisture that can cause musty smells over time.
4. Rotate Rugs Every Few Months
Rotating your rug ensures even wear and prevents moisture from settling in one area—especially in high-traffic zones or near windows and doors.
5. Allow Rugs to “Breathe” Occasionally
On dry days, take your rug outside to air it out. Even a few hours of sun and fresh air can eliminate odors naturally and keep the fibers feeling fresh.
How to Know When Your Rug is Fully Dry?
Your rug may look dry on the surface while still holding moisture inside. Here’s how to check:
- Touch test: Press your hand firmly into the rug for 10 seconds
- If your hand feels damp, more drying is needed
- Check the backing and underside
- Make sure fringes and edges are completely dry
- The rug should feel the same temperature throughout (damp areas feel cooler)
Conclusion
Rug drying times vary from 4 hours to 2 days, depending on the material, thickness, and home conditions. The key is patience and proper technique.
Remember these main points: remove excess water first, create good air flow, and check both sides before declaring your rug dry. Rush this process, and you risk mold growth and lasting odors.
Professional services offer peace of mind for valuable rugs or severe water damage. When done right, DIY methods work well for minor spills on synthetic rugs.
The touch test is your best tool—if it feels cool or damp when pressed, keep drying. Trust your senses over appearance.


