Looking to change your patio into a stunning outdoor retreat?
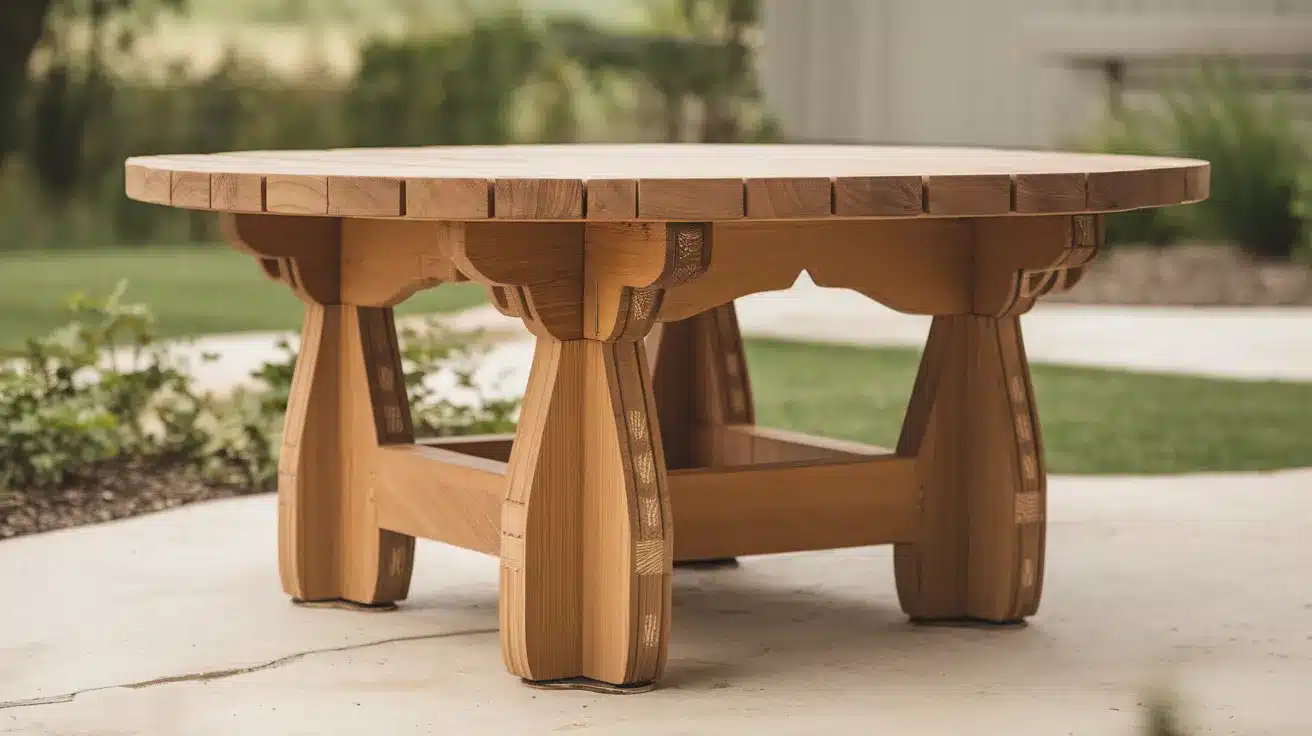
Building my cedar coffee table was the perfect weekend project to promote my backyard ambiance. Interest in outdoor entertaining spaces has never been higher, and nothing sparks curiosity like custom-built furniture that perfectly matches your existing seating.
Desire a professional-looking table without the designer price tag?
This smart yet simple design uses original cedar and basic tools you probably already own. Action time!
Grab your drill and measuring tape, I’ll show you how to unlock the satisfaction of crafting something beautiful that will daze guests and withstand the elements for years to come. Ready to embark on this woodworking adventure?
Why DIY an Outdoor Coffee Table? Here’s Why!
- Express your style – Custom-built furniture allows you to create exactly what you want instead of settling for mass-produced options that don’t quite match your outdoor attractive.
- Save significant money – Building your table can cost 50-70% less than purchasing comparable quality furniture, especially when using cheap materials like cedar fence pickets.
- Perfect size and dimensions- Create a table that perfectly fits your specific space, whether you need something compact for a small patio or oversized for a large entertaining area.
- Higher quality materials – Choose weather-resistant woods like cedar or pressure-treated lumber that will outlast many store-bought options made with cheaper materials
- Learn valuable skills – Each DIY project builds your woodworking abilities and confidence, making future projects easier and more enjoyable.
DIY Outdoor Coffee Table: Easy Steps & Materials Guide
Build a durable and stylish DIY outdoor coffee table with simple steps and materials like cedar wood, pocket hole screws, and outdoor stain. Follow our easy guide for a perfect backyard addition!
Tools & Materials for Diy Outdoor Coffee Table
| Tools | Purpose |
|---|---|
| Drill | Used for Making Pocket Holes and Driving Screws Into Wood. |
| Miter Saw | Used for Making Precise Angle Cuts on Wood. |
| Sander | Used for Smoothing Wood Surfaces and Removing Rough Spots. |
| Pocket Hole Jig | Used for Drilling Precise Pocket Holes to Join Wood Pieces. |
| Measuring Tools | Used for Measuring Lengths, Angles, and Ensuring Accuracy. |
| Materials | Purpose |
|---|---|
| Cedar Wood (4x4s, 2x4s, 2x2s) | Provides the Main Structure and Framing for The Project. |
| Cedar Fence Pickets (or 1×6 Boards) | Used for The Slats in The Design of The Project. |
| Exterior Pocket Hole Screws | Used to Join Wood Pieces Together Securely. |
| Outdoor Stain and Sealant | Protects Wood from The Elements and Enhances Its Appearance. |
| Wood Glue (optional) | Used to Help Secure Slats in Place for Added Strength. |
| Brad Nails (optional) | Can Be Used to Secure Slats While the Glue Dries Temporarily. |
| Foot Levelers (optional) | Used to Adjust the Height of The Project for Uneven Surfaces. |
Step 1. Prepare the Legs
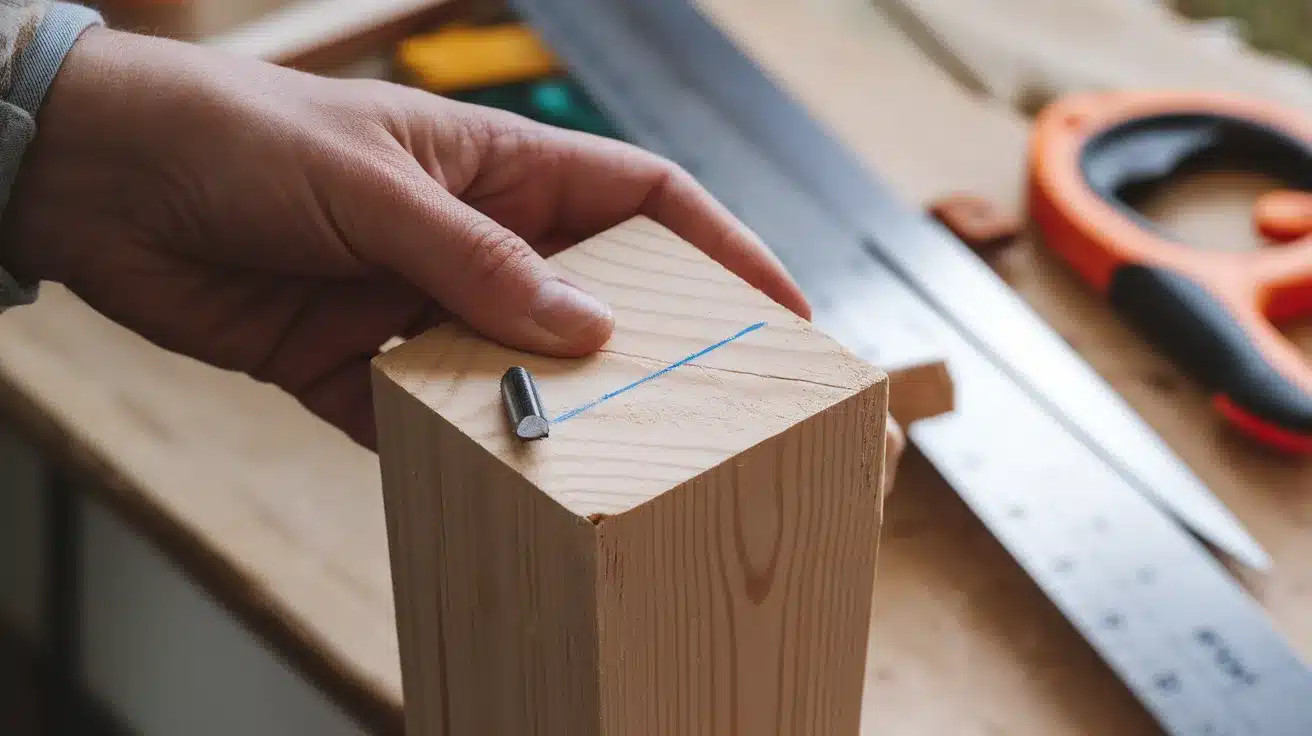
Change your cedar 4×4 posts into beautiful table legs with a simple 10-degree angle cut.
This small detail makes a big difference. Your table legs will slightly flare outward at the bottom, creating better stability and a more stylish look!
Measure carefully before cutting to ensure all four legs match perfectly. The angled legs give your table that special, handcrafted touch that store-bought furniture can’t match.
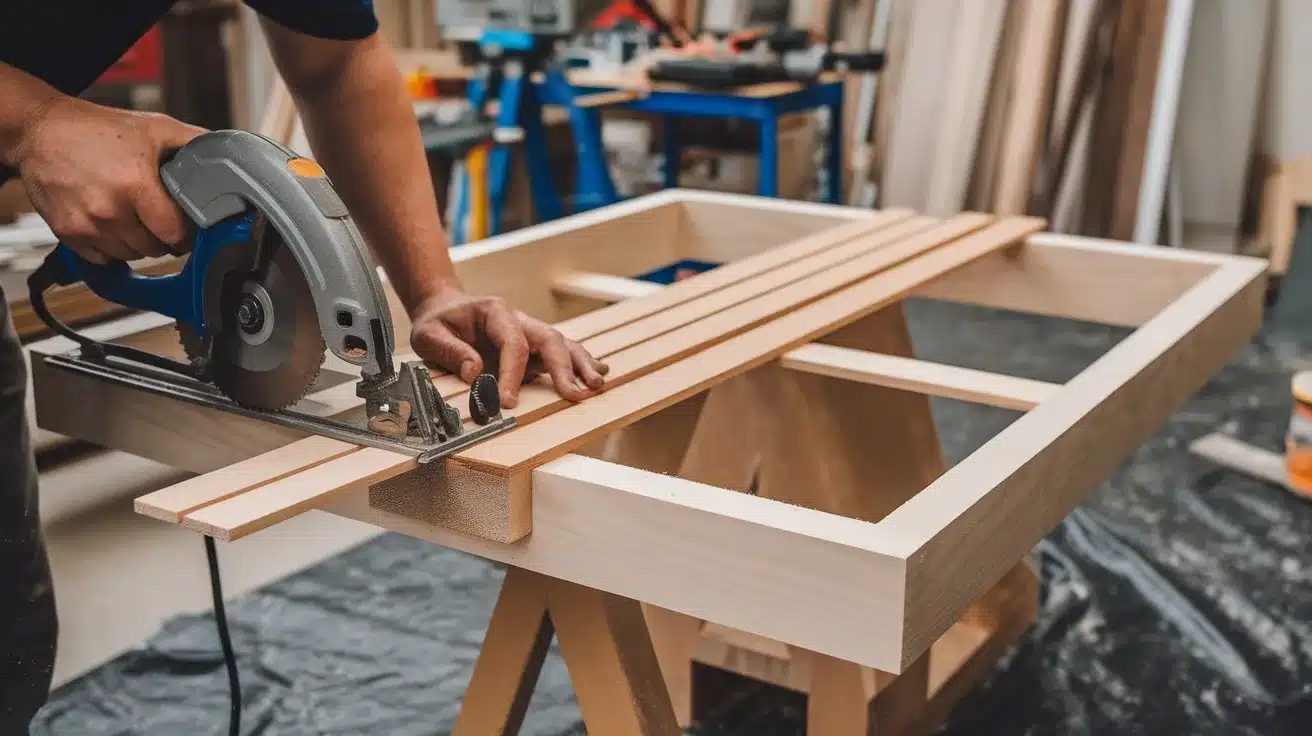
Step 2. Cut the Frame Pieces
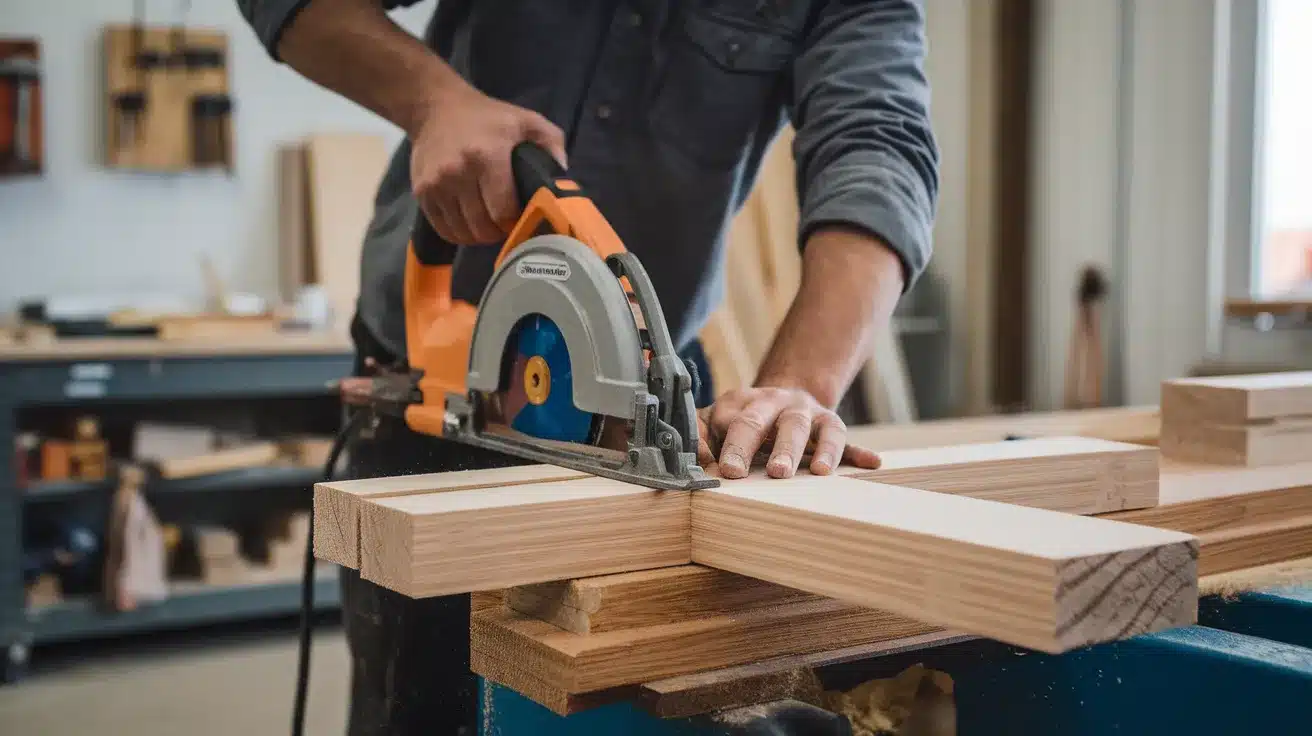
Grab your 2x4s and 2x2s to create the connecting pieces that will form your table’s structure. Make sure to measure twice and cut once!
Those 10-degree Bevels on the 2x4s Are Super Important; they help everything fit together perfectly with Those Angled Legs. Take Your Time with These Cuts, as They Create the Clean Lines that Make This Design so Appealing. The better Your Cuts, the Easier the Assembly Will Be.
Step 3. Assemble the Table Base
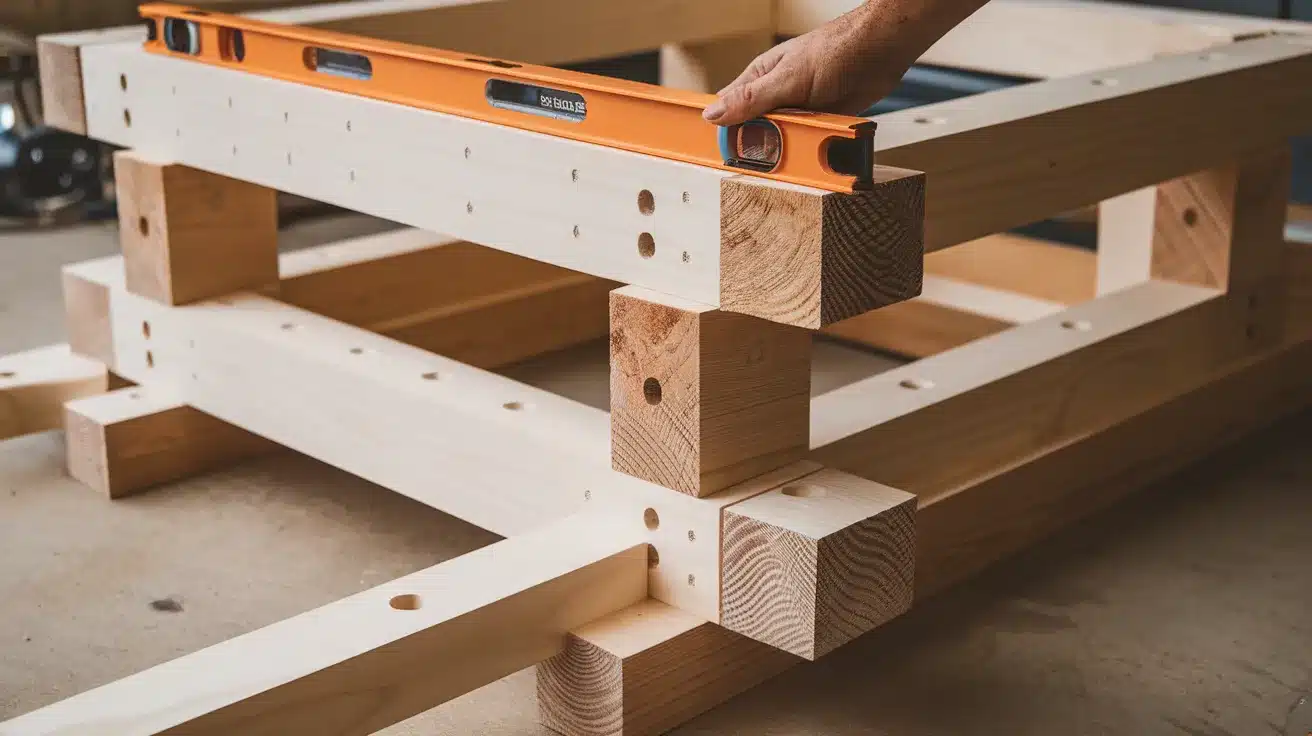
Drill pocket holes in your 2x4s (remember to place them off-center, about 2.5 inches from the edge) and 2x2s. Then connect everything to your legs using outdoor-friendly pocket hole screws.
Work on A Flat Surface and Check for Wobbles as You Go. A rock-solid Base Means Your Table Will Last for Years of Backyard Barbecues and Morning Coffees.
Step 4. Create the Tabletop Frame
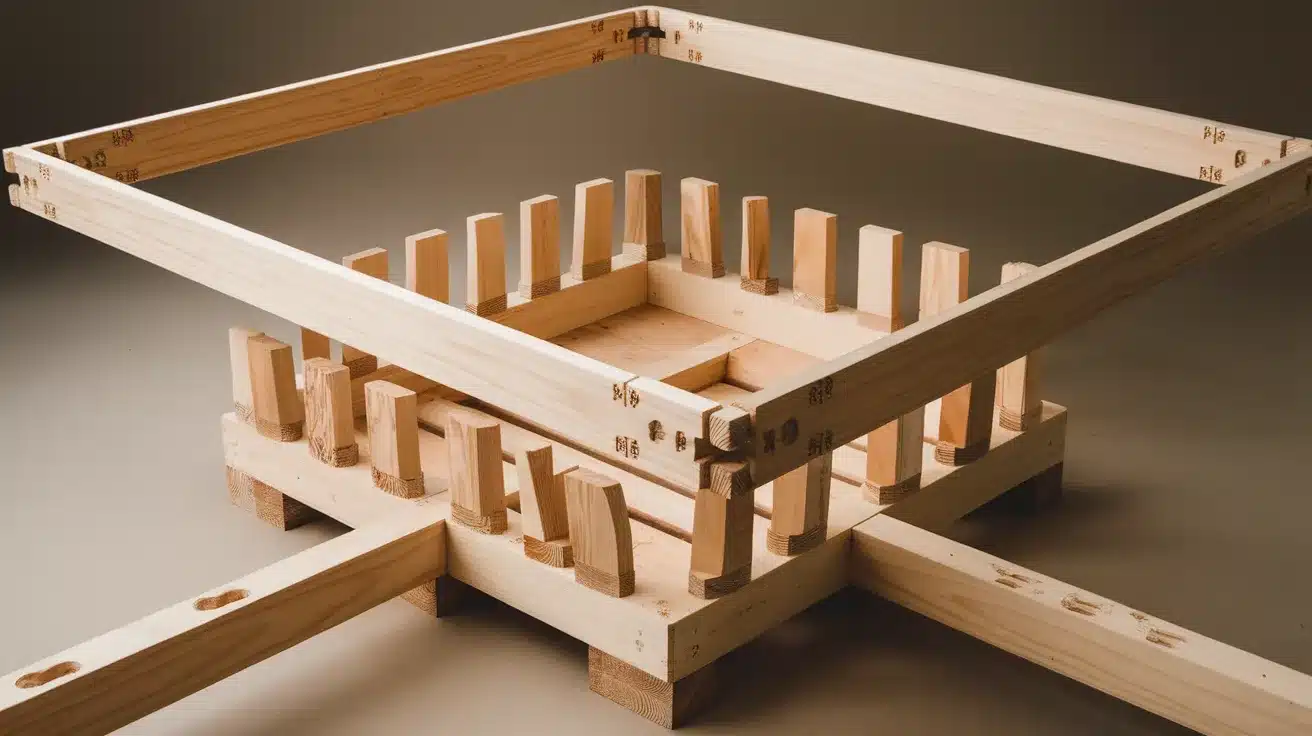
Build a simple rectangular frame using 2x4s and pocket hole joinery.
The magic happens when you flip both this frame and your table base upside down and attach them. This clever technique creates a perfect recessed area for your slats to sit in.
Center the base on the frame before screwing them together – this ensures your finished table has balanced overhangs on all sides.
Step 5. Add Spacer Blocks
Cut thin strips from a 2×4 to create spacers around the inside edge of your tabletop frame. These little helpers solve a big problem. They raise your thinner slats to be perfectly flush with the thicker frame.
Without these spacers, your slats would sit too low. This small detail creates a smooth, even surface that feels great and looks even better.
Step 6. Finish and Install Slats
Protect your beautiful cedar wood with quality outdoor stain before the final assembly. This is much easier to do while the pieces are separate!
Once dry, arrange your fence pickets or 1×6 boards across the top with around a 1/4-inch gap between each one. These gaps aren’t just for looks. They allow rainwater to drain through instead of pooling on your table.
Proper spacing ensures your table will weather beautifully through many seasons.
i want to give credit to shara woodshop diaries for their informative video, which served as a reference for this guide.
Common DIY Table Mistakes to Avoid
1. Choosing the Wrong Wood
-
Mistake: Using wood that isn’t durable for outdoor use, like untreated softwoods or indoor furniture wood.
-
Solution: Always opt for weather-resistant wood, such as cedar, teak, or pressure-treated lumber. Ensure the wood is treated or sealed for outdoor use.
2. Skipping the Sanding Process
-
Mistake: Not sanding the wood properly or skipping sanding altogether.
-
Solution: Sand all surfaces to remove rough patches and ensure a smooth finish. This will also help the stain or sealant to adhere better.
3. Not Using the Right Outdoor Sealant
-
Mistake: Using indoor wood finishes or sealants that aren’t designed to withstand the elements.
-
Solution: Choose an exterior-grade stain or sealant specifically made for outdoor furniture to ensure protection against UV rays, water, and weather conditions.
4. Incorrect Measurements and Cuts
-
Mistake: Not measuring and cutting pieces accurately, leading to a misaligned or unstable table.
-
Solution: Always measure twice and cut once! Use a miter saw or a guide to ensure accurate cuts, and check dimensions before assembling.
5. Not accounting for Wood Movement
-
Mistake: Failing to account for wood expansion and contraction due to moisture changes, which can lead to cracking or warping.
-
Solution: Leave small gaps between slats or boards when assembling the tabletop. Use screws or nails that allow the wood to move slightly.
Pro Tips for Diy Table Rookies: Craft Like a Master!
- Start Simple: To build confidence and avoid feeling overwhelmed by complexity, begin with an easy table design, like a basic coffee table or side table.
- Basic Tools Only: You don’t need fancy tools, just the basics! A miter saw, drill, and sander are all you need to create a polished, professional result.
- Work Smarter, Not Harder: A tidy, well-organized workspace makes everything easier. Keep your tools accessible and materials neatly arranged to streamline your process.
- Take Your Time: Don’t rush. Focus on precision, whether it’s measuring, cutting, or assembling. The more attention you give to each step, the better the final product.
- Use Reliable Materials: Choose durable wood like cedar for outdoor projects, and don’t skimp on the right screws or sealant to ensure long-lasting results.
- Learn and Improve: Every project teaches you something new. The more you build, the more skilled you become, and the easier future projects will be!
Wrapping It Up
Here’s a step-by-step guide to building your own cedar coffee table. With basic tools and affordable materials, you can create something both beautiful and practical.
The real magic of this project isn’t just saving money; it’s the pride that comes from pointing to that table during your next backyard gathering and saying, “I built that myself.” Your outdoor space now has a personal touch that no store-bought furniture could match.
Whether you’re downing morning coffee or hosting evening get-togethers, this handcrafted piece will be the centerpiece of countless memories.
Remember, woodworking is a skill that grows with each project. This table is just the beginning of your DIY adventure!
Frequently Asked Questions
What Kind of Wood Is Used for Coffee Table Tops?
Popular coffee table top woods include oak, walnut, maple, pine, mahogany, reclaimed wood, glass (with wood base), and teak.
What to Put Under a Coffee Table?
Under a coffee table, you can place a rug, carpet, felt pads, furniture coasters, storage baskets, ottomans, floor pillows, or pet beds.
How Tall Should an Outdoor Coffee Table Be?
Outdoor coffee tables should be 16-18 inches tall, ideally 1-2 inches lower than your seating for best comfort.