Hey there! As an art student who’s spent countless hours working with clay, I’m pumped to share my favorite leaf-making methods with you.
In this blog, I’ll explain three DIY clay leaf techniques that will add a nature-inspired touch to your space.
We’ll cover making simple clay leaf dishes (perfect for holding your rings!), deeper leaf bowls (great for keys or trinkets), and lightweight decorative leaves with a cool two-tone paint effect.
Each method brings out different textures and details from real leaves, making every piece unique. Let’s get our hands dirty!
Guide to Making Beautiful Air-Dried Clay Leaves

Creating air-dried clay leaves is a simple yet engaging craft project encouraging a closer look at nature. Follow these steps to create unique leaf-shaped dishes with beautiful details.
Materials Needed:
- Air-drying clay
- Fresh leaves (preferably with defined veins and structure)
- Rolling pin
- Craft knife or scissors
- Tin foil
- Paint (optional)
- Varnish or PVA glue (optional for sealing)
Step 1: Gather Leaves
Venture outside and gather a variety of leaves. Look for robust leaves with well-defined veins; these details will make your clay dishes more visually striking.
Step 2: Prepare the Clay
Roll out the air-drying clay to a thickness of about 3-4mm on a smooth, flat surface. This thickness is ideal for creating durable yet delicate-looking dishes.
Step 3: Position the Leaf
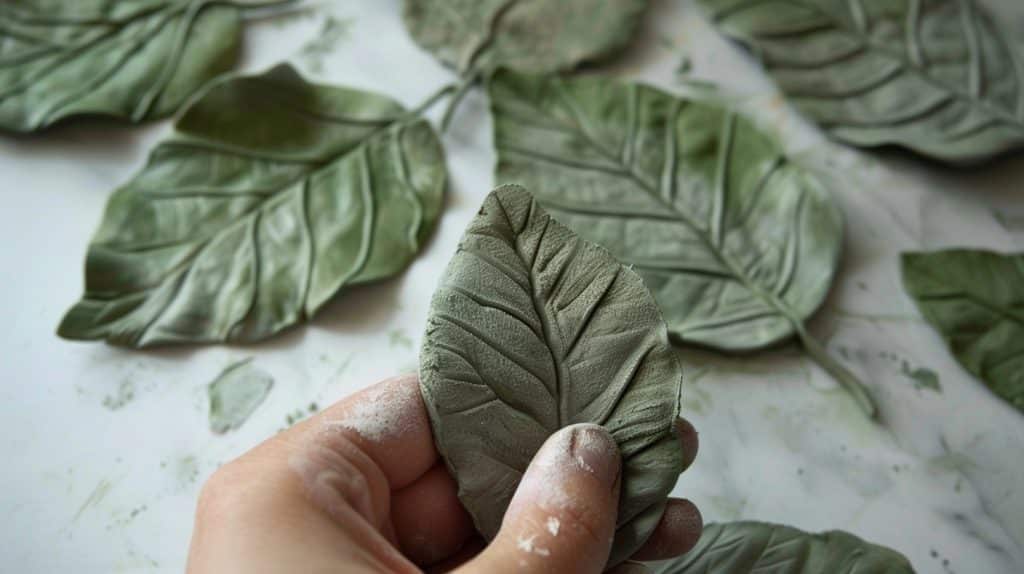
Place a leaf face-down on the rolled clay. Press or roll the leaf into the clay surface, ensuring all veins are transferred.
Step 4: Cut the Clay
Use a craft knife or scissors to cut around the leaf’s outline carefully. This will form the shape of your dish.
Step 5: Shape the Dish
Support the clay leaf by placing it on crumpled tin foil for a curved, dish-like effect. Shape the foil to your desired curve to cradle the clay while it dries.
Step 6: Remove the Leaf
Gently peel the leaf away from the clay, revealing the intricate vein patterns left behind.
Step 7: Dry the Clay
Leave the clay dish to dry overnight. This ensures that it becomes solid and ready for painting or sealing.
Step 8: Paint the Leaf (Optional)
Once dry, paint your clay leaf if desired. Water-based paints work well and allow you to accentuate the vein details.
Step 9: Seal the Dish (Optional)
To extend the life of your clay leaf dish, apply a coat of varnish or PVA glue. This adds a slight waterproofing layer, making it easier to clean gently.
Step 10: Display Your Creation
Once painted and sealed, your air-dried clay leaf dish is ready to display! Use it as a decorative piece, a small dish, or even a handmade gift.
Guide to Making a Clay Leaf Bowl with Air Dry Clay
Creating a clay leaf bowl is a quick and fun fall craft. This guide will help you make a decorative bowl that showcases the beauty of autumn leaves.
Materials Needed:
- Air dry clay (such as Crayola Air Dry Clay)
- Large, fresh leaves with visible veins
- Rolling pin
- Scissors
- Small bowl (for shaping)
- Aluminum foil
- Metallic craft paint (e.g., gold, bronze)
- Paintbrush
Step 1: Gather and Select Leaves
Look for large, fresh leaves with well-defined veins and no tears. Leaves with clear vein patterns make the best impressions in the clay.
Take this opportunity to explore nature—parks or your backyard are great places to start!
Step 2: Prepare the Clay
Roll out a medium-sized piece of clay to your desired thickness (a bit thicker than the final product). Once dry, this thickness helps to make the leaf durable.
Step 3: Press the Leaf into the Clay
Position the leaf face-down on the clay, then press it gently into the surface with your fingers. Use a rolling pin to create a detailed imprint of the leaf’s veins.
Step 4: Cut Out the Leaf Shape
Use scissors to cut around the outline of the leaf in the clay, carefully following its shape.
Step 5: Remove the Leaf
Starting from the stem, gently peel the leaf off the clay. The intricate vein patterns should be left imprinted in the clay.
Step 6: Shape the Bowl
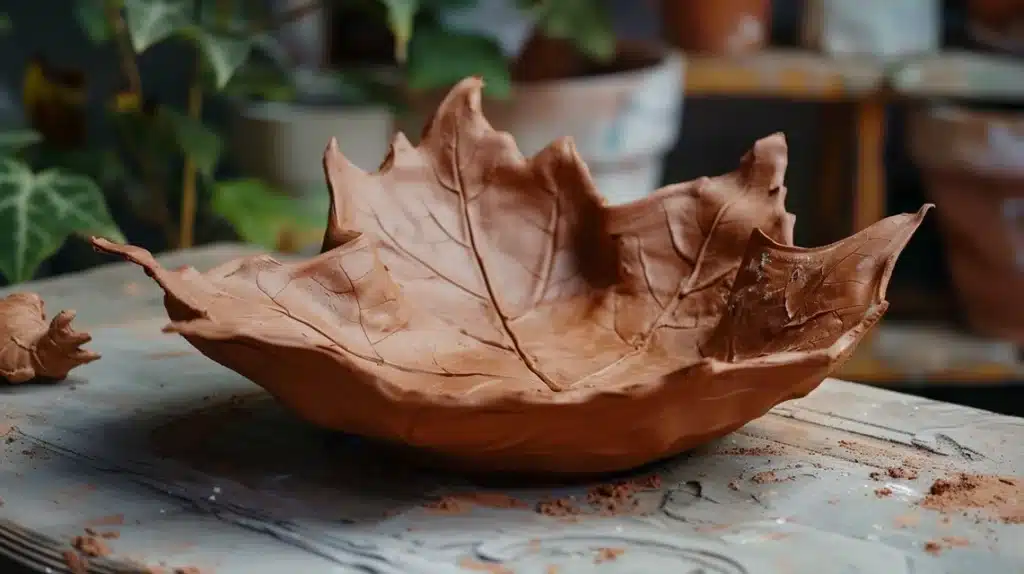
Place the clay leaf inside a small, foil-lined bowl. Gently curl up the edges of the clay leaf to form a bowl shape. Adjust the edges as needed to achieve your preferred look.
Step 7: Let the Clay Dry
Depending on the thickness, allow the clay leaf to dry for 1-2 days. Ensure it is completely hardened before moving to the next step.
Step 8: Paint the Leaf Bowl
Once dry, apply metallic craft paint to the clay leaf with a paintbrush. Gold and bronze shades create a stunning, autumn-inspired look, though reds, oranges, and yellows are also beautiful choices.
Step 9: Display Your Creation
After the paint has dried, display your clay leaf bowl! It can hold small items, serve as a candle holder, or be used as a fall decoration.
Guide to Creating Two-Tone Clay Leaves with Light-Drying Clay
This guide will help you make beautiful, lightweight clay leaves with a two-tone effect. Perfect for crafting decorations, cards, or seasonal decor!
Materials Needed:
- Light air-dry clay (extra light)
- Leaf mold (resin or plastic)
- Metallic acrylic paint (e.g., dark green)
- Distress ink (e.g., lighter green shade like “Peeled Paint”)
- Paintbrush or waterbrush
- Small container of water
- Plastic container (to store clay and prevent drying)
Step 1: Prepare the Clay
Start by taking a small piece of light, air-dry clay. Roll it into a small ball, then flatten it out.
Shape the flattened clay into a rough leaf form with a pointy end, keeping it thin to capture fine details from the mold.
Step 2: Press Clay into the Leaf Mold
Place the shaped clay onto the leaf mold, pressing it down gently to transfer the leaf’s intricate vein patterns onto the clay. Avoid pressing too hard, as this can distort the details.
Step 3: Remove the Clay from the Mold
Carefully lift the clay from the mold. Adjust the shape slightly by pinching or twisting the top for a natural, organic look. Set the leaf aside and allow it to dry for about two hours.
Step 4: Prepare the Paint
For a two-tone effect, prepare metallic acrylic paint by adding a small amount to a container with water, creating a thin, watery consistency.
Step 5: Paint the Leaf’s Veins
Use water or a regular brush to apply the watered-down paint to the clay leaf. The watery paint will settle into the veins, making them more visible and adding depth.
Step 6: Add Dimension with Distress Ink
Once the first layer of paint is dry, use a lighter green distressed ink to add dimension to the edges of the leaf.
Gently brush the ink along the edges to create a two-tone effect. To deepen the color, you may add more paint along the edges.
Step 7: Let the Leaf Dry
Allow the leaf to dry completely. Once dry, the colors will appear richer, and the two-tone effect will give the leaf added texture and realism.
Step 8: Use and Display
Once your leaf is fully dry, it’s ready to use! These lightweight leaves are perfect for decorating cards, table settings, or seasonal displays.
Summing Up
The flat leaf dishes perfectly catch those tiny vein patterns, the curved bowls add depth that makes the leaves come alive, and those two-tone decorative pieces look stunning on any wall.
Here’s a pro tip from my experiments: take your time picking your leaves. The more texture they have, the better your final piece will look.
Whether making these for yourself or as gifts, remember there’s no “wrong” way to shape your leaves. Nature isn’t perfect, and that’s what makes these projects so fun!
Frequently Asked Questions
What is the Best Way to Dry Clay Leaves to Prevent Cracking?
Dry clay leaves slowly in a cool, dry area, ideally covered with plastic wrap, to retain moisture, prevent rapid drying, and reduce the risk of cracks.
How Do I Make Clay Leaf Jewelry?
Use small leaf molds and lightweight clay. Once molded, pierce a small hole for a jump ring, let dry, and paint and seal to make durable jewelry.
Can I Incorporate Color into the Clay Before Molding?
Add acrylic or oil-based paint directly to the clay and knead until fully mixed. This gives a uniform color without needing post-drying painting.

