DIY Pressed Flower Pumpkins Under Budget
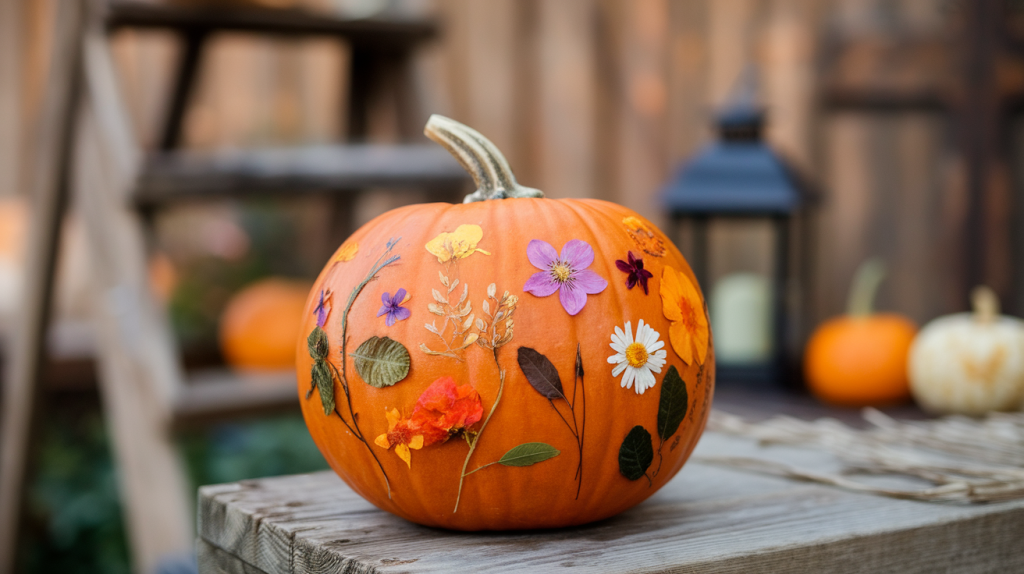
Want to make your fall decorations stand out without spending much?
I tried something new with my pumpkins last season, and my neighbors couldn’t stop asking about them.
Here’s the thing – store-bought fall decor can cost a lot.
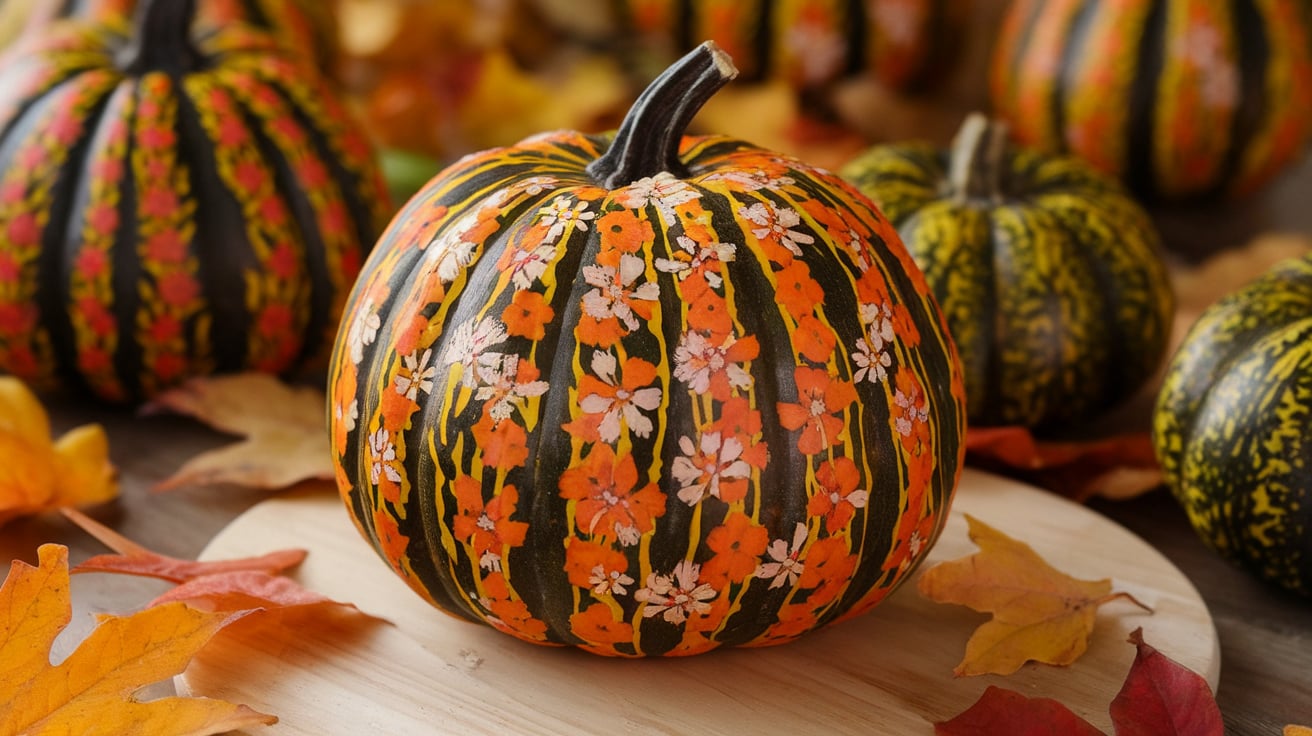
But I found a way to create beautiful pressed flower pumpkins that look fancy without the big price tag.
I’ll show you how to turn simple pumpkins into eye-catching pieces using dried flowers and basic supplies you might already have at home.
The best part? You can finish this project in one afternoon, and it’ll cost you less than $20.
How to Prepare Your Press Flowers
I’ve pressed many flowers over the years, and I want to share my favorite method with you. It’s super simple—you just need some paper and heavy books.
What You’ll Need
- Fresh flowers (pick ones that aren’t too thick)
- Plain white paper
- Heavy books
- Paper towels
- A flat surface
- 2-3 weeks of patience
Step-by-Step Process
- Pick Your Flowers: Start with flowers that are dry and free from morning dew. I like to collect them in the afternoon. Small, flat flowers work much better than thick, bulky ones.
- Get Them Ready: Take off any extra leaves you don’t want. Lay each flower face down on a piece of paper towel. Make sure no petals overlap.
- Set Up Your Press: Put a sheet of plain paper on a flat surface. Place your flowers with their paper towels on top. Cover with another sheet of paper.
- Add Weight: Stack 2-3 heavy books on top. I use old textbooks – they’re perfect for this! Put something heavy on top of the books too.
- Wait and Check: Leave your flowers alone for about 2-3 weeks. I peek at them after week one to change the paper if it feels damp.
Quick Tips From My Experience
- Small flowers dry faster than big ones
- Change paper if it gets damp to stop mold
- Keep your press away from sunlight
- Don’t rush the process – good things take time
Step-by-Step Process of Making Pressed Flower Pumpkins
Tools & Materials Required
- Real or artificial pumpkin
- Pressed flowers (various sizes)
- Matte Mod Podge
- Foam brush
- Tweezers
- Paper plate (for Mod Podge)
- Paper towels for cleanup
Step-by-Step Process of Making
1. Prep Your Pumpkin
- If using a real pumpkin, wash it well
- Pick a pumpkin with a flat bottom so it won’t roll
- Dry the surface completely
2. Set Up Your Work Area
- Pour some Mod Podge onto a paper plate
- Arrange your pressed flowers within reach
- Have tweezers ready for handling small flowers
3. Apply Base Layer
- Use the foam brush to paint Mod Podge where you want flowers
- Work in small sections so the Mod Podge doesn’t dry too fast
4. Place Your Flowers
- Start with larger pieces of greenery as your base
- Handle pressed flowers gently – they break easily
- Use tweezers for tiny flowers
- You can break larger flower pieces to fit your design
5. Secure the Design
- Brush a light layer of Mod Podge over each flower
- Work slowly, and don’t press too hard
- Smooth out any lumps or bubbles
- Fix any broken petals by pressing them back in place
6. Final Touches
- Add small flowers around the edges
- Make sure all edges are smooth
- Let it dry completely
- The Mod Podge will dry clear and matte
An Approximate Cost Required for Making
| Item | Cost Range ($) | Remarks |
|---|---|---|
| Basic Supplies (One-Time Purchase) | ||
| Matte Mod Podge | 5-7 | One-time purchase |
| Foam brush pack | 2-3 | One-time purchase |
| Tweezers | 1-2 | One-time purchase |
| Paper plates | Already at home or 1 | One-time purchase |
| For Each Pumpkin | ||
| Small white pumpkin | 3-5 | Cost per pumpkin |
| Pressed flower pack | 4-8 | Cost per pumpkin |
| Total Cost Breakdown | ||
| First-time project (all supplies) | 15-25 | Includes one pumpkin and supplies |
| Each additional pumpkin | 7-13 | Cost per additional pumpkin |
Some Advanced Tips & Tricks to Follow
1. Smart Flower Layout
- Start with a rough sketch on paper
- Put bigger flowers in the middle
- Create balance with smaller flowers on the sides
- Try laying out your design before gluing
2. Better Mod Podge Control
- Use thin layers instead of thick ones
- Wait 15 minutes between layers
- Brush in one direction only
- Keep a damp cloth handy for quick fixes
- Clean your brush between coats
3. Fixing Common Issues
- If petals curl up, add a tiny dot of glue under the edges
- For air bubbles, pop them with a pin while wet
- When pieces break, save them to fill gaps
- If the design looks messy, add small flowers to blend the edges
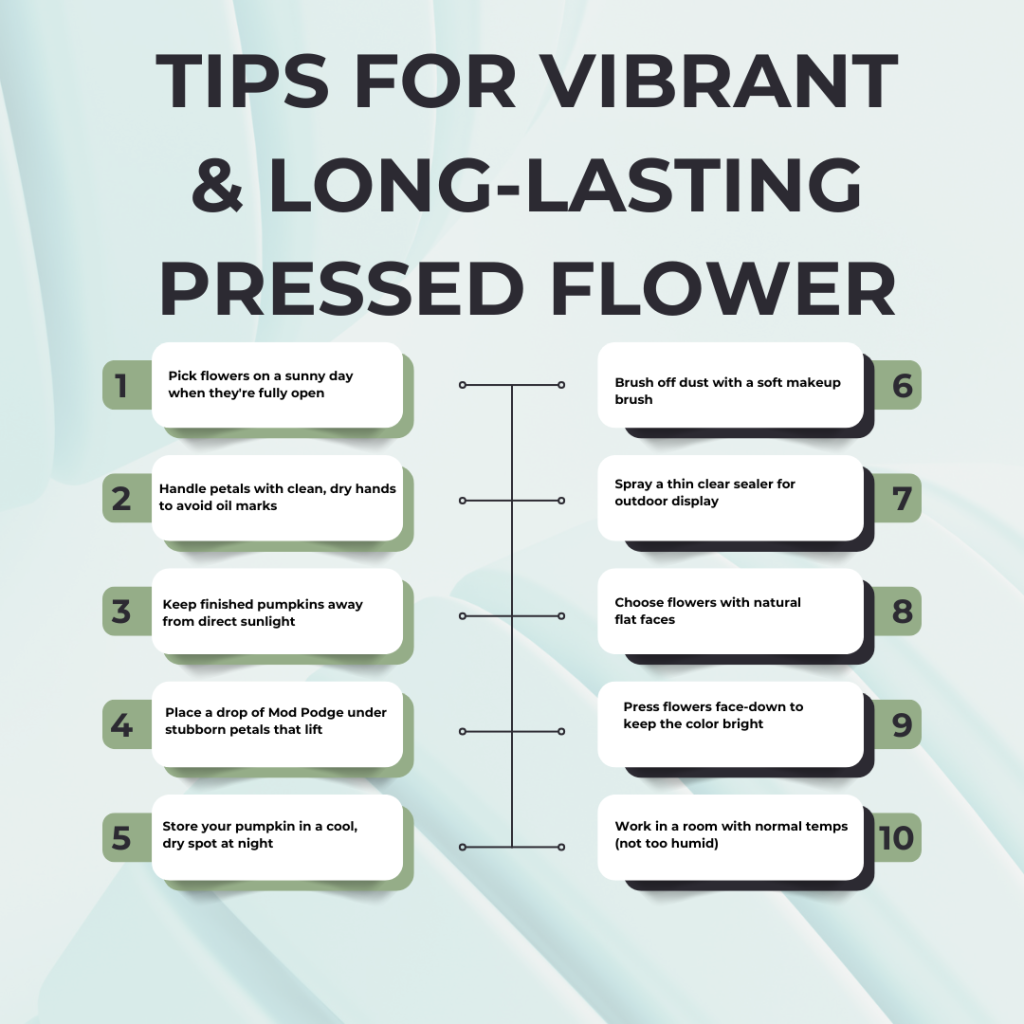
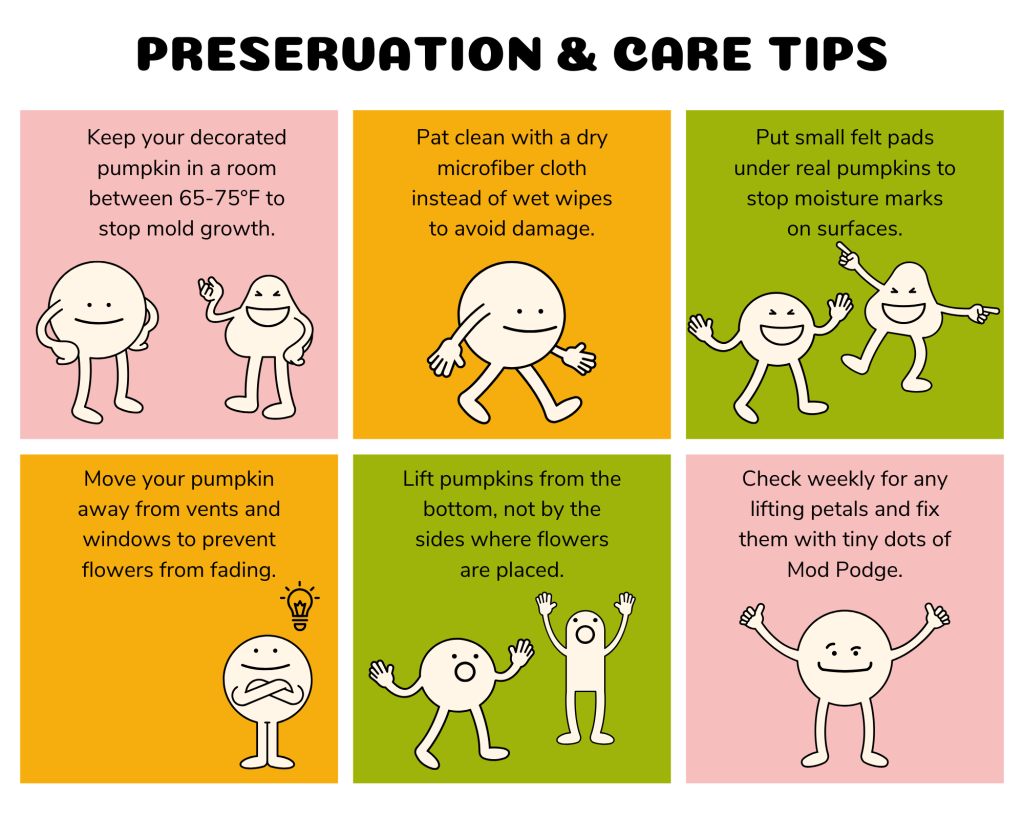
4. Making It Last
- Keep your pumpkin indoors when possible
- Put a clear mat sealer on outdoor pieces
- Handle by the bottom, not the sides
- Use a soft brush to remove dust
5. Design Ideas
- Try a flowing pattern around the stem
- Make clusters of three for a better look
- Mix leaf types for more depth
- Leave some open space – don’t pack too tight
- Use similar color families together
6. Working with Tricky Spots
- Go slow around the stem area
- Use cotton swabs for tight spaces
- Cut flowers to fit curves
- Build layers from back to front
Best Creative Uses & Display Ideas
| Category | Ideas | Average Price Invested ($) |
|---|---|---|
| Indoor Display Settings | ||
| Centerpieces with different sizes | Use varying pumpkin sizes for a table centerpiece | $20-30 |
| Line up on the mantel with fairy lights | Add fairy lights to enhance the mantel display | $15-25 |
| Put on window sills (odd numbers) | Arrange in groups of 3 or 5 on window sills | $10-15 |
| Mix with plain white pumpkins | Combine with plain pumpkins for contrast | $15-20 |
| Use as bookends on shelves | Place as functional and decorative bookends | $10-12 |
| Entry & Porch Ideas | ||
| Welcoming display at the door | Combine pumpkins with a door-side display | $25-40 |
| Set on outdoor steps (fake pumpkins) | Use weather-resistant pumpkins for steps | $20-30 |
| Mix with potted mums | Add a garden feel with potted flowers | $30-50 |
| Put in a rustic wooden crate | Use a crate for a rustic aesthetic | $15-20 |
| Line walkway with small ones | Arrange small pumpkins along walkways | $10-20 |
| Special Event Uses | ||
| Wedding table markers | Decorate with pumpkins and table numbers | $20-50 |
| Baby shower decor | Use soft pastels for baby shower displays | $15-25 |
| Fall party place cardholders | Attach place cards to pumpkins | $10-15 |
| Photo shoot props | Use as versatile props for fall-themed shoots | $10-20 |
| Gift toppers for presents | Decorate gifts with mini pumpkins | $5-10 |
| Home Decor Pairings | ||
| Mix with white candles | Create a cozy atmosphere with candles | $15-25 |
| Place near mirrors | Reflect designs for a bigger impact | $10-15 |
| Add to coffee table book display | Enhance table books with decorative pumpkins | $10-20 |
| Group with natural elements | Add pinecones or natural items for texture | $10-15 |
| Create height with cake stands | Display pumpkins on elevated stands | $15-20 |
| Seasonal Arrangements | ||
| Thankful tree with small ones | Use pumpkins to make a gratitude-themed tree | $15-25 |
| Add to fall wreaths | Incorporate pumpkins into seasonal wreaths | $20-40 |
| Dining table runner | Arrange pumpkins as a centerpiece runner | $15-30 |
| Basket with dried wheat | Create a fall-themed basket arrangement | $15-25 |
| Display on vintage cake plates | Arrange pumpkins on cake plates for vintage decor | $20-30 |
| Storage Between Seasons | ||
| Keep artificial ones in boxes | Store pumpkins in boxes with tissue | $5-10 |
| Store away from heat | Ensure proper temperature for longevity | $0 |
| Label boxes for next year | Organize storage with labeled boxes | $2-5 |
| Take photos of arrangements | Save ideas for future use | $0 |
| Clean before storing | Maintain quality with proper cleaning | $0 |
How to Host a Pressed Flower Pumpkin Crafting Party
1. Planning The Basics (1-2 Weeks Before)
- Pick a date (weekends work best)
- Invite 4-6 friends (good group size for crafting)
- Set a 2-3 hour time block
- Ask about plant allergies
- Send a supply cost note ($10-15 per person)
2. Setting Up Your Space
- Cover tables with paper
- Make workstations for each person
- Set up a drying area
- Put out paper towels
- Create good lighting
- Have trash bags ready
3. Supply Checklist (Per Person)
- 1 white pumpkin
- Set of pressed flowers
- 1 foam brush
- Paper plate for Mod Podge
- Tweezers
- Wipes for clean-up
- Small water cup for brush cleaning
4. Food & Drinks Tips
- Serve finger foods that won’t mess up crafts
- Use covered drinks with straws
- Keep snacks away from work area
- Put out hand wipes
- Have water ready
5. Making It Fun
- Play soft background music
- Take before and after photos
- Share simple tips at the start
- Make it a contest with small prizes
- Give each person a craft apron
6. Party Flow Guide
- Welcome and snacks (15 mins)
- Show example and tips (10 mins)
- Crafting time (1.5 hours)
- Group photo with creations (10 mins)
- Clean-up and goodbyes (15 mins)
Conclusion
Making pressed flower pumpkins brings a fresh twist to fall decor without breaking the bank. After trying this craft myself, I can tell you it’s both fun and simple.
Remember, the key is being gentle with your flowers and patient with the Mod Podge. If some petals break or lift, don’t worry – just press them back in place with a bit more glue.
Why not gather some friends this weekend and try making these together? At less than $20 per pumpkin, it’s a perfect project for a craft party.
Plus, you’ll end up with pretty decor pieces that last all season.
Ready to start? I’d love to see how your pumpkins turn out. Share your creations in the comments below, or tag me in your photos!

