
Have you detected unusual odors coming from beneath your floors? That smell could be an early warning sign of hidden mold.
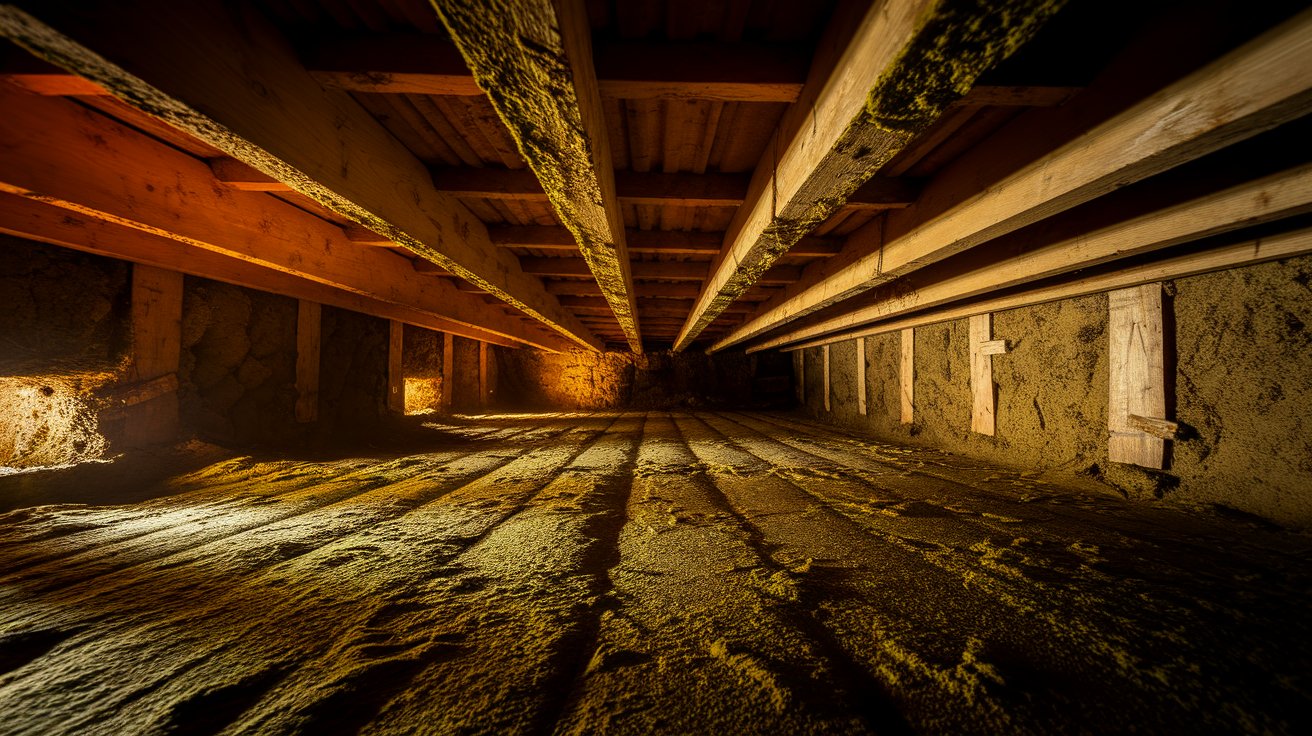
Crawl spaces create perfect conditions for mold to thrive. Dark, damp areas with poor airflow become breeding grounds for harmful spores that spread throughout your house.
Many homeowners ignore their crawl spaces until serious problems develop. This common mistake often leads to expensive health issues and structural damage that could have been prevented.
Mold doesn’t just stay in one place; it travels through your home’s ventilation system. Invisible mold spores can infiltrate your indoor air, putting your family at risk.
I’ll show you how to identify, remove, and prevent crawl space mold effectively. These proven methods will help protect your family’s health and property value.
What Is Crawl Space Mold?
Crawl space mold refers to fungal growth that develops in the area beneath your home. These microscopic organisms feed on organic materials like wood, paper, and fabric.
Mold spores exist everywhere in nature. They become problematic when they find moisture and food sources in enclosed spaces. Your crawl space provides both elements.
Key Characteristics of Crawl Space Mold:
- Grows on wooden beams, insulation, and subflooring.
- Produces musty odors that travel through your home.
- Creates health risks for occupants above.
- Spreads rapidly in humid conditions.
- Weakens structural materials over time.
Types of Mold Found in Crawl Spaces
Different mold species prefer various conditions and materials. Understanding these types helps you identify and address problems quickly.
- Black Mold (Stachybotrys chartarum) – This dark, slimy mold grows on materials with high cellulose content. It produces toxic compounds that cause serious health problems.
- White Mold (Sclerotinia sclerotiorum) – Appears as white, cotton-like growth on organic surfaces. Often mistaken for mineral deposits or efflorescence.
- Green Mold (Aspergillus) – Shows up as green or blue-green patches. Commonly found on damp wood and insulation materials.
- Brown Mold (Chaetomium) – Develops a brown, fuzzy appearance. Typically grows on water-damaged materials and produces a strong musty smell.
- Yellow Mold (Aspergillus flavus) – Creates yellow or greenish-yellow colonies. Often found on organic debris and stored materials.
Why the Crawl Space Is Vulnerable to Mold?
Crawl spaces face unique challenges that make them prime locations for mold growth. Understanding these factors helps prevent future problems.
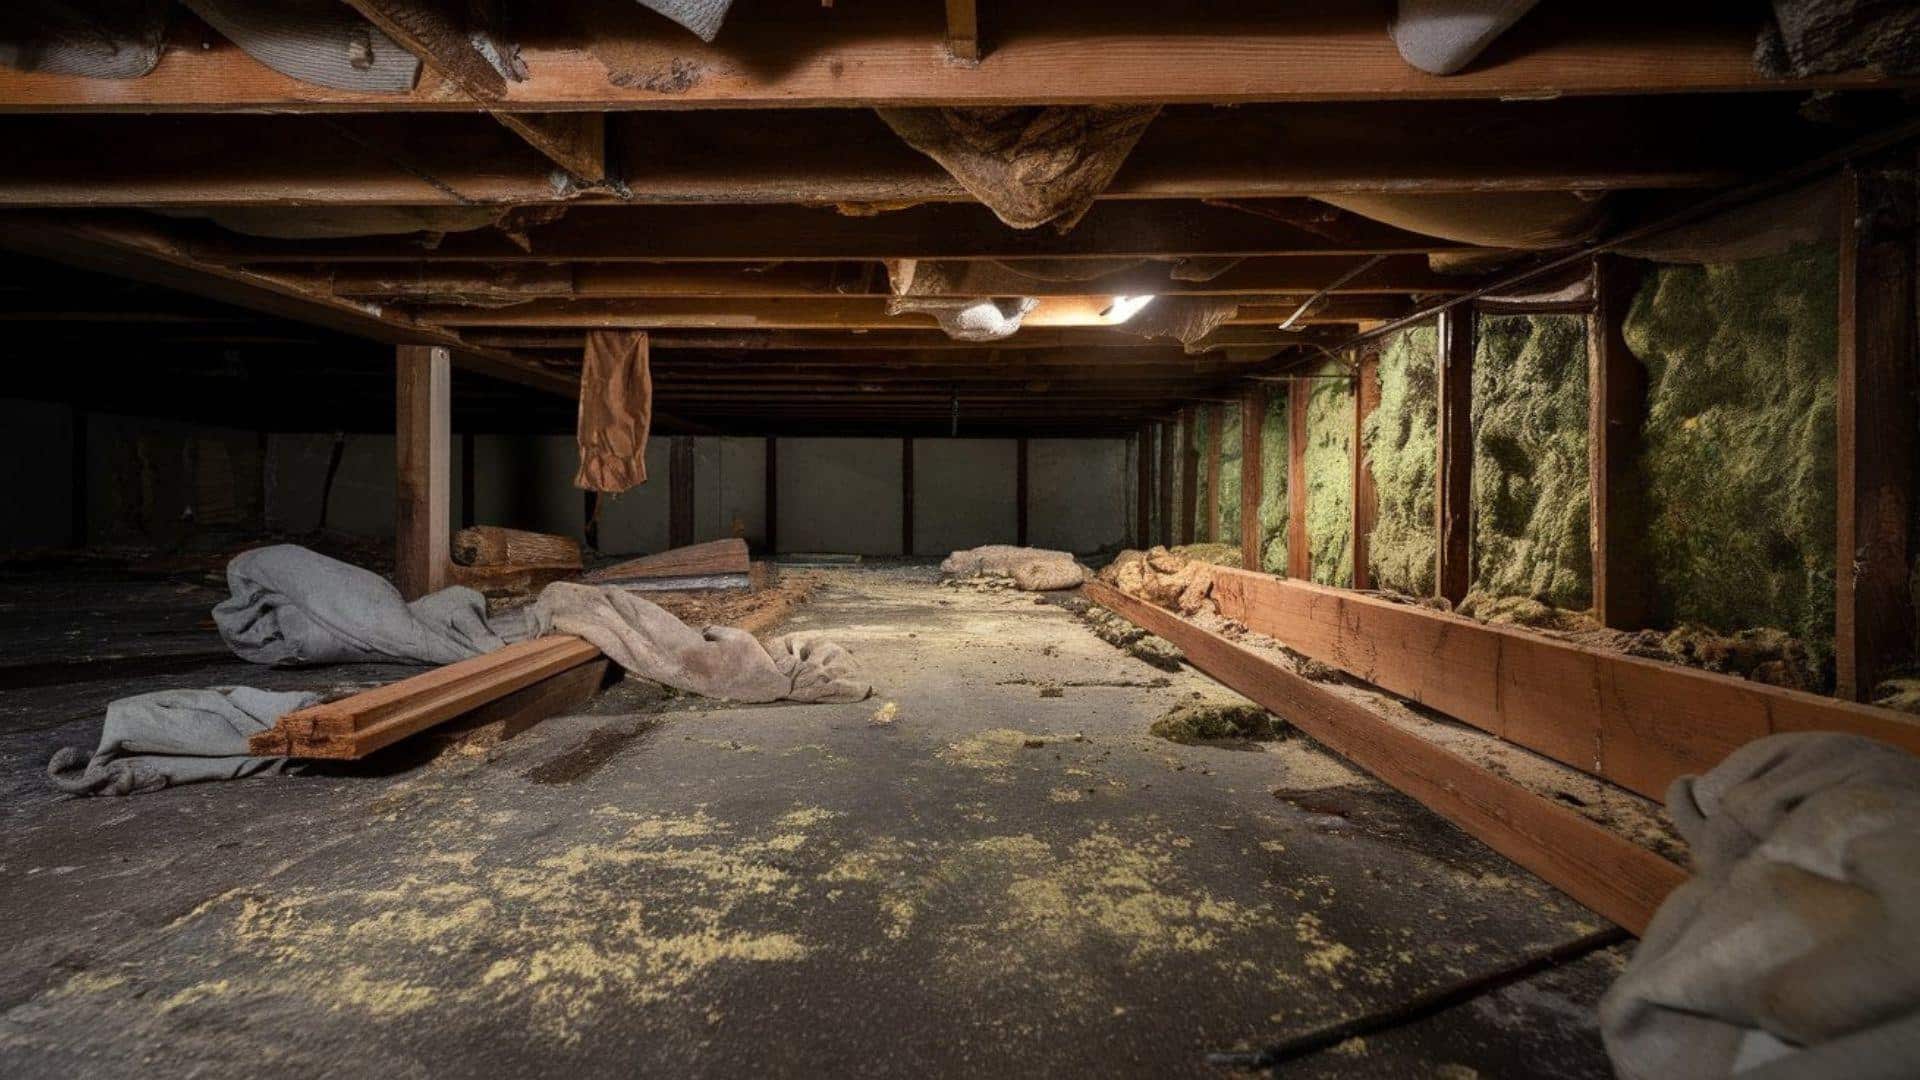
Moisture accumulation occurs easily in crawl spaces. Ground moisture seeps through concrete floors and foundation walls. Plumbing leaks and HVAC condensation add to humidity levels.
Without consistent airflow and natural light, crawl spaces remain persistently damp, creating an ideal setting for mold to develop and spread.
- High moisture from ground seepage and leaks
- Poor air circulation traps humidity
- No sunlight to kill mold spores naturally
- Plenty of organic materials for mold food
- Stable temperatures year-round
Dangers of Crawl Space Mold
Crawl space mold poses serious risks to your health, property, and finances. These problems worsen over time without proper treatment.
1. Health Risks to Occupants
Mold spores travel through your home’s air system, and family members breathe these particles daily. Respiratory problems develop from long-term exposure, including coughing, wheezing, and shortness of breath.
Allergic reactions affect sensitive individuals with sneezing, a runny nose, and skin irritation. Severe health issues can result from toxic mold exposure, including neurological problems and chronic fatigue.
2. Structural and Property Damage
Mold feeds on organic building materials and weakens your home’s foundation and support systems. Wood rot occurs when mold breaks down floor joists, beams, and subflooring, causing structural damage.
Insulation damage reduces energy efficiency, and subflooring problems create squeaky, bouncy floors. Foundation issues may develop from prolonged moisture exposure, causing cracks and settling.
3. Financial Consequences
Mold remediation costs increase dramatically with time, and early detection saves thousands of dollars. Remediation expenses range from $1,500 to $9,000 for crawl spaces, depending on the extent of damage.
Property value reduction affects your home’s marketability as mold history concerns potential buyers. Insurance complications may arise since many policies exclude mold damage or have limited coverage.
How to Get Rid of Crawl Space Mold?
Removing crawl space mold requires proper equipment and safety measures. Follow these steps for effective remediation that protects your health and prevents spore spread.
Tools and Materials You’ll Need
Proper equipment ensures safe and effective mold removal. Having the right supplies prevents contamination and protects your health during the process.
Safety equipment needed:
- N95 or P100 respirator mask
- Protective eyewear and gloves
- Disposable coveralls
- Plastic sheeting for containment
Cleaning supplies required:
- Antimicrobial solutions
- Scrub brushes and rags
- Plastic bags for disposal
- A dehumidifier or fans
Step 1: Contain the Area
Set up plastic sheeting around the work area to prevent mold spores from spreading to other parts of your home.
Seal off vents and openings that connect to your living space. Turn off HVAC systems to avoid circulating contaminated air throughout the house.
Step 2: Remove Contaminated Materials
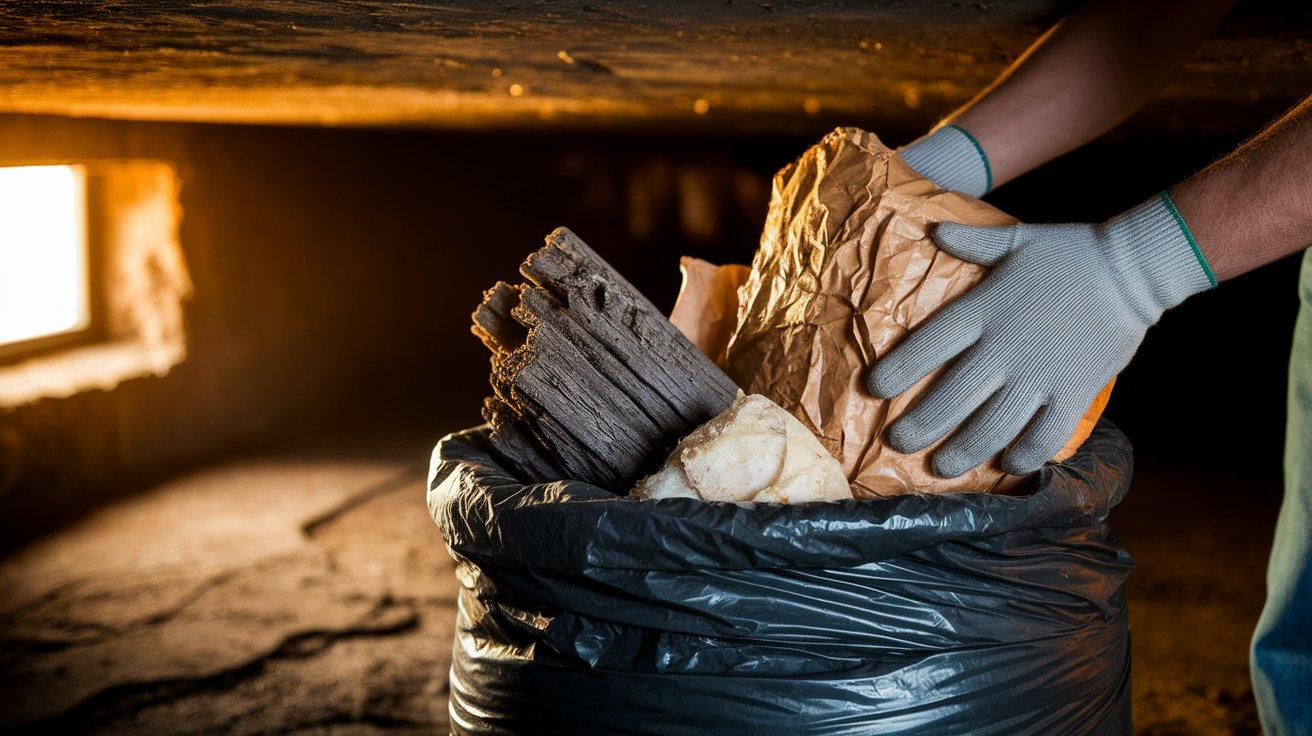
Carefully remove all mold-damaged materials, including insulation, damaged wood, and any stored items.
Place contaminated materials directly into heavy-duty plastic bags and seal them immediately. Avoid shaking or disturbing materials more than necessary to minimize spore release.
Step 3: Clean All Surfaces
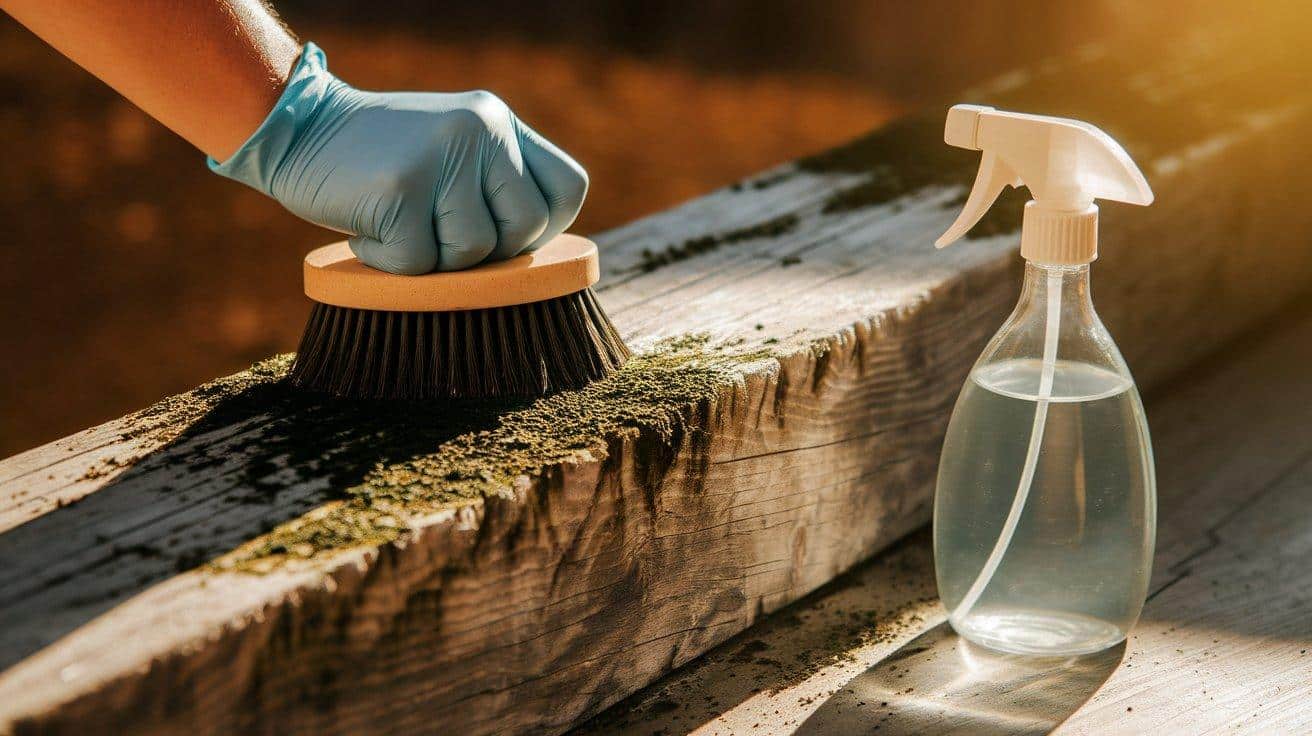
Scrub all affected surfaces with an antimicrobial solution using stiff brushes to remove visible mold.
Work from top to bottom to prevent recontamination of cleaned areas. Pay special attention to joints, cracks, and textured surfaces where mold can hide.
Step 4: Dry the Space Completely
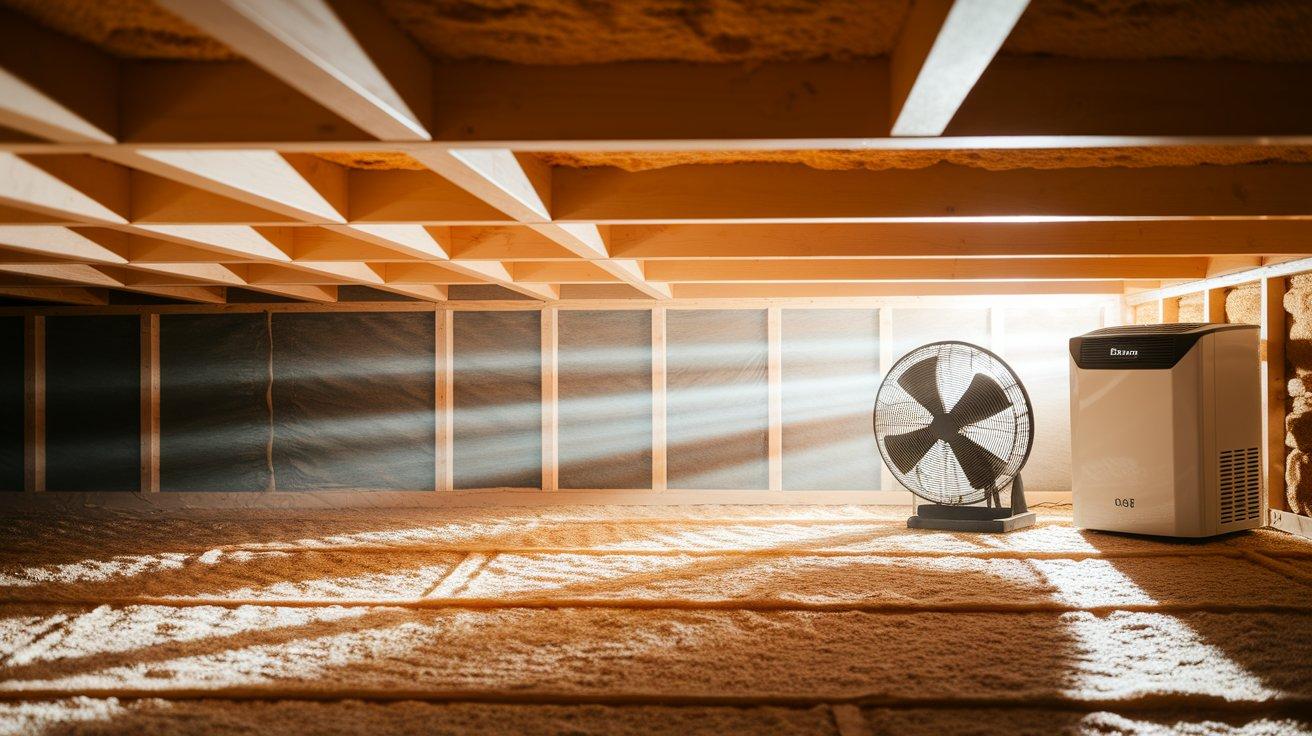
Use dehumidifiers and fans to remove all moisture from the crawl space. Maintain low humidity levels for at least 48 hours after cleaning. Proper drying prevents mold from returning and ensures treatment effectiveness.
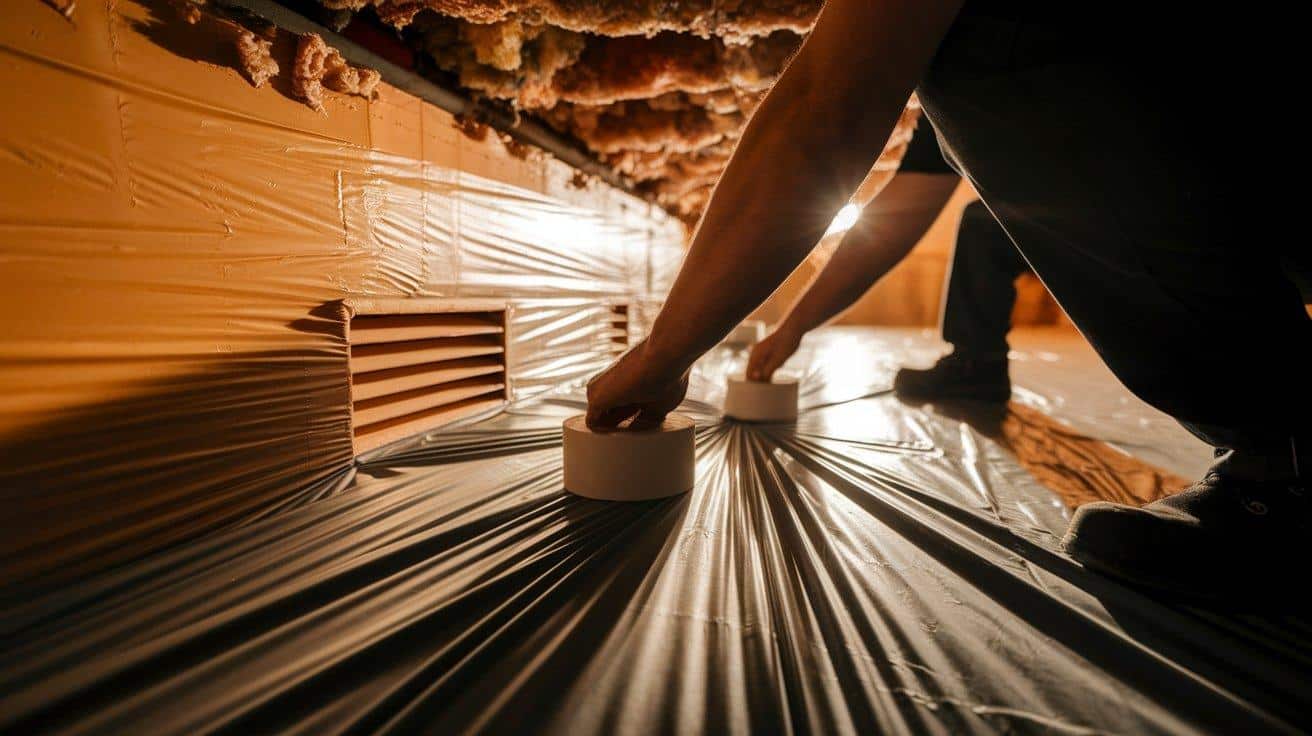
Step 5: Apply Preventive Treatment
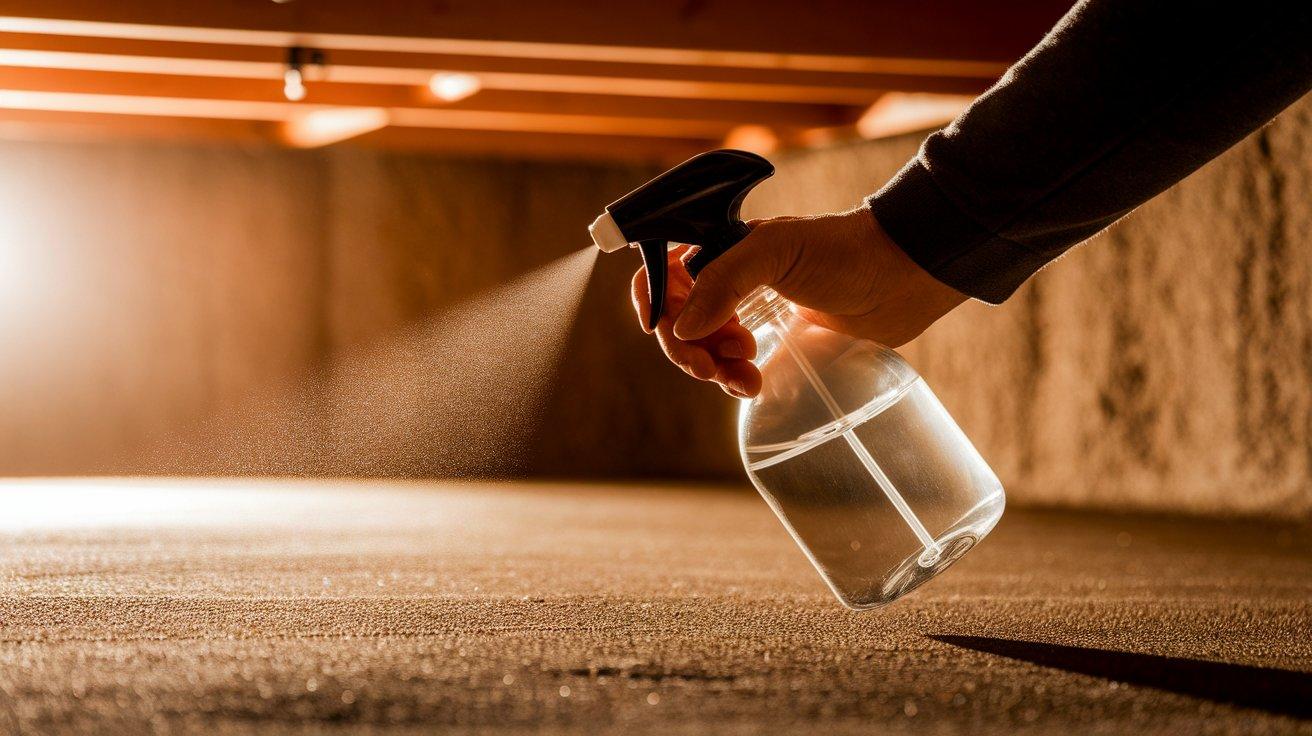
Spray mold inhibitor on all treated surfaces to prevent future growth. Focus on areas that were heavily contaminated or prone to moisture problems.
Allow the inhibitor to dry completely before replacing any materials or insulation.
DIY VS Professional Mold Remediation
Deciding between DIY and professional remediation depends on several factors. Consider the scope, safety, and complexity of your situation.
| Factor | DIY Approach | Professional Service |
|---|---|---|
| Cost | $200-500 | $1,500-9,000 |
| Time Required | 2-5 days | 1-3 days |
| Safety Risk | High | Low |
| Equipment Needed | Must purchase/rent | Included |
| Expertise Level | Limited | Extensive |
| Guarantee | None | Warranty provided |
| Insurance Coverage | May not cover | Often covered |
| Proper Disposal | Your responsibility | Handled professionally |
Choose DIY for:
Small affected areas covering less than 10 square feet with surface-level growth only are manageable for homeowners.
No structural damage should be present, and you must have adequate safety equipment available. DIY works best when mold hasn’t penetrated deep into materials or spread extensively.
Choose a professional for:
Large contaminated areas require specialized equipment and expertise that professionals provide. Structural damage evident in floor joists or subflooring needs professional assessment and repair.
Toxic mold species present or health concerns with vulnerable occupants make professional remediation the safer choice.
Preventing Crawl Space Mold
Prevention costs far less than remediation. Implement these strategies to keep your crawl space mold-free.
Install vapor barriers – Place plastic sheeting on soil and walls to block ground moisture.
Repair foundation cracks – Seal any openings where water can enter your crawl space.
Fix plumbing leaks – Address pipe problems immediately to prevent water buildup.
Add exhaust fans – Install fans to circulate air and remove excess moisture.
Monitor humidity levels – Keep humidity below 60% using dehumidifiers when needed.
Inspect monthly – Check for water damage, leaks, and early signs of mold growth.
Conclusion
Crawl space mold problems require immediate attention to protect your health and property. Early detection makes treatment easier and less expensive.
Regular inspections help catch issues before they spread throughout your home. Simple prevention measures save thousands in remediation costs.
Professional help becomes necessary for large infestations or structural damage. Don’t hesitate to call experts when safety concerns arise.
Taking action now prevents bigger problems later. Your family’s health and your home’s value depend on maintaining a mold-free crawl space.
Have you dealt with crawl space mold issues before? Share your experiences or any questions you have in the comments below. Your insights might help other homeowners facing similar challenges.
Frequently Asked Questions
What Can I Spray in My Crawl Space to Kill Mold?
White vinegar removes mold from wood surfaces effectively. Hydrogen peroxide kills mold spores quickly on various materials.
Does Homeowners Insurance Cover Mold?
Insurance covers mold from sudden water events like burst pipes. Long-term leaks or neglect usually aren’t covered.
What Are the Signs of Mold Sickness?
Common symptoms include coughing, wheezing, skin rashes, eye irritation, and fatigue. Severe reactions may occur in sensitive individuals.