Finding ways to add style to your home without taking on major renovations can feel tricky. Plain walls can often make a room feel flat and lifeless, right?
Well, here’s a simple solution: beadboard accent walls. These wall panels can really transform a space, adding charm and personality without the hefty price tag or the need for expert skills.
In this guide, we’ll show you how beadboard can boost the look of your home, give you some design ideas for different rooms, walk you through the setup process step by step, and share tips to help keep your walls looking great for years.
Why Choose Beadboard for Accent Walls?
1. Enhancing Visual Appeal: Beadboard panels bring instant charm to plain walls. The vertical lines create a clean, structured look that draws the eye and adds interest to any room.
Unlike plain paint, beadboard offers a finished appearance that feels thoughtful and put-together.
2. Adding Texture and Dimension: Flat walls can make rooms feel empty and boring. The beadboard adds depth through its grooved pattern, creating shadows and highlights that change throughout the day.
3. Easy to Install and Maintain: You don’t need expert skills to install a beadboard. Many options come in ready-to-install panels that attach directly to walls with adhesive and nails.
Cleaning is as simple as wiping with a damp cloth.
Design Ideas for Beadboard Accent Walls
Classic White Beadboard Walls
White beadboard remains a top choice for many homeowners. Its clean look fits with almost any style, from country to modern spaces. White panels reflect light and make rooms look bigger and brighter.
They create a fresh backdrop for colorful furniture and wall art. For extra impact, try pairing white beadboard with a contrasting wall color above, such as soft blue or gentle gray.
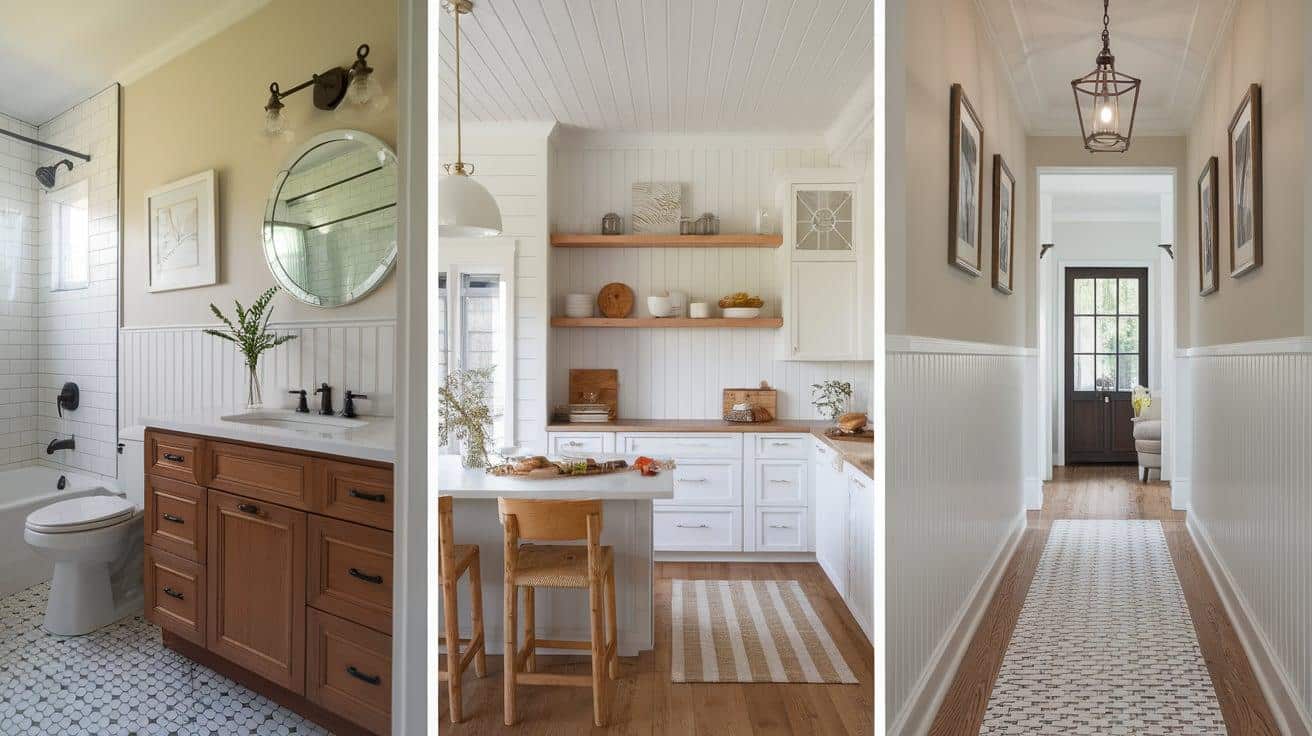
Beadboard for Bathrooms, Kitchens, and Hallways
These high-traffic areas benefit greatly from beadboard’s durability.
- In Bathrooms: Beadboard creates a water-resistant layer on lower walls, protecting them from splashes.
- In Kitchen: Beadboard backs can define eating areas or add character behind open shelving.
- In hallways: These panels stand up to daily bumps and scuffs while adding visual interest to often ignored spaces. Half-wall applications work well in these areas, giving protection where needed most.
How to Install Beadboard Accent Walls?
Tools Required
| Tool | Purpose | Quantity |
|---|---|---|
| Tape Measure | Measure wall dimensions and beadboard panels | 1 |
| Level | Ensure the beadboard panels are aligned properly | 1 |
| Stud Finder | Locate studs behind the wall for securing beadboard | 1 |
| Pencil | Mark measurements and cutting lines | 1 |
| Hammer | Drive nails into studs (if not using a nail gun) | 1 |
| Nail Gun or Nails | Secure beadboard panels to the wall | 1 (nail gun) or a pack of nails |
| Saw | Cut beadboard panels to size | 1 |
| Sandpaper | Smooth edges and surfaces of beadboard panels | 1 pack of sandpaper |
Materials Required
| Material | Purpose | Quantity |
|---|---|---|
| Wood Glue | Adhere beadboard panels in place (optional) | 1 bottle |
| Caulk | Seal gaps around edges and seams | 1 tube |
| Paint | Finish beadboard panels with desired color | 1 can (based on coverage area) |
| Beadboard Panels | Primary material for the accent wall | Enough to cover the designated wall area, plus 10% extra for mistakes and cuts |
| Trim Pieces | Finish the top and bottom edges of the beadboard | Enough for top and bottom edges |
Step-by-Step Installation Process
- Measure your wall area carefully from the floor to the desired height and across the full width. Add these numbers to determine how much beadboard you’ll need.
- Mark the studs on your wall with a pencil. This will help you determine where to secure the panels for maximum strength.
- Cut your beadboard panels to the right height using a saw. If cutting horizontally, do this first before trimming height.
- Apply adhesive to the back of your first panel, focusing on edges and center areas for good contact.
- Position the first panel in a corner, using your level to ensure it sits perfectly straight up and down.
- Secure the panel with nails into the studs you marked earlier. Space nails about 16 inches apart for proper support.
- Continue with additional panels, making sure the grooves line up perfectly between each section.
- Add trim pieces to the top and bottom edges of your beadboard wall for a finished look.
- Fill nail holes and gaps with wood filler and caulk, then sand smooth when dry.
Pro Tips for a Perfect Finish
- Let the panels sit in your home for 48 hours before installing them to adjust to the humidity
- Paint panels before installation for easier coverage in the grooves
- Use a small roller or brush to reach into small spaces
- Account for baseboards and crown molding in your measurements
- Cut panels face down when using a power saw to prevent chips
How Beadboard Complements Various Home Styles
1. Beadboard in Traditional and Coastal Homes
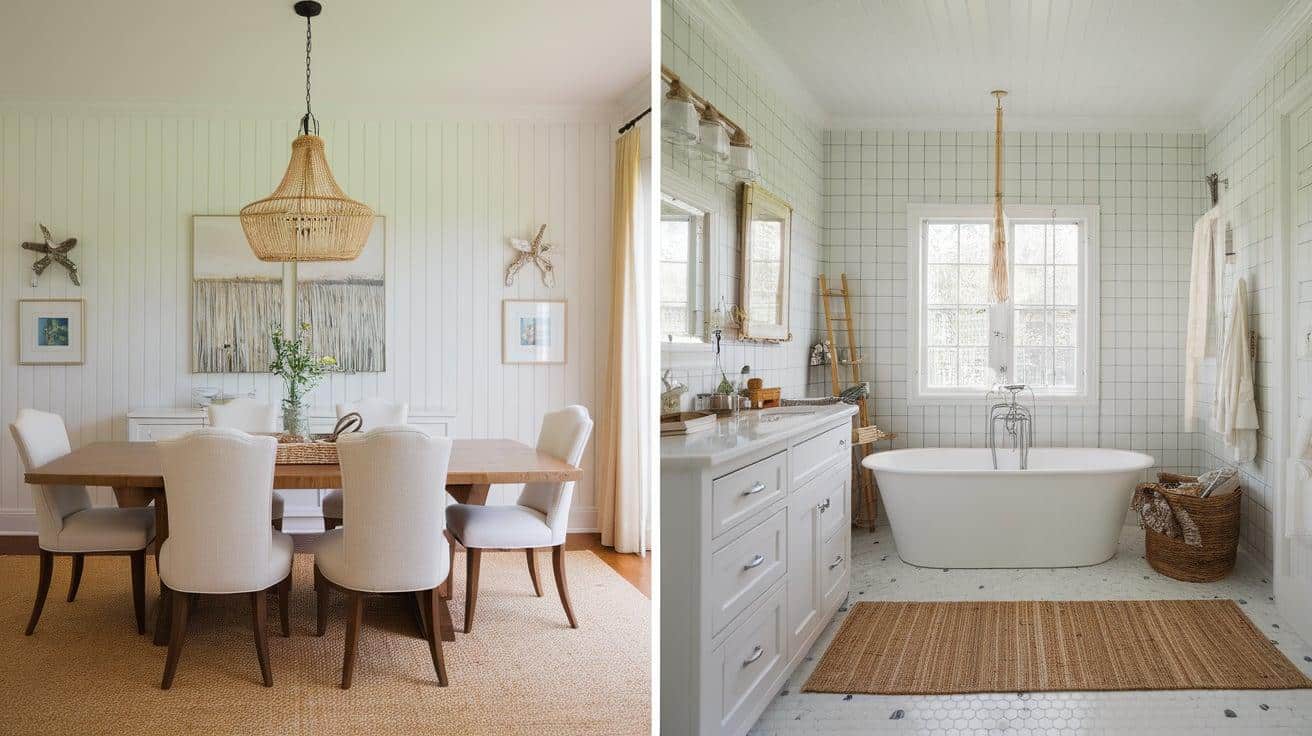
Beadboard is perfect for traditional homes, adding time-tested character to dining rooms and entryways. The vertical lines bring structure and formality that match classic furniture styles.
In coastal homes, white or pale blue beadboard recalls beach cottages and seaside retreats. Its clean, bright look pairs well with natural elements like jute rugs, shell collections, and driftwood.
Many homeowners install it in bathrooms and sunrooms to create that breezy, relaxed beach house feel.
2. Rustic Charm with Beadboard Walls
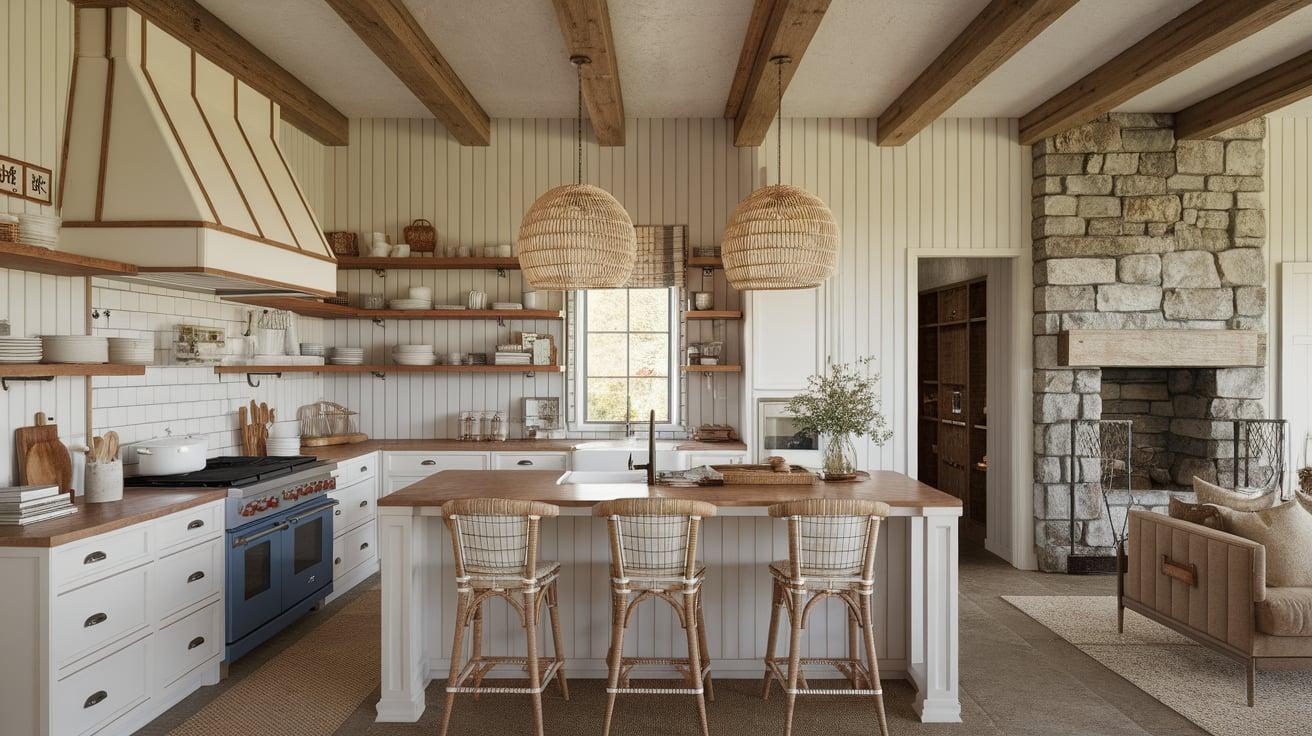
Beadboard adds warmth and texture to rustic or farmhouse styles. Instead of paint, try using natural wood tones or weathered finishes.
The simple pattern works well with other rustic elements like exposed beams and stone features. In country kitchens, beadboard backsplashes or island panels bring homey comfort.
The subtle texture balances rougher materials like brick and raw wood without competing for attention.
3. Modern and Minimalist Beadboard Designs
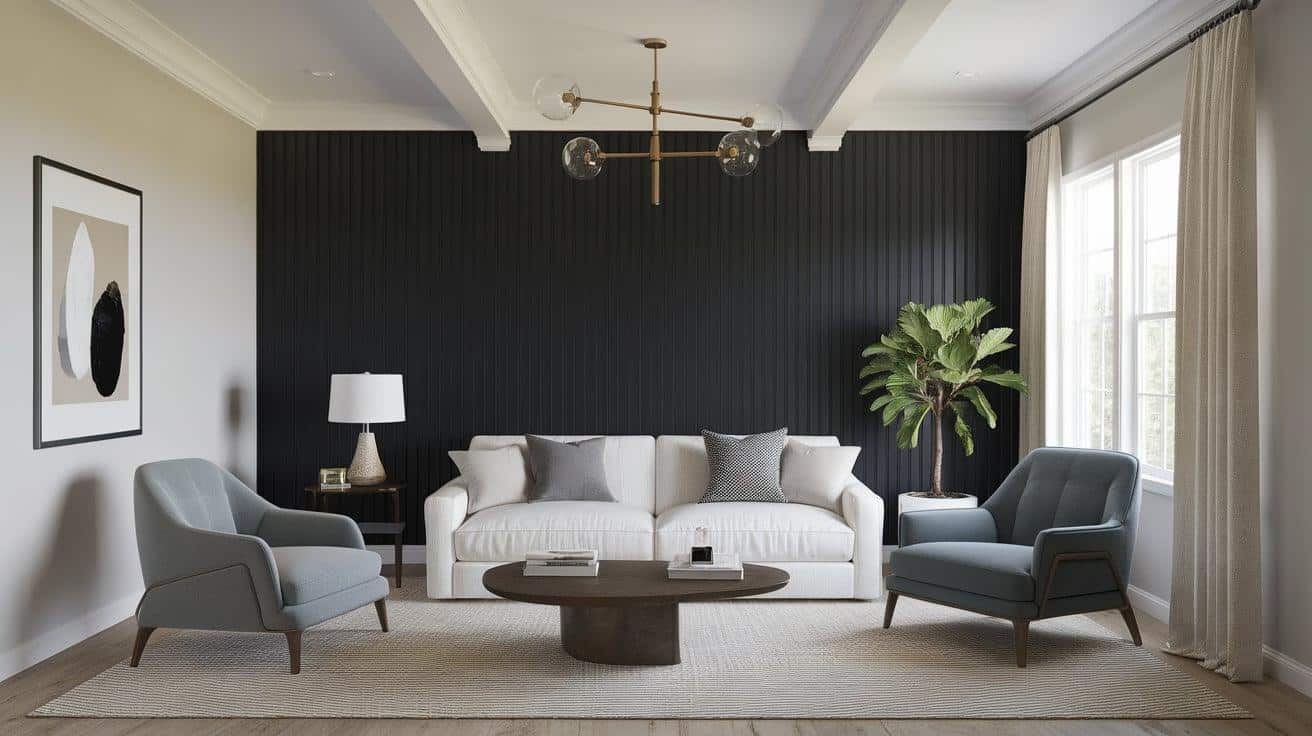
Beadboard isn’t just for classic styles. In modern homes, painted black or dark gray beadboard creates striking accent walls.
The texture adds interest, while the uniform pattern maintains clean lines. For minimalist spaces, low-height beadboard in the same color as the walls above creates subtle texture without visual clutter.
Some designers use horizontal beadboard to create width in narrow rooms, breaking traditional rules for fresh results.
Common Mistakes to Avoid When Installing Beadboard
1. Incorrect Measurement and Alignment
- Failing to measure wall dimensions multiple times leads to wasted materials and gaps between panels.
- Not using a level during installation causes crooked panels that look unprofessional and draw attention to mistakes.
- Forgetting to account for outlets, switches, and windows creates awkward cuts and poor fit around these features.
2. Choosing the Wrong Finish
- Selecting paint that isn’t moisture resistant for humid areas like bathrooms leads to peeling and damage over time.
- Using glossy finishes highlights every imperfection in the installation, making nail holes and seams more visible.
- Applying too few coats results in uneven coverage and wood grain showing through in certain lighting conditions.
3. Neglecting Wall Preparation
- Skipping wall cleaning before installation prevents adhesive from bonding properly, causing panels to loosen.
- Installing directly onto uneven walls creates gaps and bulges that are impossible to fix without starting over.
- Failing to remove or properly account for baseboards and trim pieces results in awkward joints and poor fit.
Beadboard Accent Wall Cost Breakdown
| Category | Details |
|---|---|
| Solid wood beadboard | $1.50 – $2.75 per square foot |
| Medium-density fiberboard (MDF) | $0.80 – $1.25 per square foot |
| Vinyl beadboard panels | $0.60 – $1.00 per square foot |
| Trim pieces | $0.75 – $1.50 per linear foot |
| Adhesive, nails, caulk | $25 – $40 total |
| Wall size | Larger walls require more materials (+$1.00 per additional sq ft) |
| Material quality | Premium solid wood vs. composite (+$1.50 per sq ft) |
| Wall condition | Poor surfaces need repair before installation (+$50 – $150) |
| Design complexity | Custom cuts around features (+$75 – $200) |
| Finish type | Paint grade vs. stain grade (+$0.25 – $0.75 per sq ft) |
| Regional price differences | Urban vs. rural pricing (±15% variation) |
Conclusion
Beadboard accent walls offer a simple way to bring personality and style to your home. We’ve seen how these panels work in many settings, from bathrooms to living rooms, and fit various styles from coastal to modern.
The good news? You don’t need to spend a fortune or hire experts to get great results. With basic tools, careful planning, and our step-by-step guide, this project is within reach for most homeowners.
Remember to measure twice, prepare your walls properly, and take time with the details. Your efforts will result in walls that not only look good but also add value to your home.
Which room will you start with? Beadboard’s subtle texture and timeless appeal might just become your favorite home improvement choice.
Frequently Asked Questions
1. Which Is Cheaper Beadboard or Shiplap?
Beadboard is typically cheaper than shiplap. Standard beadboard panels cost less per square foot and need fewer materials for installation.
2. Should Beadboard Be Nailed or Glued?
Both methods work well. Nails provide strong support on wall studs, while glue works better for concrete walls. Using both gives the best results.
3. Does Beadboard Go Over Drywall?
Yes, beadboard installs directly over drywall. This makes for easier installation and adds extra insulation and soundproofing to your walls.