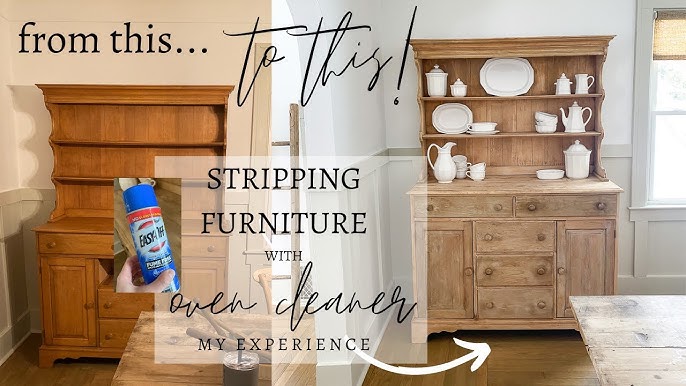
I’ve used oven cleaner to strip old furniture at home, and trust me, it’s simpler than most people think.
Like many of you, I used to worry about getting rid of old paint and varnish from wooden pieces. It felt too hard and too costly.
But here’s the good news – your kitchen already has what you need.
With a basic oven cleaner, you can remove old finishes from furniture without spending lots of money.
In this guide, I’ll show you my step-by-step method for using oven cleaner to strip furniture, plus some helpful tips I’ve learned through trial and error.
How Oven Cleaner Works on Wood Finishes
Oven cleaner contains sodium hydroxide, which breaks down paint and varnish on wooden surfaces. Think of it as a chemical peeler – it softens the finish layer by layer.
I’ve noticed that when I spray oven cleaner on old furniture, it starts working within 15 minutes.
The sodium hydroxide creates a reaction with the finish’s chemical bonds. This process makes hard finishes turn soft and bubbly. What I like most about this method is how it works on multiple types of finishes.
From my testing, oven cleaner works well on:
- Oil-based paints
- Latex paints
- Polyurethane coatings
- Shellac finishes
- Varnishes
But here’s something important I learned: oven cleaner doesn’t harm the wood underneath if used correctly. It targets only the finish layer. The wood stays intact because the cleaner doesn’t react with natural wood fibers.
One thing I always tell people: make sure to test the cleaner on a small hidden spot first. This step helps you see how your specific finish reacts to the treatment.
Step-by-Step Striping Guide
Tools & Materials Required
- Oven cleaner (two options):
- Heavy-duty oven cleaner for outdoor use
- Fume-free oven cleaner for indoor use
- Scrub brush
- Dish soap
- Water source (hose or bathtub)
- Protective gloves
- Face mask
- Window or ventilation source
- Clean rags or clothes
- Sandpaper (for stubborn areas)
Step-by-Step Process for This Method
1. Test Area First
-
- Pick a small hidden spot
- Apply oven cleaner to test the finish
- Wait 20-30 minutes to see results
2. Prepare Your Space
-
- Open windows for good airflow
- Work in a well-ventilated area
- Put on protective gear
4. Apply Oven Cleaner
-
- Spray an even coat on the surface
- Let it sit for 20-30 minutes
- Don’t let it dry completely
5. Cleaning Process
-
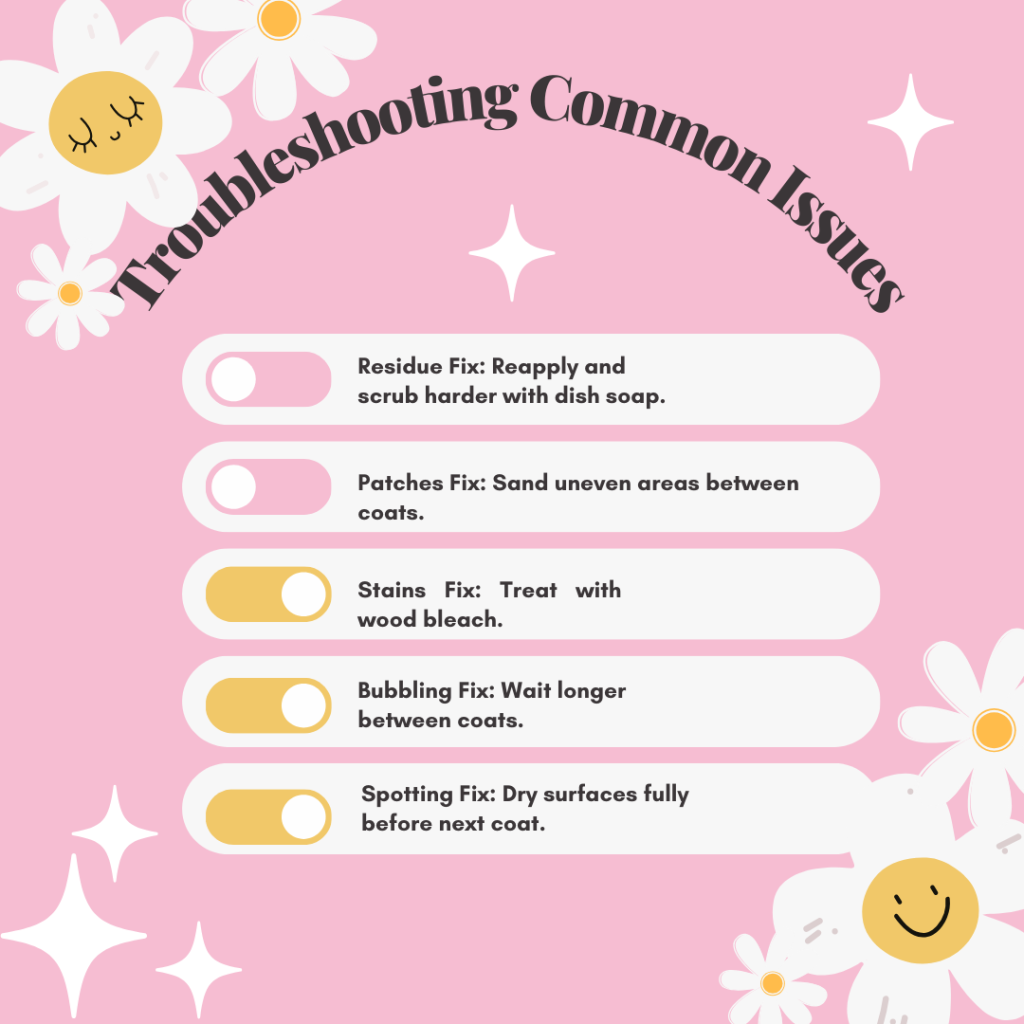
- Use soap and water with a scrub brush
- Work in small sections
- Rinse thoroughly with clean water
6. Check Results
-
- Let the wood dry completely
- Look for the remaining finish
- Repeat if needed
7. Final Steps
-
- Sand any stubborn spots
- Let the wood dry fully
- Apply new finish if desired
DOWNLOAD THE ENTIRE STRIPPING GUIDE FROM THIS PDF
Advantages & Disadvantages of This Method
| Advantages | Details |
|---|---|
| Cost-Effective | – Basic oven cleaner costs less than special stripping products • You might already have it at home • One can handle several small pieces |
| Easy Application | • Simple spray-on method • No special tools needed • Works fast (15-30 minutes per layer) |
| Works on Multiple Finishes | • Good for oil-based paints • Removes latex paint well • Takes off basic varnish coats |
| Less Mess Than Traditional Methods | • No thick, sticky residue • Cleans up with plain water • Won’t stain your work area |
| Disadvantages | Details |
|---|---|
| Strong Chemical Issues | • Heavy-duty versions have harsh fumes • Need lots of airflow • May cause nose and throat irritation |
| Limited Indoor Use | • Best used outdoors • Needs good ventilation • Not ideal for winter projects |
| Finish Limitations | • Doesn’t work on heavy lacquer • Struggles with polyurethane • May need sanding for sealed surfaces |
| Multiple Applications | • Might need several tries • Some spots need extra work • Fume-free version takes longer |
When to Use This Method
Best Times to Use This Method
- Simple Finish Projects
- Works best on basic paint layers
- Good for thin varnish coats
- Perfect for pieces without heavy sealants
- Outdoor Project Season
- Summer months are ideal
- Spring clean-up projects work well
- Fall weather still allows outdoor work
- Small Furniture Items
- Perfect for drawer fronts
- Works well on cabinet doors
- Good for small tables
- Easy to manage chairs
- Test Piece Projects
- First-time furniture makeovers
- Learning basic stripping methods
- Practicing restoration skills
When to Skip This Method
- Weather Restrictions
- Cold winter days won’t work
- Rainy weather limits outdoor use
- High humidity slows drying time
- Indoor-Only Situations
- Small apartments need different options
- Basement workshops need other methods
- Spaces without good airflow
- Specific Finish Types
- Skip for thick poly coatings
- Not for heavy lacquer finishes
- It won’t work on waxy surfaces
- Complex Projects
- Large furniture needs other methods
- Detailed carvings need special care
- Valuable antiques need expert care
Certain Safety Tips to Follow
- Always wear rubber gloves – the chemicals can harm your skin within seconds of contact.
- Keep windows open or work outside – proper airflow stops you from breathing harmful fumes.
- Never mix oven cleaner with other cleaning products – it can create toxic gas.
- Keep pets and kids away from your workspace – the spray can drift in the air.
Some Aftercare & Refinishing Touch
| Category | Details |
|---|---|
| Cleaning After Stripping | |
| Water Rinse Process | • Wipe with clean water • Use soft cloths to dry surfaces • Let air dry for 24 hours • Check for sticky spots |
| Surface Check | • Look for missed spots • Feel for rough areas • Note any watermarks • Find spots that need extra work |
| Wood Care Steps | |
| Sanding Tips | • Start with medium-grit paper • Work in wood grain direction • Remove any fuzzy spots • Finish with fine-grit paper |
| Wood Prep | • Remove all dust with a cloth • Check that the wood is fully dry • Fill any small holes • Fix loose joints |
| Final Touches | |
| Color Options | • Use wood stain if wanted • Try dark wax for an aged look • Add light wax for a natural finish • Pick oil for a raw wood look |
| Protection Choices | • Apply a clear coat if needed • Use furniture wax • Try natural oil finish • Pick water-based sealers |
| Extra Character | • Add small nicks for the old look • Highlight natural marks • Keep some wear spots • Sand edges lightly |
Best Alternatives to Oven Cleaner You Can Choose From
Citrus-Based Strippers
- Why They Work
- Made with natural orange oils
- Safe for indoor use
- Little to no harsh smell
- It won’t hurt wood grain
- How to Use
- Brush on a thick layer
- Wait 15-30 minutes
- Scrape with plastic tool
- Clean with mineral spirits
Heat Gun Method
- Basic Process
- Hold the gun 6 inches from the surface
- Move in small circles
- Scrape as paint bubbles
- Work in small sections
- Benefits
- No chemicals needed
- Works on thick finishes
- Good for detail areas
- Less mess to clean
Sanding Option
- Types to Use
- Power sanders for flat spots
- Hand sanding for details
- Different grits needed
- Special corner tools
- Best Uses
- Great for thin finishes
- Perfect for raw wood
- Works in any weather
- Good indoor option
Chemical Strippers
- Professional Types
- Paste forms for vertical spots
- Liquid types for flat areas
- Gel forms for curves
- Quick-acting formulas
- Using Safely
- Work in open-air
- Use proper masks
- Wear thick gloves
- Keep water close

Conclusion
Stripping furniture with oven cleaner can be a simple way to give old pieces new life. I’ve found this method works well for basic projects, though it needs care and patience.
From my own tries, I can say it’s not perfect for every piece, but it’s worth testing on simpler items.
Remember to put safety first – good airflow and proper gear make all the difference. If you’re new to furniture work, start with a small piece to learn the process.
Have you tried this method? I’d love to hear about your furniture projects in the comments below. Feel free to share your own tips or ask questions.
And don’t forget to check out my other furniture care guides for more helpful tips!
Frequently Asked Questions
How Long Do I Leave Oven Cleaner on to Strip Wood?
I usually let the oven cleaner sit for 20-30 minutes on wood. If the finish is thick, you might need 45 minutes. Never leave it longer than an hour to avoid wood damage.
How Do I Neutralize Wood After Using Oven Cleaner?
I first wash with dish soap and warm water. Then I wipe with clean water twice to remove all soap. Let the wood dry fully for 24 hours before any new finish.
Can Oven Cleaner Be Used on All Types of Wood?
I’ve learned oven cleaner works on most bare or lightly finished woods. But avoid using it on woods with heavy lacquer, polyurethane, or waxy coatings – it won’t work well.


