I love creating art at home, but I know painting can feel tricky at first. Trust me, I’ve had my share of messy attempts with paint and brushes.
But here’s the good news – painting a vase is actually simple when you know the right steps.
I’ve spent years teaching art classes, and I’ll share my tested method that works well for beginners. No fancy techniques or special tools needed – just basic supplies and clear instructions.
In this guide, I’ll walk you through each step of painting a vase. You’ll learn how to prep your surface, choose colors, and add designs that make your vase look great.
How to Paint a Vase
Tools & Materials Required
- Glass or ceramic vase (smooth surface works best)
- Acrylic latex paint from the hardware store
- White paint for mixing colors
- Baking soda
- Paint brushes
- Mixing container
- Clean cloth for touch-ups
Step-by-Step Process for Painting
1. Prepare Your Paint Mixture
- Pour a small amount of your chosen color paint into a mixing container
- Add white paint (about 3/4 of the colored paint amount) if you want to create a lighter shade
- Mix the paints until you get your desired color
- Add baking soda in equal parts to your paint mixture
- Stir until you create a paste-like texture
2. First Coat Application
- Clean your vase surface thoroughly
- Apply the first coat with even brush strokes
- Cover both the outside and inside of the vase opening
- Let the first coat dry for 5-10 minutes
3. Second Coat Application
- Apply a second coat using the same technique
- Make sure to cover any spots you missed in the first coat
- Wait a few minutes until the paint is slightly tacky
4. Texture Creation
- Use a dry brush (no fresh paint) to drag over the surface lightly
- This creates a textured effect in the paint
- Work in small sections to control the texture
- Make sure to maintain even coverage
5. Final Touches
- Let the vase dry completely (about 24 hours)
- Check for any spots that need touch-ups
- Apply small amounts of the mixture to fix any missed areas
DOWNLOAD THE ENTIRE VASE PAINTING GUIDE FROM THIS PDF
CLICK HERE
Approximate Cost Analysis for Painting a Vase
| Item Category | Item Description | Cost Range |
|---|---|---|
| Basic Supplies | Vase (Thrift Store) | $2 – $5 |
| – Good quality glass vases are often found at secondhand stores | ||
| – Simple shapes work best for the project | ||
| Paint Options | Small can of acrylic latex paint | $5 – $8 |
| Sample size paint container | $3 – $5 | |
| White paint for mixing | $3 – $5 | |
| Common Household Items | Baking soda (small box) | $1 – $2 |
| Paint brushes | $3 – $5 | |
| Mixing container (or use items from home) | $1 | |
| Total Cost Range | Minimum spend (using basic supplies) | $12 |
| Maximum spend (using all new materials) | $25 |
Some Money-Saving Tips
- Check your home for existing paint and brushes
- Use containers you already have for mixing
- Look for sale items at craft stores
- Share supplies with friends for bigger projects
Top Painting Techniques to Check Out
1. Baking Soda Texture Method
- Mix equal parts paint and baking soda for the best texture
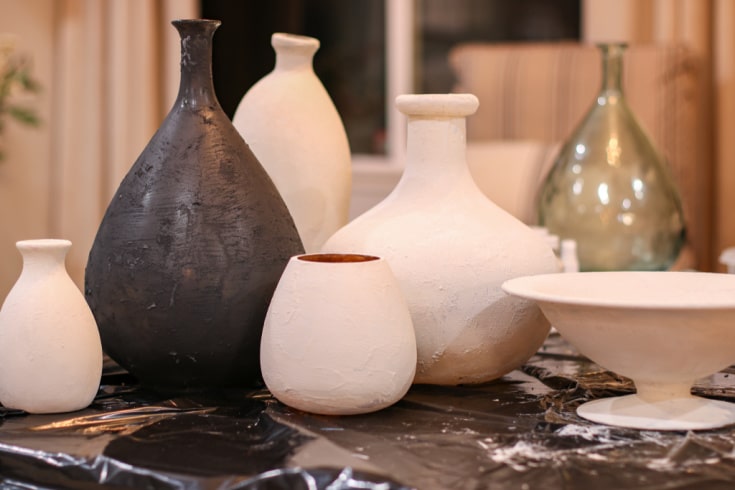
- This method creates a nice, grainy finish that looks natural
- I find this technique works best on smooth glass surfaces
- The texture stays even and consistent through drying
2. Two-Coat Coverage System
- Start with a full first coat and let it dry for 5 minutes
- Apply a second coat in the opposite direction of your first coat
- This helps fill in any missed spots or thin areas
- The two-coat method makes the color look rich and full
3. Dry Brush Texturing
- Take a clean, dry brush after your second coat
- Gently sweep the brush over the still-wet paint
- Use light strokes to create subtle texture patterns
- This method adds depth to the finished look
4. Color Mixing Strategy
- Start with your base color paint
- Add white paint in small amounts
- Mix thoroughly before adding more white
- Test the color on a small area first
5. Inside-Out Painting Method
- Begin painting the inside rim of the vase
- Work your way down to the base
- Paint the outside after the inside dries
- This prevents smudging and fingerprints
6. Blending Technique
- Use gentle, overlapping strokes
- Keep your brush strokes going in one direction
- Work in small sections at a time
- This creates a smooth, professional finish
How to Create a Sealing and Finishing Touch
After your painted vase has dried for 24 hours, it’s time to add those final touches that make it special. I would like to start by checking the entire surface using natural light. This helps me spot any areas that might need a quick touch-up. If I find any thin spots, I use a small brush to add a tiny bit of my paint mixture.
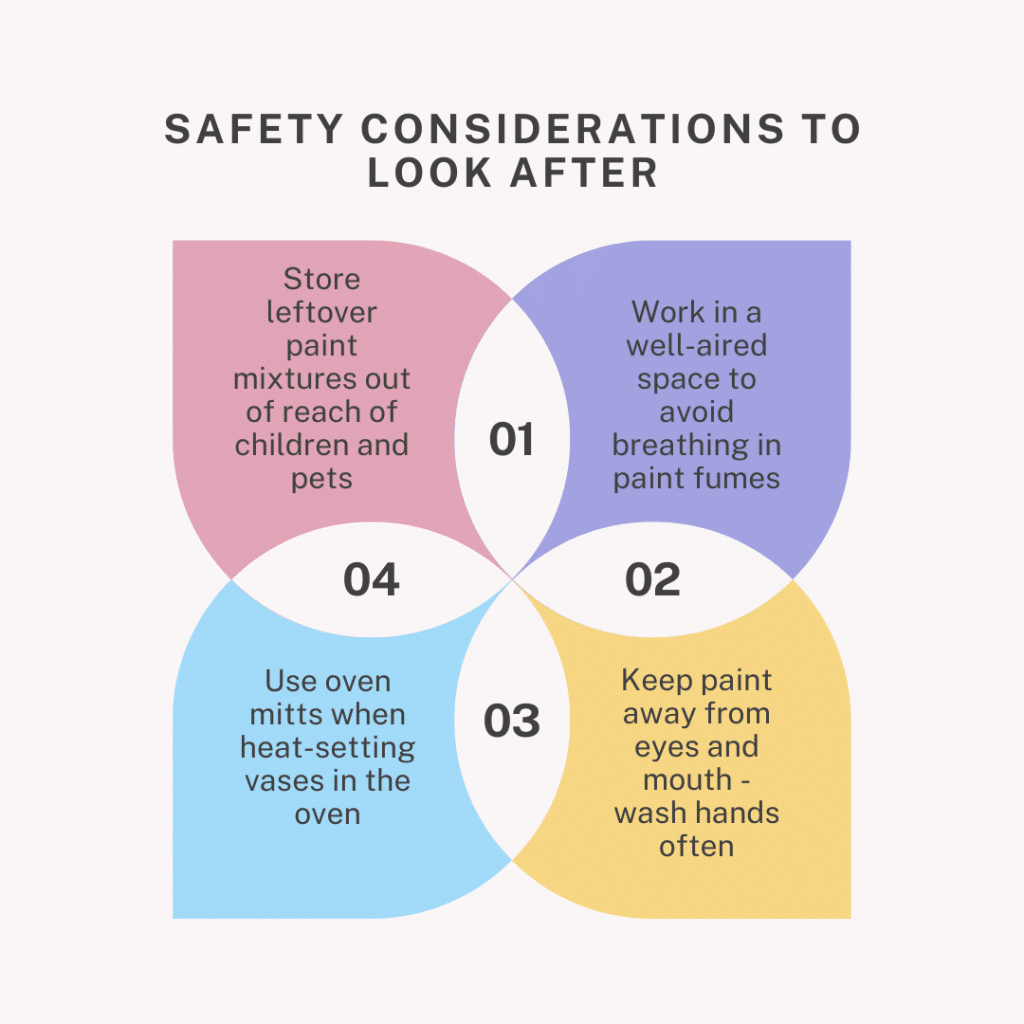
- For sealing, you have two good options. The first method is heat setting. Place your vase in a cold oven, then set it to 350 degrees. Let it warm up slowly for 30 minutes, then turn off the oven. Keep the vase inside until everything cools down. This makes the paint more long-lasting.
- The second method uses a clear sealer. Pick a matte finish sealer from your local craft store. Apply thin, even coats with a soft brush. I usually do two coats, letting each one dry for an hour. This gives your vase extra defense against water and wear.
Remember to take care of your finished vase for the first few days. Even with sealing, the surface needs time to set fully.
Keep it away from direct sunlight and avoid filling it with water for at least a week. This waiting time pays off – your vase will stay beautiful longer.
Some Troubleshooting Common Issues
- Paint Looks Too Thick: I’ve found this happens when there’s too much baking soda in the mix. Start fresh with a 1:1 ratio of paint to baking soda. If it still looks thick, add small drops of paint until the mixture feels smooth. Test it on a small area before coating the whole vase.
- Uneven Coverage: Sometimes, the first coat looks patchy. This is normal! Let the first layer dry for 5-10 minutes. Then, apply a second coat using straight brush strokes. I always work in good lighting to catch any missed spots.
- Paint Starts Peeling: This usually means the vase surface wasn’t clean enough. Wash the vase with soap and water, dry it well, then start over. Make sure your hands are clean too – oils from fingers can stop paint from sticking properly.
- Brush Marks Show Too Much: If you see lots of brush lines, your paint mixture might be drying too fast. Try working in a cooler room. Use longer, smoother strokes with your brush. Don’t go back over areas that have started to dry – this can cause pulling and lines.
- Bubbles in the Paint: Sometimes tiny bubbles pop up in your paint mix. Let the mixture sit for 2-3 minutes after stirring. This gives bubbles time to rise and pop. Apply paint with gentle strokes to avoid creating new bubbles.

Conclusion
Painting a vase is one of my favorite ways to add style to my home. This simple project turns ordinary glass into something special.
I’ve shared all my tested tips, from mixing paint with baking soda to fixing common problems.
Why does this matter? Because creating beautiful home decor doesn’t need to be hard or costly. With just $15-25 and a few hours, you can make your own custom vases.
Ready to start? Pick up a vase from your local thrift store and try these steps. I’d love to see what you create! Share photos of your painted vase in the comments below, or ask me any questions about the process.
Let’s make something beautiful together!
Frequently Asked Questions
What Kind of Paint Do You Use on Vases?
I recommend using acrylic latex paint from hardware stores for vases. It sticks well to glass and ceramic. Mix it with baking soda for that perfect textured finish.
Can I Bake Painted Vases to Set the Paint?
Yes! Place your painted vase in a cold oven. Heat to 350 degrees for 30 minutes. Please turn it off and let it cool inside. This helps make the paint last longer.
Can I Use Painted Vases for Fresh Flowers?
For fresh flowers, use a glass or plastic liner inside your painted vase. This protects the paint from water damage. Let your vase cure for one week before use.


