Ever wondered how those perfectly fitted wooden boards create such smooth, professional-looking walls? The secret lies in a time-tested woodworking technique that has shaped construction for centuries.
Shiplap joints offer builders and DIY enthusiasts a reliable method for joining boards edge-to-edge. This technique creates strong, weather-resistant connections that stand the test of time.
The overlapping design prevents moisture infiltration while maintaining structural integrity.
Modern construction projects increasingly favor shiplap for both functional and visual appeal. From exterior siding to interior accent walls, this joint style delivers consistent results across various applications.
I’ll guide you through everything you need to know about creating perfect shiplap joints using different tools and methods. You’ll learn three proven techniques that work with standard workshop equipment.
What Is a Shiplap Joint?
A shiplap joint consists of two boards with complementary grooves cut along their edges. One board features a rabbet cut on the top edge, while the adjacent board has a matching cut on the bottom edge. This creates an overlapping connection that sheds water effectively.
The joint design allows boards to expand and contract with weather changes without creating gaps. Traditional shiplap uses a 3/8-inch overlap, though modern variations may use different measurements. The overlapping edges create a shadow line that adds visual interest to surfaces.
This joint type originated in shipbuilding, where tight, waterproof connections were essential. Carpenters adapted the technique for building construction due to its superior weather resistance. Today, shiplap joints appear in both functional applications and decorative installations.
Why Choose Shiplap?
Shiplap joints have become a preferred choice for both professional builders and weekend DIY enthusiasts. The technique offers multiple advantages that make it superior to other joining methods. Understanding these benefits helps you decide when shiplap is the right solution for your project.
Key Benefits:
- Superior Weather Protection – The overlapping design directs water away from joints, preventing leaks and moisture damage that can lead to rot and structural problems.
- Strong Mechanical Connection – Boards lock together securely, creating a rigid surface that resists warping and separation over time.
- Faster Installation – Boards self-align during placement, reducing installation time and ensuring consistent spacing between pieces.
- Attractive Appearance – Creates uniform shadow lines that add visual depth and texture to both interior and exterior surfaces.
- Versatile Design Options – Works equally well for rustic farmhouse styles and modern contemporary designs, adapting to various aesthetic preferences.
- Cost-Effective Solution – Uses standard lumber sizes and basic tools, making it accessible for most budgets and skill levels.
Tools and Materials Needed to Build Shiplap Joints
Before starting your shiplap project, gather the necessary equipment and materials for clean, accurate cuts.
| Tools | Materials |
|---|---|
| Table saw or router table | Lumber boards (pine, cedar, or hardwood) |
| Dado blade set | Wood glue |
| Push sticks and featherboards | Finishing materials (stain, paint, or sealant) |
| Measuring tape and pencil | Sandpaper (120 and 220 grit) |
| Safety glasses and hearing protection | Dust collection system or shop vacuum |
4 Effective Methods to Build a Shiplap Joint
Creating shiplap joints requires precision and the right technique for your available tools. Each method produces identical results when executed properly.
Start by selecting straight, dry lumber with consistent thickness. Mill all boards to the same width before cutting joints. Mark each board clearly to avoid confusion during the cutting process.
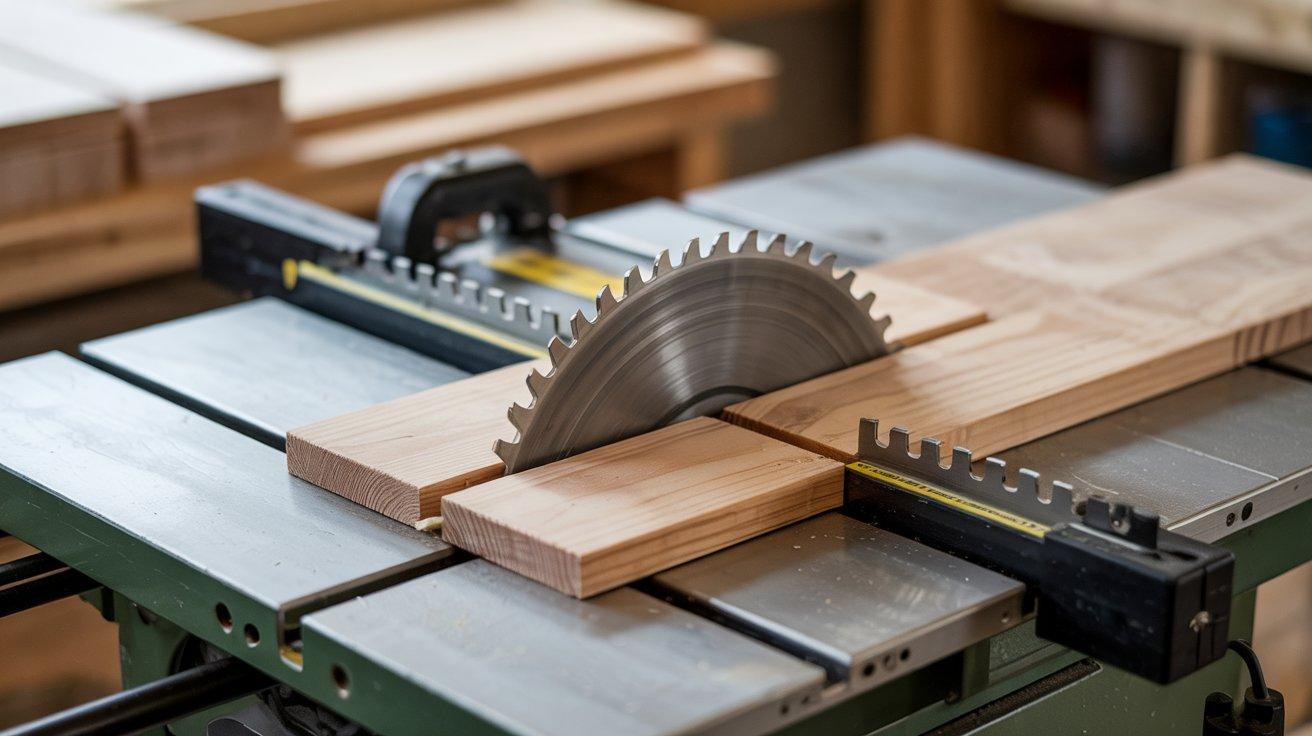
Method 1: Using a Table Saw

Set the table saw blade height to exactly half the board thickness. Position the rip fence to create a 3/8-inch rabbet cut from the board edge.
Step 1: Cut the top rabbet on all boards first. Run each board with the face against the fence, cutting along the top edge.
Step 2: Flip each board and adjust the fence position. Cut the bottom rabbet on the opposite edge, maintaining the same depth.
Step 3: Dry-fit the boards to confirm a smooth interlock without resistance. A well-formed rabbet will sit flush without forcing. Make minor fence adjustments if needed.
Step 4: Feed each board through at a steady pace to avoid burning and achieve a uniform rabbet edge. Keep the blade sharp for clean cuts without tear-out.
Method 2: Using a Router Table

Install a straight-cut bit in your router table. Set the bit height to half the board thickness for proper joint depth.
Step 1: Position the fence to cut a 3/8-inch rabbet from the board edge. Use featherboards to hold boards firmly against the fence.
Step 2: Route the top edge of each board with the face down on the table. Use consistent forward pressure and pace to prevent chatter marks or uneven depths.
Step 3: Flip boards and adjust the fence for the bottom rabbet cut. Route the opposite edge with a consistent technique.
Step 4: Ensure the routed edges align without gaps or tension. Adjust the bit depth if the boards fail to nest neatly.
Method 3: With A Dado Blade
Install a dado blade set in your table saw. Adjust the width to match your desired rabbet size, typically 3/8 inch.
Step 1: Set the dado height to half your board thickness. Use a test piece to verify the exact depth setting.
Step 2: Position the fence to cut the first rabbet. Run all boards through with the same face orientation.
Step 3: Adjust the fence position for the complementary cut. Flip boards and cut the opposite rabbet on each piece.
Step 4: Place two boards together to evaluate joint tightness. Make minor blade or fence tweaks to achieve a balanced fit. Sand any rough edges before final installation.
Method 4: Hand Tool Method (Hand Saw + Chisel or Rabbet Plane)

This traditional approach requires no power tools and offers complete control over each cut. Hand tools produce quieter work and allow for precise adjustments during the cutting process.
Step 1: Mark the rabbet dimensions clearly on each board using a marking gauge. Score the shoulder line deeply with a sharp knife to prevent tear-out.
Step 2: Use a hand saw to cut along the shoulder line to your marked depth. Keep the saw perpendicular to the board face for straight cuts.
Step 3: Make relief cuts every 1/4 inch across the waste area. These cuts make waste removal easier and prevent splitting.
Step 4: Use a sharp chisel to pare away the waste material. Work from both ends toward the center for clean results. Guide the chisel steadily to pare away waste evenly, preventing gouges or sloping surfaces.
Step 5: Fine-tune the rabbet with a rabbet plane for smooth, even surfaces. Check the fit frequently and make small adjustments as needed.
Step 6: Bring the two boards together to assess how cleanly they overlap. Use fine-grit sandpaper or a rabbet plane to smooth any tight spots. The slower pace allows for perfect fitting without rushing the process.
Which Shiplap Method Is Right for You?
Selecting the best cutting method depends on your experience level, available equipment, and project scope. This comparison helps you match the right technique to your specific needs.
| Situation | Best Method | Why This Works |
|---|---|---|
| For Beginners | Table Saw Method | Easy setup with predictable cuts, great for straight boards |
| For Precision and Clean Edges | Router Method | Offers smoother edges, cleaner rabbets, and is perfect for delicate wood |
| For Speed and Bulk Cuts | Dado Blade Method | Efficient for making many joints quickly with uniform depth |
| If You Don’t Have Power Tools | Hand Saw and Chisel Method | Slower, but doable with basic tools and patience |
Tips for Clean and Precise Shiplap Joints
Getting professional results with shiplap joints requires attention to detail and proper technique. These practical tips help you avoid common mistakes and achieve tight, clean-fitting joints every time.
Essential Tips:
- Use dry lumber – Keep moisture content below 19% to prevent warping and gaps after installation.
- Mill to identical thickness – All boards must be exactly the same thickness for consistent joint depth.
- Keep tools sharp – Sharp blades and bits create clean cuts without tear-out or burning.
- Test on scrap first – Always make practice cuts to verify settings before cutting final boards.
- Maintain steady feed rate – Consistent speed prevents burning and ensures smooth cut surfaces.
- Support long boards – Use outfeed tables or roller stands to prevent boards from dropping during cuts.
- Clean between cuts – Remove sawdust from joints before assembly for better glue adhesion.
Shiplap Joint Applications and Finishing Options
Shiplap joints serve multiple purposes in both residential and commercial construction projects. The technique adapts well to various applications while offering numerous finishing possibilities to match different design styles.
1. Exterior Applications

Exterior shiplap siding provides excellent weather protection while creating attractive building facades. The joint design sheds water effectively, making it suitable for harsh climate conditions.
Cedar and pine are popular species choices for their natural weather resistance. Many builders use shiplap for barn siding, shed construction, and accent walls on residential projects.
2. Interior Uses
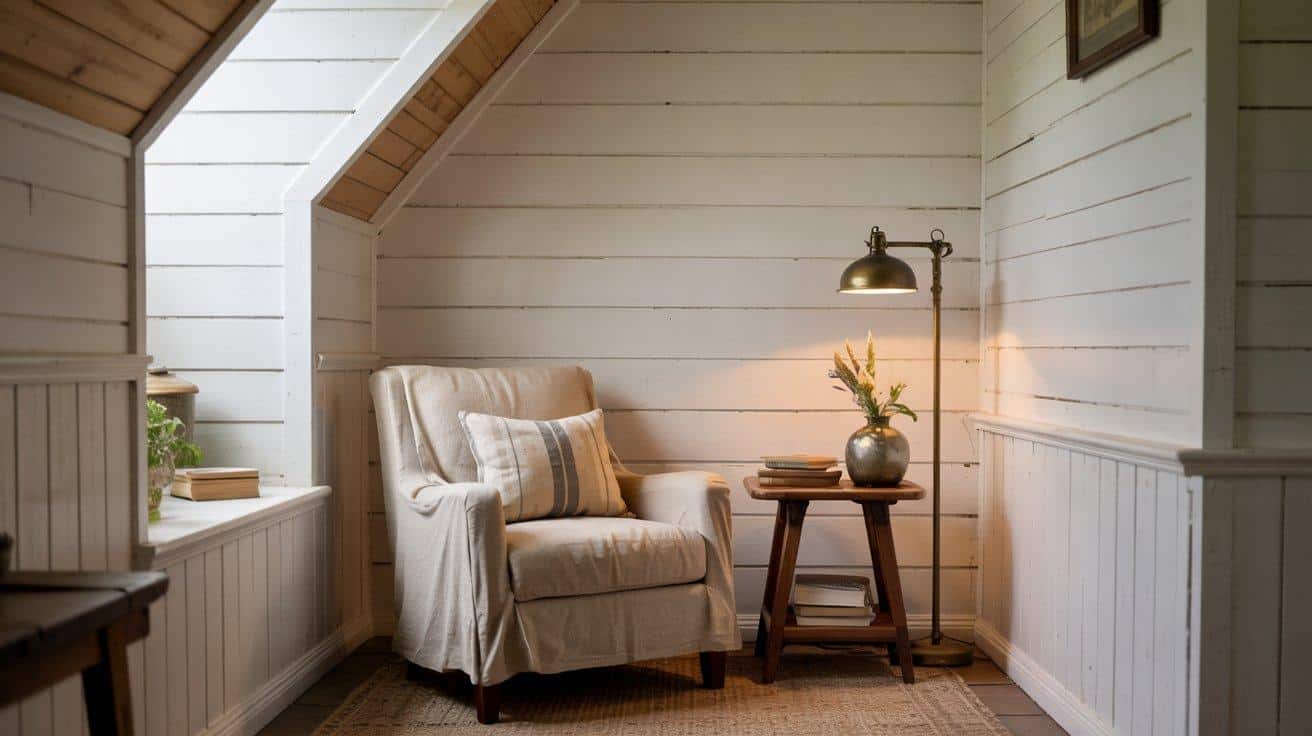
Interior shiplap creates striking accent walls, wainscoting, and ceiling treatments. The shadow lines add texture and visual interest to plain surfaces.
Painted shiplap works well in farmhouse and cottage-style interiors. Natural wood finishes complement rustic and traditional design schemes.
3. Finishing Considerations
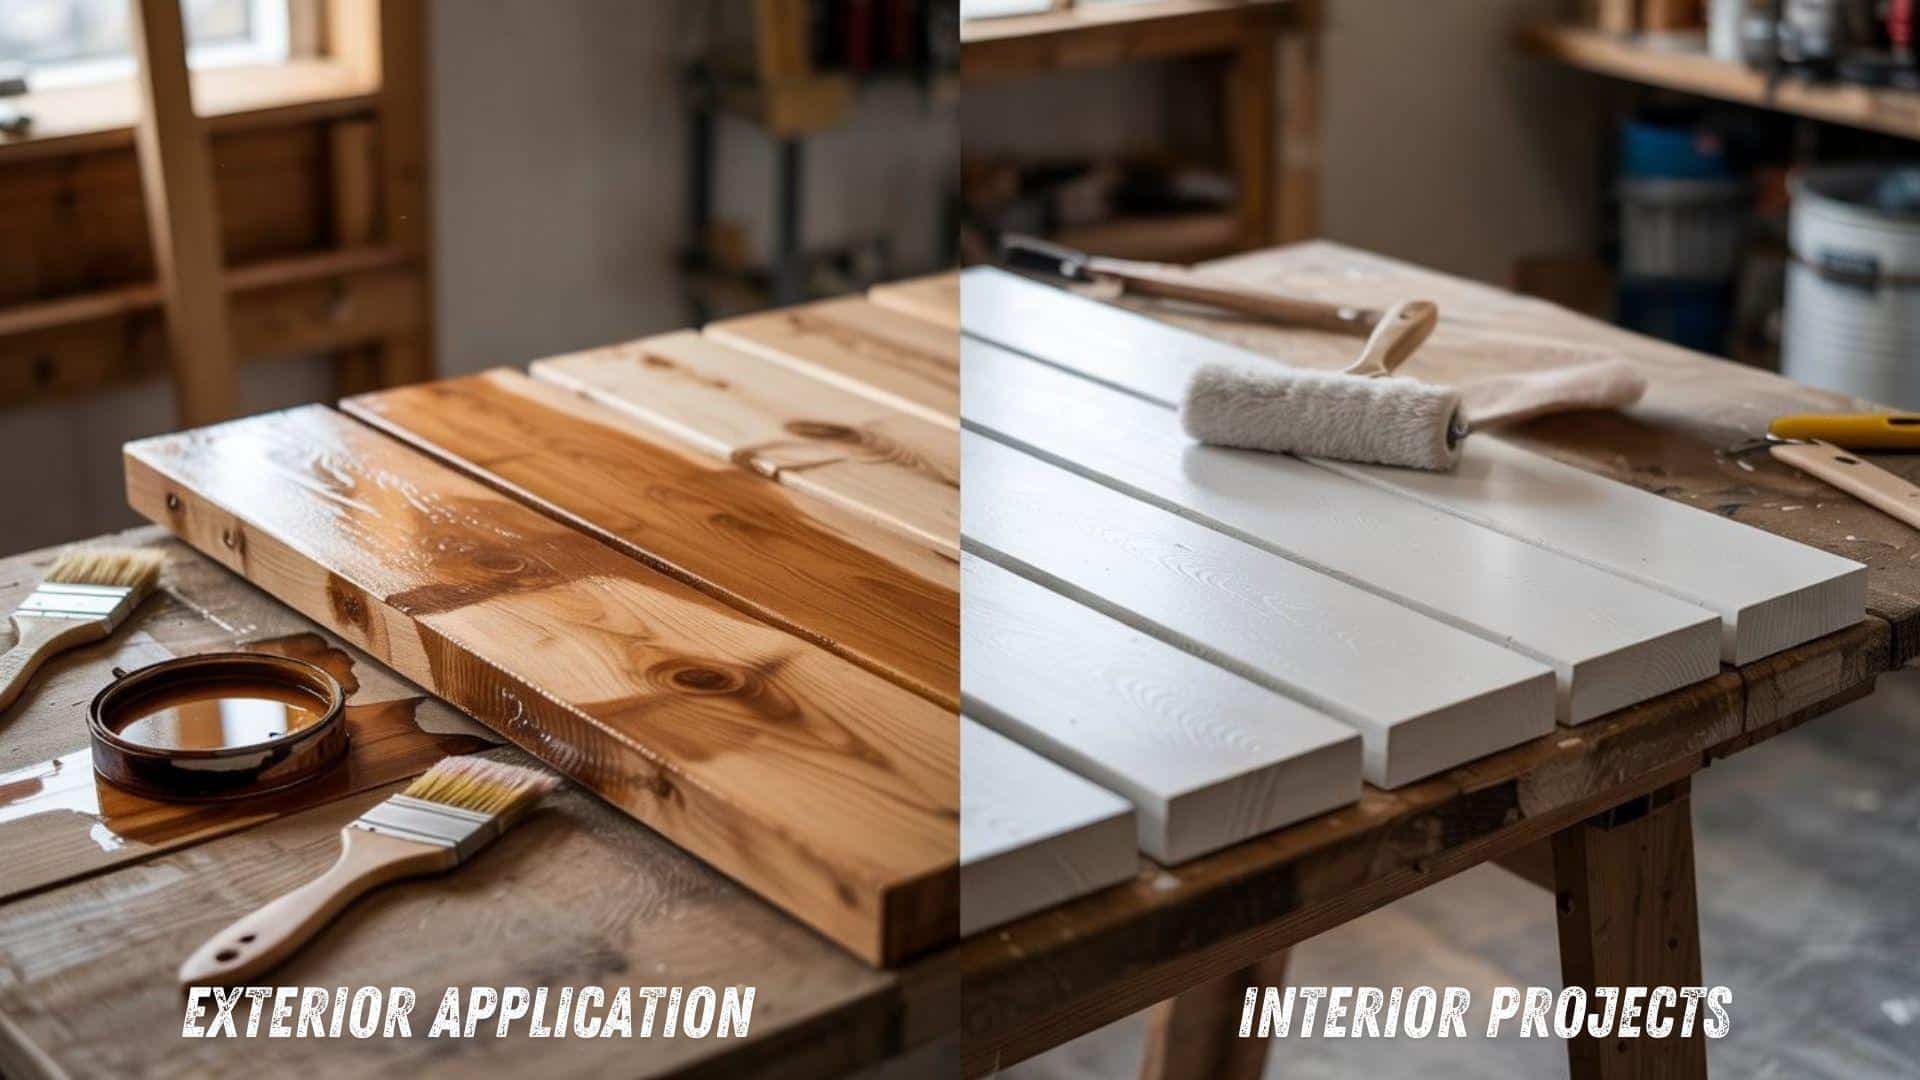
Prime all surfaces before final finishing to ensure even coverage. Oil-based stains penetrate deeper and provide better weather protection for exterior applications.
Water-based finishes dry faster and produce fewer fumes for interior projects. Apply multiple thin coats rather than single heavy applications for better durability and appearance.
Conclusion
Shiplap joints combine traditional craftsmanship with practical functionality that modern builders still value today.
The overlapping design creates weather-tight connections that protect structures while adding visual appeal to surfaces.
Mastering this technique opens up numerous project possibilities, from exterior siding to interior accent features. The four methods covered here accommodate different shop setups and skill levels.
Success with shiplap joints comes from careful preparation, accurate cutting, and proper finishing techniques. Take time to practice on scrap materials before tackling your main project.
What questions do you have about creating shiplap joints? Share your project ideas or experiences in the comments below – I’d love to hear about your woodworking successes!
Frequently Asked Questions
How Do You Hide Seams in Shiplap?
Apply acrylic caulk along seams where shiplap boards meet walls, corners, or molding. This creates clean lines and covers gaps for a professional finish.
How to Cover Shiplap Joints?
Caulk works best for covering joints and creating smooth connections. It also fills nail holes and small gaps between boards effectively.
Is It Better to Have Wide or Thin Shiplap?
Wide planks make small rooms look bigger, while narrow planks create cozy, intimate spaces. Choose based on your room size and desired feel.