How to Cut Pavers for Curves: Essential Tips & Guide
Are you stuck with straight lines in your patio design? Cutting pavers for curves might seem hard at first. Many homeowners avoid curved designs due to the cutting process.
With the right tools and steps, you can create smooth curves that add character to your outdoor space. This blog will show you how to cut pavers correctly for any curved pattern.
Ready to take your patio or walkway to a new level? Let’s look at the methods, tools, and tricks that will help you craft perfect curves in your paver project.
Curves work with the natural shapes in your yard rather than against them. They create a more relaxed feel and guide visitors through your space. With some practice, you’ll be making clean cuts that fit together well.
What are Curved Paver Cuts?
Curved paver cuts add visual appeal to patios, walkways, and driveways. They create flow in your landscape and can highlight garden beds or trees.
These cuts work with the natural shapes in your yard. They break away from the typical grid pattern of standard paver layouts.
Curves require more planning and skill than straight cuts. Each paver needs its own unique cut to fit the flow of the curve perfectly.
Planning Your Curved Paver Project
Good planning is key for curved paver projects. Take time to map out your design first.
Consider these points when planning:
- Look at how the curves will fit with your yard’s current look
- Think about how people will use the space
- Check that the curves aren’t too sharp for your paver size
- Plan for water flow and drainage
- Make sure the curved area matches the style of nearby structures
Start by sketching your design on paper. This helps you spot issues before cutting begins. Then mark the outline on the ground to get a real sense of size and flow.
Preparing the Work Area
A well-set-up work area makes cutting pavers safer and more effective.
1. Site Preparation
A good work area makes paver cutting safer and more exact. Find a flat, level spot with good light to see your cutting lines well.
Keep the area away from plants that the dust might harm. Have water nearby to reduce dust and cool your blade. Clear all trip risks from your work zone. Use a table at waist height to cut down on back strain.
2. Paver Arrangement
Lay out pavers before cutting to save time. Put whole pavers along your marked curve to find where cuts are needed.
Count the pavers that need cutting to know how much work is ahead. Note which ones need big or small cuts. Check how the final pattern will look. Mark all cut lines with chalk for clear guides.
Step-by-Step Guide to Cutting Pavers for Curves
In this, you will find clear steps to cut pavers that fit curved edges. The process uses basic tools and simple methods to create exact fits for your curved patio or walkway edges.
Essential Tools and Materials Needed:
You’ll need specific tools to cut pavers for curves correctly. The right equipment ensures clean cuts and saves you time and effort.
| Tool/Material | Purpose |
|---|---|
| Wet saw with masonry blade | Makes precise, clean cuts through pavers |
| Angle grinder with diamond blade | Good for small adjustments and touch-ups |
| Safety glasses and gloves | Protects eyes and hands from debris |
| Dust mask or respirator | Prevents dust inhalation |
| Ear protection | Reduces noise damage risk |
| Measuring tape | For accurate measurements |
| Chalk or masonry pencil | For marking cut lines |
| Garden hose or flexible PVC | For outlining curves |
| Straight edge | Helps draw straight lines on pavers |
Step 1: Plan Your Curve
Use a garden hose or flexible PVC pipe to outline your desired curve on the ground. This flexible material allows you to make adjustments until the shape flows naturally with your landscape. Once satisfied, trace along this guide with chalk or masonry crayon, creating bold lines that won’t fade easily.
- Step back often to check the flow from different angles
- Make markings bold and thick enough to stay visible
- Take photos from multiple angles for reference
- Consider how water will drain off the finished surface
Step 2: Lay and Mark Pavers
Place whole pavers along your marked curve, extending past where the final edge will be. This helps you see the pattern and determine exactly where cuts are needed. With all pavers in position, transfer your ground markings onto each one with a pencil or chalk.
- Start from a fixed point, like a wall or existing straight edge
- Number pavers if working on complex patterns
- Maintain even spacing between pavers
- Take photos of the complete layout before removing pavers
Step 3: Prepare for Cutting
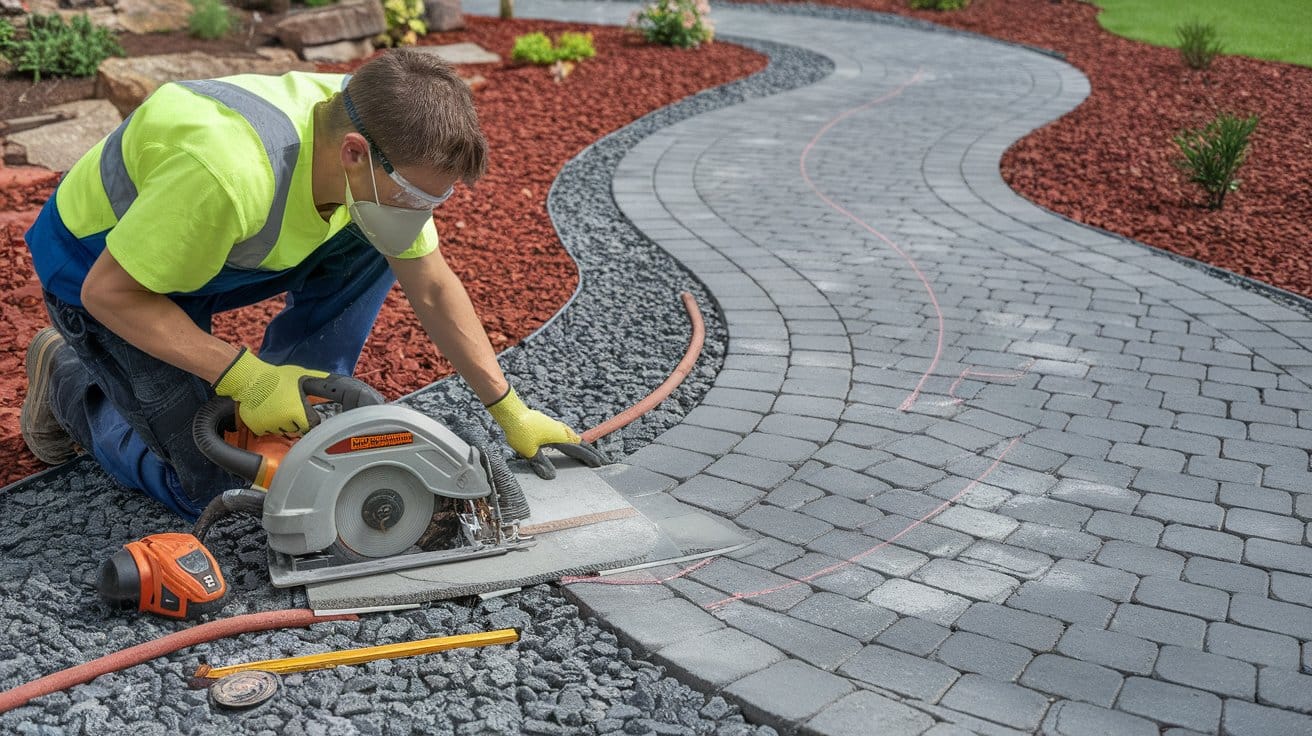
Create a safe, stable cutting station on a flat surface. Place each paver securely before cutting, using clamps when possible to prevent movement. Safety is critical – dust from cut pavers can harm your lungs, and flying chips can cause eye injuries.
- Wear safety glasses to protect your eyes.
- Use ear protection from loud cutting tools
- Put on a dust mask or respirator
- Use work gloves to protect your hands
- Cover skin with long sleeves and pants
Step 4: Cutting the Pavers
Begin with a light scoring cut along your marked line to create a guide groove. For wet saw cutting, ensure water flows constantly to the blade to reduce dust and prevent overheating. Guide the paver through slowly and steadily.
With an angle grinder, make several passes, gradually increasing depth with each pass. For curves, create a series of small straight cuts that follow your curve line. The tighter the curve, the more small cuts you’ll need to make.
Step 5: Finishing Touches
After cutting, smooth any rough edges with a sanding stone or file. This creates a more finished look and makes the pavers safer to handle.
Place all cut pavers back into the layout to check fit before final installation. Look for gaps or alignment issues that need adjusting.
Video Tutorial
I’d like to acknowledge The Christian Hardscaper for the insightful video, which was a key reference in putting this guide together.
Tips and Tricks for Success
These proven methods will help you achieve professional results when cutting pavers for your project.
- Mark Both Sides: For thick pavers, mark your cutting line on both sides to help guide straight cuts
- Cut From the Back: When using a wet saw, cut from the back side of the paver to reduce chipping on the visible face.
- Work Slowly: Rushing leads to mistakes. Take your time with each cut
- Use Templates: For repeating curves, make a template from cardboard to speed up marking
- Stay Hydrated: Cutting pavers is physical work. Drink water and take breaks
- Keep Extra Pavers: Always have spare pavers for practice cuts or mistakes
- Clean As You Go: Regularly clean your work area to maintain safety and see your marks clearly
Common Challenges and How to Overcome Them
Even with good planning, you might face some issues:
1. Inconsistent Gaps: Keep a measuring stick handy to check gap widths. Use small paver pieces to fill strange gaps rather than stretching joints.
2. Unstable Edges: Add edge restraints specifically made for curved designs. These help hold pavers in place.
3. Material Waste: Plan your cuts to use as much of each paver as possible. Sometimes, both pieces from a single cut can be used in different spots.
4. Dust Management: Work in a well-ventilated area and use wet cutting methods when possible. Take breaks to clear dust buildup.
5. Weather Issues: Avoid cutting in high winds or rain. If working in hot weather, keep pavers from overheating before cutting.
Take a step back to check the visual flow. Make adjustments to your layout before cutting anything.
Conclusion
Cutting pavers for curves might seem tricky at first, but with the right tools and method, you can create beautiful curved hardscapes. The key is careful planning, proper marking, and patient cutting.
I’ve walked you through each step of the process, from initial design to final touches. By following these tips, you’ll avoid common problems and save time.
Remember that practice helps. Try cutting a few spare pavers before working on your actual project. This builds skill and confidence.
What paver project are you planning to add curves to? Let me know in the comments below!
Frequently Asked Questions
How Do I Cut Pavers in Winter Conditions?
Work in a sheltered area, keep pavers at room temperature before cutting, and dry them completely. Cold pavers break more easily, so warm them first if possible.
Can I Use a Circular Saw Instead of A Wet Saw for Paver Cuts?
Yes, with a masonry blade installed. However, dust control will be poor, cuts may be less clean, and blade wear happens fast.
How Do I Fix a Paver that Was Cut Incorrectly?
Minor errors can be fixed with filing tools. For major mistakes, set aside the piece for smaller fill areas or order replacements.


