Are you tired of your garden hose lying in tangles around your yard? A messy hose is frustrating to use and can damage your plants. Fortunately, there’s a simple solution – a DIY wooden hose holder!
This project will help keep your hose organized and easily accessible while adding a touch of craftsmanship to your outdoor space. In this guide, I’ll walk you through creating a sturdy, attractive wooden hose holder using basic woodworking tools.
You’ll see exactly how to build this practical garden helper step by step, with all the measurements and techniques you need.
Let’s get started on solving your hose storage problems!
DIY Wooden Hose Holder: 5 Key Steps
Materials Required
| Material | Description |
|---|---|
| Hardwood boards | Oak, Sapili, White Oak, Ipe, or Red Grandis recommended |
| Stainless steel screws | 1¾” and 2″ lengths |
| Wood glue | For bonding wood pieces together |
| Wooden plugs | To cover screw holes |
| Mounting hardware | For attaching the holder to a wall or surface |
| Danish teak sealer/finish | Outdoor wood finish or sealer |
Tools Required
| Tool | Description |
|---|---|
| Table saw | For cutting wood to size |
| Miter saw | For precise angled cuts |
| Band saw | For curved cuts or intricate shapes |
| Router with roundover & cove bits | For shaping edges and curves |
| Drill press | For precise hole drilling |
| Belt sander | For smoothing and sanding surfaces |
| Clamps | To hold pieces together while assembling |
| Measuring tape | For measuring lengths and dimensions |
| Pencil | For marking measurements and cuts |
| A gallon of paint can | For tracing curves |
| Drill and bits | For drilling pilot holes |
| Countersink bit | For creating recessed holes for screws |
Now create a compelling hose Holder easily at home by following these steps, redesign your house space for that timeless chic look:
Step 1: Prepare the Main Panels
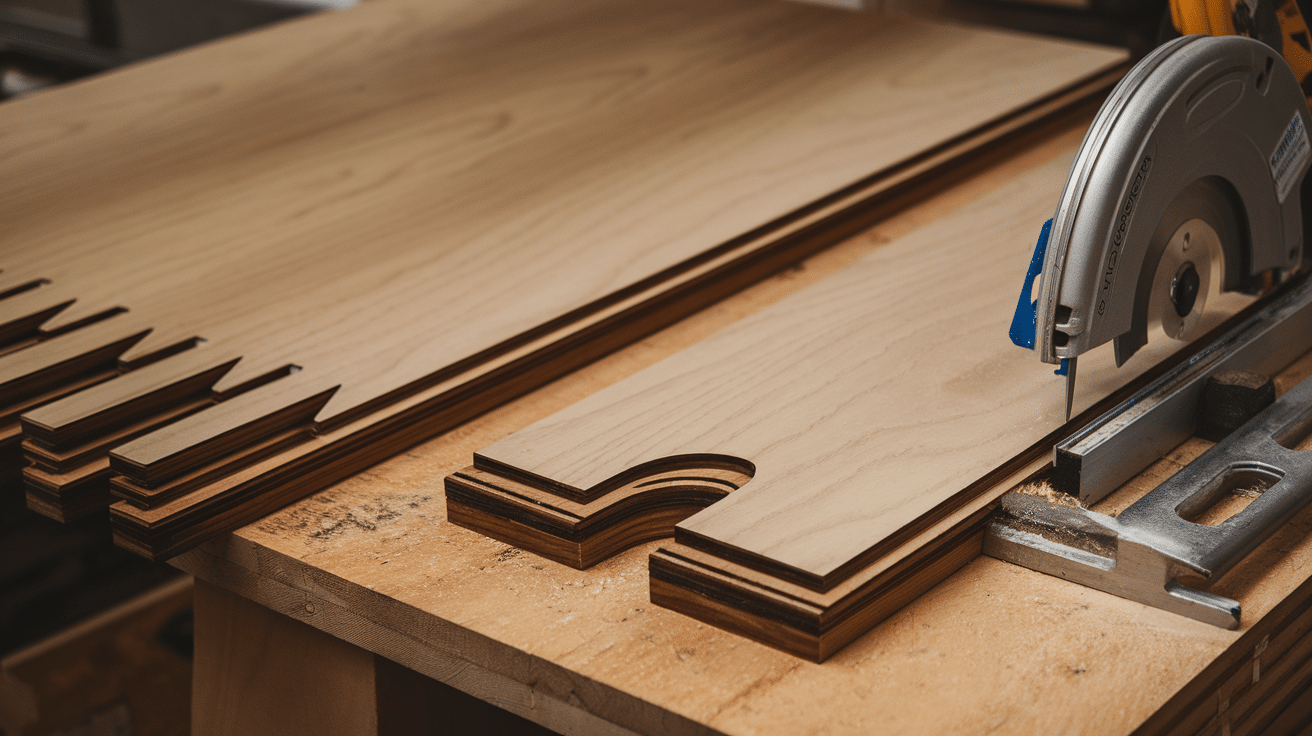
Start with hardwood boards like oak or ipe – avoid softwoods that won’t hold up outdoors. Cut the back panel to 15½ inches and add 45-degree angles at the bottom sides for style. For the front panel, use a gallon paint can to trace a curved top by marking 2 inches down from the top edge on both sides.
This curved design adds visual appeal while keeping the hose neatly contained. To save time switching router bits, cut all pieces to size first before moving on to edge treatments.
Step 2: Add Decorative Edge Details
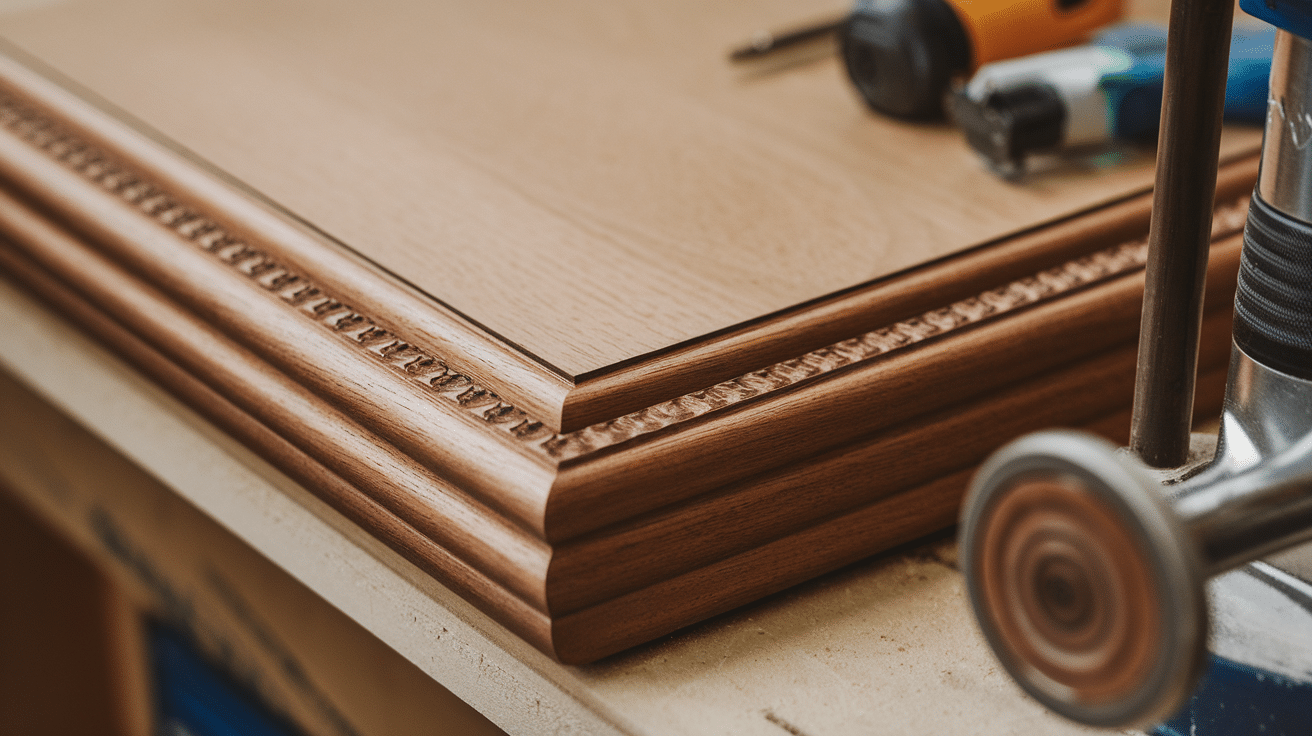
Install a roundover bit in your router to smooth the edges of all panels. This not only looks good but prevents the hose from getting damaged on sharp edges. Then switch to a cove bit to create decorative profiles on the edges of the back, front, and side panels.
Make marks 7 inches from the bottom as stopping points for these decorative treatments. These small details transform your project from plain to polished with minimal effort.
Step 3: Assemble the Frame
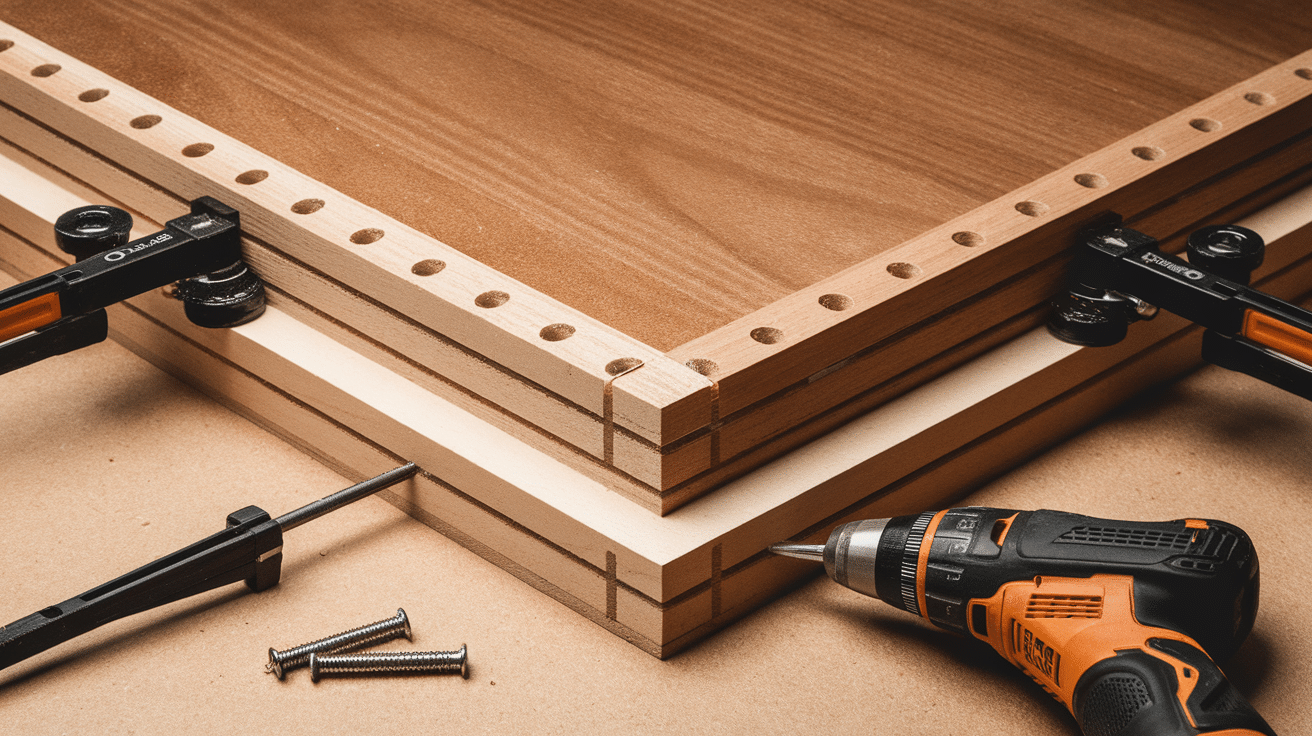
Position the side panels flush with the front panel and align the bottoms carefully. Pre-drill and countersink two holes per side to prevent wood splitting, which is especially important with hardwoods.
Apply wood glue to all joining surfaces, clamp the parts in position, and secure with 1¾-inch stainless steel screws for weather resistance. Proper alignment during this step ensures your hose holder will look professional and function correctly for years.
Step 4: Create and Attach the Nozzle Holder
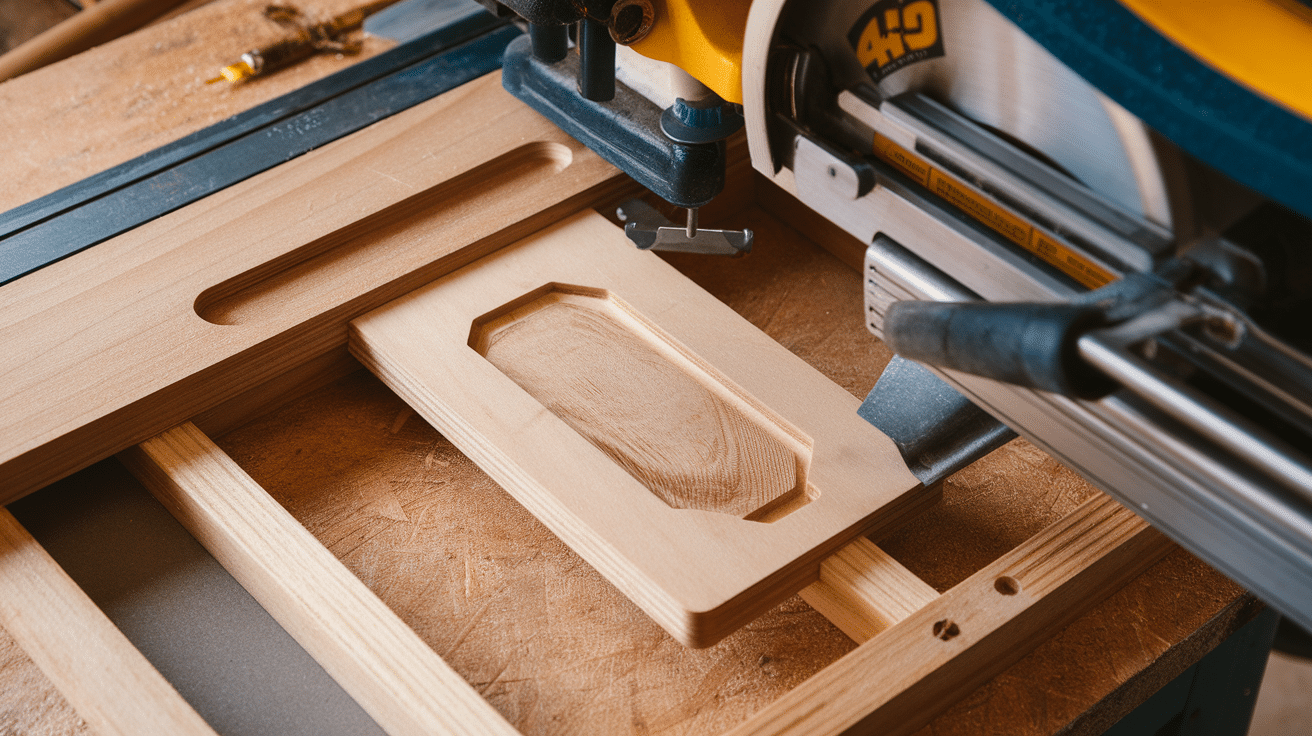
Rip a board to 1⅝ inches wide and draw the nozzle holder shape. Cut it out with a band saw and smooth the edges with a belt sander. Add roundover details to all edges for safety and appearance.
Center this piece on your assembly and secure it with two 2-inch stainless steel screws after pre-drilling and countersinking the holes. This practical addition keeps your hose nozzle off the ground and within easy reach.
Step 5: Finish and Mount
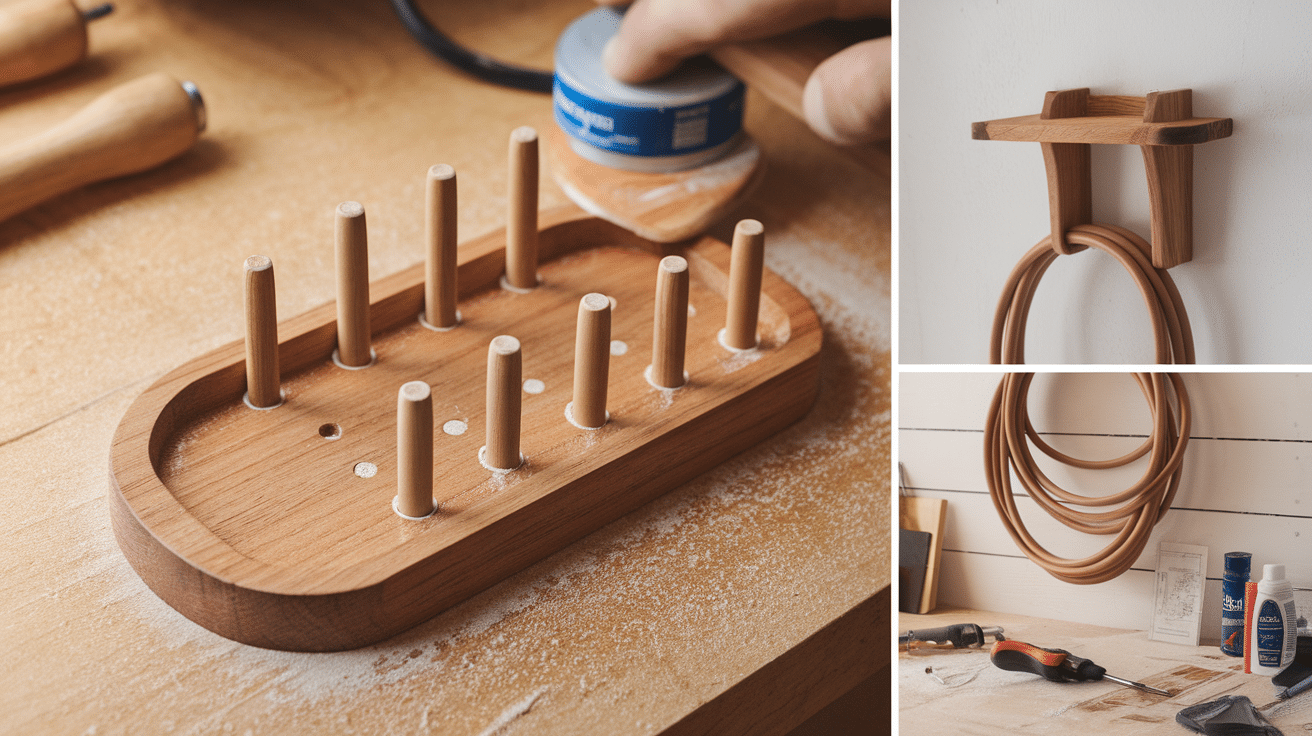
Fill all countersink holes with wooden plugs that match your wood. Sand the entire project thoroughly to ensure a smooth, splinter-free finish. Apply Danish teak sealer or another outdoor finish to protect the wood from moisture and UV damage.
Drill mounting holes based on your installation location, and use appropriate hardware for your wall type (brick, wood, vinyl, etc.). Mount the holder at a comfortable height, making sure it’s level for proper function and appearance.
I’d like to give credit to Jon Peters – Longview Woodworking for their informative video, which served as a reference for this guide.
Pro Tips For Success
- Cut all parts to size first, then do all roundover work at once, followed by all cove details. This saves time switching router bits back and forth.
- When routing stopped details, plunge the router bit into the wood before the stop line, then back up to the line for better control.
- Use clamps to hold small parts steady when sanding or routing them for safety and better results.
- Consider making multiple hose holders at once. The second and third are much faster to make once you have the process down.
- Use only stainless steel screws for outdoor projects to prevent rust stains on your wood.
- Pre-drill with a bit slightly smaller than your screw diameter to prevent splitting hardwoods.
- For mounting on brick, use masonry screws or anchors specifically designed for masonry applications.
Common Mistakes to Avoid When Building Your Hose Holder
Many first-time builders make simple mistakes that can reduce the lifespan of their wooden householder.
Using softwoods instead of hardwoods: Pine or cedar might be easier to work with and cheaper, but they won’t withstand outdoor conditions. These woods absorb moisture, warp, and can break when stressed by a heavy hose. Always choose oak, ipe, or similar hardwoods for projects exposed to weather.
Selecting the wrong screws (non-stainless steel): Regular steel or zinc-coated screws will rust quickly outdoors, creating stains on your wood and weakening the structure. Stainless steel screws cost more but provide lasting durability against rain and humidity without unsightly rust streaks.
Applying indoor finishes to outdoor projects: Standard polyurethane finishes break down quickly in sunlight and rain. They peel, crack, and leave your wood exposed to the elements. Use marine-grade finishes or Danish teak sealer specifically formulated for outdoor exposure and UV protection.
Conclusion
Now you have all the steps to build a practical, good-looking wooden hose holder for your home. This simple weekend project solves the common garden problem of tangled, messy hoses while adding a touch of craftsmanship to your outdoor space.
Remember to use hardwoods for durability and apply a quality outdoor finish yearly to protect your work. The beauty of this project is its simplicity – with basic tools and materials, you’ve created something both useful and attractive.
Ready to get started? Gather your materials, follow the steps we’ve outlined, and soon you’ll have a custom hose holder that keeps your garden tidy and your hose easily accessible. What other outdoor organization projects would you like to tackle next?
Frequently Asked Questions
How Long Does This Project Take to Complete?
Most DIYers can finish this project in 2-3 hours of active work. Allow additional time for glue drying and finish curing before outdoor use.
What Type of Wood Is Best for Outdoor Use?
Hardwoods Like Oak, Ipe, Sapili or Red Grandis Offer the Best Durability. Softwoods Like Pine Will Deteriorate Quickly when Exposed to Weather Conditions.
Do I Need Special Tools for This Project?
Basic Woodworking Tools, including a Table Saw, Miter Saw, Router, and Drill, Are Required. A Band Saw Helps with Curved Cuts, but Isn’t Absolutely Necessary.
How Do I Protect the Wood from the Weather?
Apply Danish Teak Sealer or Marine-Grade Finish with Uv Protection. Reapply Yearly to Maintain Protection Against Moisture and Sun Damage.
Can I Adjust the Size for Different Hoses?
Yes, simply modify dimensions to accommodate larger hoses. Increase the spacing between front and back panels for heavier or wider hoses.