Looking to build something useful but not sure where to start? I get it. Many beginners feel overwhelmed when faced with woodworking projects, thinking they need fancy tools or years of experience.
I promise you can build a beautiful footstool with basic tools and simple techniques. This step-by-step guide will show you exactly how to create a comfortable, sturdy footstool using walnut wood and upholstery techniques.
In this post, I’ll walk you through selecting materials, cutting wood with proper angles, assembling the base, creating a cushioned top, and finishing your piece like a pro. You’ll learn practical skills that apply to many future projects while making something you’ll actually use daily.
Let’s make your first woodworking project both manageable and rewarding.
Footstools: Symbols of Power Across Cultures
The tradition of symbolic footstools continued through many ancient cultures. In Biblical texts, footstools represented subduing enemies, with phrases like “until I make your enemies your footstool.” Medieval European royalty adopted similar customs, using elaborately carved footstools during throne ceremonies.
In China’s Ming Dynasty, footstools evolved into status markers with intricate designs reflecting the owner’s rank. The height of one’s footstool often correlated directly with social standing.
Viking chiefs used bear-skin-covered footstools to elevate their positions during important meetings. Japanese nobility preferred low-lacquered versions.
This humble furniture piece crossed cultural boundaries as both a functional item and a power symbol—a physical representation of being “above” others, literally and figuratively, throughout human history.
DIY Walnut Footstool with Upholstery: Step-by-Step Guide
Learn how to craft a stylish and durable walnut footstool with a comfortable upholstered seat in this detailed step-by-step guide.
Essential Tools and Materials for Building a Footstool
This list of essential tools and materials will help you successfully build a sturdy and comfortable footstool with a professional finish.
| Tool | Quantity | Purpose |
|---|---|---|
| Staple gun and staples | 1 | For attaching fabric to the footstool. |
| Box cutter or bread knife | 1 | To cut high-density foam and fabric. |
| Table saw | 1 | For cutting walnut wood pieces to size. |
| Sandpaper (including 400 grit) | Various sheets | For smoothing wood surfaces and finishes. |
| Pocket hole jig | 1 | For creating holes for screws to join parts securely. |
| Tape | 1 roll | For holding fabric in place while stapling or for measuring. |
| Rag for applying finish | 1 | For applying Danish Oil finish evenly. |
| Material | Quantity | Purpose |
|---|---|---|
| High-density foam | 1 sheet | For cushioning the footstool seat. |
| Walnut wood | Varies | For constructing the footstool’s frame and legs. |
| Polyfill | 1 bag | For additional padding beneath fabric if needed. |
| Fabric | 1 yard | To cover the footstool’s cushioned top. |
| Wood glue | 1 bottle | For joining wood pieces together. |
| Danish Oil Finish | 1 bottle | Finishing the wood gives it a rich, protective layer. |
| Screws | Varies | To secure wooden joints together. |
Step 1. Preparing the Foam Cushion

The foundation of comfort starts with good foam. I like to use firm, high-density foam that’s about 2-3 inches thick. Measure the size you want for your footstool top, adding a half-inch extra on all sides.
Mark these measurements clearly on your foam. Use a sharp bread knife for smooth cuts – long, sawing motions work best. Cut on a flat surface, and take your time. For curved corners, work slowly and trim gradually.
Step 2. Cutting the Wooden Base

Walnut gives this project a rich, warm look. Measure and mark your pieces to create a frame that will fit around your foam with about 1/4 inch clearance. Set your saw to exactly 45 degrees for clean miters.
Make test cuts on scrap wood first. After cutting, sand each piece with 120-grit sandpaper, then 220-grit for smoothness. Check that your mitered corners fit perfectly together before moving forward.
Step 3. Assembling the Base Frame
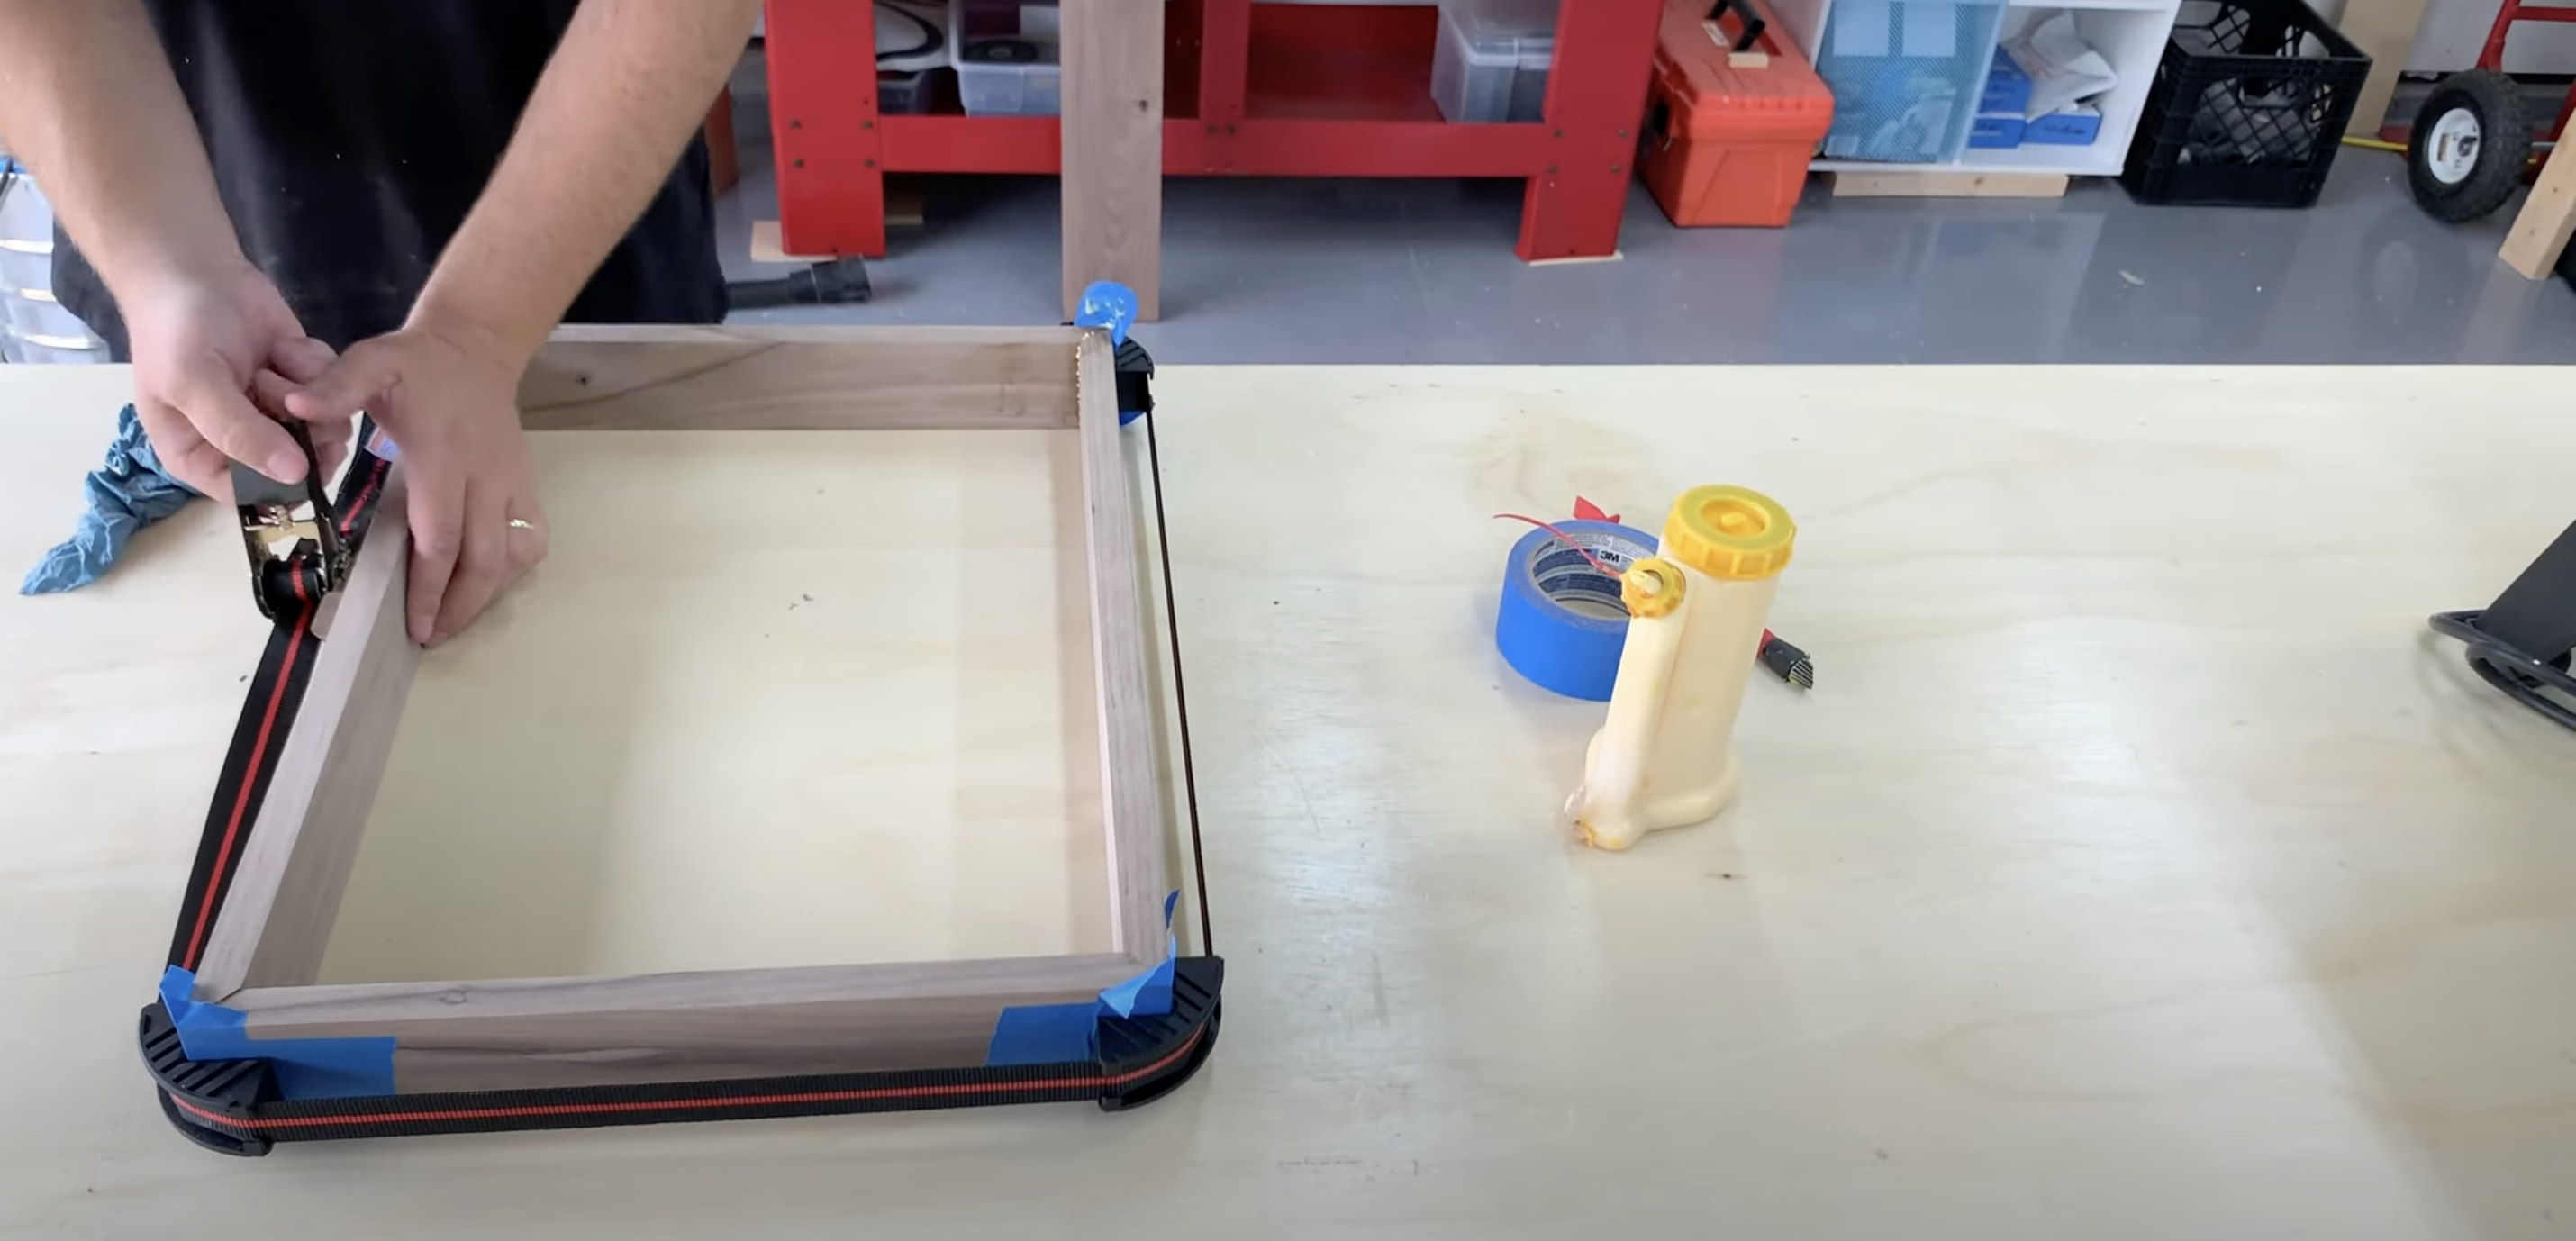
Apply wood glue to each mitered edge. Use a small brush for even coverage. Join the corners carefully, making sure they align perfectly. Wrap the frame with tape, pulling it tight to close any gaps.
Add corner clamps if you have them. Let this dry for a full 24 hours – no shortcuts! Keep the assembly flat on a level surface. Check occasionally during the first hour to make sure nothing has shifted.
Step 4. Creating the Upholstery Platform

This platform needs to fit inside your frame while supporting the foam. Measure the inside dimensions of your base frame and subtract 1/4 inch from each side.
Cut two identical pieces from thin plywood or MDF. These pieces should sit flat inside your frame. Sand the edges smooth to prevent them from catching on fabric later. Test the fit in your base frame before moving on.
Step 5. Adding the Polyfill Layer

Polyfill creates that soft, puffy look on top of your footstool. Lay your platform flat and place a generous amount of polyfill on top, adding extra thickness toward the center.
Start stapling from the middle of each side, pulling the polyfill gently toward the edges. At corners, pull firmly and add extra polyfill for roundness. Space staples about 1 inch apart. Trim any excess that hangs beyond the edges of the platform.
Step 6. Applying the Fabric Cover

Choose a fabric that matches your home and can handle daily use. Cut it about 4 inches larger than your platform on all sides. Center the fabric over the polyfill, pattern facing up.
Start with one staple in the middle of each side. Work opposite sides, pulling tight but not so tight that it distorts the fabric pattern. Fold the corners neatly like wrapping a present. Space staples about 1 inch apart. Trim excess fabric when done.
Step 7. Creating Attachment Points
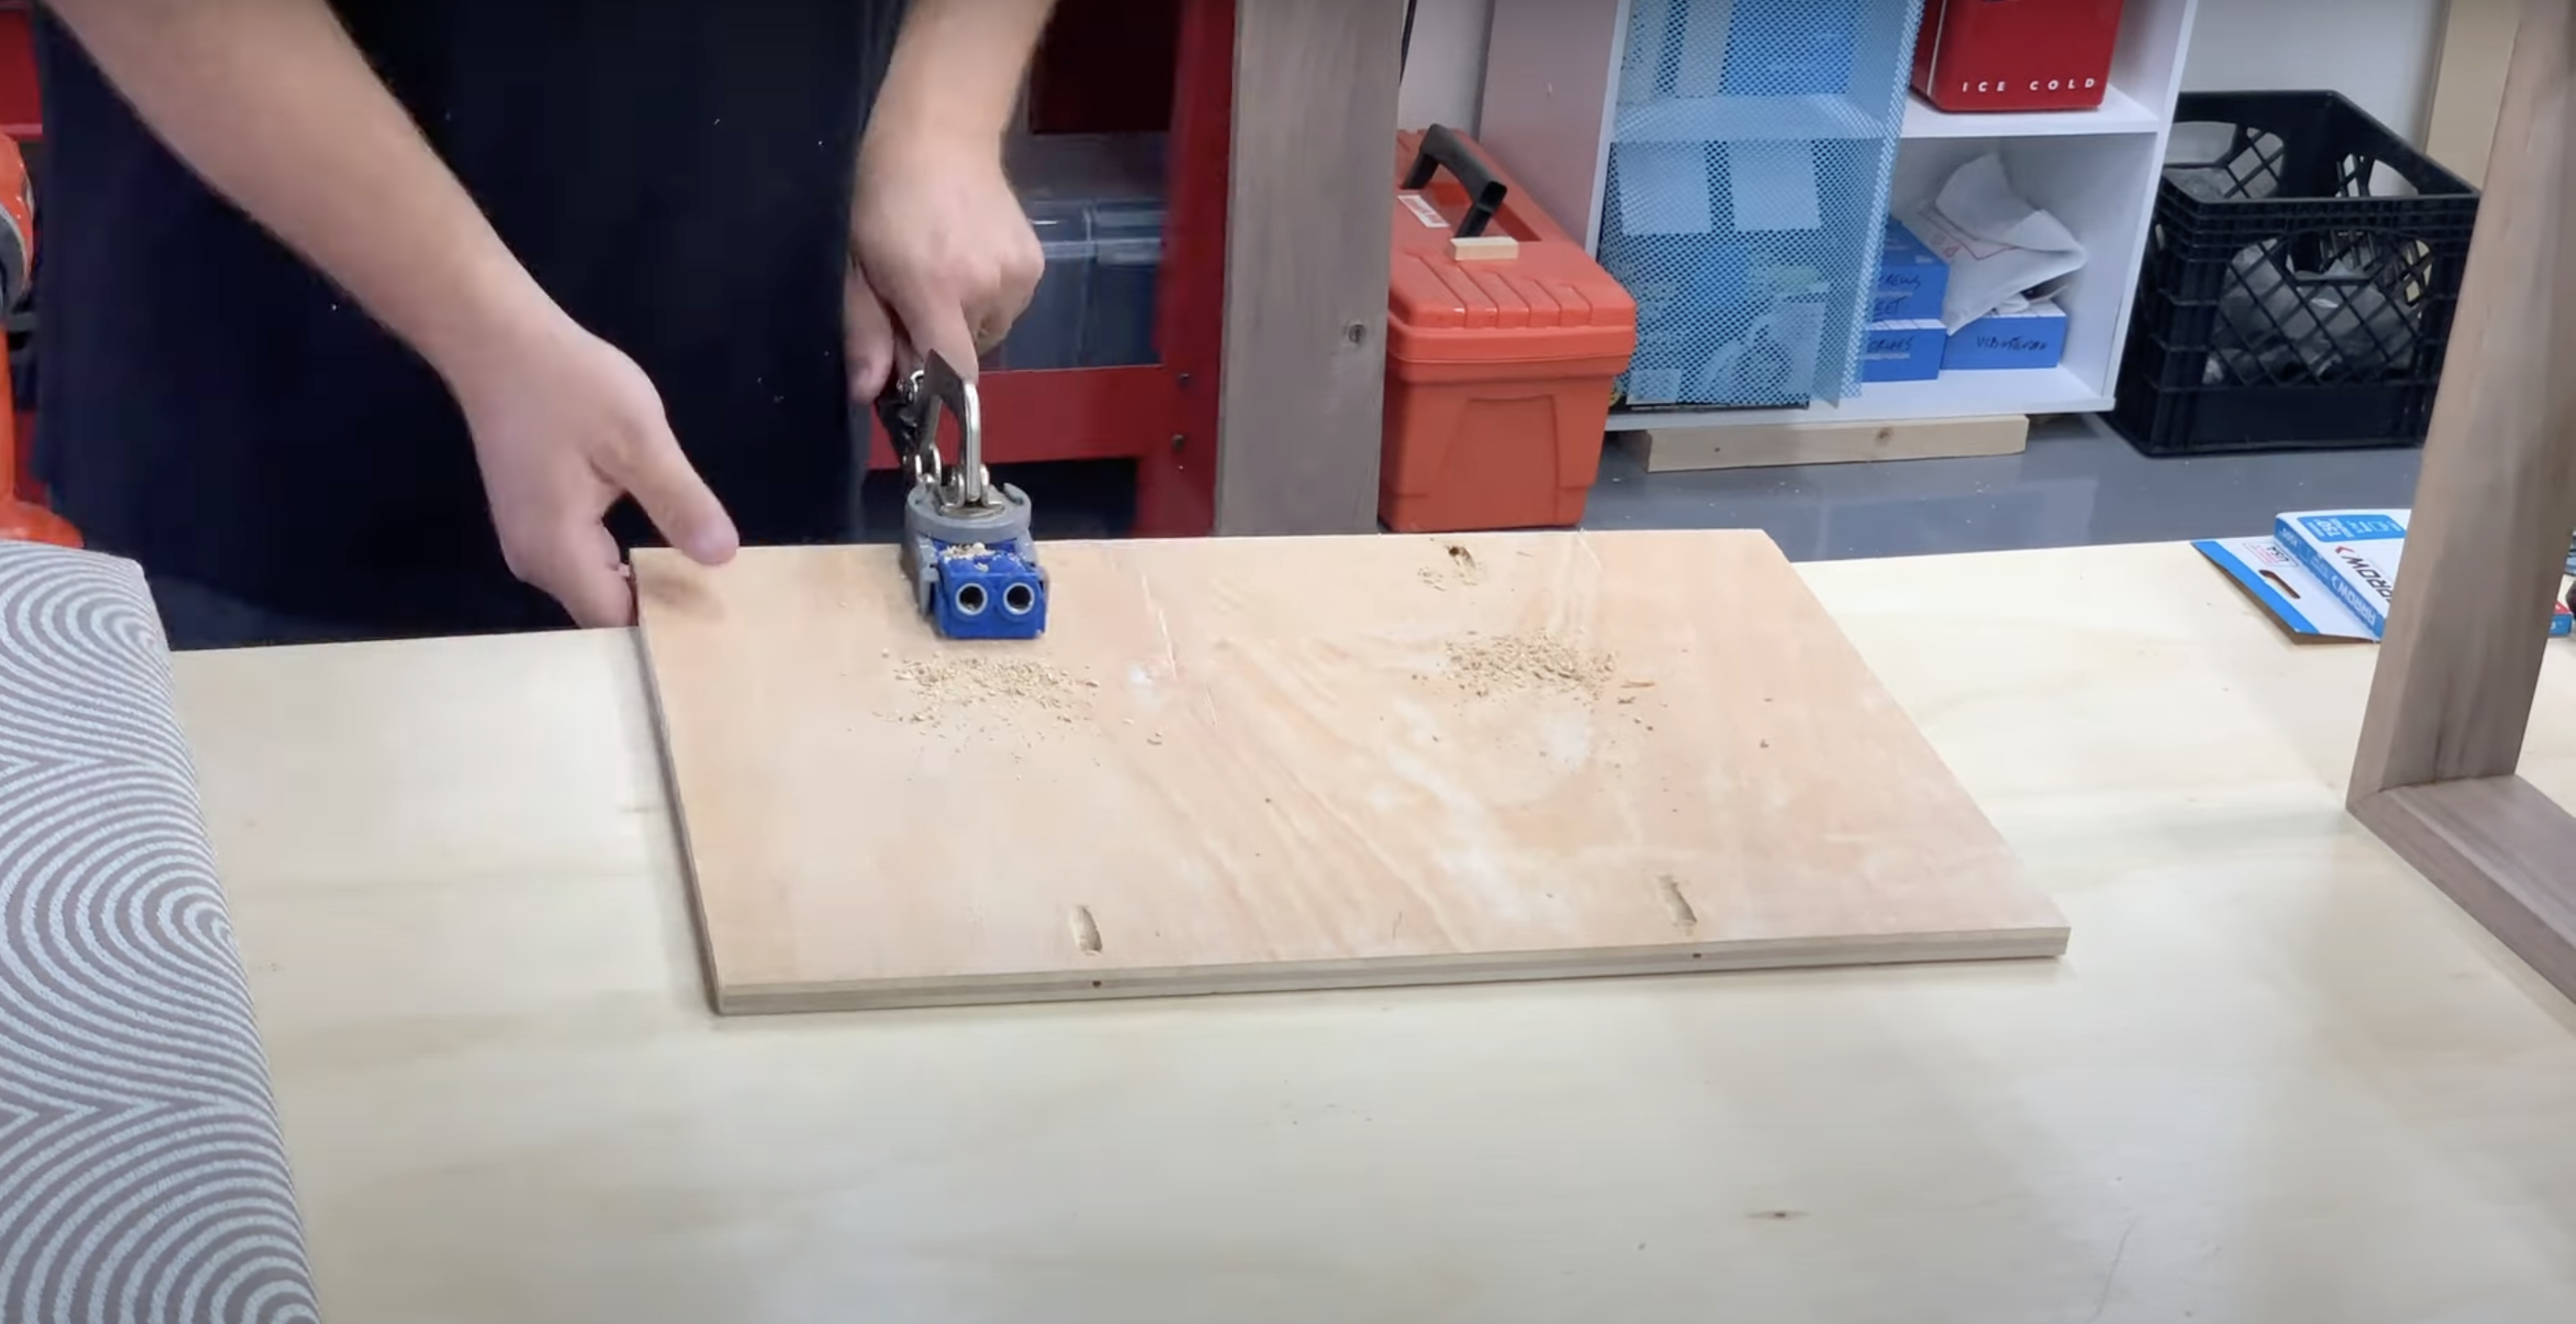
The cushion needs to connect securely to the base. Turn your platform over and mark spots for pocket holes – two on each side work well. Use a pocket hole jig to drill at proper angles.
Keep holes at least 1 inch from edges to prevent splitting. Make sure your screws will be short enough not to poke through the top. Test the placement by holding the platform inside your base frame.
Step 8. Crafting Angled Legs

Angled legs at 30 degrees create a more comfortable footrest position. Mark your cuts clearly on leg blanks. A miter saw works best for these precise angles. Cut slowly for clean edges.
Make all legs identical in length and angle. Test on a flat surface by holding it against your base. The slight forward tilt makes a big difference in comfort when using your finished footstool.
Step 9. Refining the Leg Joints

After cutting the basic leg shapes, you’ll notice excess wood at joint areas. Mark these areas with a pencil. Use a hand saw or band saw to trim away the extra material, following your marks closely.
Sand these cuts smooth, blending them into the leg shape. The goal is to make each leg look like one solid piece. Apply glue to joints and secure with clamps until fully dry.
Step 10. Sanding and Preparing for Finish

Start with 120-grit sandpaper on all wooden parts, moving to 220-grit for smoothness. Sand with the grain, never against it. Wipe all surfaces with a tack cloth to remove dust.
Apply Danish Oil with a clean cloth in thin, even coats. Let each coat dry completely – about 8 hours. Sand lightly with 400-grit between coats. Three coats usually give the best look.
Step 11. Ensuring Level Placement

After the legs are attached, place your footstool on a flat surface to check for wobbling. Mark any legs that need trimming. Make small cuts, checking frequently until all legs contact the floor evenly.
Use a sander to add a slight chamfer (about 1/8 inch) to the bottom edges of each leg. This prevents chipping when the stool is moved across the floor. Test again on several floor surfaces.
Step 12. Final Assembly

Position the legs against the base in their final locations. Mark screw hole positions clearly. Remove legs and drill pilot holes slightly smaller than your screws. Apply a drop of glue at each joint for extra strength. Drive screws carefully, not too tight.
Attach the cushion platform to the base using the pocket holes you created. Check all connections before considering the project complete.
Tips For Success
- When cutting foam, a bread knife works well for smooth, even cuts.
- Pull the fabric tight when stapling to avoid wrinkles.
- Add extra polyfill at the corners for a more rounded, comfortable look.
- Use 30-degree angles for legs instead of 45-degree for better ergonomics.
- Apply multiple thin coats of Danish Oil for a better finish than one thick coat.
- Let each coat of finish dry completely before sanding or applying the next coat.
Video Tutorial
Check out this YouTube video tutorial for detailed step-by-step guidance to make a footstool.
Footstool Upkeep: How to Keep It in Top Condition
Give your footstool regular attention with these simple care tips to keep it looking great for years to come.
1. Wooden Parts Care
The wooden parts of your footstool need regular attention. Dust them weekly with a soft cloth. Apply a thin coat of furniture wax or oil every six months to keep the wood from drying out. This helps prevent cracks and keeps the finish looking fresh.
2. Fabric Protection
Treat fabric with a stain guard spray before first use. Vacuum the fabric regularly with an upholstery attachment. Blot spills right away with a clean, dry cloth—never rub. For deeper cleaning, check the fabric type and use an appropriate cleaner.
3. Structural Checks
Check all joints and screws every few months. Tighten any loose screws. If the legs become wobbly, reglue loose joints. Look for any cracks in the wood and repair them early to prevent further damage.
4. Storage Tips
When not using the footstool for long periods, store it in a dry place. Avoid direct sunlight, which can fade the fabric and dry out the wood. Cover with a breathable cloth if storing for more than a month.
Common Mistakes to Avoid While Creating a Footstool
| Mistake | Description |
|---|---|
| Uneven Legs | Rushing the Measuring Stage Leads to Uneven Legs, Causing the Stool to Wobble. Double-Check Measurements Before Cutting to Avoid Frustration. |
| Premature Glue Use | Not Allowing Glue to Dry Fully Before Moving on To the Next Step. Wood Glue Needs at Least 24 Hours to Reach Full Strength. Moving Too Soon Can Weaken Joints. |
| Loose Fabric Stapling | Stapling Fabric Too Loosely Causes Wrinkles and Sagging. Pulling Too Tight at Corners Creates Puckers or Tears in the Fabric. |
| Skipping Sanding | Not Sanding Between Coats of Finish Leads to A Rough Texture Instead of A Smooth, Professional Appearance. |
| Screwing without Pre-Drilling | Using Screws without Pre-Drilling Splits the Wood, Particularly in Hardwoods Like Walnut. |
Conclusion
So there you have it—your very own handmade footstool! By following these simple steps, you’ve created something both beautiful and practical. The combination of solid walnut and soft upholstery makes this piece stand out from store-bought options.
Remember to check all joints regularly and treat both the wood and fabric with proper care. This will keep your footstool looking great for years to come.
What’s next for your woodworking expedition? Perhaps try one of the alternate designs I mentioned, or apply these same techniques to build a matching side table or stool.
I’d love to see how your project turned out! Drop a photo in the comments section below, or share any questions you had during the building process.
Your feedback helps other beginners gain confidence in their woodworking skills, too.
Frequently Asked Questions
1. What Are the Benefits of A Footstool?
Footstools provide comfort by supporting the feet, improve posture by allowing proper alignment, reduce leg strain during sitting, and can double as extra seating or storage in small spaces.
2. What Is the Best Material for A Footstool?
Fabric footstools offer comfort and style variety. Leather provides durability and easy cleaning. Wood gives sturdy support. The best material depends on your needs for maintenance, comfort, and room design.
3. What Is Another Name for A Cushioned Footstool?
An ottoman is another name for a cushioned footstool. Poufs and hassocks are also common terms. These pieces serve the same function but may have slight style differences in various home settings.