Do you find store-bought barstools too costly? Many homeowners face this issue. Making your barstools from scrap oak gives you full control over height, style, and finish while saving money.
This guide shows you how to build sturdy, good-looking oak barstools without fancy tools or skills. You’ll learn each step, from cutting wood to adding the final coat. By the end, you’ll have seats that will last for years in your kitchen.
The process is simpler than most think, and the results will make you proud each time guests sit on your handmade stools. Plus, you’ll gain valuable skills that apply to many other home projects.
These handmade stools allow you to match your kitchen perfectly, unlike mass-produced options that might not fit your space.
Why Handcrafted Barstools Are a Great Idea
Making your barstools yourself offers many benefits beyond cost savings. You can build them to match your kitchen’s style and height needs.
Store-bought options often come in limited sizes and designs, but with DIY, you control every aspect of the project. Working with oak gives your barstools lasting strength. Oak has been used for furniture for hundreds of years because it stands up to daily use.
Your handmade stools will likely outlast many store options, which often use less sturdy materials to save on costs.
What You’ll Need to Build Barstools: Tools & Materials
| Tools | Materials |
|---|---|
| Band saw | Oak boards (scrap works well) |
| Drill | Wood glue (Tight Bond 3 recommended) |
| Impact driver | Pocket hole screws (fine thread) |
| Router | Pocket hole plugs (oak) |
| Clamps | Wood finish (polyurethane) |
| Sander | Sandpaper (various grits) |
| Pocket hole jig | |
| Measuring tape | |
| Square blocks | |
| Stop collar for drill bit. |
Step-by-Step Guide to Building Oak Barstools
Building oak barstools is a rewarding project that allows you to craft stylish, sturdy seating for your kitchen or bar area. Here’s a simple guide to help you create your oak barstools step by step.
Step 1: Prepare Your Wood Pieces

Start by cutting all wood pieces to size. For the back legs, cut longer pieces that extend up for the backrest support. The front legs can be shorter. If using scrap wood, you may need to laminate (glue together) multiple pieces to get the proper thickness.
Mark the top of the back legs where you’ll need to cut an angle for the backrest. This angle makes the stool more comfortable than a straight 90-degree backrest.
Step 2: Cut and Shape the Legs

Take your marked back legs to the band saw and cut the angled tops. This creates the proper tilt for the backrest. Save these cutoffs, as they can be useful for other projects. If you’re laminating pieces for the front legs, apply glue between each layer and clamp firmly.
A helpful trick: clamp multiple laminations at once by staggering your clamps. Let the glue dry completely before moving to the next step.
Step 3: Prepare the Seat Blanks

Create seat blanks by gluing boards side by side. If your boards vary in thickness, plane them to equal thickness first. Use foot clamps to keep everything level during gluing. Make sure you get good squeeze-out along all joints, as these will be highly visible on the finished stool.
Wipe away excess glue before it dries. Let the seats dry completely before moving on.
Step 4: Add Pocket Holes

Drill pocket holes in the cross-pieces that will connect the legs. Since you’re using oak, be sure to use fine-thread pocket hole screws to prevent splitting. Set up your pocket hole jig according to the thickness of your wood.
Keep the pocket holes on sides that won’t be visible when the stool is upright, or plan to fill them with plugs later.
Step 5: Assemble the Stool Frames
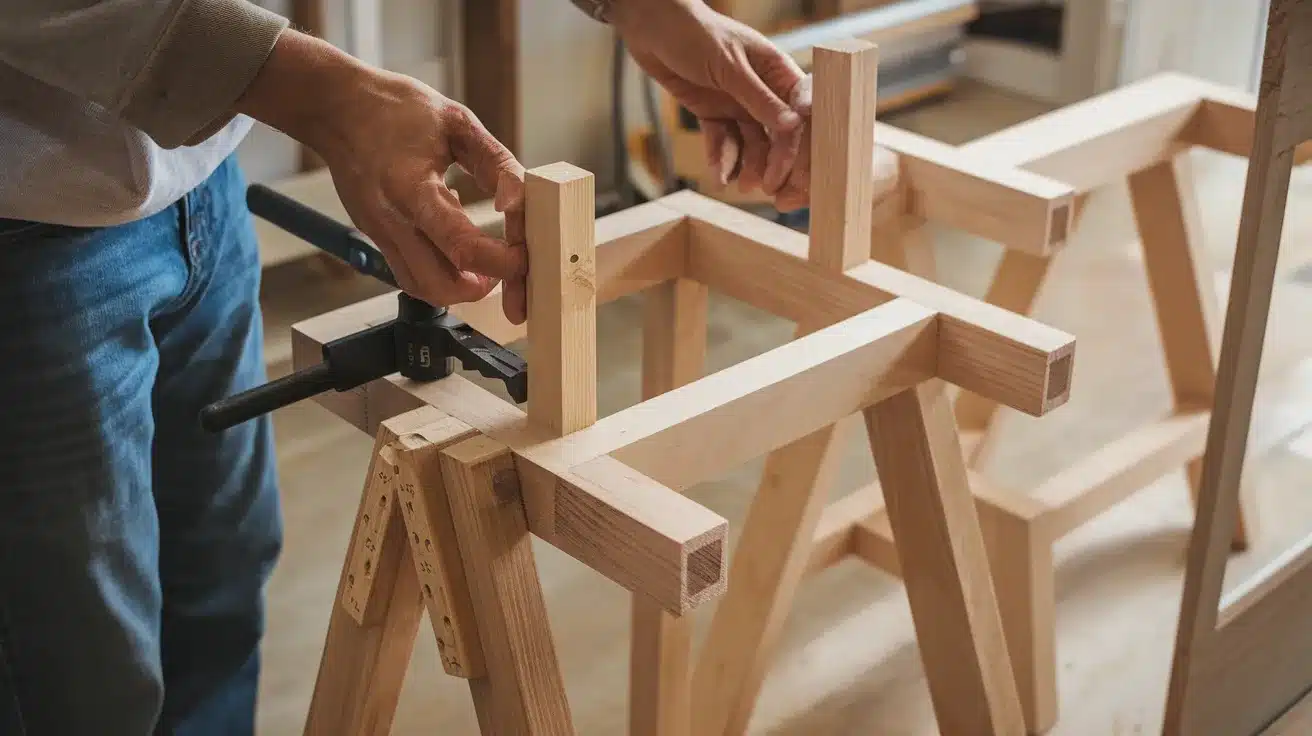
Begin by assembling the two side frames. Use 1-2-3 blocks to keep everything square as you work. Add a bar clamp to hold pieces together while driving in screws. Go slowly when driving screws into oak to prevent splitting.
Once both sides are assembled, connect them with the cross pieces. For the lower support, you can drill straight through and use plugs to hide the screw heads.
Step 6: Attach the Seat and Backrest

Drill pocket holes in the underside of the seat for attachment. Use a stop collar on your drill bit to prevent drilling through the seat surface. Attach the seat to the frame with pocket hole screws. For the backrest, attach it at the angle you cut earlier.
Some holes will be visible, so use oak pocket hole plugs with a small amount of glue to fill these gaps.
Step 7: Round the Edges and Sand

Use a router to round all edges that will contact with users, including the seat edges and backrest. The routing step makes a huge difference in how finished the stools look and how comfortable they feel.
After routing, sand all parts thoroughly, starting with medium-grit sandpaper and working up to fine-grit sandpaper for a smooth finish that’s ready for staining or finishing.
Step 8: Apply the Finish

Apply a durable finish to protect your barstools and bring out the natural beauty of the oak. Polyurethane in semi-gloss works well for kitchen furniture that sees daily use.
Apply thin coats with a brush or cloth, letting each coat dry completely before lightly sanding and applying the next. For maximum durability in a kitchen setting, apply at least three coats, following the product instructions for drying times.
If you prefer a more vintage aesthetic, learn how to age wood to give your barstools a charming, timeworn appearance.
Video Tutorial
Special thanks to Ben Grimsley Woodworking for providing valuable insights in their video, which I referenced while creating this guide.
Safety First: DIY Barstool Construction Tips
- Always wear eye protection – Wood chips and dust can cause serious eye injuries, so never skip safety glasses, even for quick cuts.
- Use hearing protection with loud power tools – Power tools can damage your hearing permanently, so earplugs or muffs are essential when operating noisy equipment.
- Wear a dust mask when cutting or sanding – Wood dust, especially from hardwoods like oak, can harm your lungs, so proper breathing protection is a must.
- Understand how to use your tools safely – Read the manuals and learn proper techniques before operating any tool to prevent dangerous accidents.
- Keep your work area clean and uncluttered – A messy workspace leads to trips, falls, and other accidents that can ruin your project or cause injuries.
- Secure your workpiece before cutting or drilling – Loose materials can shift or kick back during work, so always use clamps or vises to hold pieces firmly in place.
Barstool Style Variations for Every Taste and Trend
| Style | Description |
|---|---|
| Modern Style | Sleek lines, minimalist design, and light finishes. |
| Farmhouse Style | Rustic touches like distressed wood, natural finishes, and comfy seat pads. |
| Industrial Style | Combining wood with metal accents for a more rugged look. |
| Mid-Century Modern Style | Clean lines with a retro vibe, focusing on tapered legs and smooth finishes. |
| Boho or Eclectic Style | How to mix different materials and colors to create a unique, laid-back vibe. |
Conclusion
You’ve now learned how to build strong, good-looking oak barstools that will serve your kitchen for years. The process takes time, but it costs much less than buying ready-made stools of similar quality.
The skills you’ve gained from this project will also help with future furniture building. Remember that wood needs time—time for glue to dry, time for the finish to cure, and time for you to work carefully.
Don’t rush any step. If you make a mistake, it’s often fixable. The most important thing is that you made these with your own hands. These stools aren’t just places to sit; they’re proof of what you can create.
Why not try making matching coasters for your new kitchen setup next?
After completing your barstools, consider adding a DIY bar cart with custom artwork to further personalize your entertaining space.
Frequently Asked Questions
1. How Long Does It Take to Build These Barstools?
For a first-time builder, expect to spend a weekend on this project, including drying time for glue and finish.
2. Can I Use Pine Instead of Oak for This Project?
Yes, pine works well and is cheaper, but switch to coarse-thread pocket screws and know the seats may dent more easily.
3. What Height Should I Make My Barstools?
For standard 42-inch bars, make 30-inch stools; for 36-inch counters, make 24-inch stools.
4. Do I Need Special Tools to Make These Barstools?
Most steps can be done with basic tools, but a pocket hole jig makes the project much faster and stronger.