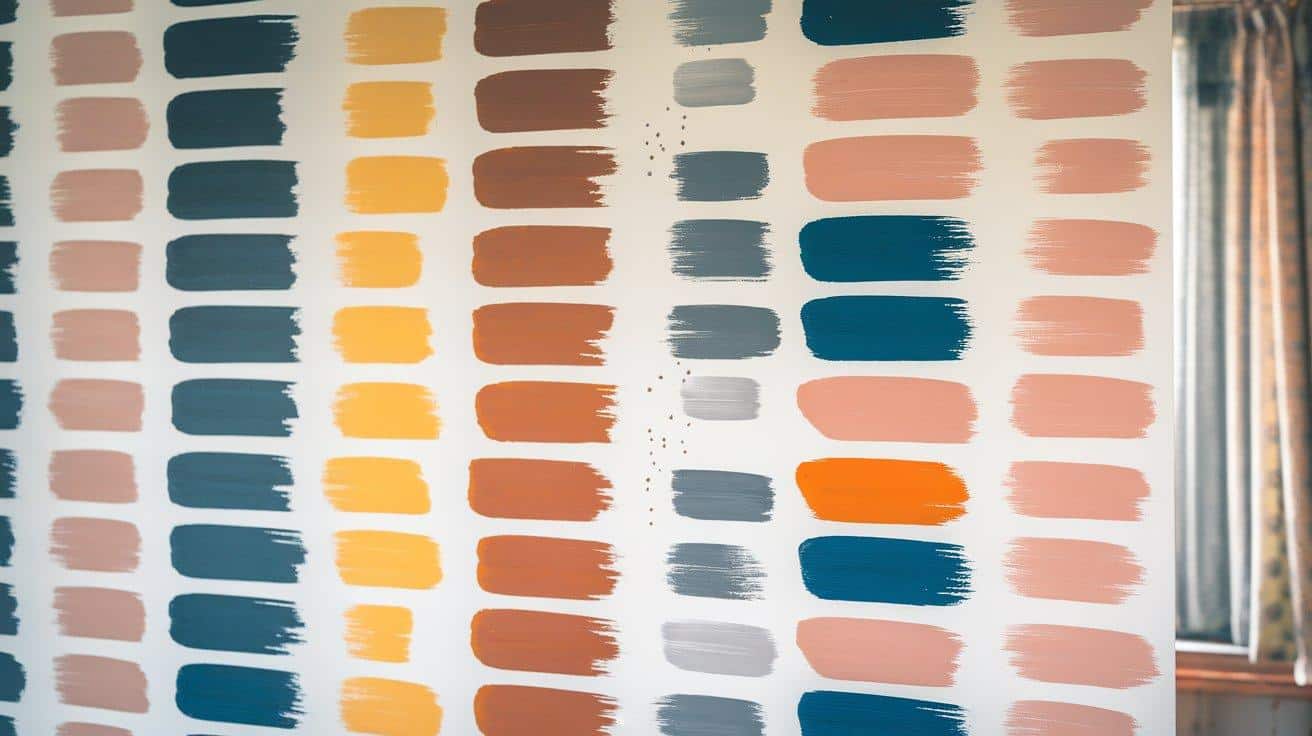
Love the look of custom wallpaper but not the price tag? Convert your walls with paint instead! This faux wallpaper technique gives you complete control over colors, patterns, and style—all at a fraction of the cost.
Create a unique watercolor-inspired wall treatment that adds character and visual interest to any room. The intentionally imperfect brush strokes create a designer look that’s completely customizable to your space.
There is no need to commit to expensive pre-made patterns when you can craft your bespoke wall design. This approachable project is suitable for DIYers of all skill levels and can be completed in a weekend.
Get ready to unleash your creativity and turn ordinary walls into gorgeous statement pieces!
Using Faux Wallpaper for Temporary Spaces
Faux wallpaper is not just for permanent home makeovers; it’s also an excellent choice for temporary spaces that need a quick, stylish transformation.
Whether you’re redesigning a party room, an event venue, or even a home office that changes with the seasons, faux wallpaper offers a flexible and removable solution without the commitment of traditional wallpaper.
Because it’s easy to apply and just as easy to remove, faux wallpaper allows you to refresh the look of a space in no time. It’s a fantastic option for renting, hosting, or any temporary design project.
You can create a stunning environment that suits your needs, whether it’s for a single event or a changing theme, and remove it just as easily when you’re done.
Tip: For frequently redesigned spaces, choose a matte finish to hide damage and use peelable wallpaper adhesive or easy-to-clean paint for hassle-free removal.
Step-By-Step Guide to Creating Faux Wallpaper with Paint
Tools and Materials Needed:
| Item | Purpose |
|---|---|
| Base coat paint (neutral shade) | Creates a foundation for design |
| Colored paints (quarts or samples) | Main colors for pattern creation |
| Paint glaze | Creates the translucent watercolor effect |
| Water | Adjusts paint consistency |
| Various paintbrushes (including 1-inch) | Apply paint with different stroke styles |
| Level | Ensures a straight baseline for the pattern |
| Painter’s tape | Protects trim and adjacent surfaces |
| Sample boards | Test techniques before wall application |
| Paint trays | Holds paint mixtures |
| Mixing containers | Creates custom paint formulations |
| Clean rags | Wipes spills and adjusts paint application |
| Drop cloths | Protects flooring |
| Ladder or step stool | Reaches higher wall areas |
| Measuring tape | Ensures consistent pattern spacing |
Step 1: Prepare Your Walls
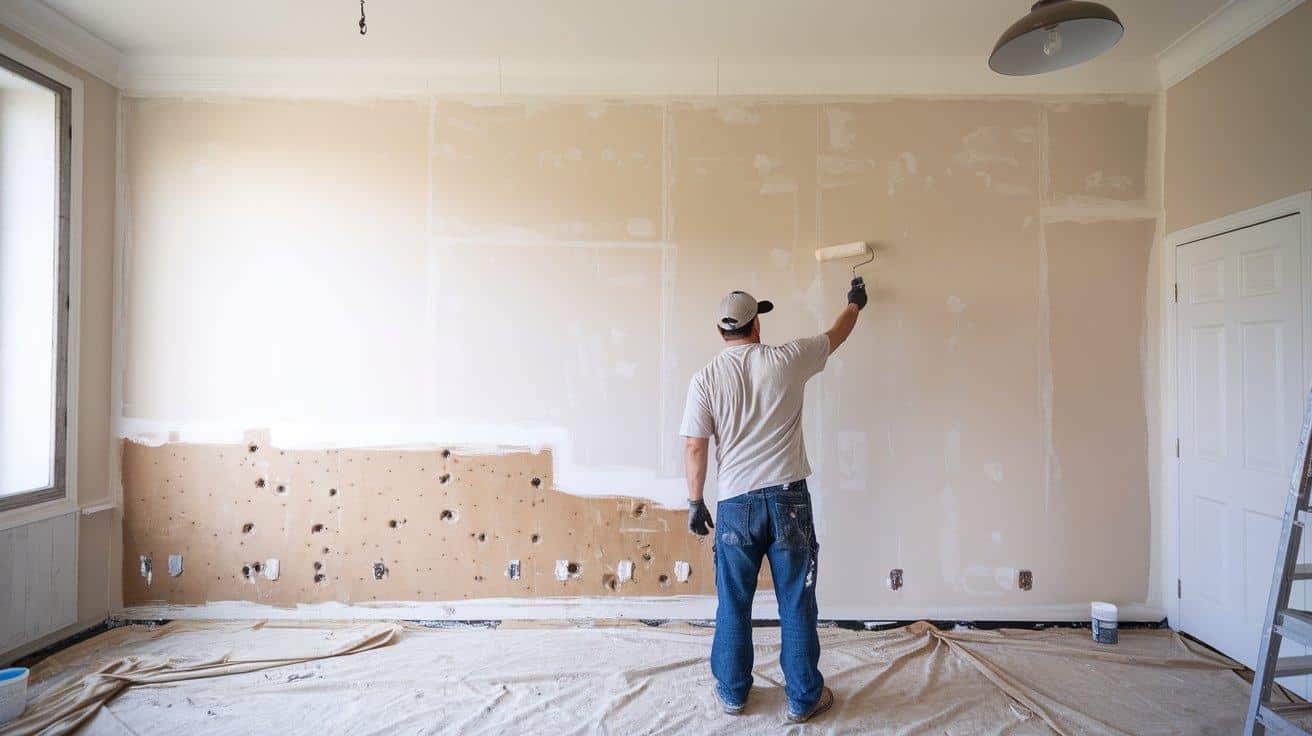
Start by thoroughly cleaning your walls to remove dust, dirt, or grease, ensuring a smooth surface for painting. Fill any holes or cracks with spackling compound and sand them down once dry for an even finish. Carefully apply painter’s tape around the edges to protect trim, windows, and doors.
Lay down drop cloths to safeguard your floors from paint spills and splatters. If your walls are dark or uneven, apply a primer and let it dry completely before moving on.
Step 2: Select Your Color Palette
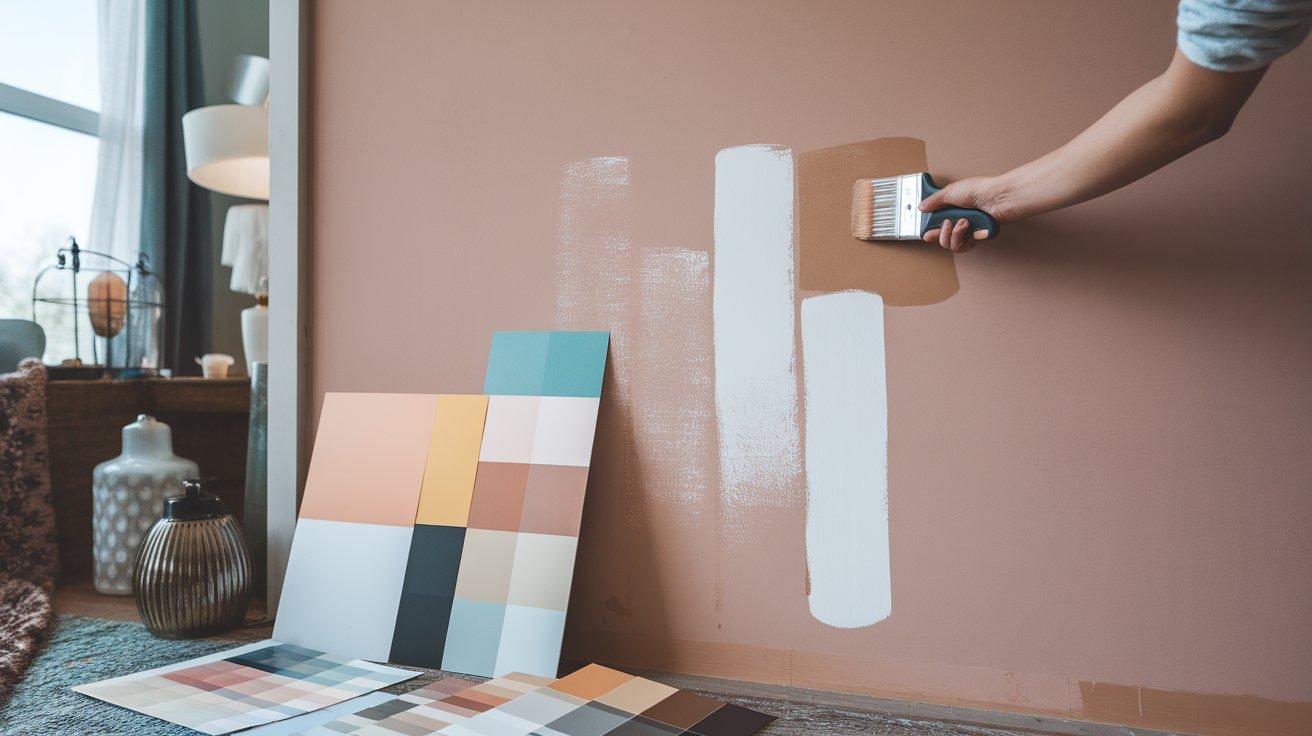
Choose paint colors that will either complement or contrast with your existing décor, depending on the mood you want to create. Bright and bold colors make a statement, while softer, muted tones offer a more subtle and calming effect.
Consider how your chosen colors will appear under different lighting conditions throughout the day. Testing colors directly on your wall or creating a mood board can help you visualize the outcome. Take your time in this step to ensure your colors harmonize well together.
Step 3: Create Your Paint Mixture

To achieve a translucent, watercolor-like effect, mix your paint with glaze and a small amount of water. Start by combining 1 to 2 tablespoons of paint with 4 ounces of glaze, then add just a touch of water to thin the mixture. Test this blend on a sample board to check for smoothness and translucency.
Adjust the amounts as needed to get the perfect consistency that suits your style. Keep notes of your mixture proportions so you can replicate the effect consistently throughout your project.
Step 4: Practice Brush Techniques and Design Your Pattern
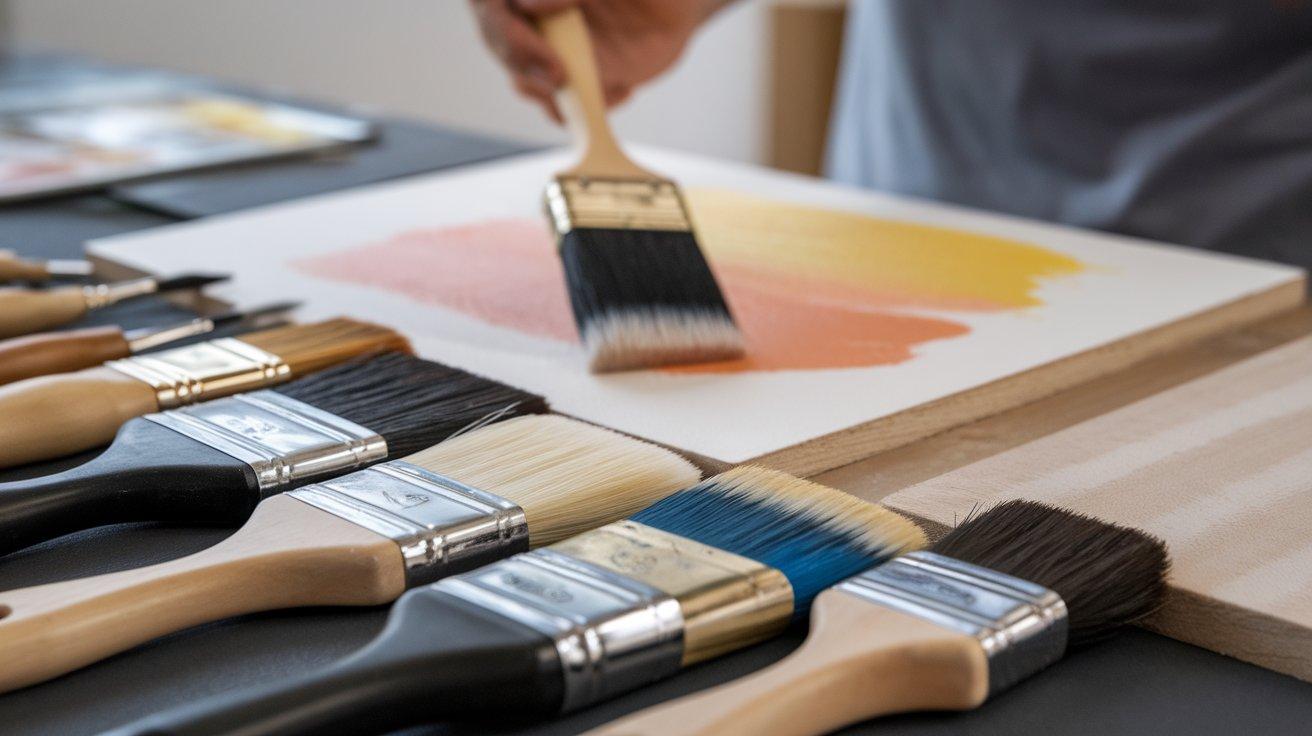
Use a sample board to experiment with different brushes and stroke techniques to create various lengths, widths, and textures. Practice applying different pressures to understand how it affects the paint strokes. Once comfortable, make a small-scale version of your pattern on the sample board to see how colors and spacing interact.
Sketch a simple guide design on your wall or draw light pencil lines using a level to help keep your pattern aligned. Remember, the beauty of this design comes from its imperfect, handcrafted nature, so embrace slight variations.
Step 5: Create Your First Row
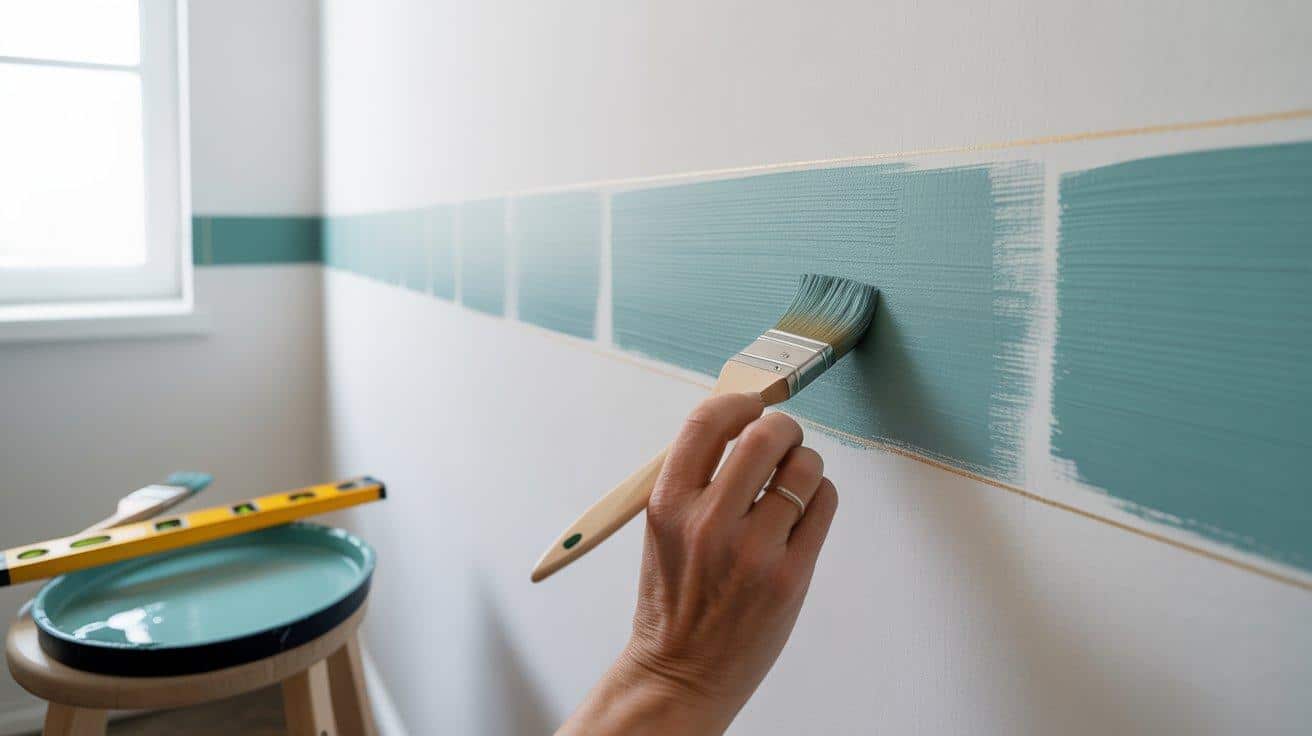
Use a level to lightly mark a straight pencil line on your wall to guide your first row of paint strokes. Begin painting the first color using the brush technique you practiced, maintaining even spacing between each stroke.
Take your time and step back frequently to ensure your strokes are aligned and balanced. This initial row is crucial as it sets the foundation and tone for the rest of your pattern. Don’t rush—accuracy here makes the next steps much easier.
Step 6: Continue the Pattern
After completing your first row, move on to adding additional rows, working either horizontally or vertically as your design dictates. Use the previous rows as a reference point, but don’t worry about perfect precision—small inconsistencies add charm and character.
Keep refreshing your paint mixture as needed to maintain consistency in color and texture. Regularly step back to assess the overall balance and flow of your pattern across the wall. Enjoy the process, knowing that the imperfect, hand-painted look is what makes your wall unique.
Video Tutorial
I want to give credit to Lowe’s Home Improvement for their informative video, which served as a reference for this guide.
Looking to explore more creative wall treatments? Learn how to convert your space with DIY Wallpaper Stamps: Creating a Custom Wall Art and add a personalized touch to any room!
Creative Faux Wallpaper Ideas to Recast Your Walls
Explore unique and artistic ways to convert your space with customized faux wallpaper designs.
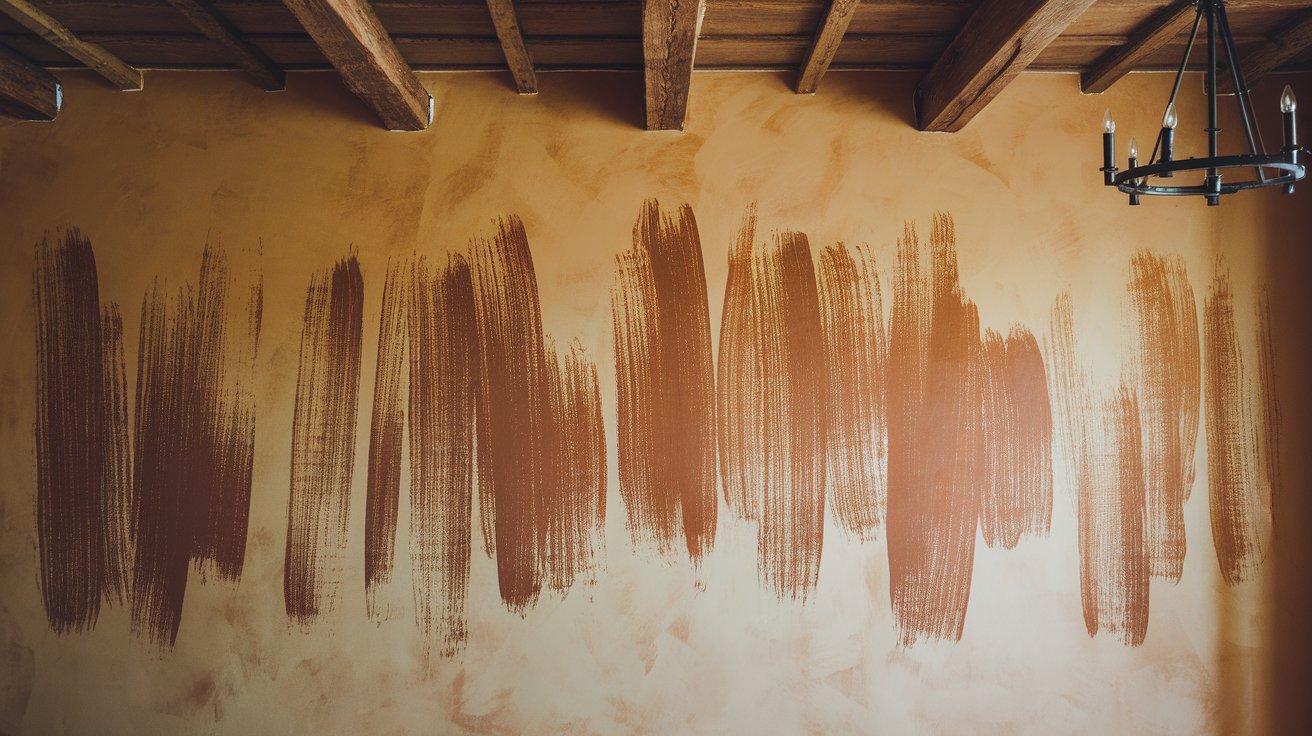
1. Watercolor Effect
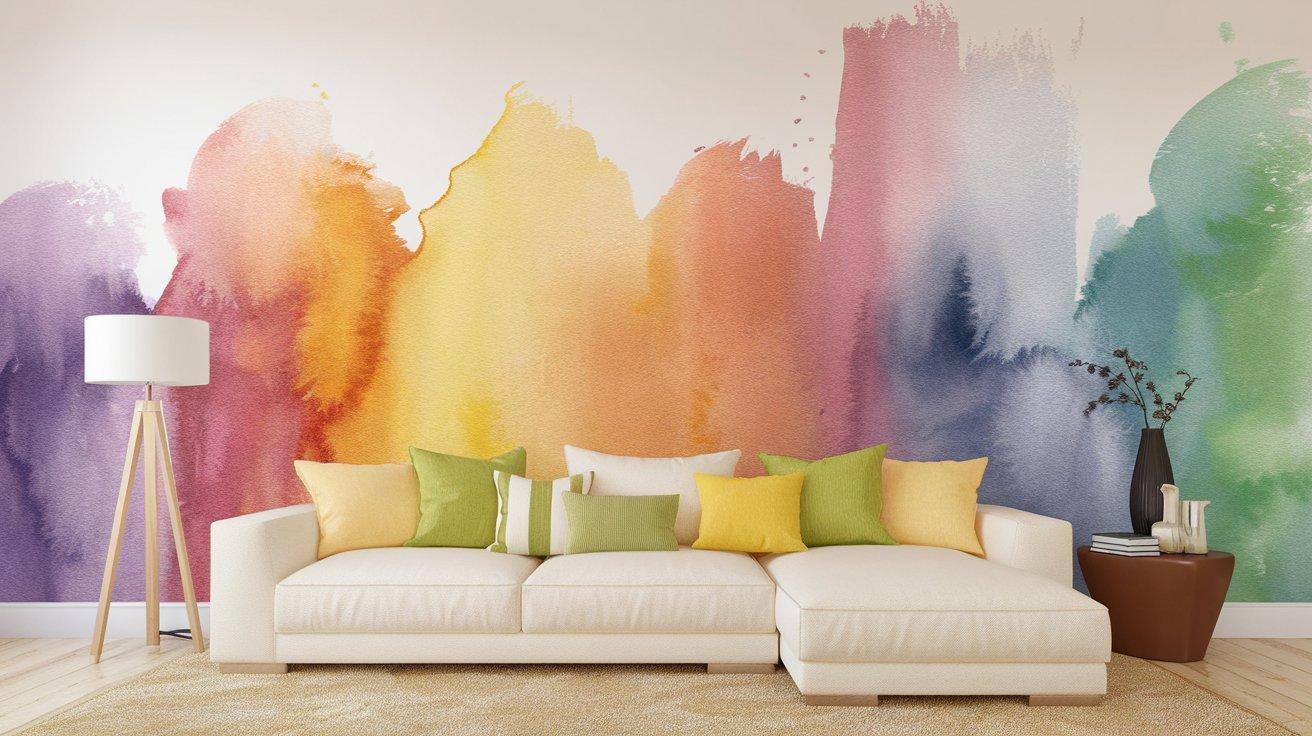
Apply translucent, flowing brush strokes in complementary or contrasting colors to create a soft, serene look. This technique mimics the look of watercolor art, adding depth and a dreamy feel to the space.
It’s perfect for bedrooms or living rooms where you want to evoke calmness and creativity. You can experiment with different shades of a single color or blend multiple hues for a unique look.
2. Geometric Patterns
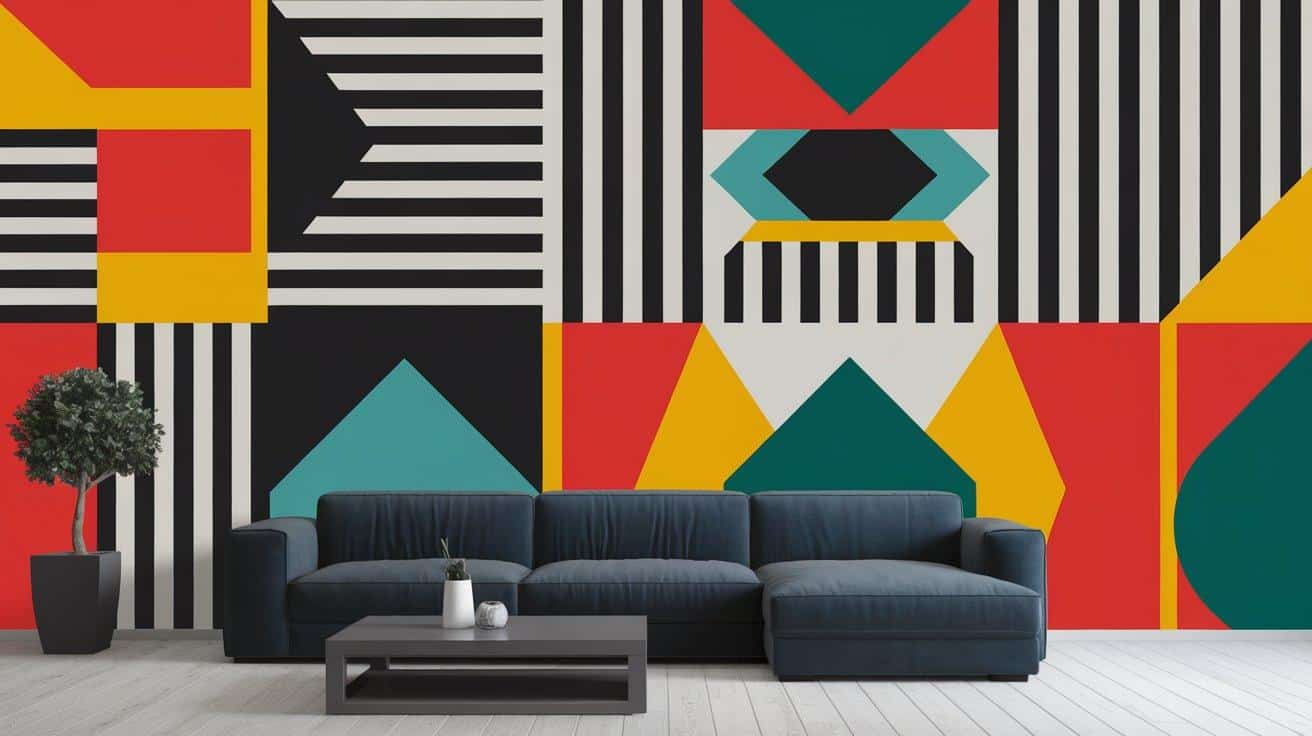
For a modern and clean artistic, try geometric patterns such as stripes, triangles, diamonds, or squares. These designs bring a structured and dynamic feel to the room.
Whether you go bold with contrasting colors or subtle with neutral tones, geometric shapes are ideal for a statement wall in living rooms, offices, or even as an accent wall in hallways.
3. Organic Shapes
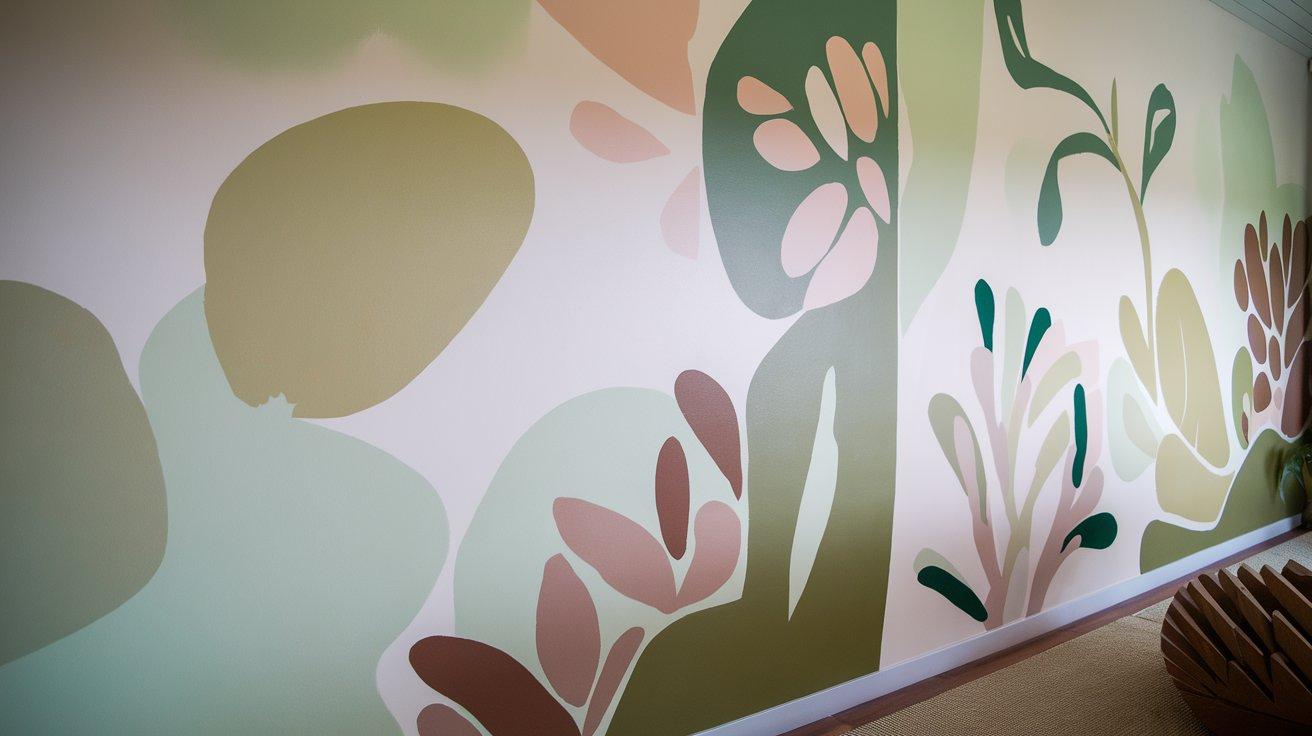
Bring nature indoors with organic, free-flowing shapes like leaves, vines, or abstract floral designs. These patterns can add a natural, earthy touch to your space, perfect for creating a calming environment.
Choose soft green and beige tones for a subtle vibe or bold, vibrant colors for a more playful look. This design works well in kitchens, bathrooms, or even areas like a meditation room.
4. Textured Brush Strokes
Add depth and dimension to your walls with textured brush strokes that mimic the look of fabric or a textured wallpaper. This design can create a luxurious and sophisticated feel without the cost of actual textured wallpaper.
It’s a great choice for living rooms, dining areas, or entryways, adding visual interest without overwhelming the space. The slight imperfections in the brush strokes will give the wall an artisanal, hand-crafted look.
5. Color Blocking
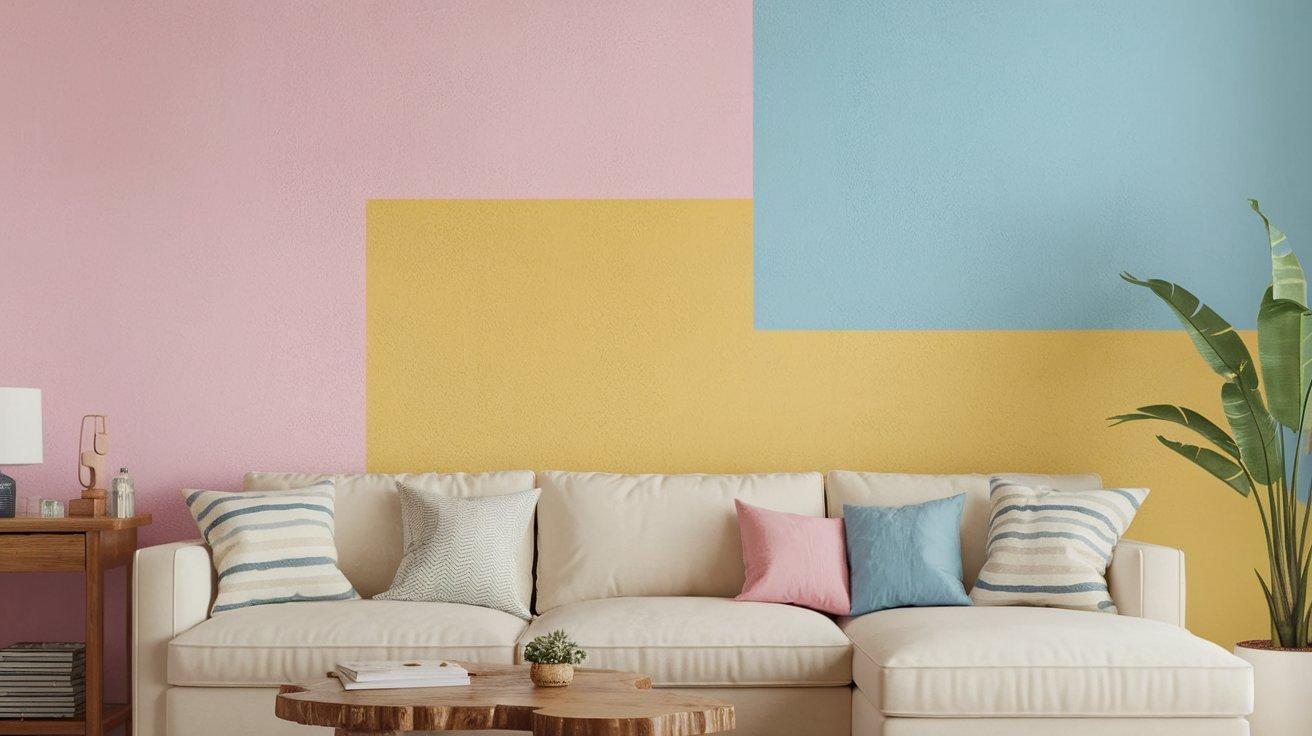
Color blocking involves applying blocks of contrasting or complementary colors in large, flat sections. This technique can add bold visual impact to a room while still feeling modern and chic.
Opt for soft pastel blocks for a calm, minimalistic look or bright, contrasting blocks for a statement-making design. This style is perfect for accent walls in living rooms, bedrooms, or even kitchens, bringing a pop of color and personality to any space.
6. Tonal Gradient
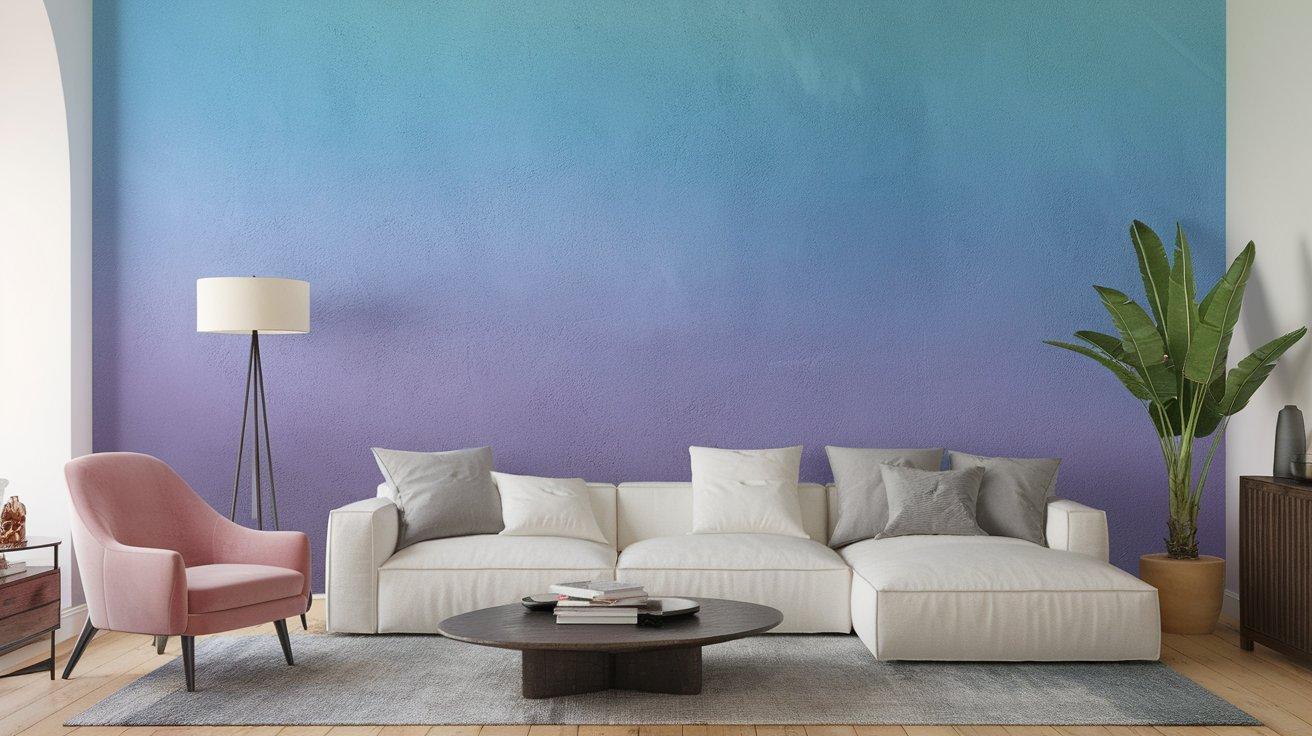
A gradient effect, where one color gradually fades into another, can create an eye-catching and dynamic feature wall. You can choose to use shades of the same color for a subtle fade or combine contrasting hues for a bolder look.
This design adds depth and sophistication to the wall, making it perfect for larger areas or accent walls behind furniture in living rooms, bedrooms, or hallways. The gradual change in color can make a room feel more expansive and visually engaging.
Benefits of Faux Wallpaper
-
Complete Customization
Faux wallpaper allows you to design your look by choosing colors, patterns, and textures that fit your style and complement your space. Whether you want a subtle watercolor effect or bold geometric patterns, you have full creative control. -
Affordable and Cost-Effective
Traditional wallpaper, especially designer options, can be expensive when factoring in both the wallpaper and professional installation costs. Faux wallpaper provides a high-end look at a fraction of the price, allowing you to achieve stunning results without breaking the bank. -
Easy DIY Installation
Unlike traditional wallpaper, faux wallpaper doesn’t require professional installation. With the right tools and a little time, you can complete the project yourself, making it a fun and rewarding DIY activity. You’ll save money on labor and have the satisfaction of creating something unique. -
Flexibility to Change or Refresh
One of the main benefits of faux wallpaper is its flexibility. If you tire of the design or want a new look, you can paint over your faux wallpaper and start fresh. This is much easier than removing traditional wallpaper, giving you the freedom to change your space whenever you like. -
Durability and Long-Lasting Quality
Faux wallpaper tends to be more durable than traditional paper wallpaper, which can peel or tear over time. When applied properly, the painted design is resistant to damage, fading, and general wear and tear, making it a lasting addition to your walls. -
Low Maintenance and Easy Care
Faux wallpaper is easier to maintain than traditional wallpaper. It’s simple to clean with just a soft cloth or mild soap solution, making it ideal for high-traffic areas or spaces that require regular upkeep. It doesn’t have seams that could peel or gather dust, reducing the need for constant touch-ups.
Tips for Maintenance and Care of Faux Wallpaper
-
Cleaning: Dust regularly with a microfiber cloth or duster, and for deeper cleaning, use a mild soap solution. Always test in an inconspicuous area first to avoid damaging the paint. Avoid harsh chemicals or abrasives.
-
Touching Up: Store extra paint for easy touch-ups. Clean the damaged area, then carefully recreate the original pattern with the same paint and brush. Blend the strokes for a seamless repair.
-
Preventing Fading: Minimize sunlight exposure with UV-filtering window treatments and proper ventilation in humid areas. Consider a protective clear topcoat, and use fade-resistant paints for better longevity.
-
Refreshing: For minor touch-ups, apply new paint over worn areas. For a more thorough refresh, add a translucent wash or complementary strokes to revive the design.
-
Transitioning: When changing designs, apply primer over the existing wall to seal it, then paint a new design or color. Save photos of your original work as a reminder of your creative effort.
Things to Avoid When Creating Faux Wallpaper with Paint
| Issue to Avoid | Consequence/Solution |
|---|---|
| Too much water in the mixture | Causes drips – stick to the recommended ratio of paint, glaze, and minimal water. |
| Skipping test phases | Leads to unpredictable results – always test techniques on sample boards first |
| Crowded pattern placement | Creates a cluttered look – maintain consistent spacing between elements |
| Perfectionism | Results in stiff appearance – embrace the “perfectly imperfect” nature |
| Using poor-quality materials | Affects durability – invest in good brushes and quality paint products |
Conclusion
Creating faux wallpaper with paint is a fun and affordable way to add a personal touch to your space. This DIY technique allows you to break free from pre-made designs, offering complete creative control over patterns and colors.
With no need for professional expertise, you can achieve impressive results that celebrate handcrafted beauty.
Beyond artistic satisfaction, faux wallpaper saves money, perfectly coordinates with your décor, and allows you to update your design whenever you wish.
Why settle for ordinary walls when you can create a custom masterpiece?
Frequently Asked Questions
How to Paint Over Wallpaper without Seams Showing?
To paint over wallpaper without seams showing, prime the wall to seal seams, then apply thin, even coats of paint. Sand between coats for a smooth finish and use a matte or eggshell paint to minimize seam visibility.
How Do You Prepare a Painted Wall for Wallpaper?
Clean the wall, sand lightly, fill any holes, and apply a primer for wallpaper adhesion. Let it dry before applying the wallpaper.
What Is Hand Painted Wallpaper Called?
Hand-painted wallpaper is often called “murals” or “hand-painted murals.” Depending on the style and technique used, it can also be referred to as “custom-painted wallpaper” or “artisan wallpaper.