Laundry rooms often become cluttered for a simple reason. We use them daily but rarely show them any love.
Piles of clothes, detergent bottles, and random items find a home in this forgotten space.
A laundry room renovation isn’t just about looks. It’s about making a useful, well-ordered space that makes chores less of a chore.
Small changes can impact this area of your home. Fresh paint, better storage, and smart sorting systems can change how you feel about doing laundry.
The magic of fixing your laundry room lies in the details. Better lighting, smart shelving, and proper work zones can turn a chaotic corner into a calm, efficient space.
Are you ready to transform your messy laundry zone into a place that works for you? Let’s examine how to do that.
Essentials You’ll Need
Before starting your laundry room renewal, you’ll need the right tools and materials. Good preparation improves the workflow and helps avoid multiple trips to the store.
| Category | Item |
|---|---|
| Building Materials | Wood boards for shelving Wood for countertops Pin nailer |
| Flooring | Vinyl tiles (Saddle Gray) Grout Floor cleaner |
| Paint & Finish | Light gray wall paint Darker gray shelf paint Adhesive glue Caulk Liquid nails |
| Repair Tools | Wood filler Sanding tools Measuring tape Razor blade Clamps |
| Storage & Style | Baskets Glass jars Simple decor items |
The right tools make all the difference in updating a laundry room. Having these items ready before you start will save you time and stress. The goal is to create a space that works well and looks good simultaneously.
Step-by-Step Makeover Guide
A complete guide to changing your messy laundry space into an organized, functional room that makes washing clothes less of a chore, all without breaking the bank or requiring professional skills.
Step 1: Decluttering, Planning & Prepping

First, remove items you don’t need and keep only true laundry essentials. Remove old cabinet doors and patch any holes with wood filler, sanding until smooth.
Plan your layout carefully to include open shelving that best uses your space. Pick colors that work well together, such as light gray for walls and darker gray for shelves.
Step 2: Upgrading the Flooring Vinyl Tiles
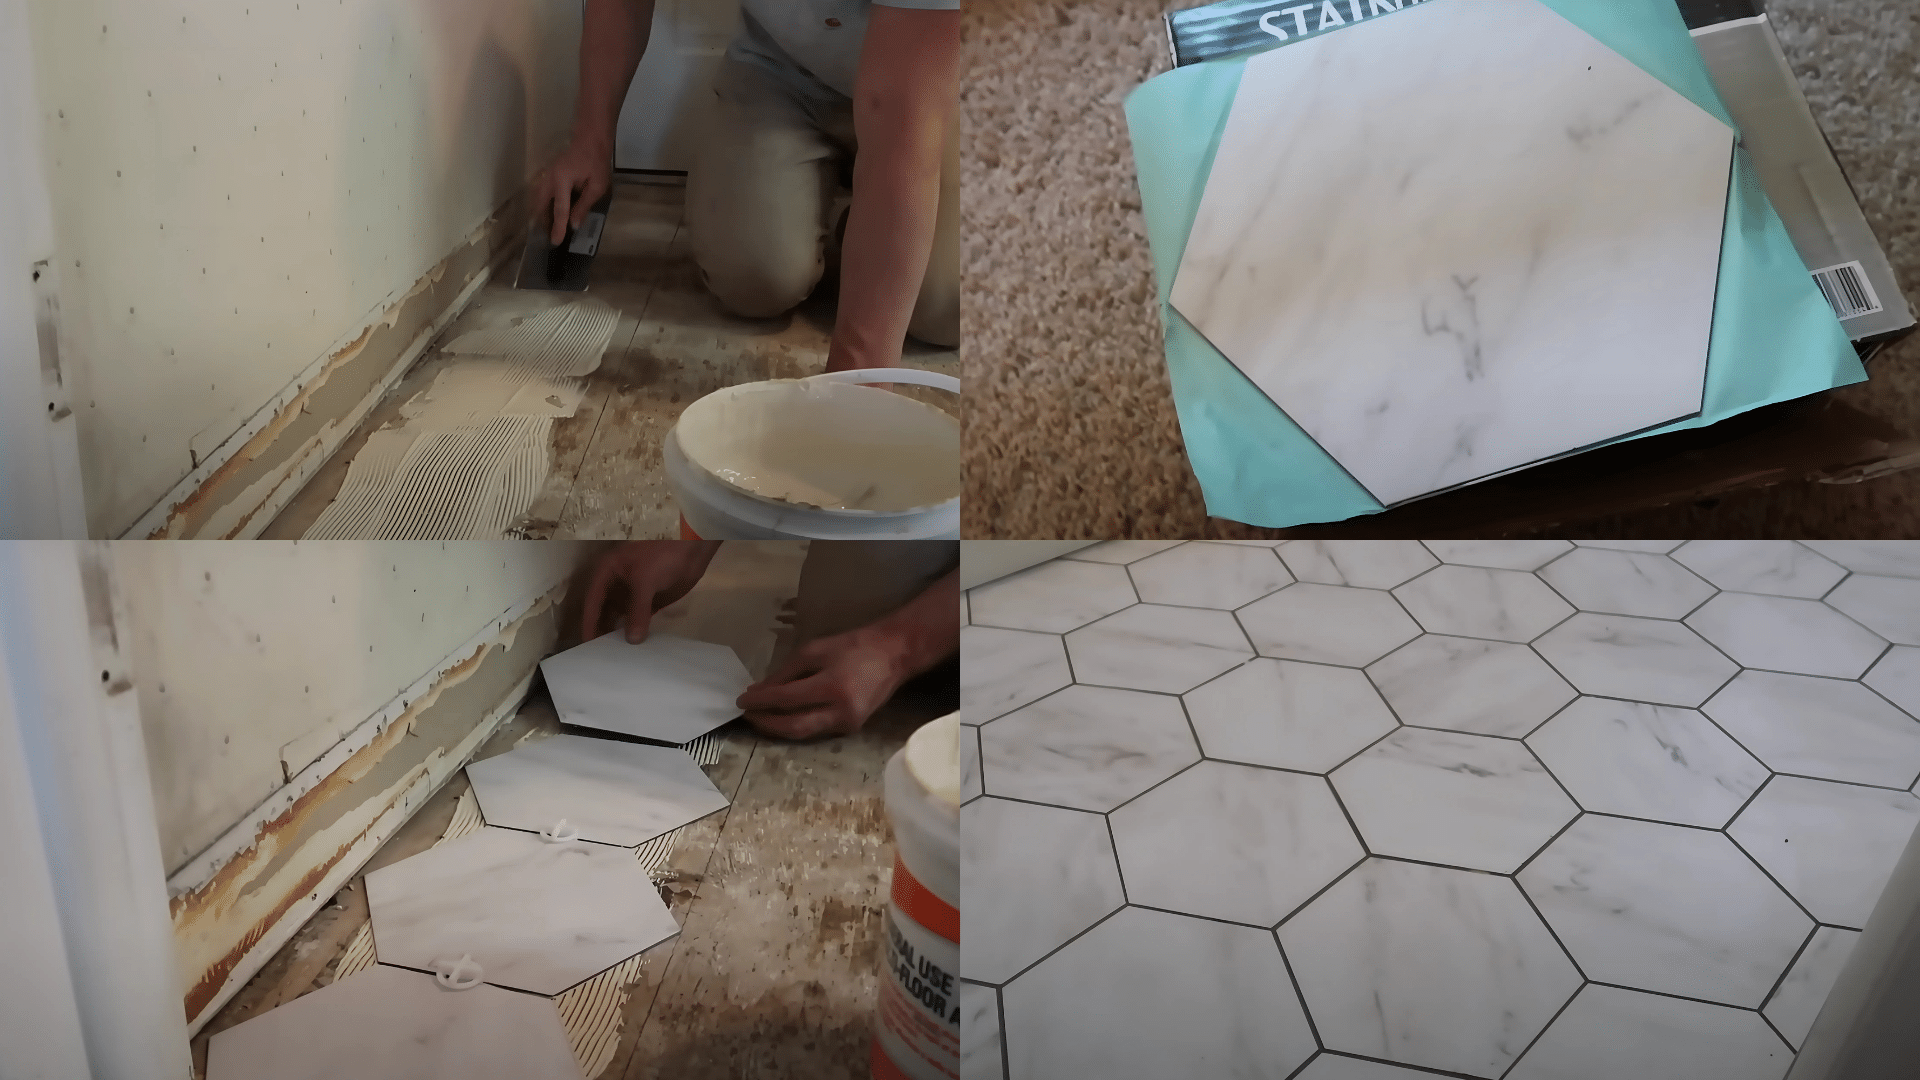
Choose sturdy vinyl tiles that look like real tiles but cost much less. For best results, follow the package instructions to apply floor adhesive in small sections.
Cut tiles for edges and corners using a sharp razor blade. Once the tiles are in place, add vinyl grout and let it dry fully for 24 hours.
Step 3: Installing Open Shelves & Creating Smart Storage Solutions

Replace old cabinets with open shelving to make items easy to see and reach. Add trim pieces to shelf edges for a more finished, built-in look.
Create a DIY hook rack to hang brooms, mops, and cleaning tools neatly. Store detergents and supplies in deep baskets and clear jars for function and style.
Step 4: Adding a Custom Countertop

Measure your washer and dryer area carefully before cutting wooden boards to size. For more even results, stain the wood using a sock or rag instead of a brush.
Secure the countertop firmly to create a useful workspace for folding clothes or sorting items.
Step 5: Final Touches to Upgrade the Laundry Room Aesthetic

Paint closet doors and add simple trim for a fresh, updated look. Spray paint knobs and handles flat black to give them a modern feel.
Caulk corners and edges to hide gaps and make paint lines look clean. Add useful decorative items, such as framed prints or candles.
Step 6: Organizing for Long-Term Efficiency

Use deep baskets to keep commonly used items within easy reach. Store pet food in clean trash bins to keep it fresh and neat.
Arrange vacuum parts, iron, and cleaning supplies in logical groups in your storage area. Keep your system simple, so it’s easy to maintain over time.
Final Reveal: Before & After Transformation
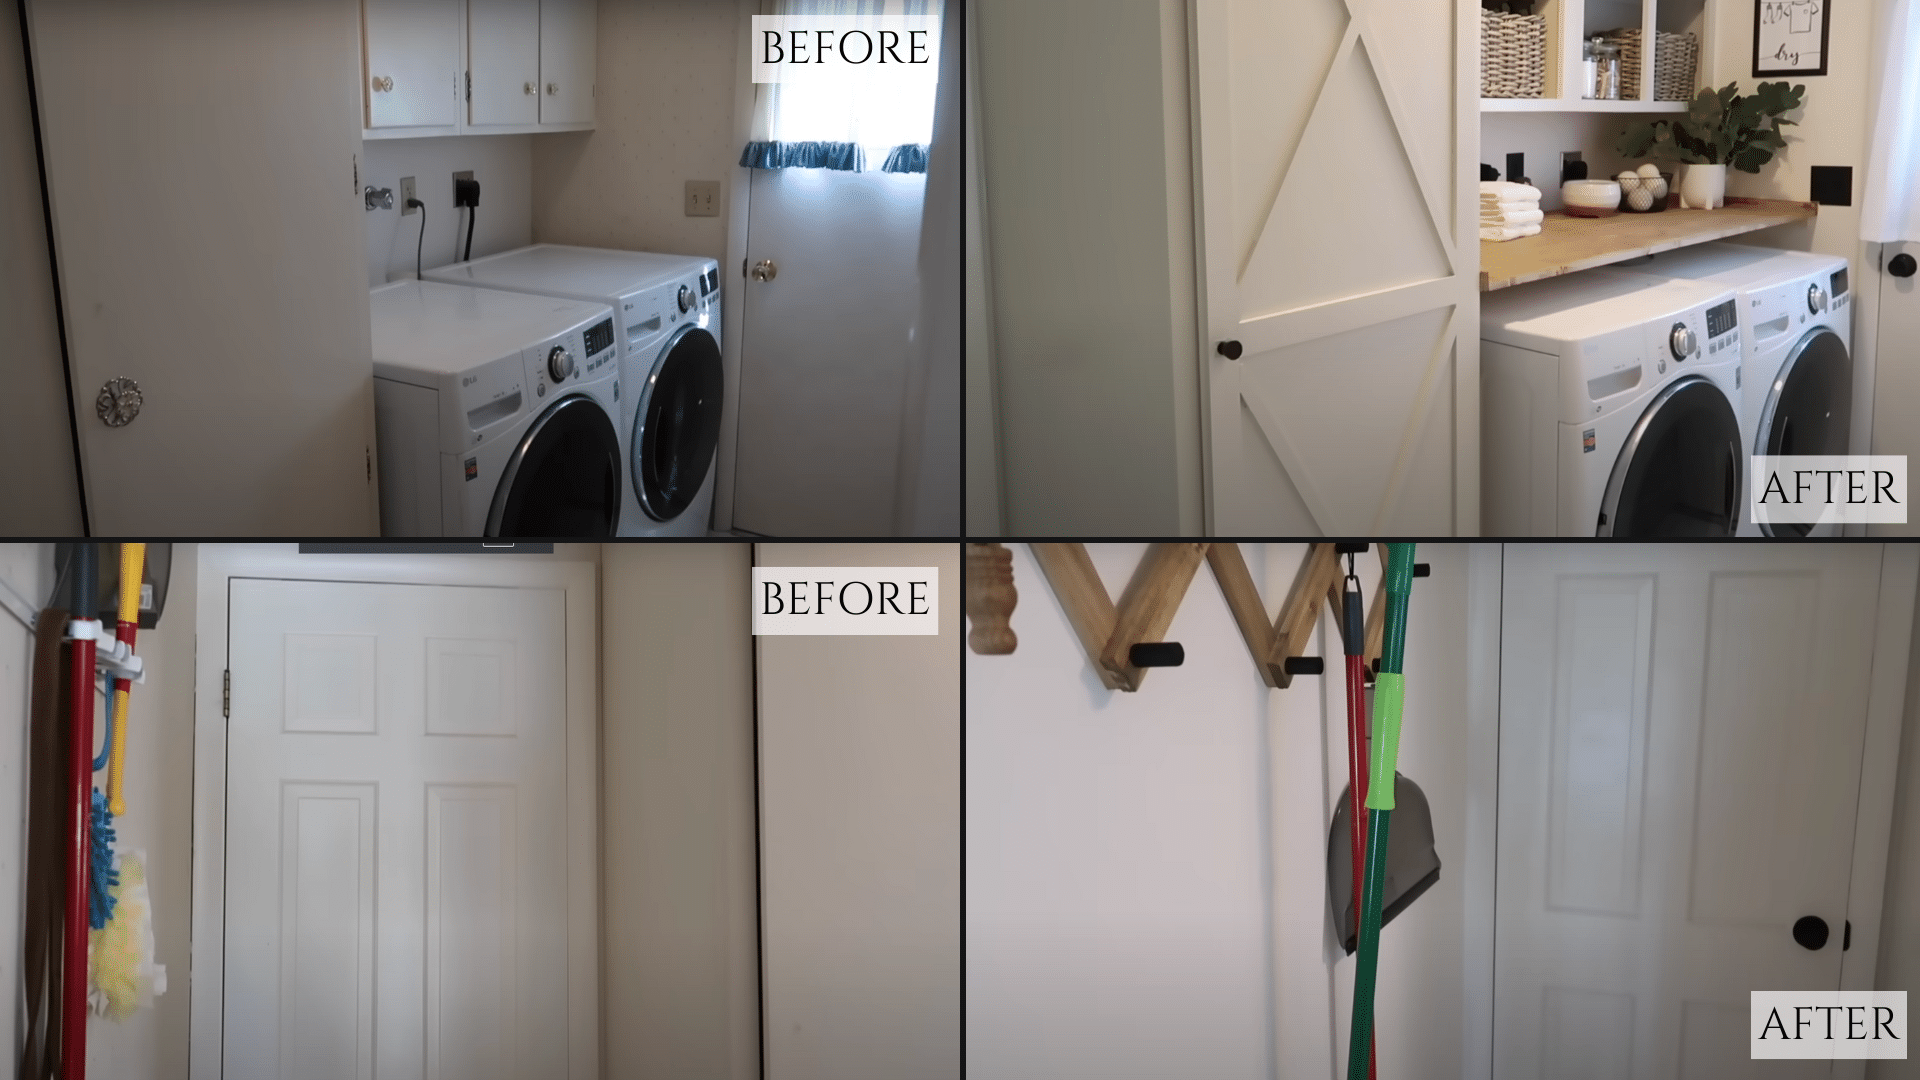
The change in this laundry room shows how small steps can create big results. The space went from cluttered and dull to clean and useful. What you once wanted to avoid is now a room that makes daily tasks easier.
This project cost under $500, with flooring being the largest expense at $150. Paint costs only $75, while the wood for shelving and countertops costs $125. Storage bins and finishing touches added another $150.
For this small amount, the laundry room now feels like a brand-new space much better suited to daily life.
The true value of this laundry room renewal goes beyond looks. The real win is how much easier it will be to use and keep the space tidy in the long term.
Video Tutorial
For a detailed video, check out SMALL LAUNDRY ROOM MAKEOVER UNDER $300 by Ashley Hughes
6 Common Mistakes to Avoid
- Avoid unnecessary clutter: Sort and remove unused items before you start organizing. Extra items will only get in your way, making the renovation more difficult.
- Skip the planning stage: Instead, create a clear plan to buy only what you need, measure correctly, and avoid costly mistakes that can lead to do-overs or wasted materials.
- Choosing the wrong flooring: Select thicker vinyl tiles that withstand moisture and heavy use. Thin or poorly made options will wear quickly in a busy laundry room.
- Neglecting proper wall prep: Fill holes and sand walls thoroughly for a smooth, lasting paint job that looks professional and holds up over time in a high-humidity environment.
- Overcomplicating storage: Choose simple open shelves that make items easy to see and grab rather than deep cabinets where things get lost or complex systems you won’t maintain.
- Forgetting about long-term maintenance: Create a basic system you can easily keep up with to prevent your newly renovated space from returning to its cluttered state.
Conclusion
Let’s be honest—laundry isn’t anyone’s favorite task. But a thoughtful laundry room renovation can turn a dreaded chore into something almost pleasant.
A well-planned space saves time searching for supplies and allows for efficient work. Having a place for everything makes the whole process flow better.
You don’t need fancy skills or big money to make these changes. Even small updates, such as fresh paint, better storage, and a wooden countertop, can transform your space completely.
The best part? You’ll feel the difference every single day.
That moment when you walk into your laundry room, and everything is in its place, is worth every minute you spend on this project.
So grab that measuring tape and paintbrush. Your future self will thank you each laundry day.