39 Stylish Pea Gravel Fire Pit Arrangements
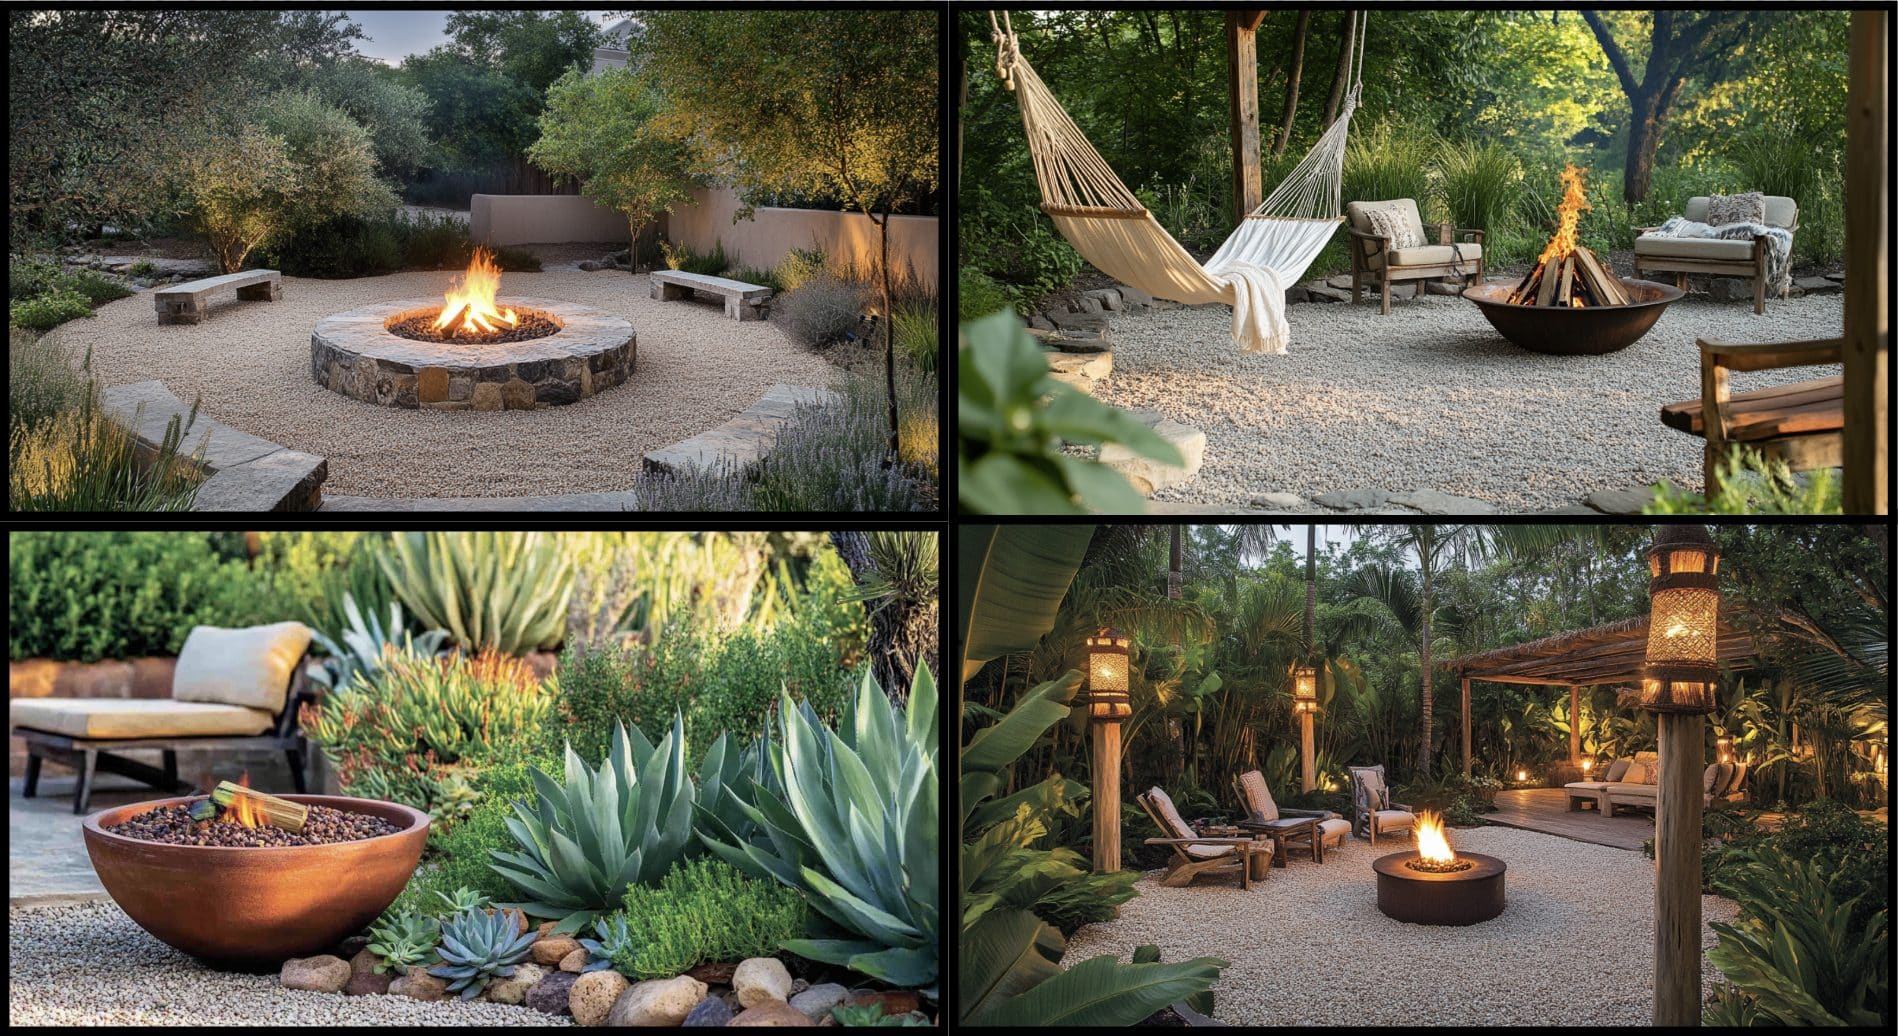
Are you looking to level up your backyard? A pea gravel fire pit might be just what you need. We’ve gathered wonderful ideas that blend style and function, perfect for cozy evening hangouts or weekend gatherings with friends.
What’s great about pea gravel is how versatile it is. It’s affordable, drains well, and feels nice underfoot. Plus, it also creates a laid-back vibe that works with complementary style, from super modern to rustic.
From basic circular setups to fancy multi-level spaces, these ideas will help you create that perfect outdoor spot where everyone loves to gather.
Ready to level up your backyard? Let’s explore these fire pit designs, which will make your outdoor space the place to be.
Exploring the Versatility of Pea Gravel Fire Pits
1. Circular Pea Gravel Oasis
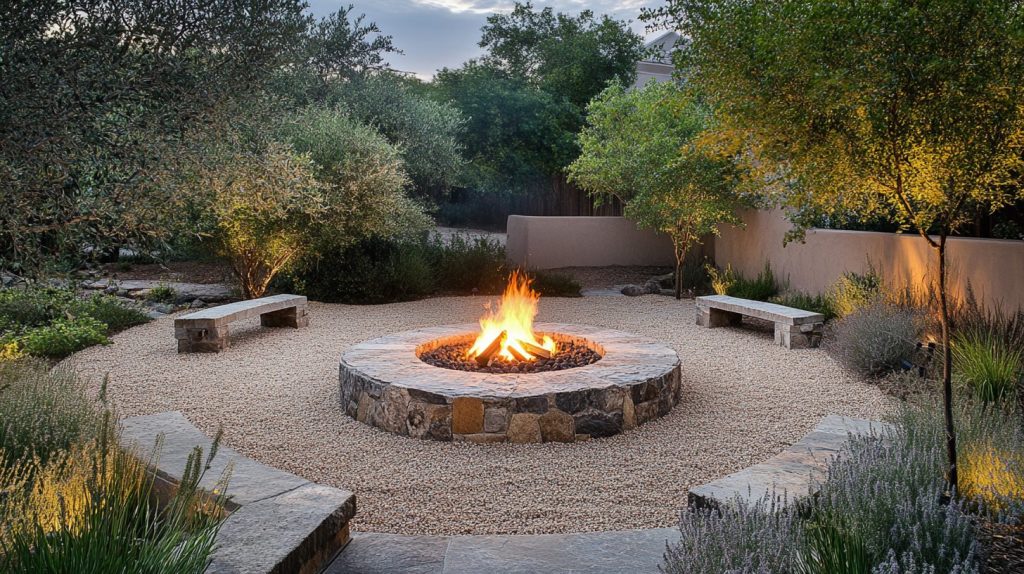
Step into a welcoming round sanctuary where natural stone seating creates perfect spots for evening gatherings. The smooth ground covering offers excellent drainage while remaining gentle underfoot.
The strategic placement of chairs encourages face-to-face interaction, making this arrangement ideal for storytelling and shared meals.
Careful lighting placement Upgrade the area as dusk approaches, creating a magical atmosphere for continued conversations long into the evening.
DIY Steps:
- Choose the location: Pick a flat area in your yard away from overhanging trees or structures.
- Outline the circle: Use a string and stake to outline the desired size of your fire pit area.
- Prepare the ground: Dig a shallow trench, ensuring the surface is level and debris-free.
- Add a gravel layer: Spread pea gravel evenly, covering the outlined area.
- Install seating: Place natural stone benches or chairs around the fire pit for a finished look.
2. Modern Minimalist Fire Pit
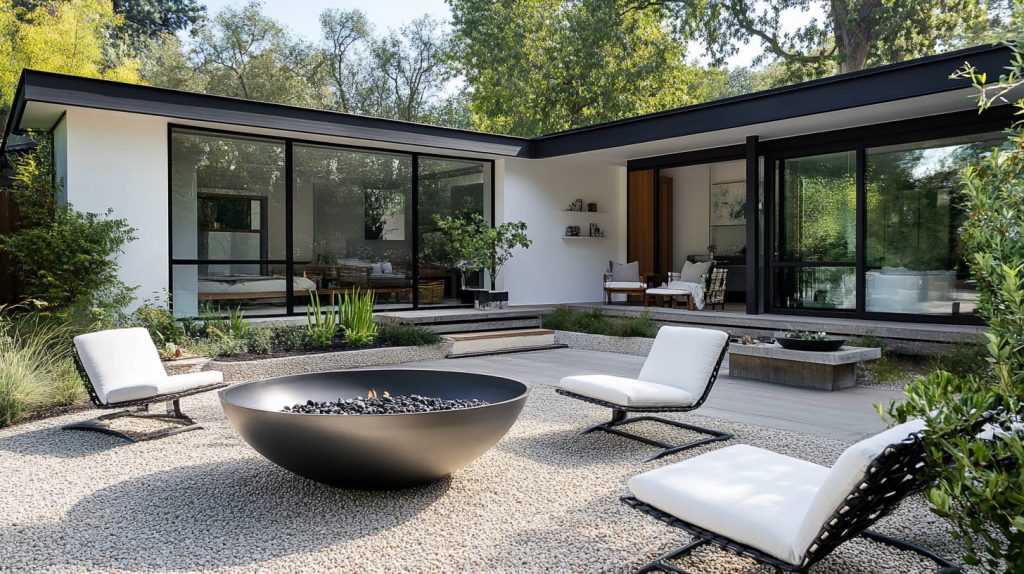
Sleek lines and contemporary styling define this sophisticated outdoor space. The metallic centerpiece stands proud against a neutral base, while monochromatic furniture maintains visual harmony.
Clean angles and purposeful design elements create an uncluttered atmosphere that’s both inviting and refined.
The black and white color scheme ensures timeless appeal, while careful spacing maintains excellent flow for guests to move freely throughout the area.
DIY Steps:
- Select a modern fire bowl: Choose a sleek, simple one that matches your design theme.
- Mark the area: Outline where the fire pit and gravel will go, keeping a geometric shape like a square or rectangle.
- Level the ground: Remove any grass or debris and ensure the surface is flat.
- Lay the gravel: Spread a layer of pea gravel across the outlined area, keeping it smooth and even.
- Arrange furniture: Add minimalist outdoor furniture in a matching color scheme to complete the setup.
3. Pea Gravel Zen Garden Fire Pit
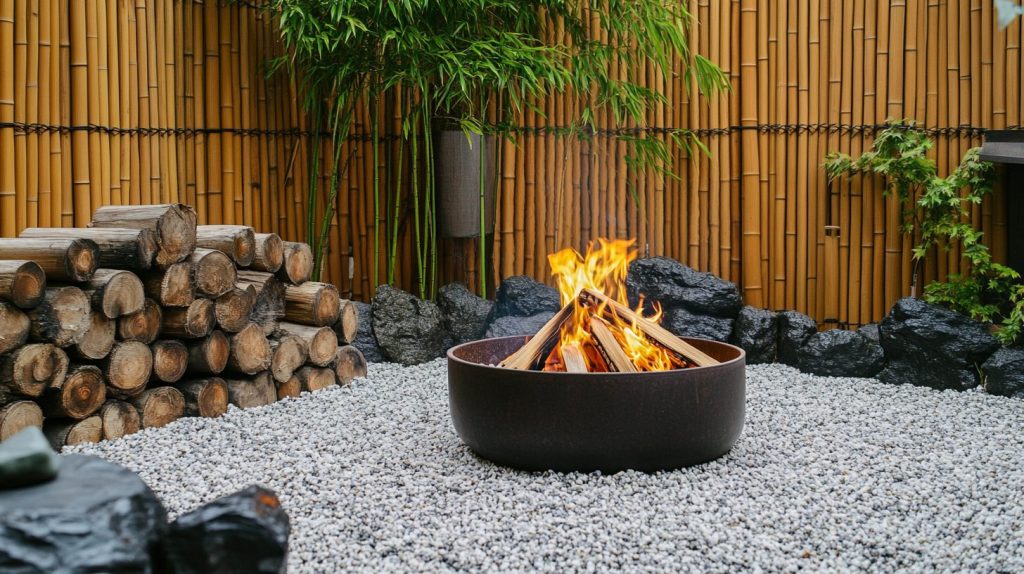
Upgrade your outdoor space into a serene retreat where Eastern design elements create ultimate tranquility. Bamboo screens establish natural boundaries, while water features add gentle background music to evening gatherings.
Natural stones and thoughtfully selected plants create visual interest throughout the space. The arrangement encourages quiet contemplation or intimate conversations, making it ideal for unwinding after busy days.
DIY Steps:
- Prepare the area: Clear a space in your yard and ensure it’s level and free from debris.
- Install bamboo fencing: Place bamboo fencing around the area to create a private, serene atmosphere.
- Add natural elements: Incorporate stones, a small water feature, and plants like bonsai trees for a zen feel.
- Position the fire pit: Place a simple fire bowl or built-in fire pit in the center of the setup.
- Lay the pea gravel: Spread it evenly across the area, ensuring it complements the natural surroundings.
4. Rustic Stone And Gravel Fire Pit
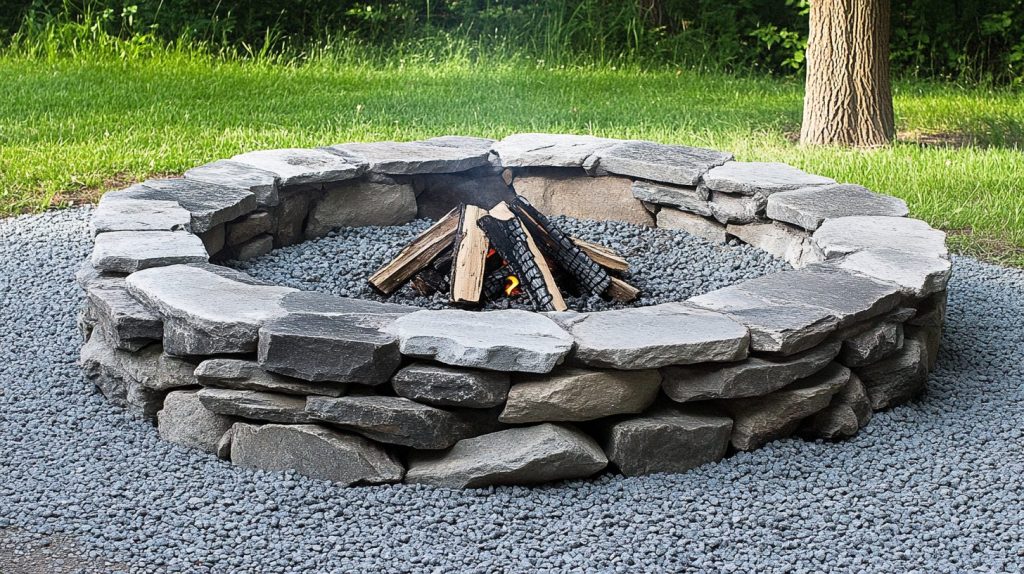
Natural materials take center stage in this authentic outdoor retreat. Substantial stones form a sturdy central gathering point, complemented by comfortable wooden seating at perfect conversational distances.
The thick ground covering ensures stable footing while adding textural interest. This arrangement feels completely at home in natural surroundings, creating an atmosphere encouraging long evenings of storytelling and stargazing.
DIY Steps:
- Select your fire pit material: Choose rustic stones or bricks for the fire pit structure.
- Mark the area: Use stakes and string to outline the fire pit and surrounding gravel area.
- Excavate the site: Dig a shallow trench and ensure the base is level.
- Build the fire pit: Stack the stones securely to form the fire pit.
- Spread pea gravel: Cover the surrounding area with pea gravel for a finished look.
5. Island-Style Fire Pit
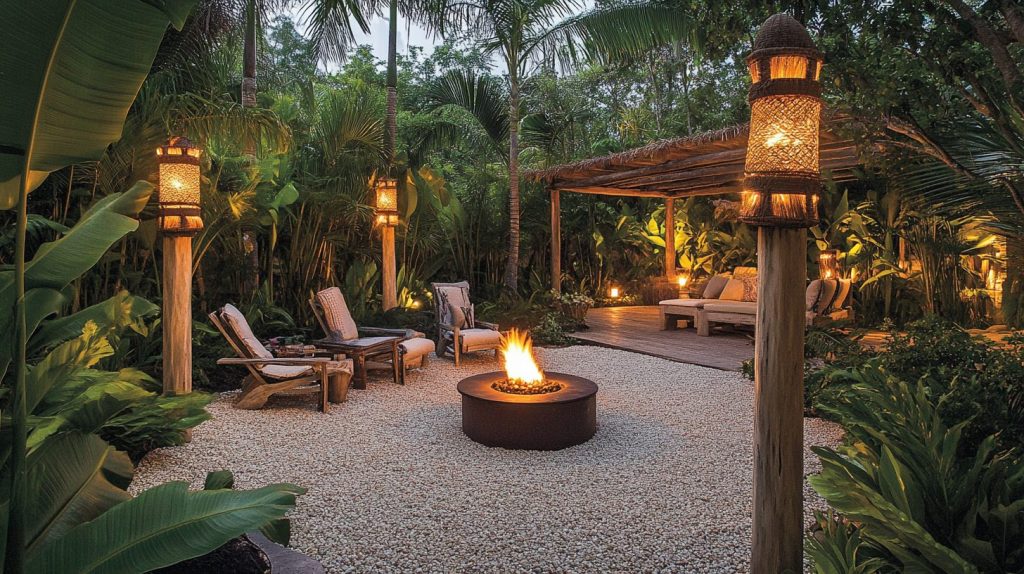
Experience vacation vibes right in your backyard with this tropically-inspired setting. A thoughtfully designed sunken area creates an intimate gathering space, while strategic torch placement casts dancing light patterns.
Lush greenery establishes an exotic atmosphere, transporting guests to distant shores. The arrangement encourages laid-back relaxation while maintaining functionality for entertaining groups of any size.
DIY Steps:
- Plan the design: Decide on the size and shape of the fire pit area, keeping it circular or irregular for a natural look.
- Prepare the ground: Dig a shallow trench and level the area.
- Add pea gravel: Spread a thick layer evenly across the space.
- Incorporate decor: Position tiki torches and tropical plants around the area.
- Place the fire pit: Add a fire bowl or built-in fire pit at the center for warmth and ambiance.
6. Sunken Fire Pit Lounge
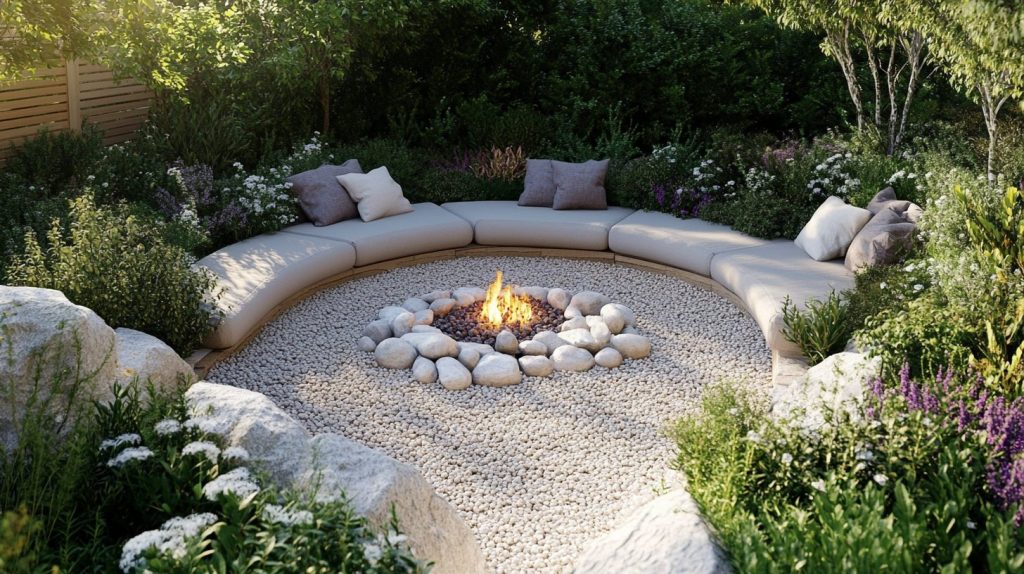
This innovative design takes advantage of changes to create an intimate gathering space. The lowered area provides natural shelter from wind while establishing a cozy atmosphere.
Rectangular concrete elements add modern appeal while comfortable seating Upgrades the space into an outdoor room.
Careful consideration of drainage ensures this sunken paradise remains Enjoyable throughout the seasons.
DIY Steps:
- Excavate the site: Dig a circular or square area to create a sunken space.
- Reinforce the walls: Use stone, brick, or wood to stabilize the walls of the sunken area.
- Add pea gravel: Spread gravel across the floor for texture and drainage.
- Install seating: Position built-in benches or arrange weatherproof furniture.
- Place the fire pit: Add a fire bowl or build a permanent fire pit in the center.
7. Pea Gravel With A Built-In Bench
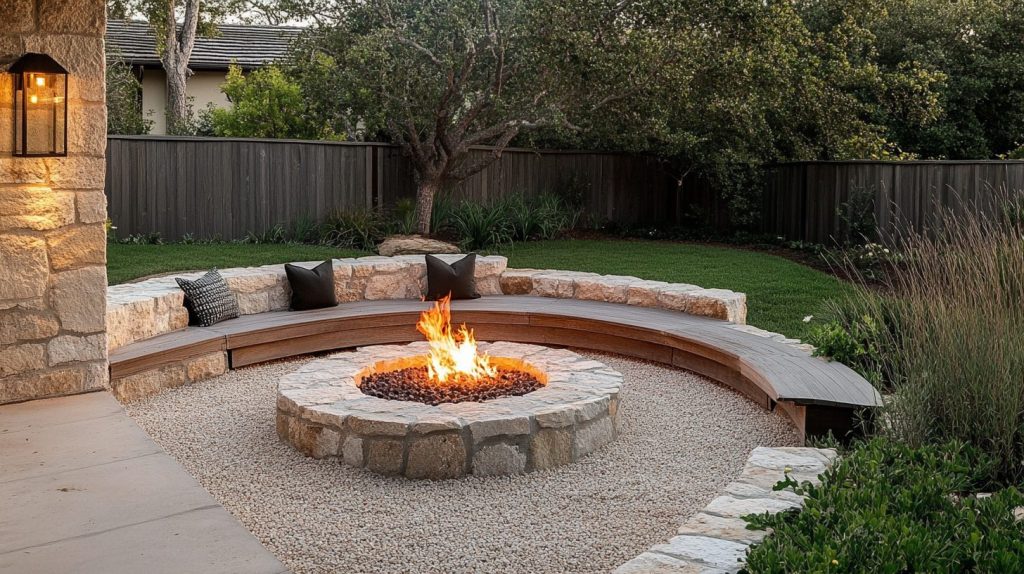
Maximize your outdoor space with this clever combination of permanent seating and flexible design. Stone benches provide sturdy, weather-resistant seating while adding natural interest to the landscape.
The integrated approach ensures everything stays exactly where it should while reducing maintenance needs.
Strategic placement allows for natural conversation flow while maintaining clear sightlines to the central gathering point.
DIY Steps:
- Plan the layout: Design the area with space for the fire pit and seating.
- Construct the benches: Build stone or wood benches that can withstand outdoor conditions.
- Prepare the ground: Level the area and spread pea gravel across the surface.
- Install the fire pit: Place the fire pit in the center of the setup.
- Decorate the space: Add cushions or outdoor decor for comfort and style.
8. Cottage Garden Fire Pit
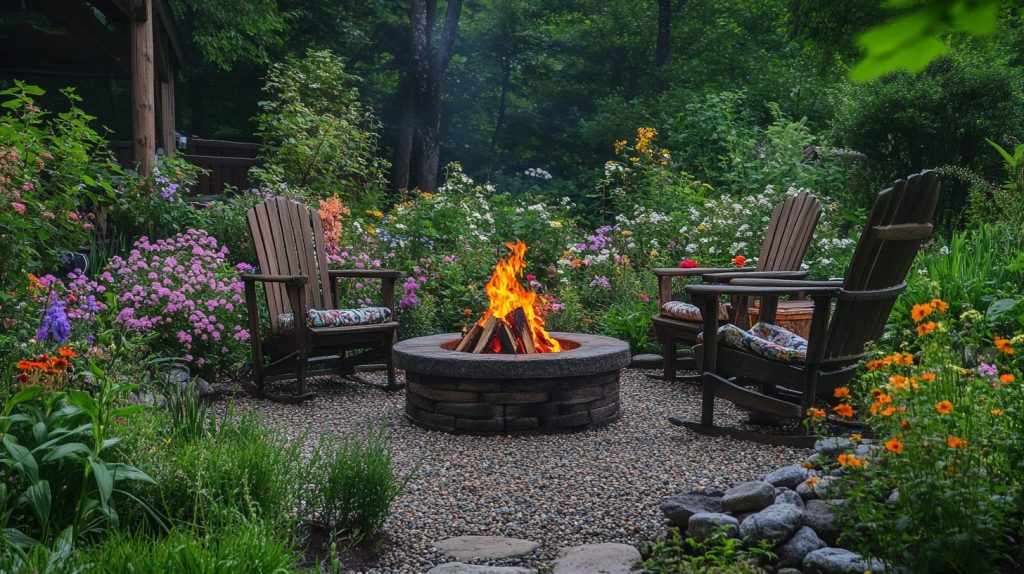
Enjoy romantic outdoor living with this bloom-filled sanctuary. Wrought iron elements add vintage charm while providing practical functionality.
Fragrant flowers and verdant shrubs create a storybook setting that changes with the seasons. The arrangement feels like exploring a secret garden, perfect for afternoon gatherings that stretch into evening hours.
Thoughtful placement of seating ensures guests can admire the surrounding natural beauty.
DIY Steps:
- Choose the location: Select a sunny or semi-shaded spot in your garden.
- Install the fire pit: Place a wrought iron fire pit in the center of the area.
- Add pea gravel: Spread a layer of pea gravel evenly around the fire pit.
- Plant greenery: Surround the space with flowering plants and shrubs.
- Include furniture: Add vintage-style chairs or a bench to complete the look.
9. Industrial Fire Pit Design
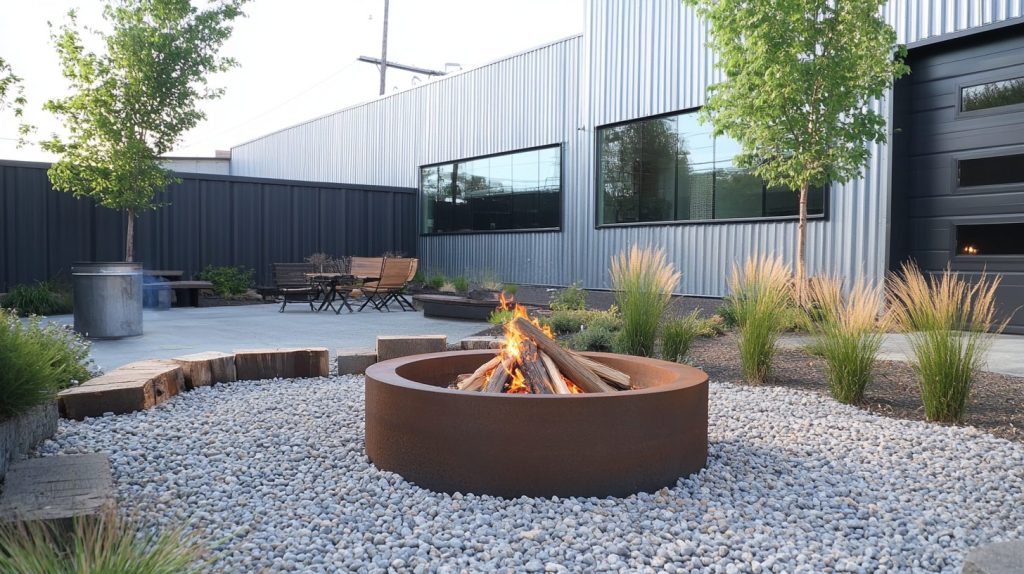
Enjoy urban sophistication with this raw, edgy arrangement. Metal elements with exposed pipes create striking visual interest while maintaining functionality.
The stark contrast between smooth surfaces and industrial materials makes a bold statement. Contemporary seating options complement the metropolitan Stylewhile ensuring comfort.
This arrangement works particularly well in modern settings, bringing warehouse district charm to intimate gatherings.
DIY Steps:
- Choose an industrial fire pit: Opt for a metal or concrete fire pit with a minimalist design.
- Mark the area: Outline a geometric shape for the gravel base.
- Level the ground: Remove debris and ensure the surface is smooth.
- Spread pea gravel: Cover the marked area with pea gravel.
- Add furniture: Incorporate industrial-style seating, such as metal stools or benches.
10. Desert-Inspired Fire Pit

Channel the beauty of arid landscapes with this southwestern arrangement. Terra-cotta elements provide warmth and authenticity, while carefully selected desert plants create natural drama.
The earth-toned palette feels both grounding and sophisticated. The strategic placement of cacti and succulents adds height variation and visual interest.
This low-maintenance design brings the magic of desert evenings to any outdoor space.
DIY Steps:
- Plan the design: Choose a warm color palette and simple layout.
- Prepare the ground: Clear the area and level the surface.
- Add pea gravel: Spread gravel to cover the space around the fire pit.
- Incorporate plants: Use succulents and cacti in terra-cotta planters.
- Position the fire pit: Place a clay fire bowl at the center for an authentic touch.
11. Pathway-Lit Fire Pit Area
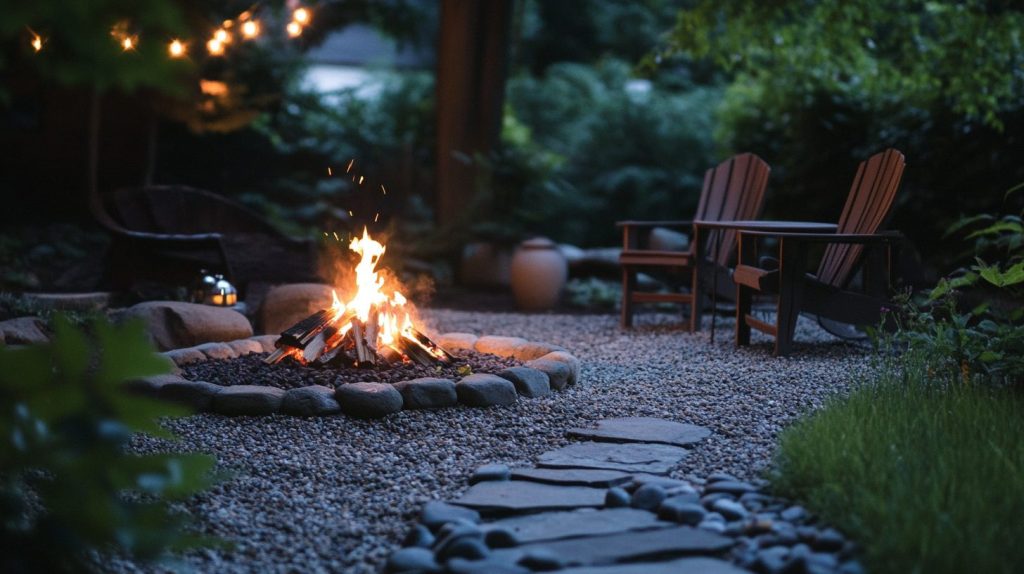
Cheris evening gatherings with style using this illuminated arrangement. LED lighting guides guests safely while creating a magical ambiance.
The thoughtfully designed path leads to a central gathering spot, building anticipation with each step.
Strategic light placement ensures both safety and atmosphere, while careful consideration of spacing allows for easy movement throughout the area.
DIY Steps:
- Design the pathway: Plan a straight or curved path leading to the fire pit.
- Install lighting: Add LED lights or lanterns along the pathway edges.
- Prepare the ground: Clear and level the area for the pea gravel.
- Spread pea gravel: Cover the fire pit area and pathway with pea gravel.
- Position the fire pit: Place the fire pit at the pathway’s end for a focal point.
12. Wood And Gravel Combo
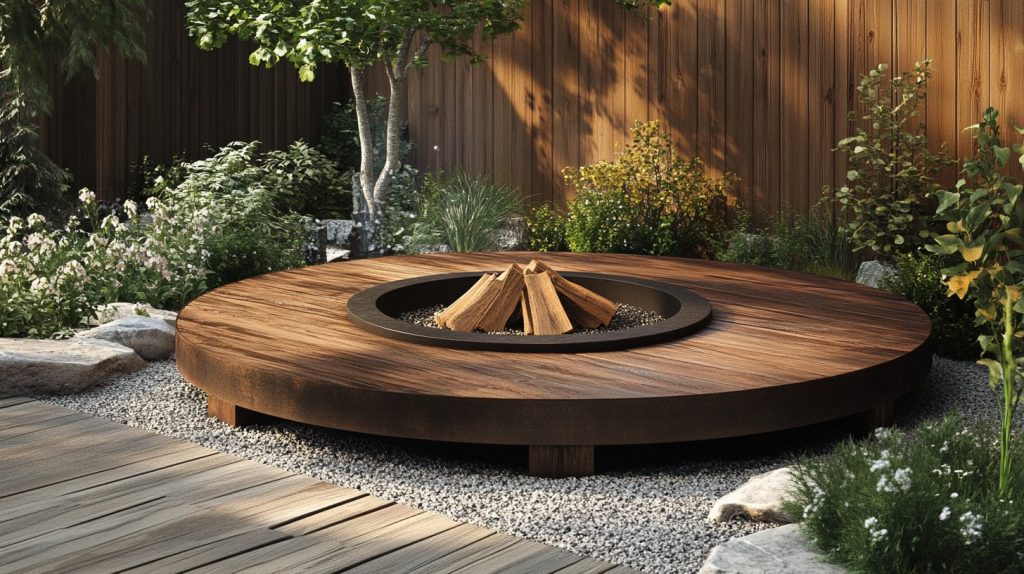
Experience effortless transitions with this mixed-material masterpiece. A wooden deck flows naturally into a textured gathering space, creating distinct yet connected areas.
The thoughtful combination of materials adds visual interest while maintaining functionality.
This arrangement works particularly well for spaces that need clear activity zones while maintaining an open, connected feel.
DIY Steps:
- Construct the wooden deck: Build a deck area adjacent to the fire pit space.
- Mark the gravel area: Outline the section for pea gravel next to the deck.
- Spread pea gravel: Cover the outlined area with gravel for a cohesive look.
- Add seating: Use wooden furniture to complement the deck and gravel.
- Install the fire pit: Position the fire pit where the deck meets the gravel.
13. Fire Pit With String Lights
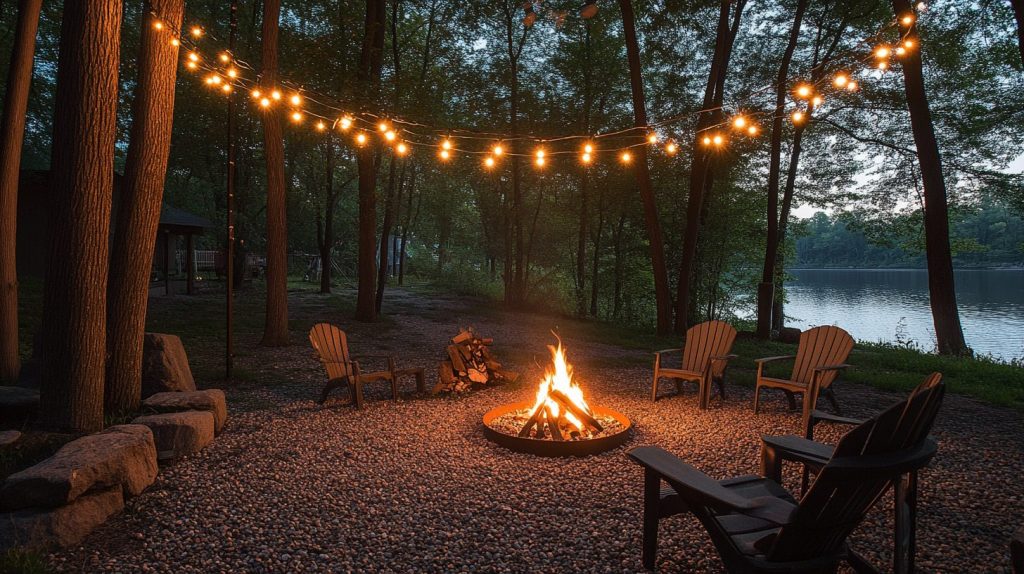
Create magical evenings under a canopy of twinkling lights. Overhead illumination casts gentle shadows while providing practical lighting for gatherings.
The careful arrangement of light strands ensures even coverage without feeling overwhelming. This magical setting encourages guests to linger longer, sharing stories as stars begin to twinkle overhead.
DIY Steps:
- Install light poles: Place sturdy poles around the fire pit area.
- Hang the string lights: Attach string lights securely between the poles.
- Prepare the ground: Level the area and spread pea gravel.
- Add the fire pit: Position the fire pit centrally under the string lights.
- Include furniture: Arrange comfortable outdoor seating for guests.
14. Circular Tiered Fire Pit Design
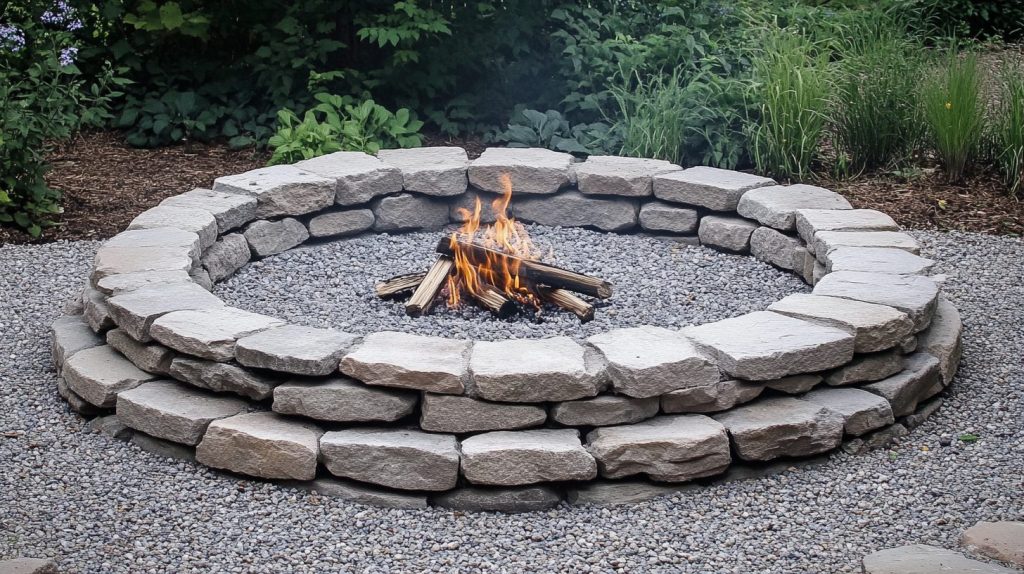
Add natural interest with this multi-level arrangement. Carefully constructed stone circles create natural gathering spaces while adding visual drama.
Each tier serves a purpose, from casual seating to subtle boundaries. The graduated design naturally draws eyes toward the center while providing numerous spots for guests to gather in small groups.
DIY Steps:
- Plan the tiers: Decide on the number of levels and their dimensions.
- Build the base: Construct the lowest tier using bricks or stones.
- Add pea gravel: Fill each tier with gravel, ensuring even coverage.
- Install the fire pit: Place the fire pit on the highest tier.
- Finish the edges: Use stones or bricks to define each tier’s boundary.
15. Pea Gravel With Hammock Combo
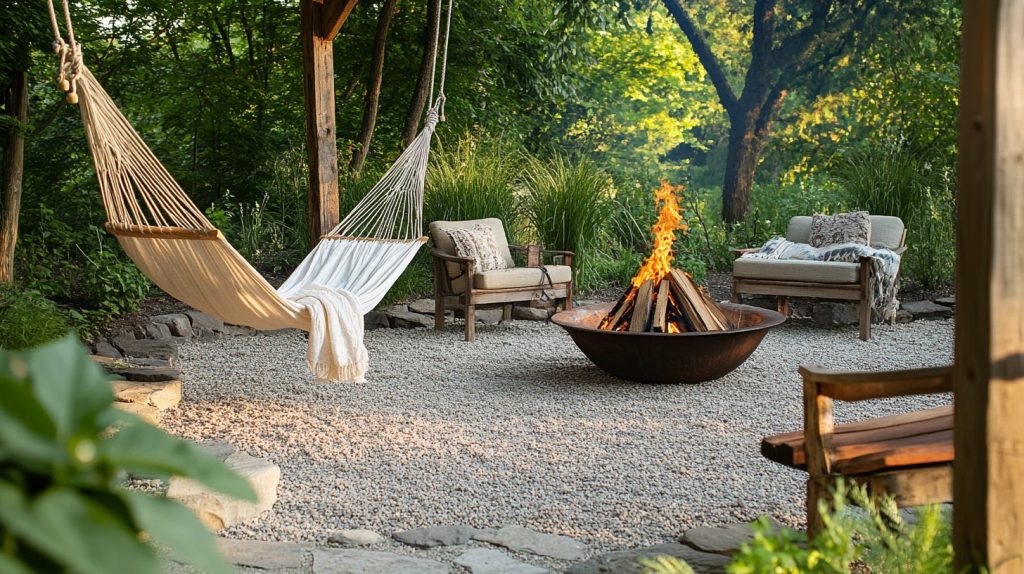
Upgrade your outdoor space into the ultimate relaxation zone. Strategically placed hammocks invite afternoon naps while the central gathering area beckons for evening socializing.
The thoughtful arrangement ensures both private and communal spaces coexist harmoniously. Weather-resistant materials guarantee long-lasting comfort through changing seasons.
DIY Steps:
- Choose the location: Pick a shaded spot near trees or install sturdy hammock stands.
- Prepare the ground: Clear and level the area, then spread pea gravel.
- Install hammocks: Hang hammocks securely between trees or stands.
- Add the fire pit: Position the fire pit centrally for easy access.
- Include decor: Add outdoor cushions and lanterns for a cozy touch.
16. Mediterranean-Style Fire Pit
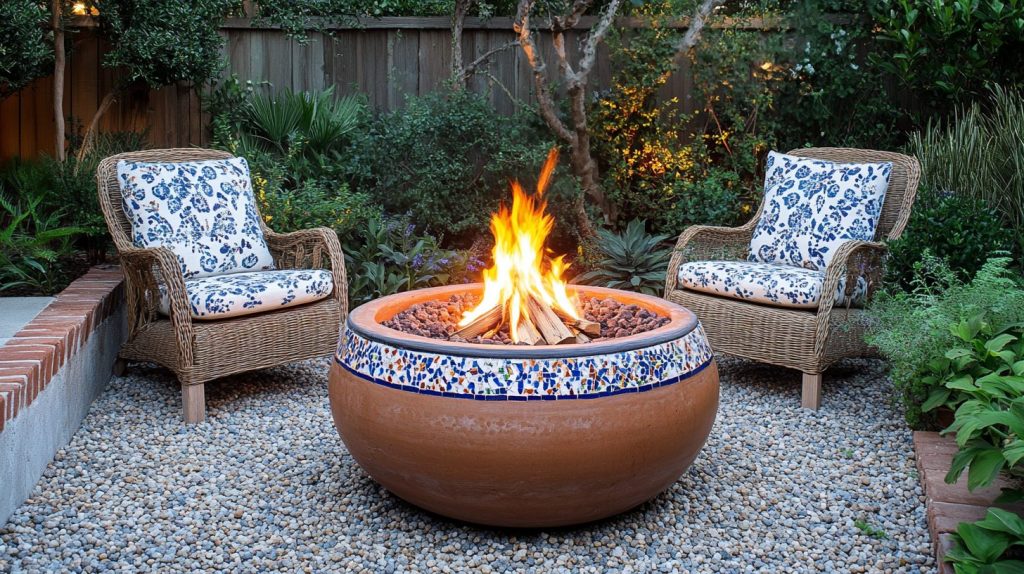
Transport yourself to European coastal villages with this warm, inviting arrangement. Mosaic details and clay elements create authentic charm, while careful material selection ensures durability.
The rich color palette encourages lingering conversations over shared meals. Thoughtful seating arrangements accommodate both intimate gatherings and larger groups with equal comfort.
DIY Steps:
- Choose a clay fire bowl: Select one that complements the Mediterranean theme.
- Mark the area: Outline the gravel section with stones or tiles.
- Spread pea gravel: Cover the outlined area evenly.
- Add mosaic accents: Place decorative tiles around the fire pit for detail.
- Include seating: Use wooden or wrought iron furniture to complete the look.
17. Modern Boho Fire Pit Area
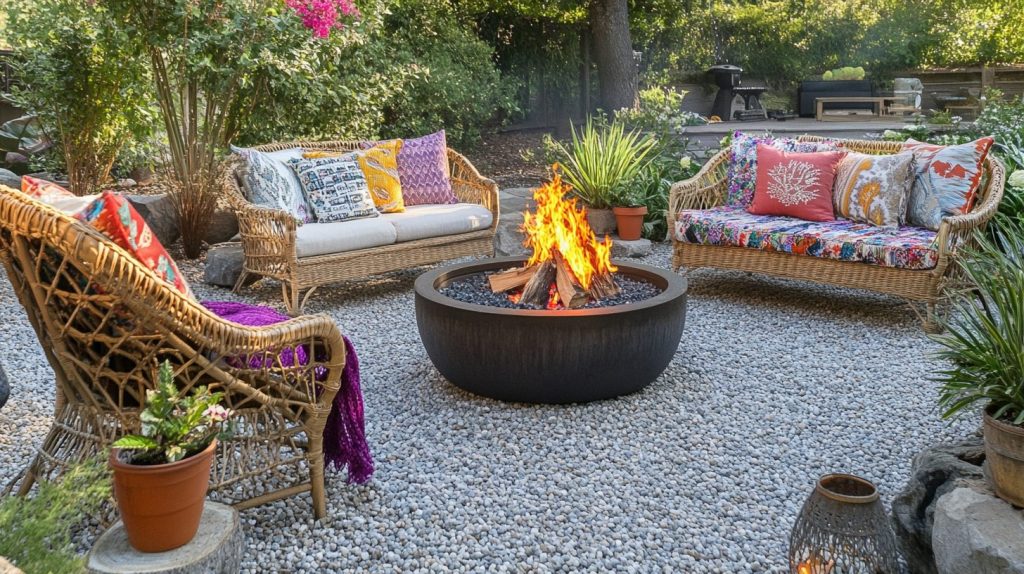
Blend casual comfort with artistic flair in this free-spirited setting. Rattan furniture adds natural texture, while neutral tones create a sophisticated base.
Thoughtfully selected throw pillows introduce personality without overwhelming the space. This arrangement masters the balance between curated and casual, creating an atmosphere where guests naturally relax.
The strategic placement of decorative elements ensures visual interest from every angle.
DIY Steps:
- Prepare the area: Level the ground and spread a layer of pea gravel.
- Choose boho furniture: Select rattan chairs or poufs with vibrant cushions.
- Add the fire pit: Position the fire pit in the center of the space.
- Decorate the area: Include potted plants, lanterns, and macrame decor.
- Finish the look: Use layered outdoor rugs for added texture.
18. Fire Pit With Built-In Planters
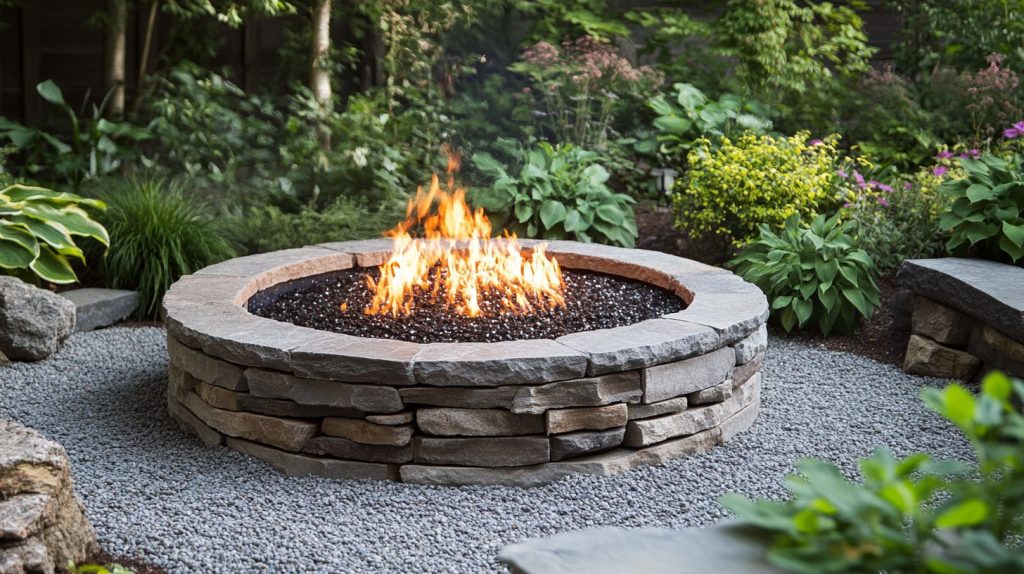
Maximize your outdoor space with this clever multi-functional design. Raised garden beds bring nature closer while creating natural boundaries.
The combination of growing things and gathering spaces makes this arrangement particularly flexible.
Fresh herbs and blooming plants add sensory elements to evening gatherings, while practical considerations ensure easy maintenance.
DIY Steps:
- Design the layout: Plan where the fire pit and planters will be placed.
- Construct planters: Use wood or stone to create built-in planters around the area.
- Spread pea gravel: Cover the ground evenly with gravel.
- Add greenery: Plant shrubs, flowers, or herbs in the planters.
- Place the fire pit: Position the fire pit centrally to complement the greenery.
19. Water And Fire Contrast
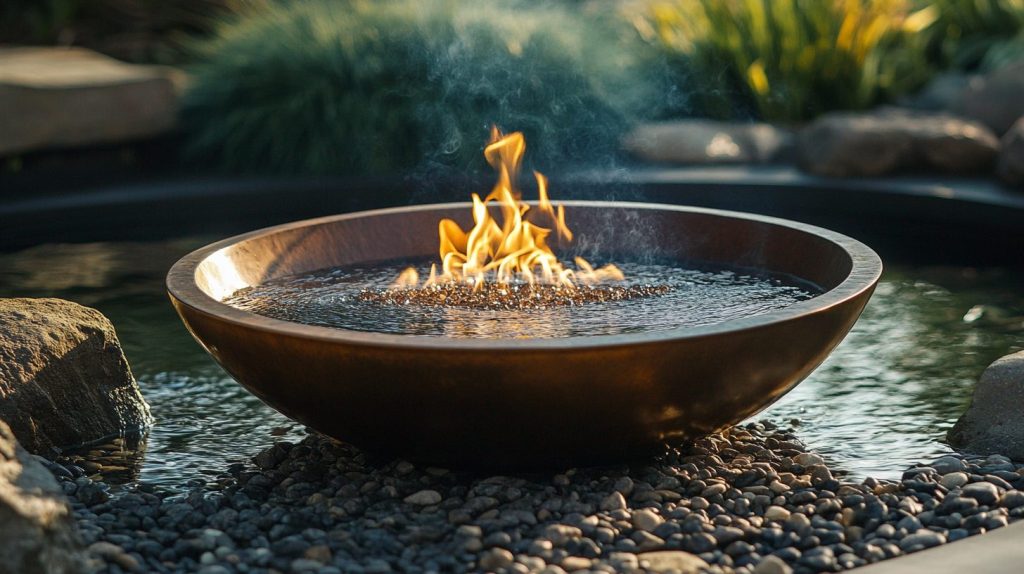
Experience the harmony of opposing elements in this sophisticated arrangement. A small fountain creates gentle background sounds while adding visual movement to the space.
The interplay between water features and dancing flames creates an engaging atmosphere that awakens the senses. This thoughtful design encourages both relaxation and lively conversation.
DIY Steps:
- Choose the layout: Decide where the fire pit and water feature will go.
- Prepare the area: Clear and level the ground, spreading pea gravel around the fire pit.
- Install the water feature: Add a small fountain or pond near the fire pit.
- Add the fire pit: Position the fire pit to complement the water feature.
- Finish with decor: Include outdoor lighting to highlight both elements.
20. Outdoor Dining With Fire Pit
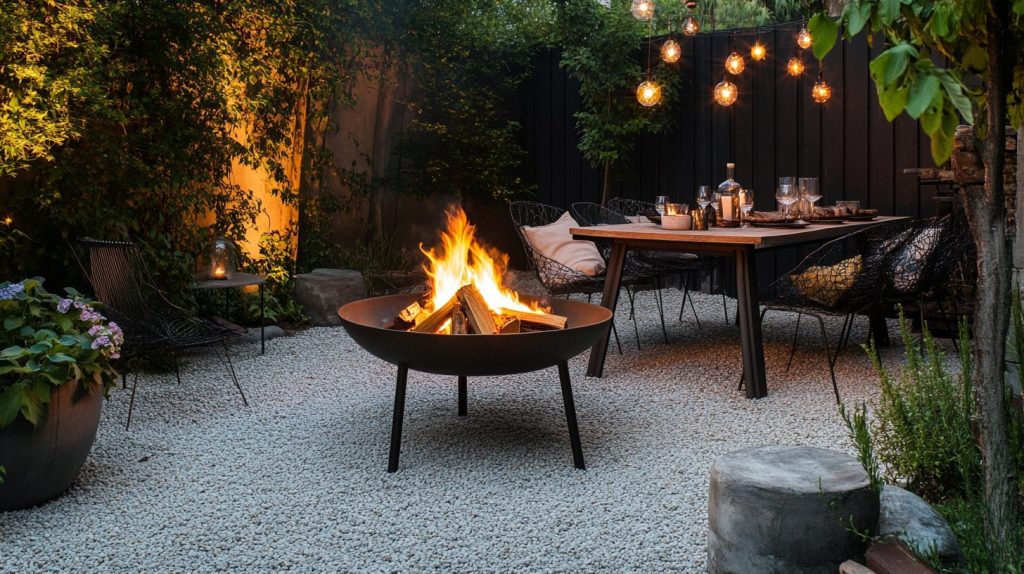
Upgrade everyday meals into memorable occasions with this practical yet atmospheric arrangement. A carefully positioned dining table ensures food stays warm while conversations flow naturally.
The setup accommodates both casual family dinners and special celebrations with equal style. Strategic placement of lighting elements ensures comfortable visibility without sacrificing ambiance.
DIY Steps:
- Plan the space: Allocate areas for the fire pit and dining table.
- Spread pea gravel: Cover the entire area with a thick layer of gravel.
- Position the fire pit centrally or near the dining table for warmth.
- Add furniture: Use a durable outdoor dining set to complete the setup.
- Decorate the space: Include cushions, lanterns, or fairy lights for ambiance.
21. Fire Pit With Driftwood Decor
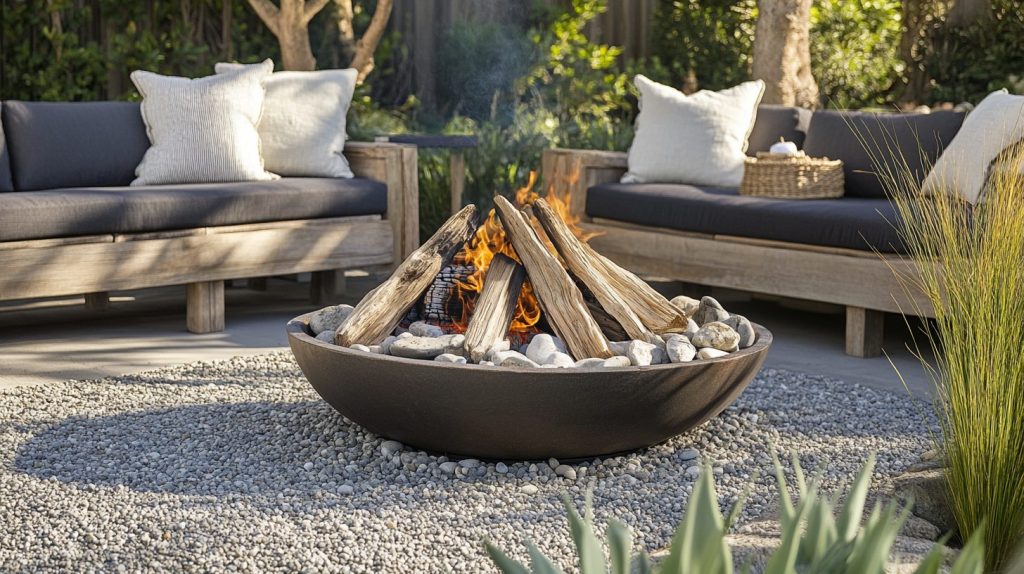
Bring coastal charm inland with this naturally artistic arrangement. Weather-worn wood pieces create organic sculpture throughout the space, while comfortable seating encourages long conversations.
The careful balance of decorative and functional elements ensures the space feels curated and casual. Natural textures and neutral tones create a soothing atmosphere perfect for evening relaxation.
DIY Steps:
- Collect driftwood: Gather large driftwood pieces for decor.
- Prepare the ground: Spread pea gravel across the fire pit area.
- Arrange the fire pit: Position the fire pit in the center of the gravel space.
- Place driftwood: Lay driftwood pieces artistically around the area.
- Add seating: Use wooden benches or Adirondack chairs to match the theme.
22. Geometric Pea Gravel Layout
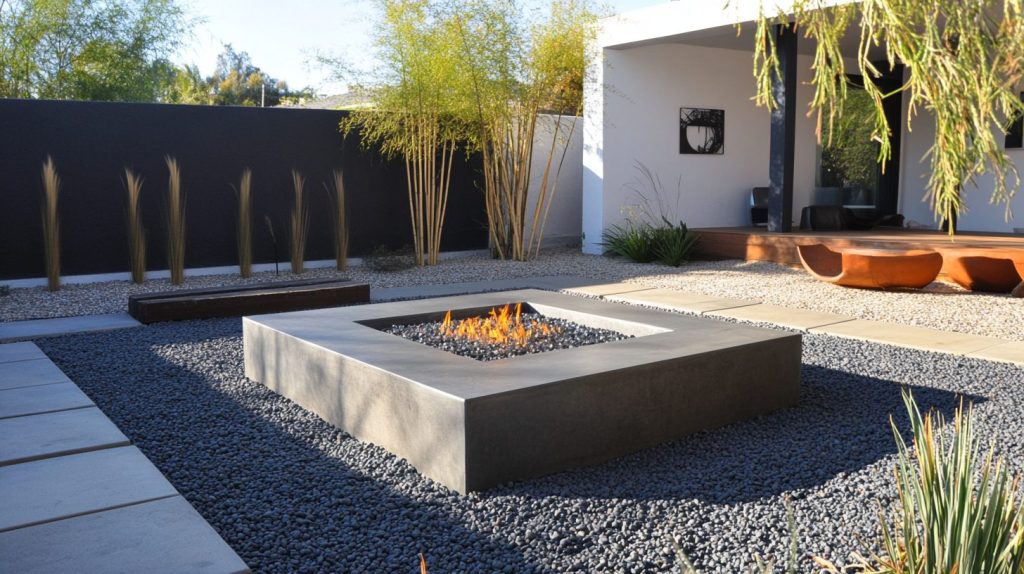
Add contemporary sophistication with this precisely planned arrangement. Strong lines and intentional patterns create visual interest from above, while smooth surfaces ensure comfortable walking paths.
The square central feature anchors the space while maintaining clean sight lines. This modern approach to outdoor gathering spaces proves geometry can feel both welcoming and sophisticated.
DIY Steps:
- Plan the shape: Choose a square, rectangle, or hexagonal layout.
- Outline the area: Use stakes and string to define the shape.
- Prepare the ground: Level the surface and remove debris.
- Spread pea gravel: Cover the outlined area evenly with gravel.
- Install the fire pit: Place a fire bowl or built-in pit at the center of the design.
23. Fire Pit With Garden Arches
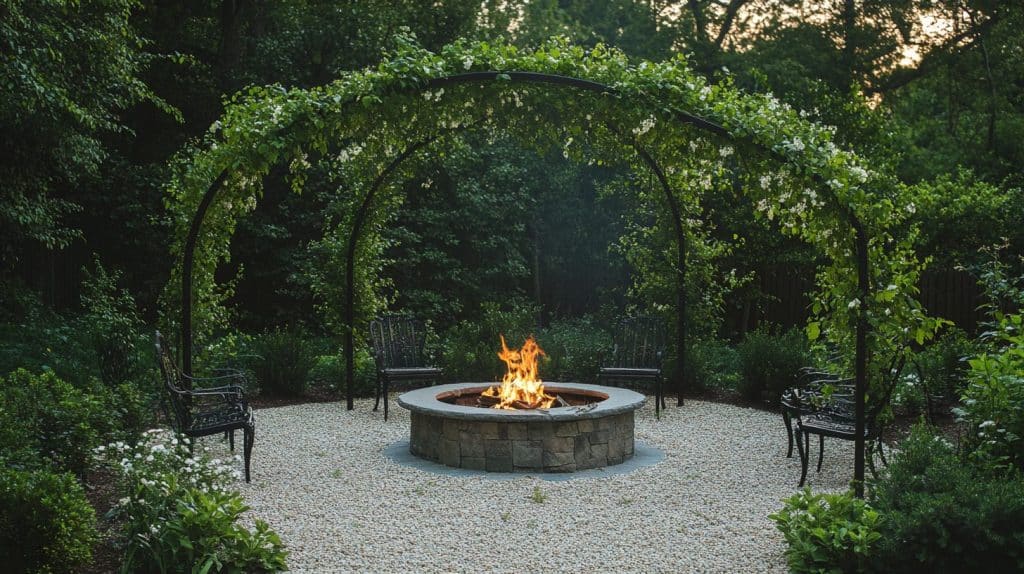
Create a magical evening setting with this romantic arrangement. Curved metal frames establish natural pathways while offering support for climbing plants.
Combining structural elements and organic growth makes this space feel established and inviting. Strategic arch placement frames views while creating distinct gathering areas within the larger space.
DIY Steps:
- Choose the arches: Select metal or wooden arches to suit your style.
- Install the arches: Place them around or leading to the fire pit area.
- Prepare the ground: Spread pea gravel evenly across the area.
- Add climbing plants: Train vines or flowers to grow over the arches.
- Include seating: Arrange comfortable chairs or a bench under the arches.
24. Stone-Lined Pea Gravel Fire Pit
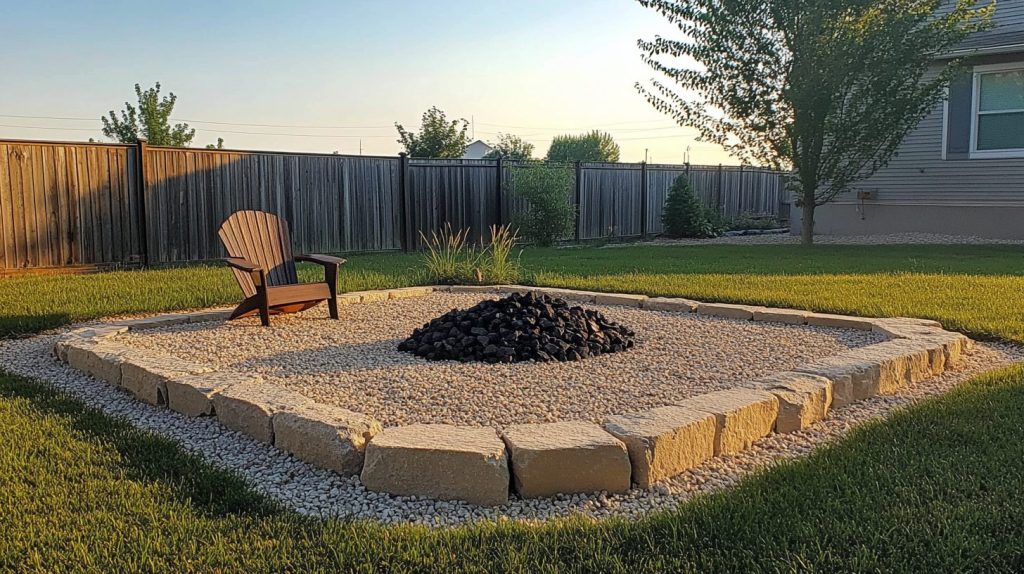
Establish clear boundaries without sacrificing style in this well-defined arrangement. Raised stone edges create natural seating while containing the base materials effectively.
The thoughtful combination of textures adds visual interest while maintaining practical functionality. This design proves sometimes the simplest solutions create the most classy results.
DIY Steps:
- Select the stones: Choose natural or decorative stones for the border.
- Outline the area: Use the stones to create a circular or rectangular boundary.
- Spread pea gravel: Fill the interior space with gravel, keeping it level.
- Place the fire pit: Position the fire pit at the center of the stone-lined area.
- Add finishing touches: Include outdoor furniture or decor to complete the space.
25. Mixed Gravel Textures
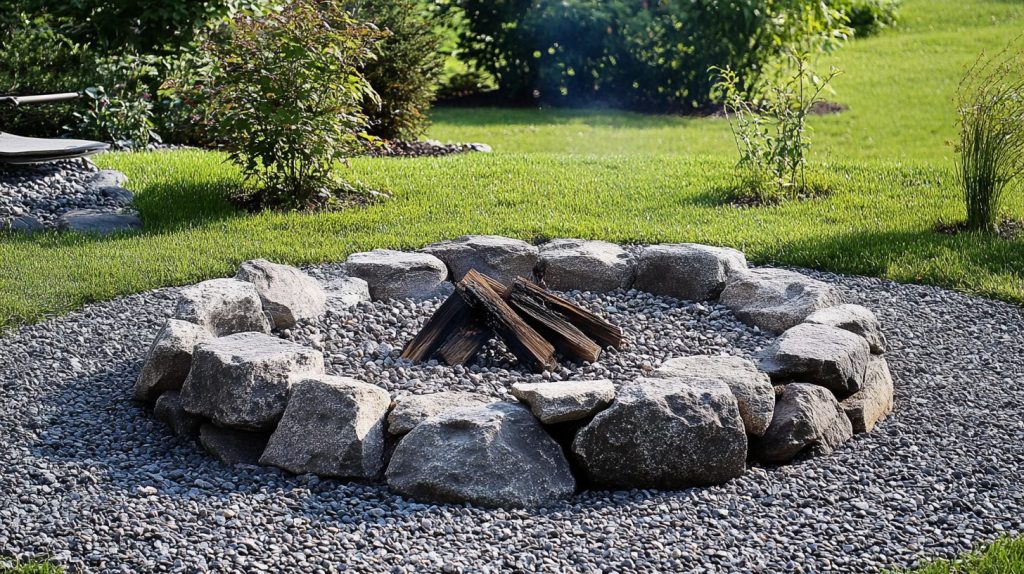
Create visual intrigue through varied surface materials in this flexible arrangement. Combining different-sized stones adds depth and interest while maintaining practical drainage solutions.
Thoughtful placement of materials creates natural pathways and gathering areas. The layered approach to ground covering proves that subtle variations can make a significant impact in outdoor spaces.
The strategic mixing of textures ensures the space feels intentional rather than random.
DIY Steps:
- Choose gravel types: Pea gravel and larger gravel stones in complementary colors.
- Prepare the area: Level the ground and mark the space for gravel.
- Lay the base layer: Spread pea gravel evenly across the area.
- Add larger stones: Arrange the larger gravel stones in patterns or borders.
- Position the fire pit: Place the fire pit centrally to unify the design.
26. Fire Pit With Lounge Chairs
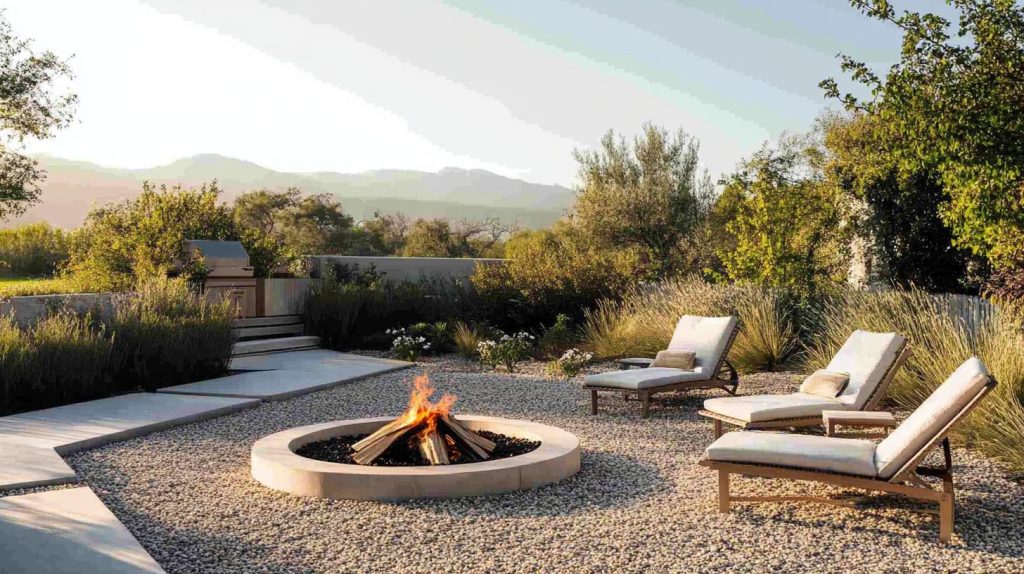
Upgrade your backyard into a high-end retreat with this luxurious arrangement. Premium seating options invite extended relaxation while maintaining durability for outdoor use.
The careful balance between comfort and sophistication creates an atmosphere worthy of exclusive resorts.
Strategic furniture placement ensures both intimate conversations and group gatherings flow naturally. The attention to comfort details encourages guests to settle in for long, leisurely evenings.
DIY Steps:
- Choose lounge chairs: Select weather-resistant chairs with cushions for comfort.
- Prepare the area: Clear the space and spread pea gravel evenly.
- Arrange the fire pit: Position the fire pit in the center of the seating area.
- Place the chairs: Arrange the lounge chairs in a semicircle or full circle around the pit.
- Add decor: Include side tables, lanterns, or string lights for a polished look.
27. Log Cabin Fire Pit Theme
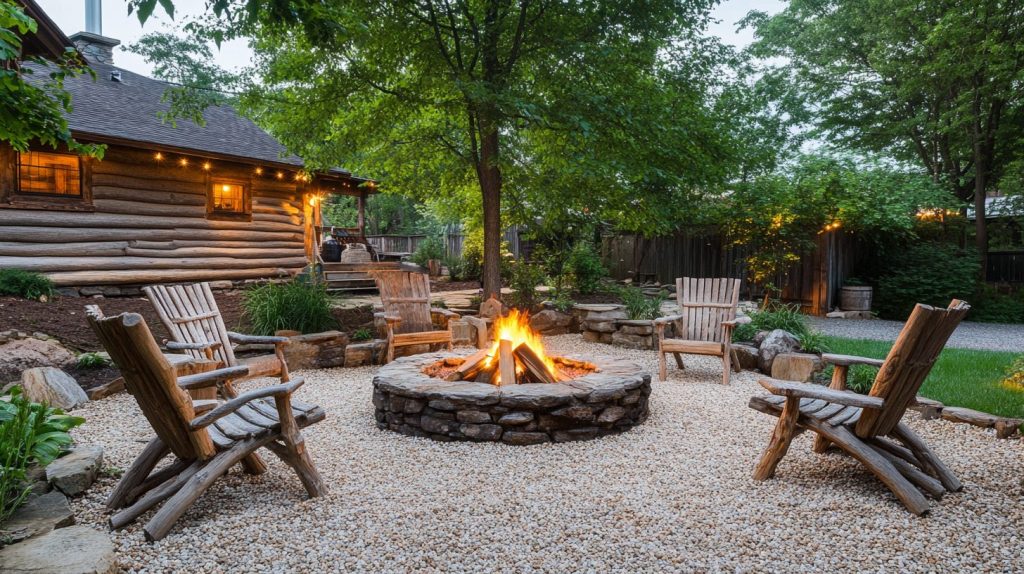
Channel mountain retreat vibes with this rustic-inspired arrangement. Natural log seating brings authentic charm while maintaining practical function.
Stone elements add stability and visual weight to the design while complementing the natural theme.
This arrangement feels grounded and inviting, perfect for creating memories of summer camp nostalgia or winter cabin coziness.
DIY Steps:
- Select the fire pit: Choose a stone or brick fire pit for a rustic look.
- Prepare the ground: Clear and level the area, then spread pea gravel.
- Add log seating: Use large logs as natural, rustic seating around the fire pit.
- Incorporate accents: Place lanterns, firewood stacks, or throw blankets for added warmth.
- Complete the look: Surround the space with greenery or wooden decor.
28. Outdoor Movie Fire Pit Area
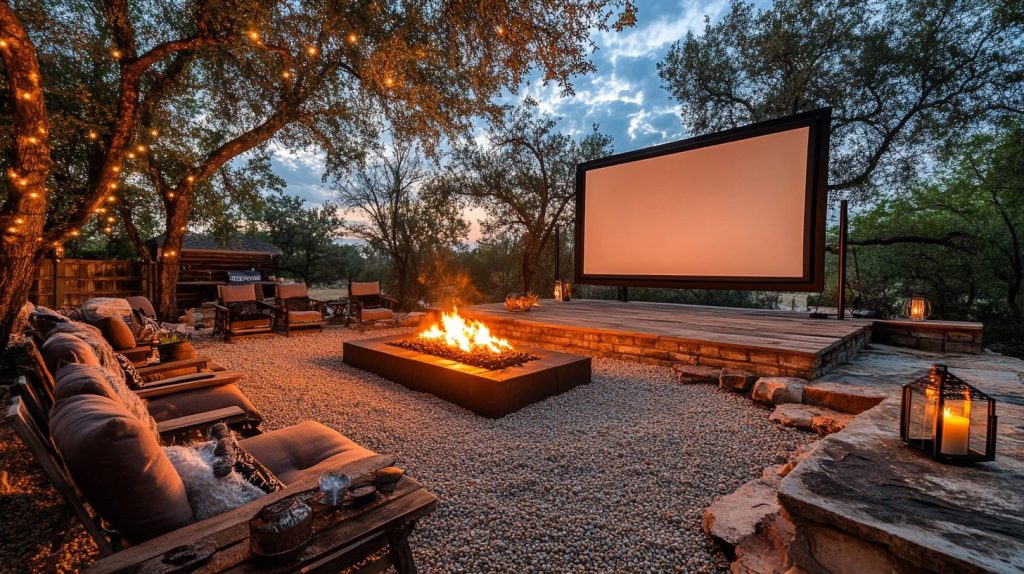
Combine entertainment with the atmosphere in this multi-functional space. A thoughtfully positioned screen creates viewing opportunities while maintaining intimate gathering potential.
The arrangement accommodates both casual movie nights and social gatherings with equal success. Strategic seating placement ensures comfortable viewing angles without sacrificing conversation possibilities.
The versatile setup makes every evening an opportunity for memorable experiences.
DIY Steps:
- Prepare the space: Clear the area and spread pea gravel evenly.
- Install the fire pit: Position it centrally or to the side for warmth.
- Set up the screen: Use a portable screen or hang a white sheet on a frame.
- Add seating: Arrange chairs, cushions, or blankets for comfortable viewing.
- Include lighting: Use string lights or lanterns to illuminate the area.
29. Fire Pit With Privacy Wall
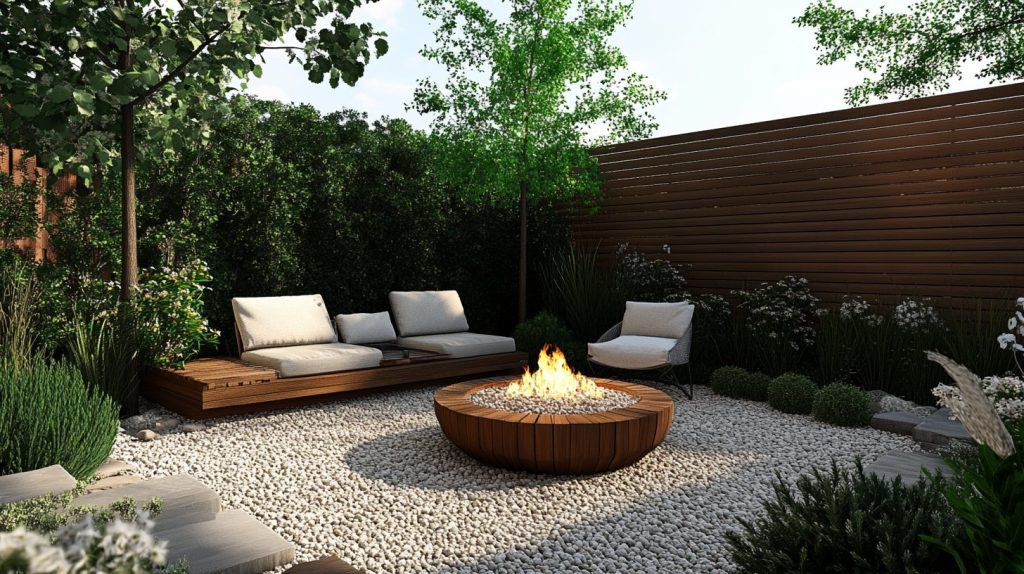
Create an intimate outdoor room with this clever arrangement. A substantial barrier offers protection from winds while establishing a sense of seclusion.
The strategic wall placement frames the gathering space without making it feel confined. This design upgrades open areas into cozy nooks perfect for private conversations and peaceful evenings under the stars.
DIY Steps:
- Plan the wall: Decide on the size and material for the privacy wall.
- Install the wall: Build the wall near one side of the fire pit area.
- Spread pea gravel: Cover the fire pit area with gravel, keeping it level.
- Add the fire pit: Position the fire pit centrally or near the wall.
- Decorate the wall: Use hanging planters or lights to enhance the design.
30. Bright And Colorful Fire Pit Area
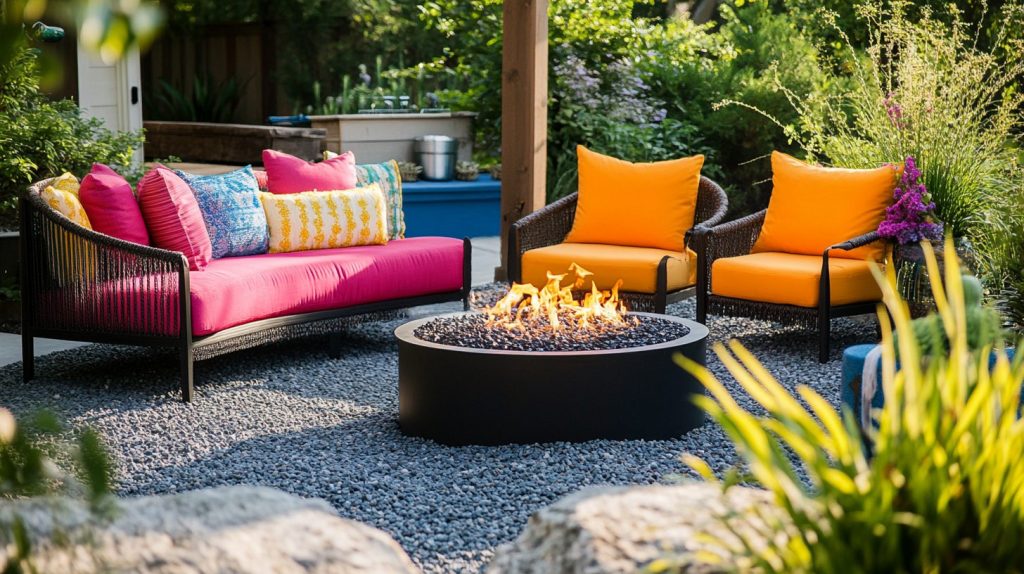
Infuse energy and personality into your outdoor space with this vibrant arrangement. Bold cushions and decorative elements create visual excitement while maintaining a sophisticated balance.
The thoughtful combination of colors ensures the space feels cheerful rather than overwhelming.
The strategic placement of bright elements draws attention to comfortable seating areas while creating an atmosphere of joy and celebration.
DIY Steps:
- Choose colorful accents: Select bright cushions, rugs, and decor items.
- Prepare the area: Spread pea gravel evenly to cover the space.
- Position the fire pit: Place the fire pit in the center of the area.
- Add seating: Use colorful chairs or benches around the fire pit.
- Finish the look: Include potted flowers or lanterns for extra pops of color.
31. Fire Pit In A Gravel Circle
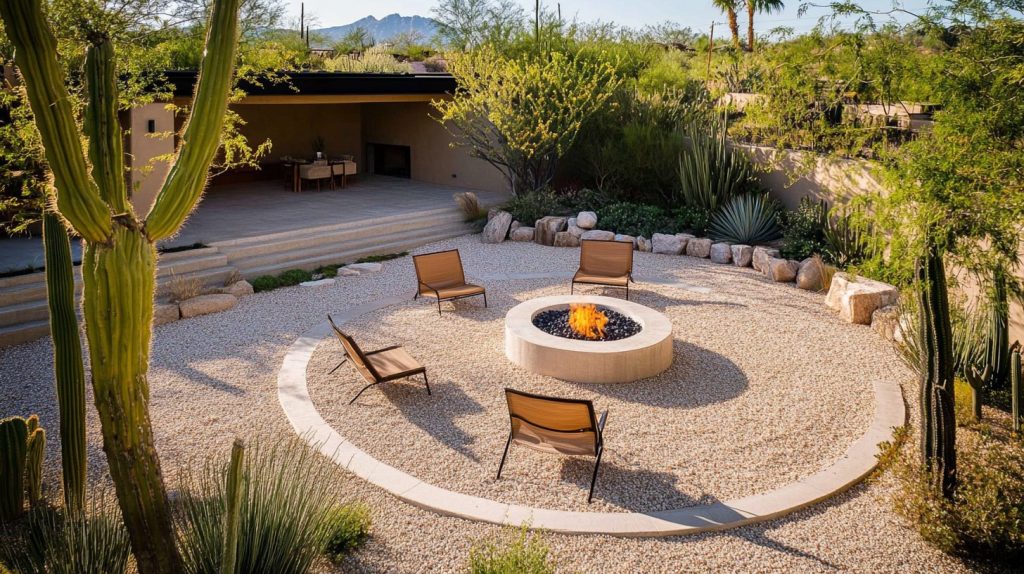
Enjoy simplicity and function with this classic circular arrangement. The rounded design naturally encourages inclusive gatherings while maintaining clear sight lines for all guests.
Careful consideration of circumference ensures plenty of room for seating while keeping everyone close enough for easy conversation.
This timeless approach to outdoor gathering spaces proves that sometimes traditional solutions offer the best results.
DIY Steps:
- Mark the circle: Use stakes and string to outline the circular area.
- Prepare the ground: Clear and level the area before adding gravel.
- Spread pea gravel: Fill the circle evenly with gravel.
- Place the fire pit: Position the fire pit in the center of the circle.
- Add seating: Arrange chairs or benches around the perimeter of the circle.
32. Pea Gravel With Pergola Fire Pit
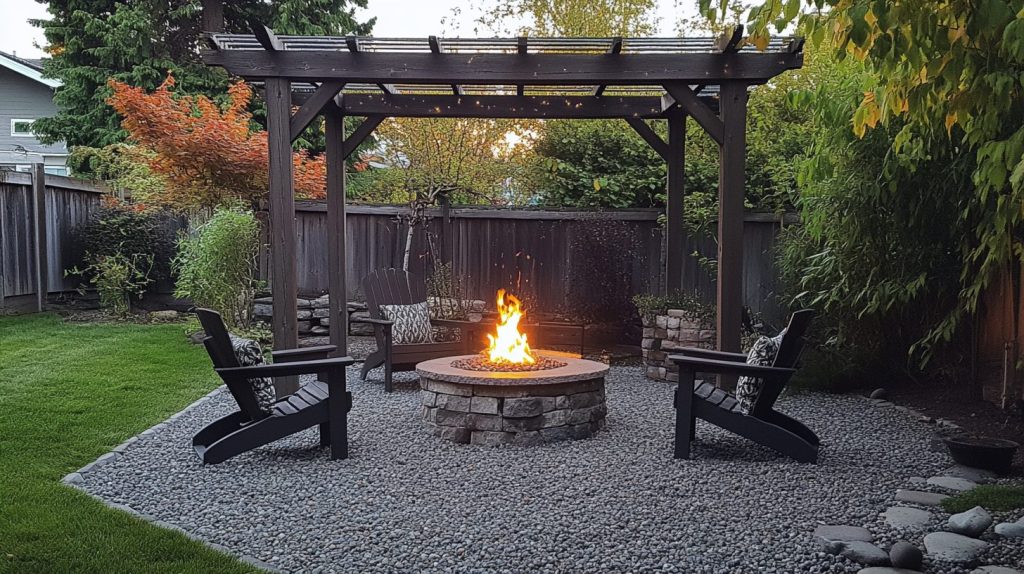
Add natural interest overhead while creating useful shade with this sophisticated arrangement. Climbing plants introduce natural elements, while the sturdy structure provides practical coverage.
Vertical and ground-level design elements create a defined outdoor room feeling. Strategic placement of support posts ensures unobstructed movement while maintaining structural integrity.
DIY Steps:
- Install the pergola: Build or place a pergola over the fire pit area.
- Spread pea gravel: Cover the ground evenly with gravel.
- Add the fire pit: Position the fire pit in the center under the pergola.
- Decorate the pergola: Use climbing plants or string lights for added charm.
- Include seating: Arrange chairs or benches to complete the look.
33. Modern Concrete And Gravel Fire Pit
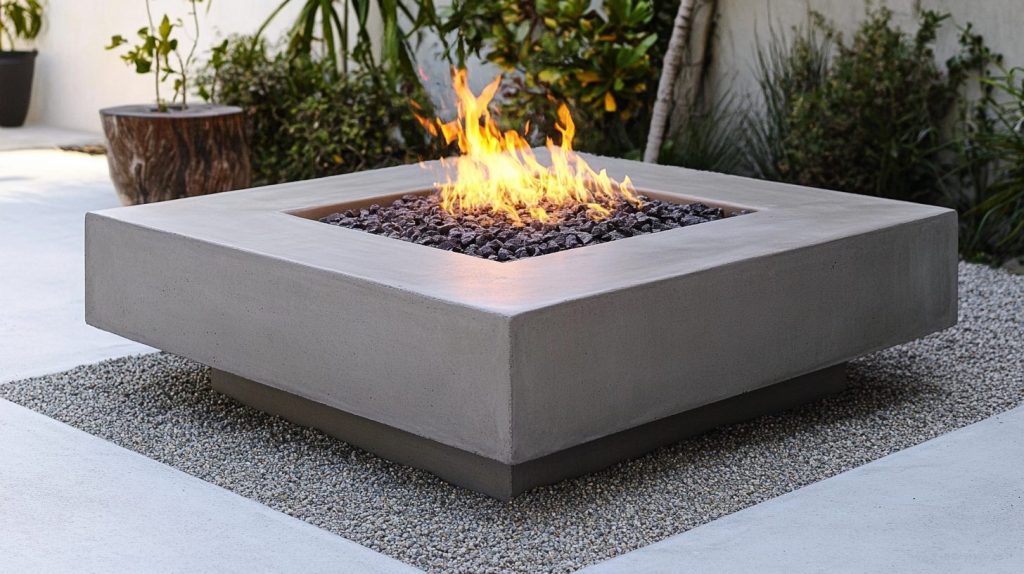
Upgrade your outdoor area into a contemporary masterpiece where clean lines meet natural elements.
The smooth, polished surface of the concrete fire table creates a striking contrast against the organic texture of the pea gravel base.
Geometric furniture with crisp edges maintains the modernist theme, while strategically placed metal planters add industrial sophistication.
The neutral color palette ensures timeless appeal, while careful spacing between elements maintains excellent flow for guests to move freely throughout the space.
DIY Steps:
- Choose a concrete fire table: Select a clean and modern design.
- Prepare the area: Level the ground and spread pea gravel evenly.
- Position the fire table: Place it centrally on the gravel base.
- Add seating: Use modern outdoor furniture with clean lines.
- Enhance the space: Include planters or lanterns for subtle decor.
34. Coastal Vibes Fire Pit Area
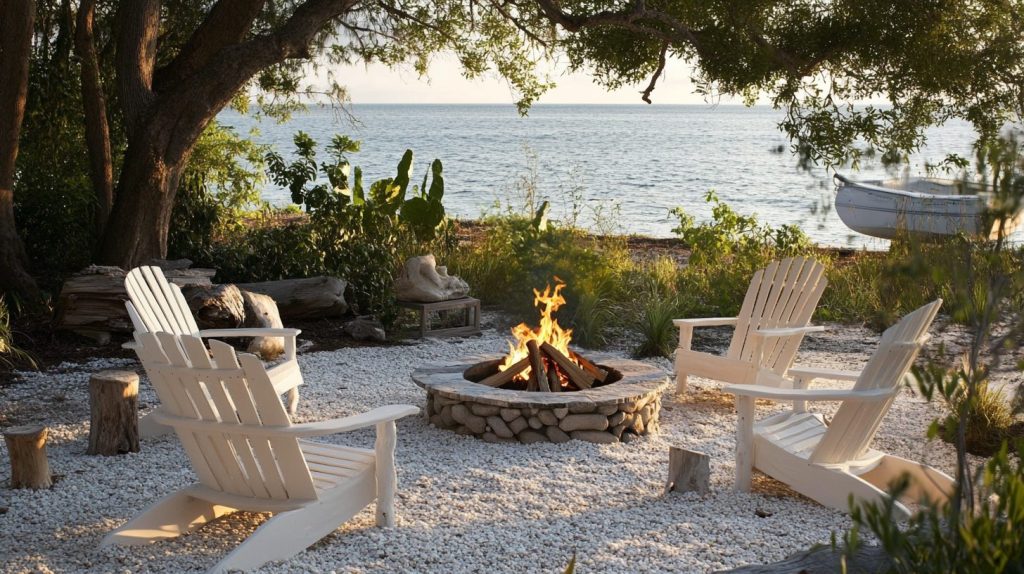
Step into a seaside retreat where whitewashed furniture pieces stand classy against a textured gravel foundation.
Weathered wood elements and carefully placed seashell collections create authentic maritime charm, while rope-wrapped lanterns cast gentle shadows across evening gatherings.
Natural fiber cushions and light linen throws enhance the breezy coastal atmosphere. The arrangement encourages barefoot comfort while maintaining a sophisticated style perfect for both afternoon relaxation and evening entertaining.
DIY Steps:
- Spread pea gravel: Cover the fire pit area evenly with gravel.
- Add the fire pit: Choose a fire bowl or table in neutral tones.
- Incorporate coastal decor: Use seashells, driftwood, and lanterns as accents.
- Add furniture: Place whitewashed or light-colored chairs around the fire pit.
- Finish the look: Include soft lighting to enhance the coastal vibe.
35. Fire Pit With Outdoor Rugs
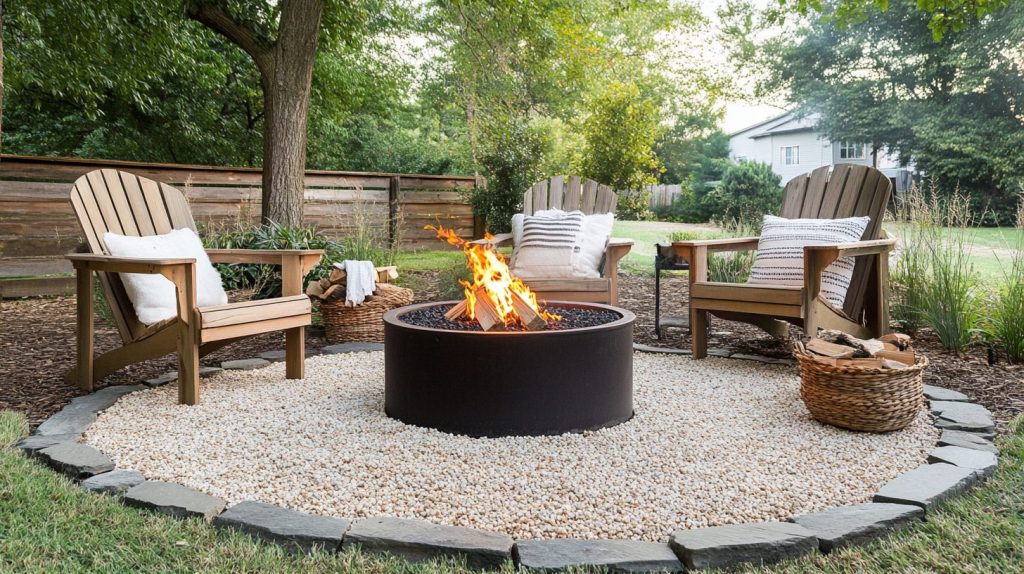
Experience layered luxury where weatherproof textiles create inviting pathways across the gravel expanse.
The thoughtful placement of durable rugs establishes distinct conversation areas while adding visual depth through pattern play.
The strategic layering of different rug sizes creates natural movement through the space, while carefully selected materials ensure longevity against outdoor elements.
The combination of textures Upgrades basic gravel into a classy foundation for sophisticated outdoor living.
DIY Steps:
- Select outdoor rugs: Choose rugs made from durable, weather-resistant materials.
- Spread pea gravel: Cover the area evenly before adding the rugs.
- Position the fire pit: Place the fire pit in the center of the space.
- Lay the rugs: Arrange the rugs around or under seating areas for comfort.
- Add seating: Use chairs or cushions to complete the cozy setup.
36. Pea Gravel And Fire Pit With Ottomans
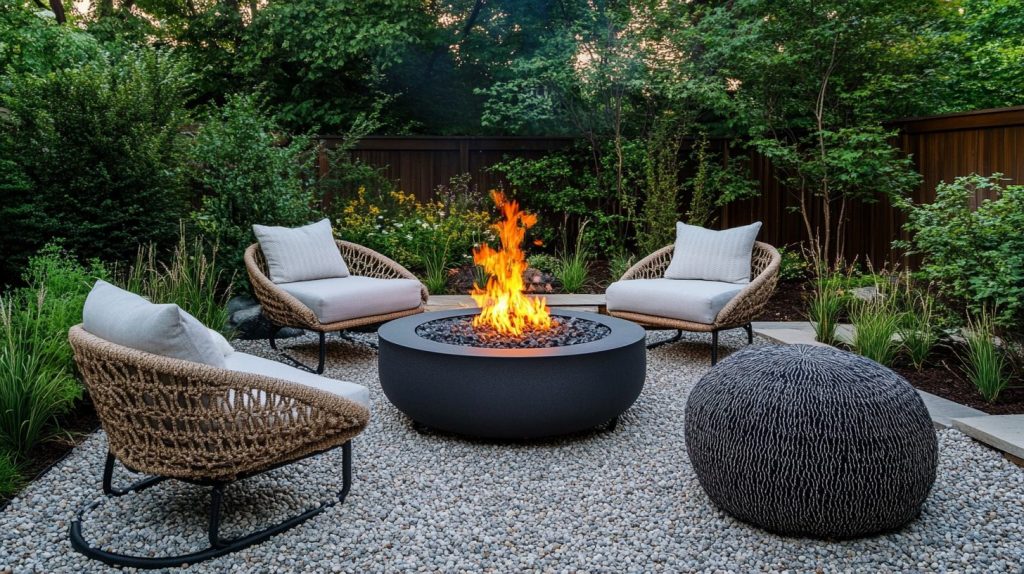
Create flexible luxury in your outdoor space where plush seating options encourage extended relaxation.
Each ottoman serves multiple purposes, from extra seating to impromptu tables, while maintaining visual cohesion through carefully selected weather-resistant fabrics.
The arrangement allows for easy reconfiguration as gathering needs change while maintaining comfortable conversation distance.
Strategic placement ensures each piece can be appreciated individually and as part of the collective design.
DIY Steps:
- Prepare the ground: Level the area and spread a thick layer of pea gravel.
- Position the fire pit: Place it in the center of the gravel area.
- Select ottomans: Choose weatherproof ottomans with durable fabric covers.
- Arrange seating: Place the ottomans evenly around the fire pit.
- Decorate the space: Add throw pillows and side tables for a complete setup.
37. Fire Pit With Tree Canopy
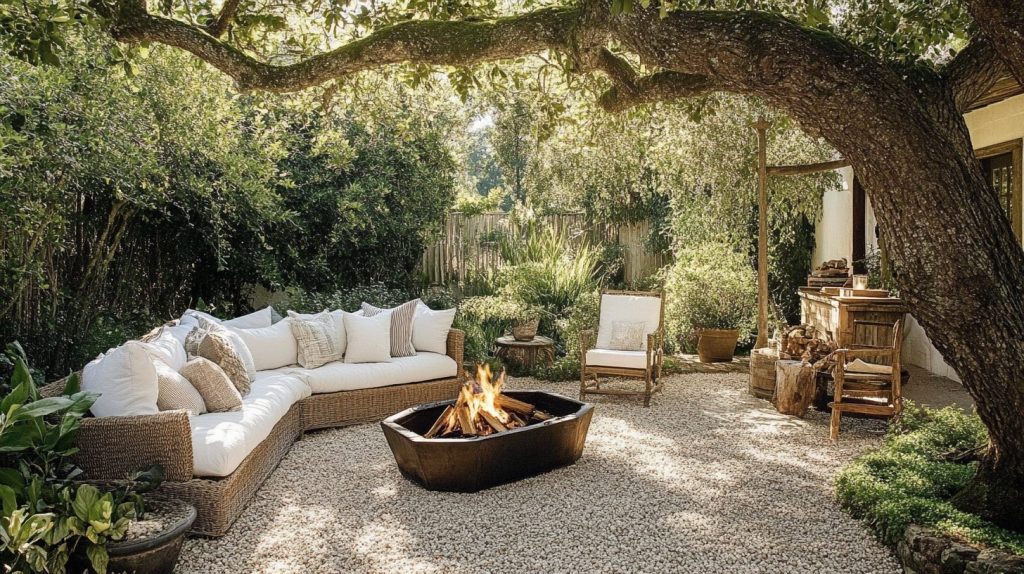
Explore natural shelter beneath a living umbrella where mature branches create dappled shadows across evening gatherings.
The strategic placement beneath established trees provides natural climate control, while filtered sunlight creates ever-changing patterns across the gravel surface throughout the day.
The organic ceiling establishes natural boundaries while maintaining an open-air feeling.
Careful consideration of root systems and branch patterns ensures safety and optimal shade coverage, while thoughtful lighting upgrades the canopy to a magical evening ceiling.
DIY Steps:
- Choose the location: Select an area beneath large, sturdy trees.
- Prepare the ground: Clear debris and spread pea gravel evenly across the space.
- Add the fire pit: Position a fire bowl or built-in fire pit centrally.
- Include seating: Use lightweight furniture that can be moved as needed.
- Enhance the area: Add lanterns or string lights to the tree branches for ambiance.
38. Eco-Friendly Fire Pit Area
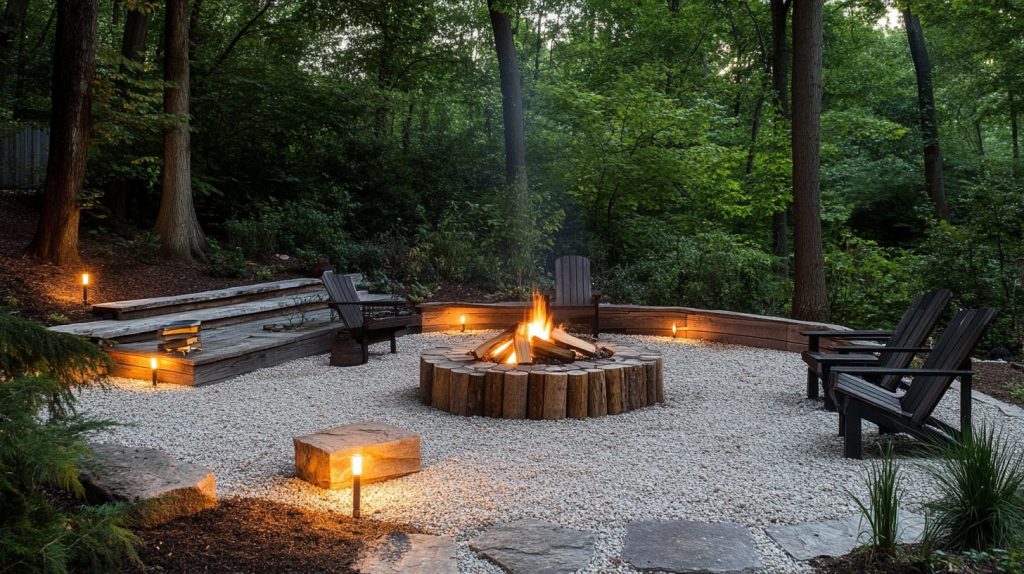
Enjoy environmental consciousness without sacrificing style in this sustainably crafted gathering space. Reclaimed materials tell stories through weathered surfaces, while solar-powered lighting elements eliminate energy waste.
Locally sourced stone and recycled metal components create conversation pieces that reflect environmental values.
The careful selection of native plants around the perimeter supports local ecosystems, while permeable gravel surfaces manages water runoff effectively.
Thoughtful material choices prove that responsible design can also be beautiful.
DIY Steps:
- Source materials: Use recycled bricks or stones for the fire pit.
- Prepare the area: Spread pea gravel across the cleared and leveled ground.
- Position the fire pit: Build or place it centrally within the gravel area.
- Add seating: Use benches or stools made from reclaimed wood.
- Include lighting: Install solar-powered lights around the space.
39. Seasonal Fire Pit Decor
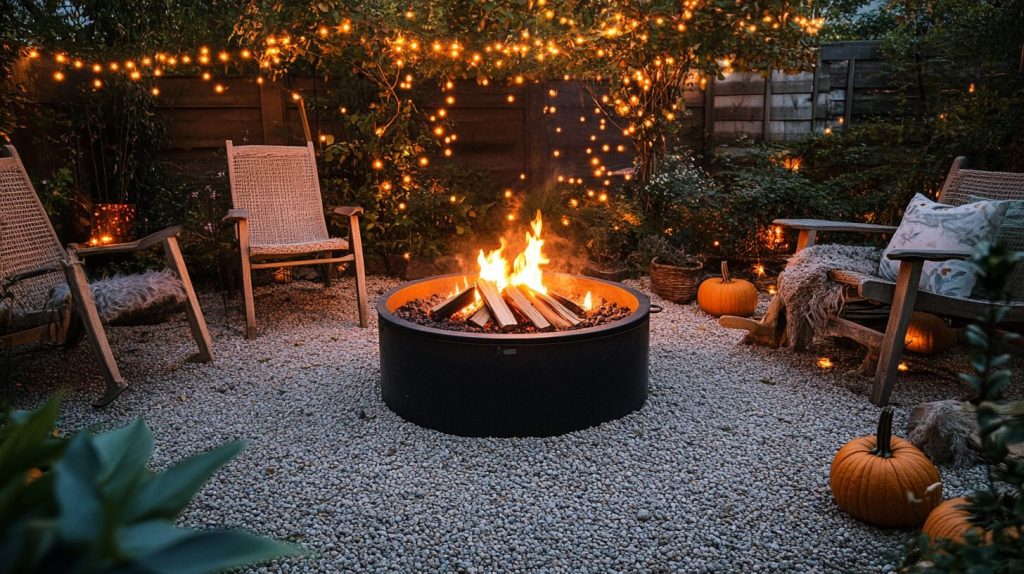
Experience year-round outdoor excitement with this adaptable arrangement that celebrates each season’s unique character. Autumn brings warm-toned pumpkins and rustic lanterns, while winter sparkles with frost-resistant ornaments and evergreen garlands.
Spring awakens the space with potted bulbs and pastel accessories, transitioning effortlessly into summer’s vibrant flowering containers and cooling elements.
The thoughtful rotation of decorative pieces ensures the space remains fresh and inviting throughout the year while maintaining functional gathering areas.
DIY Steps:
- Prepare the base: Level the area and spread pea gravel evenly.
- Add the fire pit: Place a versatile fire bowl that complements all seasonal decor.
- Decorate seasonally: Incorporate pumpkins and gourds in fall, fairy lights in winter, and potted flowers in spring and summer.
- Update seating: Use themed cushions or throws for each season.
- Enhance the ambiance: Use lighting and accessories that fit the seasonal mood.
Conclusion
Turn your backyard dreams into reality with these fire pit ideas. Each design offers something unique, so you can pick what works best for your space and style.
If you’re into modern vibes, rustic charm, or something in between, a setup here’ll catch your eye. Don’t feel pressured to copy any design exactly.
The best outdoor spaces come from mixing different elements that speak to you.
Start with the basics – a solid foundation and good seating – then add your personal touches. Keep in mind that great outdoor spaces grow over time.
Add lights one weekend, maybe some plants the next. Before you know it, you’ll have created that perfect spot where memories are made, stories are shared, and everyone wants to hang out.
Now it’s your turn to get creative and make your outdoor space truly shine.

