Kitchen cabinets take a beating over time, grease splatters, daily wear, and outdated finishes can make even the sturdiest cabinets look tired and worn.
I know the frustration of staring at cabinets that no longer match your style or seem dirty despite your best cleaning efforts.
Here’s the good news: you don’t need to replace your entire kitchen to get that fresh, updated look you’re craving. Restaining your cabinets is a cost-effective way to breathe new life into your space without the big price tag of a full renovation.
In this step-by-step guide, I’ll walk you through everything you need to know about restaining kitchen cabinets, from choosing the right stain color to applying the final protective coat.
You’ll learn the tools you need, the prep work that makes all the difference, and pro tips that ensure beautiful, long-lasting results.
Why is it Important to Restain Kitchen Cabinets?
Kitchen cabinets face daily wear from cooking grease, moisture, and constant use. Over time, this exposure causes the original finish to fade, chip, or look outdated. Restaining brings back their natural beauty while extending their lifespan.
Cost savings: Restaining costs hundreds instead of thousands for cabinet replacement. Get a fresh kitchen look without breaking your budget.
Increased home value: Updated cabinets boost resale value and make your kitchen more appealing to buyers. Well-maintained cabinets signal quality to potential purchasers.
Protection from damage: New stain and protective coatings prevent moisture damage, warping, and cracking. Proper protection extends cabinet life for years.
Style updates: Change cabinet colors to match current trends without major construction. Transform honey oak to rich espresso or modern gray finishes.
Environmental benefits: Refinishing keeps solid wood out of landfills while using fewer new materials. Choose an eco-friendly option that reduces waste.
Daily wear recovery: Kitchen cabinets face constant exposure to grease, moisture, and heavy use. Restaining restores their natural beauty and original appeal.
Step-by-Step Kitchen Cabinet Restaining Process
Here’s the complete roadmap to restaining kitchen cabinets. Each step includes clear instructions to help achieve professional-looking results throughout the project.
Tools Required:
| Tool | Description |
|---|---|
| Frog Tape | For masking off areas to prevent paint bleeding. |
| Brown Rosin Paper | Protects floors and countertops from damage. |
| Screwdriver | Used to remove cabinet hardware. |
| Sanding Sponge | For smoothing surfaces before painting. |
| Paint Sprayer | Applies paint evenly for a smooth finish. |
| Vacuum | Cleans up dust and debris after sanding. |
Materials Required:
| Material | Description |
|---|---|
| Brown Rosin Paper | Protects surfaces from paint and dust. |
| Frog Tape | Prevents paint bleed for clean edges. |
| Primer (Acrylic Enamel) | Prepares surfaces for paint adhesion. |
| Enamel Paint | Provides a smooth, durable finish for cabinets. |
| Top Coat (Satin Urethane) | Adds a protective finish to painted cabinets. |
Step 1: Workspace Preparation
Proper workspace setup prevents damage to your kitchen and ensures clean results. This foundational step protects surfaces and creates an organized work environment. Taking time here saves cleanup later.
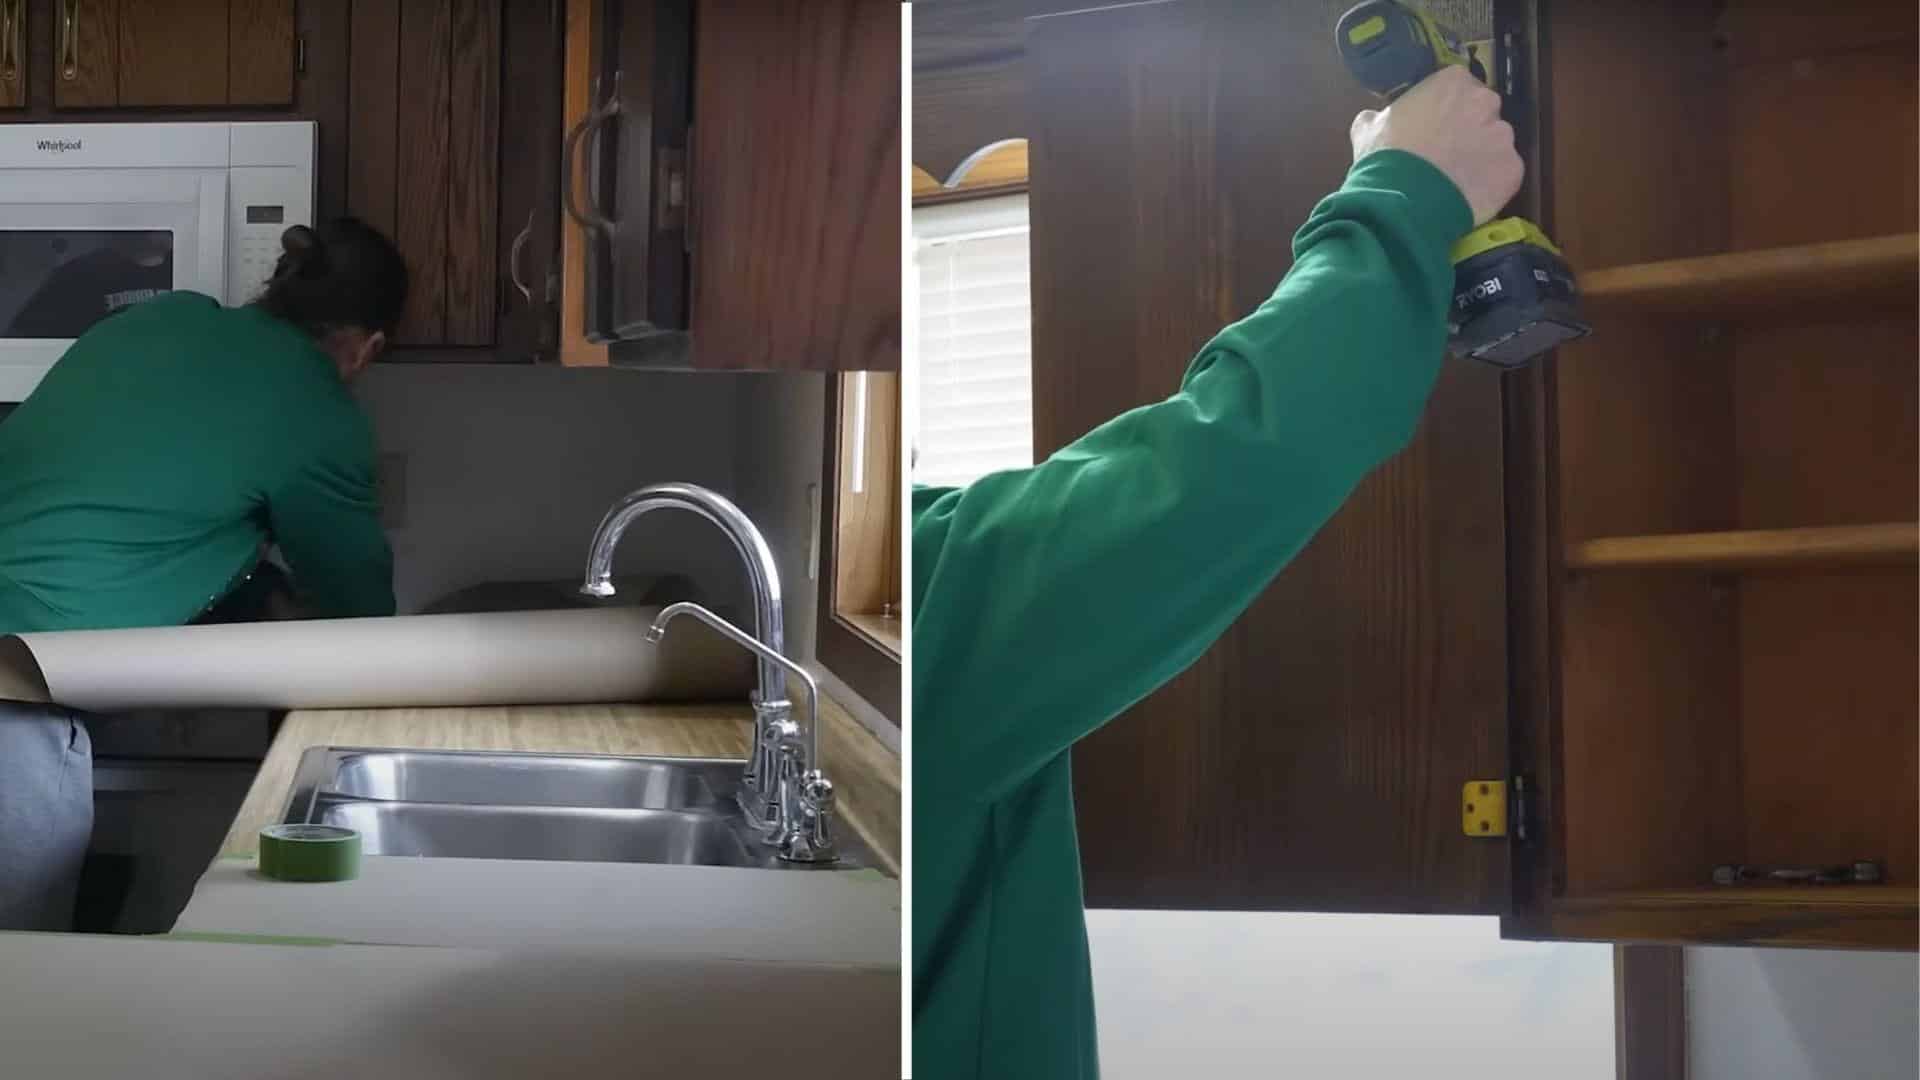
Start by covering floors with brown rosin paper to protect them from paint drips and dust. Next, protect countertops with plastic sheeting and use painter’s tape to mask unwanted areas.
Remove all cabinet hardware before beginning any work. Clear the workspace of kitchen items and set up proper lighting to ensure clear visibility of your work.
Step 2: Grain Filling Process
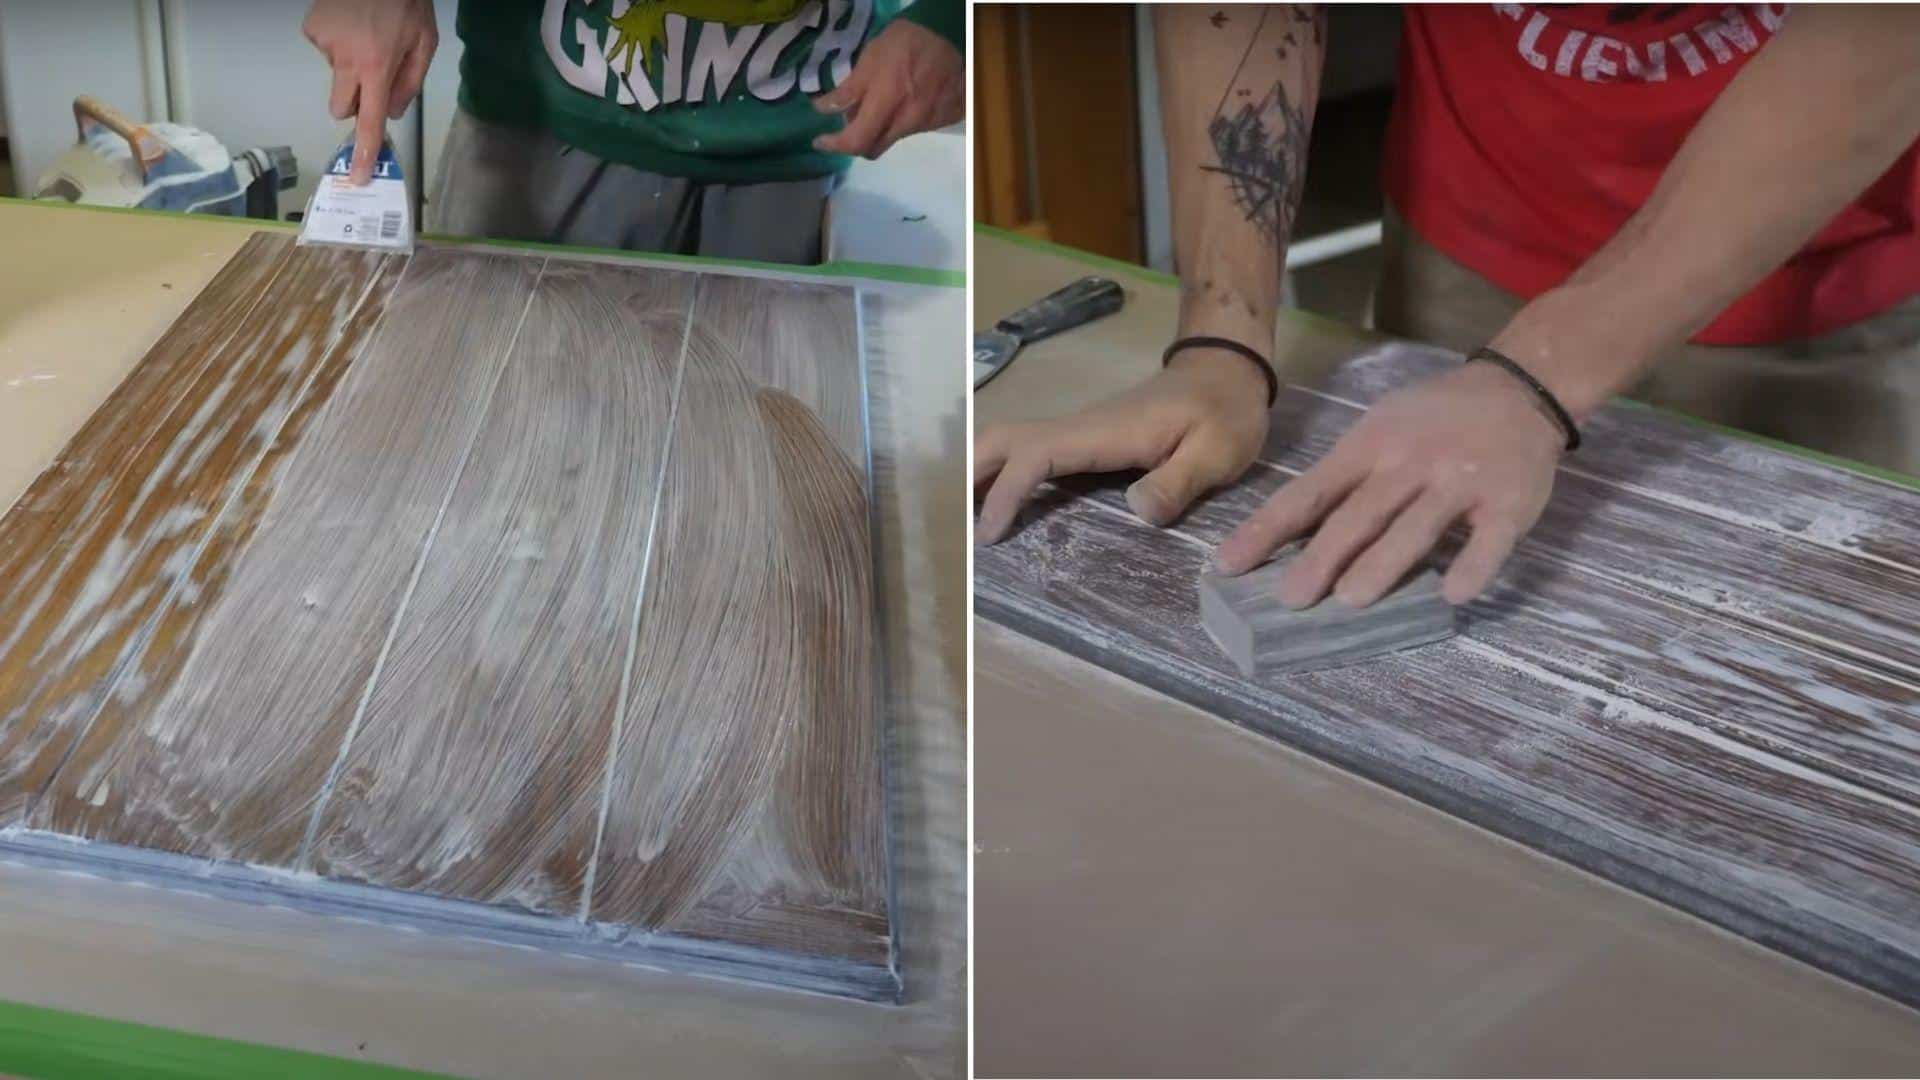
Oak cabinets need grain filling to create smooth surfaces for painting. This step eliminates the natural wood grain texture that shows through paint. Skipping this creates an uneven finish.
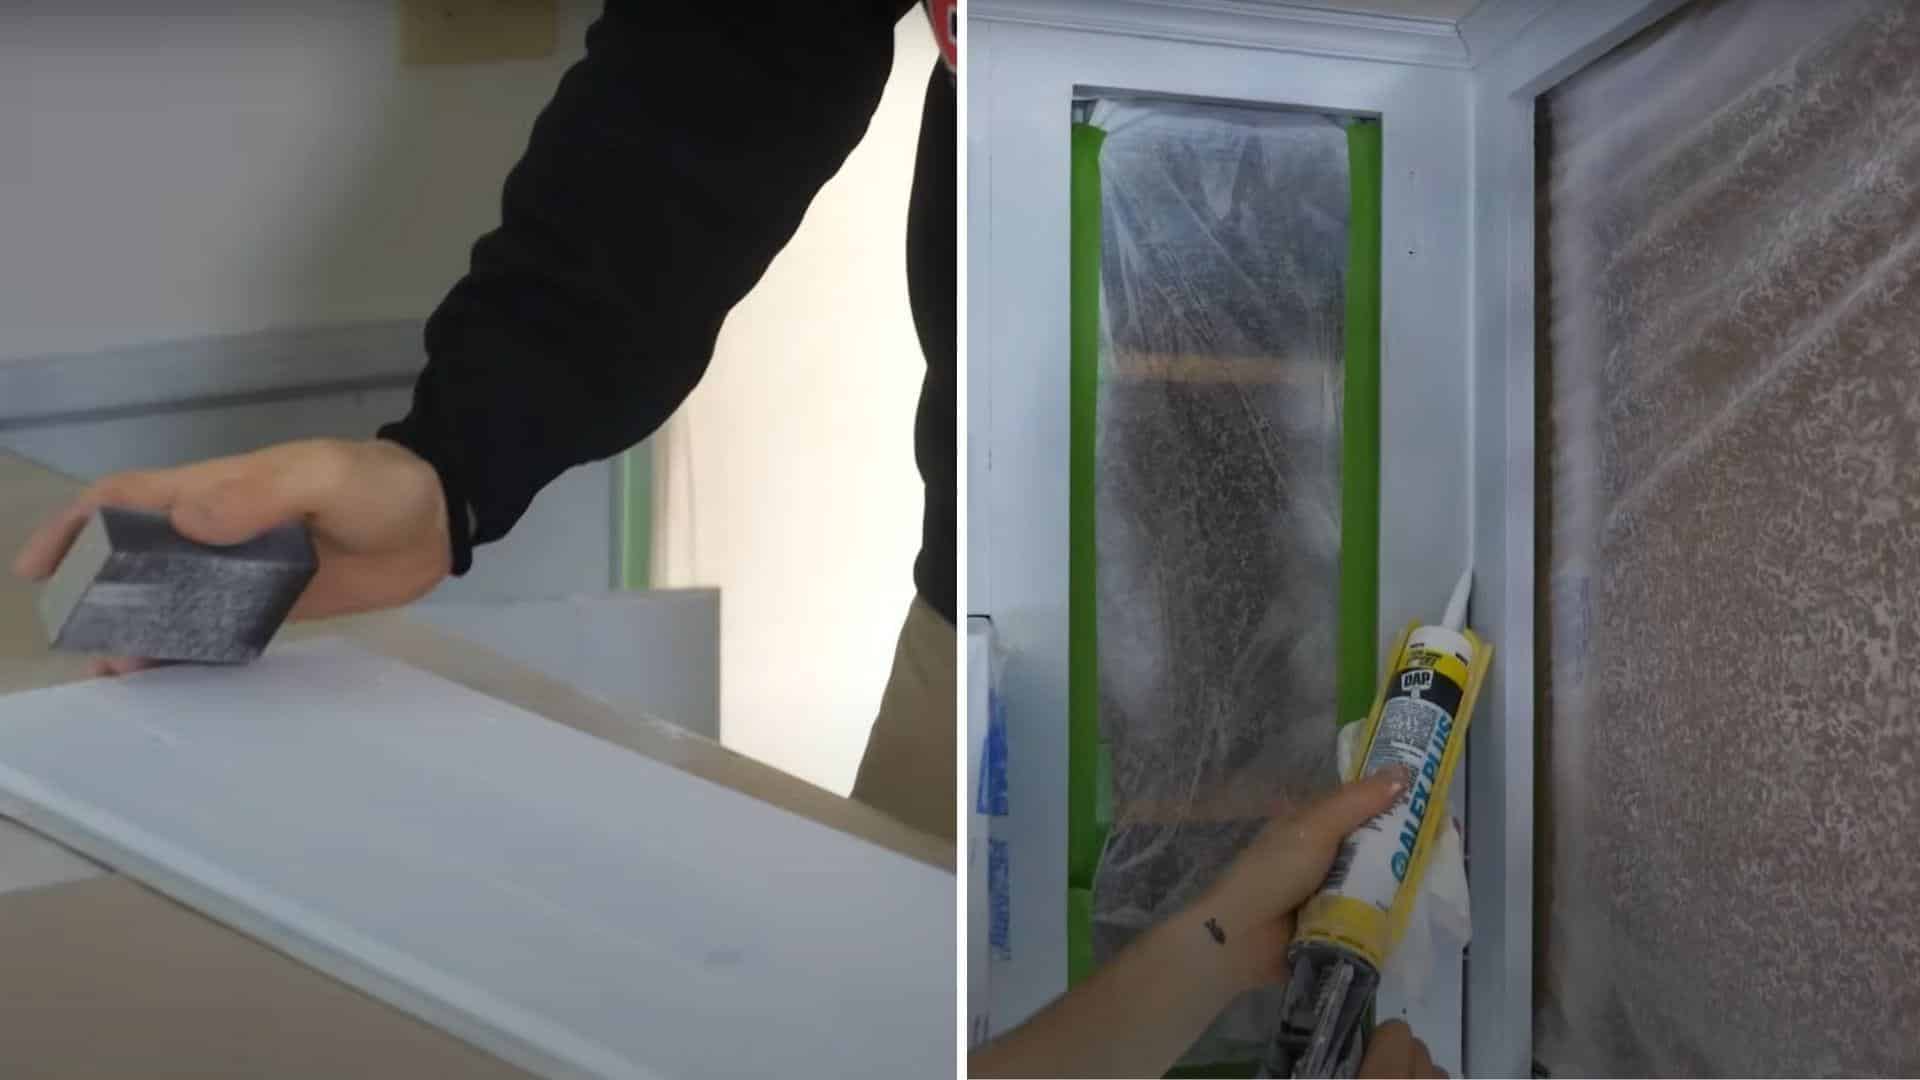
Apply grain filler to cabinet doors using a putty knife to work the filler into the wood grain. Remove excess filler by scraping against the grain direction, then allow complete drying time before moving to the next step.
Step 3: Complete Kitchen Protection
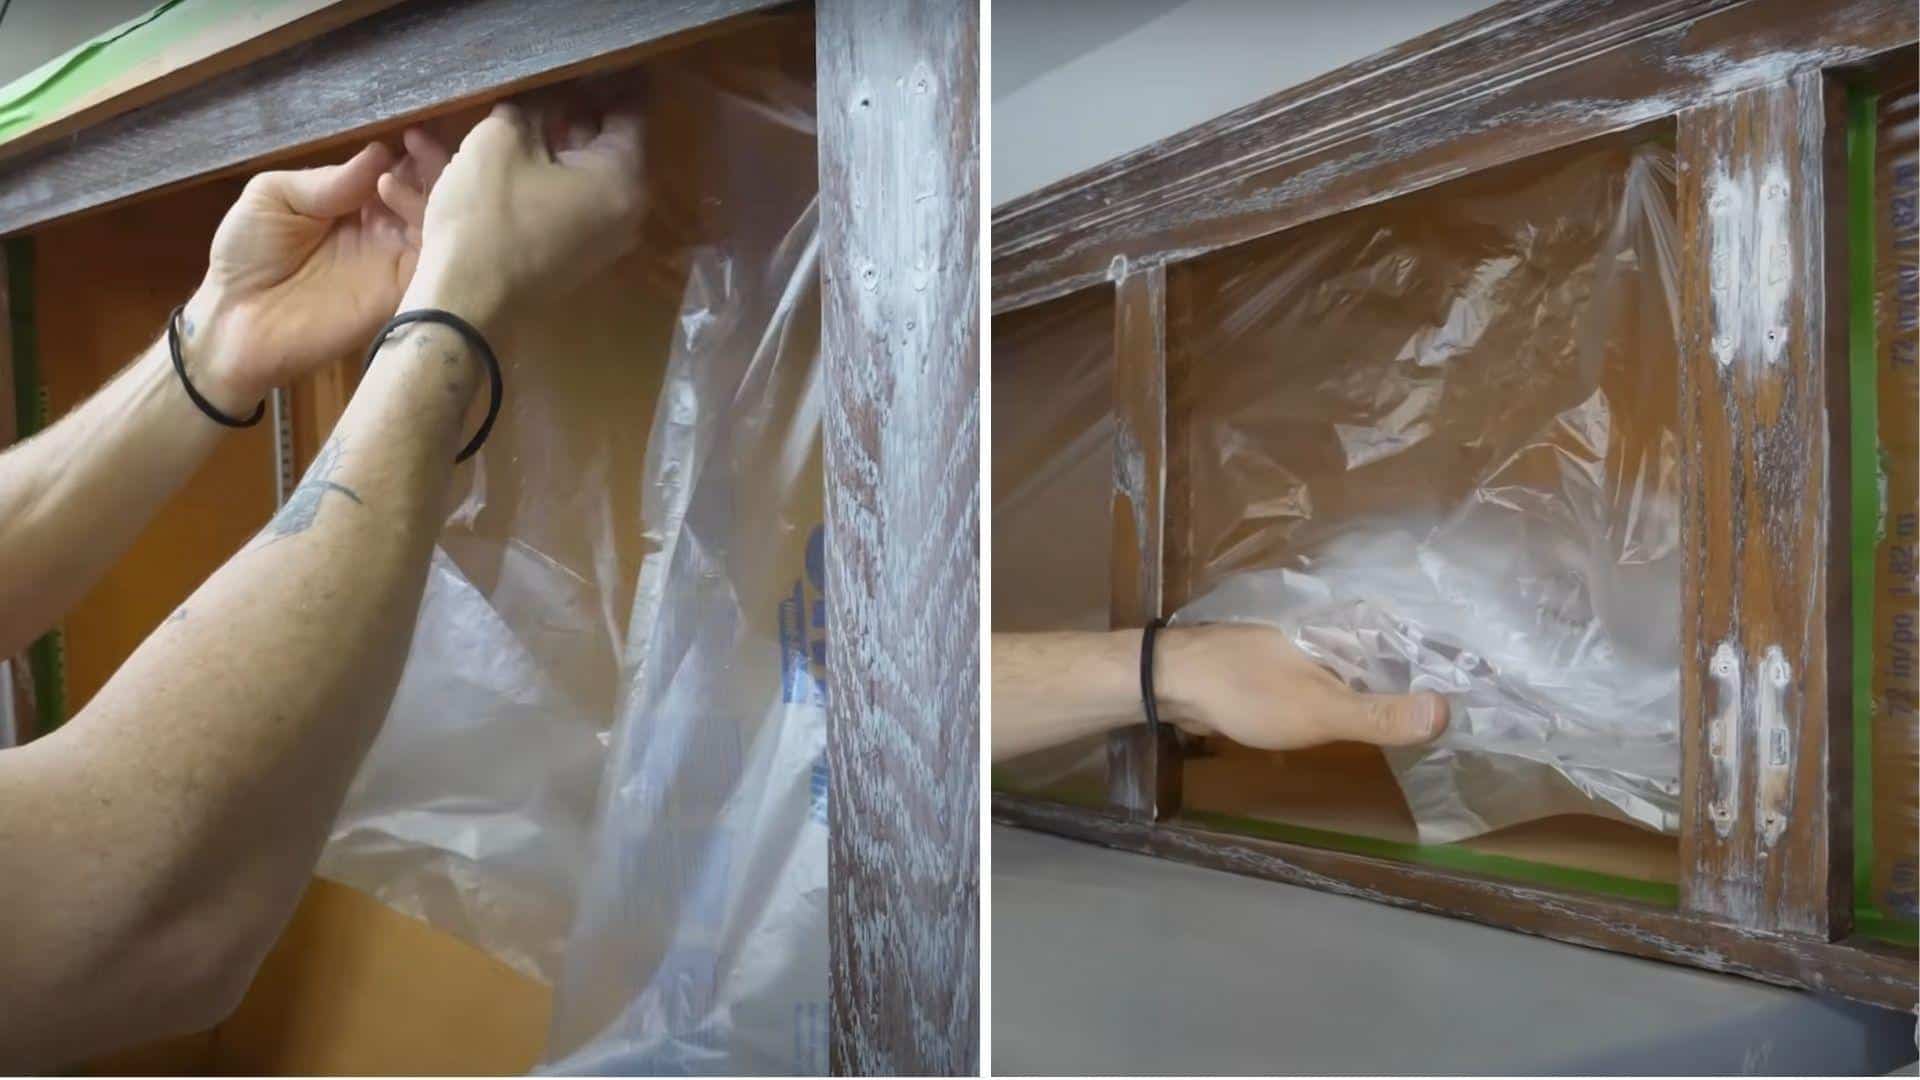
Total kitchen protection prevents overspray damage and makes cleanup easier. Plastic sheeting creates a controlled environment for spray application. This step is vital for spray painting projects. Cover all appliances with plastic and protect windows and glass surfaces.
Seal doorways to prevent overspray and ensure good ventilation throughout the work area. Double-check all coverage and create protected walkways. Remove or cover light fixtures that might get damaged during the process.
Step 4: Primer Application
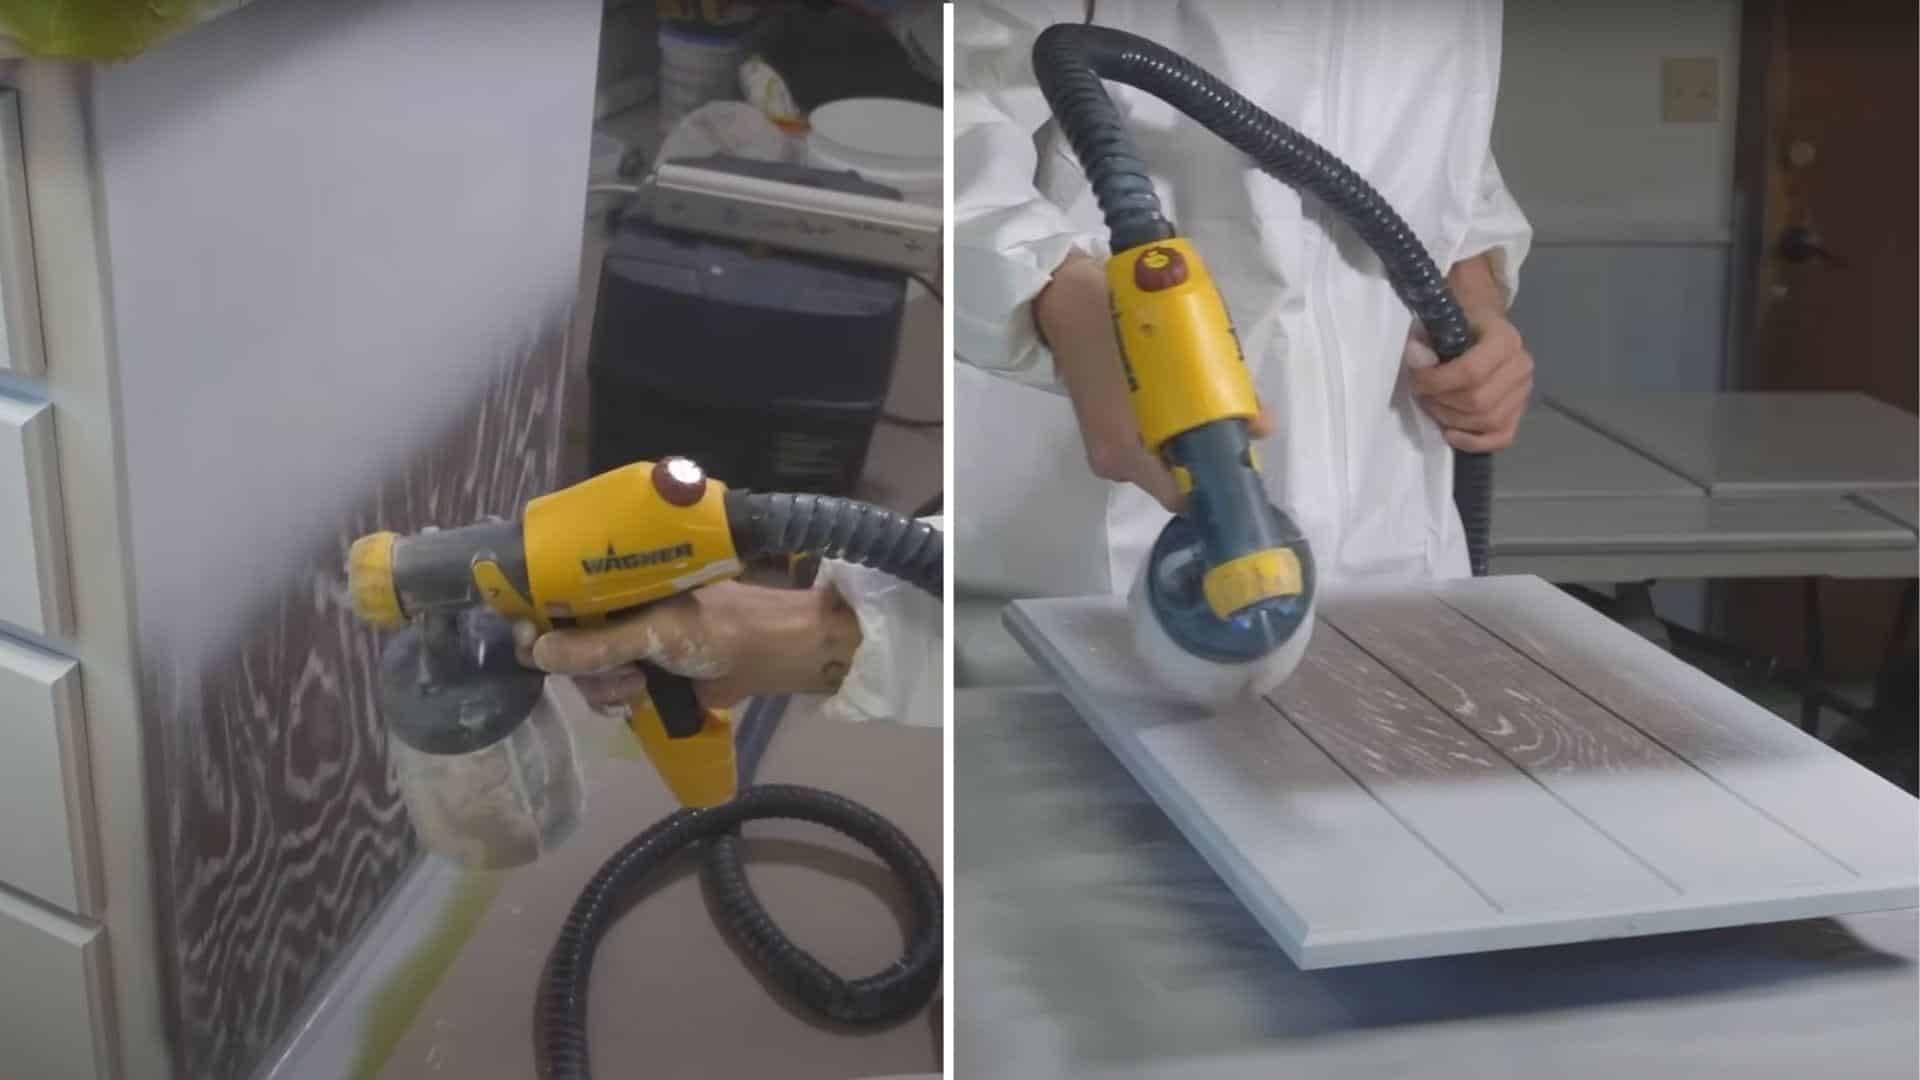
Primer creates the foundation for paint adhesion and color coverage. This step ensures the topcoat bonds properly and provides an even color. The quality of primer application determines the final result.
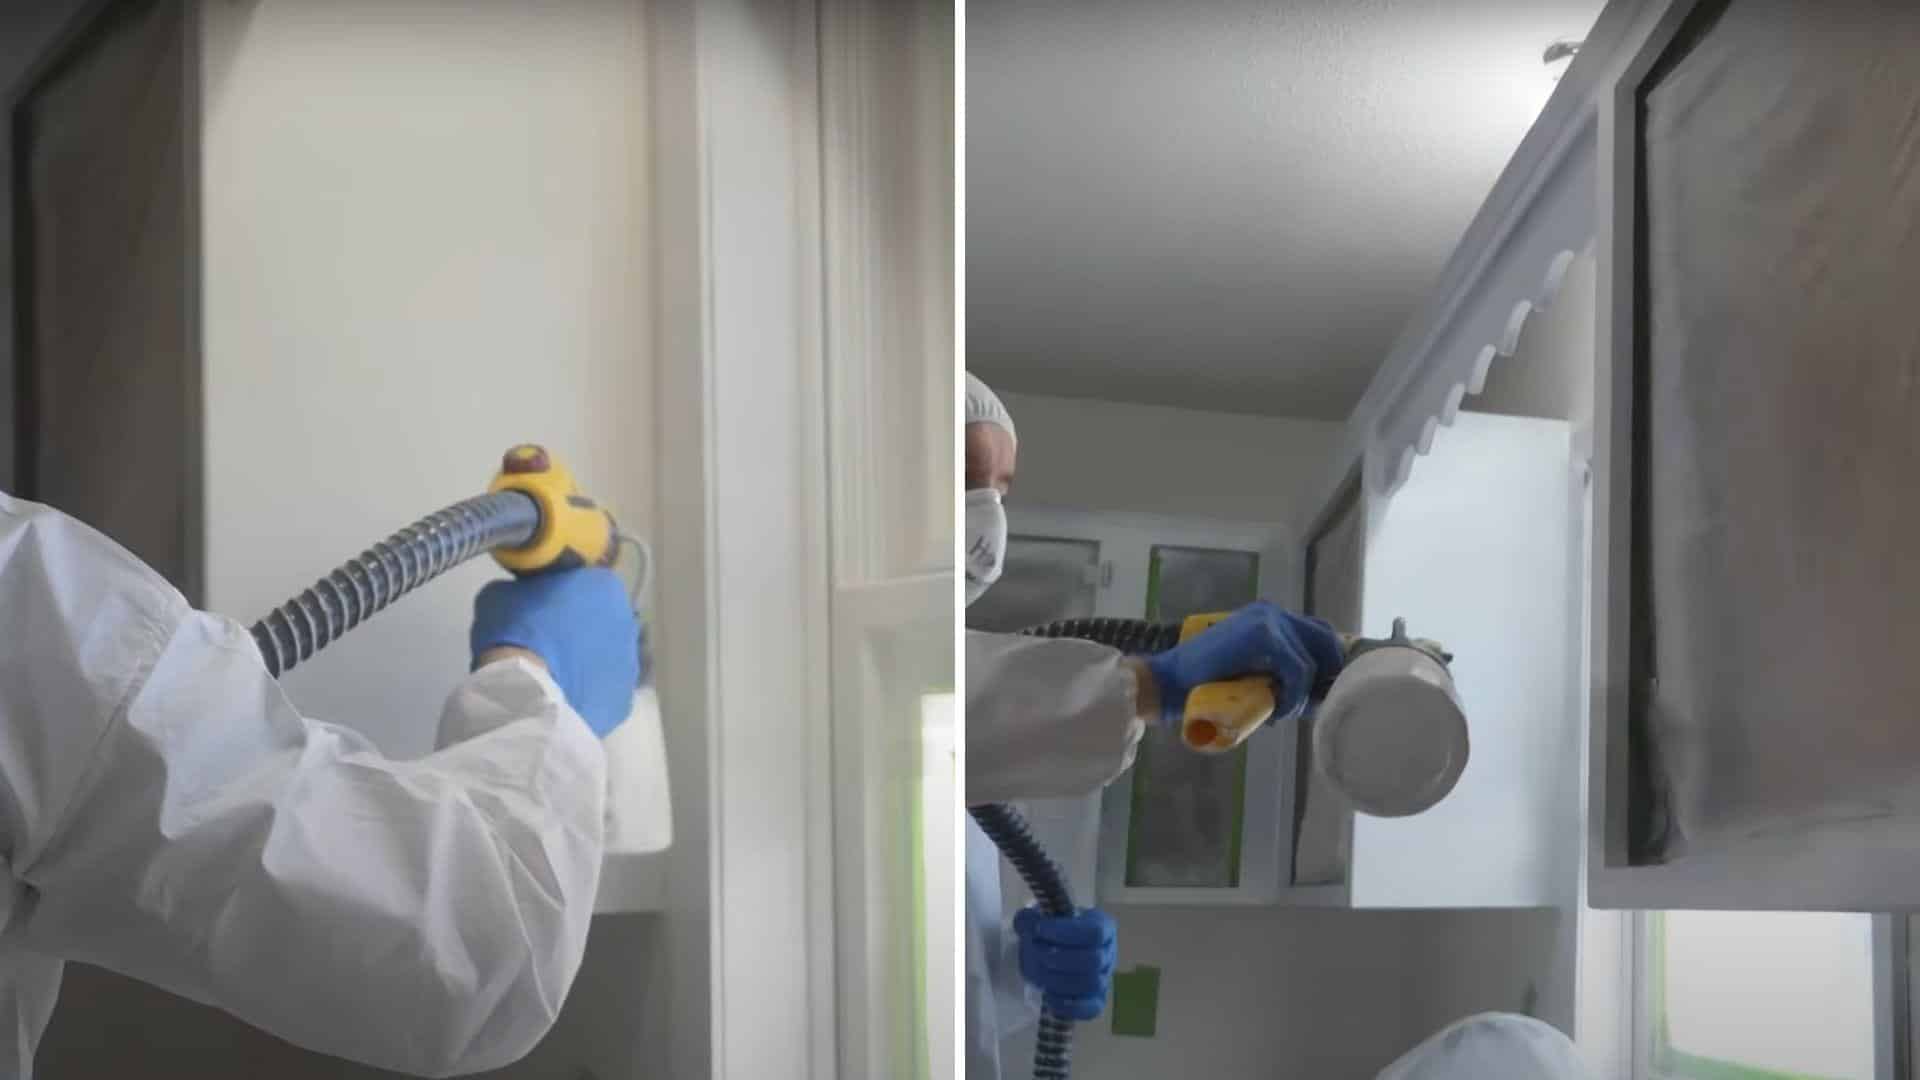
Choose a suitable primer for the cabinet material and apply thin, even coats with a spray gun. Maintain a consistent spray pattern throughout the application and allow proper drying between coats.
Step 5: Surface Preparation Between Coats
Sanding between coats creates smooth surfaces and removes imperfections. Caulking fills gaps that would show as dark lines. This step separates amateur from professional results.
Sand primer with 220-grit paper and remove dust with a tack cloth. Fill gaps with paintable caulk and smooth caulk lines properly. Allow caulk to dry completely and check for drips or runs before proceeding.
Step 6: Final Coat Application
The topcoat provides durability and the final appearance. Multiple thin coats are more effective than a single thick coat. This step requires patience and proper technique.
Apply topcoat in thin layers while maintaining a wet edge during spraying. Allow flash time between coats and apply a minimum of two topcoats for best results.
Step 7: Finishing and Reassembly
Final touches and reassembly complete the project. Careful handling prevents damage to the new finish. This step brings everything together for the finished look.
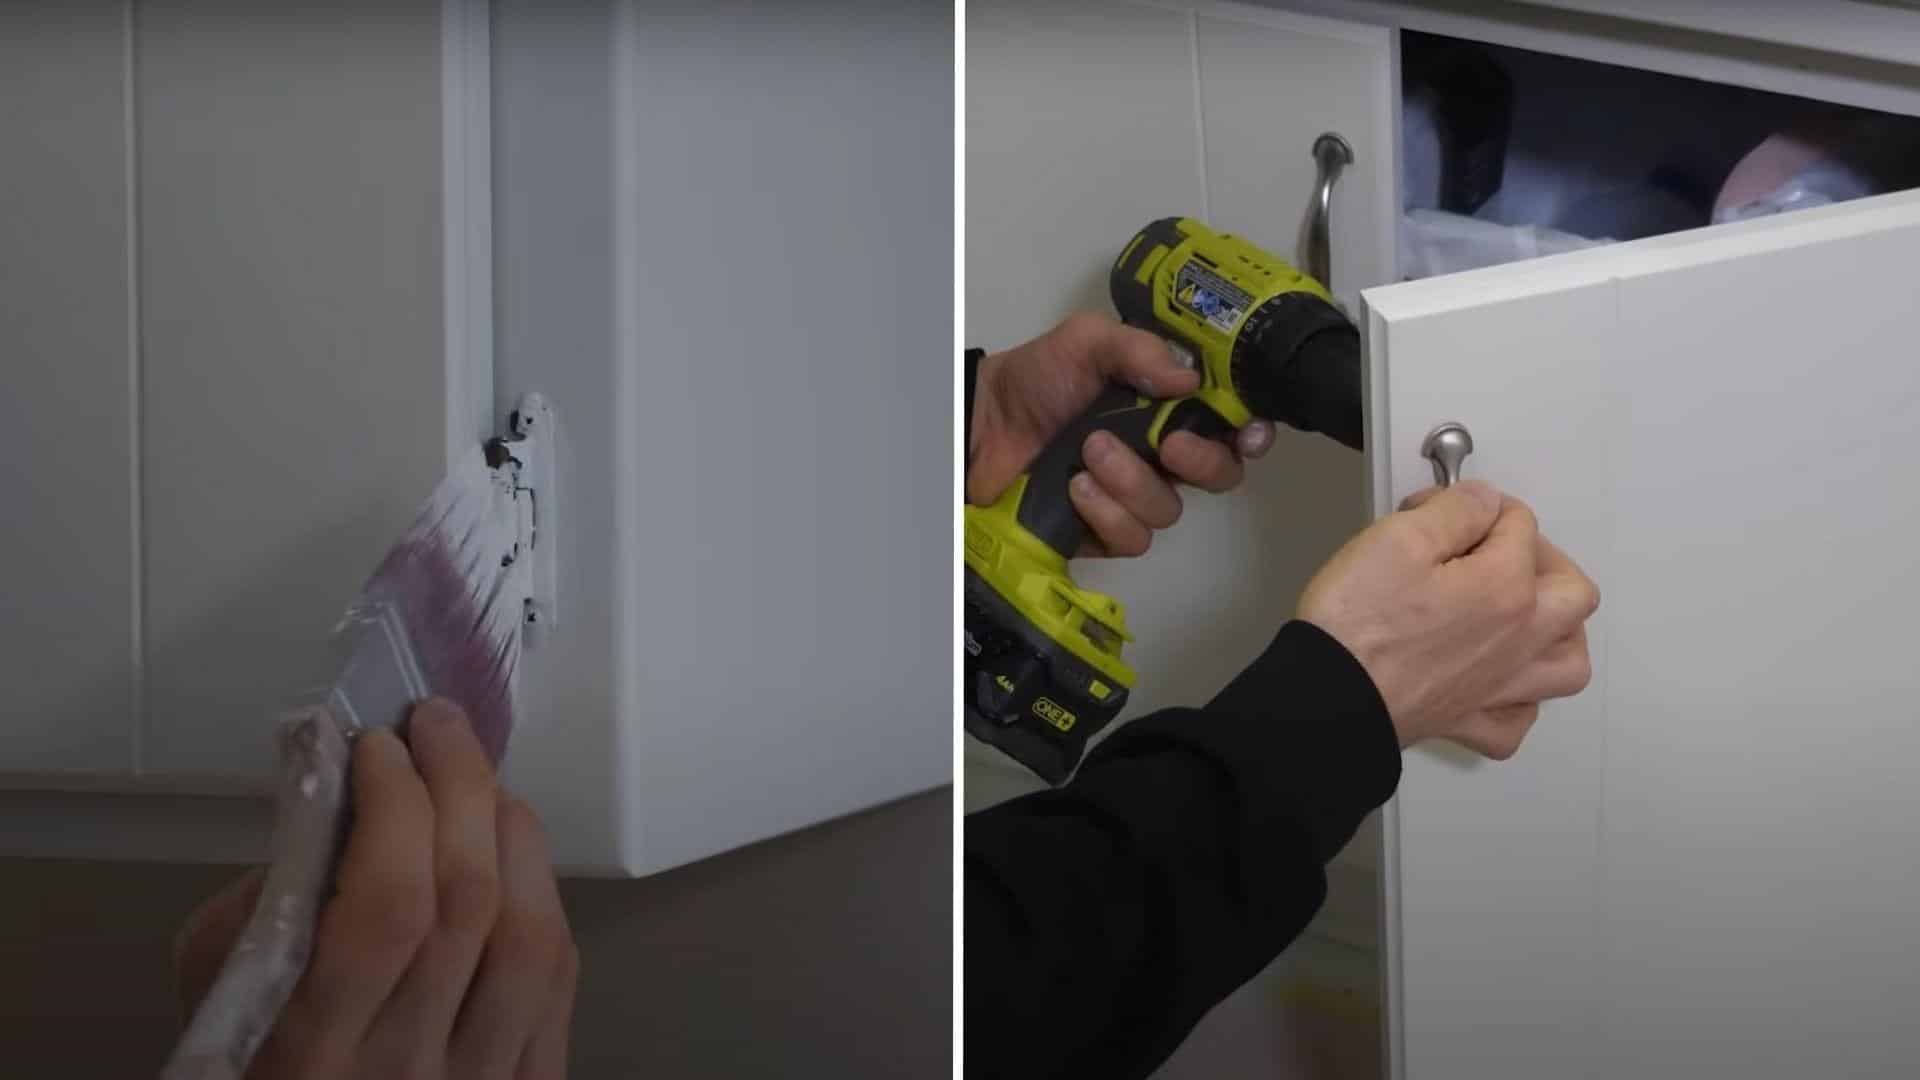
Make necessary touch-ups and allow complete curing time before handling. Reinstall hardware in the original holes and reattach doors, adjusting the fit as needed. Clean the workspace thoroughly to complete the project.
Each step builds on the previous one, so don’t rush the process. Taking time with prep work pays off with results that look professionally done and last for years.
Video Tutorial
I’d like to give credit to DIY Painting for their informative video, which served as a reference for this guide.
Tips for Kitchen Cabinet Refinishing
- Choose the Right Stain for Your Wood Type: Oak absorbs stain differently than maple or cherry wood. Check inside cabinet doors to identify your wood type before selecting a stain.
- Remove All Hardware and Doors Before Starting: Take off all cabinet doors, drawers, and hardware first. This approach makes the job easier and delivers better results.
- Sand in the Right Direction and Grit Sequence: Always sand with the wood grain, never against it. Cross-grain scratches show through the stain and look unprofessional.
- Clean All Surfaces Thoroughly Between Steps: Kitchen cabinets collect grease and grime that regular cleaners can’t remove. Use degreasing cleaners designed for wood surfaces.
- Apply Stain with the Grain in Thin Coats: Work stain into wood using a brush or cloth, following grain direction. Avoid flooding the surface with too much stain at once.
Mistakes to Avoid When Restaining Kitchen Cabinets
Most cabinet restaining projects fail due to simple errors that homeowners make during the process, and here’s how to avoid them.
Mistake 1: Skipping the Wood Preparation Step
Solution: Strip all old finishes completely before staining. Sand down to bare wood with 120-grit paper. Clean surfaces with degreasing cleaner and mineral spirits.
Mistake 2: Not Testing Stain Color First
Solution: Test the chosen stain on hidden areas of the cabinet first. Apply exactly as planned for the main project. Let it dry completely and add a topcoat as well.
Mistake 3: Applying Stain Too Thick or Too Fast
Rushing stain application creates uneven, blotchy results. Heavy application prevents proper wood penetration, creating obvious color variations throughout the surface.
Solution: Apply thin, even coats with the wood grain direction. Work on small sections at a time. Follow the timing instructions exactly and wipe the excess properly.
Mistake 4: Working in Poor Environmental Conditions
Temperature and humidity significantly impact the application of stains. Cold, hot, or humid conditions can cause finish problems that appear days later.
Solution: Work in 65-75 degree temperatures with good lighting. Use fans for air circulation. Avoid humid weather and direct sunlight on surfaces.
Conclusion
Kitchen cabinet restaining offers a budget-friendly solution to update your space without the expense of full replacement.
By following these step-by-step instructions and avoiding common mistakes, you can achieve professional-looking results that last for years.
Remember that proper preparation is the foundation of success. Take time with each step, from workspace setup to final curing. The difference between amateur and professional results lies in attention to detail and patience throughout the process.
Your newly refinished cabinets will give your kitchen a fresh look while saving thousands compared to replacement costs. The investment in time and effort pays off with a kitchen that feels brand new.
Ready to start your cabinet restaining project? Share your before and after results in the comments below!!