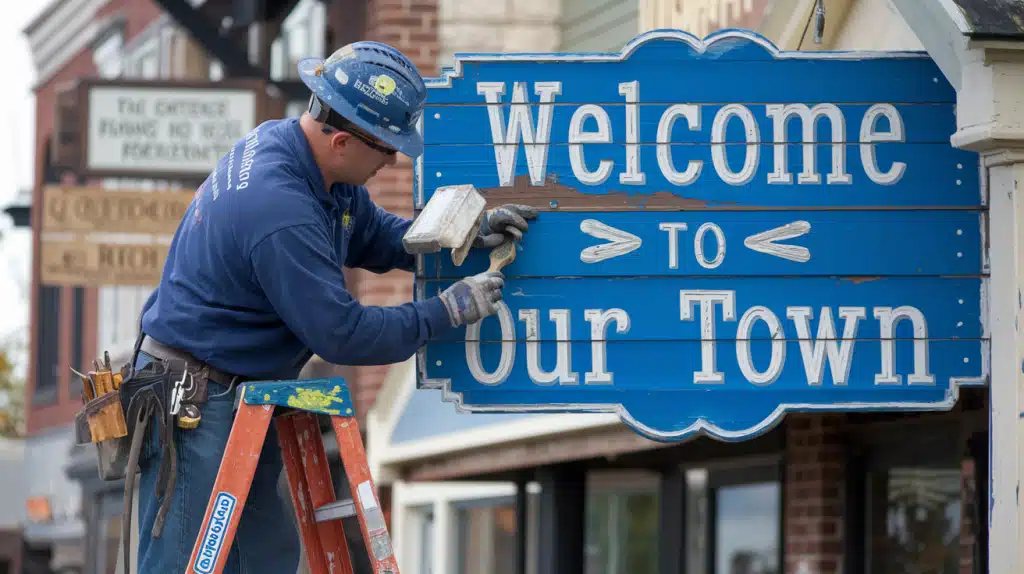
Are you looking for a way to create beautiful wood signs without dropping hundreds on fancy cutting machines?
I get it – I was in the same boat until I found this game-changing technique.
You’ve probably seen those gorgeous farmhouse signs all over Pinterest and thought, “I could never make that without a Cricut.” Well, I’m about to show you how wrong that thought is.
What if I told you you could create professional-looking lettered signs with a paint pen and basic supplies from your desk drawer?
No expensive equipment, no complicated techniques – just simple tools and a foolproof method.
Ready to learn how to make stunning wood signs that look machine-made but cost a fraction of the price?
Let’s explore this step-by-step guide.
Materials and Tools Needed to Make Wood Signs
| Material | Purpose |
|---|---|
| Wood | Smooth, flat surface for the sign |
| Paint Pen | For lettering (Oil-based or Acrylic) |
| Graphite Paper | For transferring text to wood |
| Pencil | For marking center and tracing |
| Ruler | For measuring and finding the center |
| Painter’s Tape | To secure the template |
| Stain or Paint | For base coat |
| Clear Sealant | To finish and protect the sign |
| Cloth | For wiping dust and cleaning |
| Tool | Purpose |
|---|---|
| Fine-tip Paint Pens | For small details and lettering |
| Wide-tip Paint Pens | For large lettering |
| Scrap Paper | For testing paint flow |
| Sanding Block | For smoothing the wood surface |
| Paintbrush | Optional for a base coat or detailing |
| Wood Cleaner | For touch-ups and cleaning |
| Measuring Tape/Ruler | For accuracy in measuring the sign |
| Scissors | For cutting paper or templates |
| Paper Towels | For cleanup during the project |
| Workbench or Flat Surface | For working on your sign |
Step-by-Step Guide to Sign Painting
Step 1. Paint Pen Preparation
- Shake the pen well for 30 seconds
- Press the tip on scrap paper until the paint flows
- Make test strokes to check the flow rate
- Keep cap on when not in use
- Test paint color on similar wood
Step 2. Initial Outline Work
- Start from the top left (if right-handed)
- Draw thin lines around each letter
- Work in small sections
- Keep strokes steady and light
- Follow transferred lines carefully
Step 3. Fill-in Techniques
- Work in one direction only
- Fill the largest spaces first
- Use smooth, steady strokes
- Maintain even pressure
- Let sections dry for 5 minutes
Step 4. Small Letter Handling
- Use fine-tip markers for tiny details
- Hold a pen at a 45-degree angle
- Support your hand on the surface
- Take breaks to maintain control
- Work slowly for precision
Step 5. Touch-up Methods
- Wait until the first layer dries
- Check-in good lighting
- Fix thin spots with light strokes
- Clean edges with careful lines
- Blend new paint with old
Step 6. Multiple Layer Application
- Allow 10 minutes between layers
- Apply a second coat if needed
- Keep strokes in the same direction
- Check coverage in different lights
- Build up the color gradually
Step 7. Paint Flow Management
- Test flow on scrap paper often
- Clean pen tip if paint builds up
- Store pens horizontally when not in use
- Press the tip gently for consistent flow
- Keep extra paper handy
Step 8. Corner and Edge Treatment
- Use pen tip point for sharp corners
- Clean up edges with careful strokes
- Make corners meet precisely
- Fix any bleeding right away
- Keep edges straight and clean
Step 9. Spacing Adjustments
- Step back to check the overall look
- Fix any uneven spaces
- Adjust letter width if needed
- Check alignment regularly
- Keep letters balanced
Step 10. Final Detailing
- Check work in different lights
- Add final touch-ups where needed
- Clean any smudges
- Let dry completely (24 hours). Apply a clear coat if desired
Video Tutorial
Check out this YouTube video for a detailed step-by-step tutorial on how to paint wood signs
Common Mistakes to Avoid When Painting Signs
Good sign painting requires knowing what can go wrong before you start. Understanding these basic mistakes helps you create better signs and waste less time and materials.
Paint Overflow Problems
Paint overflow happens when artists skip testing on scrap surfaces first. Using too much force on paint pens causes excess paint to leak out.
Fast work in one area leads to uneven paint buildup. Always let your paint pen flow normally before starting to ensure clean results.
Preventing Smudges
Most smudges happen when hands touch wet paint during work. Right-handed artists should paint from right to left to keep clean work.
Moving stencils while the paint is wet ruins the design. Give each section enough time to dry fully before touching or adding more paint.
Pressure Control
Using too much force makes uneven lines and tires your hands. Keep steady pressure for consistent lines. Support your arm while working for better control. Take breaks when tired instead of pushing through detailed work.
Maintenance and Care for Painted Wood Signs
1. Storage Tips for Long-Term Care
Store your signs in a dry environment to prevent any damage. Ensure they are placed flat, not upright, to avoid warping.
Cover them with a soft cloth to protect them from direct sunlight. When stacking multiple signs, use paper between each to avoid scratching the surface.
2. Cleaning Your Signs
Remove dust by gently wiping your sign with a soft, dry cloth. Avoid using water on raw wood as it can damage the material.
If there are spots, use a cleaner designed for wood. Be sure to pat the sign dry immediately after cleaning to avoid moisture buildup.
3. Indoor Sign Care
Check your indoor signs for dust regularly, ideally weekly, and clean them with a dry cloth. Keep the signs away from heat sources, and avoid placing them in humid areas like bathrooms.
Watch for any color changes over time.
4. Outdoor Sign Protection
Outdoor signs need special care. Use a weather-resistant sealer, and check it each season. Keep signs away from sprinklers, and if possible, protect them during storms with a roof or cover.
Any chips should be addressed immediately to prevent water damage.
Additional Considerations for Sign-Making
Indoor vs Outdoor Signs
| Feature | Indoor Signs | Outdoor Signs |
|---|---|---|
| Paint Type | Standard paint markers | Water-resistant paints |
| Material | Light woods work well | Solid, treated wood |
| Sealant | Basic sealant is sufficient | Strong, durable sealants |
| Font Options | More font options are available | Larger, bold fonts preferred |
| Detailing | Finer details stay sharp | Letters need to be thicker for visibility |
Wood Types and Their Uses
- Pine (Soft Wood): Ideal for basic signs. It’s cost-effective but requires some care.
- Cedar (Soft Wood): Known for its weather resistance, it is durable for outdoor use.
- Birch (Soft Wood): Has a smooth surface, perfect for easy painting.
- Basswood (Soft Wood): Absorbs paint well, making it ideal for creating painted signs.
- Oak (Hard Wood): Offers long-lasting durability and is great for sturdy, reliable signs.
- Maple (Hard Wood): Known for its clean, smooth finish and high-quality appearance.
- Walnut (Hard Wood): Provides a rich, dark background, perfect for creating depth.
- Cherry (Hard Wood): Ages beautifully over time, adding character as it matures.
Paint Selection Guide
| Category | Options |
|---|---|
| Paint Types | Oil-based markers, Acrylic paint pens, Latex paint markers, Permanent markers, Specialty wood paints |
| Paint Features | UV protection options, Water-resistant choices, Quick-dry formulas, Easy-flow tips, Multi-surface types |
Conclusions
Creating wood signs takes time and patience, but the results are worth the effort. Following these steps, you’ll develop signs that stand out and stay beautiful.
Remember to pick the right tools, take time with each letter, and care for your work properly.
Want to make your first sign? Start with a small indoor piece. This lets you practice your skills without pressure. Try bigger projects or outdoor signs once you feel good about your work.
Need more help? Try our free templates in the link below. You can also comment with your questions – we love seeing what other sign makers create!
Ready to start?
Grab your supplies and make something special. Your perfect wood sign is just a project away.