I know the struggle of a messy home office. Papers scattered everywhere, supplies taking over my desk, and no proper storage space.
Store-bought cabinets didn’t fit my space or budget when I searched for solutions.
Building your office cabinets saves money and gives you exactly what you need. I’ll show you how I made custom built-ins that look like they came straight from a high-end catalog.
In this guide, I’ll explain the steps I used, from basic measurements to final touches.
I’ll share the tools needed, the materials list, and the simple techniques that helped me create professional-looking built-in cabinets for my home office.
Planning Your Built-In Office Cabinets
Let me share how I planned my office cabinet project.
Assessing Your Needs and Space
I pulled out my measuring tape and notebook when I started my cabinet project. I marked each wall length and ceiling height. Next, I noted spots for windows, doors, and outlets.
These details helped me create a practical layout that used every inch of space.
I sat down and listed everything I wanted to store in my new cabinets. My list included daily items, files, computer stuff, and extra supplies. This step helped me determine how many shelves, drawers, and compartments I needed.
Budget Planning
Making a clear budget kept my project on track.
I broke down costs into main parts: wood materials cost me about $500, hardware cost $150, and paint cost $75. I also needed some new tools, which added $250 to my total.
I found smart ways to save money without cutting corners. My local lumber yard offered better prices than big stores. I borrowed some tools from friends.
Choosing paint over wood veneer saved me $200. These choices helped me stay within budget.
DIY Built-in Office Cabinets vs. Pre-Made Cabinets: Which is the Better Option?
| Aspect | DIY Office Cabinets | Pre-Made Cabinets (IKEA, Stock Cabinets) |
|---|---|---|
| Pros | – Fully customizable to fit exact dimensions and preferences. – Offers the satisfaction of a handmade, unique piece. – Potentially higher quality materials can be selected. |
– Quick and easy to assemble. – Wide range of designs and colors readily available. – Often comes with detailed instructions, making assembly straightforward. |
| Cons | – Requires time, skill, and access to tools. – Mistakes can be costly, and adjustments may require additional work. – Can be physically demanding. |
– Limited customization in terms of dimensions and style. – Quality may vary depending on brand; some materials are less durable. – Often need to make compromises in layout or fit. |
| Cost Efficiency | – Material costs can vary but are generally cheaper using basic plywood or MDF. – Labor costs are saved if done personally, but material costs can increase if high-quality wood is chosen. |
– Cost-effective for pre-fabricated solutions; affordable for standard sizes and designs. – Potentially more economical if frequent sales or bundles are available. |
| Time Efficiency | – Time-intensive, particularly if cutting, sanding, and painting are involved. – Estimated time can vary from days to weeks depending on skill level and design complexity. |
– Very time-efficient; can be set up within hours, sometimes within a day. – Minimal time needed once components are delivered, allowing for quick installation. |
Safety Equipment Required
Importance of Safety in DIY Projects
Let me share what I learned about safety. When I started my first cabinet project, I ignored safety gear. Big mistake! A small wood splinter in my eye taught me better.
Now, I never start work without proper protection. Good safety habits make the project smooth.
List of Necessary Safety Gear
Here’s what I keep ready before starting:
- Safety glasses to protect eyes
- Dust mask for sawdust
- Work gloves to prevent cuts
- Ear protection near loud tools
- Steel-toed boots for heavy items
- Long sleeves to guard arms
- Knee pads for floor work
I store all my safety items in one box near my tools. This makes it easy to grab what I need. Trust me, taking a minute to put on safety gear saves hours of trouble later.
Tools and Materials Required
| Tool/Material | Quantity Needed |
|---|---|
| Plywood Sheets | 3-5 (depending on size) |
| Circular/Table Saw | 1 |
| Drill | 1 |
| Wood Screws | Approx. 50-100 |
| Wood Glue | 1 bottle |
| Sandpaper | 2-3 sheets |
| Primer | 1 can |
| Paint | 1-2 cans |
| Paint Roller | 1 |
| Paintbrush | 1 |
| Carpenter’s Level | 1 |
| Tape Measure | 1 |
| Shelf Brackets | 4-6 per shelf |
| Wall Anchors | As needed for studs |
| Finishing Trim | Length as needed |
| Cabinet Doors | 2-4 (optional) |
| Hardware (Handles) | 2-4 (optional) |
Building Your Own Built-In Office Cabinets: A Tutorial
Step 1: Plan and Measure the Space Precisely
- Measure the entire wall where you want to place the built-ins. Note the width, height, and depth to ensure the built-ins fit perfectly.
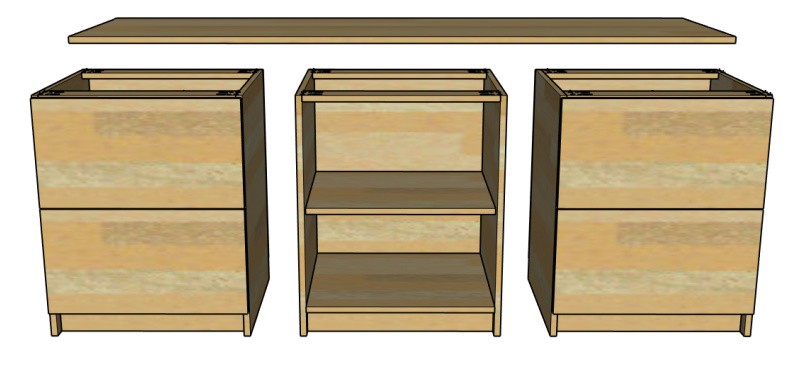
- Draw a rough layout of your built-in unit to visualize where each cabinet, shelf, and opening will go.
- Decide the number and placement of shelves, cabinets, and other elements: Mark shelf heights and cabinet locations on the wall.
- Use a level to ensure your markings are even and straight.
Step 2: Cut the Wood Pieces to Size

- Based on your measurements, use ¾-inch plywood for the structural parts (cabinet boxes, shelves, and dividers). Use a circular or table saw for accurate cuts.
- Cut each piece as follows:
- Cabinet Side Panels: Cut two per cabinet.
- Top and Bottom Panels: Cut two per cabinet.
- Back Panel: Cut one per cabinet (optional if mounted directly to the wall).
- Shelves: Cut as needed based on the number of shelves.
- Label each piece to keep track of where it fits. Double-check measurements before cutting to avoid errors.
Step 3: Assemble the Cabinet Boxes

- Lay out the cut pieces for each cabinet box.
- Apply wood glue along the edges of the panels where they will join.
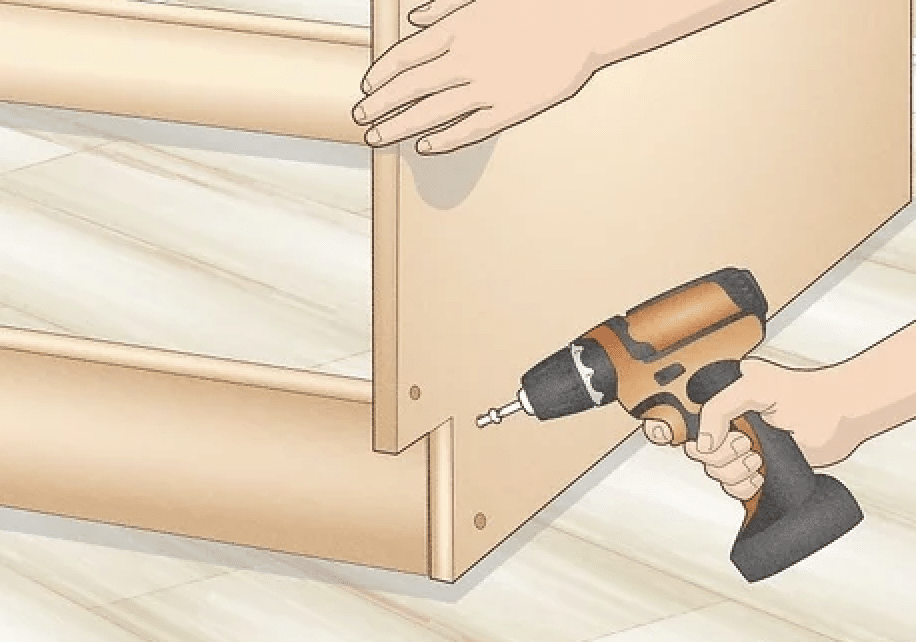
- Use wood screws to attach the side panels to the top and bottom panels, forming a rectangular box.
- Drill pilot holes for each screw to prevent the wood from splitting.
- Attach the back panel to the box (if you’ve chosen to use one), securing it with screws along the edges.
- Reinforce all corners and edges with additional screws to ensure a sturdy frame.
Step 4: Install the Shelving and Supports
- Determine the height of each shelf and mark the placement inside the cabinet.
- Install shelf brackets along the markings to support the shelves:
- Drill holes for each bracket and secure them with screws.
- Place each shelf on top of the brackets, ensuring they are level. Use a carpenter’s level to confirm.
- For a seamless look, screw the shelves to the brackets or use hidden supports.
Step 5: Sand, Prime, and Paint All Surfaces

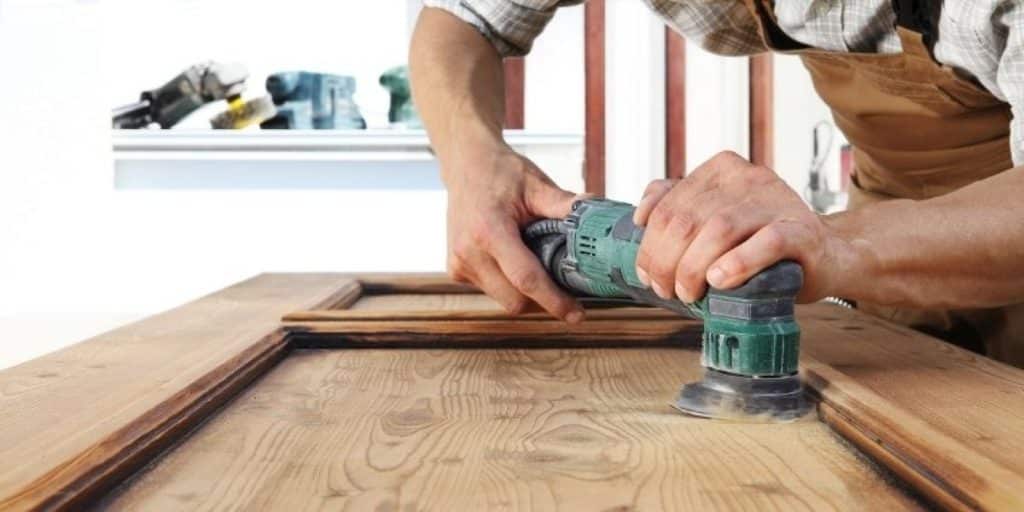
- Sand all surfaces of the cabinets and shelves with medium to fine-grit sandpaper until smooth, focusing on edges and corners.
- Wipe off any dust with a damp cloth.
- Apply a coat of primer to the entire unit, including shelves and cabinet boxes. Allow it to dry completely before moving to paint.
- Once the primer is dry, apply the first coat of paint. Use a roller for large surfaces and a brush for edges or tight spots.
- Let the paint dry, then add additional coats for full coverage. Allow drying time between coats.
Step 6: Install and Secure the Built-In Units
- Move the assembled units to your desired location on the wall.
- Using a stud finder, locate wall studs where you’ll secure the cabinets.
- Drill through the cabinet into the wall stud and secure with screws. Use at least two screws per cabinet for secure mounting.
- Attach any finishing trim to the edges and gaps around the unit to give it a seamless, built-in look.
- If desired, add cabinet doors and hardware (handles, knobs) to complete the look.
- Finish by checking all components for sturdiness and alignment.
Maintenance and Care For DIY Built-in Office Cabinets
1. Routine Maintenance Tips
Let me tell you how I keep my cabinets looking fresh. I dust them weekly with a soft cloth. For deeper cleaning, I use a mild soap mix monthly.
I avoid harsh cleaners that can harm the finish. A light polish every six months keeps the surfaces smooth.
2. Handling Repairs
Small marks show up on cabinets – it’s part of life! For tiny scratches, I use a matching marker. Deeper dents need wood filler. I sand the spot gently and touch up the paint.
Cabinet doors might need hinge tightening or soft-close adjustments yearly.
3. Upgrades and Adaptations
My office needs changed over time, and my cabinets changed too. I added extra shelves when I needed more storage. LED lights under cabinets improved my workspace.
When I got new equipment, I drilled holes for cables. Small changes kept my built-ins useful.
Conclusion
Thank you for joining me on this cabinet-building project. As someone who turned my office mess into an organized space, I can tell you that custom built-ins make a real difference.
Building your cabinets might feel challenging at first. But with the right tools, safety gear, and careful planning, you’ll create storage that fits your needs perfectly. Plus, you’ll save money while learning valuable skills.
Remember to take your time with measurements and planning. Pay attention to safety steps. And don’t forget that maintaining your cabinets keeps them looking good for years.
Ready to start your project? I’d love to hear how it goes. Share your progress in the comments below, or check out my guide on choosing the right wood for your cabinets.
Your perfect home office awaits!


