
Plain walls can make any room feel flat and lifeless. I know the feeling – I stared at my boring bedroom wall for months before finally doing something about it.
I will show you how to build an accent wall to make your space stand out. This guide breaks down the process into simple, manageable tasks that even first-time DIYers can handle.
In this guide, you’ll learn:
- A complete list of tools and materials you’ll need
- Step-by-step instructions from prep to finish
- Simple design tips to match your style
- Expert tricks to avoid common mistakes
Ready to change your space? Let’s get started with the basics.
The Ultimate Step-by-Step Guide to Building an Accent Wall
Tools Required
| Tool | Purpose |
|---|---|
| Laser Level + Magnetic Mount | Ensures straight lines and level installation |
| Air Compressor | Powers nail guns |
| 18-gauge Brad Nailer | Secures trim to wall studs |
| 23-gauge Pin Nailer | Connects trim pieces at corners |
| Tape Measure | Takes accurate measurements |
| Carpenter’s Square | Checks and marks right angles |
| Stud Finder | Locates wall studs |
| Saw Stand + Adjustable Stop | Makes consistent trim cuts |
| Sanding Tool | Smooths wall surface |
| Paint Brushes | Applies paint in detailed areas |
| 4-inch Mini Roller (Microfiber) | Creates even paint texture |
| Pencil | Makes layout marks |
| Tool Bag | Provides weight for laser-level stand |
Materials Required
| Material | Specifications |
|---|---|
| MDF Trim | Pre-primed pieces for boxes |
| Construction Adhesive | Clear type |
| Paint | Eggshell finish |
| Painter’s Tape | For marking and layout |
| Brad Nails | 2-inch length |
| Pin Nails | 23-gauge |
| Spacers | 5/8-inch thickness |
| Wall Repair Compound | Quick-drying type |
| Sponge | For cleanup |
| Water Bucket | For compound cleanup |
| Outlet Cover Plates | For final installation |
Step-By-Step Process of DIY Accent Wall
Step 1. Planning and Wall Assessment
Start by measuring your entire wall and making careful calculations. Divide the total width into equal-sized boxes with 6-inch gaps between them. Consider outlet locations to ensure your design works around them.
Bring all materials into the room 24 hours before starting to match room temperature.
Step 2. Wall and Material Preparation
Begin by sanding the existing wall surface to remove any roughness. Clean the wall thoroughly, then apply your first coat of paint. While the wall paint dries, pre-paint all your trim pieces.
This saves time and ensures better coverage in tight corners later. Let everything dry completely before moving forward.
Step 3. Layout and Marking
Measure and mark the wall’s center point. Set up your laser level to create perfect vertical lines. Use your stud finder to locate and mark all wall studs—these are essential for secure mounting.
Create a template board marked with your box measurements. This template will help maintain consistent spacing throughout the project.
Step 4. First Stage Installation
Start at the center and work outward. Install horizontal pieces, securing them into wall studs with 2-inch brad nails. Use your spacer blocks to maintain consistent 6-inch gaps.
Check your level frequently as you work. This creates the framework for your design and ensures everything lines up correctly.
Step 5. Vertical Piece Installation
Apply a thin line of clear adhesive down the middle of each vertical piece’s back. Carefully place the pieces on your marked lines, using pin nails to connect the corners.
Keep checking your gaps and alignments. The thin pin nails leave minimal holes while holding the pieces as the adhesive sets.
Step 6. Final Installation and Cleanup
Complete all remaining horizontal pieces, maintaining equal spacing. Clean any excess adhesive immediately with a damp sponge. Fill nail holes with wall compound, creating slight depressions rather than bumps.
Wipe the compound smooth while wet to minimize sanding later.
Step 7. Final Painting and Finishing
Once the compound dries, apply paint carefully to all filled holes and touch-up areas. Use your brush for precise cutting-in around trim edges. Follow with a mini roller to match the wall texture.
Paint entire wall sections between trim for a consistent finish. Let dry completely before replacing outlet covers.
Video Tutorial
Check out this YouTube video by Home RenoVision DIY for a detailed step-by-step tutorial on making an accent wall.
Why an Accent Wall is a Game-Changer for Your Home
1. Added Value Without Major Changes
An accent wall can greatly impact your space without the cost of a full room update. It gives your space a fresh look while keeping most of your wall colors and decor.
2. Makes Rooms Feel Larger
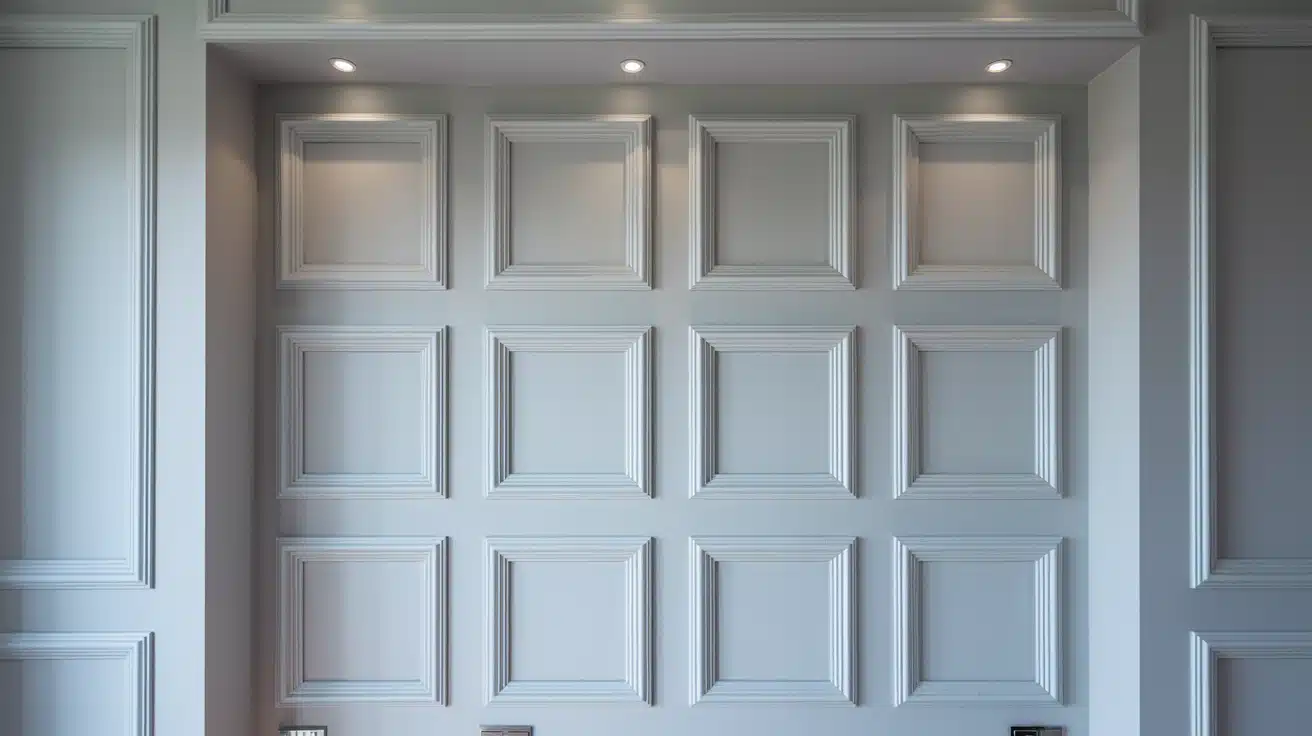
A well-placed accent wall creates depth. This simple change can make small rooms feel bigger and more open. The box trim design adds interest without taking up any floor space.
3. Fits Any Budget
You can scale the project to match your budget. Basic materials like MDF trim and paint keep costs low while providing professional results. Most tools can be rented if needed.
4. Simple to Update
Unlike permanent changes, an accent wall is easy to modify. You can repaint it, change the color scheme, or even remove the trim work if your style preferences change later.
5. Highlights Your Space
The wall becomes a natural focal point. It works well behind beds, sofas, or dining room tables. This helps organize your room’s layout and draws attention to your favorite pieces.
6. Weekend-Friendly Project
You can complete this project in 2-3 days with proper planning. Most of that time is spent painting and drying, making it perfect for a weekend makeover.
Expert Tricks to Avoid Common Mistakes
Here are expert tricks to avoid common mistakes when building an accent wall, based on the content and keeping it practical:
1. Temperature Matters: Let all materials sit in the room for 24 hours before starting. This prevents wood from expanding or shrinking after installation, which could create gaps.
2. Measure from the Middle: Start work from the center of the wall and move outward. This keeps the design balanced and helps hide any small size differences at the edges.
3. Check Outlet Locations First: Plan your box layout around outlets. Measure outlet heights and positions before cutting any trim. This prevents awkward cuts or misaligned boxes.
4. Avoid Paint Build-up: Use less paint than you think you need when coating trim pieces. Too much paint creates drips in corners and edges. Keep your brush lighter for cleaner lines.
5. Secure to Wall Studs: Always attach horizontal pieces to wall studs, not just drywall. This prevents sagging and ensures the wall moves naturally with your house.
6. Use Clear Adhesive: Pick clear construction adhesive to prevent visible glue lines. Clean excess immediately with a damp sponge before it dries.
Conclusion
Building an accent wall might seem like a big task, but with proper planning and tools, you can create a lasting feature in your room.
Remember the key steps: let materials adjust to room temperature, use a template for consistent spacing, and secure horizontal pieces to wall studs.
The most vital part? Take your time. Good preparation leads to better results. Paint before installation, use clear adhesive and clean as you go. These simple steps help create clean lines that last.
Looking to start your wall project? Begin with the basic tools: a laser level, nail guns, and a saw stand.
Please share your results with us in the comments below, or check out our other home improvement guides for more tips.