Ever noticed your floor feels like a trampoline when you walk across it?
Sagging floors are more than a cosmetic issue; they’re a warning sign that your home’s foundation or support system is under strain.
Those bouncy spots and visible dips indicate that your home’s support system requires attention. Left unchecked, small sags turn into major structural failures.
The good news is that most sagging floors can be fixed before they become dangerous or expensive disasters.
Understanding the problem helps you make smart decisions about repairs. Whether you’re a hands-on homeowner or prefer calling professionals, knowing the basics saves time and money.
Ready to get your floors back to being solid and safe?
What Is a Sagging Floor and Why Should You Care?
A sagging floor occurs when the floor joists bend downward under the weight. These support beams run beneath your flooring and carry the load above. Over time, various factors cause them to weaken and bow.
Ignoring sagging floors can lead to more significant problems in the future. The structural integrity of your home depends on solid flooring systems. Early repair saves money and prevents dangerous situations.
Why should you care about sagging floors?
- Weakened floors can collapse unexpectedly.
- Structural issues scare away potential buyers.
- One sagging joist stresses neighboring joists.
- Neglected maintenance voids insurance coverage.
- Furniture wobbles and doors won’t close properly.
Taking action at the first sign of sagging protects your investment. A stable floor system keeps your family safe and your home valuable.
How Can You Tell if Your Floor Is Actually Sagging?
Spotting a sagging floor early makes repairs simpler and cheaper. Your floors give clear signals when the support beams start to fail. The marble test works great, rolling toward problem areas.
Visual inspection reveals most problems quickly. Walk through rooms checking for dips or slopes. Look for unusual gaps where walls meet floors.
Physical symptoms accompany visual clues. Bouncy floors flex when you walk. Creaking sounds grow louder over time. Doors and windows stick or won’t close properly.
Common signs of sagging floors include
- Visible dips or bowl shapes appearing in your floor surface areas.
- Cracks are developing in walls or ceilings directly above the sagging floor.
- Gaps are forming between baseboards and floors where none existed before repairs.
- Furniture rocking on surfaces that used to be level and stable.
- Squeaking sounds are getting progressively worse each time you walk across rooms.
- Bouncing sensation when walking across rooms that should feel solid underneath.
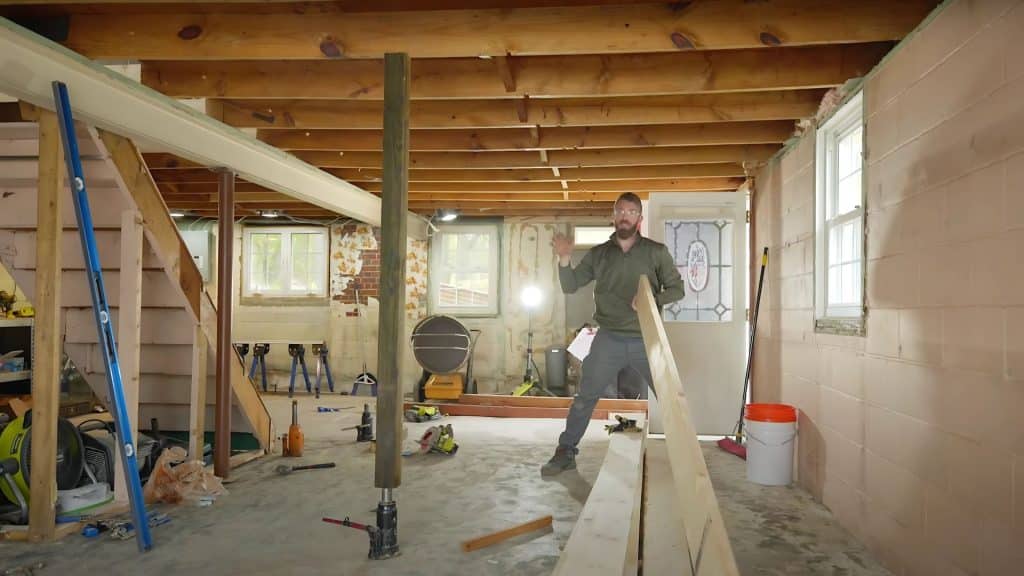
Step-By-Step Process to Repair a Sagging Floor
Repairing a sagging floor requires patience and proper technique. Follow these steps carefully to restore your floor’s strength and stability.
Tools and Materials You’ll Require
Getting the right equipment before starting saves time and prevents frustration during repairs. Review this list to ensure you have all the necessary items for a successful floor repair.
| Tools | Materials |
|---|---|
| Jack (Floor or Bottle Jack) | 2×8 Lumber (Sister Joists) |
| Hammer or Nail Gun | Framing Nails |
| Saw | Solid Wood Blocking |
| Tape Measure | |
| Pencil | |
| Kreg Track Horse | |
| Kreg Versa Clamps | |
| Pocket Hole Jig (Kreg Tool) | |
| Safety Glasses | |
| Work Gloves | |
| Dust Mask |
Step 1: Identify the Sagging Joists
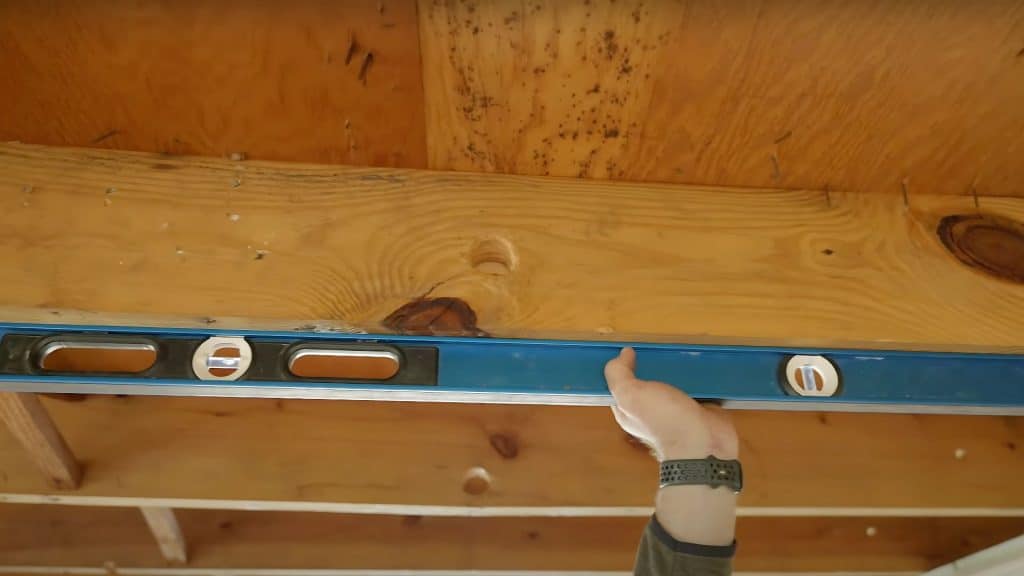
Begin your repair by identifying which joists require attention. Access the crawl space or basement beneath the sagging area. Use a long level or straight board to check each joist.
Mark sagging joists with chalk or tape for easy identification. Measure how far each joist dips from its original position. Document these measurements for reference during repairs.
Step 2: Prepare the Area
Clear the work space of stored items and debris. Set up temporary lighting for better visibility. Position your jack on solid ground or concrete blocks.
Create a clear path for moving materials by removing any wiring or plumbing attached to the affected joists. Protect finished floors above with drop cloths.
Step 3: Jack up The Sagging Joists
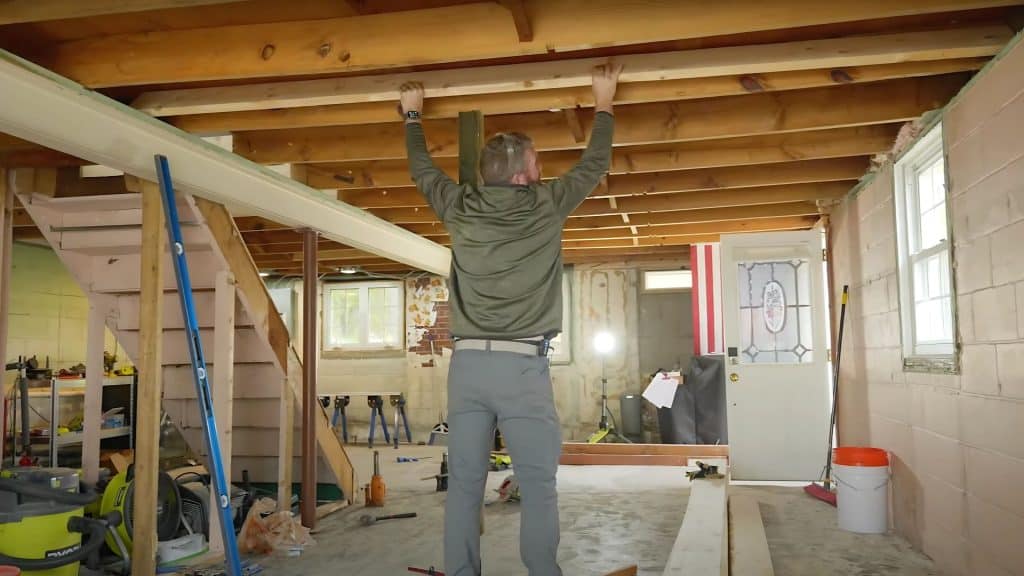
Place the jack directly under the lowest point of sag. Raise slowly, checking progress every quarter turn. Stop when the joist reaches its original level position.
Never lift beyond your level, as this can cause new problems. Support multiple joists with a beam across the jack. Allow wood to adjust for 24-48 hours before proceeding.
Step 4: Select and Prep Sister Joists
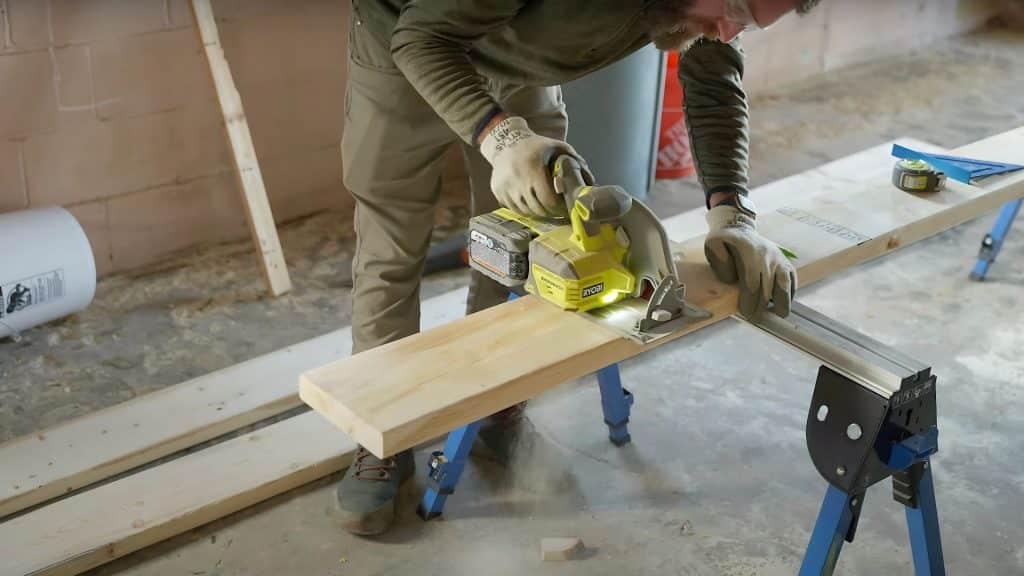
Select lumber that matches the original joist dimensions. Inspect each board for straightness and defects. Cut sister joists to span the entire damaged section.
Sand rough edges to prevent splinters. Pre-drill pilot holes to prevent splitting. Apply wood preservative if moisture was the cause of the original damage.
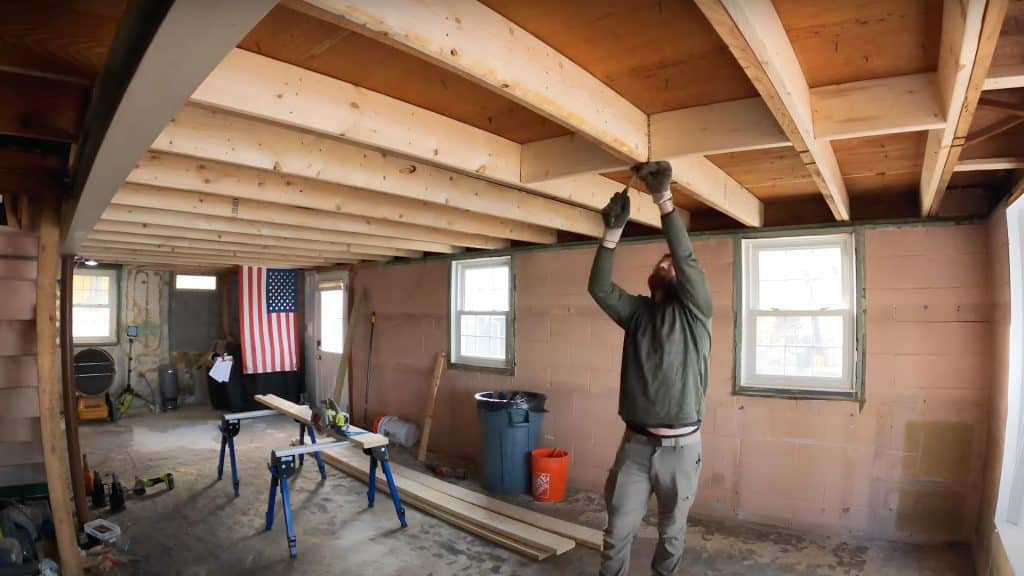
Step 5: Install the Sister Joists
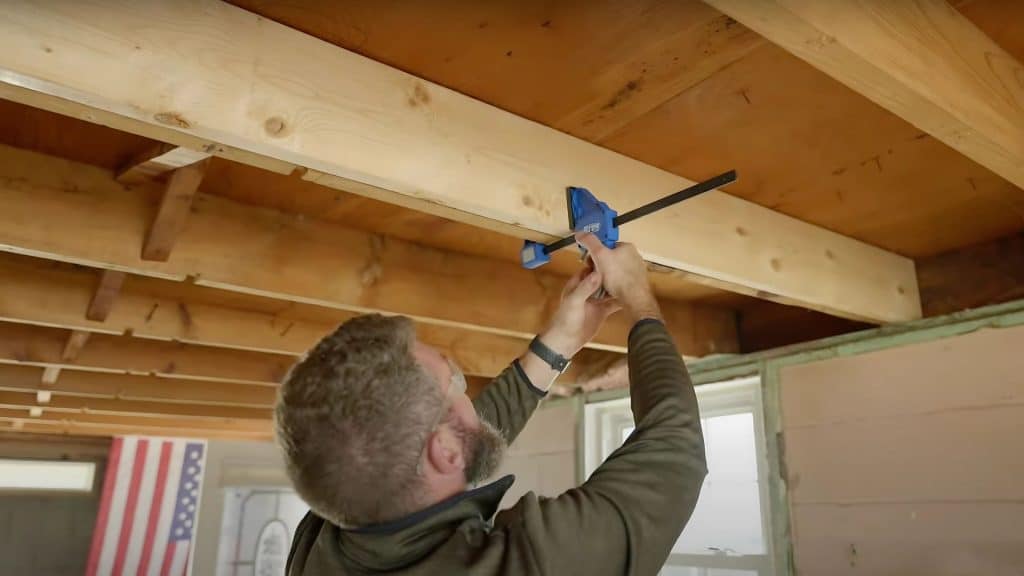
Position the sister joist tightly against the original. Start fastening from the center, working outward. Drive nails or screws every 12 inches in a zigzag pattern.
Use construction adhesive for extra bonding strength. Ensure complete contact along the entire length. Check the level frequently during installation.
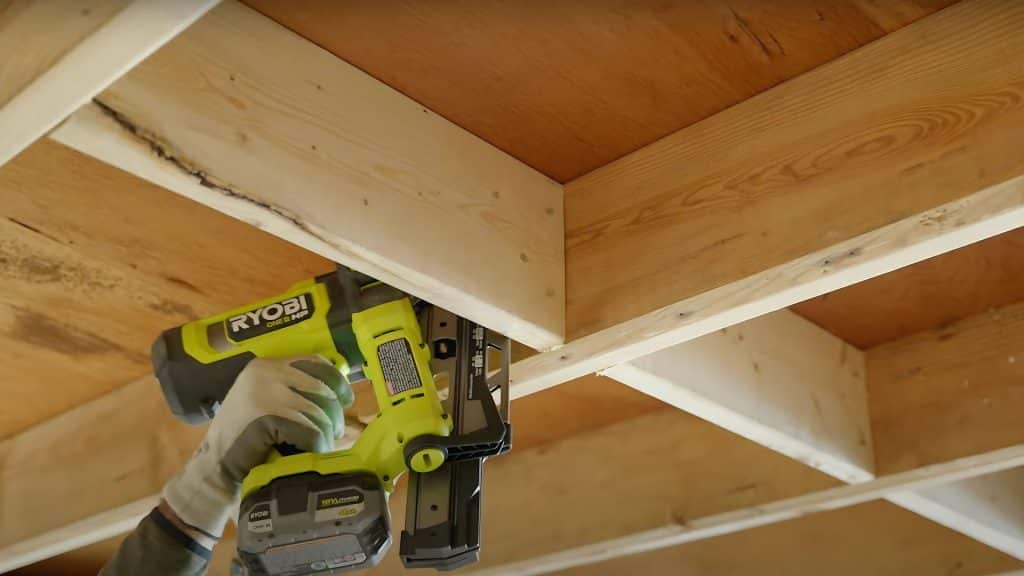
Step 6: Reinforce the Floor with Blocking
Cut blocking pieces to fit snugly between joists. Install blocks every 4 to 8 feet along the span. Stagger blocks on opposite sides of joists.
Nail through joists into block ends securely. This prevents future twisting and adds rigidity to the material. Pay extra attention to areas under heavy loads.
Step 7: Inspect & Wrap Up
Lower the jack slowly after all repairs are complete. Check that doors and windows operate smoothly. Walk the floor listening for squeaks or movement.
Verify all connections remain tight and secure. Replace any insulation or vapor barriers that have been removed. Schedule a follow-up inspection in six months.
Video Tutorial
Check out the video for more insights! Watch a complete demonstration of how to repair sagging floors using the sister joist method.
By – Rogue Engineer
Alternative DIY Methods You Can Consider
When traditional joist repair isn’t suitable, these alternative methods offer practical solutions for different sagging floor situations.
Method 1: Steel Plates and Bolts
Steel reinforcement plates offer incredible strength for severely damaged joists. Sandwich the weakened joist between two steel plates. Drill holes and bolt through all three layers. This method is most effective for localized damage or cracks.
Method 2: Adjustable Support Posts
Installing permanent support posts provides ongoing support for the floor. Position posts at strategic points beneath sagging areas. Use adjustable tops to fine-tune floor height. Concrete footings ensure posts won’t sink over time.
Method 3: Engineered Wood Beams
Laminated veneer lumber (LVL) beams replace multiple damaged joists. These engineered products resist warping and sagging. They span longer distances than traditional lumber. Professional installation is often required due to weight.
Cost Comparison: DIY Repairs vs Professional Services
Understanding the price difference between doing it yourself and hiring experts helps you make informed choices. Both options have advantages depending on your budget, skills, and available time.
| Cost Factor | DIY Approach | Professional Service |
|---|---|---|
| Materials | $200-$500 | Included in the quote |
| Tools (if needed) | $150-$300 | No cost to you |
| Labor | Your time (20-40 hours) | $1,500-$3,000 |
| Permits | $50-$200 | Usually included |
| Total Estimated Cost | $400-$1,000 | $2,000-$5,000 |
Common Mistakes to Avoid
Smart preparation prevents costly errors and ensures successful repairs. These guidelines help you avoid the most common pitfalls during floor repair projects.
- Never rush the jacking process; wood needs time to adjust.
- Don’t forget to check local building codes before starting work.
- Don’t skip the inspection phase after completing repairs.
- Avoid using undersized lumber for sister joists.
- Never work alone under heavy floor structures.
- Don’t forget to address the underlying moisture problem.
Maintenance Tips for Long-Lasting Results
Regular maintenance keeps your floors solid and prevents future sagging. Simple routine checks save thousands in repair costs down the road.
- Inspect crawl spaces twice yearly for moisture issues.
- Maintain proper ventilation in basements and crawl spaces.
- Fix plumbing leaks immediately to prevent wood rot.
- Monitor humidity levels and use dehumidifiers when needed.
- Check floor levelness annually using a long, straight edge.
- Address pest problems quickly before termites damage joists.
Conclusion
Sagging floor repair demands attention but remains manageable with proper knowledge. You now understand the warning signs that signal floor problems.
The cost differences help guide your decision-making for repairs. Each method serves specific situations and damage types.
Remember that prevention beats repair every time. Regular maintenance protects your investment and prevents major structural failures.
Whether choosing DIY repairs or professional help, addressing sagging floors promptly keeps your home safe.
Proactive repairs not only prevent costly damage but also ensure a safer, more stable living environment for years to come.
What floor concerns have you noticed in your home? Share your repair experiences below!
Frequently Asked Questions
Is It Safe to Live in The House with Sagging Floors?
Living with sagging floors poses risks. Small problems can escalate into costly foundation repairs. Floors may collapse, create tripping hazards, or fail under heavy furniture.
Are Sagging Floors Covered by Insurance?
Insurance typically excludes gradual floor damage from settling or wear. Coverage applies only when sudden events, such as burst pipes, cause the sagging problem.
How Much Weight Can a Floor Support Before It Collapses?
Most residential floors can safely support 40 pounds per square foot. This includes furniture, people, and belongings added to your home’s existing structure.