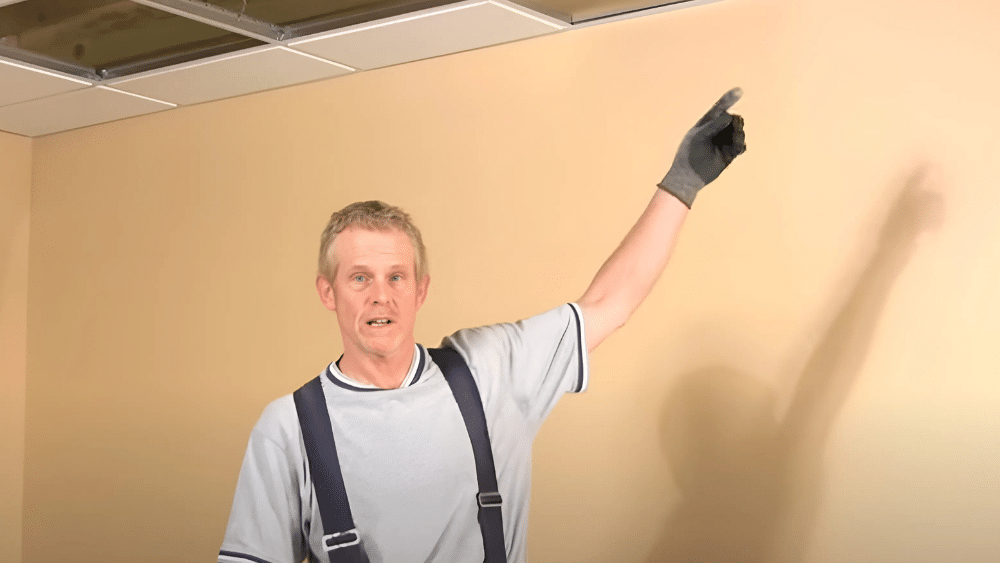
Crooked ceiling tiles stick out like a sore thumb and ruin the look of any room.
Most people think cutting ceiling tiles is hard work that only professionals can handle. But here’s what they don’t know: with the right tools and simple steps, anyone can cut perfect tiles every time. The secret isn’t in having fancy equipment – it’s in knowing the right technique.
Learning to cut ceiling tiles properly will save you hundreds of dollars on contractor fees. You’ll get clean, straight edges that fit perfectly.
No more gaps, cracks, or uneven lines that make your ceiling look unprofessional. Plus, you’ll feel confident taking on bigger projects once you master this basic skill.
This guide will show you exactly how to cut different types of ceiling tiles like a pro, step by step. We’ll cover the tools you need, the best cutting methods, and common mistakes to avoid.
Understanding Ceiling Tile Types
Knowing your ceiling tile type is the first step to making clean, accurate cuts. Acoustic tiles are the most common choice for drop ceilings. These lightweight tiles are made from mineral fiber and cut easily with basic tools.
Drywall or gypsum tiles are much heavier and denser than acoustic tiles. They need more pressure and sharper tools to avoid cracking during cuts.
Metal or tin tiles add style to any room but require special cutting tools like tin snips or a fine-tooth saw. These decorative tiles can bend or warp if the wrong technique is used.
Here are key things to remember:
- Test your cutting method on a scrap piece first to avoid wasting good tiles
- Check tile thickness before choosing your cutting tool – thicker tiles need different approaches
- Look for fiber direction in acoustic tiles – cutting against the grain can cause tears
Plastic and vinyl tiles are well-suited for damp areas, such as basements and bathrooms. They stay flexible even when wet, which makes them tricky to cut without the right approach.
How to Cut Ceiling Tiles: Step-by-Step Cutting Guide
Cut ceiling tiles like a professional contractor with these proven techniques that save time, reduce waste, and deliver clean, accurate results.
Tools Required
| Tool | Purpose |
|---|---|
| Carpet Knife | Sharp cutting tool with four cutting surfaces |
| Tape Measure with Hook | Measuring and scoring tiles |
| Light Gloves | Protect hands and prevent fingerprints |
Materials Required
| Material | Description |
|---|---|
| Ceiling Tiles | Fresh tiles for custom cutting |
| Suspended Ceiling Grid | Cross tees and main runners |
| Replacement Knife Blades | Keep cutting tools sharp |
Step 1: Prepare Your Workspace and Tools
Put on light gloves before handling any tiles. The gloves protect your hands from the rough tile surface and prevent fingerprints from appearing on the tiles. Set up your cutting area with good lighting and a stable work surface.
- Wear light gloves to protect hands and tiles from damage
- Check your carpet knife is sharp and ready to use
- Clean your work area to avoid dirt getting on tiles
Note: Light gloves are better than heavy work gloves because you need to feel the tile edges while cutting.
Step 2: Measure and Mark Your Tile

Measure from the wall to the edge of the cross tee to get your tile size. Use the hook end of your tape measure to score a line across the width of the tile. If the measurement is under halfway, mark the next tile at the same time to save effort.
- Measure each tile individually for the best fit
- Use the tape measure hook to score your cutting line
- Mark multiple tiles when measurements are the same
Note: Measuring one tile at a time ensures each piece fits perfectly in its spot.
Step 3: Cut the Tile to Width
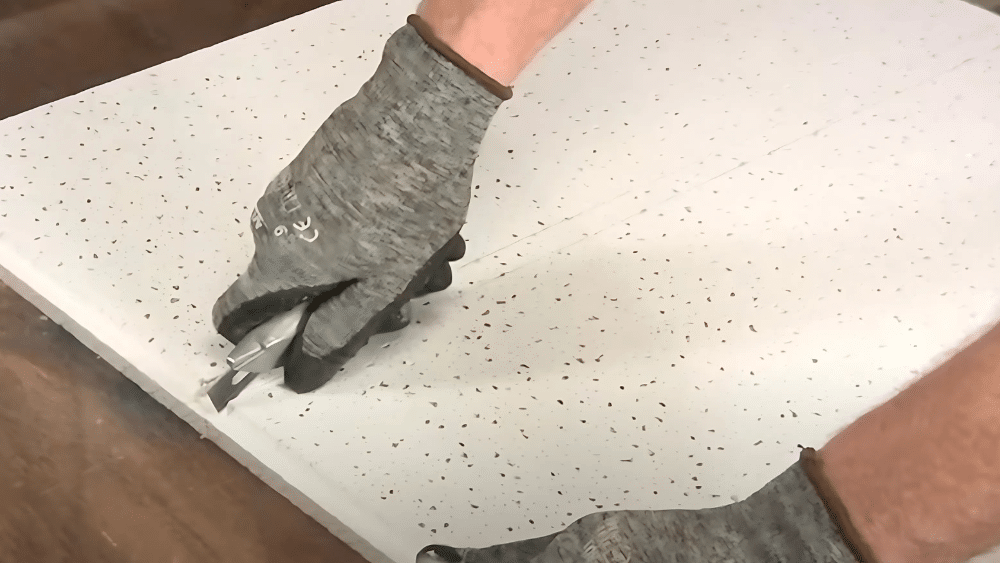
Follow your scored line and cut through the tile using your carpet knife. Make several passes, cutting deeper each time until you cut completely through. The carpet knife works better than a utility knife because it’s sharper and cuts deeper.
- Make multiple shallow passes instead of trying to cut through in one go
- Keep your cuts straight by following the scored line
- Apply steady pressure without forcing the blade
Note: A carpet knife has four cutting surfaces, so you can rotate to a fresh edge when one gets dull.
Step 4: Score the Shadow Line
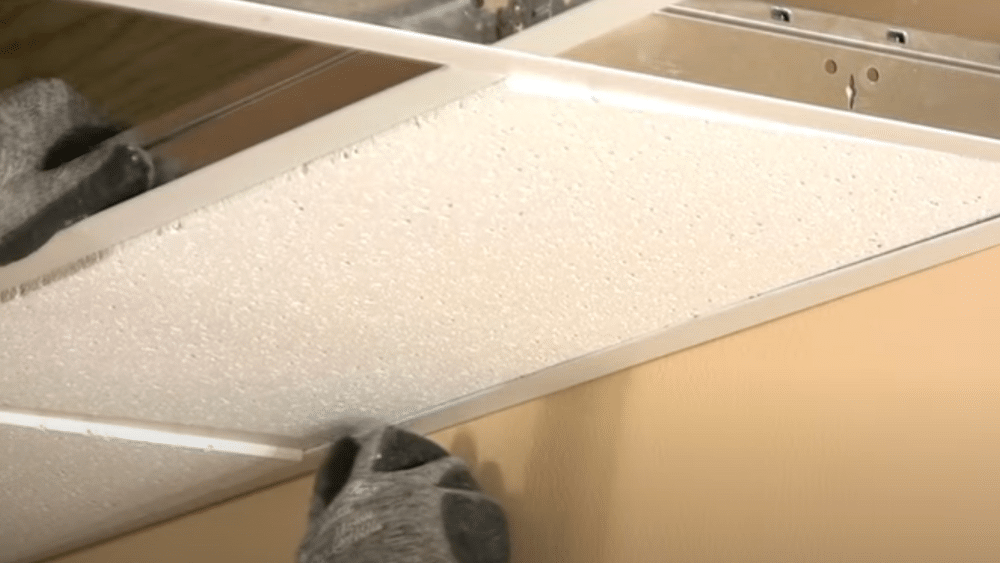
Place the cut tile in the ceiling grid and score the shadow line with a light pass of your carpet knife. This line shows where you need to cut the tile edge so it sits flat in the grid system.
- Rest the tile in the grid first to see exactly where to cut
- Make a light scoring pass to mark your shadow line
- Take the tile down before making the deeper cuts
Note: The shadow line cut allows the tile to lay flat while hiding the grid edges.
Step 5: Complete the Shadow Line Cut

Cut a little over halfway through the tile using the edge and your finger as a guide. Then lay the knife on its side and cut through the edge to remove the piece from the shadow line. Test fit the tile in the grid to make sure it sits properly.
- Cut halfway through first to maintain control
- Use the tile edge as your guide for a straight cut
- Remove the shadow line piece by cutting through the edge
Note: The shadow line creates a clean look by hiding the grid while allowing the tile to fit properly.
Cutting Ceiling Tiles: 5 Tips for Perfect Results
1. Double-Check Measurements – Always measure your cutting area twice before making any cuts. This simple habit prevents costly mistakes and reduces tile waste. One wrong measurement can ruin an entire tile and slow down your project.
2. Maintain Sharp Tools – Keep your carpet knife blades fresh and replace them often during cutting. Sharp blades create clean, smooth cuts that look professional. Dull blades tear tile fibers and leave rough, uneven edges that stand out.
3. Practice on Spare Tiles – Use leftover or damaged tiles to test your cutting technique before working on good tiles. This practice helps build your confidence and enables you to find the right pressure and cutting angle. You’ll make fewer mistakes on your actual ceiling project.
4. Smooth Rough Edges – Use fine-grit sandpaper to clean up any rough or uneven cuts after completing each tile. Smooth edges fit better in the grid system and create a cleaner overall appearance. Take a few extra seconds to sand each cut edge.
5. Work in Good Lighting – Set up bright lights over your cutting area to see your measurement marks. Poor lighting leads to crooked cuts and missed details. Natural daylight or LED work lights help you spot problems before they become permanent mistakes.
5 Common Ceiling Tile Cutting Mistakes
1. Rushing the Process – Many people attempt to cut tiles too quickly, resulting in crooked lines or broken pieces. Take your time to measure carefully and make slow, controlled cuts. Rushing leads to wasted materials and a ceiling that looks unprofessional.
2. Using Inappropriate Tools – Different tile materials require different cutting tools, but people often use whatever is available on hand. Metal tiles need tin snips, not utility knives. Gypsum tiles require sharp blades that can handle dense material. Using the wrong tool can damage tiles and result in poor cuts.
3. Neglecting Safety Precautions – Failing to use safety gear, such as gloves and eye protection, puts you at risk of cuts and injuries. Tile dust can irritate your eyes and lungs. Sharp tools can slip and cause serious cuts. Always wear proper protection before starting any cutting work.
4. Not Testing Fitting Before Final Installation – Installing tiles without checking the fit first can lead to gaps, overlaps, and tiles that don’t sit properly in the grid. Always test each cut tile in its final position before moving to the next one. Minor adjustments are easier to make before the tile is permanently installed.
5. Ignoring Tile Grain Direction – Acoustic tiles have a grain direction that affects how they cut and look when installed. Cutting against the grain causes tears and rough edges. Check the grain direction before cutting and keep all tiles facing the same way for a uniform appearance.
Conclusion
Cutting ceiling tiles doesn’t have to be complicated when you know the right steps. Start by identifying your tile type, use the proper tools, and take time to measure twice before cutting. Following these simple techniques will consistently yield clean, professional results.
The key to success is preparation and patience. Sharp tools, proper measurements, and careful cutting make all the difference between a ceiling that looks great and one that requires later repair.
Ready to start your ceiling project? Gather your tools, practice on spare tiles first, and remember to work safely. Take your time with each cut and don’t rush the process. Your finished ceiling will look professional, and you’ll feel proud of the work you accomplished.
What challenges are you facing with your ceiling tile project? Please share your questions in the comments section below.